


 本文详细介绍了OpenCV-Python中阈值处理的各种方法,包括二值化、反二值化、截断、超阈值零处理、低阈值零处理,以及自适应阈值和Otsu阈值处理。通过实例代码展示了每种方法的实现,帮助读者理解如何在实际图像处理中应用这些技术。
OpenCV-Python快速入门(五):阈值处理
前言
- 本文是个人快速入门OpenCV-Python的电子笔记,由于水平有限,难免出现错漏,敬请批评改正。
- 更多精彩内容,可点击进入
OpenCV-Python快速入门专栏或我的个人主页查看
前提条件
- 熟悉Python
实验环境
- Python 3.x (面向对象的高级语言)
- OpenCV 4.0(python第三方库)
pip3 install opencv-python
阈值处理
阈值处理是指剔除图像内像素值高于一定值或者低于一定值的像素点。
二值化阈值处理(cv2.THRESH_BINARY)
d s t [ x , y ] = { 255 , i m g [ x , y ] > t h r e s h 0 , e l s e dst[x,y]= \begin{cases} 255,\quad img[x,y]>thresh\\ 0,\quad else \end{cases} dst[x,y]={255,img[x,y]>thresh0,else
import cv2
img1=cv2.imread("1.jpg",0)
img1_resize=cv2.resize(img1,(400,400))
# ret, thresh = cv2.threshold(img,thresh,maxval,type)
ret, thresh = cv2.threshold(img1_resize,127,255, cv2.THRESH_BINARY)
cv2.imshow("origin",img1_resize)
cv2.imshow("cv2.THRESH_BINARY",thresh)
cv2.waitKey()
cv2.destroyAllWindows()

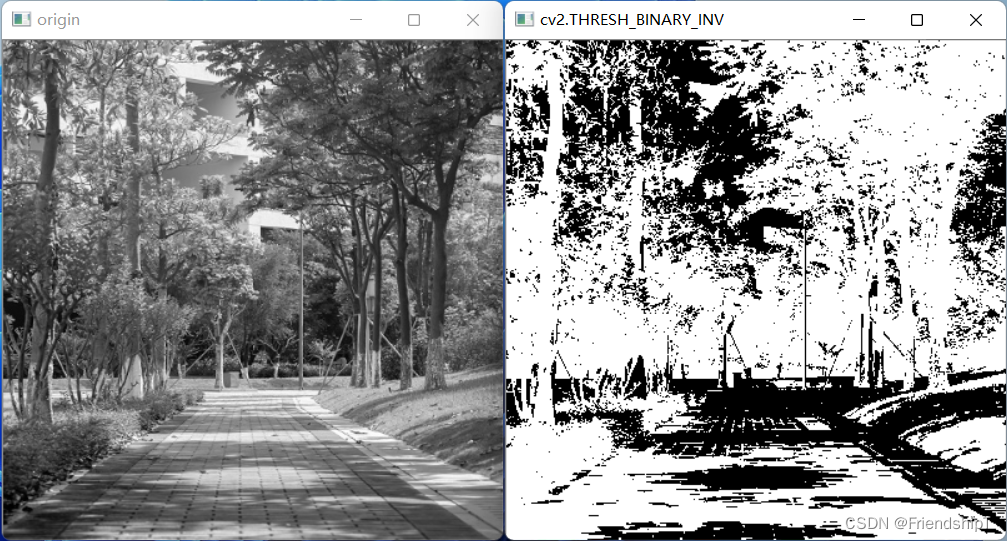
反二值化阈值处理(cv2.THRESH_BINARY_INV)
d s t [ x , y ] = { 0 , i m g [ x , y ] > t h r e s h 255 , e l s e dst[x,y]= \begin{cases} 0,\quad img[x,y]>thresh\\ 255,\quad else \end{cases} dst[x,y]={0,img[x,y]>thresh255,else
import cv2
img1=cv2.imread("1.jpg",0)
img1_resize=cv2.resize(img1,(400,400))
# ret, thresh = cv2.threshold(img,thresh,maxval,type)
ret, thresh = cv2.threshold(img1_resize,127,255, cv2.THRESH_BINARY_INV)
cv2.imshow("origin",img1_resize)
cv2.imshow("cv2.THRESH_BINARY_INV",thresh)
cv2.waitKey()
cv2.destroyAllWindows()
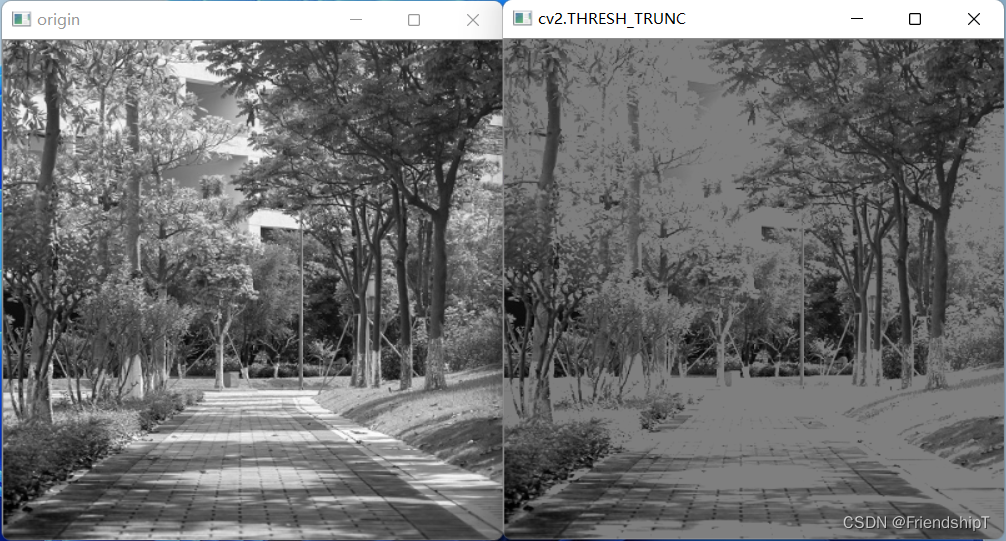
截断阈值化处理(cv2.THRESH_TRUNC)
d s t [ x , y ] = { t h r e s h , i m g [ x , y ] > t h r e s h 0 , e l s e dst[x,y]= \begin{cases} thresh,\quad img[x,y]>thresh\\ 0,\quad else \end{cases} dst[x,y]={thresh,img[x,y]>thresh0,else
import cv2
img1=cv2.imread("1.jpg",0)
img1_resize=cv2.resize(img1,(400,400))
# ret, thresh = cv2.threshold(img,thresh,maxval,type)
ret, thresh = cv2.threshold(img1_resize,127,255, cv2.THRESH_TRUNC)
cv2.imshow("origin",img1_resize)
cv2.imshow("cv2.THRESH_TRUNC",thresh)
cv2.waitKey()
cv2.destroyAllWindows()
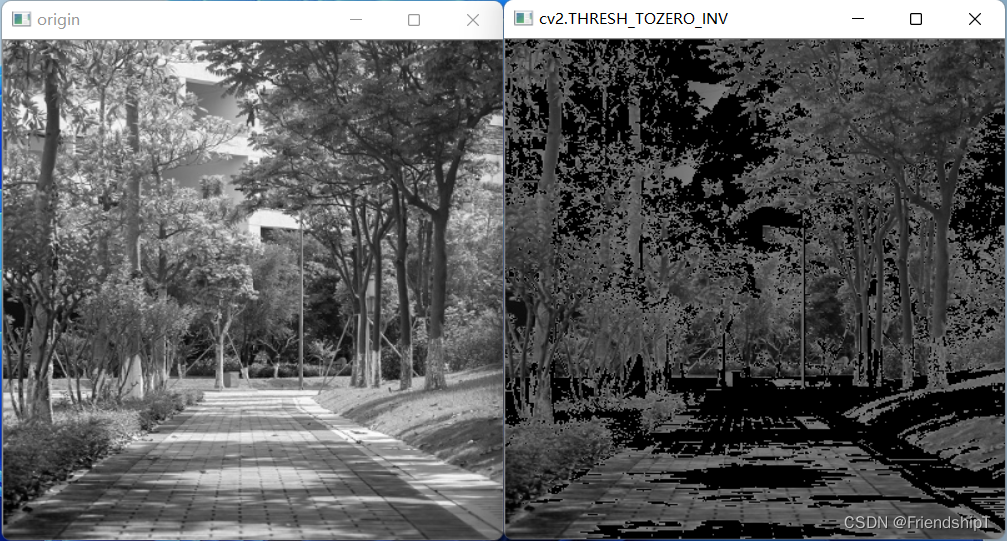
超阈值零处理(cv2.THRESH_TOZERO_INV)
d s t [ x , y ] = { 0 , i m g [ x , y ] > t h r e s h i m g [ x , y ] , e l s e dst[x,y]= \begin{cases} 0,\quad img[x,y]>thresh\\ img[x,y],\quad else \end{cases} dst[x,y]={0,img[x,y]>threshimg[x,y],else
import cv2
img1=cv2.imread("1.jpg",0)
img1_resize=cv2.resize(img1,(400,400))
# ret, thresh = cv2.threshold(img,thresh,maxval,type)
ret, thresh = cv2.threshold(img1_resize,127,255, cv2.THRESH_TOZERO_INV)
cv2.imshow("origin",img1_resize)
cv2.imshow("cv2.THRESH_TOZERO_INV",thresh)
cv2.waitKey()
cv2.destroyAllWindows()
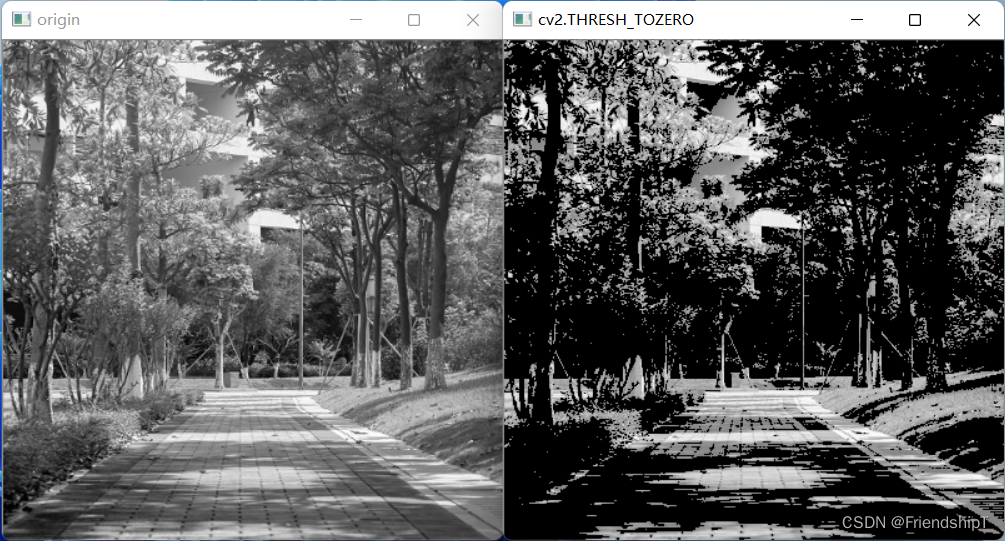
低阈值零处理(cv2.THRESH_TOZERO)
d s t [ x , y ] = { i m g [ x , y ] , i m g [ x , y ] > t h r e s h 0 , e l s e dst[x,y]= \begin{cases} img[x,y],\quad img[x,y]>thresh\\ 0,\quad else \end{cases} dst[x,y]={img[x,y],img[x,y]>thresh0,else
import cv2
img1=cv2.imread("1.jpg",0)
img1_resize=cv2.resize(img1,(400,400))
# ret, thresh = cv2.threshold(img,thresh,maxval,type)
ret, thresh = cv2.threshold(img1_resize,127,255, cv2.THRESH_TOZERO)
cv2.imshow("origin",img1_resize)
cv2.imshow("cv2.THRESH_TOZERO",thresh)
cv2.waitKey()
cv2.destroyAllWindows()
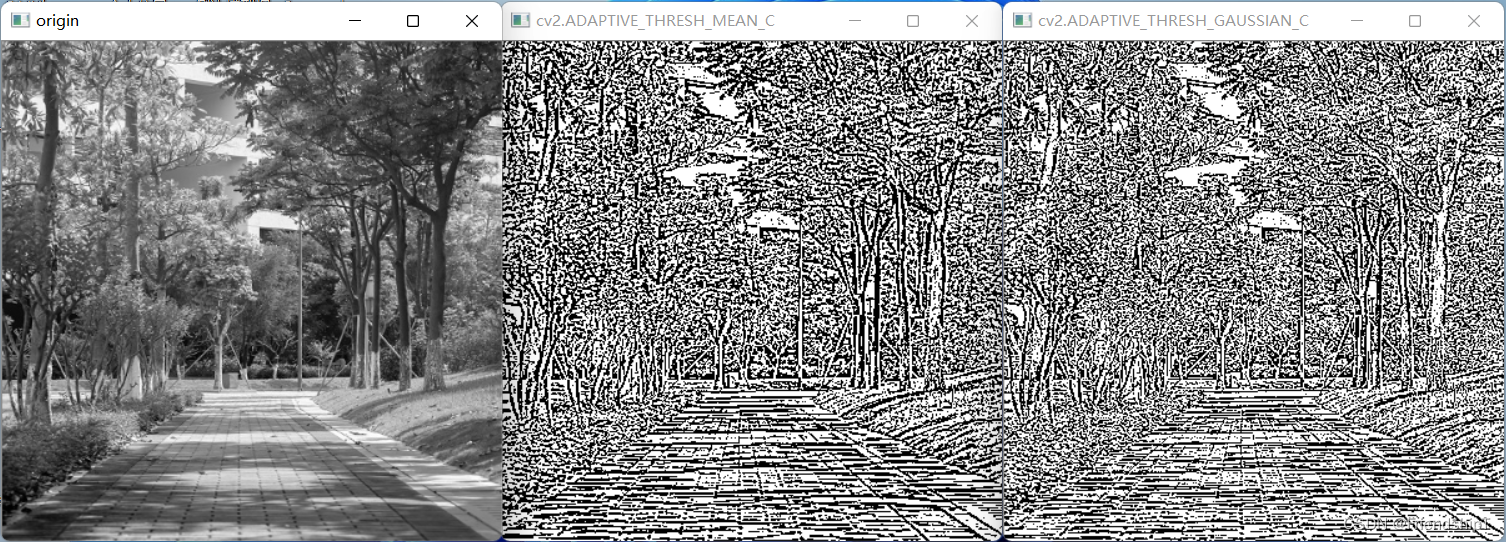
自适应阈值处理 (cv2.adaptiveThreshold())
- 对于色彩均衡的图像,直接使用一个阈值就能完成对图像的阈值化处理。但是,有时图像的色彩是不均衡的,此时如果只使用一个阈值,就无法得到清晰有效的阈值分割结果图像。
- 有一种改进的阈值处理技术,其使用变化的阈值完成对图像的阈值处理,这种技术被称为自适应阈值处理。
- 在进行阈值处理时,自适应阈值处理的方式通过计算每个像素点周围临近区域的加权平均值获得阈值,并使用该阈值对当前像素点进行处理。与普通的阈值处理方法相比,自适应阈值处理能够更好地处理明暗差异较大的图像。
- dst = cv.adaptiveThreshold(img, maxValue, adaptiveMethod, thresholdType, blockSize, C)
- dst 代表自适应阈值处理结果。
- src 代表要进行处理的原始图像。需要注意的是,该图像必须是 8 位单通道的图像。
- maxValue 代表最大值。
- adaptiveMethod 代表自适应方法。
- thresholdType 代表阈值处理方式 , 该值必须是cv2.THRESH_BINARY 或者cv2.THRESH_BINARY_INV 中的一个。
- blockSize 代表块大小。表示一个像素在计算其阈值时所使用的邻域尺寸,通常为 3、5、7 等。
- C 是常量。
- 函数 cv2.adaptiveThreshold()根据参数 adaptiveMethod 来确定自适应阈值的计算方法,函数包含 cv2.ADAPTIVE_THRESH_MEAN_C 和cv2.ADAPTIVE_THRESH_GAUSSIAN_C 两种不同的方法。
- 这两种方法都是逐个像素地计算自适应阈值,自适应阈值等于每个像素由参数blockSize 所指定邻域的加权平均值减去常量 C。
- cv2.ADAPTIVE_THRESH_MEAN_C:邻域所有像素点的权重值是一致的。
- cv2.ADAPTIVE_THRESH_GAUSSIAN_C:与邻域各个像素点到中心点的距离有关,通过高斯方程得到各个点的权重值。
import cv2
img1=cv2.imread("1.jpg",0)
img1_resize=cv2.resize(img1,(400,400))
ADAPTIVE_MEAN=cv2.adaptiveThreshold(img1_resize,255,cv2.ADAPTIVE_THRESH_MEAN_C,cv2.THRESH_BINARY,5,3)
ADAPTIVE_GAUSSIAN=cv2.adaptiveThreshold(img1_resize,255,cv2.ADAPTIVE_THRESH_GAUSSIAN_C,cv2.THRESH_BINARY,5,3)
cv2.imshow("origin",img1_resize)
cv2.imshow("cv2.ADAPTIVE_THRESH_MEAN_C",ADAPTIVE_MEAN)
cv2.imshow("cv2.ADAPTIVE_THRESH_GAUSSIAN_C",ADAPTIVE_GAUSSIAN)
cv2.waitKey()
cv2.destroyAllWindows()
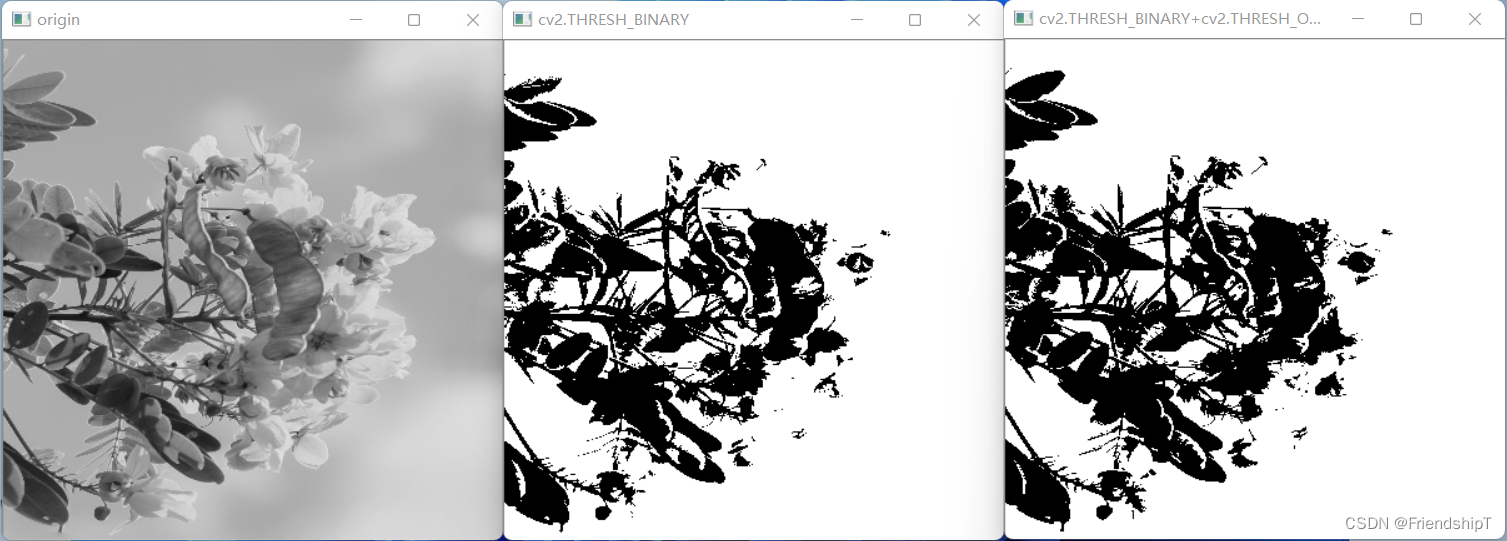
Otsu 处理(cv2.THRESH_OTSU)
- 在进行阈值处理时,需要自定义一个阈值,并以此阈值作为图像阈值处理的依据。通常情况下处理的图像都是色彩均衡的,这时直接将阈值设为 127 是比较合适的。
- 但是,有时图像灰度级的分布是不均衡的,如果此时还将阈值设置为 127,那么阈值处理的结果就是失败的。
- 比如,一张3×3图像img: [ 120 120 120 120 126 126 120 126 126 ] \left[ \begin{matrix} 120 & 120 & 120\\ 120 & 126 & 126 \\ 120 & 126 & 126 \end{matrix} \right] ⎣ ⎡120120120120126126120126126⎦ ⎤
如果,thresh=127,则得到的结果图像: [ 0 0 0 0 0 0 0 0 0 ] \left[ \begin{matrix} 0 & 0 & 0\\ 0 & 0& 0\\ 0 & 0 & 0 \end{matrix} \right] ⎣ ⎡000000000⎦ ⎤
显然,不是我们想要的,但是,如果thresh=125,则可以得到较好的结果图像: [ 0 0 0 0 126 126 0 126 126 ] \left[ \begin{matrix} 0 & 0 & 0\\ 0 & 126 & 126 \\ 0 & 126 & 126 \end{matrix} \right] ⎣ ⎡00001261260126126⎦ ⎤
但是,实际处理的图像往往是很复杂的。- Otsu 方法能够根据当前图像给出最佳的类间分割阈值。简而言之,Otsu 方法会遍历所有可能阈值,从而找到最佳的阈值。
import cv2
img1=cv2.imread("4.jpg",0)
img1_resize=cv2.resize(img1,(400,400))
# ret, thresh = cv2.threshold(img,thresh,maxval,type)
ret, thresh = cv2.threshold(img1_resize,127,255, cv2.THRESH_BINARY)
ret, thresh_Otsu  = cv2.threshold(img1_resize,127,255, cv2.THRESH_BINARY+cv2.THRESH_OTSU)
cv2.imshow("origin",img1_resize)
cv2.imshow("cv2.THRESH_BINARY",thresh)
cv2.imshow("cv2.THRESH_BINARY+cv2.THRESH_OTSU",thresh_Otsu)
cv2.waitKey()
cv2.destroyAllWindows()
参考文献
[1] https://opencv.org/
[2] 李立宗. OpenCV轻松入门:面向Python. 北京: 电子工业出版社,2019
- 更多精彩内容,可点击进入
OpenCV-Python快速入门专栏或我的个人主页查看


 27万+
27万+

 被折叠的 条评论
为什么被折叠?
被折叠的 条评论
为什么被折叠?
 到【灌水乐园】发言


