


 本文详细介绍了Servlet的概念、创建方法及配置过程,并通过实例演示了如何处理GET和POST请求。
一.什么是Servlet?
Servlet对接收客户端的Request请求数据进行解析,按照业务逻辑进行处理
Servlet将最终的执行结果封装成Response返回客户端
Servlet是JavaWeb的三大组件之一(Servlet,Filter,Listener)
二.Servlet类的创建
1.实现Servlet接口(interface)
public class XXX implements Servlet{....}
2.继承GenericServlet类(abstract)
public class XXX extends GenericServlet {....}
3.继承HttpServlet类(abstract)
/**
 * 先有继承关系如下
 */
HttpServlet extends GenericServlet{....}

/**
 * 再有继承关系如下
 */
public class MyHttpServlet extends HttpServlet {....}
三.编写配置文件web.xml
<?xml version="1.0" encoding="UTF-8"?>
<web-app xmlns="http://xmlns.jcp.org/xml/ns/javaee"
         xmlns:xsi="http://www.w3.org/2001/XMLSchema-instance"
         xsi:schemaLocation="http://xmlns.jcp.org/xml/ns/javaee
         http://xmlns.jcp.org/xml/ns/javaee/web-app_4_0.xsd"
         version="4.0">
    <!--注册servlet-->
    <servlet>
        <!--servlet名称,当前xml中唯一-->
        <servlet-name>msr</servlet-name>
        <!--servlet实现类的全限定类名-->
        <servlet-class>controller.MyHttpServlet</servlet-class>
    </servlet>
    <!--给注册的servlet添加映射路径-->
    <servlet-mapping>
        <!--已经注册的servlet名称。注意:必须与注册的名称一致-->
        <servlet-name>msr</servlet-name>
        <!--访问路径。要求:必须/开头-->
        <url-pattern>/MyHttpServlet</url-pattern>
    </servlet-mapping>
</web-app>
四.创建Servlet类(这使用继承HttpServlet)的方式
package controller;

import javax.servlet.ServletException;
import javax.servlet.annotation.WebServlet;
import javax.servlet.http.HttpServlet;
import javax.servlet.http.HttpServletRequest;
import javax.servlet.http.HttpServletResponse;
import java.io.IOException;

/**
 * @Author weihuanwen
 * @Date 2019/7/21 11:08
 * @Version 1.0
 * 这个是通过右键创建的servlet,默认继承HttpServlet,其祖上GenericServlet是Servlet的实现类
 * 我们发现这个自动创建的子类中并不存在service(),而Tomcat引擎却只认识这一个方法
 * 所以我们断定MyHttpServlet的父类中或者其父类的父类中必然存在一个service()方法
 * 恰巧我们在其父类HttpServlet中找到了service()方法
 * 子类中虽然没有service()方法,但是其继承了HttpServlet()中的servce(),也就相当于拥有了
 * 父类的service(request,response)中会将两个参数分别强制转换为其对应的子接口
 * ServletRequest req--->HttpServletRequest request
 * ServletResponse res--->HttpServletResponse response
 * 再将这两个子接口传入HttpServlet中重写过的servce(HttpServletRequest,HttpServletResponse)方法中
 * 判断客户端请求方式到底是get还是post
 * 以上就是自动创建的servlet类的工作机制
 */
@WebServlet(name = "/MyHttpServlet")
public class MyHttpServlet extends HttpServlet {
    /**
     * 重写doGet
     * @param req
     * @param resp
     * @throws ServletException
     * @throws IOException
     */
    @Override
    protected void doGet(HttpServletRequest req, HttpServletResponse resp) throws ServletException, IOException {
        System.out.println("get请求!");
    }

    /**
     * 重写doPost
     * @param req
     * @param resp
     * @throws ServletException
     * @throws IOException
     */
    @Override
    protected void doPost(HttpServletRequest req, HttpServletResponse resp) throws ServletException, IOException {
        System.out.println("post请求!");
    }
}
五.创建前端页面index.jsp
<%--
  Created by IntelliJ IDEA.
  User: WHW
  Date: 2019/7/21
  Time: 10:30
  To change this template use File | Settings | File Templates.
--%>
<%@ page contentType="text/html;charset=UTF-8" language="java" %>
<html>
  <head>
    <title>$Title$</title>
  </head>
  <body>
  <fieldset>
    <button><a href="http://localhost:8080/MyHttpServlet">doGet</a></button>
  </fieldset>
  <fieldset>
    <form action="http://localhost:8080/MyHttpServlet" method="post">
      用户名:<input type="text"/><br/>
      密 码:<input type="text"/><br/>
      <input type="submit" value="提交">
    </form>
  </fieldset>
  </body>
</html>
六.测试:
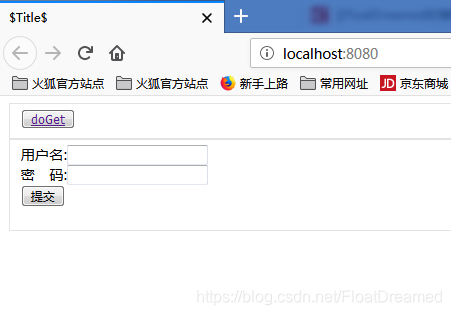
1.启动工程-->浏览器中弹出页面如下:
2.点击doGet按钮后控制台输出如下:
get请求!
3.输入用户名和密码后点击提交按钮,控制台输出如下:
post请求!
七.post请求使用doGet()处理
package controller;

import javax.servlet.ServletException;
import javax.servlet.annotation.WebServlet;
import javax.servlet.http.HttpServlet;
import javax.servlet.http.HttpServletRequest;
import javax.servlet.http.HttpServletResponse;
import java.io.IOException;

/**
 * @Author weihuanwen
 * @Date 2019/7/21 11:08
 * @Version 1.0
 */
@WebServlet(name = "/MyHttpServlet")
public class MyHttpServlet extends HttpServlet {
    /**
     * 重写doGet
     * @param req
     * @param resp
     * @throws ServletException
     * @throws IOException
     */
    @Override
    protected void doGet(HttpServletRequest req, HttpServletResponse resp) throws ServletException, IOException {
        System.out.println("get请求!");
    }

    /**
     * 重写doPost
     * @param req
     * @param resp
     * @throws ServletException
     * @throws IOException
     */
    @Override
    protected void doPost(HttpServletRequest req, HttpServletResponse resp) throws ServletException, IOException {
        doGet(req,resp);
    }
}


 471
471

 被折叠的 条评论
为什么被折叠?
被折叠的 条评论
为什么被折叠?
 到【灌水乐园】发言


