


 本文介绍了TarsGateway的功能及配置方法,包括不同协议的支持、流量控制、环境切换等内容,并详细展示了配置文件的具体设置。
0.学习链接
GIT上的介绍-链接打不开了
1.TarsGateway简介
1.1 什么是TarsGateway
TarsGateway是基于tars框架开发的一套通用api网关,请求为http协议,后端同时支持tars-tup&tars-tars
协议、tars-json协议、http协议。除了协议转发之外,还支持流量控制,黑白名单等功能。
1.2 支持版本说明
TarsCpp: >= v2.4.5
TarsJava: >= v1.7.2
TarsGo: >= v1.1.4
TarsNode: (rpc: >= v2.0.14, stream: >= v2.0.3, tars2node: >= v20200707)
TarsPHP: tars-server: >= v0.6.0
2.功能介绍
2.0 源码
/home/muten/module/TARS/TarsFramework/TarsGateway/src2.1 代理类型的判断
2.2 TARS-tup && TARS-tars 协议代理
2.3 TARS-JSON 协议代理
2.4 普通HTTP协议代理
2.5 流量控制
2.6 黑名单策略
2.7 配置热更新
2.8 环境切换
2.9 返回码说明
2.10 日志格式说明
3.编译安装
3.1 一键安装
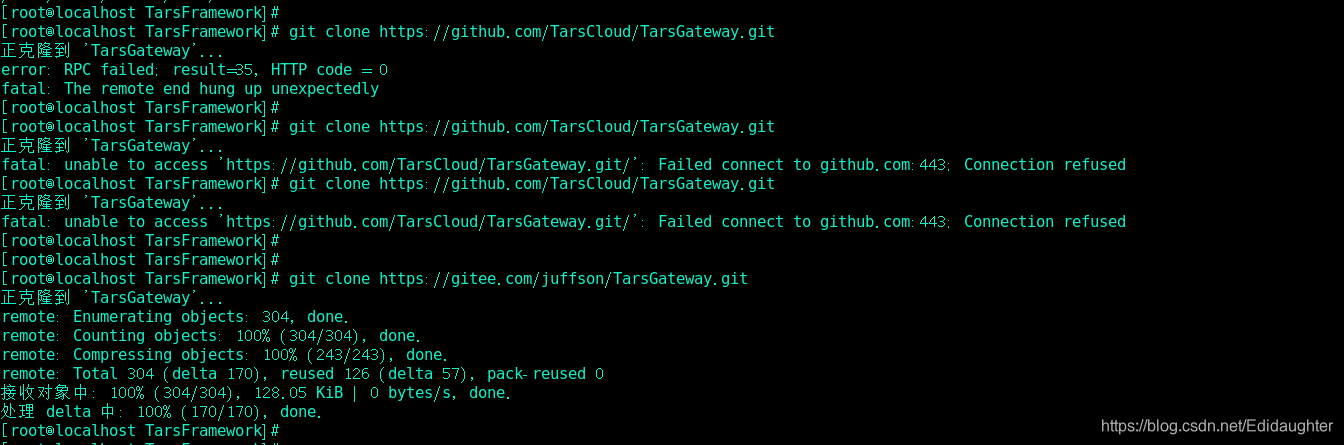
git clone https://github.com/TarsCloud/TarsGateway.git(非常慢,建议从gitee上拉取)
git clone https://gitee.com/juffson/TarsGateway.git(gitee的链接)
cd TarsGateway/install;
./install.sh webhost token server_ip tars_db_ip tars_db_port tars_db_user tars_db_pwd

安装参数如下:
webhost TarsWeb管理端的host或ip:port
token TarsWeb管理端的token,可以通过管理端获取http://webhost:3001/auth.html#/token
server_ip GatewayServer部署的ip,目前这里只支持一个,如果需要更多,后面直接在平台上面扩容即可。
tars_db_ip tarsdb 所在的数据库服务器ip。
tars_db_port tarsdb 端口。
tars_db_user tarsdb 用户名(需要有建库建表权限)。
tars_db_pwd tarsdb 密码.

例如:
./install.sh 172.16.8.220:3000 036105e1ebfc13843b4db0edcd000b3d9f47b13928423f0443df54d20ca65855 172.16.8.220 172.16.8.221 3306 tars tars2015


我的一一键安装命令:
./install.sh 192.168.118.138:3000 c870510e929fa3b05bfe29c1c0289627b714f268 192.168.118.138 192.168.118.138 3306 root 123456


验证安装结果:
在浏览器打开 http://${server_ip}:8200/monitor/monitor.html,如果能正常显示 hello TupMonitorxxx 就表示安装成功.

我的是http://192.168.118.138:8200/monitor/monitor.html

3.2 手动部署安装
手动部署安装(需要先具备tarscpp编译环境)
准备tarscpp 编译环境;
获取源码: git clone https://github.com/TarsCloud/TarsGateway.git(同样建议gitee)
编译: cd TarsGateway; mkdir build; cd build; make GatewayServer && make GatewayServer-tar
在tarsweb 管理平台上面,部署tars.GatewayServer,该服务有两个servant,即部署两个Obj,如下:
tars.GatewayServer.ProxyObj 非tars协议 5个线程 端口 xxxx (一键部署的端口默认为8200)
tars.GatewayServer.FlowControlObj tars协议 1个线程 端口 xxxx
添加配置文件:GatewayServer.conf,内容参考 TarsGateway/conf/GatewayServer.conf
发布服务
验证:同上一键部署 验证安装结果.
4.服务配置说明
    <main>
        #传到后面taf服务的http头, 多个头以,分隔,在后端taf服务,通过 current->getContext()["X-GUID"] 获取。
        filterheaders = X-GUID|X-XUA|Host

        # auto_proxy 是否打开通过主控发现代理,1打开, 0 关闭
        # 在测试环境,可以配置为1, 方便服务调试, 在正式环境, 强烈建议配置为0,
        #以保证内部服务不随便在外网被调用,在还有配置了proxy的才可以调用
        auto_proxy=1

        # 分布式多机协同流控 Obj,如果这里为空, 那么流控的配置指标都为单机指标
        flow_report_obj=tars.GatewayServer.FlowControlObj

        <base>
            # tup 回包大小限制
            rspsize=5242880
            #tup_host 如果为空,那么所有host开头的,且没有path或者path为 / ,
            #也判断为 tup 请求, 例如: prx.tup.whup.com|127.0.0.1|192.168.2.123
            tup_host=prx.tup.whup.com
            tup_path=/tup
            json_path=/json
            monitor_url=/monitor/monitor.jsp
        </base>

        # proxy 配置,前端通过 http 协议访问后端tars接口, 如果前面配置auto_proxy = 0,
        # 那么这里一定需要配置了对应的servant别名, 才可以通过该别名进行该服务接口的访问
        # 除了配置别名, 还可选支持不通的负载均衡策略,支持轮训,hash等
        <proxy>
            # servant = server_full_obj [| hash_type [| http header key] ]
            # hash_type: 0, 轮训; 1: requestid, 2: http头, 3: client ip
            # Hello=TestApp.HelloServer.HelloObj | 1
            # Hello=TestApp.HelloServer.HelloObj | 2 | X-GUID
            #Hello=TestApp.HelloServer.HelloObj | 3

            hello = TestApp.HelloServer.HelloObj
            login = Base.LoginServer.LoginObj

            # 可以支持其他环节的转发,配合 httpheader 一起使用,
            # 例如下面的配置中,http头 X-GUID 为 b7392a2d60604eac81892f6f9c0232f7 时,
            # 那么客户端请求 hello servant,会调用
            # Test.HelloServer.HelloObj@tcp -h 127.0.0.1 -p 22346 这个指定的服务节点,
            # 而不是调用以上默认的 TestApp.HelloServer.HelloObj
            <test>
                # test 环境转发规则,如果这里配置了的(例如hello)则优先用这里的配置,
                # 如果没有配置(例如login),那么还是用proxy下面默认的配置
                hello = Test.HelloServer.HelloObj@tcp -h 127.0.0.1 -p 22346 | 2 | X-GUID
            </test>

            <dogfood>
                # dogfood 环境转发规则
                login = Base.LoginServer.LoginObj@tcp -h 192.168.2.123 -p 12000
            </dogfood>
        </proxy>

        #http头:值, 转到proxy某个服务
        <httpheader>
            # b7392a2d60604eac81892f6f9c0232f7 转发到 test 环境
            X-GUID:b7392a2d60604eac81892f6f9c0232f7 = test
            # 344bfdf1afb146ffa68b2bd69a57f193 转发到 dogfood 环境
            X-GUID:344bfdf1afb146ffa68b2bd69a57f193 = dogfood
        </httpheader>

        <http_retcode>
            # 定义哪些返回码做超时容错处理,哪些返回码做出错容灾处理, 这里一般不用改动
            inactive=2|6
            timeout=1|3
        </http_retcode>

        #http_router 为http协议转发配置,这里主要方便自动测试用,
        #在实际使用过程中, 建议在taf-web 的网关配置页面进行配置!
        <http_router>
            # 本机绑定host 来测试以下用例
            # 192.168.2.131 x.tup.cn
            # 192.168.2.131 x.tup.com
            # 192.168.2.131 x1.tup.net
            # 192.168.2.131 x.tuptest.com
            # 192.168.2.131 f.tup.com
            <station1>
                # server_name, location, proxy_pass 类似nginx对应的字段
                server_name=127.0.0.1
                location=/testhost/
                proxy_pass=http://127.0.0.1:8999
            </station1>
            # <fullhost>
            #     server_name=192.168.2.131
            #     location=/testhost/
            #     proxy_pass=http://127.0.0.1:8999/fullhost/
            # </fullhost>
            # <pre_host>
            #     server_name=*.tup.com
            #     location=/testhost/
            #     proxy_pass=http://127.0.0.1:8999/prehost/
            # </pre_host>
            # <suf_host>
            #     server_name=x.tup.*
            #     location=/testhost/
            #     proxy_pass=http://127.0.0.1:8999/sufhost/
            # </suf_host>
            # <reg_host>
            #     server_name=~x[0-9].tup.net$
            #     location=/testhost/
            #     proxy_pass=http://127.0.0.1:8999/reghost/
            # </reg_host>
            # <default_host>
            #     location=/testhost/
            #     proxy_pass=http://127.0.0.1:8999/defaulthost/
            # </default_host>
            # <full_path>
            #     server_name=f.tup.com
            #     location== /fullpath/
            #     proxy_pass=http://127.0.0.1:8999/full_path/
            # </full_path>
            # <startwith_path>
            #     server_name=f.tup.com
            #     location=^~ /startpath/
            #     proxy_pass=http://127.0.0.1:8999/startwith_path/
            # </startwith_path>
            # <reg_path>
            #     server_name=f.tup.com
            #     location=~ /[0-9]regpath/
            #     proxy_pass=http://127.0.0.1:8999
            # </reg_path>
            # <reg2_path>
            #     server_name=f.tup.com
            #     location=~* /[0-9]reg2PaTH/
            #     proxy_pass=http://127.0.0.1:8999
            # </reg2_path>
            # # <notreg_path>
            # #     server_name=f.tup.com
            # #     location=!~ /notreg/
            # #     proxy_pass=http://172.16.8.171:10008
            # # </notreg_path>
            # <comm_path>
            #     server_name=f.tup.com
            #     location=/commpath/
            #     proxy_pass=http://127.0.0.1:8999/comm_path/
            # </comm_path>
            # <default_path>
            #     server_name=f.tup.com
            #     location=/
            #     proxy_pass=http://127.0.0.1:8999/default_path/
            # </default_path>
            # <proxy_path>
            #     server_name=f.tup.com
            #     location=/proxypath/
            #     proxy_pass=http://127.0.0.1:8999
            # </proxy_path>
            # <proxy2_path>
            #     server_name=f.tup.com
            #     location=/proxy2path/
            #     proxy_pass=http://127.0.0.1:8999/
            # </proxy2_path>
        </http_router>

        # tars db 连接信息,这里新的框架都默认建好了该db,如果没有建,
        # 也可以自己手动建,建表信息见代码下面的:install/db_tars.sql
        <db>
            charset=utf8
            dbhost =db.tars.com
            dbname =db_base
            dbpass =taf2015
            dbport =3306
            dbuser =tars
        </db>
    </main>
5.Tars网关配置使用说明
5.1 Tars-Json && Tars-Tup 协议代理配置
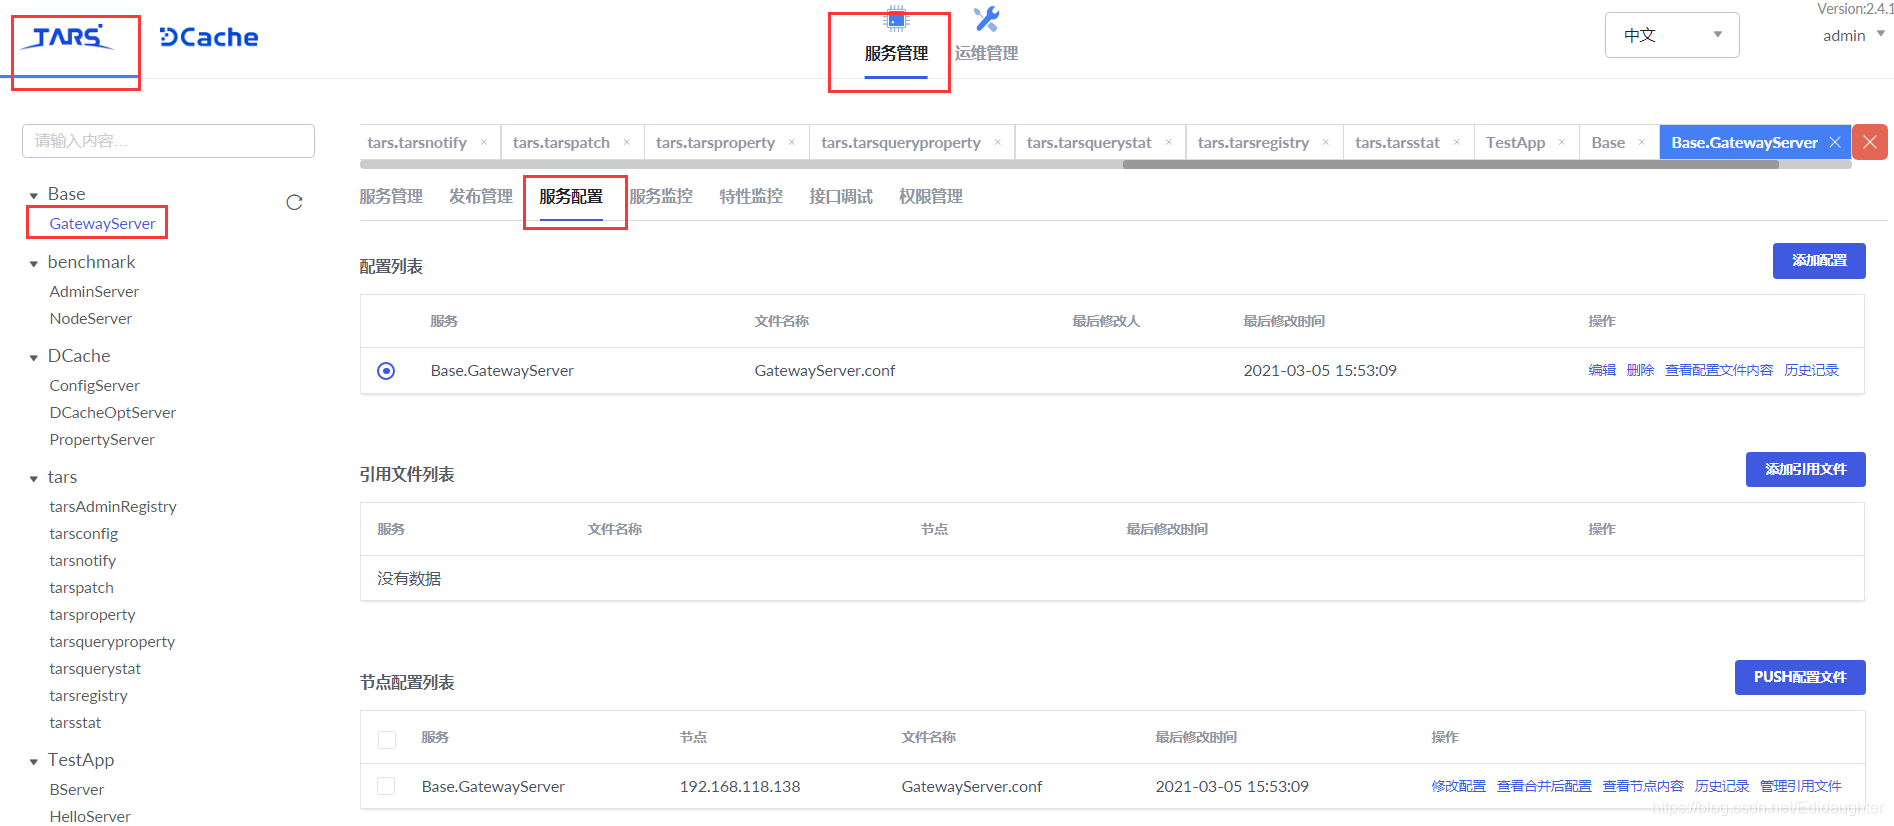
5.1.1【修改配置】
环境刚刚搭好的时候我们就已经有了配置,我们此处修改配置就可以了.

<main>
    #传到后面taf服务的http头, 多个头以,分隔
    filterheaders = X-GUID|X-XUA|Host
    # 是否打开通过主控发现代理,1打开, 0 关闭
    auto_proxy=1
    flow_report_obj=Base.GatewayServer.FlowControlObj
    <base>
        # tup 回包大小限制
        rspsize=5242880
        #tup_host 如果不配置,那么所有host开头的,且没有path或者path为 / , 也判断为 tup 请求, 例如: prx.tup.whup.com|127.0.0.1|192.168.2.123
        tup_host=
        tup_path=/tup
        json_path=/json
        monitor_url=/monitor/monitor.html
    </base>
    <http_retcode>
        # 定义哪些返回码做超时容错处理,哪些返回码做出错容灾处理
        inactive=2|6
        timeout=1|3
    </http_retcode>

    <http_router>
        # 本机绑定host 来测试以下用例
        # 192.168.2.131 x.tup.cn
        # 192.168.2.131 x.tup.com
        # 192.168.2.131 x1.tup.net
        # 192.168.2.131 x.tuptest.com
        # 192.168.2.131 f.tup.com
        <station1>
            server_name=127.0.0.1
            location=/testhost/
            proxy_pass=http://127.0.0.1:8999
        </station1>
        # <fullhost>
        #     server_name=192.168.2.131
        #     location=/testhost/
        #     proxy_pass=http://127.0.0.1:8999/fullhost/
        # </fullhost>
        # <pre_host>
        #     server_name=*.tup.com
        #     location=/testhost/
        #     proxy_pass=http://127.0.0.1:8999/prehost/
        # </pre_host>
        # <suf_host>
        #     server_name=x.tup.*
        #     location=/testhost/
        #     proxy_pass=http://127.0.0.1:8999/sufhost/
        # </suf_host>
        # <reg_host>
        #     server_name=~x[0-9].tup.net$
        #     location=/testhost/
        #     proxy_pass=http://127.0.0.1:8999/reghost/
        # </reg_host>
        # <default_host>
        #     location=/testhost/
        #     proxy_pass=http://127.0.0.1:8999/defaulthost/
        # </default_host>
        # <full_path>
        #     server_name=f.tup.com
        #     location== /fullpath/
        #     proxy_pass=http://127.0.0.1:8999/full_path/
        # </full_path>
        # <startwith_path>
        #     server_name=f.tup.com
        #     location=^~ /startpath/
        #     proxy_pass=http://127.0.0.1:8999/startwith_path/
        # </startwith_path>
        # <reg_path>
        #     server_name=f.tup.com
        #     location=~ /[0-9]regpath/
        #     proxy_pass=http://127.0.0.1:8999
        # </reg_path>
        # <reg2_path>
        #     server_name=f.tup.com
        #     location=~* /[0-9]reg2PaTH/
        #     proxy_pass=http://127.0.0.1:8999
        # </reg2_path>
        # # <notreg_path>
        # #     server_name=f.tup.com
        # #     location=!~ /notreg/
        # #     proxy_pass=http://172.16.8.171:10008
        # # </notreg_path>
        # <comm_path>
        #     server_name=f.tup.com
        #     location=/commpath/
        #     proxy_pass=http://127.0.0.1:8999/comm_path/
        # </comm_path>
        # <default_path>
        #     server_name=f.tup.com
        #     location=/
        #     proxy_pass=http://127.0.0.1:8999/default_path/
        # </default_path>
        # <proxy_path>
        #     server_name=f.tup.com
        #     location=/proxypath/
        #     proxy_pass=http://127.0.0.1:8999
        # </proxy_path>
        # <proxy2_path>
        #     server_name=f.tup.com
        #     location=/proxy2path/
        #     proxy_pass=http://127.0.0.1:8999/
        # </proxy2_path>
    </http_router>

    <proxy>
        # servant = server_full_obj [| hash_type [| http header key] ]
        # hash_type: 0, 轮训; 1: requestid, 2: http头, 3: client ip
        # Hello=TestApp.HelloServer.HelloObj | 1
        # Hello=TestApp.HelloServer.HelloObj | 2 | X-GUID
        #Hello=TestApp.HelloServer.HelloObj | 3

        hello = TestApp.HelloServer.HelloObj
        getSum = Test.GetSumServer.GetSumObj

        <test>
            v = Base.LoginServer.LoginObj
            hello = Test.HelloServer.HelloObj@tcp -h 192.168.118.138 -p 16344
        </test>

        <dogfood>
            v = Base.LoginServer.LoginObj
            hello = Test.HelloServer.HelloObj@tcp -h 192.168.118.138 -p 16344
        </dogfood>
    </proxy>


    #http头:值, 转到proxy某个服务
    <httpheader>
        Q-gUID:344bfdf1afb146ffa68b2bd69a57f193 = test
        Q-GUID:b7392a2d60604eac81892f6f9c0232f7 = test
    </httpheader>

    <db>
        charset=utf8
        dbhost =192.168.118.138
        dbname =db_base
        dbpass =123456
        dbport =3306
        dbuser =root
    </db>
</main>


 1341
1341


 到【灌水乐园】发言


