


一、Servlet的API访问
Struts2和Servlet的API为解耦合的。如果要使用涉及到Servlet的API则 使用一下方式访问
1.1 Servlet的API访问方式
- 完全解耦合的方式
只能存取值,不能像Servlet中request,session,application一样可以有别的方法
Action类的编写:
package com.struts2Demo_02.demo01;

import java.util.Arrays;
import java.util.Map;
import java.util.Map.Entry;

import com.opensymphony.xwork2.ActionContext;
import com.opensymphony.xwork2.ActionSupport;

/**
 * 访问Servlet的API方式一:完全解耦合方式
 * @author cf
 *
 */
public class RequestDemo01 extends ActionSupport{

	@Override
	public String execute() throws Exception {
		//接受参数
		//利用struts2中的对象ActionContext对象
		ActionContext context = ActionContext.getContext();
		//调用ActionContext中的方法
		Map<String, Object> map = context.getParameters();
		for (Entry<String, Object> entry: map.entrySet()) {
			System.out.println(entry.getKey());
			System.out.println(Arrays.toString((String[])entry.getValue()));
		}

		//向域对象中存入数据
		context.put("reqName", "reqValue"); //相当于request.setAttribute();
		context.getSession().put("sessName", "sessValue");//相当于session.setAttribute();
		context.getApplication().put("appName", "appValule");//相当于application.setAttribute();


		return SUCCESS;
	}
}
跳转至success.jsp页面:
<%@ page language="java" contentType="text/html; charset=UTF-8"
pageEncoding="UTF-8"%>
<!DOCTYPE html>
<html>
<head>
<meta charset="UTF-8">
<title>Insert title here</title>
</head>
<body>
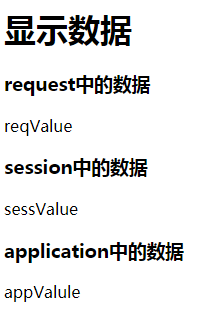
<h1>显示数据</h1>
<h3>request中的数据</h3>
${reqName }
<h3>session中的数据</h3>
${sessName }
<h3>application中的数据</h3>
${appName }
</body>
</html>
结果如下:
- 使用Servlet的API的原生方式
使用原生方式
 package com.struts2Demo_02.demo01;

    import java.util.Arrays;
    import java.util.Map;
    import java.util.Map.Entry;

    import javax.servlet.http.HttpServletRequest;

    import org.apache.struts2.ServletActionContext;

    import com.opensymphony.xwork2.ActionSupport;

    public class RequestDemo02 extends ActionSupport {
    	@Override
    	public String execute() throws Exception {
    		//接受数据
    		//通过ServletActionContext接受
    		HttpServletRequest request = ServletActionContext.getRequest();
    		Map<String, String[]> map = request.getParameterMap();
    		for (Entry<String, String[]> entry : map.entrySet()) {
    			System.out.println(entry.getKey());
    			System.out.println(Arrays.toString(entry.getValue()));
    		}

    		//向域中保存数据
    		//向request中保存数据
    		request.setAttribute("reqName", "reqValue");
    		//向session中保存数据
    		request.getSession().setAttribute("sessName", "sessValue");
    		//向application中保存数据
    		ServletActionContext.getServletContext().setAttribute("appName", "appValue");

    		return SUCCESS;
    	}
    }
- 接口注入的方式
需要实现相关的对应接口
package com.struts2Demo_02.demo01;

import java.util.Map;
import java.util.Map.Entry;

import javax.servlet.ServletContext;
import javax.servlet.http.HttpServletRequest;

import org.apache.catalina.tribes.util.Arrays;
import org.apache.struts2.interceptor.ServletRequestAware;
import org.apache.struts2.util.ServletContextAware;

import com.opensymphony.xwork2.ActionSupport;
/**
 * 方式三:接口注入
 * @author cf
 *
 */
public class RequestDemo03 extends ActionSupport implements ServletRequestAware, ServletContextAware{

	private HttpServletRequest request;
	private ServletContext context;

	@Override
	public String execute() throws Exception {
		//接收参数
		//通过接口注入的方式获得request对象
		Map<String, String[]> map = request.getParameterMap();
		for (Entry<String, String[]> entry : map.entrySet()) {
			System.out.println(entry.getKey());
			System.out.println(Arrays.toString(entry.getValue()));
		}

		//向域中保存数据
		request.setAttribute("reqName", "reqValue");
		//向session中保存数据
		request.getSession().setAttribute("sessName", "sessValue");
		//向application中保存数据
		context.setAttribute("appName", "appValue");

		return SUCCESS;
	}

	@Override
	public void setServletRequest(HttpServletRequest request) {
		this.request = request;
	}

	@Override
	public void setServletContext(ServletContext context) {
		this.context = context;
	}

}
二、结果页面的配置
2.1 全局结果页面
全局结果页面: 在包中配置一次,其他包只要返回相同值,都会跳转到此页面
第一节中的案列,所有的返回结果都一样。可以配置为全局结果页面,如果局部仍配置了返回结果,则局部生效
使用<global-results>标签配置
<?xml version="1.0" encoding="UTF-8" ?>
<!DOCTYPE struts PUBLIC
	"-//Apache Software Foundation//DTD Struts Configuration 2.3//EN"
	"http://struts.apache.org/dtds/struts-2.3.dtd">

<struts>
	<package name="demo01" extends="struts-default" namespace="/">

		<!-- 全局结果页面 -->
		<global-results>
				<result name="success">/demo01/success.jsp</result>
		</global-results>

		<action name="requestDemo01" class="com.struts2Demo_02.demo01.RequestDemo01">
<!-- 					<result name="success">/demo01/success.jsp</result> -->
		</action>

			<action name="requestDemo02" class="com.struts2Demo_02.demo01.RequestDemo02">
<!-- 					<result name="success">/demo01/success.jsp</result> -->
		</action>

		<action name="requestDemo03" class="com.struts2Demo_02.demo01.RequestDemo03">
<!-- 					<result name="success">/demo01/success.jsp</result> -->
		</action>
	</package>
</struts>
2.2 局部结果页面
局部结果页面:只在当前的action中的配置有效
一下配置,则局部配置有配置的局部配置有效
<?xml version="1.0" encoding="UTF-8" ?>
<!DOCTYPE struts PUBLIC
	"-//Apache Software Foundation//DTD Struts Configuration 2.3//EN"
	"http://struts.apache.org/dtds/struts-2.3.dtd">

<struts>
	<package name="demo01" extends="struts-default" namespace="/">

		<!-- 全局结果页面 -->
		<global-results>
				<result name="success">/demo01/success.jsp</result>
		</global-results>

		<action name="requestDemo01" class="com.struts2Demo_02.demo01.RequestDemo01">
					<result name="success" >/demo01/success.jsp</result>
		</action>

			<action name="requestDemo02" class="com.struts2Demo_02.demo01.RequestDemo02">
<!-- 					<result name="success">/demo01/success.jsp</result> -->
		</action>

		<action name="requestDemo03" class="com.struts2Demo_02.demo01.RequestDemo03">
<!-- 					<result name="success">/demo01/success.jsp</result> -->
		</action>
	</package>
</struts>
三、数据封装
3.1 属性驱动
- 提供属性set方法
创建实体类:
product.java

package com.struts2Demo_02.domain;

import java.util.Date;

public class Product {
	private String name;
	private double price;
	private Date time;
	private String category;
	public String getName() {
		return name;
	}
	public void setName(String name) {
		this.name = name;
	}
	public double getPrice() {
		return price;
	}
	public void setPrice(double price) {
		this.price = price;
	}
	public Date getTime() {
		return time;
	}
	public void setTime(Date time) {
		this.time = time;
	}
	public String getCategory() {
		return category;
	}
	public void setCategory(String category) {
		this.category = category;
	}
}
demo02.jsp
输入商品参数
<%@ page language="java" contentType="text/html; charset=UTF-8"
    pageEncoding="UTF-8"%>
<!DOCTYPE html>
<html>
<head>
<meta charset="UTF-8">
<title>Insert title here</title>
</head>
<body>
<h1>Struts2的数据封装</h1>
<h3>方式一:属性驱动提供set方法</h3>
<form action="${pageContext.request.contextPath }/productAction01.action" method="post">
	商品名称:<input type="text" name="name"><br>
	商品价格:<input type="text" name="price"><br>
	上架时间:<input type="text" name="time"><br>
	商品分类:<input type="text" name="category"><br>
	<input type="submit" value="提交">
</form>
</body>
</html>
Action类
action类中需提供相关属性及set方法
package com.struts2Demo_02.demo02;

import java.util.Date;

import com.opensymphony.xwork2.ActionSupport;
import com.struts2Demo_02.domain.Product;

/**
 * 数据封装方式一:提供属性的set方法
 * @author cf
 *
 */
public class ProductAction01 extends ActionSupport{
	//提供了对应的属性
	private String name;
	private double price;
	private Date time;
	private String category;
	//提供了对应的set方法
	public void setName(String name) {
		this.name = name;
	}


	public void setPrice(double price) {
		this.price = price;
	}


	public void setTime(Date time) {
		this.time = time;
	}


	public void setCategory(String category) {
		this.category = category;
	}


	@Override
	public String execute() throws Exception {
		//获取数据
		System.out.println(name);
		System.out.println(price);
		System.out.println(time);
		System.out.println(category);
		//封装数据
		Product product = new Product();
		product.setName(name);
		product.setPrice(price);
		product.setTime(time);
		product.setCategory(category);
		return NONE;
	}
}
struts配置:
<?xml version="1.0" encoding="UTF-8" ?>
<!DOCTYPE struts PUBLIC
	"-//Apache Software Foundation//DTD Struts Configuration 2.3//EN"
	"http://struts.apache.org/dtds/struts-2.3.dtd">

<struts>
	<package name="demo02" extends="struts-default" namespace="/">

		<action name="productAction01" class="com.struts2Demo_02.demo02.ProductAction01">

		</action>
	</package>
</struts>
结果如下:
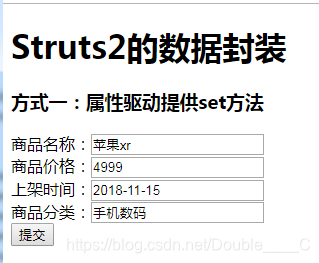
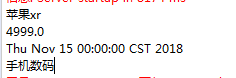
虽然取到了数据,但是需要自己手动封装数据
- 页面中提供表达式
jsp页面增加:
<h3>方式二:在页面中提供表达式</h3>
<form action="${pageContext.request.contextPath }/productAction02.action" method="post">
	商品名称:<input type="text" name="product.name"><br>
	商品价格:<input type="text" name="product.price"><br>
	上架时间:<input type="text" name="product.time"><br>
	商品分类:<input type="text" name="product.category"><br>
	<input type="submit" value="提交">
</form>
Action类:
创建domain类的对象,提供set和get方法
package com.struts2Demo_02.demo02;

import com.opensymphony.xwork2.ActionSupport;
import com.struts2Demo_02.domain.Product;

/**
 * 属性驱动:页面中使用表达式
 * @author cf
 *
 */

public class ProductAction02 extends ActionSupport {

	//提供一个domain类的对象
	private Product product;
	//提供user的set和get方法
	public Product getProduct() {
		return product;
	}


	public void setProduct(Product product) {
		this.product = product;
	}

	 @Override
	public String execute() throws Exception {
		 System.out.println(product);
		 return NONE;
	 }
}
结果如下:

3.2 模型驱动
jsp页面
<h3>方式三:模型驱动</h3>
<form action="${pageContext.request.contextPath }/productAction01.action" method="post">
	商品名称:<input type="text" name="name"><br>
	商品价格:<input type="text" name="price"><br>
	上架时间:<input type="text" name="time"><br>
	商品分类:<input type="text" name="category"><br>
	<input type="submit" value="提交">
</form>
Action类:
需实现modeldrvie接口
package com.struts2Demo_02.demo02;


import com.opensymphony.xwork2.ActionSupport;
import com.opensymphony.xwork2.ModelDriven;
import com.struts2Demo_02.domain.Product;

/**
 * 模型qudong
 * @author cf
 *
 */
public class ProductAction03 extends ActionSupport implements ModelDriven<Product>{

	//需手动提供对象实例
	private Product product = new Product();

	@Override
	public String execute() throws Exception {
		System.out.println(product);
		return NONE;
	}

	@Override
	public Product getModel() {
		return product;
	}
}
结果如下:

四、复杂类型的数据封装
4.1 复杂类型的数据封装
批量向数据库中插入数据,需要在页面中将数据封装到集合中
- 封装数据到LIst集合中
此种方式需在jsp页面提供list的名称,list创建在Action类,使用以下方式修改jsp的name属性。products为Action类中的list名称
jsp页面如下:
<%@ page language="java" contentType="text/html; charset=UTF-8"
pageEncoding="UTF-8"%>
<!DOCTYPE html>
<html>
<head>
<meta charset="UTF-8">
<title>Insert title here</title>
</head>
<body>
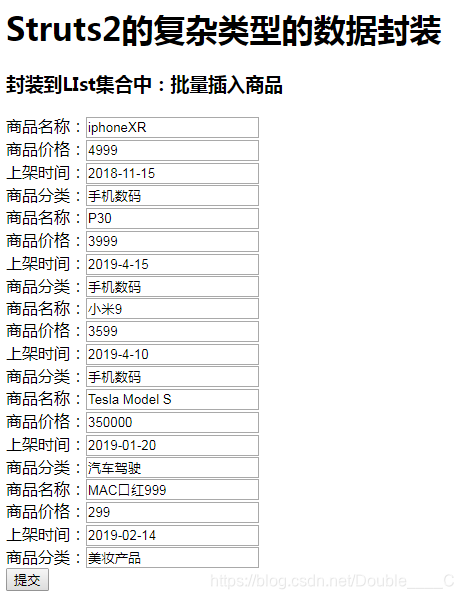
<h1>Struts2的复杂类型的数据封装</h1>
<h3>封装到LIst集合中:批量插入商品</h3>
<form action="${pageContext.request.contextPath }/productAction04.action" method="post">
商品名称:<input type="text" name="products[0].name"><br>
商品价格:<input type="text" name="products[0].price"><br>
上架时间:<input type="text" name="products[0].time"><br>
商品分类:<input type="text" name="products[0].category"><br>
商品名称:<input type="text" name="products[1].name"><br>
商品价格:<input type="text" name="products[1].price"><br>
上架时间:<input type="text" name="products[1].time"><br>
商品分类:<input type="text" name="products[1].category"><br>
商品名称:<input type="text" name="products[2].name"><br>
商品价格:<input type="text" name="products[2].price"><br>
上架时间:<input type="text" name="products[2].time"><br>
商品分类:<input type="text" name="products[2].category"><br>
商品名称:<input type="text" name="products[3].name"><br>
商品价格:<input type="text" name="products[3].price"><br>
上架时间:<input type="text" name="products[3].time"><br>
商品分类:<input type="text" name="products[3].category"><br>
商品名称:<input type="text" name="products[4].name"><br>
商品价格:<input type="text" name="products[4].price"><br>
上架时间:<input type="text" name="products[4].time"><br>
商品分类:<input type="text" name="products[4].category"><br>
<input type="submit" value="提交">
</form>
</body>
</html>
Action类如下:
ProductAction04.java
package com.struts2Demo_02.demo02;

import java.util.List;

import com.opensymphony.xwork2.ActionSupport;
import com.struts2Demo_02.domain.Product;

/**
 * 复杂数据封装至list中
 * @author cf
 *
 */
public class ProductAction04 extends ActionSupport{
	//封装数据至list中,需先创建list
	private List<Product> products;
	//提供集合的get/set方法
	public void setProducts(List<Product> products) {
		this.products = products;
	}

	public List<Product> getProducts() {
		return products;
	}

	@Override
	public String execute() throws Exception {
		for (Product product : products) {
			System.out.println(product);
		}

		return NONE;
	}
}
结果如下:

- 封装数据到Map集合中
与list方法有些类似
jsp页面
<%@ page language="java" contentType="text/html; charset=UTF-8"
    pageEncoding="UTF-8"%>
<!DOCTYPE html>
<html>
<head>
<meta charset="UTF-8">
<title>Insert title here</title>
</head>
<body>
<h'two'>Struts'three'的复杂类型的数据封装</h'two'>
<h'four'>封装到Map集合中:批量插入商品</h'four'>
<form action="${pageContext.request.contextPath }/productAction05.action" method="post">
	商品名称:<input type="text" name="map['one'].name"><br>
	商品价格:<input type="text" name="map['one'].price"><br>
	上架时间:<input type="text" name="map['one'].time"><br>
	商品分类:<input type="text" name="map['one'].category"><br>
		商品名称:<input type="text" name="map['two'].name"><br>
	商品价格:<input type="text" name="map['two'].price"><br>
	上架时间:<input type="text" name="map['two'].time"><br>
	商品分类:<input type="text" name="map['two'].category"><br>
		商品名称:<input type="text" name="map['three'].name"><br>
	商品价格:<input type="text" name="map['three'].price"><br>
	上架时间:<input type="text" name="map['three'].time"><br>
	商品分类:<input type="text" name="map['three'].category"><br>
		商品名称:<input type="text" name="map['four'].name"><br>
	商品价格:<input type="text" name="map['four'].price"><br>
	上架时间:<input type="text" name="map['four'].time"><br>
	商品分类:<input type="text" name="map['four'].category"><br>
		商品名称:<input type="text" name="map['five'].name"><br>
	商品价格:<input type="text" name="map['five'].price"><br>
	上架时间:<input type="text" name="map['five'].time"><br>
	商品分类:<input type="text" name="map['five'].category"><br>
	<input type="submit" value="提交">
</form>
</body>
</html>
Action类:
package com.struts2Demo_02.demo02;

import java.util.Map;
import java.util.Map.Entry;

import com.opensymphony.xwork2.ActionSupport;
import com.struts2Demo_02.domain.Product;

/**
 * 复杂数据的封装,封装至map集合
 * @author cf
 *
 */
public class ProductAction05 extends ActionSupport{
	//县创建map
	private Map<String, Product> map;
	//提供get和set方法
	public Map<String, Product> getMap() {
		return map;
	}


	public void setMap(Map<String, Product> map) {
		this.map = map;
	}

	@Override
	public String execute() throws Exception {
		for (Entry<String, Product> entry : map.entrySet()) {
			System.out.print(entry.getKey()+"---");
			System.out.print(entry.getValue());
			System.out.println("---------------------");
		}
		return NONE;
	}
}
结果如下:

分割线没搞好。。。。


 292
292

 被折叠的 条评论
为什么被折叠?
被折叠的 条评论
为什么被折叠?
 到【灌水乐园】发言


