


1、多配置文件管理
1.1、优先级
默认优先级:jar同级路径config目录配置文件 > jar同级路径配置文件 > classpath下config目录配置文件 > classpath下配置文件
springboot默认配置中,配置文件为application.properties或者application.yml,配置文件的目录为config,这两个是在没有任何配置的前提下的默认配置
1.2、自定义路径和多配置源
如果需要自定义配置文件路径,可以通过命令行启动
-Dspring.config.location=classpath:/,classpath:/config/,./config/,../config/
则优先级根据所配置的位置(用逗号分隔),从右到左降低(先加载右边的路径),这里的【../config】是jar上级目录的路径,文件名称可以自定义
如果需要多配置源,可以通过命令,可以配合上面的命令一起使用
-Dspring.profiles.active=test,db

这里的test,db分别指的是:application-test.yml和application-db.yml两个文件,文件的前缀必须是application
可以指定所有优先级里面的配置源,并且按优先级顺序加载,优先级从左到右升高(如果有,则靠右的会覆盖靠左的)
2、@ConfigurationProperties
若继续在application.properties中添加如:
wisely.name=zhangsan
wisely.gender=male
wisely.age=20
@ConfigurationProperties(prefix = "wisely")
public class WiselySettings {

    private String name;

    private String gender;

    private Integer age;

    public String getName() {
        return name;
    }

    public void setName(String name) {
        this.name = name;
    }

    public String getGender() {
        return gender;
    }

    public void setGender(String gender) {
        this.gender = gender;
    }

    public Integer getAge() {
        return age;
    }

    public void setAge(Integer age) {
        this.age = age;
    }
}
3、@Configuration&@PropertySource
自定义配置文件,如新建一个wisely.properties
wisely2.name=lisi
wisely2.gender=female
wisely2.age=30
@Configuration
@PropertySource("classpath:wisely.properties")//注意路径
public class Wisely2Settings {

    @Value("${wisely2.name}")
    private String name;

    @Value("${wisely2.gender}")
    private String gender;

    @Value("${wisely2.age}")
    private Integer age;

    public String getName() {
        return name;
    }

    public void setName(String name) {
        this.name = name;
    }

    public String getGender() {
        return gender;
    }

    public void setGender(String gender) {
        this.gender = gender;
    }

    public Integer getAge() {
        return age;
    }

    public void setAge(Integer age) {
        this.age = age;
    }
}
@ConfigurationProperties(prefix = "wisely2",locations = "classpath:wisely.properties")
这个注解貌似已经取消了,所以这里使用@PropertySource注解
最后注意在spring Boot入口类加上@EnableConfigurationProperties
@SpringBootApplication
@EnableConfigurationProperties({WiselySettings.class})
public class DemoApplication {

    public static void main(String[] args) {
        SpringApplication.run(DemoApplication.class, args);
    }
}
Wisely2Settings.class不需要加,因为它没有使用@ConfigurationProperties注解
@Controller
public class TestController {

    @Resource
    WiselySettings wiselySettings;

    @Resource
    Wisely2Settings wisely2Settings;

    @RequestMapping("/test")
    public
    @ResponseBody
    String test() {
        System.out.println("wisely.name = " + wiselySettings.getName());
        System.out.println("wisely.gender = " + wiselySettings.getGender());
        System.out.println("wisely.age = " + wiselySettings.getAge());
        System.out.println("wisely2.name = " + wisely2Settings.getName());
        System.out.println("wisely2.gender = " + wisely2Settings.getGender());
        System.out.println("wisely2.age = " + wisely2Settings.getAge());
        return "ok";
    }
}
但是第二种方式需要将需要注意包结构
1. 修改注解,
@SpringBootApplication(scanBasePackages={
"com.yigo.web1.p1", "com.com.yigo.web1.p2"})
但是这样有个问题,以后包越来越多怎么办?所以采用第二种办法更合适。
2. 调整包结构,把@SpringBootApplication 所在类放在其他包的最外层:
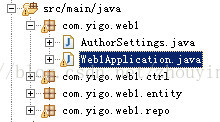
如此,其他包就和启动类在同一个目录下,就能被扫描到了。


 被折叠的 条评论
为什么被折叠?
被折叠的 条评论
为什么被折叠?
 到【灌水乐园】发言


