


个人学习ES之路-从安装入门到项目之实战window环境入门学习
大体分三个阶段:1.了解阶段 2.安装配置单例及集群阶段 3.实战学习阶段 4.总结阶段
一、了解阶段:
听说是目前最牛逼的搜索插件
二、安装阶段:
1.下载ES(6.4.2)
ES官网:https://www.elastic.co/cn/
方便下载:链接:https://pan.baidu.com/s/18GpfnqR77_aTFVkiYnHyMg 提取码:76yt
2.解压缩后进入bin目录,双击elasticsearch.bat
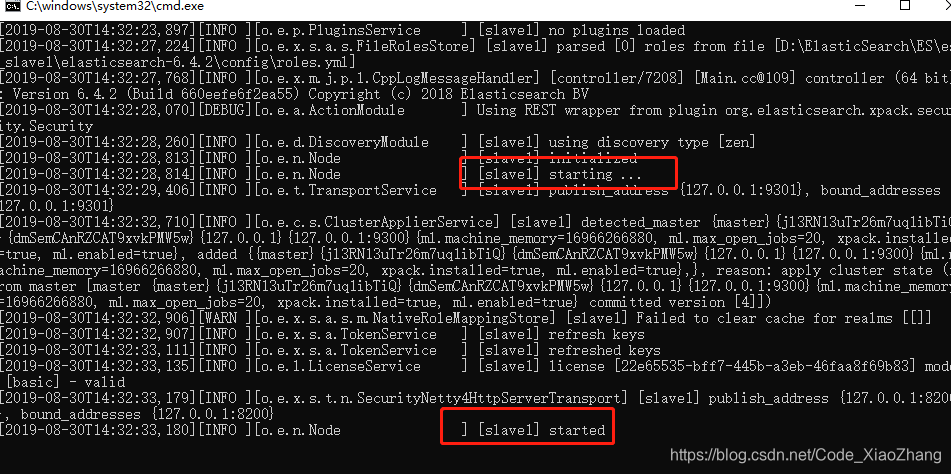
看到下入红色框,则是单例启动成功,进入 localhost:9200 可以看到返回的json串
3.插件安装Head安装
github上搜索elasticsearch-head 下载,解压缩后,用cmd界面,进入此目录,执行npm install(不支持npm请百度一下)
此时在elasticsearch-head下输入npm run start, 发现localhost:9100 后台界面,然后关闭命令。(相当于关闭head程序)
4.配置elasticsearch6-4-2/conf/elasticsearch.yml配置文件
#master的conf配置
http.cors.enabled: true
http.cors.allow-origin: “*”
cluster.name: zq
node.name: master
node.master: true
network.host: 127.0.0.1
【到这一步后,再次运行 elasticsearch.bat 程序 和 head目录下 npm run start ,进入9100界面 能看到master已运行】
5.配置集群:
新建两个文件夹 slave1和slave2 ,把最早下载的ES压缩包分别解压缩到这两个文件夹,然后分别修改各自的conf文件(如下), 然后 分别启动各自es程序, 刷新9100界面可以发现 集群创建完成
#slave1的conf配置:
cluster.name: name
node.name: slave1
network.host: 127.0.0.1
http.port: 8200
discovery.zen.ping.unicast.hosts: [“127.0.0.1”]
#slave2的conf配置:
cluster.name: name
node.name: slave1
network.host: 127.0.0.1
http.port: 8000
discovery.zen.ping.unicast.hosts: [“127.0.0.1”]
6.基本知识:
索引、类型、文档id (数据库、table、一行记录)
7.开始简单操作
用postman,put方式创建索引时候出现这个错误
"Rejecting mapping update to [people] as the final mapping would have more than 1 type: [woman, man]"
原因,es6.0版本后 不支持一次性插入多个类型
(1)创建索引:可以走head界面手动创建,或者走postman发起put请求创建:地址127.0.0.1:9200/people
{


	"settings": {


		"number_of_shards": 3,
		"number_of_replicas": 1
	},
	"mappings": {


		"man": {


			"properties": {


				"name": {


					"type": "text"
				},
				"country": {


					"type": "keyword
最低0.47元/天 解锁文章


 被折叠的 条评论
为什么被折叠?
被折叠的 条评论
为什么被折叠?
 到【灌水乐园】发言


