


前言
这篇博客主要介绍如何借助现有的isaac_tasks代码示例开发自己的Project,比较适合有开发经验的developer,纯入门的同学可以借鉴内容掌握一下整体的代码架构比如仿真的流程与训练流程如何结合,如何封装仿真环境并给强化学习提供合适的api,在把握整体的同时学习各个模块的开发细节,齐头并进。后续的帖子会根据lab和sim自带的tutorials和standalone scripts分享一些自己的开发经验。这篇博客开发环境是IsaacSim4.5.0/IsaacLab(Ubuntu22.04),使用了conda虚拟环境,下载方式是pip installation方式,安装过程可以看我之前的帖子:IsaacLab最新2025教程-环境配置(IsaacSim 4.5.0/Ubuntu22.04) 原创-优快云博客
isaac_tasks示例介绍
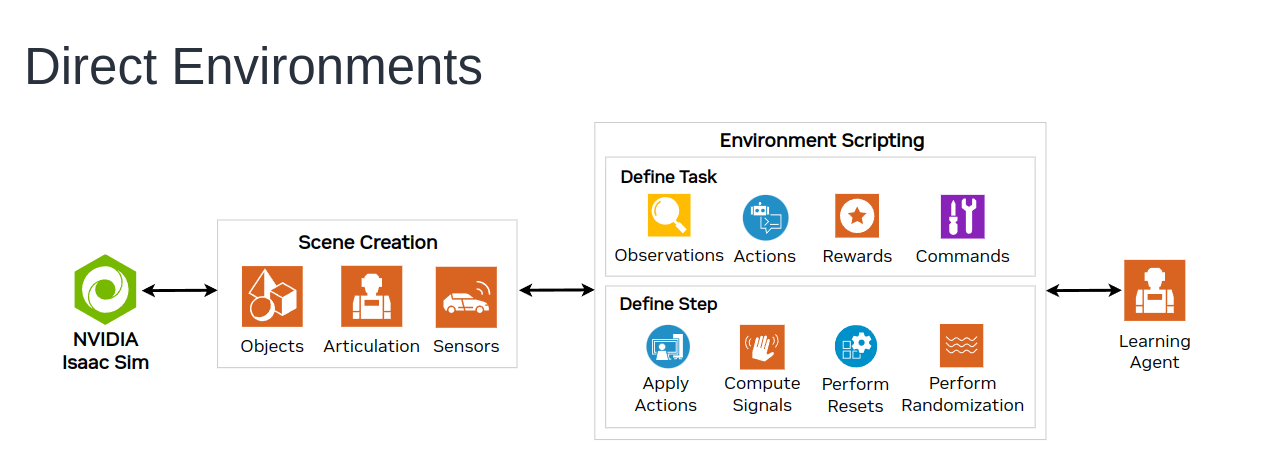
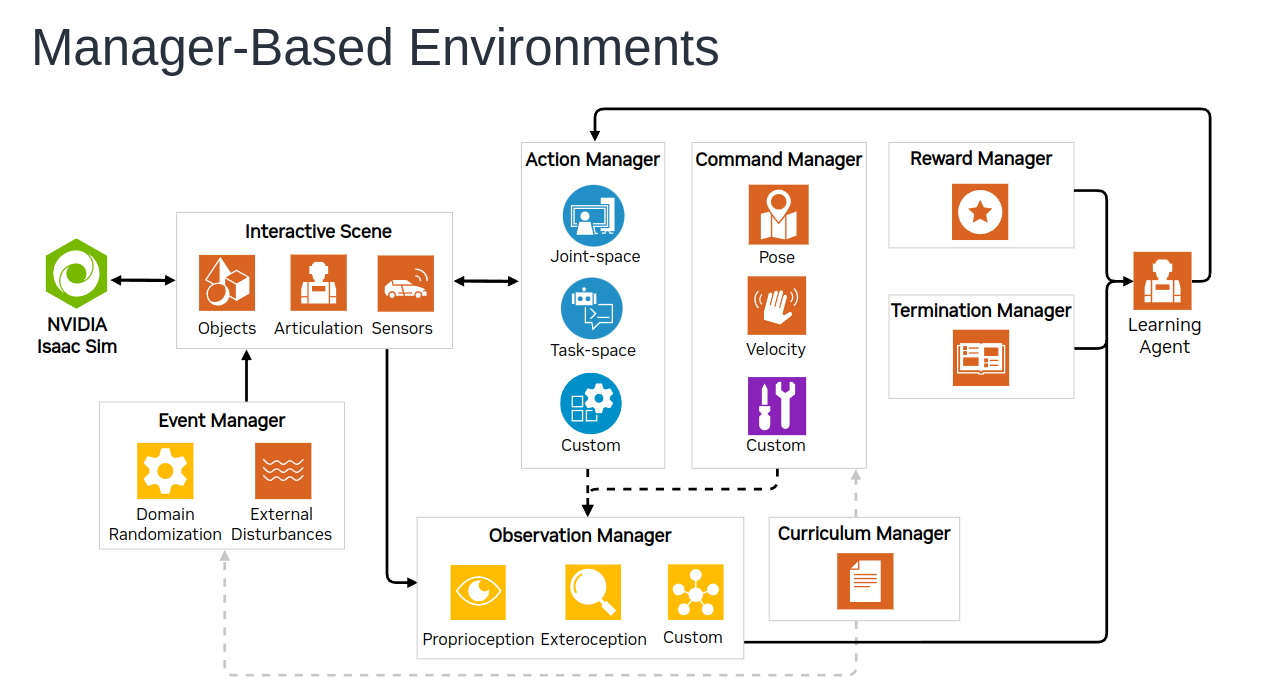
Isaac Tasks分为两个类型,一个是direct,另外一个是manager-based,官网介绍网址(看英语费劲可以直接页面翻译或者扔给gpt),我截取了网页图片在下面。
Task Design Workflows — Isaac Lab Documentation
两者主要区别是代码设计思路,第一种是延续了之前OmniIsaacGymEnvs的风格,将整个搭建特定强化学习训练环境的流程全部写出来,比如env.reset(), env.step()等等,比较直观也是强化学习常见的,但是有些复杂,对初学者冲击比较大,而且特定任务的开发需求也不尽相同,经常要从头写一些底层的`_function()`。
manager-based将整个流程模块化,抽象出整个强化学习包括搭建强化学习环境的框架,然后各个功能诸如domain randomization等模块化加入到整个框架,这样开发时候不必从头写底层的类框架,虽然目的很好,但是其实现在版本有些死板,不如direct类型更加灵活特别是一些特殊任务需求比如精准控制每个step的重力。大家可以根据自己的实际选取。纯新手建议先跟着教材或者简单的的机器人+强化学习内容学习,再来看一下direct的代码内容。
寻找相似的task environment示例
IsaacLab的官方文档列举了现有的learning环境,包括manipulation和locomotion,但是注意很多环境其实也是开发中的状态,不是很完善,不必奉为圭臬。
Available Environments — Isaac Lab Documentation
部分截图:
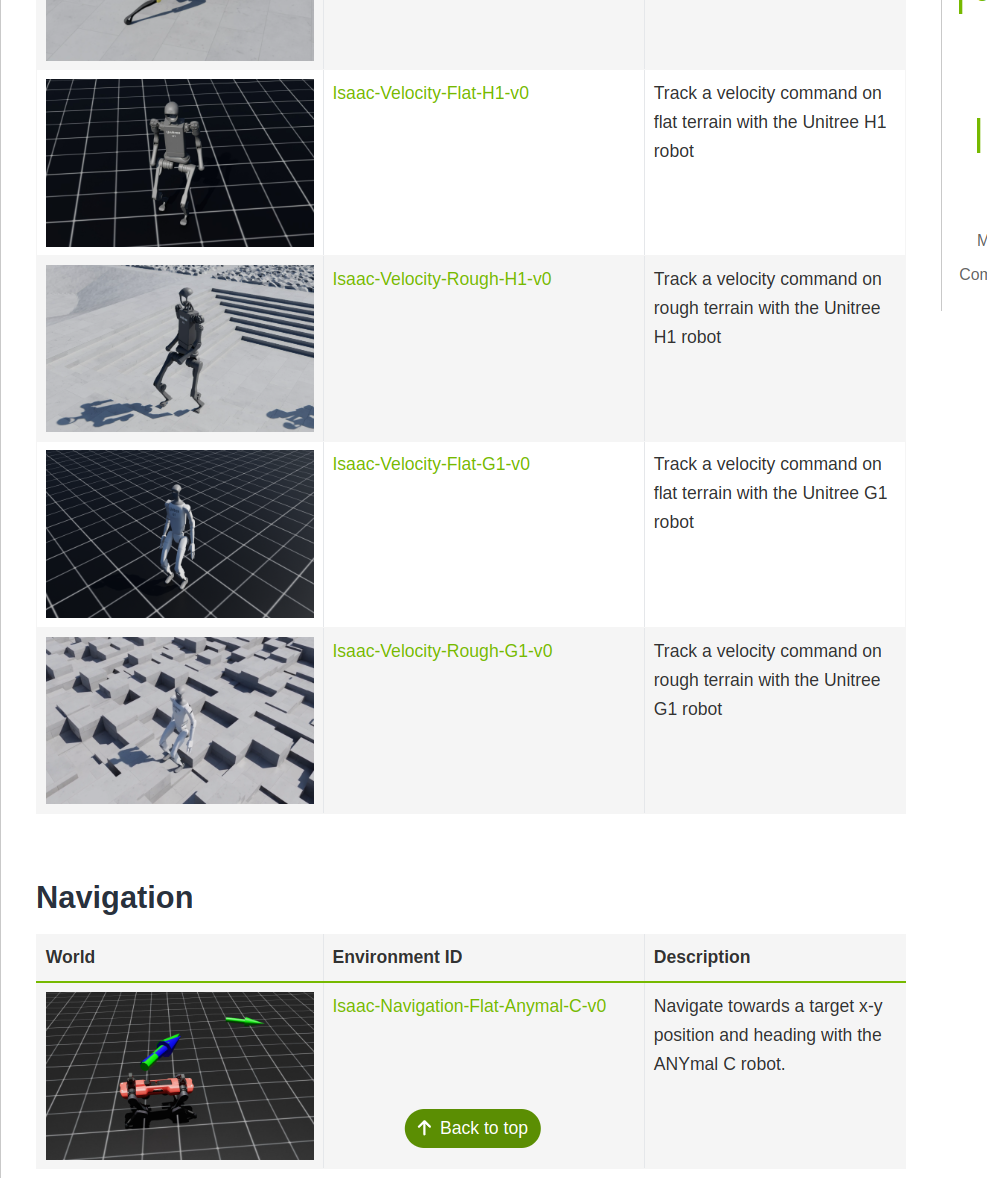
在这些环境中可以找一个和自己相似的示例,以这个示例作为基础进行二次开发。UR-reach将作为本文相似示例进行演示。
首先运行一下环境,看看效果。
# 我的是conda环境,所以之间python了

python scripts/reinforcement_learning/rl_games/train.py --task Isaac-Reach-UR10-v0 --num_envs 8192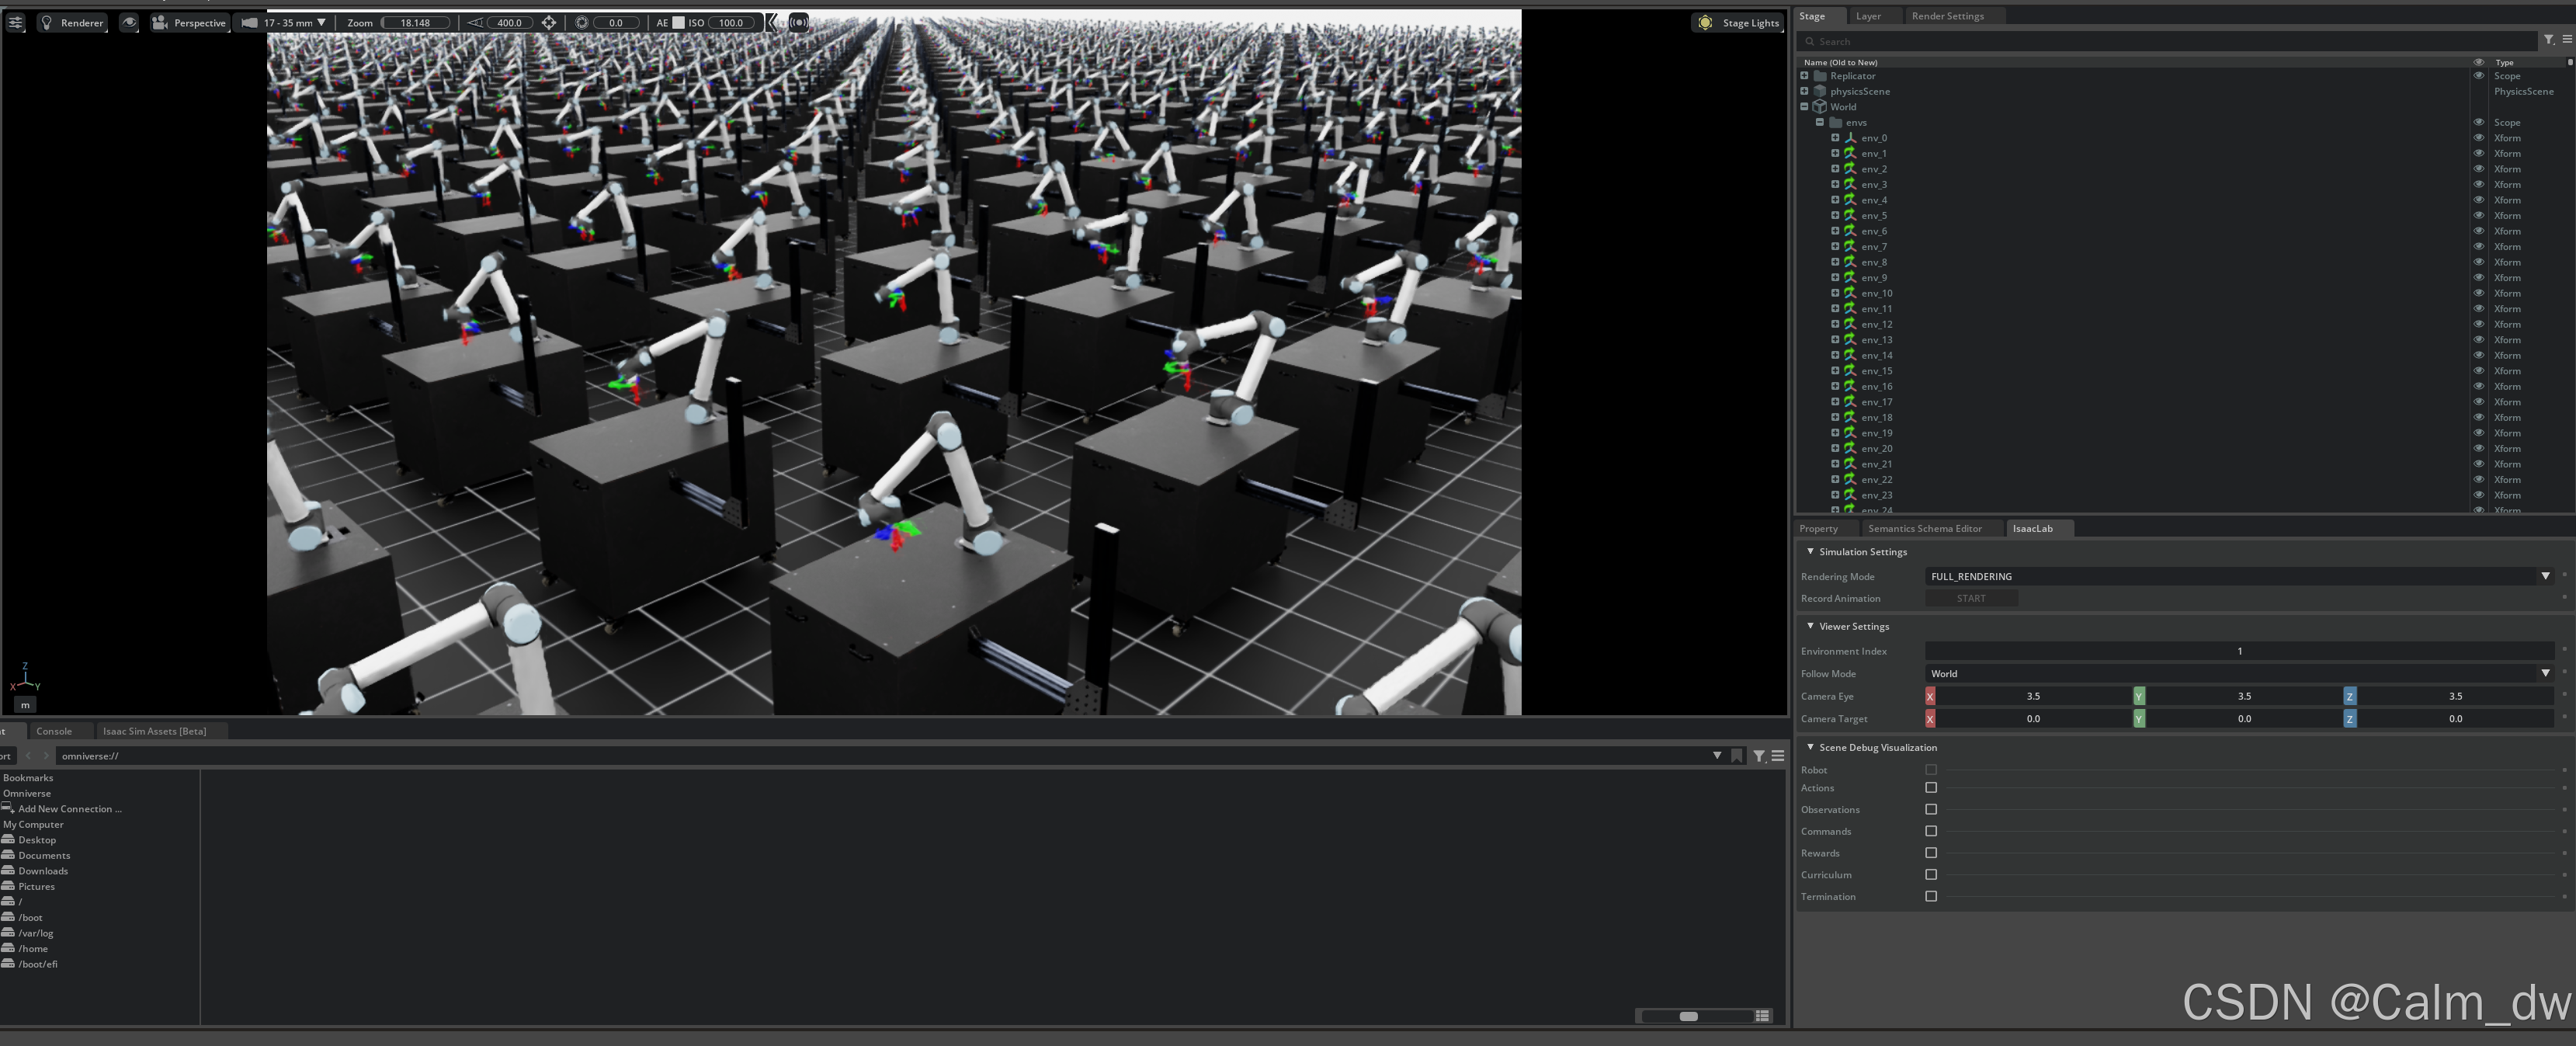
如何使用这些自带的强化学习库可以参考文档:
Reinforcement Learning Wrappers — Isaac Lab Documentation
以rl-games为例,我把代码粘贴过来了,用中文注释了一下命令行:
# 如果是在conda虚拟环境,可以直接使用python替代./isaaclab.sh -p运行脚本
# 用rl-games包进行policy learning。首先是trian.py路径,必备的超参数是--task也就是任务对应的环境名称,这个和上面提到的availiable environments名称一样。--headless是无渲染(GUI)运行,我一般不用
./isaaclab.sh -p scripts/reinforcement_learning/rl_games/train.py --task Isaac-Ant-v0 --headless

# 训练结束之后,加载模型进行无bp和no_grad的模式单纯检测性能。--num_envs就是并行环境个数,电脑配置一般的可以尽可能调小。--checkpoint 就是保存的policy模型路径,因为要加载肯定不能为空。
./isaaclab.sh -p scripts/reinforcement_learning/rl_games/play.py --task Isaac-Ant-v0 --num_envs 32 --checkpoint /PATH/TO/model.pth

# --use_pretrained_checkpoint是最近开发的,直接选取最新的policy模型,省时间和麻烦,但是一般训练很长而且对比试验,这个功能其实有些鸡肋,只能说 如省。
./isaaclab.sh -p scripts/reinforcement_learning/rl_games/play.py --task Isaac-Ant-v0 --num_envs 32 --use_pretrained_checkpoint

# 这个就是不开渲染,定时录取视频,这样就可以不必全程开渲染,无渲染训练加速,偶尔看看视频看看效果,但是调相机位置很烦,依然还是 如省plus。
./isaaclab.sh -p scripts/reinforcement_learning/rl_games/play.py --task Isaac-Ant-v0 --headless --video --video_length 200
找到对应源代码
之后找到源代码,看一下代码架构,了解一下各个部分的内容,遇到不懂的建议直接扔给gpt,亲测能理解99%的问题并找到该问题的背景知识。
源代码可以直接查看自己git clone的IsaacLab文件夹,一般路径都在:IsaacLab/source/isaaclab_tasks/isaaclab_tasks/[manager_based/direct]/....
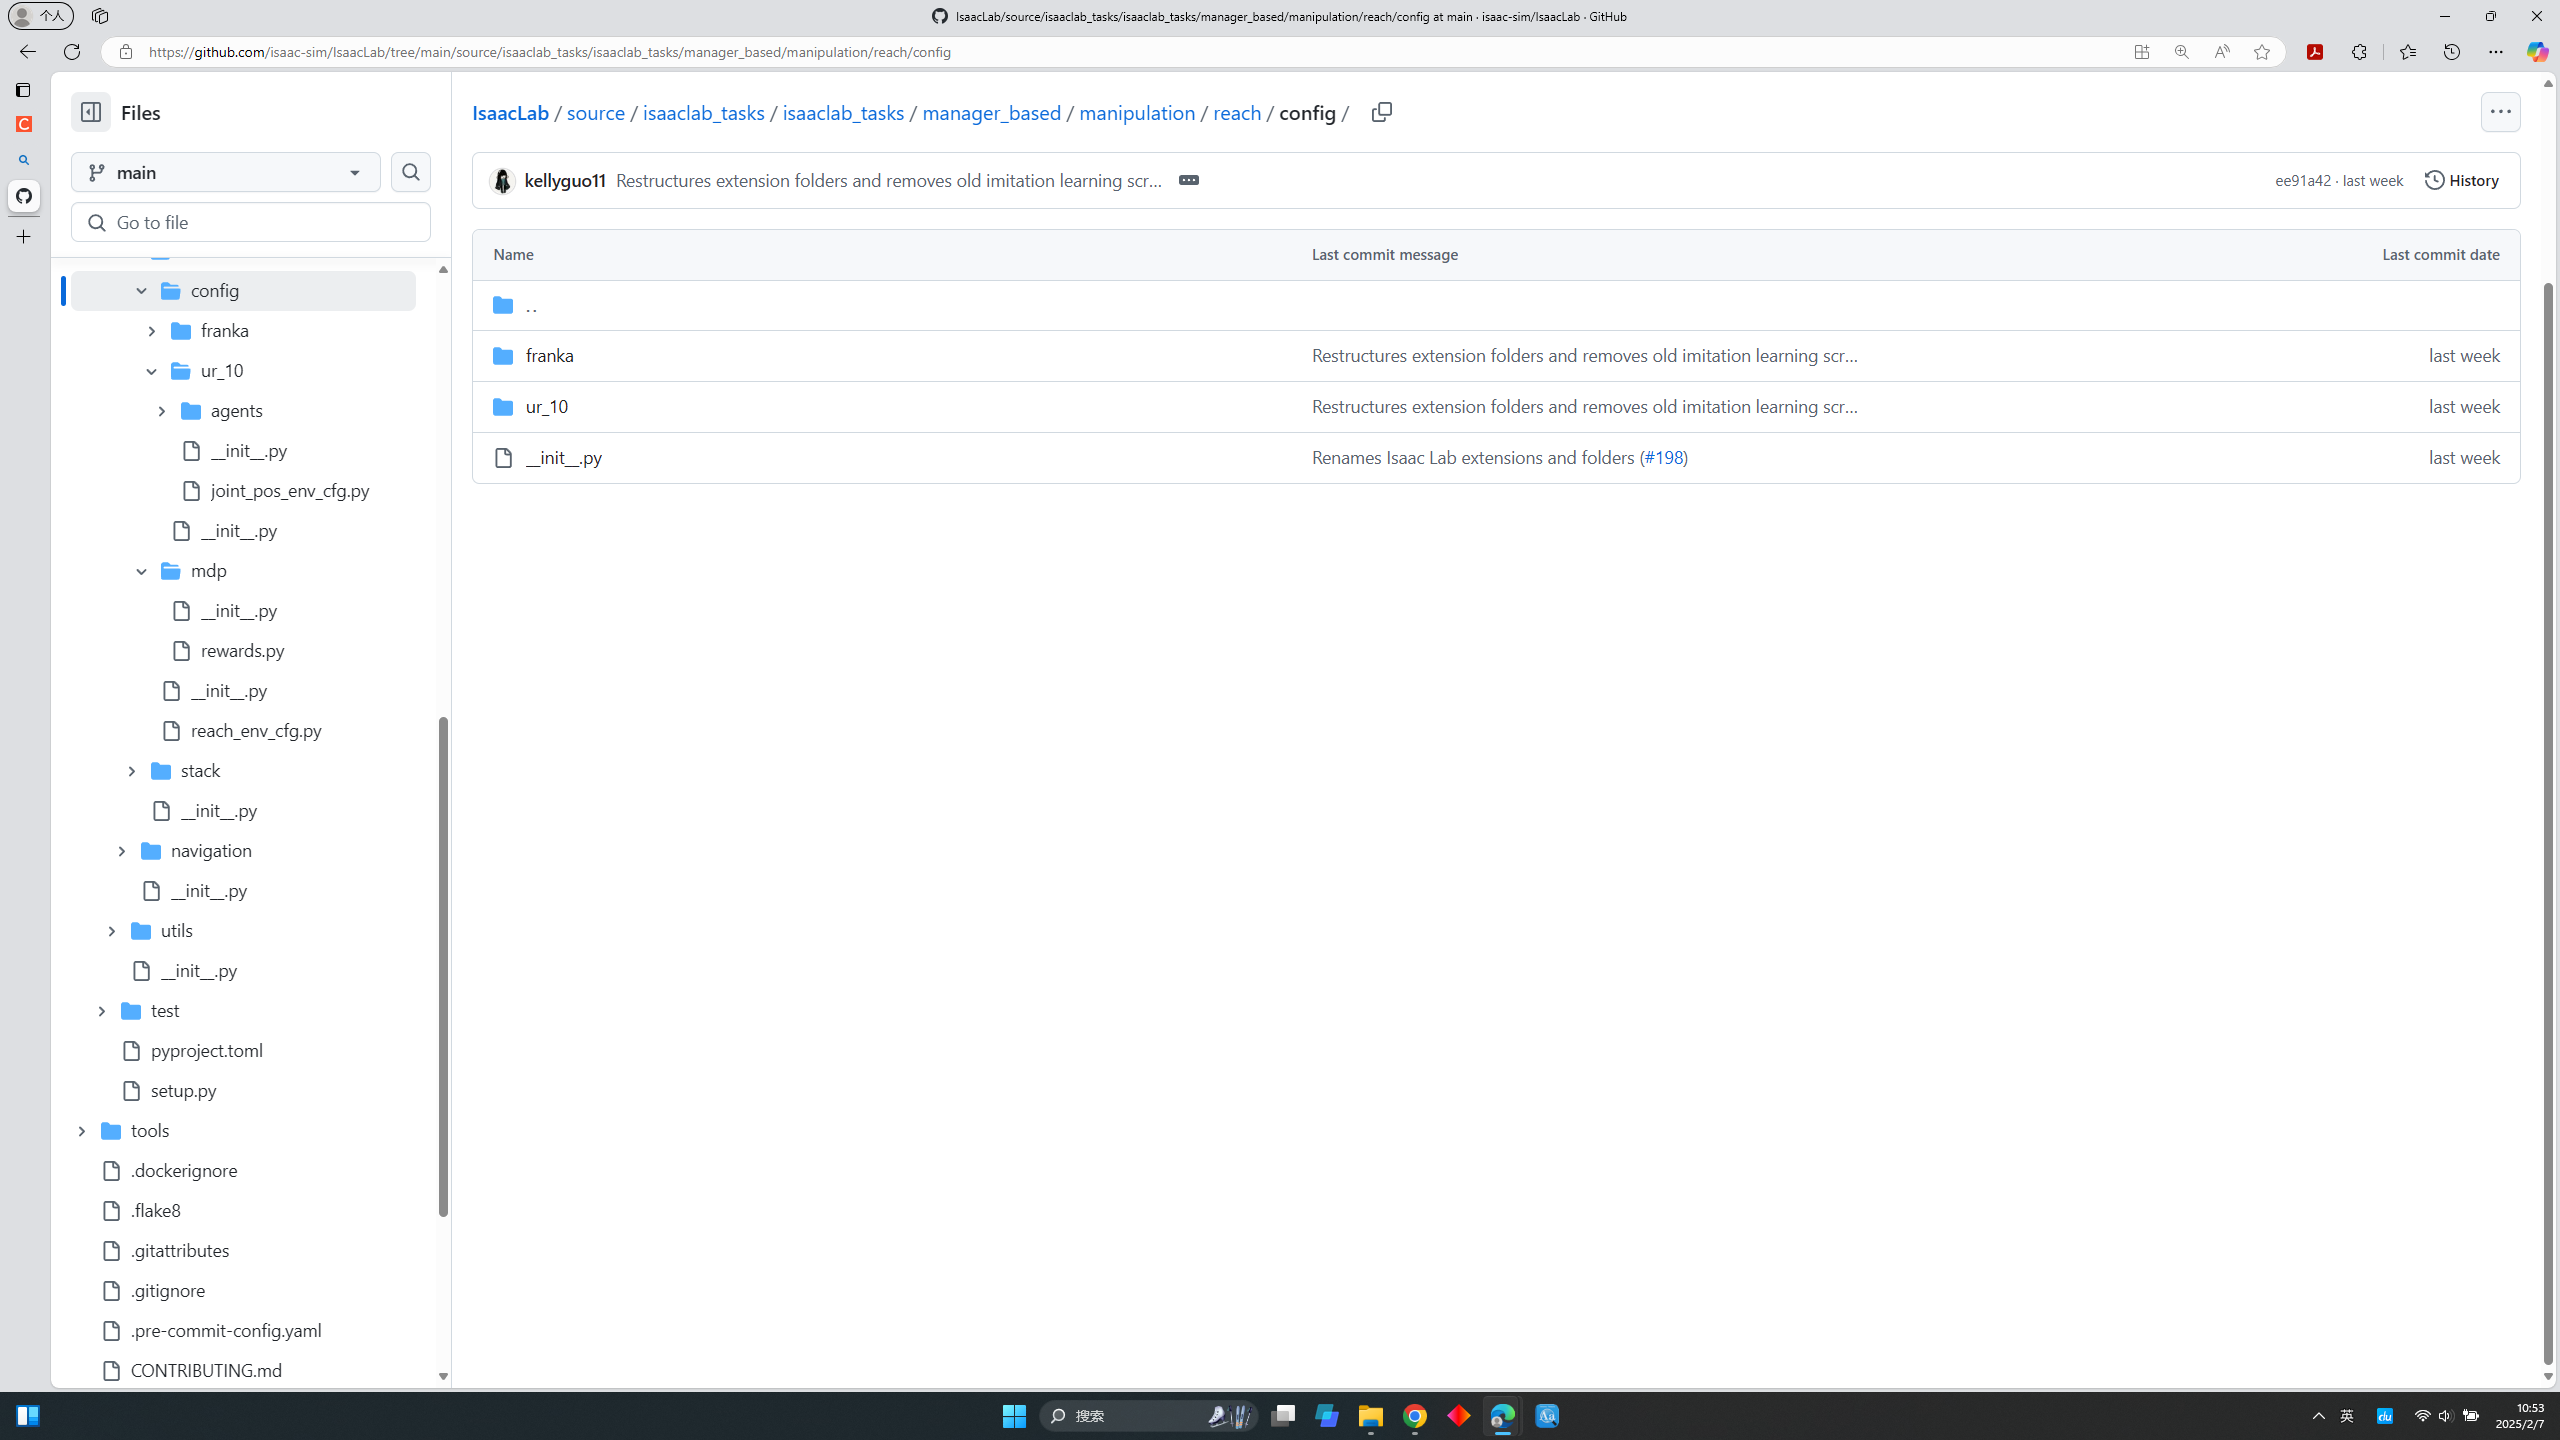
比如这个reach就在: IsaacLab/source/isaaclab_tasks/isaaclab_tasks/manager_based/manipulation/reach
或者github直接看仓库/直接点availiab environments里面环境名字会跳转链接,虽然要翻墙,但是好处就是遇到问题时候在tram上手机就能看不需要电脑或者服务器,以Isaac-Reach-UR10-v0为例,github仓库架构截图:

源代码架构
这个task下面的一级目录包括:
--config(训练环境设置和强化学习超参数)
--mdp(马尔科夫决策过程涉及的function,比如奖励函数,环境初始化等等)
--init.py(编译生成的不用管)
--reach_env_cfg.py(这类任务的训练环境基类,主要是整个pipeline,如何加载asset,奖励函数格式,domain randomization等等,不涉及到具体的asset文件)
在mdp文件夹下面其实没什么,主要就是导入manager-based environment提前设置好的一些mdp常用组件。

---init.py 可以看到是直接导入

---rewards.py 就是设计一些特别的奖励函数了

在config文件夹下面就是task-specific的环境设置比如导入哪个机器人和强化学习训练的超参数了,根据不同的机器人,他分成了两个文件夹,结构大同小异:
---franka(franka机器人based环境)
---ur_10(UR机器人based环境)
我还是以ur10为例:
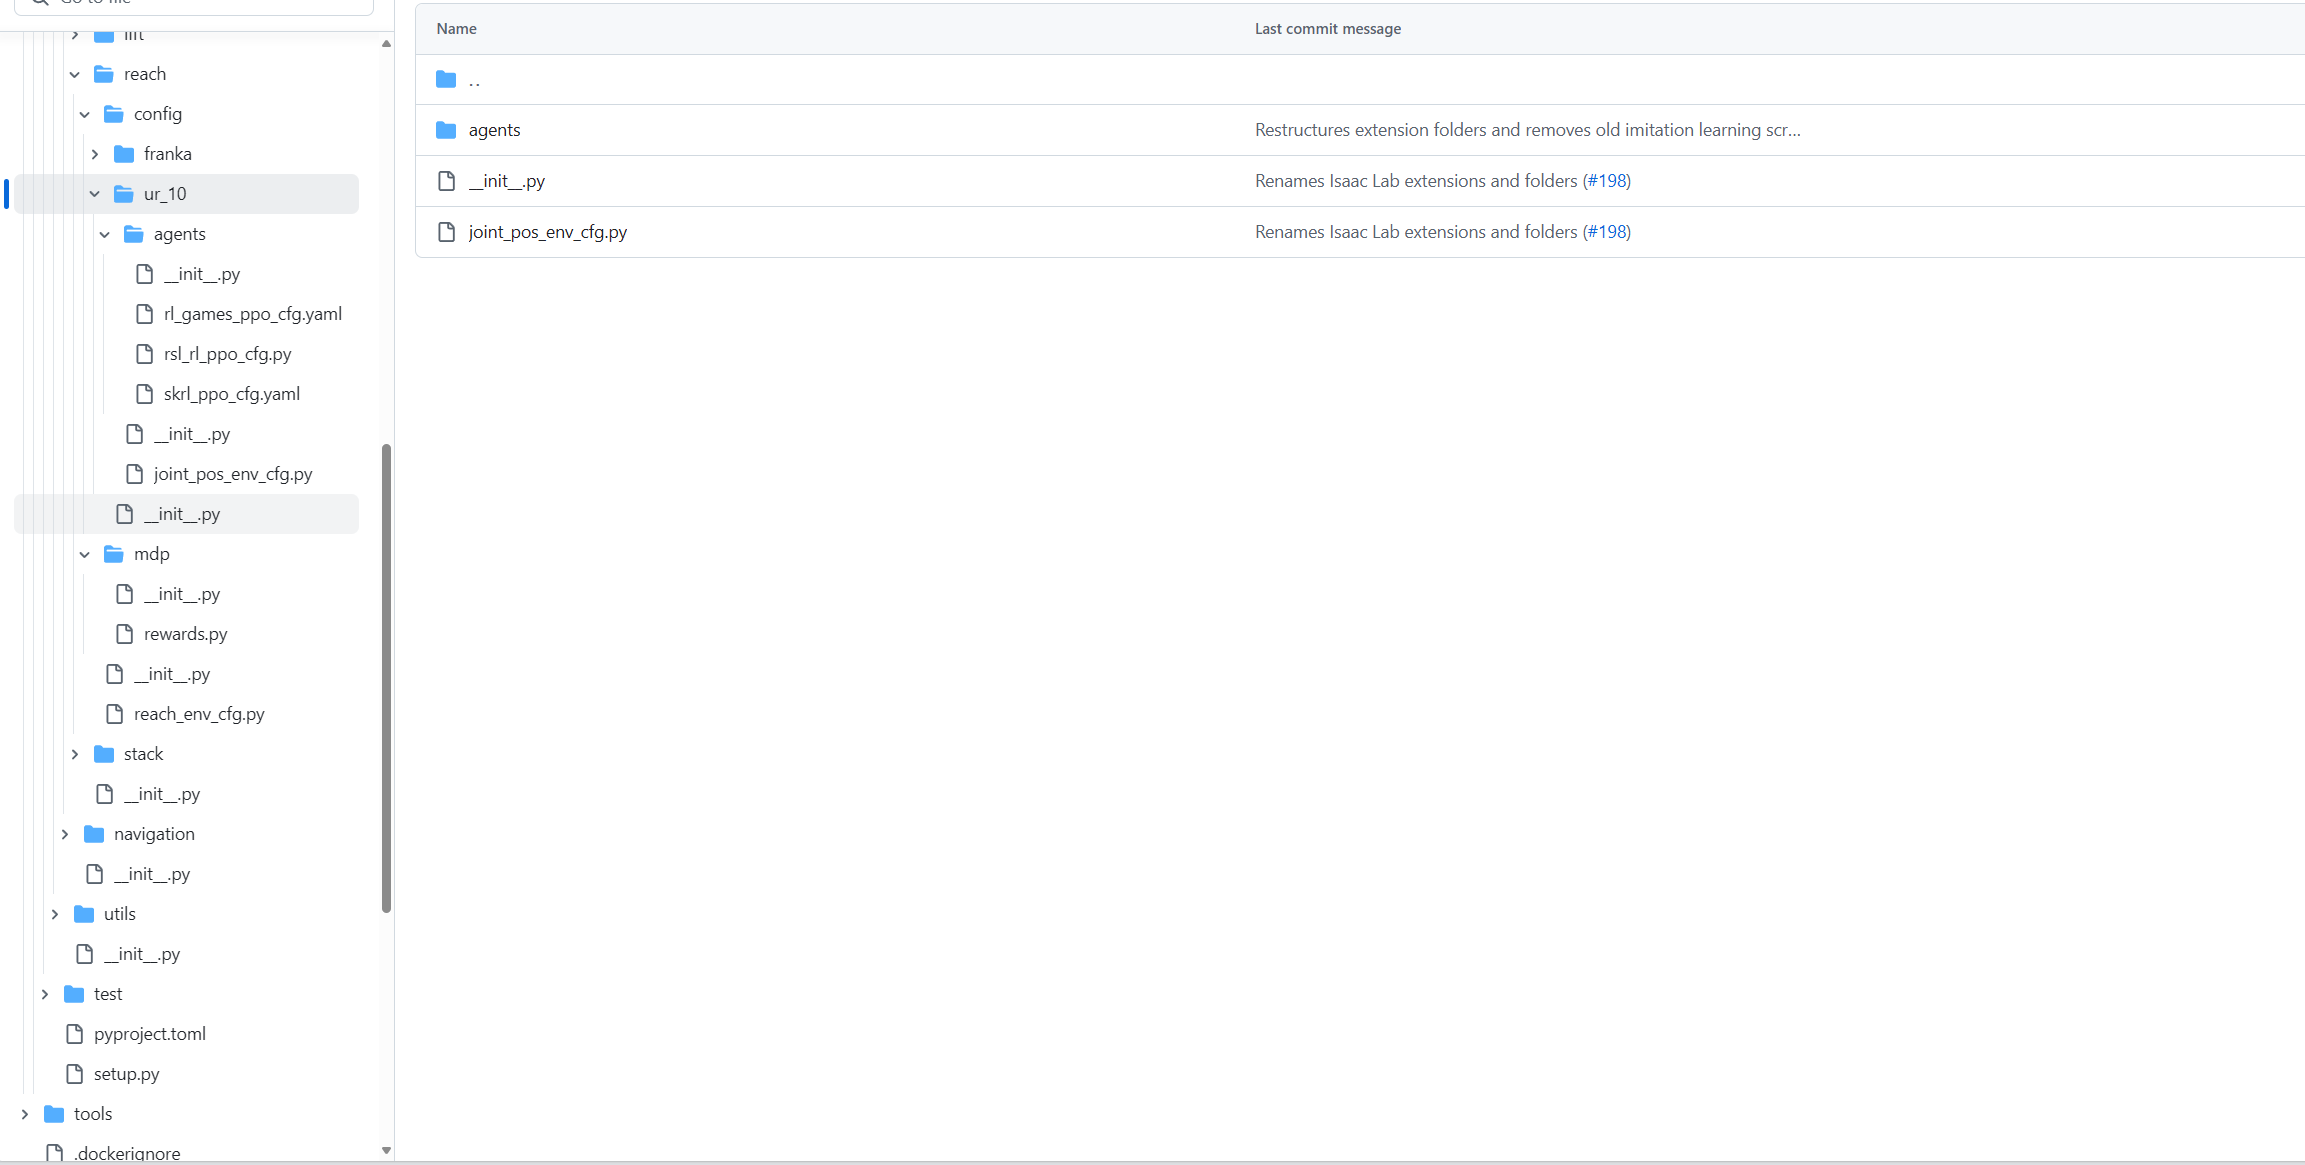
----init.py(这里的初始化文件很重要,是用来注册环境的,类似ros2的设置,截个图看看)
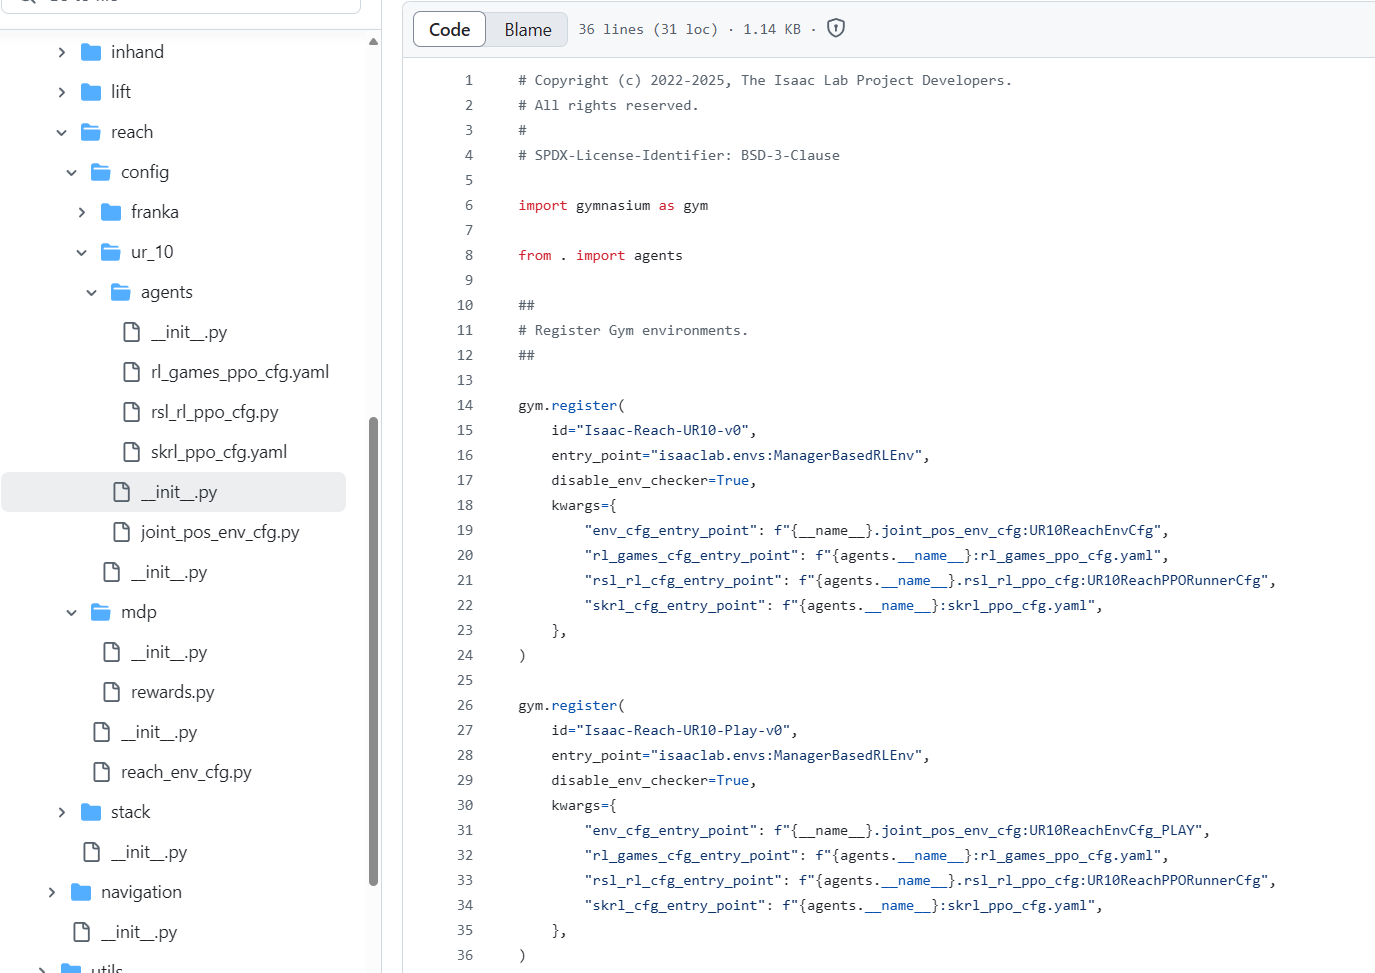
----agent(该环境强化学习训练的超参数设置文件,可以看到每一个强化学习包都有一个对应的yaml文件,入口都在这个init.py文件里设置)
----[ik/joint_pos/osc]env(该环境特定的控制方式了,输出是eef pose,还是直接的joint positions或者是relative pose等等,根据需求自定义)
这里是一个概览,非常建议大家自己结合源代码看这篇文章,机器人仿真就很麻烦,再加上强化学习的流程,两个复杂的pipeline搞在一起就很乱,初次接触头大很正常,可以多运行,尝试慢慢捋顺,我当时熟悉isaacgym大概用了两三个月,这些内容每一个拉出来都能写好几篇,之后有时间再慢慢开帖吧,或者留言一些具体问题,尽可能解决一下。


 5812
5812

 被折叠的 条评论
为什么被折叠?
被折叠的 条评论
为什么被折叠?
 到【灌水乐园】发言


