


一、文件上传
1.首先我们文件上传的方法用到的是multipart/form-data,它是基于post方法来传递数据的,需求是实现类似与这样的:来一个弹框实现两个excel的文件导入

2.用vue的axios发起post请求:
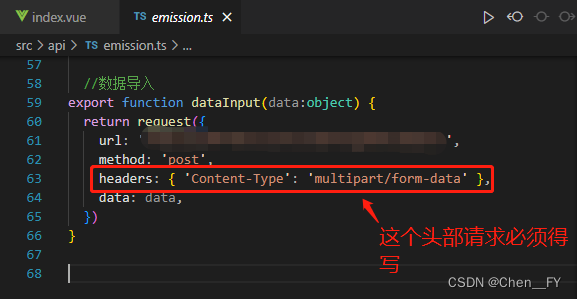
3.引用elementPlus组件中的upload,注意:upload有默认的上传文件方式,并且是数组类型
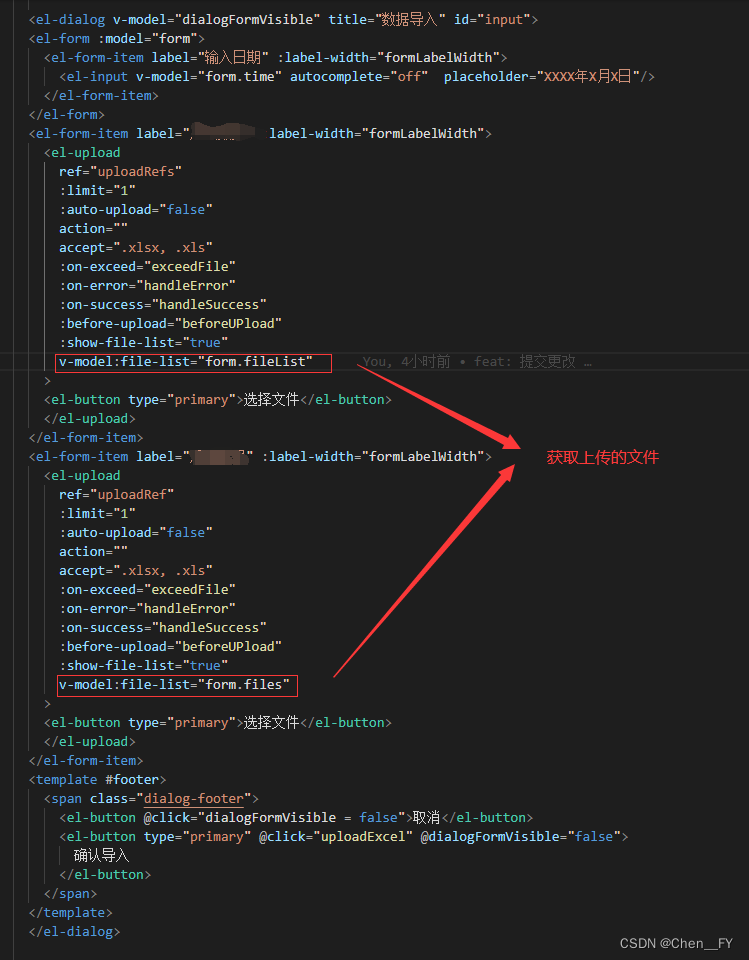
<el-dialog v-model="dialogFormVisible" title="数据导入" id="input">
      <el-form :model="form">
        <el-form-item label="输入日期" :label-width="formLabelWidth">
          <el-input v-model="form.time" autocomplete="off"  placeholder="XXXX年X月X日"/>
        </el-form-item>
      </el-form>
      <el-form-item label="数据" :label-width="formLabelWidth">
        <el-upload
          ref="uploadRefs"
          :limit="1"
          :auto-upload="false"
          action=""
          accept=".xlsx, .xls"
          :on-exceed="exceedFile"
          :on-error="handleError"
          :on-success="handleSuccess"
          :before-upload="beforeUPload"
          :show-file-list="true"
          v-model:file-list="form.fileList"
        >
        <el-button type="primary">选择文件</el-button>
        </el-upload>
      </el-form-item>
      <el-form-item label="数据" :label-width="formLabelWidth">
        <el-upload
          ref="uploadRef"
          :limit="1"
          :auto-upload="false"
          action=""
          accept=".xlsx, .xls"
          :on-exceed="exceedFile"
          :on-error="handleError"
          :on-success="handleSuccess"
          :before-upload="beforeUPload"
          :show-file-list="true"
          v-model:file-list="form.files"
        >
        <el-button type="primary">选择文件</el-button>
        </el-upload>
      </el-form-item>
      <template #footer>
        <span class="dialog-footer">
          <el-button @click="dialogFormVisible = false">取消</el-button>
          <el-button type="primary" @click="uploadExcel" @dialogFormVisible="false">
            确认导入
          </el-button>
        </span>
      </template>
      </el-dialog>
4.在ts中先导入以下东西:

import {ref, reactive} from 'vue'
import {ElMessage, ElTable,ElUpload, ElButton,ElMessageBox} from 'element-plus'
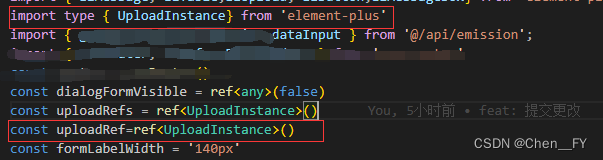
import type {UploadInstance} from 'element-plus'
import {dataInput} from '@/api/emission';
5.在from表单中接收上传文件的数组:

const form = reactive<any>({
  fileList: [],
  files: []
})
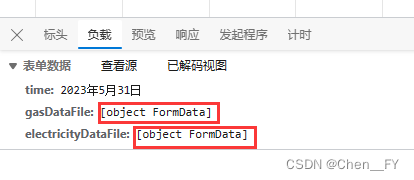
6.之前看了一些上传文件的博客,好像都有const file = new FormData(),于是我也这样写了:
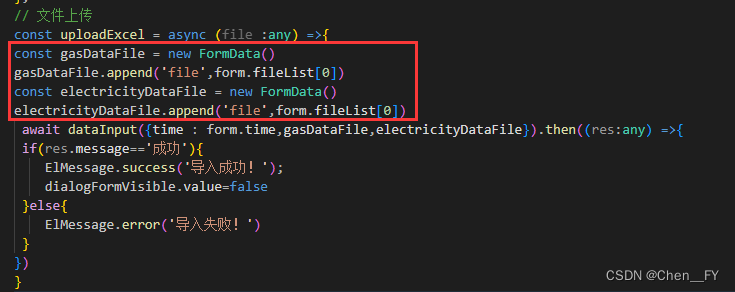
就发现了上传文件错误:formData变成[object FormData]
FormData 它的基本用法:
FormData 是一个构造函数,new FormData() 即可得到 FormData 对象:
const fd = new FormData() // 创建一个空白的 FormData 对象,里面没有包含任何数据。
调用 FormData 对象的 append(键, 值) 方法,可以向空白的 FormData 中追加键值对数据
但是事实上element Plus里的upload组件里面已经有写好的文件上传方法
并不需要我们再次将获取到的文件变为二进制,然后上传
7.于是我就改成了以下代码:
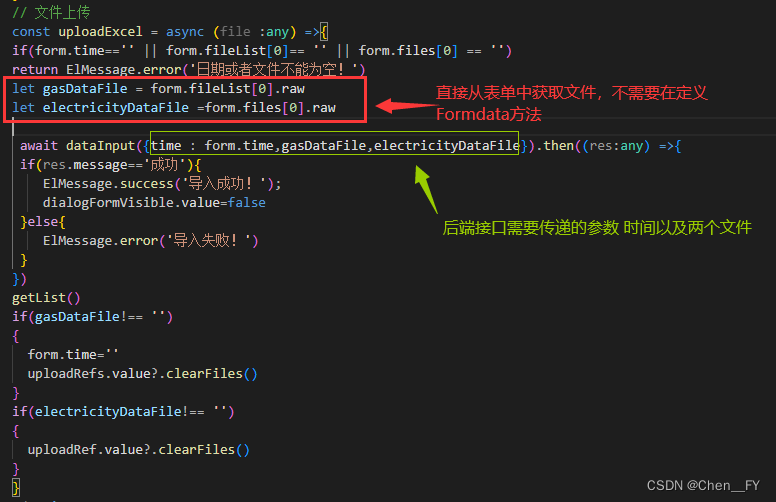
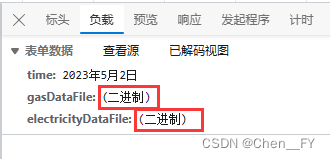
8.成功将文件转换为binary(二进制)并上传给后端!
9.ts文件上传的完整代码
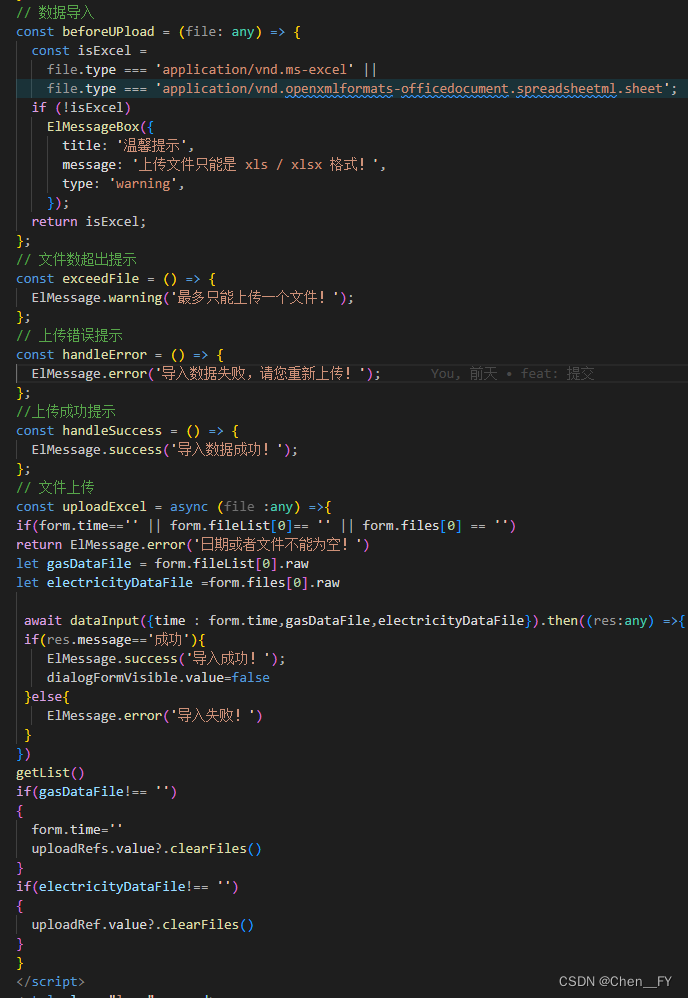
// 数据导入
const beforeUPload = (file: any) => {
	const isExcel =
		file.type === 'application/vnd.ms-excel' ||
		file.type ===	'application/vnd.openxmlformats-officedocument.spreadsheetml.sheet';
	if (!isExcel)
		ElMessageBox({
			title: '温馨提示',
			message: '上传文件只能是 xls / xlsx 格式!',
			type: 'warning',
		});
	return isExcel;
};
// 文件数超出提示
const exceedFile = () => {
	ElMessage.warning('最多只能上传一个文件!');
};
// 上传错误提示
const handleError = () => {
	ElMessage.error('导入数据失败,请您重新上传!');
};
//上传成功提示
const handleSuccess = () => {
	ElMessage.success('导入数据成功!');
};
// 文件上传
const uploadExcel = async (file :any) =>{
if(form.time=='' || form.fileList[0]== '' || form.files[0] == '')
return ElMessage.error('日期或者文件不能为空!')
let gasDataFile = form.fileList[0].raw
let electricityDataFile =form.files[0].raw

 await dataInput({time : form.time,gasDataFile,electricityDataFile}).then((res:any) =>{
 if(res.message=='成功'){
    ElMessage.success('导入成功!');
    dialogFormVisible.value=false
 }else{
    ElMessage.error('导入失败!')
 }
})
getList()
if(gasDataFile!== '')
{
  form.time=''
  uploadRefs.value?.clearFiles()
}
if(electricityDataFile!== '')
{
  uploadRef.value?.clearFiles()
}
}
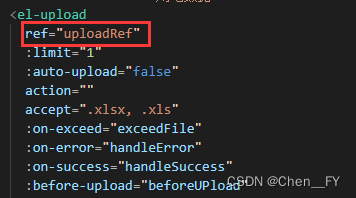
二、清空文件上传的列表
post请求成功后,清空文件上传的列表用clearFiles():
(1)因为我这里上传了两个文件,但清空方法都一样,所以以下我只举列了一个文件列表清空的方法:
先写ref="uploadRef(名字自取,但是不能写upload,它应该是关键字)",
ref="uploadRef"
(2)引用并调用外部方法:
import type {UploadInstance} from 'element-plus'

const uploadRefs = ref<UploadInstance>()
(3)使用清空文件上传的clearFiles():
uploadRef.value?.clearFiles()
将会成功清除!


 被折叠的 条评论
为什么被折叠?
被折叠的 条评论
为什么被折叠?
 到【灌水乐园】发言


