


关于vimplus安装以及如何设置自定义头以及开发者信息
- 安装vimplus
- 编译YouCompleteMe
- 设置自定义头信息
- 1、以上我们安装好以后进入/home/你的用户名/.vim/plugged/prepare-code/autoload/prepare这个目录
- 2、我们可以看到有两个文件*prepare.vim和util.vim*
- 3、我们打开**prepare.vim**
- 4、在最上面找到**function! prepare#prepare#gen_prepare_code()**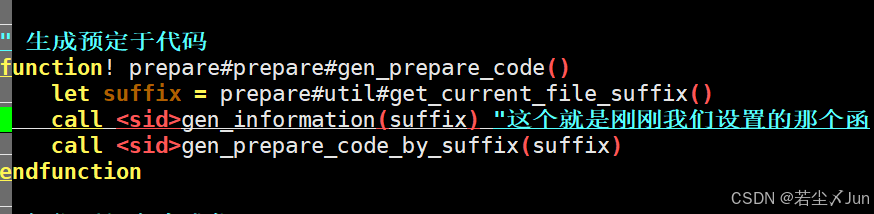
- 5、打开util.vim
- 6、将其加入一行得到
- 7、我们还需要做一件事
- 8、我们测试来看看
安装vimplus
//第一步先下载
git clone https://github.com/chxuan/vimplus.git ~/.vimplus
//第二步进入目录
cd ~/.vimplus
//第三步执行命令(直接等待完成)
./install.sh  //注意此处不需要加sudo
PS:编译到最后他会让你选择Python版本[2/3],这个选择2或者3都可以
编译YouCompleteMe
1、YouCompleteMe是一个很强大的代码自动补全的插件
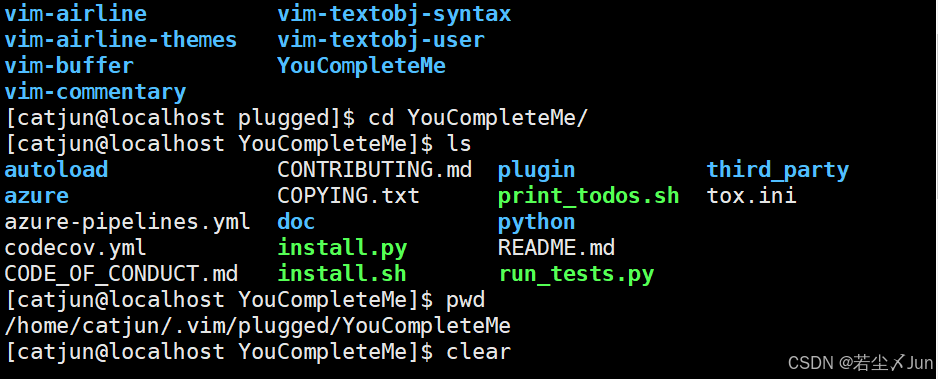
2、安装完毕后进入此目录**/home/你的用户名/.vim/plugged/YouCompleteMe**
3、然后你就能看见一个install.py
4、输入 python3 install.py --clang-completer进行编译(注意Python3的版本很高导致编译出错,使用python install.py --clang-completer默认用python2来编译)
5,等待完成100%即可
设置自定义头信息
1、以上我们安装好以后进入/home/你的用户名/.vim/plugged/prepare-code/autoload/prepare这个目录

2、我们可以看到有两个文件prepare.vim和util.vim
3、我们打开prepare.vim
在最后加上以下代码
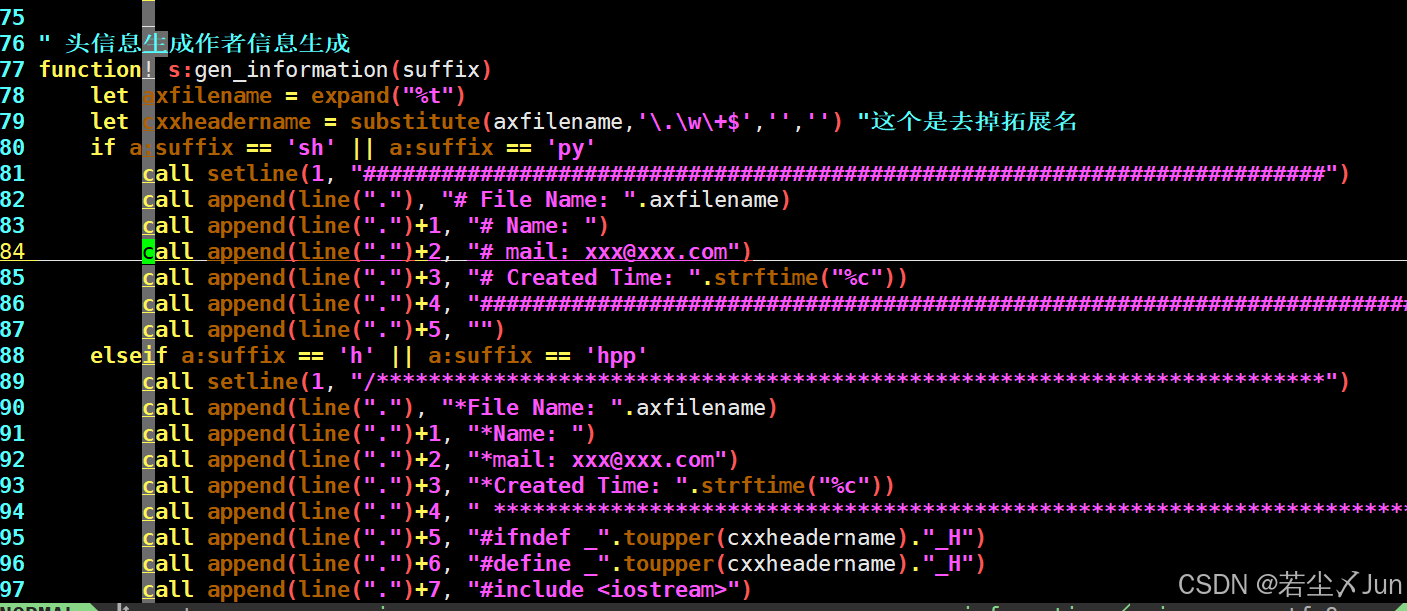
" 头信息生成作者信息生成
function! s:gen_information(suffix)
    let axfilename = expand("%t")
    let cxxheadername = substitute(axfilename,'\.\w\+$','','') "这个是去掉拓展名
    if a:suffix == 'sh' || a:suffix == 'py'
        call setline(1, "##########################################################################")
        call append(line("."), "# File Name: ".axfilename)
        call append(line(".")+1, "# Name: ")
        call append(line(".")+2, "# mail: xxx@xxx.com")
        call append(line(".")+3, "# Created Time: ".strftime("%c"))
        call append(line(".")+4, "#########################################################################")
        call append(line(".")+5, "")
    elseif a:suffix == 'h' || a:suffix == 'hpp'
        call setline(1, "/*************************************************************************")
        call append(line("."), "*File Name: ".axfilename)
        call append(line(".")+1, "*Name: ")
        call append(line(".")+2, "*mail: xxx@xxx.com")
        call append(line(".")+3, "*Created Time: ".strftime("%c"))
        call append(line(".")+4, " ************************************************************************/")
        call append(line(".")+5, "#ifndef _".toupper(cxxheadername)."_H")
        call append(line(".")+6, "#define _".toupper(cxxheadername)."_H")
        call append(line(".")+7, "#include <iostream>")
        call append(line(".")+8, "#include <map>")
        call append(line(".")+9, "#include <vector>")
        call append(line(".")+10, "#include <cstdlib>")
        call append(line(".")+11, "")
        call append(line(".")+12, "#endif")
    elseif a:suffix == 'c' || a:suffix == 'cpp' || a:suffix == 'cxx' || a:suffix == 'cc'
        call setline(1, "/*************************************************************************")
        call append(line("."), "*File Name: ".axfilename)
        call append(line(".")+1, "*Name: ")
        call append(line(".")+2, "*mail: xxx@xxx.com")
        call append(line(".")+3, "*Created Time: ".strftime("%c"))
        call append(line(".")+4, " ************************************************************************/")
        call append(line(".")+5, "")
    endif
endfunction
//elseif a:suffix == 'h' || a:suffix == 'hpp'
//elseif a:suffix == 'c' || a:suffix == 'cpp' || a:suffix == 'cxx' || a::suffix == 'cc' 下面的call可以自由发挥
具体操作是
call append(line(".")+行号, "这里面写内容(例如头文件包含)")
4、在最上面找到function! prepare#prepare#gen_prepare_code()
- 找到let suffix = prepare#util#get_current_file_suffix()在此下面加上一行代码
call <sid>gen_information(suffix) "这个就是刚刚我们设置的那个函数
- 然后就得到了以上图一的结果
- 然后我们按键盘的esc键,然后按shift+冒号输入wq,退出保存
5、打开util.vim
- 找到下图中的代码

function! prepare#util#write_text_at_current_row(text)
    execute "normal i" . a:text
endfunction
6、将其加入一行得到
function! prepare#util#write_text_at_current_row(text)
    execute "normal G"
    execute "normal i" . a:text
endfunction
如图:
 - 然后我们按键盘的esc键,然后按shift+冒号输入wq,退出保存即可
7、我们还需要做一件事
- 进入/home/用户名/.vim/plugged/prepare-code/snippet目录下
- 然后进入编辑snippet.h里面的文件,将其情空
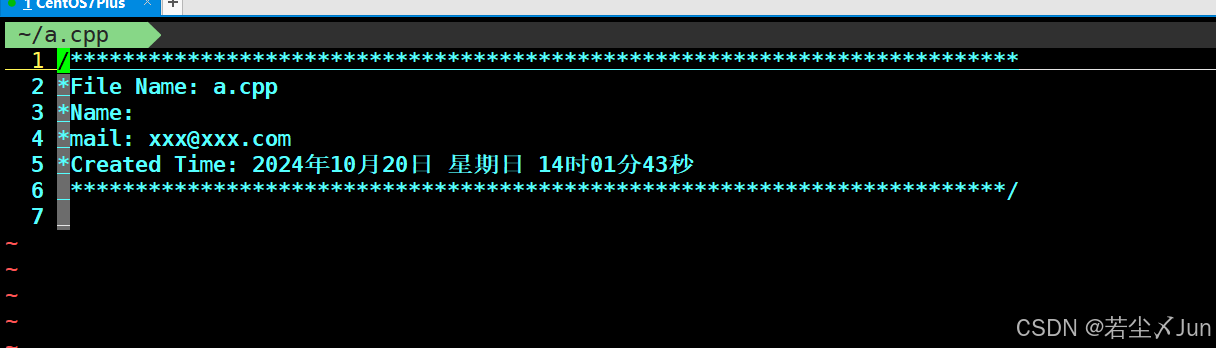
8、我们测试来看看
- 这是CPP文件创建后的效果
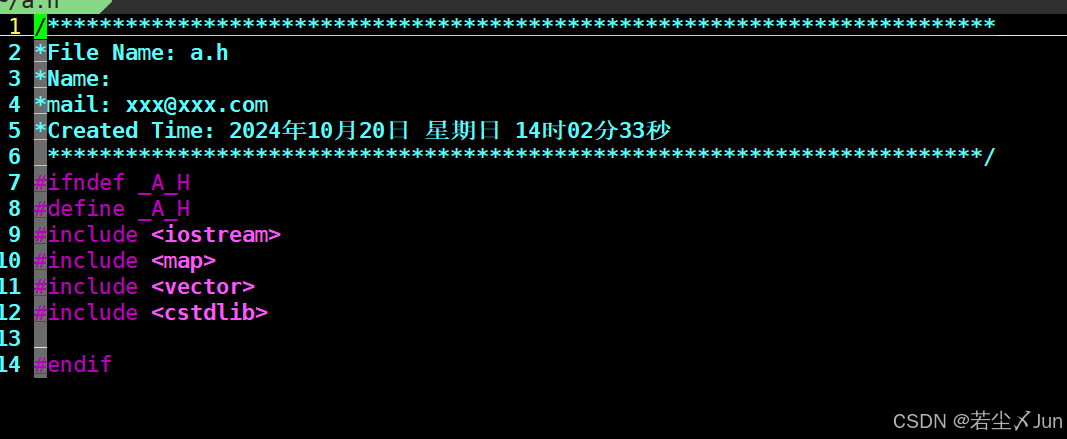
- 这是.h文件创建的效果
- 这是py创建的效果

制作不易,请大家点个赞哈,关注关注,谢谢


 被折叠的 条评论
为什么被折叠?
被折叠的 条评论
为什么被折叠?
 到【灌水乐园】发言


