前言
考虑到之前学习的OpenCV主要用于物体分割识别啥的,太多人搞了这玩意,已经没有什么新意,想着看看能不能用OpenCV能玩出什么花样来。观察某些直播当中有些技术例如人脸上方会有动态的猫耳朵并且时刻随着人脸姿态变化而变化感觉就像是真的长了猫耳朵一样。突然想起来如果能够将猫耳朵模型和人脸同样姿态展现是否就可以实现,因此编写了此趣味性的代码博大伙一乐。
该代码主要作用是 利用人脸识别先识别人脸的位姿然后将位姿(由于是图像位置量只考虑xy,z通过人脸框大小和距离对应关系)这些信息和一个眼镜模型的位姿对应上然后在对应视角得到这个模型的二维图片,最后将这个图片覆盖到人脸上实现自动戴模型效果。
准备工作
同样需要安装python,并且需要依赖多个库
首先为了不影响或者破坏其他python库,需要创建一个虚拟环境,参考YOLOv8实战和matlab建模:检测监控站视频的车流量、速度、车辆时间占用率以及预估拥堵模型_yolov8可以在matlab上运行吗-优快云博客
先创建虚拟环境
进入环境后输入:
pip install opencv-python
pip install boost cmake build
pip install dlib
pip install face_recognition trimesh pyrender pillow
在安装过程当中可能会出现问题,主要的问题应该出现在dlib的安装上,如果是win10/win11系统一般出现dlib安装失败的问题,解决方法是安装VS2015版本及以上、cmake等依赖
参考:dlib 安装教程(三种方法)_dlib库安装-优快云博客
如果是使用python310尝试多次还是不能解决的可以下载下列当中的dlib直接安装:
dlib-19.22.99-cp310-cp310-win_amd64.whl · huangxiaohuok/Install-dlib - Gitee.com
安装指令:
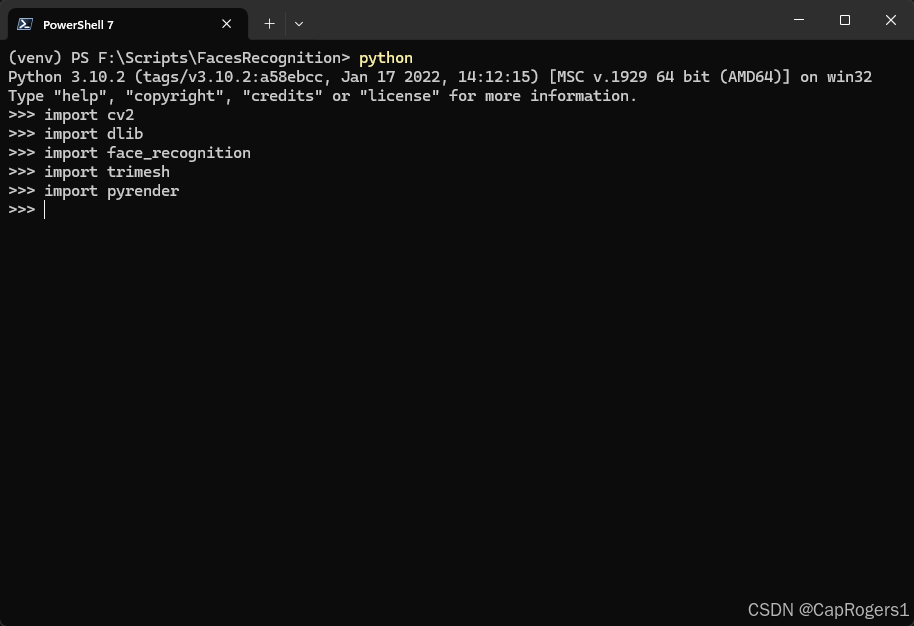
pip install ./dlib-19.22.99-cp310-cp310-win_amd64.whl
安装完成后输入:
python
然后再依次输入:
import cv2
import dlib
import face_recognition
import trimesh
import pyrender
如果显示如下表示安装成功:
人脸识别
在人脸识别这部分。首先利用OpenCV和Face_Recognition库,我们可以快速地找到脸部所在的位置。确认了脸的位置之后,我们还能进一步提取到一些重要的特征点,比如眼睛、鼻子和嘴巴的具体位置。
然后我们需要把这些特征点运用起来。使用一些空间几何变换能够计算出头部在三维空间里的角度,也即推理出这张脸朝向哪个方向。于是,我们得到了所谓的人脸姿态,也就在图像上显示为roll、pitch和yaw的角度。RPY转角参考欧拉角机器人RPY角和Euler角 -- 基本公式-优快云博客
同时还缺少人脸深度数据,因此考虑用dlib检测并利用opencv勾勒一个人脸相框来表示人脸在图像当中的大小,这个相框越大人脸距离摄像头也越近。
接下来描述部分数学公式作为编写代码的基础:
人脸姿态识别及姿态矩阵的推导
-
解PnP问题:
使用的是
cv2.solvePnP
函数。解PnP问题的目的是根据已知的3D模型点与对应的2D图像平面点,求解摄像机的姿态——即平移向量T
和旋转向量R
。这一过程基于以下矩阵公式:其中:
- s 是比例因子
- (u,v)(u, v)(u,v) 是图像平面点
- KKK 是相机内参矩阵
- (X,Y,Z)(X, Y, Z)(X,Y,Z) 是3D模型点
- RRR 是旋转矩阵, TTT 是平移向量
-
欧拉角(RPY)计算:
欧拉角用于表达旋转矩阵的三个旋转分量:滚动(Roll)、俯仰(Pitch)、偏航(Yaw)。通过Rodrigues变换,我们获得3x3的旋转矩阵,然后使用
cv2.RQDecomp3x3
将其分解为欧拉角:- Roll (ϕ\phiϕ): 旋转矩阵 around X轴
- Pitch (θ\thetaθ): 旋转矩阵 around Y轴
- Yaw (ψ\psiψ): 旋转矩阵 around Z轴
-
投影到图像平面:
接下来,我们将3D坐标轴投影到图像平面上。这通过
cv2.projectPoints
函数完成,该函数将定义的3D坐标轴变换为2D图像坐标:这样做的目的是在图像中显示坐标轴线,以示意头部朝向。
通过上述步骤,整个算法可以检测出头部在三维空间中的方向,并在二维图像中用红绿蓝三色坐标轴表现出来。同时,在人脸周围会绘制一个矩形框,标记出人脸位置。整体过程融合了计算机视觉与数学,最终实现了一种直观的人脸姿态展示。
将上述方案编写为代码:
源引库文件并加载dlib的预训练模型dlib模型shape_predictor_68_face_landmarks并转化为灰度图:
import cv2
import dlib
import numpy as np
# 加载预训练的人脸检测器和特征点标记模型
detector = dlib.get_frontal_face_detector()
predictor = dlib.shape_predictor("./models/.dlib/shape_predictor_68_face_landmarks.dat")
image = cv2.imread("./datasets/unknown/test1.jpg")
gray = cv2.cvtColor(image, cv2.COLOR_BGR2GRAY)
在脸部特征循环当中不断提取面部特征点,每一个循环当中需要读取图像的二维特征并转化为三维模型点
for face in faces:
# 提取面部特征点
landmarks = predictor(gray, face)
# 准备3D模型点
model_points = np.array([
(0.0, 0.0, 0.0),
(0.0, -330.0, -65.0),
(-225.0, 170.0, -135.0),
(225.0, 170.0, -135.0),
(-150.0, -150.0, -125.0),
(150.0, -150.0, -125.0),
])
# 提取图像中的2D特征点对应于3D模型点
image_points = np.array([
(landmarks.part(30).x, landmarks.part(30).y),
(landmarks.part(8).x, landmarks.part(8).y),
(landmarks.part(36).x, landmarks.part(36).y),
(landmarks.part(45).x, landmarks.part(45).y),
(landmarks.part(48).x, landmarks.part(48).y),
(landmarks.part(54).x, landmarks.part(54).y)
], dtype="double")
# 相机矩阵
focal_length = gray.shape[1]
center = (gray.shape[1] / 2, gray.shape[0] / 2)
camera_matrix = np.array([
[focal_length, 0, center[0]],
[0, focal_length, center[1]],
[0, 0, 1]
], dtype="double")
dist_coeffs = np.zeros((4, 1))
# PnP问题
success, rotation_vector, translation_vector = cv2.solvePnP(
model_points, image_points, camera_matrix, dist_coeffs)
# 将旋转向量转换为欧拉角
rotation_matrix, _ = cv2.Rodrigues(rotation_vector)
euler_angles, _, _, _, _, _ = cv2.RQDecomp3x3(rotation_matrix)
# 获取姿态
roll, pitch, yaw = euler_angles
总体代码表示如下:
import cv2
import dlib
import numpy as np
# 加载预训练的人脸检测器和特征点标记模型
detector = dlib.get_frontal_face_detector()
predictor = dlib.shape_predictor("./models/.dlib/shape_predictor_68_face_landmarks.dat")
image = cv2.imread("./datasets/unknown/test1.jpg")
gray = cv2.cvtColor(image, cv2.COLOR_BGR2GRAY)
faces = detector(gray)
for face in faces:
# 提取面部特征点
landmarks = predictor(gray, face)
# 准备3D模型点
model_points = np.array([
(0.0, 0.0, 0.0),
(0.0, -330.0, -65.0),
(-225.0, 170.0, -135.0),
(225.0, 170.0, -135.0),
(-150.0, -150.0, -125.0),
(150.0, -150.0, -125.0),
])
# 提取图像中的2D特征点对应于3D模型点
image_points = np.array([
(landmarks.part(30).x, landmarks.part(30).y),
(landmarks.part(8).x, landmarks.part(8).y),
(landmarks.part(36).x, landmarks.part(36).y),
(landmarks.part(45).x, landmarks.part(45).y),
(landmarks.part(48).x, landmarks.part(48).y),
(landmarks.part(54).x, landmarks.part(54).y)
], dtype="double")
# 相机矩阵
focal_length = gray.shape[1]
center = (gray.shape[1] / 2, gray.shape[0] / 2)
camera_matrix = np.array([
[focal_length, 0, center[0]],
[0, focal_length, center[1]],
[0, 0, 1]
], dtype="double")
dist_coeffs = np.zeros((4, 1))
# PnP问题
success, rotation_vector, translation_vector = cv2.solvePnP(
model_points, image_points, camera_matrix, dist_coeffs)
# 将旋转向量转换为欧拉角
rotation_matrix, _ = cv2.Rodrigues(rotation_vector)
euler_angles, _, _, _, _, _ = cv2.RQDecomp3x3(rotation_matrix)
# 获取姿态
roll, pitch, yaw = euler_angles
# roll = roll + 180
# 计算投影到图像平面的参考坐标系
axis_length = 400
axis = np.float32([[axis_length, 0, 0], [0, axis_length, 0], [0, 0, axis_length]])
imgpts, jac = cv2.projectPoints(axis, rotation_vector, translation_vector, camera_matrix, dist_coeffs)
corner = tuple(map(int, image_points[0].ravel()))
image = cv2.line(image, corner, tuple(map(int, imgpts[0].ravel())), (0, 0, 255), 2)
image = cv2.line(image, corner, tuple(map(int, imgpts[1].ravel())), (0, 255, 0), 2)
image = cv2.line(image, corner, tuple(map(int, imgpts[2].ravel())), (255, 0, 0), 2)
# 绘制人脸框
cv2.rectangle(image, (face.left(), face.top()), (face.right(), face.bottom()), (255, 255, 255), 2)
print(f"Roll: {roll}, Pitch: {pitch}, Yaw: {yaw}")
cv2.imshow("Output", image)
cv2.waitKey(0)
cv2.destroyAllWindows()
将上述代码命名为face_toward_show.py并运行:
python .\face_toward_show.py
得到的输出结果如下:
同时终端输出显示如下:
由此可以得到图像当中人脸的欧拉角,接下来需要考虑的是人脸的位置和大小,人脸的尺寸大小将会直接决定3D模型的缩放大小。
将上述代码当中利用CV2显示人脸结果的部分去除并将代码命名为face_towards.py然后运行让它能够返回rpy+wh这5个数据量:
我们可以发现Roll在同一张图运行会返回两种结果,其实这是一个角度,只是转动方向不同,为了保持一致我们可以用角度转化让所有角度保持在0到180或者-90到90的区间内。
三维模型处理
这里我们打开blender模型处理软件将模型导出为obj格式模型文件或者fbx格式,这类文件在输出了模型meshe的同时还将模型贴图一起保留并合并文件,即便以win自带的3D浏览器打开也是带有贴图的。
以一个太阳镜文件为例:
最后输出会包含如下文件:
接下来我们需要用到python的3D模型处理和渲染等库trimesh以及pyrender
pip install trimesh
pip install pyrender
定义一个函数用于加载三维模型并根据特定角度将这个视角下的三维模型转化为二维图片:
def render_and_save_model(file_path, output_image_path, angle_x=0, angle_y=0, angle_z=0):
加载模型并进行渲染:
# 加载OBJ模型
scene_or_mesh = trimesh.load(file_path)
# 创建渲染场景
render_scene = pyrender.Scene()
创建一个白色光源打到这个模型上:
# 创建光源
light = pyrender.DirectionalLight(color=[1.0, 1.0, 1.0], intensity=2.0)
render_scene.add(light)
接下来则是核心:调用RPY参数在特定视角拍摄得到图片:
# 创建并设置相机
camera = pyrender.PerspectiveCamera(yfov=np.pi / 3.0)
camera_pose = np.eye(4)
camera_pose[:3, :3] = trimesh.transformations.euler_matrix(
np.radians(angle_x), np.radians(angle_y), np.radians(angle_z), 'rxyz')[:3, :3]
camera_pose[:3, 3] = [0, 0, 3] # 设置相机位置
render_scene.add(camera, pose=camera_pose)
总代码如下:
import trimesh
import pyrender
import numpy as np
from PIL import Image
def render_and_save_model(file_path, output_image_path, angle_x=0, angle_y=0, angle_z=0):
scene_or_mesh = trimesh.load(file_path)
render_scene = pyrender.Scene()
if isinstance(scene_or_mesh, trimesh.Scene):
meshes = scene_or_mesh.dump()
else:
meshes = [scene_or_mesh]
for mesh in meshes:
render_mesh = pyrender.Mesh.from_trimesh(mesh)
render_scene.add(render_mesh)
light = pyrender.DirectionalLight(color=[1.0, 1.0, 1.0], intensity=2.0)
render_scene.add(light)
camera = pyrender.PerspectiveCamera(yfov=np.pi / 3.0)
camera_pose = np.eye(4)
camera_pose[:3, :3] = trimesh.transformations.euler_matrix(
np.radians(angle_x), np.radians(angle_y), np.radians(angle_z), 'rxyz')[:3, :3]
camera_pose[:3, 3] = [0, 0, 3]
render_scene.add(camera, pose=camera_pose)
r = pyrender.OffscreenRenderer(viewport_width=800, viewport_height=600)
color, _ = r.render(render_scene)
image = Image.fromarray(color)
image.save(output_image_path)
print(f"Rendered image saved as {output_image_path}")
render_and_save_model("Sunglasses.obj", "output_image.png", angle_x=30, angle_y=45, angle_z=60)
对该自定义函数输入特定的rpy角度,输出透明背景眼镜图片,部分特定角度输出图片如下:
1.正视视角(0,0,0)
2.俯视视角(0,0,90)
3.侧视视角(0,90,0)
翻转90°的某个视角(90,0,0)
此面部视角下输出图片:
图层结合
得到输出的转化为二维图片的眼镜图片后,最后一步则是将两者结合并输出,当然注意输出时合并的方式不是简单将其合并,否则会位置错乱。
首先第一步,我们得到的眼镜都是以眼镜几何中心作为坐标系原点转化视角得到的,最终输出的眼镜几何中心基本在图片中心,我们需要将第一步得到的脸部几何中心和眼镜图片的中心对其;
第二步则是缩放系数,此系数取决于第一步获取的人脸w和h的大小,大致测试参数,不断调整到一个合适的值,让眼镜大小缩放到和人脸尺寸基本相同;
第三步才是将第二步的图层简单覆盖到原图当中,最终输出。
import cv2
import numpy as np
def merge_glass2face(face_img, glass_img, face_center, face_w, face_h, scale_factor=1.0):
glass_h, glass_w = glass_img.shape[:2]
glass_center = (glass_w // 2, glass_h // 2)
offset_x = face_center[0] - glass_center[0]
offset_y = face_center[1] - glass_center[1]
# 计算缩放比例
scale = (face_w / glass_w) * scale_factor
glass_resized = cv2.resize(glass_img, None, fx=scale, fy=scale,
interpolation=cv2.INTER_LINEAR)
new_glass_h, new_glass_w = glass_resized.shape[:2]
new_glass_center = (new_glass_w // 2, new_glass_h // 2)
# 重新计算偏移量 (缩放后中心对齐)
offset_x = face_center[0] - new_glass_center[0]
offset_y = face_center[1] - new_glass_center[1]
# 第三步:图层合并
overlay = np.zeros_like(face_img, dtype=np.uint8)
y1, y2 = max(0, offset_y), min(face_img.shape[0], offset_y + new_glass_h)
x1, x2 = max(0, offset_x), min(face_img.shape[1], offset_x + new_glass_w)
# 计算眼镜图片的对应区域
glass_y1 = max(0, -offset_y)
glass_y2 = min(new_glass_h, face_img.shape[0] - offset_y)
glass_x1 = max(0, -offset_x)
glass_x2 = min(new_glass_w, face_img.shape[1] - offset_x)
# 提取眼镜的Alpha通道并归一化
if glass_resized.shape[2] == 4:
glass_rgb = glass_resized[glass_y1:glass_y2, glass_x1:glass_x2, :3]
glass_alpha = glass_resized[glass_y1:glass_y2, glass_x1:glass_x2, 3] / 255.0
else:
glass_rgb = glass_resized[glass_y1:glass_y2, glass_x1:glass_x2]
_, glass_alpha = cv2.threshold(cv2.cvtColor(glass_rgb, cv2.COLOR_BGR2GRAY),
0, 255, cv2.THRESH_BINARY)
glass_alpha = glass_alpha / 255.0
# 混合两个图层
for c in range(0, 3):
overlay[y1:y2, x1:x2, c] = (
glass_alpha * glass_rgb[..., c] +
(1 - glass_alpha) * face_img[y1:y2, x1:x2, c]
)
# 将叠加层合并到原始图片
result = face_img.copy()
result[y1:y2, x1:x2] = overlay[y1:y2, x1:x2]
return result
最终得到结果: