


 本文详述在CentOS 6.5环境下,如何通过在线安装方式部署MySQL数据库服务,包括修改yum源、安装必要组件、启动服务、设置开机启动、配置密码、授权远程访问等关键步骤。
hive会用到mysql 所以要安装好!
这是依照前几篇博客写的
环境
CentOS6.5
可以上网
防火墙关闭了 永久性
很干净 但是设置过本地yum这个东西
所以需要 设置成默认的yum源 在线安装mysql
很简单
我把需要的命令罗列下 然后具体解释
这就是所有步骤
1.重新设置yum源 在线下载mysql
[root@testsix ~]# cd /etc/yum.repos.d/
[root@testsix yum.repos.d]# mv nginx.repo nginx.repo.bak
[root@testsix yum.repos.d]# mv CentOS-Base.repo.bak CentOS-Base.repo
2.改变yum源后一定要重新构建缓存
[root@testsix yum.repos.d]# yum clean all
[root@testsix yum.repos.d]# yum makecache

3.找到需要安装的那两个文件 我也不知道为啥是这俩 查查?
[root@testsix yum.repos.d]# yum list | grep mysql
mysql-devel.x86_64
mysql-server.x86_64

4.下载
[root@testsix yum.repos.d]# yum -y install mysql-server.x86_64 mysql-devel.x86_64

5.启动服务 设置开机启动
[root@testsix yum.repos.d]# service mysqld start
[root@testsix yum.repos.d]# chkconfig mysqld on

6.设置密码 输入命令后 直接回车 它让你输入密码 刚建的当然没有密码默认为空 然后重新登录 输入账户密码
[root@testsix yum.repos.d]# mysqladmin -u root -p password 'root'
Enter password:    这里直接回车 默认密码为空
[root@testsix yum.repos.d]# mysql -u root -proot  现在登录 使用我们刚刚设置的

如果只是在Linux使用 到这里就结束了 如果还要在windows下连接Linux的mysql 需要开放Linux的3306端口用于数据库访问

7.修改防火墙
[root@testsix ~]# vi /etc/sysconfig/iptables
添加这句话
-A INPUT -p tcp -m state --state NEW -m tcp --dport 3306 -j ACCEPT

8.然后重新登录mysql 输入下面那句话 第一个root用户名 第二个root是密码 自行修改  然后刷新命令
mysqladmin -u root -p password 'root'

mysql> GRANT ALL PRIVILEGES ON *.* TO 'root'@'%' IDENTIFIED BY 'root' WITH GRANT OPTION;
Query OK, 0 rows affected (0.00 sec)

mysql> flush privileges;
Query OK, 0 rows affected (0.00 sec)
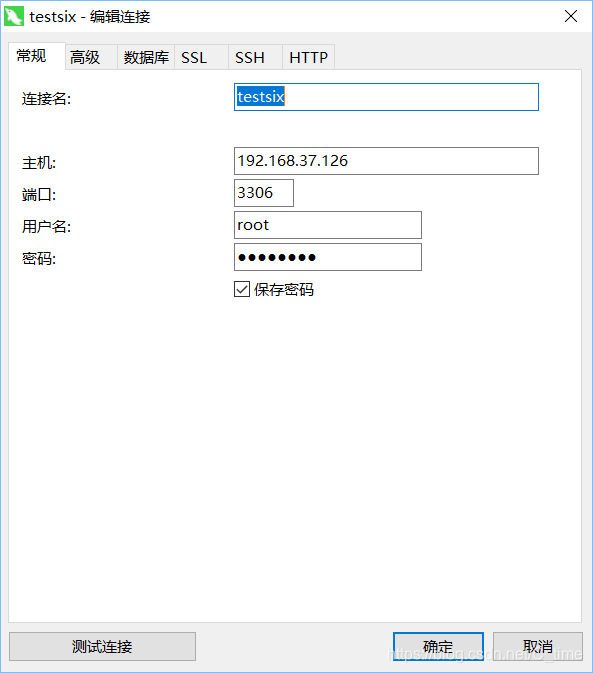
testsix的ip为主机名 端口刚刚开放的3306 用户名root 密码root 我的密码哈 自行修改
ok 下面加上我的执行命令 详细解释下:
因为修改过yum源 这里安装mysql需要在线安装 所以改回来!
[root@testsix ~]# ll /etc/yum.repos.d/
total 20
-rw-r--r--. 1 root root 1926 Nov 27  2013 CentOS-Base.repo.bak
-rw-r--r--. 1 root root  638 Nov 27  2013 CentOS-Debuginfo.repo.bak
-rw-r--r--. 1 root root  630 Nov 27  2013 CentOS-Media.repo.bak
-rw-r--r--. 1 root root 3664 Nov 27  2013 CentOS-Vault.repo.bak
-rw-r--r--. 1 root root   83 Aug 27 17:59 nginx.repo
[root@testsix ~]#
怎么用rename没反应 没报错 咋回事
就是将文件改个名呗 然后那用mv吧
[root@testsix yum.repos.d]# mv nginx.repo nginx.repo.bak
[root@testsix yum.repos.d]# ll
total 20
-rw-r--r--. 1 root root 1926 Nov 27  2013 CentOS-Base.repo.bak
-rw-r--r--. 1 root root  638 Nov 27  2013 CentOS-Debuginfo.repo.bak
-rw-r--r--. 1 root root  630 Nov 27  2013 CentOS-Media.repo.bak
-rw-r--r--. 1 root root 3664 Nov 27  2013 CentOS-Vault.repo.bak
-rw-r--r--. 1 root root   83 Aug 27 17:59 nginx.repo.bak
[root@testsix yum.repos.d]# mv CentOS-Base.repo.bak CentOS-Base.repo
[root@testsix yum.repos.d]# yum clean all
这一步应该在下载之前 查看mysql相关的东西 我们找出那两个需要下载的 不然也不知道怎么写出来这么长的名字啊 哈哈
[root@testsix yum.repos.d]# yum list | grep mysql
mysql-libs.x86_64                          5.1.71-1.el6                  @anaconda-CentOS-201311272149.x86_64/6.5
apr-util-mysql.x86_64                      1.3.9-3.el6_0.1               base
bacula-director-mysql.x86_64               5.0.0-13.el6                  base
bacula-storage-mysql.x86_64                5.0.0-13.el6                  base
dovecot-mysql.x86_64                       1:2.0.9-22.el6                base
freeradius-mysql.x86_64                    2.2.6-7.el6_9                 base
libdbi-dbd-mysql.x86_64                    0.8.3-5.1.el6                 base
mod_auth_mysql.x86_64                      1:3.0.0-11.el6_0.1            base
mysql.x86_64                               5.1.73-8.el6_8                base
mysql-bench.x86_64                         5.1.73-8.el6_8                base
mysql-connector-java.noarch                1:5.1.17-6.el6                base
mysql-connector-odbc.x86_64                5.1.5r1144-7.el6              base
mysql-devel.i686                           5.1.73-8.el6_8                base
mysql-devel.x86_64                         5.1.73-8.el6_8                base
mysql-embedded.i686                        5.1.73-8.el6_8                base
mysql-embedded.x86_64                      5.1.73-8.el6_8                base
mysql-embedded-devel.i686                  5.1.73-8.el6_8                base
mysql-embedded-devel.x86_64                5.1.73-8.el6_8                base
mysql-libs.i686                            5.1.73-8.el6_8                base
mysql-libs.x86_64                          5.1.73-8.el6_8                base
mysql-server.x86_64                        5.1.73-8.el6_8                base
mysql-test.x86_64                          5.1.73-8.el6_8                base
pcp-pmda-mysql.x86_64                      3.10.9-9.el6                  base
php-mysql.x86_64                           5.3.3-49.el6                  base
qt-mysql.i686                              1:4.6.2-28.el6_5              base
qt-mysql.x86_64                            1:4.6.2-28.el6_5              base
rsyslog-mysql.x86_64                       5.8.10-12.el6                 base
rsyslog7-mysql.x86_64                      7.4.10-7.el6                  base
[root@testsix yum.repos.d]#
就是这俩
mysql-devel.x86_64
mysql-server.x86_64
下载
[root@testsix yum.repos.d]# yum -y install mysql-server.x86_64 mysql-devel.x86_64


Installed:
  mysql-devel.x86_64 0:5.1.73-8.el6_8                                                 mysql-server.x86_64 0:5.1.73-8.el6_8

Dependency Installed:
  mysql.x86_64 0:5.1.73-8.el6_8                         perl-DBD-MySQL.x86_64 0:4.013-3.el6                         perl-DBI.x86_64 0:1.609-4.el6

Dependency Updated:
  mysql-libs.x86_64 0:5.1.73-8.el6_8

Complete!
1.启动数据库服务service mysqld start
[root@testsix yum.repos.d]# service mysqld start
Initializing MySQL database:  Installing MySQL system tables...
OK
Filling help tables...
OK

To start mysqld at boot time you have to copy
support-files/mysql.server to the right place for your system

PLEASE REMEMBER TO SET A PASSWORD FOR THE MySQL root USER !
To do so, start the server, then issue the following commands:

/usr/bin/mysqladmin -u root password 'new-password'
/usr/bin/mysqladmin -u root -h testsix password 'new-password'

Alternatively you can run:
/usr/bin/mysql_secure_installation

which will also give you the option of removing the test
databases and anonymous user created by default.  This is
strongly recommended for production servers.

See the manual for more instructions.

You can start the MySQL daemon with:
cd /usr ; /usr/bin/mysqld_safe &

You can test the MySQL daemon with mysql-test-run.pl
cd /usr/mysql-test ; perl mysql-test-run.pl

Please report any problems with the /usr/bin/mysqlbug script!

                                                           [  OK  ]
Starting mysqld:                                           [  OK  ]
[root@testsix yum.repos.d]#
2.设置开机启动mysqld服务chkconfig mysqld on
[root@testsix yum.repos.d]# chkconfig --list | grep mysqld
mysqld         	0:off	1:off	2:off	3:off	4:off	5:off	6:off
[root@testsix yum.repos.d]# chkconfig mysqld on
[root@testsix yum.repos.d]# chkconfig --list | grep mysqld
mysqld         	0:off	1:off	2:on	3:on	4:on	5:on	6:off
[root@testsix yum.repos.d]#
3.设置密码
这个设置仅有一次机会 如果设置错了 请百度再次设置
我们设置为之前安装hive时的配置文件 用户名密码都是root
[root@testsix yum.repos.d]# service mysqld status 要先启动mysqld服务
mysqld (pid  2455) is running...
意思是把root用户的密码设置为root 现在可以登录mysql数据库了
[root@testsix yum.repos.d]# mysqladmin -u root -p password 'root'
Enter password:    这里直接回车 默认密码为空
[root@testsix yum.repos.d]# mysql -u root -proot  现在登录 使用我们刚刚设置的
Welcome to the MySQL monitor.  Commands end with ; or \g.
Your MySQL connection id is 3
Server version: 5.1.73 Source distribution

Copyright (c) 2000, 2013, Oracle and/or its affiliates. All rights reserved.

Oracle is a registered trademark of Oracle Corporation and/or its
affiliates. Other names may be trademarks of their respective
owners.

Type 'help;' or '\h' for help. Type '\c' to clear the current input statement.

mysql> 这不就进来了
5.设置navicat远程连接 就是从windows端的navicat软件可以连接到Linux的mysql数据库
先添加开放3306端口
[root@testsix ~]# vi /etc/sysconfig/iptables
[root@testsix ~]#
添加这句话
-A INPUT -p tcp -m state --state NEW -m tcp --dport 3306 -j ACCEPT
# Firewall configuration written by system-config-firewall
# Manual customization of this file is not recommended.
*filter
:INPUT ACCEPT [0:0]
:FORWARD ACCEPT [0:0]
:OUTPUT ACCEPT [0:0]
-A INPUT -m state --state ESTABLISHED,RELATED -j ACCEPT
-A INPUT -p icmp -j ACCEPT
-A INPUT -i lo -j ACCEPT
-A INPUT -m state --state NEW -m tcp -p tcp --dport 22 -j ACCEPT
-A INPUT -j REJECT --reject-with icmp-host-prohibited
-A FORWARD -j REJECT --reject-with icmp-host-prohibited
-A INPUT -p tcp -m state --state NEW -m tcp --dport 3306 -j ACCEPT
COMMIT
然后授权
两种方法
第一种我个人感觉麻烦
直接使用第二种
一句话搞定
记得刷新
https://www.cnblogs.com/blogforly/p/5997553.html
最后授权MySQL,允许远程用户登录访问MySQL
手动增加可以远程访问数据库的用户。
方法一、本地登入mysql,更改 "mysql" 数据库里的 "user" 表里的 "host" 项,将"localhost"改为"%"
#mysql -u root -proot
mysql>use mysql;
mysql>update user set host = '%' where user = 'root';
mysql>select host, user from user;
方法二、直接授权(推荐)
从任何主机上使用root用户,密码:youpassword(你的root密码)连接到mysql服务器:
# mysql -u root -proot
mysql>GRANT ALL PRIVILEGES ON *.* TO 'root'@'%' IDENTIFIED BY 'youpassword' WITH GRANT OPTION;
操作完后切记执行以下命令刷新权限
FLUSH PRIVILEGES
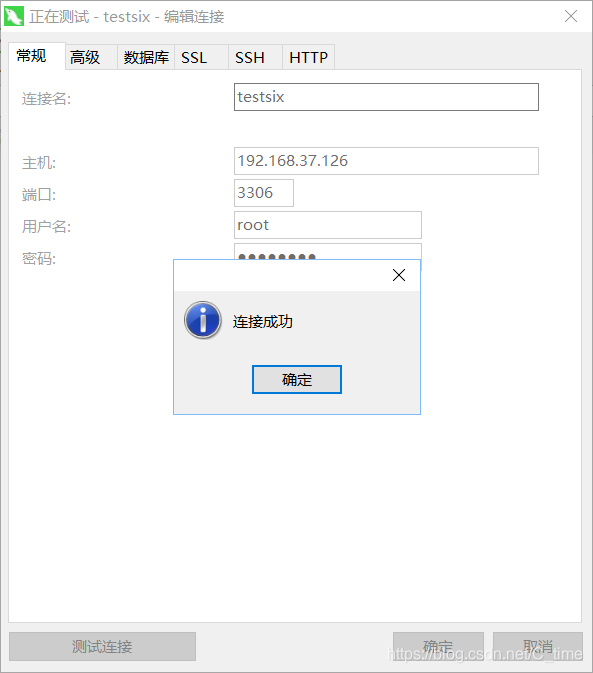
这时再通过navicat远程链接MySQL,链接测试,如下图,成功。
mysql> GRANT ALL PRIVILEGES ON *.* TO 'root'@'%' IDENTIFIED BY 'root' WITH GRANT OPTION;
Query OK, 0 rows affected (0.00 sec)

mysql> flush privileges;
Query OK, 0 rows affected (0.00 sec)

mysql>


 5008
5008

 被折叠的 条评论
为什么被折叠?
被折叠的 条评论
为什么被折叠?
 到【灌水乐园】发言


