


 本文详细介绍了Apache Flume的数据采集源配置与使用,包括Avro Source、Exec Source、Spool Dir Source及Thrift Source的配置步骤与常见问题解决。通过实例演示如何实时采集日志、监控文件更新、收集离线数据及实现多语言支持。
1.flume的avro_source 的使用
1.在flume的conf文件夹下 建立avro.conf文件
[root@hadoop01 /]# vi /usr/local/flume-1.9.0/conf/avro.conf
2.内容是
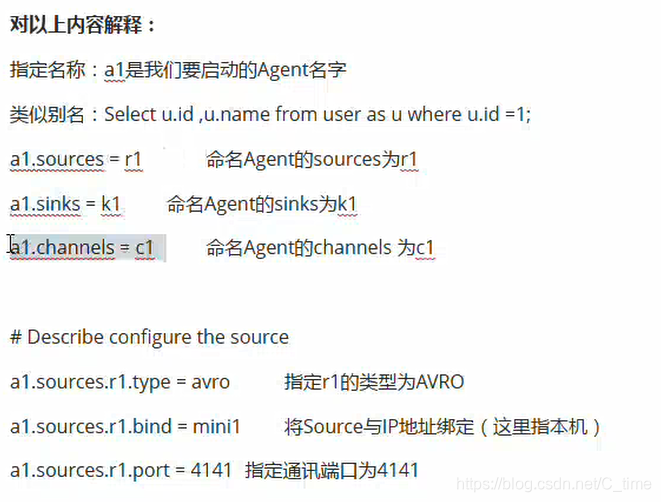
a1.sources = r1
a1.sinks = k1
a1.channels = c1
#Describe configure the source
a1.sources.r1.type = avro
a1.sources.r1.bind = hadoop01
a1.sources.r1.port = 4141
#Describe the sink
a1.sinks.k1.type = logger
#Use a channel which buffers events in memory
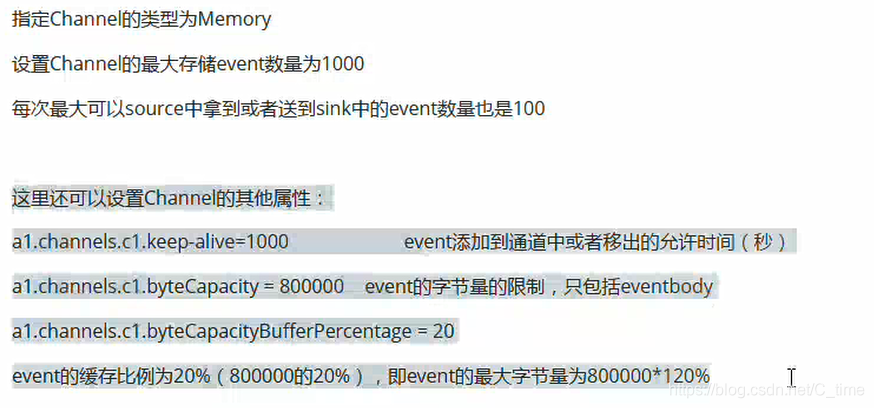
a1.channels.c1.type = memory
a1.channels.c1.capacity = 1000
a1.channels.c1.transactionCapacity = 100
#Bind the source and sink to the channel
a1.sources.r1.channels = c1
a1.sinks.k1.channel = c1
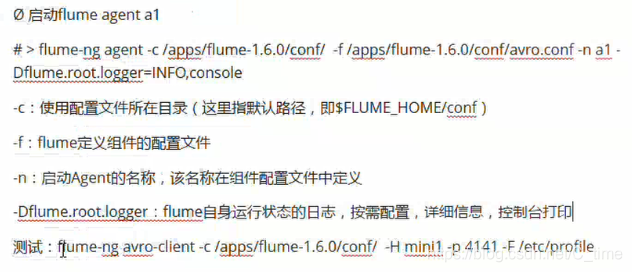
2.创建好后启动
[root@hadoop01 /]# flume-ng agent -c /usr/local/flume-1.9.0/conf/ -f /usr/local/flume-1.9.0/conf/avro.conf -n a1 -Dflume.root.logger=INFO,console
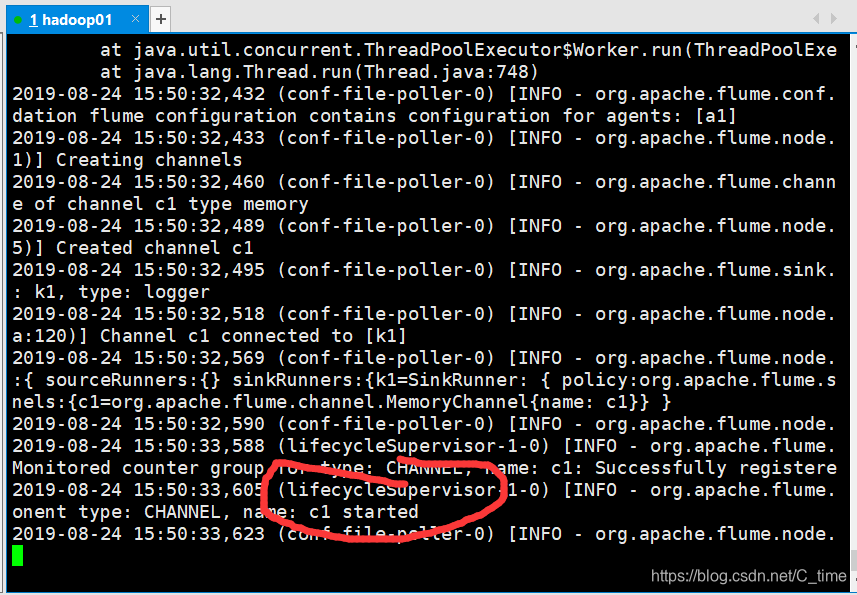
然后会显示信息
前边很长的一段
...
最后一句才是started
Avro source r1 started.
然后另开一个会话 当然还是本台机子
给它发一个文件 以/etc/profile为例
flume-ng avro-client -c /usr/local/flume-1.9.0/ -H hadoop01 -p 4141 -F /etc/profile
那个stated的机子 打印一堆信息 全是字节 看不懂
但是正确运行 没问题
2.exec_source 实时的采集日志 动态监控日志文件
tail -F /home/a.txt 监控文件a.txt 不管它是否存在就是一直监控
1.创建agent配置文件
#创建agent配置文件
# vi /usr/local/flume-1.9.0/conf/exec_tail.conf
a1.sources = r1
a1.sinks = k1
a1.channels = c1
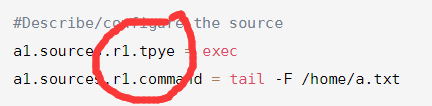
#Describe/configure the source
a1.sources.r1.tpye = exec
a1.sources.r1.command = tail -F /home/a.txt
#Describe the sinks
a1.sinks.k1.type = logger
# Use a channel which buffers events in memory
a1.channels.c1.type = memory
a1.channels.c1.capacity = 1000
a1.channels.c1.transactionCapacity = 100
#Bind the source and sink to the channel
a1.sources.r1.channels = c1
a1.sinks.k1.channel = c1
2.启动flume agent a1
#启动flume agent a1
# flume-ng agent -c /usr/local/flume-1.9.0/conf/ -f /usr/local/flume-1.9.0/conf/exec_tail.conf -n a1 -Dflume.root.logger=INFO,console
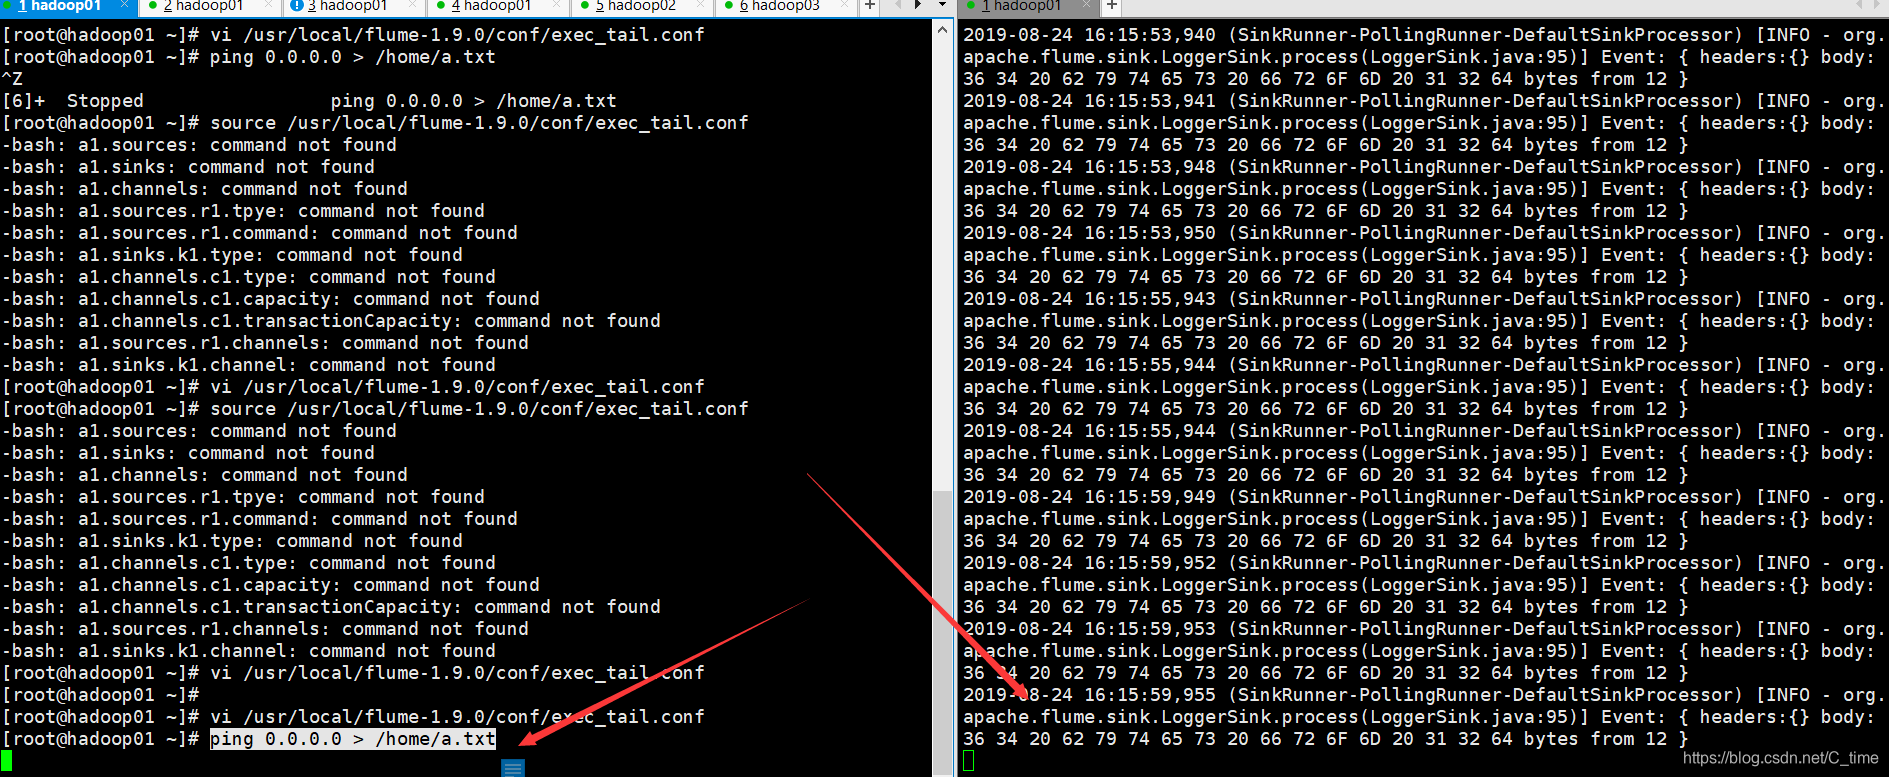
失败 我失败了两三次 明确说的是r1错误
然后就找文件 果然有两处书写错误!
0)] Could not configure source  r1 due to: Component has no type. Cannot configure. r1
org.apache.flume.conf.ConfigurationException: Component has no type. Cannot configure. r1
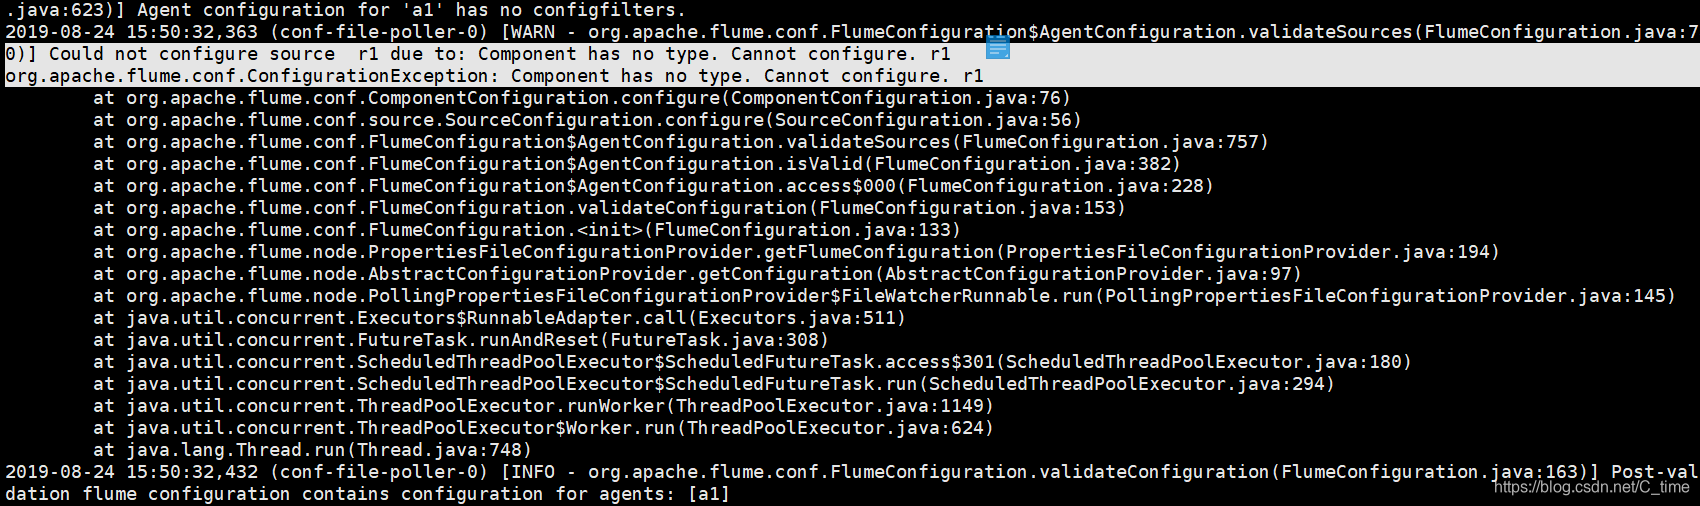

重写启动 可以了
然后新开个窗口
ping这个不是动态的嘛 ping通了地址后就一直输出 让它把内容输出到a.txt
果然 右边就一直有显示
ping 0.0.0.0 >> /home/a.txt
动态监控
然后换个方式 echo 右边也能监控到
[root@hadoop01 ~]# echo 1111111 >> /home/a.txt

3.spooldir source 监控目录 将目录下文件都采集到flume 针对离线数据采集 不具有实时性
被采集的完的文件可以将后缀名加一个.COMMPLETED
不能放同名文件到目录下
实例
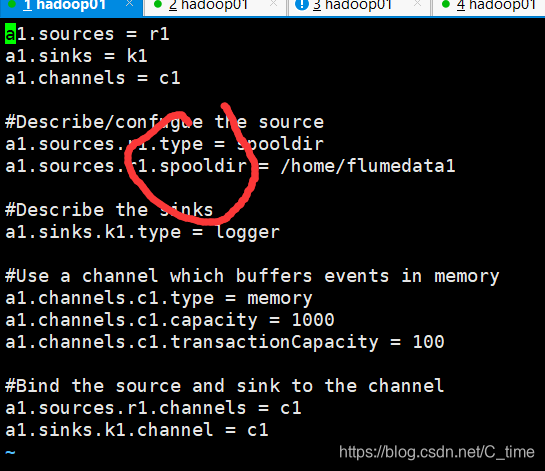
1.写配置文件
vi /usr/local/flume-1.9.0/conf/spooldir.conf
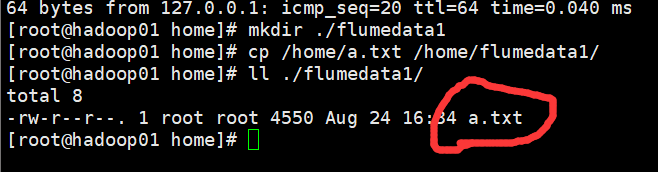
[root@hadoop01 home]# mkdir ./flumedata1
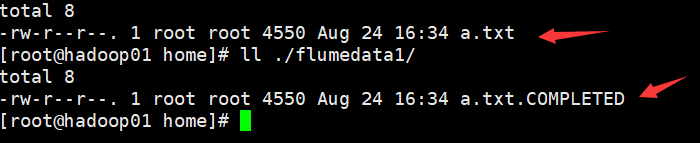
[root@hadoop01 home]# cp /home/a.txt /home/flumedata1/
[root@hadoop01 home]# ll ./flumedata1/
total 8
-rw-r--r--. 1 root root 4550 Aug 24 16:34 a.txt
[root@hadoop01 home]#
#定义a1的各组件的名称
a1.sources = r1
a1.sinks = k1
a1.channels = c1

#Describe/confugue the source source的类型 目录
a1.sources.r1.type = spooldir
a1.sources.r1.spoolDir = /home/flumedata1

#Describe the sinks
a1.sinks.k1.type = logger

#Use a channel which buffers events in memory
a1.channels.c1.type = memory
a1.channels.c1.capacity = 1000
a1.channels.c1.transactionCapacity = 100

#Bind the source and sink to the channel
a1.sources.r1.channels = c1
a1.sinks.k1.channel = c1
2.启动
flume-ng agent -c /usr/local/flume-1.9.0/conf/ -f /usr/local/flume-1.9.0/conf/spooldir.conf -n a1 -Dflume.root.logger=INFO,console
3.报错 查看
2019-08-24 16:38:44,716 (conf-file-poller-0) [ERROR - org.apache.flume.node.AbstractConfigurationProvider.loadSources(AbstractConfigurationProvider.java:355)] Source r1 has been removed due to an error during configuration
java.lang.IllegalStateException: Configuration must specify a spooling directory

d小些了 不对
4.找到错误 修改为大写D 重新启动 读到数据
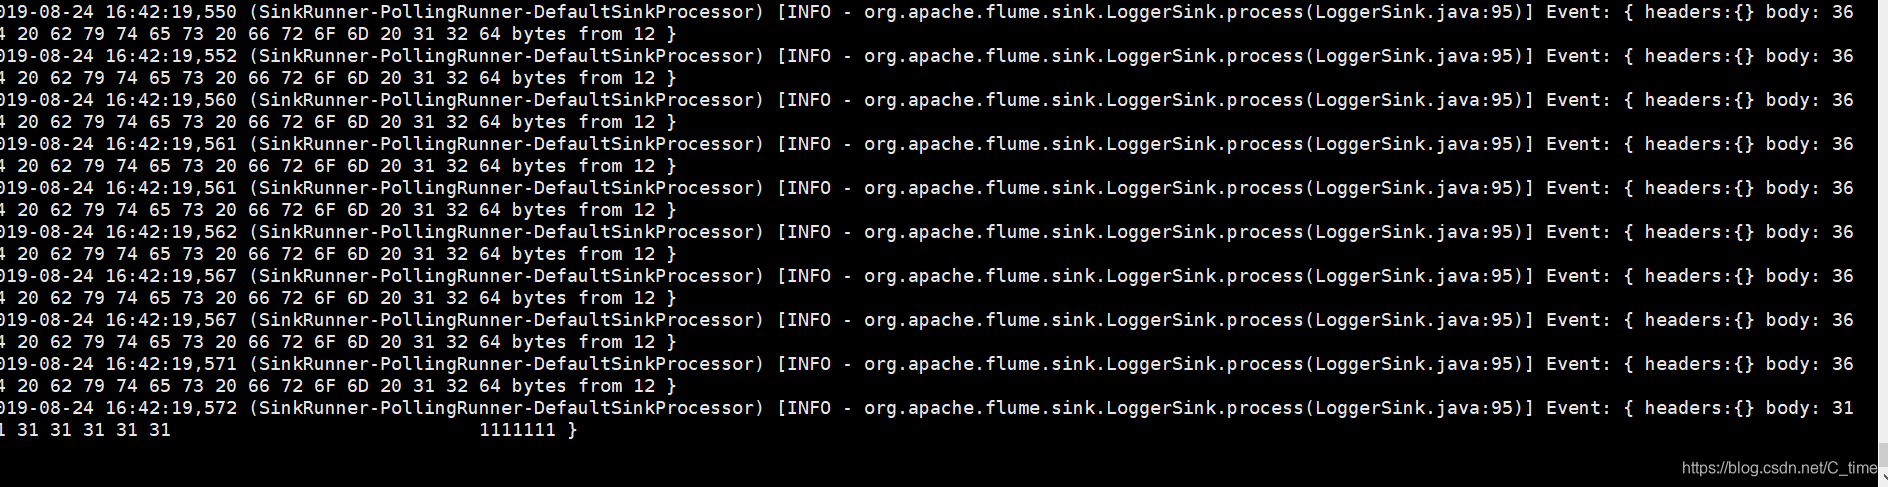
查看目录下的a.txt文件
[root@hadoop01 home]# ll ./flumedata1/
total 8
-rw-r--r--. 1 root root 4550 Aug 24 16:34 a.txt.COMPLETED
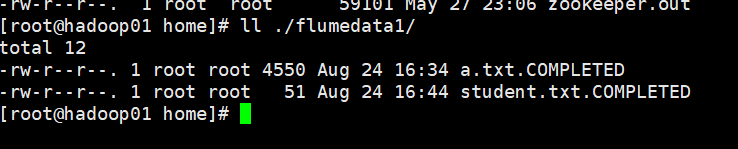
再找个文件放进去 看监控的窗口 果然有变化 然后
[root@hadoop01 ~]# cp /home/student.txt /home/flumedata1/
变为了student.txt.COMPLETED
Preparing to move file /home/flumedata1/student.txt to /home/flumedata1/student.txt.COMPLETED

注意 目录下不允许出现相同名字的文件
1.我再放个同名文件放到目录下
[root@hadoop01 ~]# cp /home/student.txt /home/flumedata1/
2.文件名已经被用了 不让再用相同的 报错!!!!
java.lang.IllegalStateException: File name has been re-used with different files. Spooling assumptions violated for /home/flumedata1/student.txt.COMPLETED

4. thrift source 支持多语言
可以使用任意语言编写
vi /usr/local/flume-1.9.0/conf/thrift.conf
a1.sources = r1
a1.sinks = k1
a1.channels = c1

#Describe/confugue the source
a1.sources.r1.type = thrift
a1.sources.r1.bind = hadoop01
a1.sources.r1.port = 4141

#Describe the sinks
a1.sinks.k1.type = logger

#Use a channel which buffers events in memory
a1.channels.c1.type = memory
a1.channels.c1.capacity = 1000
a1.channels.c1.transactionCapacity = 100

#Bind the source and sink to the channel
a1.sources.r1.channels = c1
a1.sinks.k1.channel = c1
[root@hadoop01 conf]# flume-ng agent -c /usr/local/flume-1.9.0/conf/ -f /usr/local/flume-1.9.0/conf/thrift.conf -n a1 -Dflume.root.logger=INFO,console
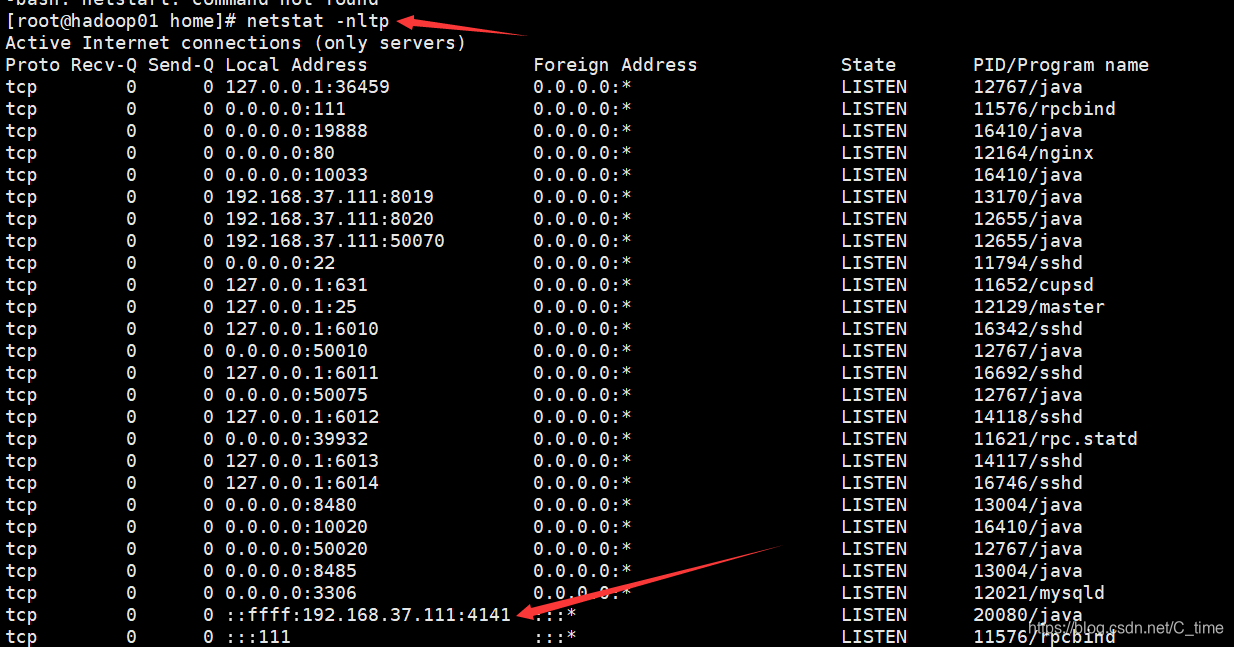
启动之后 新开窗口 查看4141端口 是出于被监听的状态·
[root@hadoop01 home]# netstat -nltp
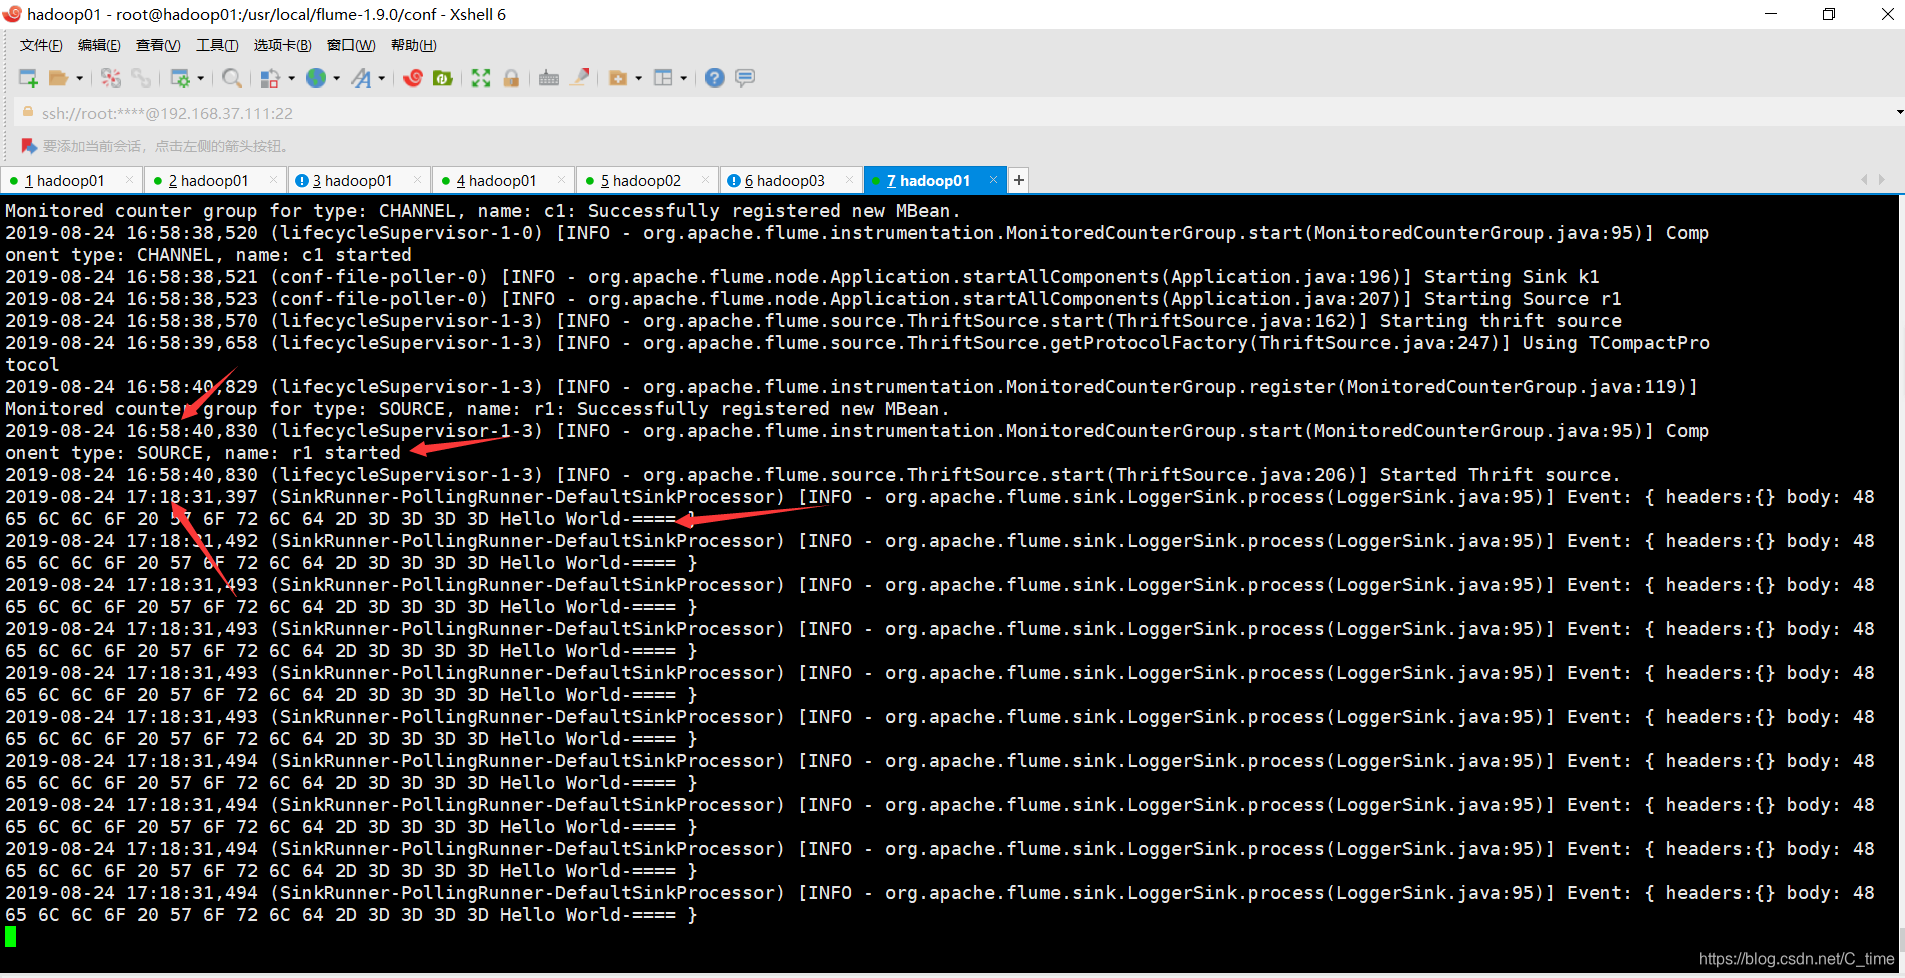
然后用java代码发送消息
看看thrift能否采集到数据
java代码
import org.apache.flume.Event;
import org.apache.flume.EventDeliveryException;
import org.apache.flume.api.RpcClient;
import org.apache.flume.api.RpcClientFactory;
import org.apache.flume.event.EventBuilder;

import java.nio.charset.Charset;

/**
 *
 */

public class MyRpcClientFacade {
    private RpcClient client;
    private String hostname;
    private int port;
    //初始化客户端的方法
    public void init(String hostname, int port){
        this.hostname = hostname;
        this.port = port;
        //获取客户端
        this.client = RpcClientFactory.getThriftInstance(hostname, port);
    }
    //向服务端发送数据的方法
    public void sendDataToFlume(String data){
        Event event = EventBuilder.withBody(data, Charset.forName("UTF-8"));
        try {
            client.append(event);
        } catch (EventDeliveryException e) {
            client.close();
            client = null;
            this.client = RpcClientFactory.getThriftInstance(hostname, port);
//            e.printStackTrace();
        }

    }
    //关闭客户端的方法
    public void cleanUp(){
        client.close();
    }
    public static void main(String[] args) {
        MyRpcClientFacade client = new MyRpcClientFacade();
        //初始化client
        client.init("192.168.37.111", 4141);
        String simpleData = "Hello World";
        System.out.println(simpleData);
        for(int i = 0; i < 10; i++){
            //向flume写数据
            client.sendDataToFlume(simpleData+"-=======-"+i);
        }
        client.cleanUp();
    }
}
依赖
<dependency>
            <groupId>org.apache.flume</groupId>
            <artifactId>flume-ng-core</artifactId>
            <version>1.9.0</version>
</dependency>
启动之前
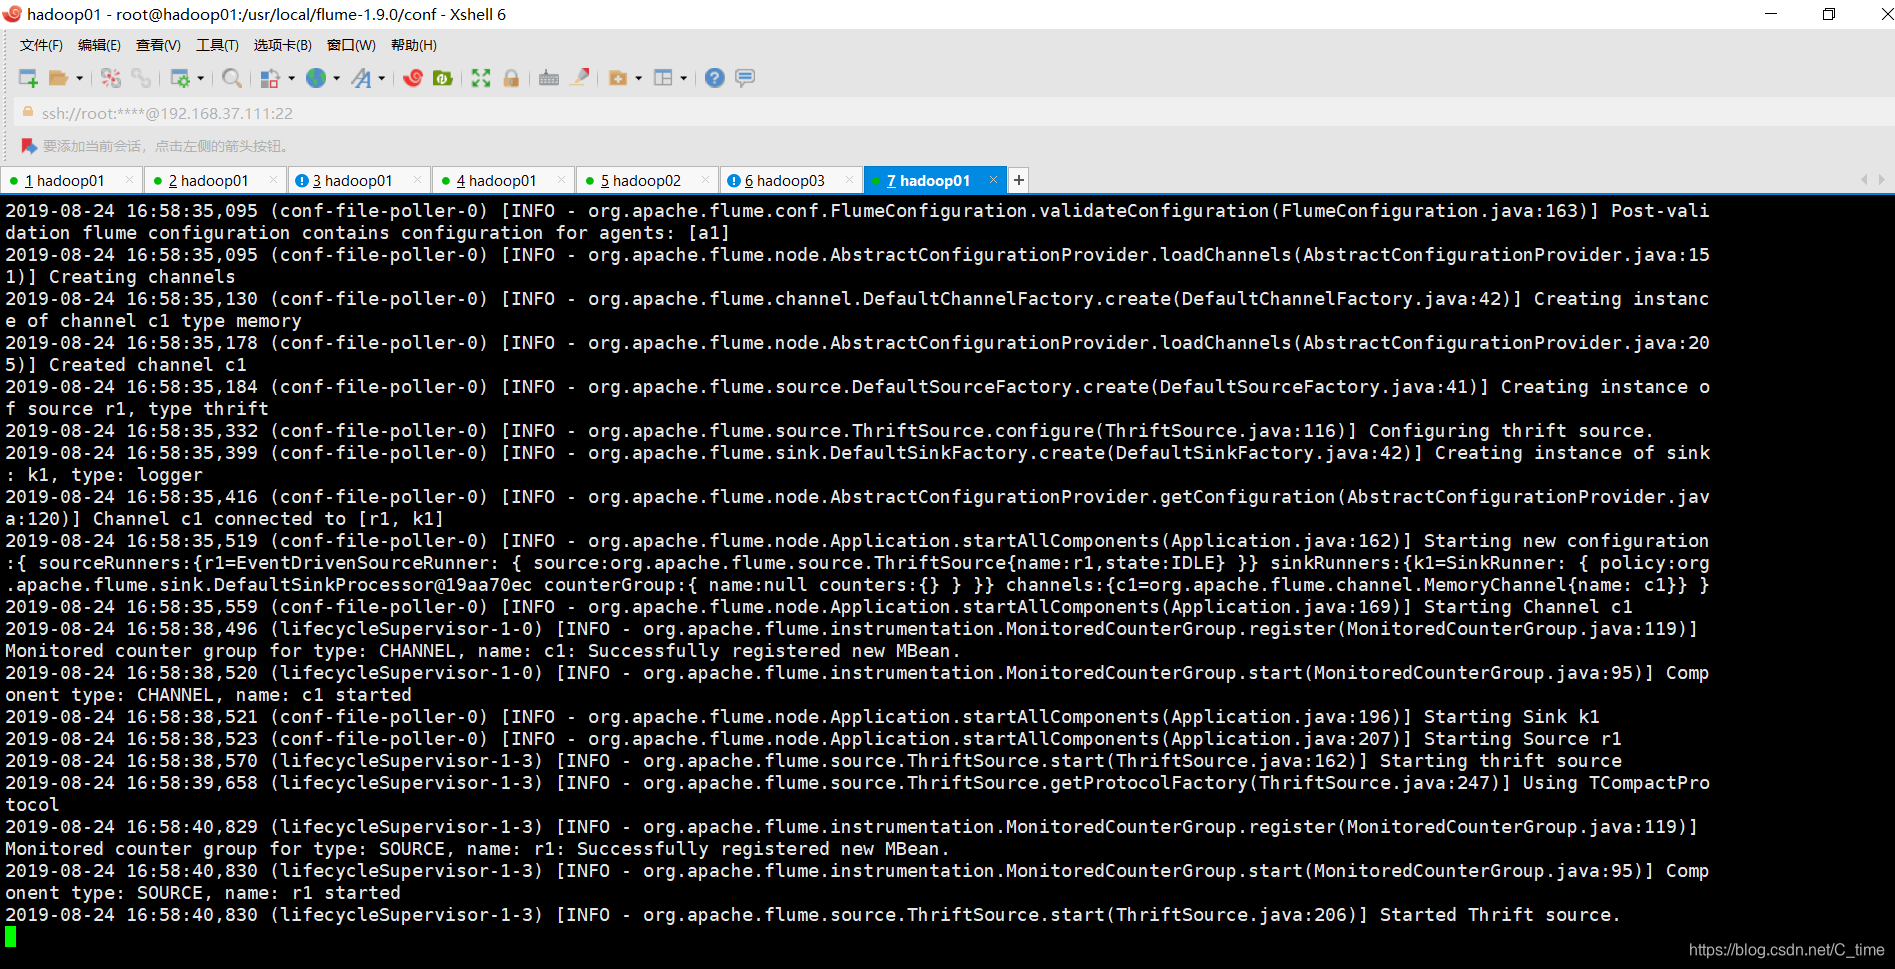
监控到时的样子


 621
621

 被折叠的 条评论
为什么被折叠?
被折叠的 条评论
为什么被折叠?
 到【灌水乐园】发言


