


往期知识点整理
- 【鸿蒙UI实战开发】基于List和Scroller由简单到复杂列表布局开发实践
- 【鸿蒙UI实战开发】基于原生能力的键盘控制
- 【鸿蒙UI实战开发】基于ArkUI现有能力实现自定义弹窗封装方案
- 【鸿蒙ArkUI实战】基于ImageKit对图片进行处理
- 【鸿蒙ArkUI开发】基于ArkUI的验证码实现
- 【鸿蒙ArkUI实战开发】基于原生能力的深色模式适配
- 【鸿蒙ArkUI实战开发】基于ArkUI的动效能力
- 持续更新中……
场景一:使用属性动画完成登录的动效
效果图

方案
控制输入框的宽度和显隐状态实现第一段动画,输入框的缩放动画完成后onFinish隐藏输入框,同时展示加载动画。
核心代码
Column() {

LoadingProgress()

.width(60)

.height(60)

}

.width(80)

.height(80)

.borderRadius(40)

.backgroundColor(Color.White)

.justifyContent(FlexAlign.Center)

.position({ x: 90, y: 0 })

.opacity(this.loadingOpacity)

.animation({

duration: 300,

playMode: PlayMode.Alternate,

expectedFrameRateRange: {

min: 20,

max: 120,

expected: 90,

}

})

TextInput({ text: $$this.username, placeholder: "请输入用户名", controller: this.controller })

.placeholderColor("#D4D3D1")

.backgroundColor("#ffffff")

.width(this.inputWidth)

.height(40)

.visibility(this.inputVisibility)

.border({

width: {

left: 0,

right: 0,

top: 0,

bottom: 1

},

color: { bottom: Color.Gray },

radius: { topLeft: this.inputRadius, topRight: this.inputRadius },

style: { bottom: BorderStyle.Solid }

})

.id("username")

.defaultFocus(true)

.animation({

duration: 300,

playMode: PlayMode.Alternate,

onFinish: () => {

if (this.isLogin) {

this.inputVisibility = Visibility.Hidden;

this.loadingOpacity = 1;

this.isLogin = false;

}

},

expectedFrameRateRange: {

min: 20,

max: 120,

expected: 90,

}

})
场景二:使用Navigation完成不同的转场动画。
效果图
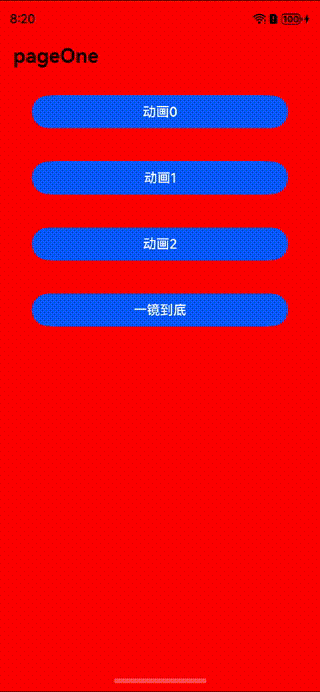
方案
配置完自定义的转场动画,然后将name指定的NavDestination页面信息入栈。
核心代码
// PageOne.ets

Button('动画1', { stateEffect: true, type: ButtonType.Capsule })Button('动画0', { stateEffect: true, type: ButtonType.Capsule })

.width('80%')

.height(40)

.margin(20)

.onClick(() => {

CustomTransition.getInstance().registerNavParam(this.pageId, (isPush: boolean, isExit: boolean) => {

}, (isPush: boolean, isExit: boolean)=> {

}, (isPush: boolean, isExit: boolean) => {

}, 200);

this.pageInfos.pushPathByName('pageTwo', null) //将name指定的NavDestination页面信息入栈,传递的数据为param

})

Button('动画1', { stateEffect: true, type: ButtonType.Capsule })

.width('80%')

.height(40)

.margin(20)

.onClick(() => {

CustomTransition.getInstance().registerNavParam(this.pageId, (isPush: boolean, isExit: boolean) => {

this.myScale = isExit ? 1 : 1.2;

}, (isPush: boolean, isExit: boolean)=> {

this.myScale = isExit ? 1.2 : 1;

}, (isPush: boolean, isExit: boolean) => {

this.myScale = 1;

}, 200);

this.pageInfos.pushPathByName('pageThree', null) //将name指定的NavDestination页面信息入栈,传递的数据为param

})

Button('动画2', { stateEffect: true, type: ButtonType.Capsule })

.width('80%')

.height(40)

.margin(20)

.onClick(() => {

CustomTransition.getInstance().registerNavParam(this.pageId, (isPush: boolean, isExit: boolean) => {

this.myScale = isExit ? 1 : 0.7;

this.x = isExit ? 0 : '-100%';

}, (isPush: boolean, isExit: boolean)=> {

this.myScale = isExit ? 0.7 : 1;

this.x = isExit ? '-100%' : 0;

}, (isPush: boolean, isExit: boolean) => {

this.myScale = 1;

this.x = 0

}, 200);

this.pageInfos.pushPathByName('pageFour', null) //将name指定的NavDestination页面信息入栈,传递的数据为param

})

......

// PageTwo.ets

import {CustomTransition} from './CustomNavigationUtils'

@Component

export struct PageTwoTemp {

@Consume('pageInfos') pageInfos: NavPathStack

@State y: number|string = '100%'

pageId: number = 0

aboutToAppear() {

this.pageId = this.pageInfos.getAllPathName().length - 1;

console.log('this.pageInfos.getAllPathName()',JSON.stringify(this.pageInfos.getAllPathName()))

CustomTransition.getInstance().registerNavParam(this.pageId, (isPush: boolean, isExit: boolean)=>{

console.log("current page is pageOne")

this.y = isExit ? 0 : isPush ? '-100%' : '100%';

}, (isPush: boolean, isExit: boolean)=>{

this.y = isExit ? isPush ? '100%' : '-100%' : 0;

}, (isPush: boolean, isExit: boolean) => {

this.y = 0;

}, 2000)

}

build() {

NavDestination() {

Column() {

Text('动画0')

.width('80%')

.height(40)

.margin(20)

.textAlign(TextAlign.Center)

}.width('100%').height('100%')

}.title('动画0')

.onBackPressed(() => {

const popDestinationInfo = this.pageInfos.pop() // 弹出路由栈栈顶元素

console.log('pop' + '返回值' + JSON.stringify(popDestinationInfo))

return true

})

.onDisAppear(()=>{

CustomTransition.getInstance().unRegisterNavParam(this.pageId)

})

.translate({x: 0, y: this.y})

.backgroundColor(Color.Yellow)

}

}
场景三:使用Navigation实现一镜到底的动画效果。
方案
配置完自定义的转场动画,然后将name指定的NavDestination页面信息入栈,同时传参给对应页面,在跳转的页面使用onReady事件接收参数
核心代码
// PageLookTakeWaterFlow.ets

.onClick(()=>{

this.currentIndex = index

const itemPX:number = this.scroller.getItemRect(index).x

const itemPY:number = this.scroller.getItemRect(index).y

this.lineNum = -1

CustomTransition.getInstance().registerNavParam(this.pageId, (isPush: boolean, isExit: boolean)=>{

this.itemRealW = isExit ? '100%' : isPush ? '100%' : this.screenW

this.itemRealH = isExit ? '' : isPush ? '' : this.screenH

this.itemOffsetX = isExit ? 0 : isPush ? 0 : -itemPX

this.itemOffsetY = isExit ? 0 : isPush ? 0 : -itemPY

// this.lineNum = isExit ? 2 : isPush ? 2 : -1

}, (isPush: boolean, isExit: boolean)=>{

this.itemRealW = isExit ? isPush ? this.screenW : this.screenW : '100%'

this.itemRealH = isExit ? isPush ? this.screenH : this.screenH : ''

this.itemOffsetX = isExit ? isPush ? -itemPX : -itemPX : 0

this.itemOffsetY = isExit ? isPush ? -itemPY : -itemPY : 0

// this.lineNum = isExit ? isPush ? -1 : -1 : 2

}, (isPush: boolean, isExit: boolean) => {

this.itemRealW = '100%'

this.itemRealH = ''

this.itemOffsetX = 0

this.itemOffsetY = 0

this.lineNum = 2

}, 2000)

let temp = new itemData(this.title,this.content,index)

this.pageInfos.pushPathByName('pageLookTakeDetail', temp)

console.log('is click')

})

// PageLookTakeDetail.ets

import { CustomTransition, itemData } from './CustomNavigationUtils'

@Component

export struct PageLookTakeDetailTemp {

@Consume('pageInfos') pageInfos: NavPathStack

@State opacityNum: number = 1

pageId: number = 0;

@State title: string = ''

@State content: string = ''

@State itemIndex: number = 0

aboutToAppear() {

this.pageId = this.pageInfos.getAllPathName().length - 1;

console.log('this.pageInfos.getAllPathName()', JSON.stringify(this.pageInfos.getAllPathName()))

CustomTransition.getInstance().registerNavParam(this.pageId, (isPush: boolean, isExit: boolean) => {

console.log("current page is pageOne")

this.opacityNum = isExit ? 1 : isPush ? 0 : 1;

}, (isPush: boolean, isExit: boolean) => {

this.opacityNum = isExit ? isPush ? 0 : 0 : 0;

}, (isPush: boolean, isExit: boolean) => {

this.opacityNum = 1

}, 2000)

}

build() {

NavDestination() {

Scroll() {

Column({ space: 10 }) {

Image($r('app.media.food'))

.width('100%')

Text(this.title + this.itemIndex)

.fontSize(20)

Text(this.content)

// .maxLines(2)

// .textOverflow({overflow:TextOverflow.Ellipsis})

}

}

}

.title('动画2')

.hideTitleBar(true)

.onBackPressed(() => {

const popDestinationInfo = this.pageInfos.pop() // 弹出路由栈栈顶元素

console.log('pop' + '返回值' + JSON.stringify(popDestinationInfo))

return true

})

.onDisAppear(() => {

CustomTransition.getInstance().unRegisterNavParam(this.pageId)

})

.opacity(this.opacityNum)

.onReady((ctx: NavDestinationContext) => {

// 在NavDestination中能够拿到传来的NavPathInfo和当前所处的NavPathStack

try {

this.title = (ctx?.pathInfo?.param as itemData)?.title

this.content = (ctx?.pathInfo?.param as itemData)?.content;

this.itemIndex = (ctx?.pathInfo?.param as itemData)?.itemIndex;

} catch (e) {

console.log(`testTag onReady catch exception: ${JSON.stringify(e)}`)

}

})

}

}
场景四:使用关键帧动画实现骨架屏效果。
效果图
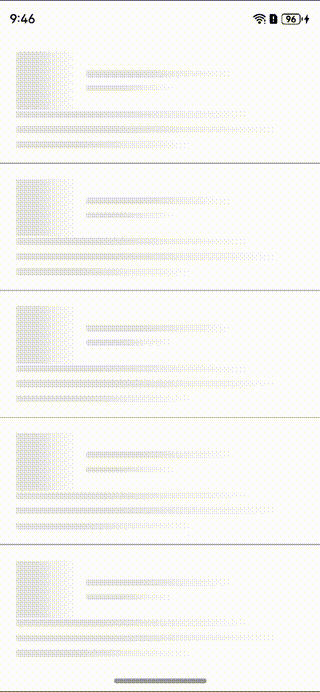
方案
通过Stack嵌套双层Column,然后获取UIContext实例,使用.keyframeAnimateTo控制上层Column的translate的x偏移实现骨架屏效果
核心代码
@Builder columnShow(width: string, height:string, aspectRatioNum?:number){

Stack(){

Column()

.linearGradient({

angle: 90,

colors: [["f2f2f2", 0.25], ["#e6e6e6", 0.37], ["#f2f2f2", 0.63]],

})

.height('100%')

.width('100%')

Column()

.height('100%')

.width('100%')

.translate({ x: this.translateValue })

.linearGradient({

angle: 90,

colors: [

['rgba(255,255,255,0)', 0],

['rgba(255,255,255,1)', 0.5],

['rgba(255,255,255,0)', 1]

]

})

}

.width(width)

.height(height)

.borderRadius(2)

.aspectRatio(aspectRatioNum)

.clip(true)

}

......

.onAppear(() => {

// this.translateValue = '100%'

this.uiContext?.keyframeAnimateTo({

iterations: -1,

}, [

{

duration: 500,

curve: Curve.Linear,

event: () => {

this.translateValue = '0'

}

},

{

duration: 500,

curve: Curve.Linear,

event: () => {

this.translateValue = '100%'

}

},

]);

})
总是有很多小伙伴反馈说:鸿蒙开发不知道学习哪些技术?不知道需要重点掌握哪些鸿蒙开发知识点? 为了解决大家这些学习烦恼。在这准备了一份很实用的鸿蒙全栈开发学习路线与学习文档给大家用来跟着学习。
针对一些列因素,整理了一套纯血版鸿蒙(HarmonyOS Next)全栈开发技术的学习路线,包含了鸿蒙开发必掌握的核心知识要点,内容有(OpenHarmony多媒体技术、Napi组件、OpenHarmony内核、OpenHarmony驱动开发、系统定制移植……等)技术知识点。

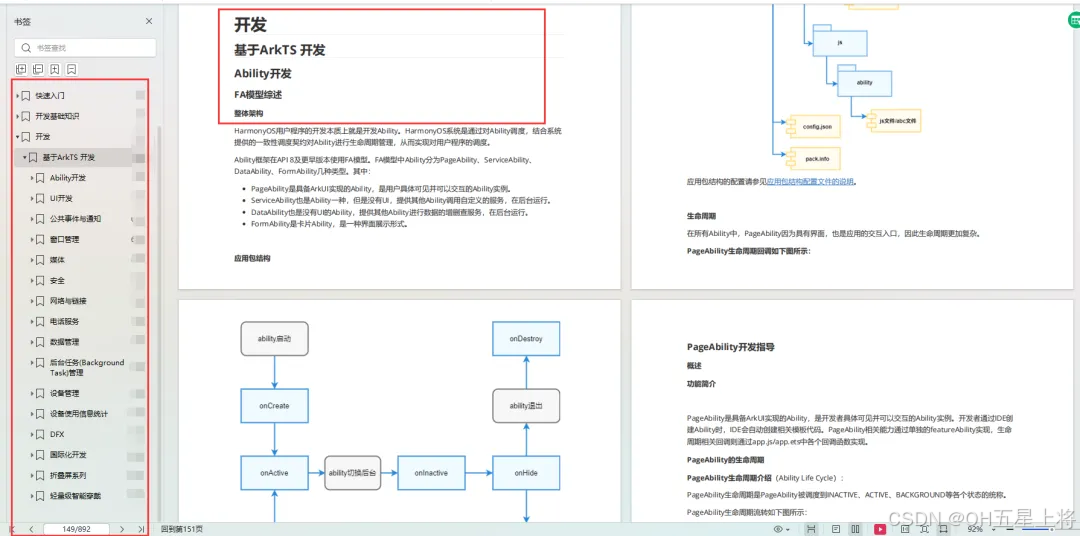
《鸿蒙 (Harmony OS)开发学习手册》(共计892页):https://gitcode.com/HarmonyOS_MN/733GH/overview
如何快速入门?
1.基本概念
2.构建第一个ArkTS应用
3.……
开发基础知识:
1.应用基础知识
2.配置文件
3.应用数据管理
4.应用安全管理
5.应用隐私保护
6.三方应用调用管控机制
7.资源分类与访问
8.学习ArkTS语言
9.……
基于ArkTS 开发
1.Ability开发
2.UI开发
3.公共事件与通知
4.窗口管理
5.媒体
6.安全
7.网络与链接
8.电话服务
9.数据管理
10.后台任务(Background Task)管理
11.设备管理
12.设备使用信息统计
13.DFX
14.国际化开发
15.折叠屏系列
16.……
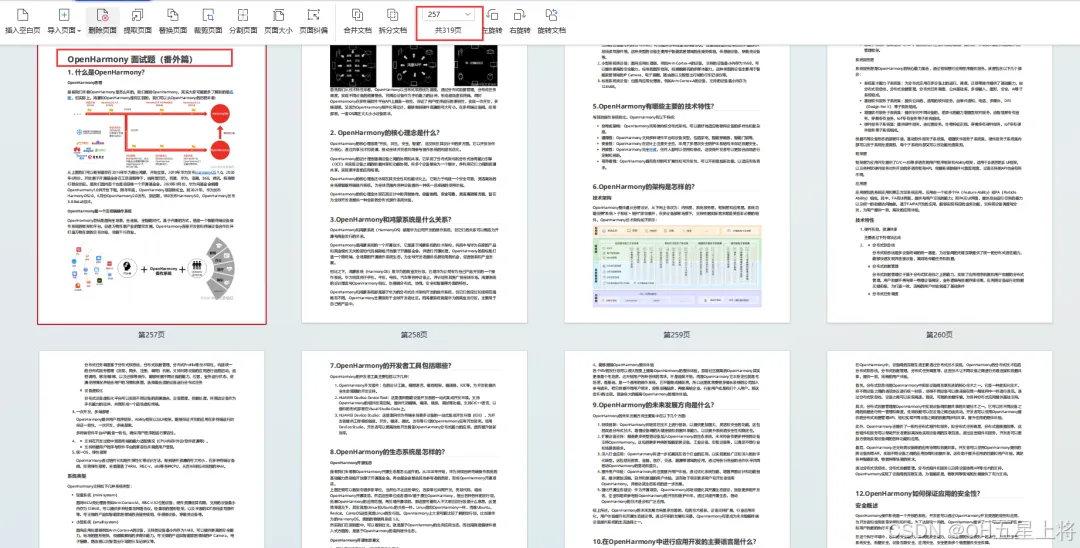
鸿蒙开发面试真题(含参考答案):https://gitcode.com/HarmonyOS_MN/733GH/overview
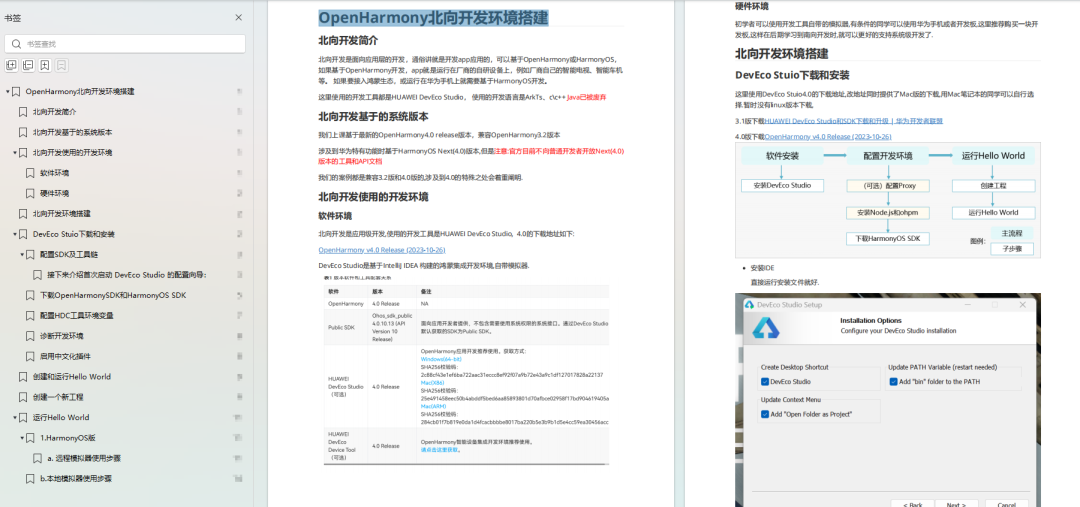
OpenHarmony 开发环境搭建
《OpenHarmony源码解析》:https://gitcode.com/HarmonyOS_MN/733GH/overview
- 搭建开发环境
- Windows 开发环境的搭建
- Ubuntu 开发环境搭建
- Linux 与 Windows 之间的文件共享
- ……
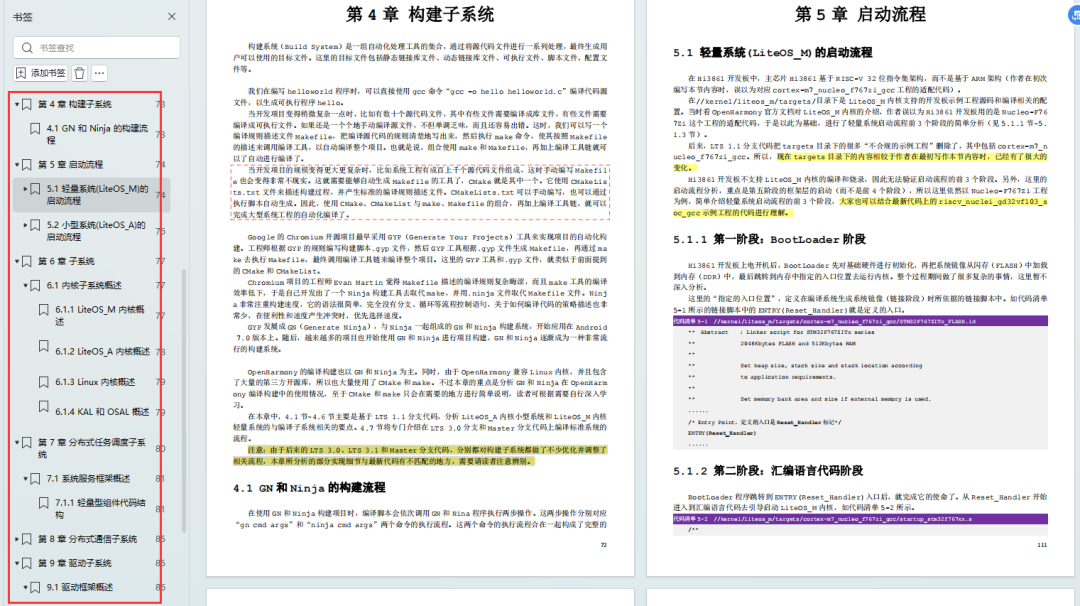
- 系统架构分析
- 构建子系统
- 启动流程
- 子系统
- 分布式任务调度子系统
- 分布式通信子系统
- 驱动子系统
- ……
OpenHarmony 设备开发学习手册:https://gitcode.com/HarmonyOS_MN/733GH/overview


 84
84

 被折叠的 条评论
为什么被折叠?
被折叠的 条评论
为什么被折叠?
 到【灌水乐园】发言


