


常规、Bean、Array、List等注入方式
一、先定义两个实体类
1、User类
下面的实体类上的注解,是我首先在pom文件中引入了Lombok依赖,关于这个依赖的使用,看可以参考我在注解专栏中的文章
@Data
@AllArgsConstructor
@NoArgsConstructor
public class User {
    private  String name;
    private Address address;
    private String[] books;
    private List<String> hobbies;
    private Map<String,Object> cards;
    private Set<String> wife;
    private String food;
    private Properties info;

}
2、Address类
@Data
@AllArgsConstructor
@NoArgsConstructor
public class Address {
    private String address;

}
二、编写xml配置文件
常见的依赖注入都在下面的配置文件中,请耐心学习!
<?xml version="1.0" encoding="UTF-8"?>
<beans xmlns="http://www.springframework.org/schema/beans"
xmlns:xsi="http://www.w3.org/2001/XMLSchema-instance"
xsi:schemaLocation="http://www.springframework.org/schema/beans
https://www.springframework.org/schema/beans/spring-beans.xsd">
<bean id="address" class="com.guohui.pojo.Address">
<property name="address" value="北京王府井"/>
</bean>
<bean id="user" class="com.guohui.pojo.User">
<!-- 普通注入 value-->
<property name="name" value="王五"/>
<!-- Bean注入 ref-->
<property name="address" ref="address"/>
<!-- 数组注入 array-->
<property name="books">
<array>
<value>人生海海</value>
<value>命运</value>
<value>月亮与六便士</value>
<value>老人和海</value>
</array>
</property>
<!-- 集合注入 list-->
<property name="hobbies">
<list>
<value>听歌</value>
<value>看书</value>
<value>学习</value>
</list>
</property>
<!-- Map注入 map和entry-->
<property name="cards">
<map>
<entry key="身份证" value="123"/>
<entry key="军官证" value="2213"/>
</map>
</property>
<!-- set注入,value,空注入直接给一个空字符串即可-->
<property name="wife">
<set>
<value>刘诗诗</value>
<value>Q</value>
</set>
</property>
<!-- NULL注入-->
<property name="food">
<null/>
</property>
<!-- Properties注入-->
<property name="info">
<props>
<prop key="学号">123123</prop>
<prop key="姓名">王九</prop>
</props>
</property>
</bean>
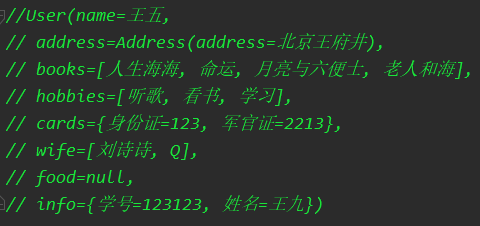
</beans>三、控制台打印结果
C和P标签注入
这种标签注入的方式,现在用的比较少,但是不能排除你将来接触的项目比较老,里面还是用的标签注入,那么还是很有必要了解下
想要用这两个标签进行注入,首先先分别引入两条约束
P标签的:
xmlns:p="http://www.springframework.org/schema/p"
C标签的:
xmlns:c="http://www.springframework.org/schema/c"
实现方式:
一、P标签
1、配置文件
<?xml version="1.0" encoding="UTF-8"?>
<beans xmlns="http://www.springframework.org/schema/beans"
       xmlns:xsi="http://www.w3.org/2001/XMLSchema-instance"
       xmlns:p="http://www.springframework.org/schema/p"
       xsi:schemaLocation="http://www.springframework.org/schema/beans
        https://www.springframework.org/schema/beans/spring-beans.xsd">
<!--    引入了P标签的约束后,P标签就相当与Properties标签-->
    <bean id="student" class="com.guohui.pojo.Student" p:name="张三" p:address="北京"/>

    </beans>
2、控制台

二、C标签
1、配置文件
<?xml version="1.0" encoding="UTF-8"?>
<beans xmlns="http://www.springframework.org/schema/beans"
       xmlns:xsi="http://www.w3.org/2001/XMLSchema-instance"
       xmlns:p="http://www.springframework.org/schema/p"
       xmlns:c="http://www.springframework.org/schema/c"
       xsi:schemaLocation="http://www.springframework.org/schema/beans
        https://www.springframework.org/schema/beans/spring-beans.xsd">
    <!--    引入了P标签的约束后,P标签就相当与Properties标签-->
<!--    <bean id="student" class="com.guohui.pojo.Student" p:name="张三" p:address="北京"/>-->

<!--    C标签就相当与有参构造器注入的方式-->
  <bean id="student" class="com.guohui.pojo.Student" c:name="李四" c:address="河北"/>

</beans>
2、控制台

注意:想要使用P和C两个标签,首先必须在配置文件上导入约束!!!
至此,关于Spring的依赖注入就讲解完毕,后续会持续更新,欢迎交流和指正!


 被折叠的 条评论
为什么被折叠?
被折叠的 条评论
为什么被折叠?
 到【灌水乐园】发言


