


 本文详细介绍了Vue3.0中的组件创建、props传递、插槽使用(包括具名插槽和作用域插槽)以及过渡动画的实现,包括内置组件`transition`的用法和自定义动画。此外,还提到了Vue CLI(脚手架)在项目初始化中的作用。
组件components
全局组件
app.component 来创建组件:
const app = Vue.createApp({
})
app.component("btn",{
template:`<button @click="n++">{{n}}</button>`,
data(){return {n:1}}
})
app.mount("#app")
局部组件
const step = {
template:`<div><button @click="n--">-</button>{{n}}<button @click="n++">+</button></div>`,
data(){return {n:1}}
}
const app = Vue.createApp({
components:{step}
})
<step></step>
<step></step>
我们来讲个最简单的 父亲,儿子 ,孙子的 例子
要注意以下几点:
1.先实例化对象vm
2.造出parent模板,并挂载在 vm的 conponents 下
3.造出 son 模板 并 挂载 在 父级 parent 的conponents下,并在 父级template属性中 包裹住自己的 模板名标签 ;同理 造出孙子标签
4.在HTML节点中添加 目标 根节点
(节点的顺序一定要书写正确)
<div id="app">
<parent></parent>
</div>
//创建 孙子 模板
let grendson = {
template:"<div>孙子</div>"
}
//创建 儿子 模板
let son= {
template:"<son>儿子<grendson >孙子</grendson ></son>"
components:{
grendson
}
}
//创建 父亲 模板
let parent = {
template:"<div>父亲<son></son></div>"
components:{
son
}
}
//实例化vm对象
let vm = new Vue({
el:"#app",
data:{
},
components:{
parent
}
});
props传递参数
<step :num="10"></step>
<step :num="5"></step>
props:{
"num":{type:Number,default:1}
},
data(){return {n:this.num}}
对象与数组的默认值必须是函数的返回值
组件的插槽(嵌套)
和 HTML 元素一样,我们经常需要向一个组件传递内容
我们使用 <slot> 作为我们想要插入内容的占位符
<step>
你好,我是嵌套内容
</step>
template:`<div><h1>组件的标题</h1><slot></slot></div>`
具名插槽
<step>
<template v-slot:pre>
<span slot="pre">¥</span>
</template>
<template v-slot:next>
<span slot="next">元</span>
</template>
</step>
const step = {
template:`<div><slot name="pre"></slot>100<slot name="next"></slot></div>`,
}
作用域插槽
有时让插槽内容能够访问子组件中才有的数据是很有用的。
当一个组件被用来渲染一个项目数组时,这是一个常见的情况,我们希望能够自定义每个项目的渲染方式。
<step>
<template v-slot:default="scope">
<i class="fas fa-check">{{scope.index}}</i>
<span class="green">{{ scope.item }}</span>
</template>
</step>
const step = {
template: `<ul><li v-for="( item, index ) in list">
<slot :item="item" :index="index"></slot>
</li></ul>`,
data() { return {list: ["vue", 'react', 'angular']}}}
弹框组件

动画transition
Vue 提供了内置的过渡封装组件,该组件用于包裹要实现过渡效果的组件。
组件进入和离开 DOM 的钩子 使用内置的 <transition> 组件
<button @click="flag=!flag">切换</button> <br>
<transition name="fade">
<img src="./images/sun.jpeg" alt="" width="120" v-if="flag">
</transition>
组件和元素切换
1.多元素切换
    <transition mode="out-in" appear>
        <div v-if="show">hello world</div>
        <div v-else="show">bye world</div>
    </transition>
transition标签
v为默认名字,如果transition标签的name为其他,则把v换成name的内容
<style>
        @keyframes snake {
            0%{
                transform: translateX(-100px);
            }
            50%{
                transform: translateX(-50px);
            }
            100%{
                transform: translateX(50px);
            }
        }
        .v-enter-active{
           animation: snake 3s;
        }
        .v-leave-active{
            animation: snake 3s;
        }
        /* v为默认名字,如果transition标签的name为其他,则把v换成name的内容
        .v-enter-from{
            opacity: 0;
        }
        .v-enter-active{
            transition: opacity 3s ease-out;
        }
        .v-enter-to{
            opacity: 1;
        }
        .v-leave-from{
            opacity: 1;
        }
        .v-leave-active{
            transition: opacity 3s ease-in;
        }
        .v-leave-to{
            opacity: 0;
        }  */
    </style>
<script>
    const app = Vue.createApp({
        data(){
            return{
                show:false,
            }
        },
        methods: {
            handleClick(){
                this.show=!this.show;
            }

        },
        template:`
            <div>
                <transition>
                    <div v-if="show">hello world</div>
                </transition>
                <button @click="handleClick">切换</button>
            </div>
        `
    });
    app.component({

    });
   const vm = app.mount("#root");
</script>
<style>
        /* @keyframes snake {
            0%{
                transform: translateX(-100px);
            }
            50%{
                transform: translateX(-50px);
            }
            100%{
                transform: translateX(50px);
            }
        }
        .hello{
           animation: snake 3s;
        }
        .bye{
            animation: snake 3s;
        } */

    </style>

<script>
    //过渡:一个状态转变为另一个状态
    const app = Vue.createApp({
        data(){
            return{
                show:false,
            }
        },
        methods: {
            handleClick(){
                this.show=!this.show;
            }

        },
        template:`
            <div>
                <transition
                enter-active-class="animate__animated animate__bounce"
                leave-active-class="animate__animated animate__bounce"
                >
                    <div v-show="show">hello world</div>
                </transition>
                <button @click="handleClick">切换</button>
            </div>
        `
    });

   const vm = app.mount("#root");
</script>
<!DOCTYPE html>
<html lang="en">
<head>
    <meta charset="UTF-8">
    <meta http-equiv="X-UA-Compatible" content="IE=edge">
    <meta name="viewport" content="width=device-width, initial-scale=1.0">
    <link
    rel="stylesheet"
    href="https://cdnjs.cloudflare.com/ajax/libs/animate.css/4.1.1/animate.min.css"
  />
    <title>动画</title>
    <script src= "https://unpkg.com/vue@next"></script>
    <style>
        @keyframes snake {
            0%{
                transform: translateX(-100px);
            }
            50%{
                transform: translateX(-50px);
            }
            100%{
                transform: translateX(50px);
            }
        }
        .v-enter-active{
           animation: snake 3s;
        }
        .v-leave-active{
            animation: snake 3s;
        }

    </style>
</head>
<body>
    <div id="root"></div>
</body>
<script>
    //过渡:一个状态转变为另一个状态
    const app = Vue.createApp({
        data(){
            return{
                show:false,
            }
        },
        methods: {
            handleClick(){
                this.show=!this.show;
            },
            handleBeforeEnter(el){
                el.style.color="red";
            },
            handleEnterActive(el,done){
                const animation = setInterval(()=>{
                    const color = el.style.color;
                    if(color==='red'){
                        el.style.color='green'
                    }else{
                        el.style.color='red'
                    }
                },1000)
                setTimeout(()=>{
                    clearInterval(animation);
                    done();
                },3000)
            },
            handleEnterEnd(el){
                alert(123);
            }


        },
        template:`
            <div>
                <transition
                :css="false"
                @before-enter="handleBeforeEnter"
                @enter="handleEnterActive"
                @after-enter="handleEnterEnd"
                >
                    <div v-show="show">hello world</div>
                </transition>
                <button @click="handleClick">切换</button>
            </div>
        `
    });
    app.component({

    });
   const vm = app.mount("#root");
</script>
</html>
v-enter-from 进入开始 v-enter-to 进入结束 v-enter-active进入整个状态
v-leave-from 离开开始 v-leave-to 离开结束 v-leave-active离开整个状态
in-out 先进在出,out-in先出在进
动画-使用关键帧动画
@keyframes fadeIn{
from{opacity: 0;}
to{ opacity: 1;}
}
@keyframes fadeOut {
0%{ opacity: 1;}
100%{ opacity: 0;}
}
.fade-enter-active{ animation: fadeIn ease 1s;}
.fade-leave-active{ animation: fadeOut ease 1s;}
动画-引入第三方
animate动画库:https://www.jq22.com/yanshi819
<link rel="stylesheet" href="./css/animate.css">
<transition name="fade" enter-active-class="animated slideInDown" leave-active-class="slideOutDown animated">
<img src="./images/sun.jpeg" alt="" width="120" v-if="flag">
</transition>
总结
父传子 props,子传父$emit, slot插槽 作用域 v-slot:default=”$scope”
transition,transition-group,6个动画类,自定义动画列enter-active-class
<input ref=" inp" > this.$refs.inp
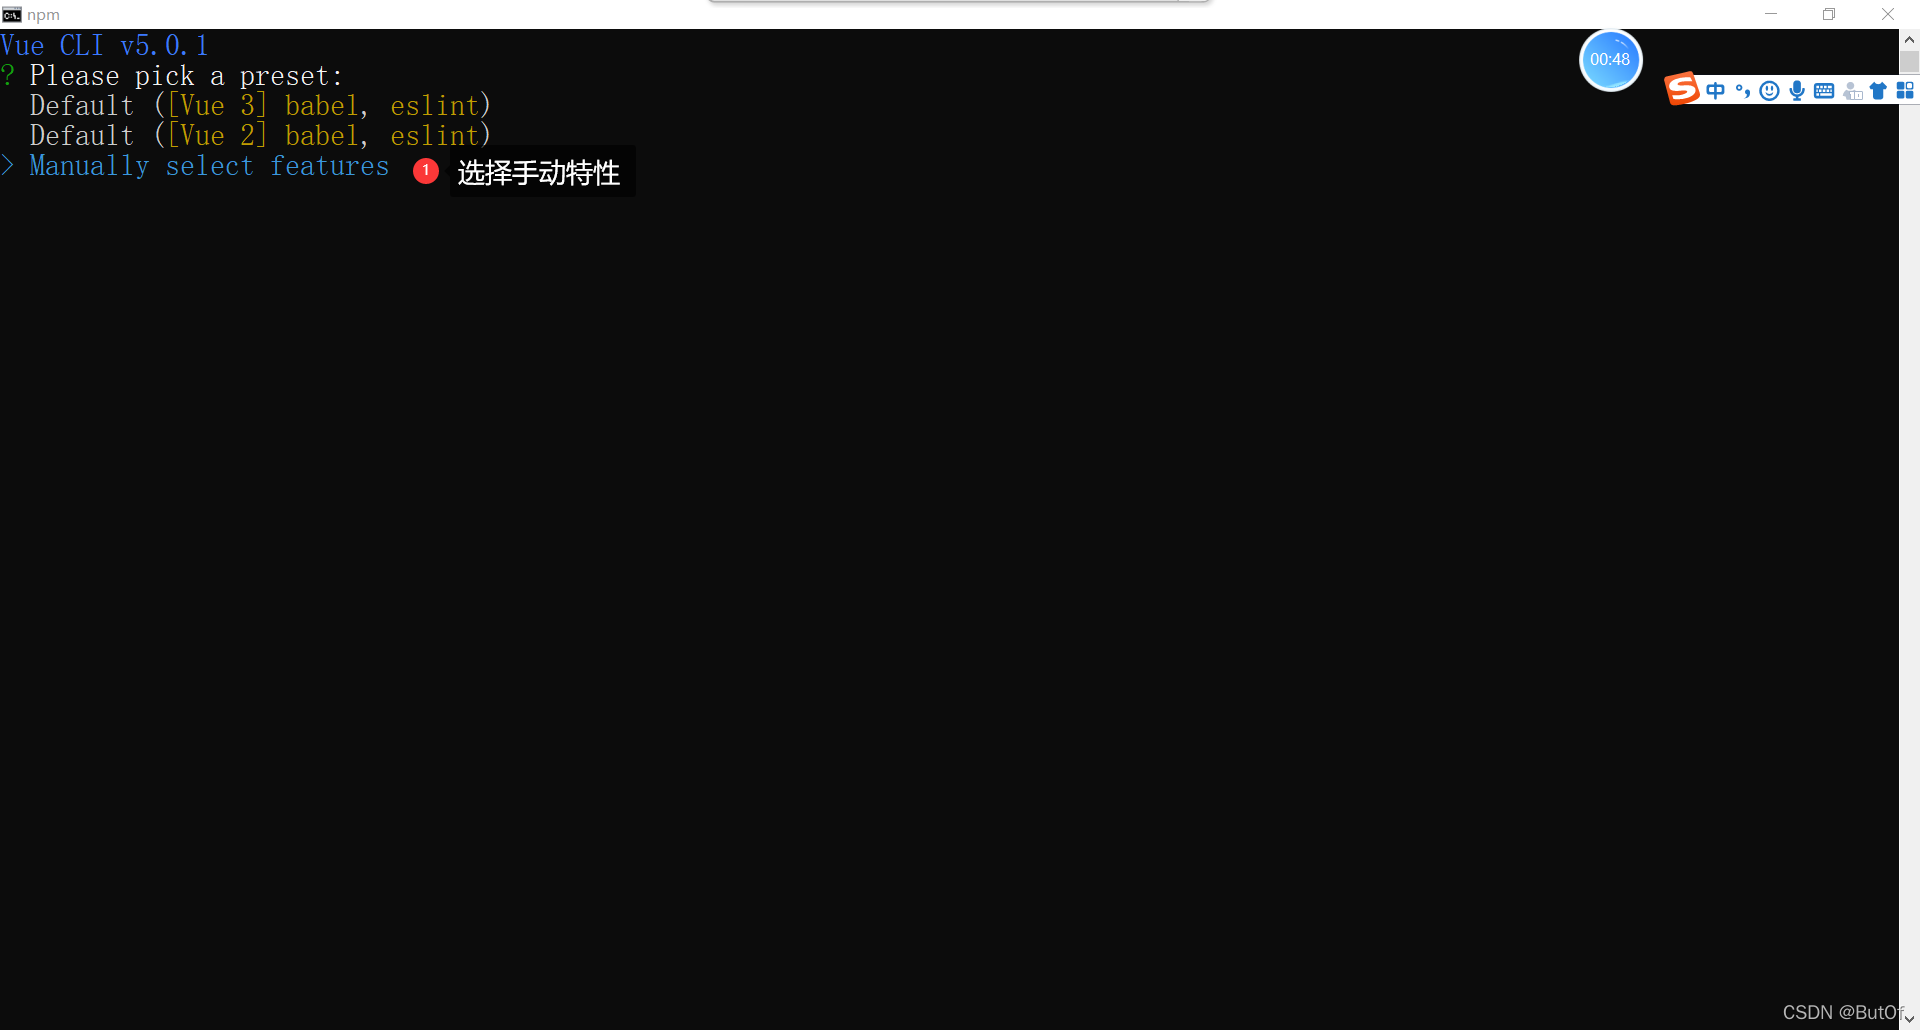
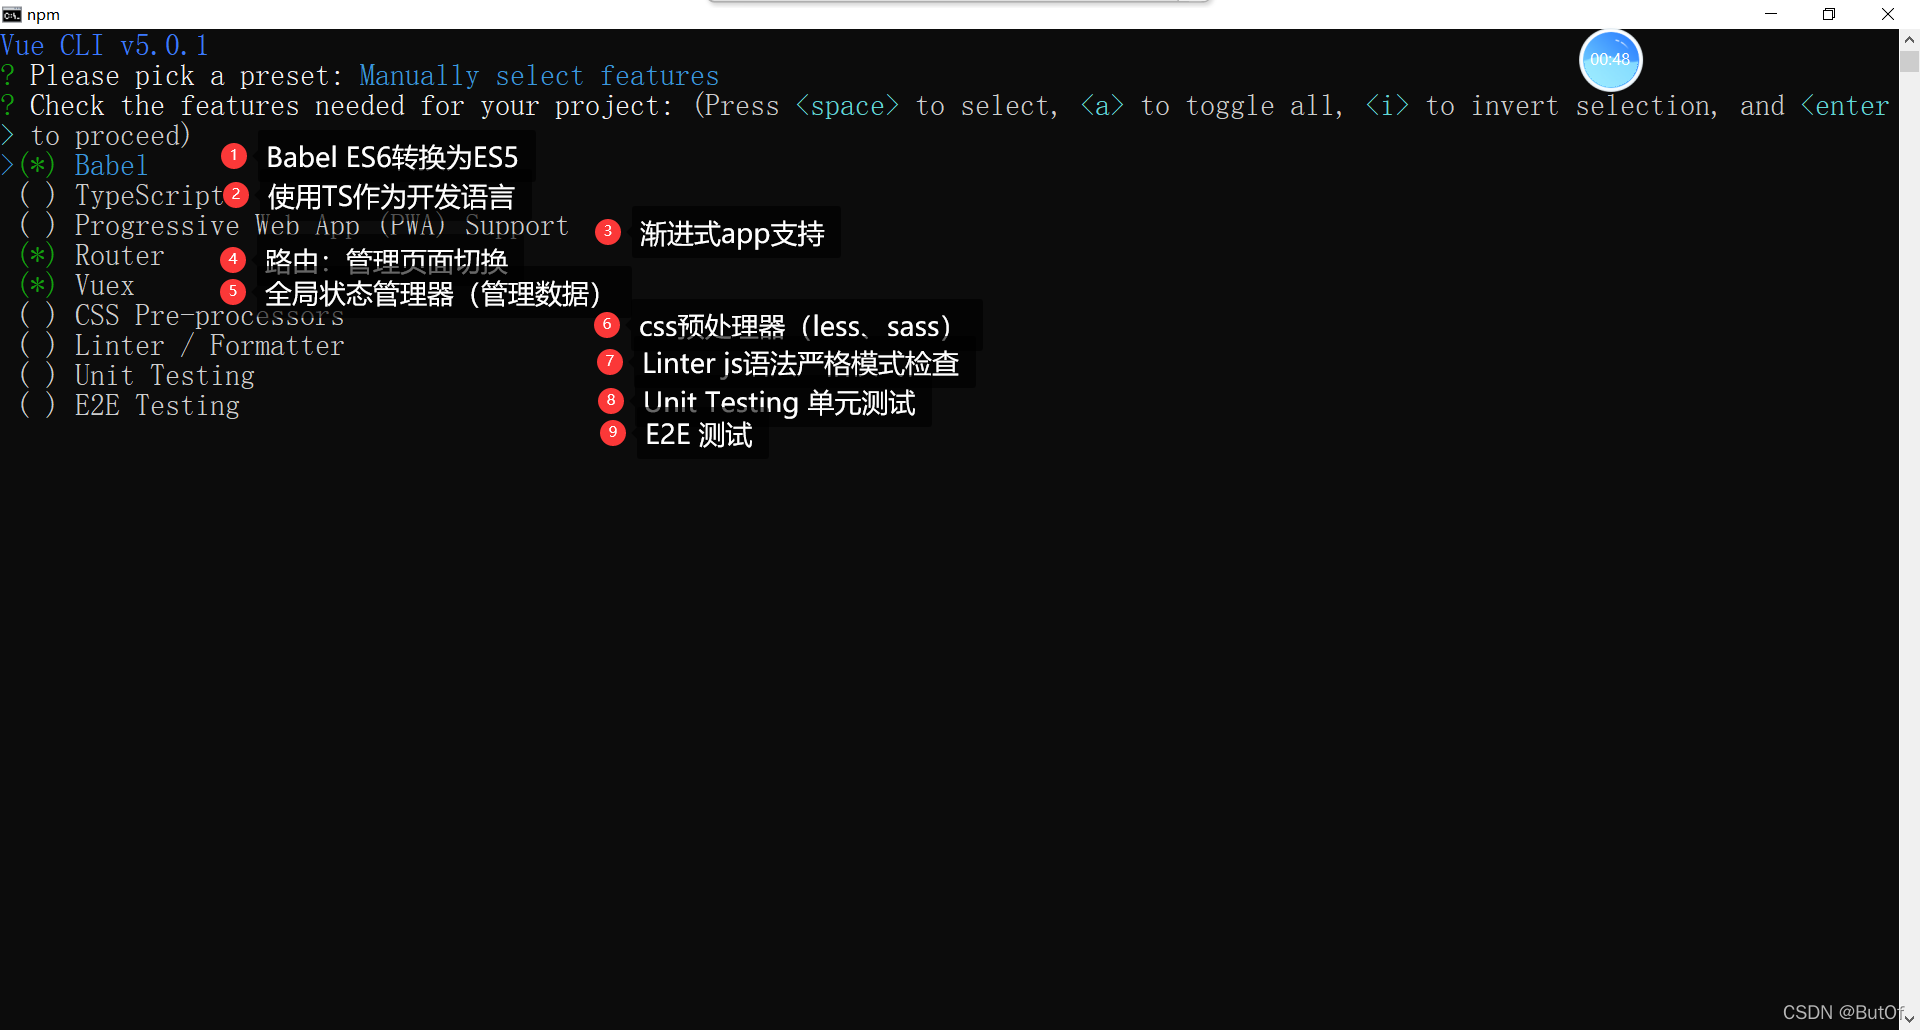
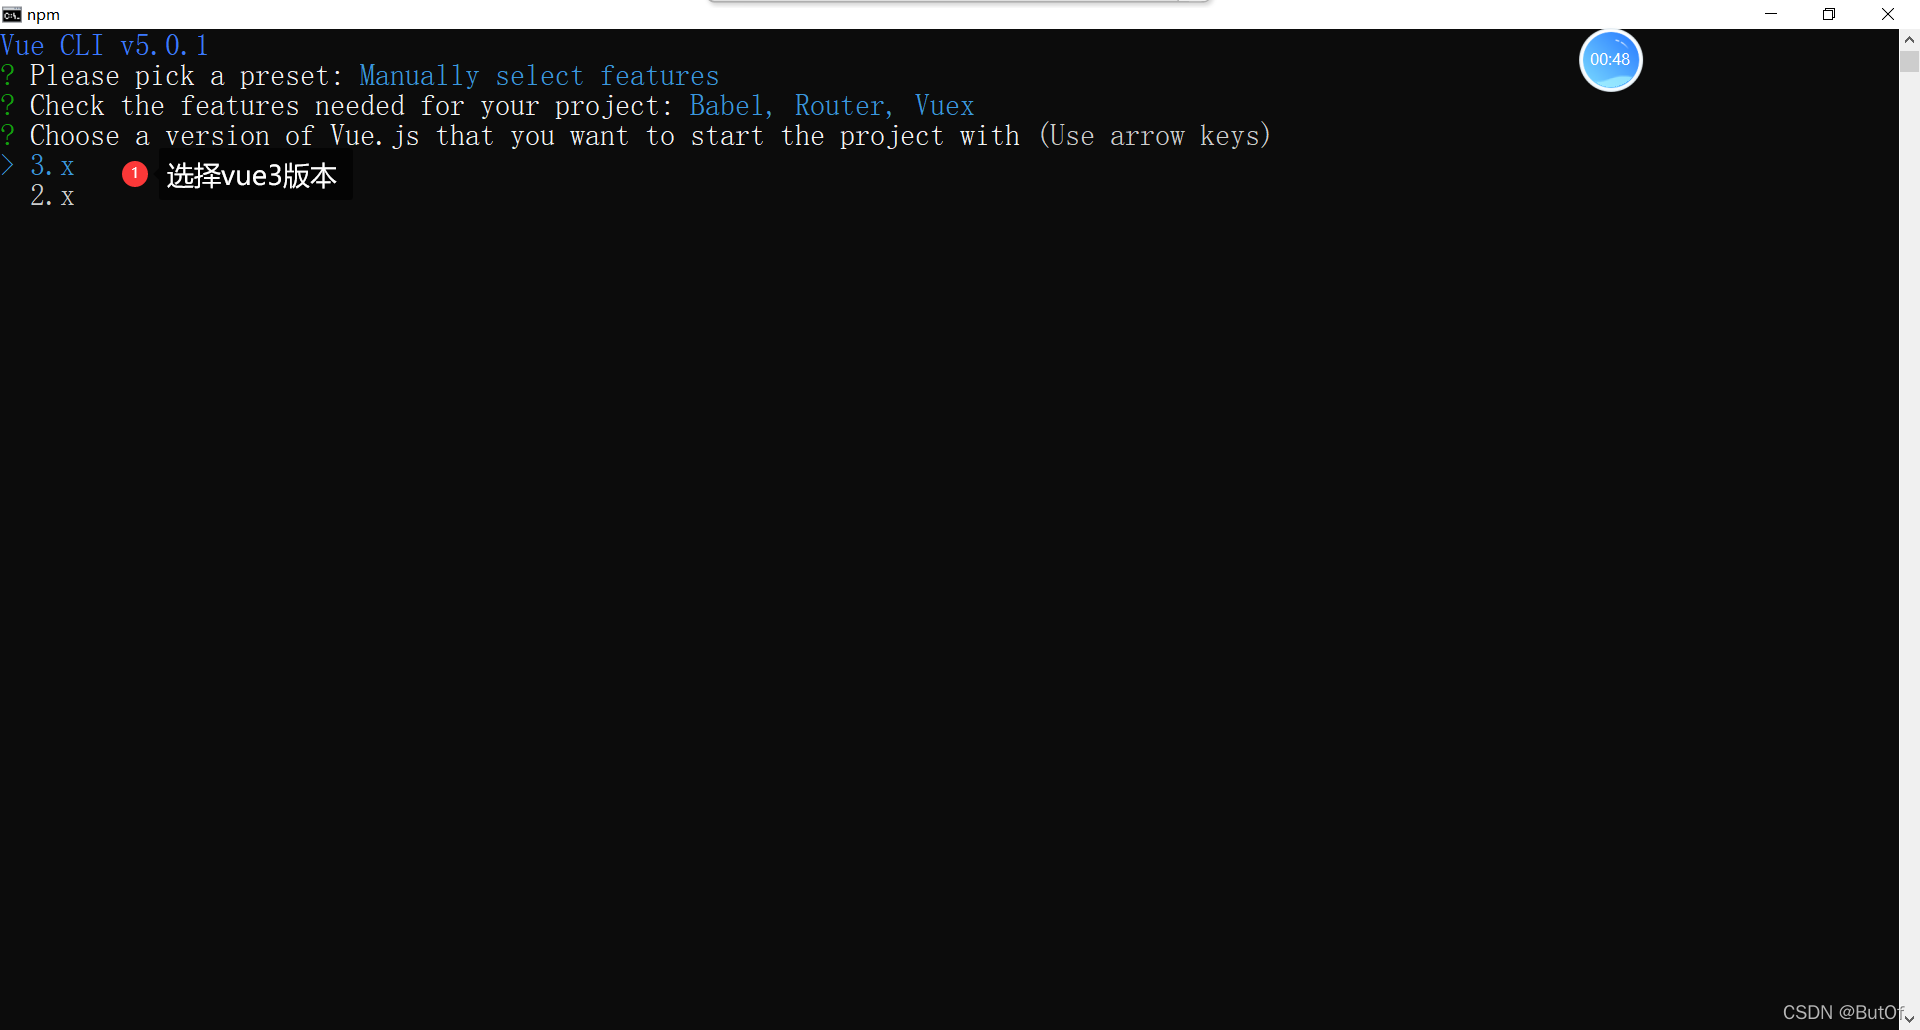
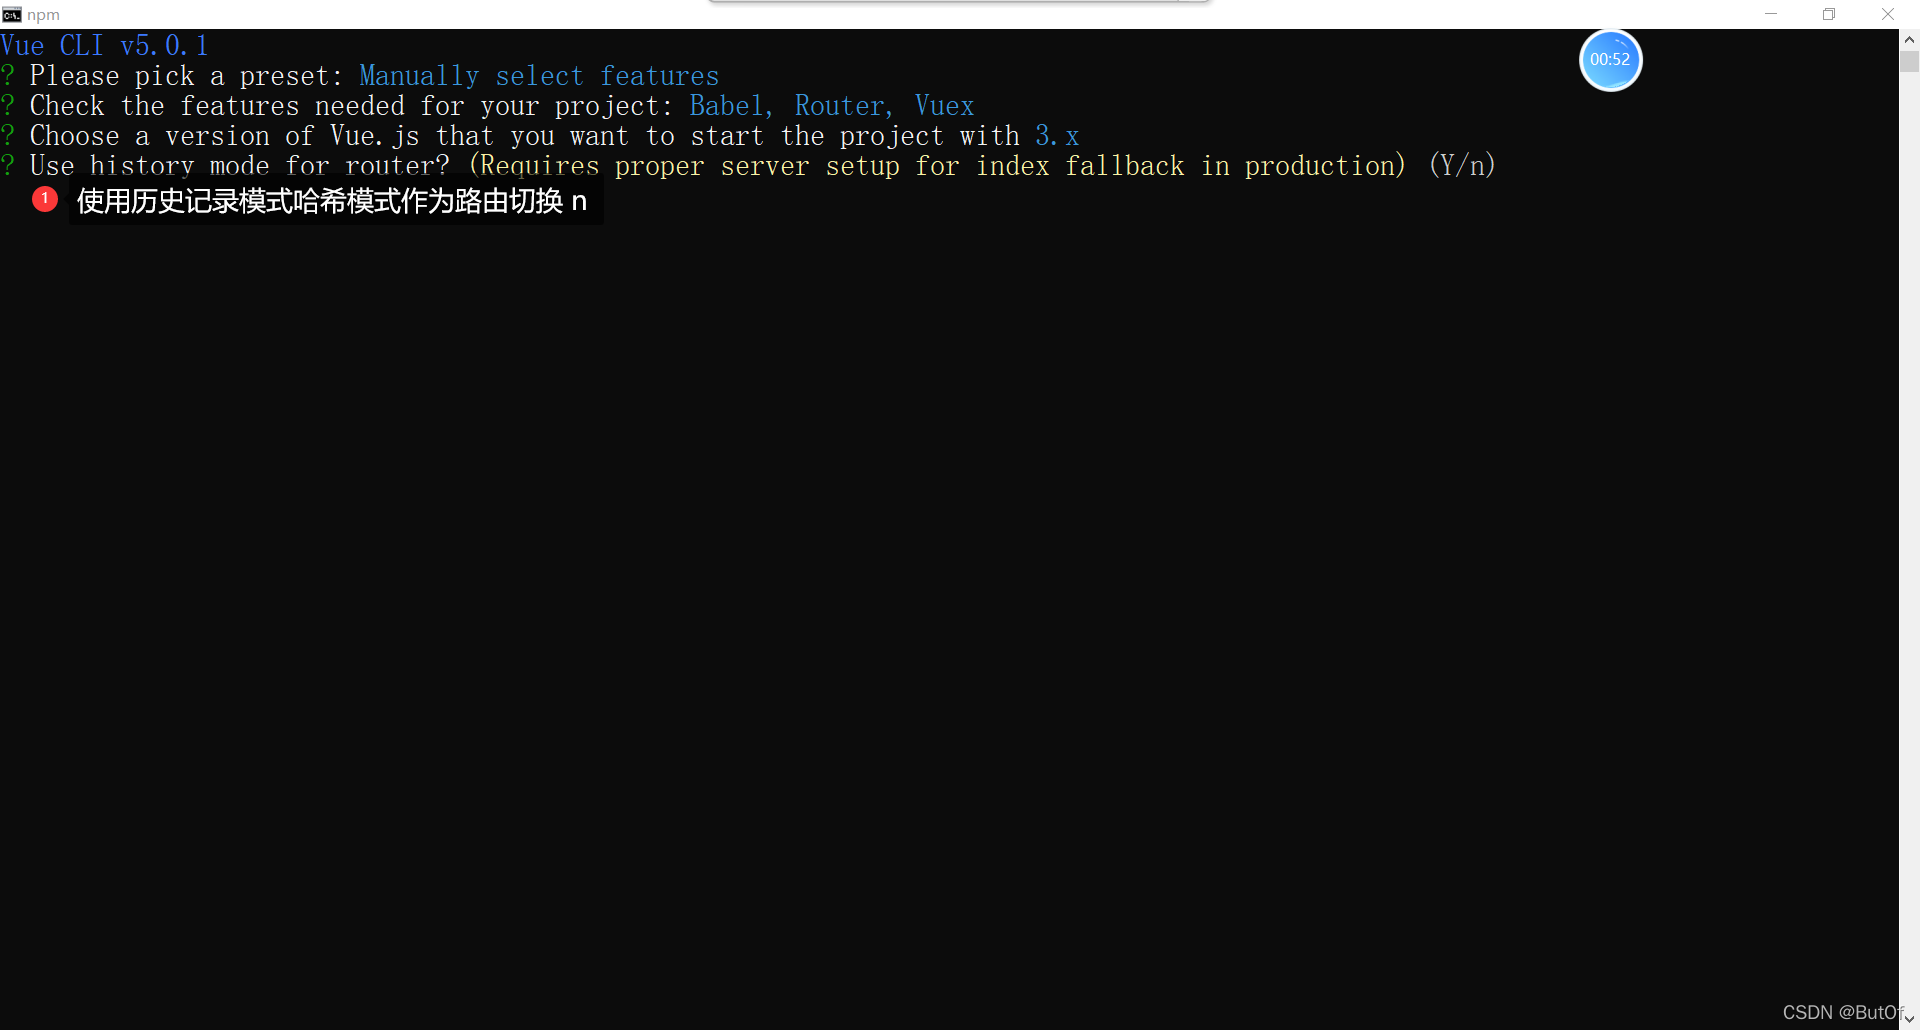
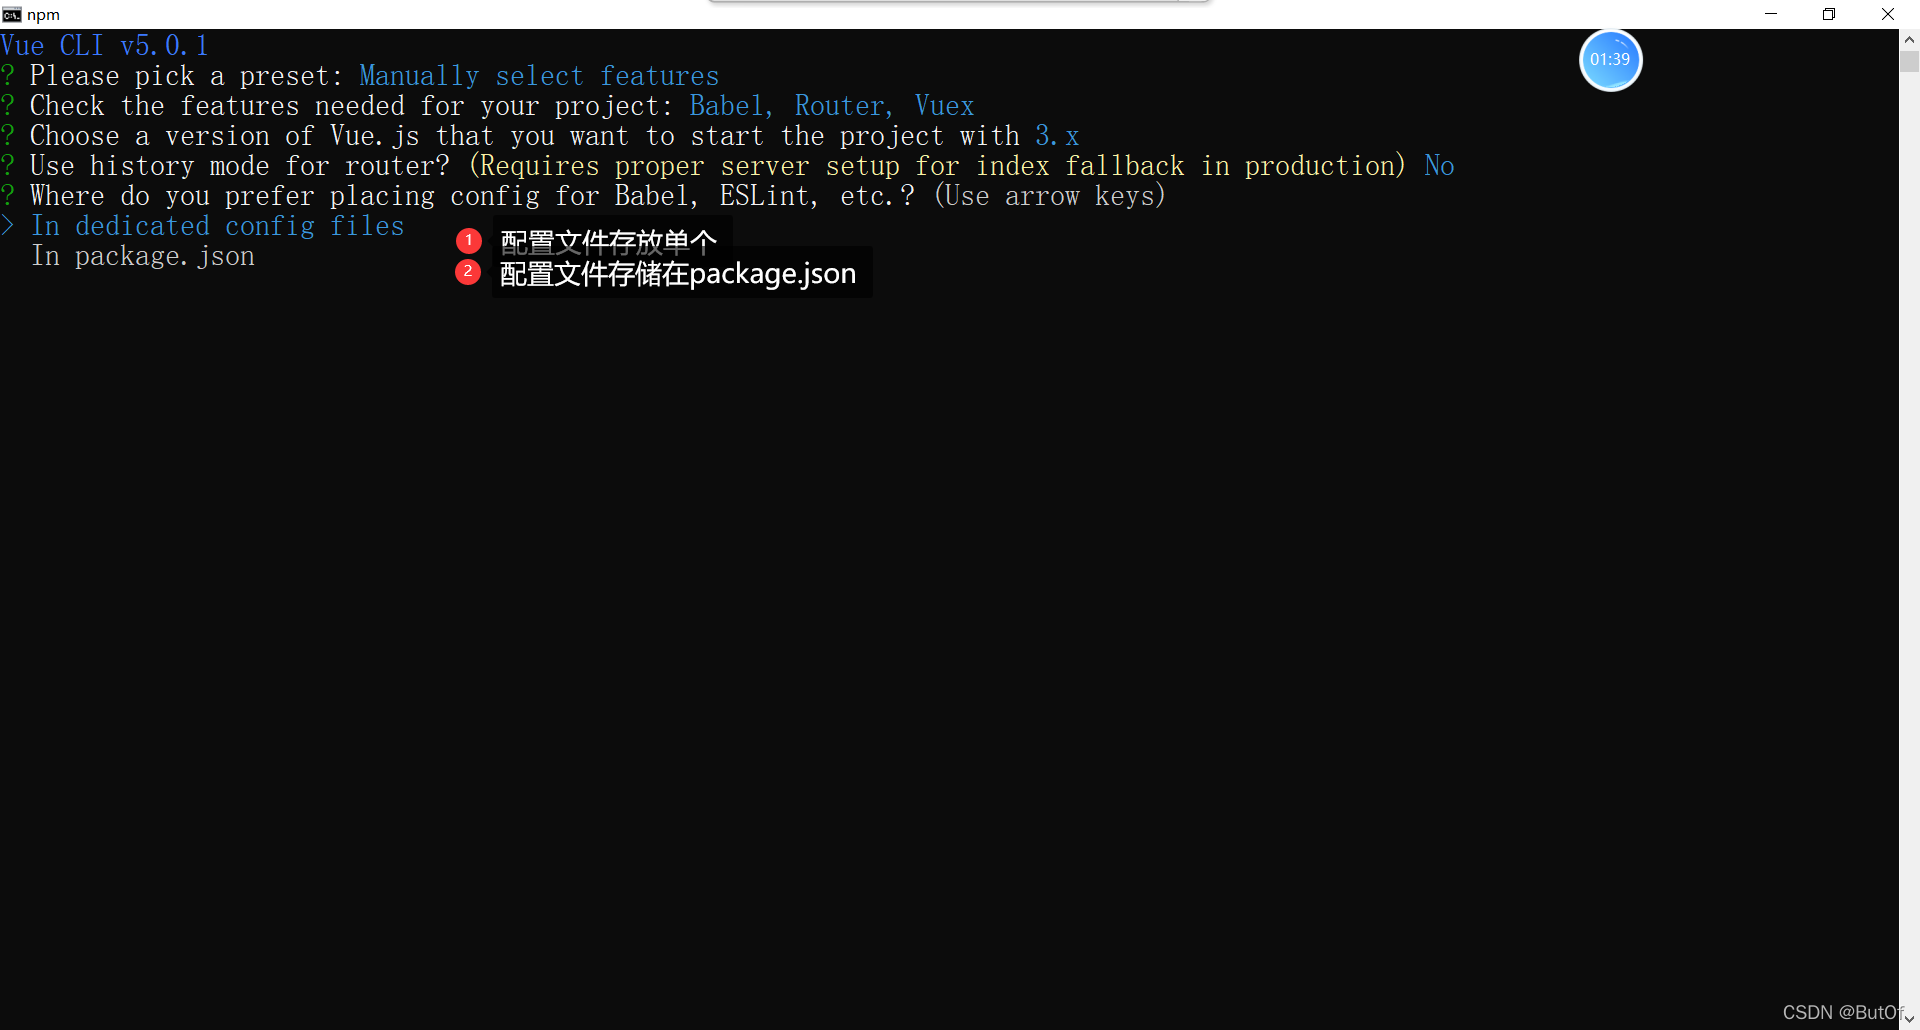
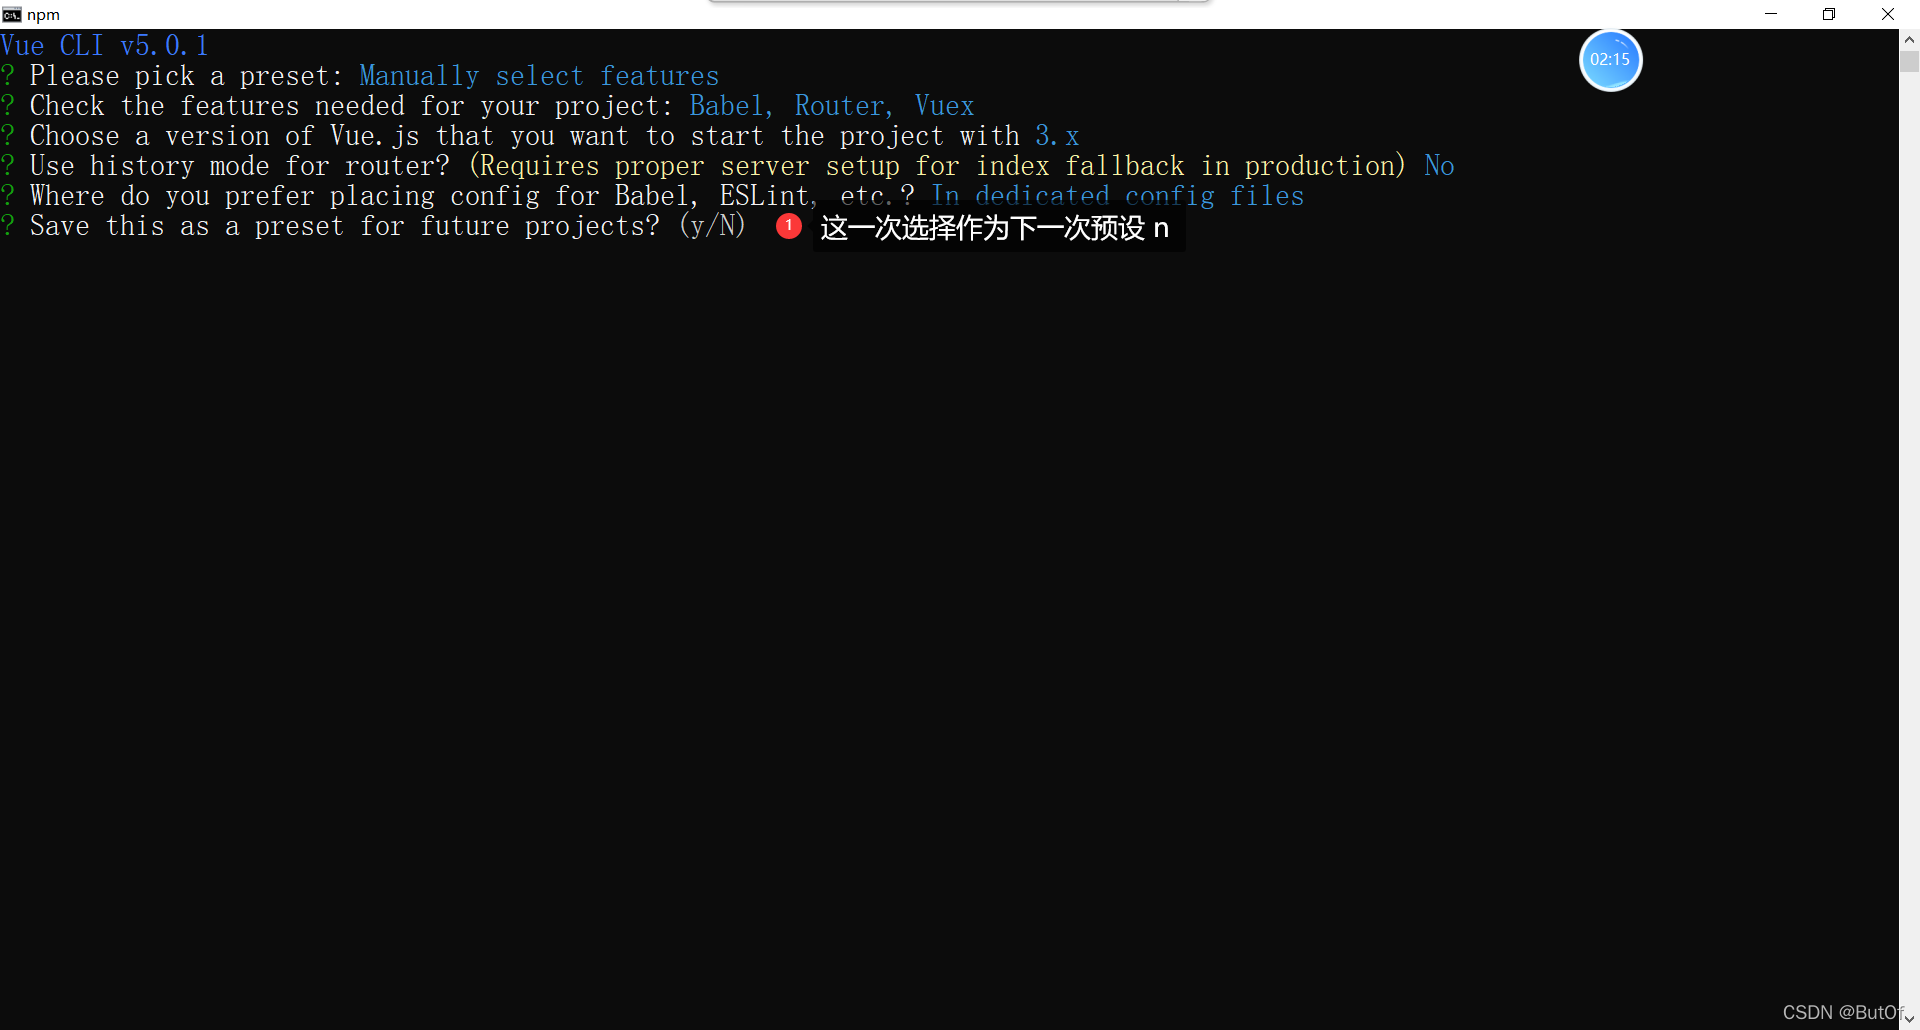
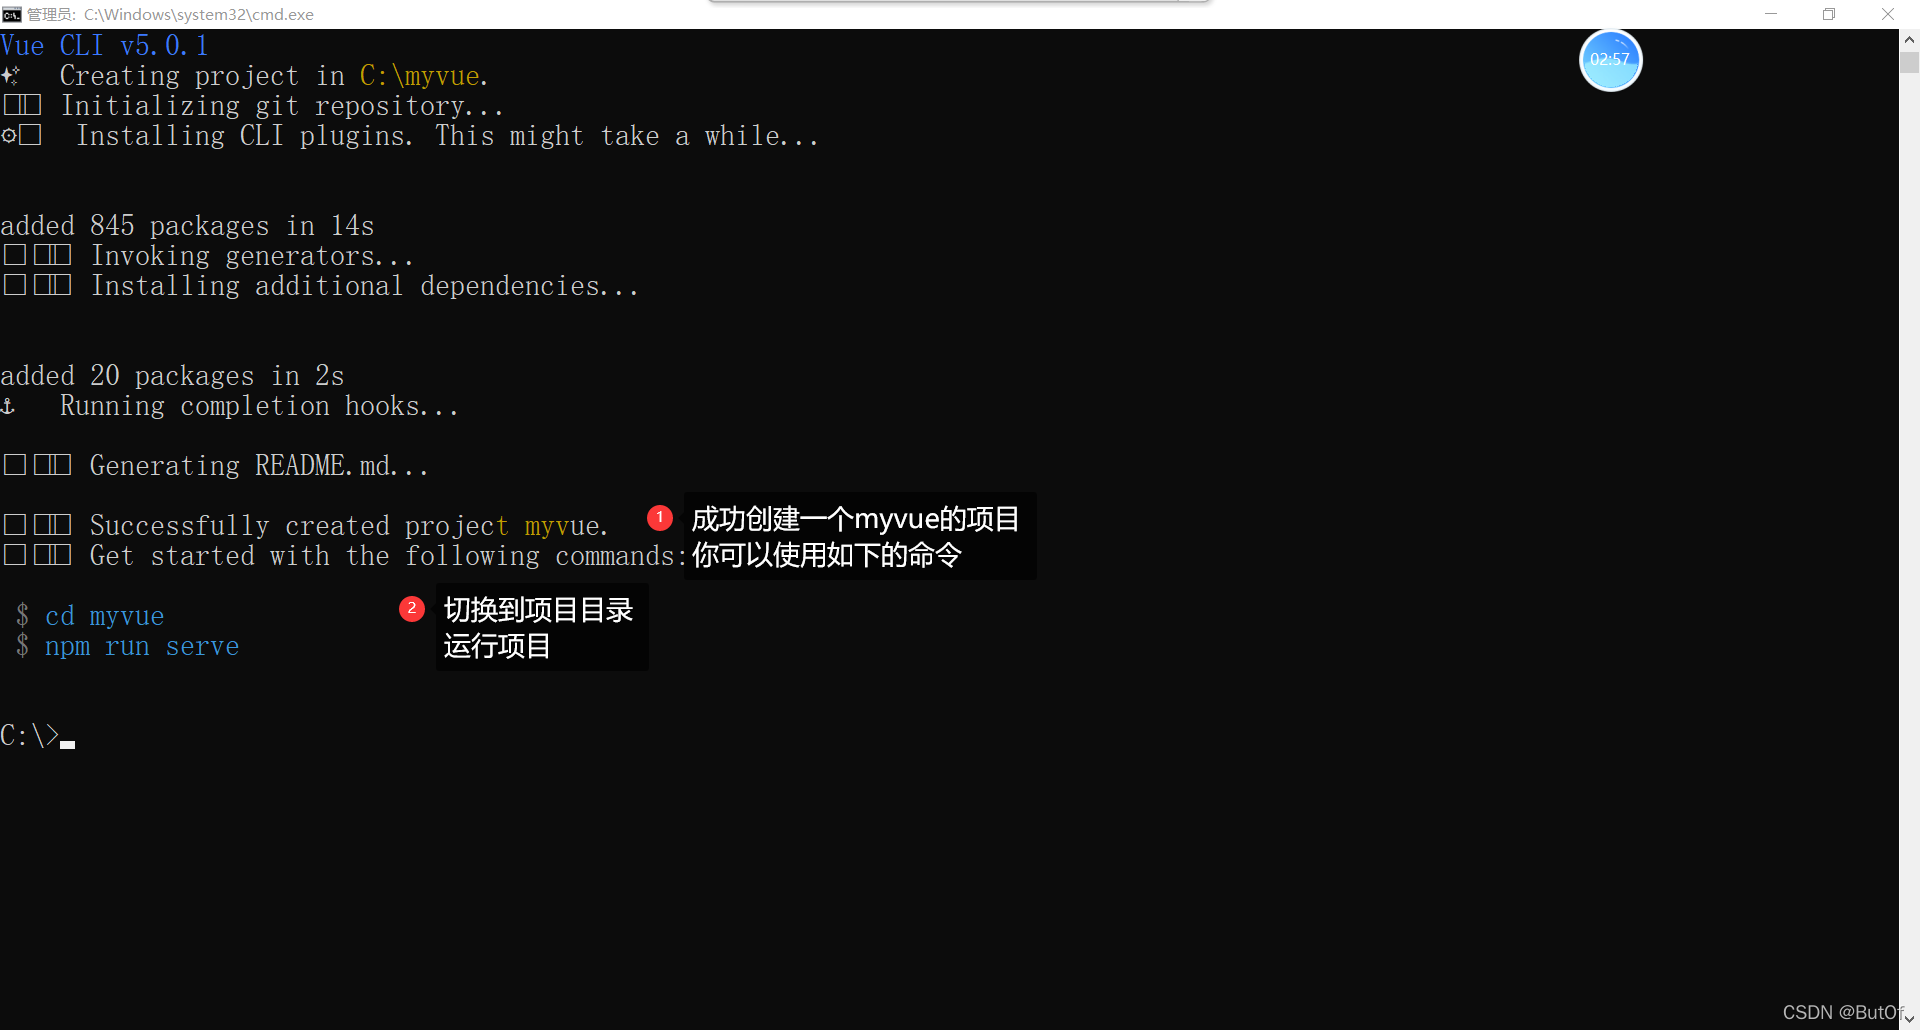
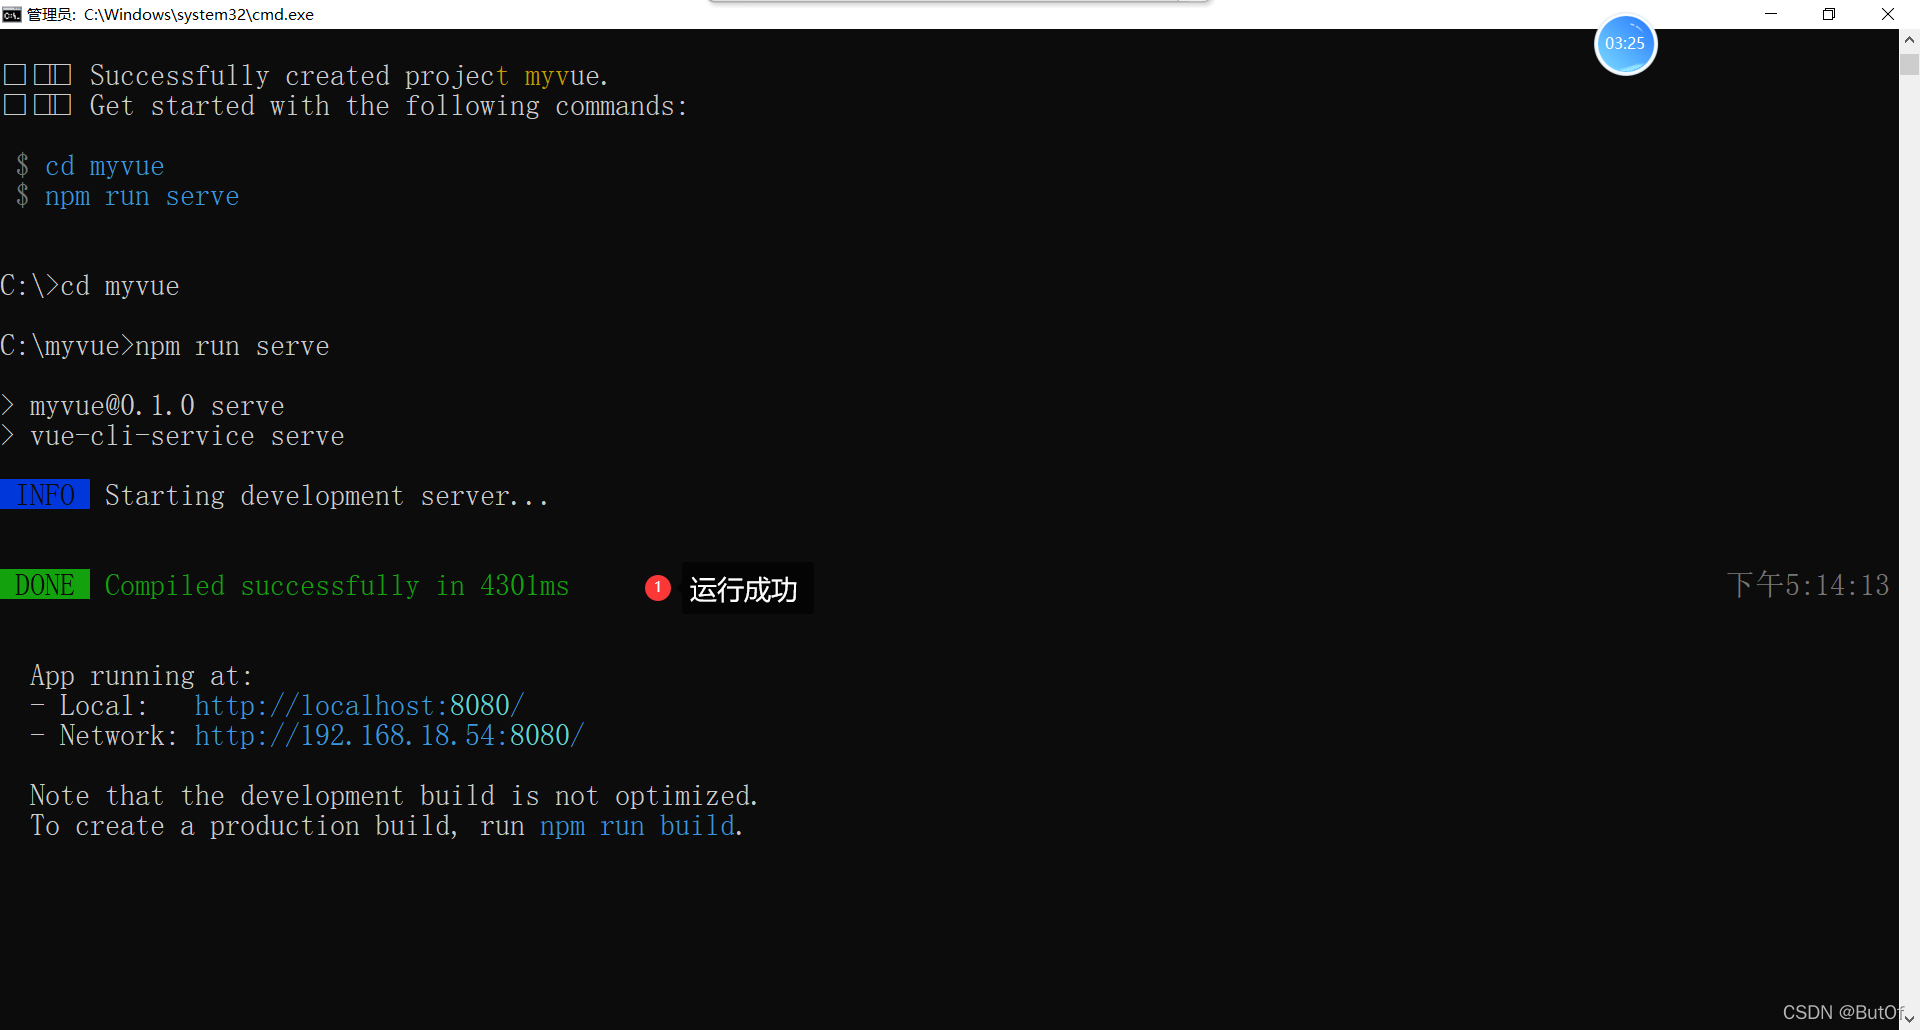
脚手架


 730
730

 被折叠的 条评论
为什么被折叠?
被折叠的 条评论
为什么被折叠?
 到【灌水乐园】发言


