


文章目录
一、关于Nginx
前言
本次要讲一个高性能、轻量级的web服务软件,它不仅稳定性高,系统资源消耗还低,它是由俄罗斯的伊戈尔·赛索耶夫开发的,第一个公开版本0.1.0发布于2004年10月4日。
1.了解Nginx
Nginx是由俄罗斯的伊戈尔·赛索耶夫开发的,第一个公开版本0.1.0发布于2004年10月4日。
Nginx (engine x) 是一个高性能的HTTP和反向代理web服务器,其将源代码以类BSD许可证的形式发布,因它的稳定性、丰富的功能集、简单的配置文件和低系统资源的消耗而闻名。其特点是占有内存少,并发能力强,单台物理服务器可支持30000~50000个并发请求。
2.对比
nginx和Apache的区别
Apache是同步多进程模型,一个连接对应一个进程,而nginx是异步的,多个连接(万级别)可以对应一个进程。
nginx轻量级,抗并发,处理静态文件好
Apache超稳定,对PHP支持比较简单,nginx需要配合其他后端用,处理动态请求有优势,建议使用前端nginx抗并发,后端apache集群,配合起来会更好
nignx的正向代理和反向代理
优缺点比较
- nginx相对于apache的优点
轻量级,同样起web 服务,比apache占用更少的内存及资源 抗并发,nginx 处理请求是异步非阻塞的,而apache 则是阻塞型的,在高并发下nginx 能保持低资源低消耗高性能高度模块化的设计,编写模块相对简单提供负载均衡
社区活跃,各种高性能模块出品迅速 - apache 相对于nginx 的优点
apache的 rewrite(重写) 比nginx 的强大 ;
支持动态页面;
支持的模块多,基本涵盖所有应用;
性能稳定,而nginx相对bug较多。 - 两者优缺点比较
Nginx 配置简洁, Apache 复杂 ;
Nginx 静态处理性能比 Apache 高 3倍以上 ;
Apache 对 PHP 支持比较简单,Nginx 需要配合其他后端用;Apache 的组件比 Nginx 多 ;
apache是同步多进程模型,一个连接对应一个进程;nginx是异步的,多个连接(万级别)可以对应一个进程;
nginx处理静态文件好,耗费内存少;
动态请求由apache去做,nginx只适合静态和反向;
Nginx适合做前端服务器,负载性能很好;
Nginx本身就是一个反向代理服务器 ,且支持负载均衡
2.Nginx编译安装
1.把防火墙关闭
[root@localhost ~]# systemctl stop firewalld.service
[root@localhost ~]# systemctl disable firewalld.service
[root@localhost ~]# setenforce 0
[root@localhost ~]# yum -y install epel-release && yum clean all && yum makecache
EPEL (Extra Packages for Enterprise Linux)是基于Fedora的一个项目,为“红帽系”的操作系统提供额外的软件包
2.拖入安装包到opt下进行安装编译
[root@localhost ~]# cd /opt
[root@localhost ~]# yum -y install pcre-devel zlib-devel gcc gcc-c++ make   #安装依赖包
[root@localhost opt]# tar zxvf nginx-1.12.2.tar.gz -C /opt/
[root@localhost opt]# cd /opt/nginx-1.12.2/
[root@localhost nginx-1.12.2]# ./configure \
> --prefix=/usr/local/nginx \                      #指定nginx的安装路径
> --user=nginx \                                   #指定用户名
> --group=nginx \                                  #指定组名
> --with-http_stub_status_module                   #启用模块以支持状态统计
[root@localhost nginx-1.12.2]# make && make install
[root@localhost nginx-1.12.2]# ln -s /usr/local/nginx/sbin/* /usr/local/sbin/     #创建软链接
[root@localhost nginx-1.12.2]# useradd -M -s /sbin/nologin nginx     #创建程序用户
3.检查、启用、添加系统管理
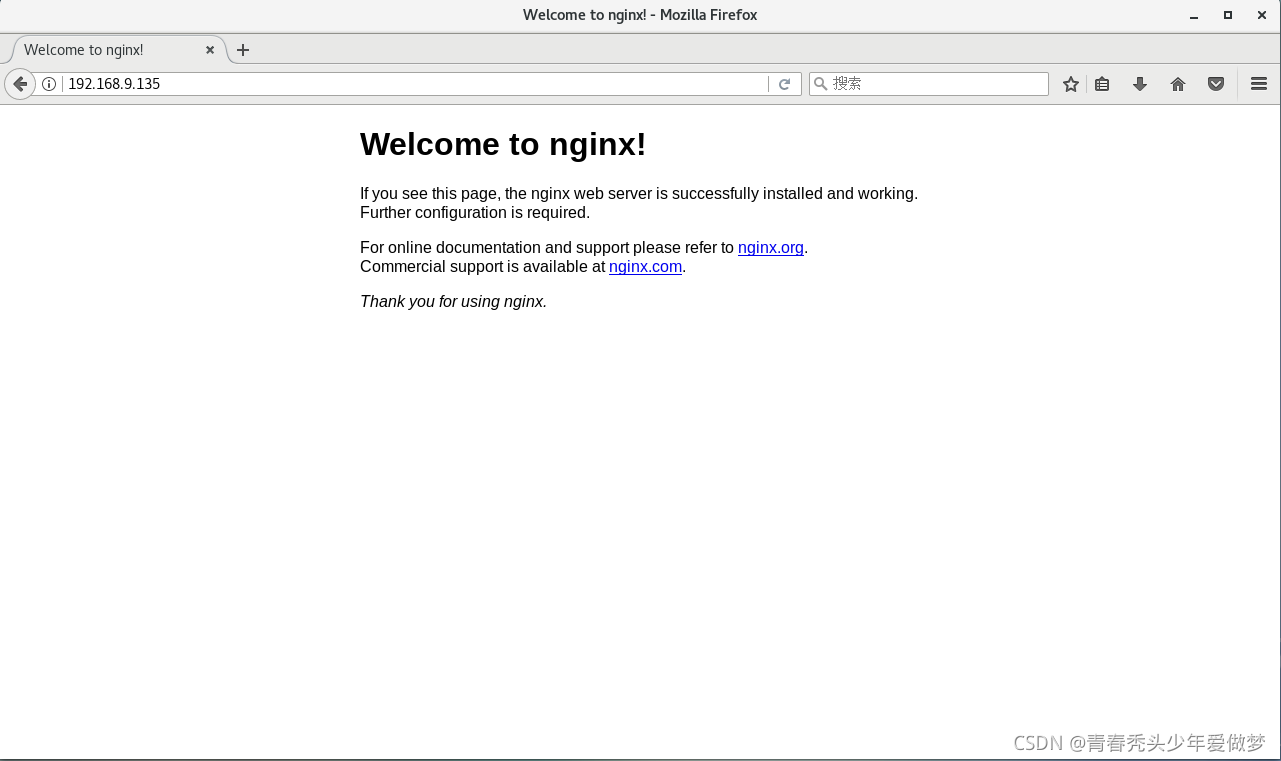
[root@lamp nginx-1.12.2]# nginx -t            #检查配置文件是否配置正确
nginx: the configuration file /usr/local/nginx/conf/nginx.conf syntax is ok
nginx: configuration file /usr/local/nginx/conf/nginx.conf test is successful
[root@lamp nginx-1.12.2]# nginx               #启动
[root@localhost nginx-1.12.2]# netstat -natp | grep 80
tcp        0      0 0.0.0.0:80              0.0.0.0:*               LISTEN      8817/nginx: master
Nginx服务程序默认以nobody身份运行,建议为其创建专门的用户账号,以便更准确地控制其访问权限
4.停止nginx服务
[root@localhost nginx-1.12.2]# cat /usr/local/nginx/logs/nginx.pid   #查看nginx的pid号
8817
[root@localhost nginx-1.12.2]# kill -3 8817           #停止nginx
[root@localhost nginx-1.12.2]# nginx                  #启动nginx
[root@localhost nginx-1.12.2]# kill -s QUIT 8871      #停止nginx
6.添加Nginx系统服务
[root@localhost nginx-1.12.2]# vim /lib/systemd/system/nginx.service
[Unit]
Description=nginx                                           #描述
After=network.target                                        #描述服务类别
[Service]
Type=forking                                                #后台运行类型
PIDFile =/usr/local/nginx/logs/nginx.pid                    #PID文件位置
ExecStart=/usr/local/nginx/sbin/nginx                       #启动服务
ExecrReload=/bin/kill -s HUP $MAINPID                       #根据PID重载配置
ExecrStop=/bin/kill -s QUIT $MAINPID                        #根据PID终止进程
PrivateTmp=true
[Install]
WantedBy=multi-user.target                                  #启动级别
[root@localhost nginx-1.12.2]# chmod 754 /lib/systemd/system/nginx.service     #设置754权限是一种安全优化
[root@localhost nginx-1.12.2]# systemctl start nginx.service    #开启服务
[root@localhost nginx-1.12.2]# systemctl enable nginx.service   #开机自启
Created symlink from /etc/systemd/system/multi-user.target.wants/nginx.service to /usr/lib/sy
stemd/system/nginx.service.

3.Nginx主配置文件
#user nobody;                       #运行用户,若编译时未指定则默认为 nobody
worker_processes 1;                 #工作进程数量,可配置成服务器内核数 * 2
#error_log logs/error.log;          #错误日志文件的位置
#pid logs/nginx.pid;                #PID 文件的位置

events {
    use epoll;         #使用 epoll 模型,2.6及以上版本的系统内核,建议使用epoll模型以提高性能
    worker_connections 4026;        #每个进程处理4026个连接
}
#如提高每个进程的连接数还需执行“ulimit -n 65535”命令临时修改本地每个进程可以同时打开的最大文件数。
#在Linux平台上,在进行高并发TCP连接处理时,最高的并发数量都要受到系统对用户单一进程同时可打开文件数量的限制(这是因为系统为每个TCP连接都要创建一个socket句柄,每个socket句柄同时也是一个文件句柄)。
#可使用ulimit -a命令查看系统允许当前用户进程打开的文件数限制.


http {
    include       mime.types;                         #文件扩展名与文件类型映射表
    default_type  application/octet-stream;           #默认文件类型

    #log_format  main  '$remote_addr - $remote_user [$time_local] "$request" '           #日志格式设定
    #                  '$status $body_bytes_sent "$http_referer" '
    #                  '"$http_user_agent" "$http_x_forwarded_for"';

    #access_log  logs/access.log  main;               #访问日志位置

    sendfile        on;         #支持文件发送(下载),此选项允许或禁止使用socke的TCP_CORK的选项(发送数据包前先缓存数据),此选项仅在使用sendfile的时候使用
    #tcp_nopush     on;

    #keepalive_timeout  0;
    keepalive_timeout  65;     #连接保持超时时间,单位是秒

    #gzip  on;                 #gzip模块设置,设置是否开启gzip压缩输出

    server {
        listen       80;                 #监听地址及端口
        server_name  localhost;          #站点域名,可以有多个,用空格隔开

        #charset koi8-r;                 #网页的默认字符集

        #access_log  logs/host.access.log  main;

        location / {                    #根目录配置
            root   html;                #网站根目录的位置/usr/local/nginx/html
            index  index.html index.htm;                  #默认首页文件名
        }

        #error_page  404              /404.html;

        # redirect server error pages to the static page /50x.html
        #
        error_page   500 502 503 504  /50x.html;          #内部错误的反馈页面
        location = /50x.html {                            #错误页面配置
            root   html;
        }
4.nginx配置文件
1.备份
[root@localhost /]# cp /usr/local/nginx/conf/nginx.conf /usr/local/nginx/conf/nginx.conf.bak
2.修改配置文件
[root@localhost ~]# vim /usr/local/nginx/conf/nginx.conf
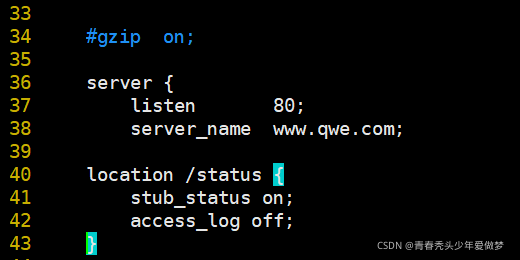
server {
listen 80;
server_name localhost;
修改为:
server {
listen 80; #监听端口
server_name www.qaz.com; #域名
插入配置:
location /status { #访问位置为/status:www.qaz.com/status
stub_status on; #打开状态统计功能
access_log off; #关闭此位置的日志记录
}
3.配置dns,重启服务,测试时记得加入/status
[root@localhost ~]# vim /etc/hosts    #配置DNS
192.168.9.135 www.qwe.com
[root@localhost ~]# systemctl restart nginx.service

二、Nginx访问控制
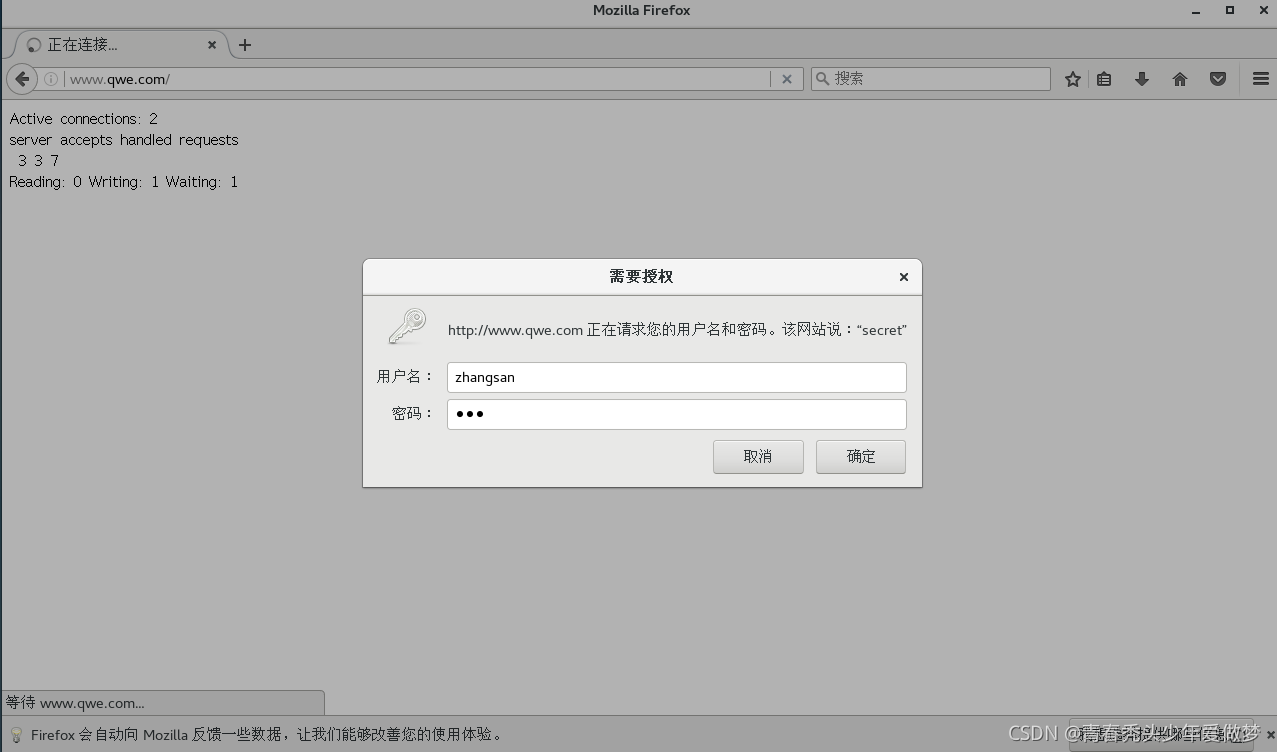
1、基于授权的访问控制
1.生成用户密码认证文件
[root@localhost ~]# yum install -y httpd-tools        #因为htpasswd是apache的工具,所以我们要先安装工具
[root@localhost ~]# htpasswd -c /usr/local/nginx/passwd.db lisi     #创建一个用户,并且-c创建一个/usr/local/nginx/passwd.db用于存储用户信息

New password:
Re-type new password:
Adding password for user lisi
[root@localhost ~]# chown nginx /usr/local/nginx/passwd.db     #添加nginx管理
[root@localhost ~]# chmod 400 /usr/local/nginx/passwd.db       #修改权限
这样一来除了nginx和root用户能读,其他都不可读
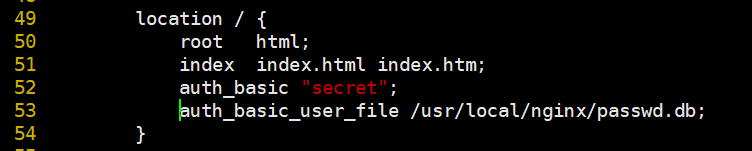
2.修改主配置文件相对应目录,添加认证配置项
[root@localhost ~]# vim /usr/local/nginx/conf/nginx.conf

        location / {
            root   html;
            index  index.html index.htm;
            auth_basic "secret";
            auth_basic_user_file /usr/local/nginx/passwd.db;
        }
3.重启服务,进行访问
[root@localhost /]# systemctl restart nginx.service
2.基于客户端的访问控制
访问控制规则如下:
deny IP/IP 段:拒绝某个 IP 或 IP 段的客户端访问。
allow IP/IP 段:允许某个 IP 或 IP 段的客户端访问。
规则从上往下执行,如匹配则停止,不再往下匹配。
[root@localhost ~]# vim /usr/local/nginx/conf/nginx.conf
location / {
root html;
index index.html index.htm;
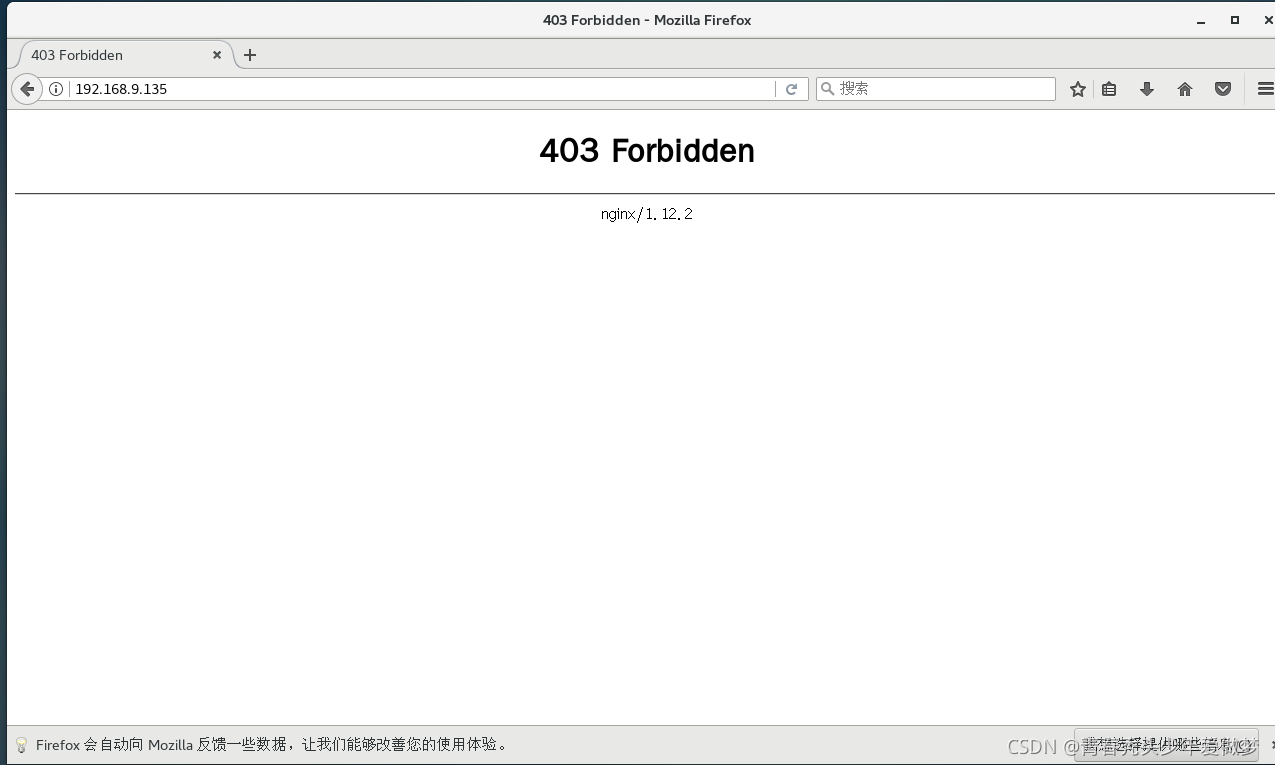
deny 192.168.9.135; #拒绝访问的客户端 IP
allow all; #允许其它IP客户端访问
}
[root@localhost /]# systemctl restart nginx.service
总结
Nginx优点:负载均衡、反向代理、处理静态文件优势。nginx处理静态请求的速度高于apache;
Apache优点:相对于Tomcat服务器来说处理静态文件是它的优势,速度快。Apache是静态解析,适合静态HTML、图片等。
Tomcat:动态解析容器,处理动态请求,是编译JSPServlet的容器,Nginx有动态分离机制,静态请求直接就可以通过Nginx处理,动态请求才转发请求到后台交由Tomcat进行处理。
Apache在处理动态有优势,Nginx并发性比较好,CPU内存占用低,如果rewrite频繁,那还是Apache较适合


 970
970

 被折叠的 条评论
为什么被折叠?
被折叠的 条评论
为什么被折叠?
 到【灌水乐园】发言


