


1、环境介绍
操作系统:centos7
elasticsearch版本:6.5.0
JDK版本:1.8
2、下载安装包
官网下载地址:https://www.elastic.co/cn/downloads/elasticsearch
ps:官网下载太慢了,给出自己的网盘连接
地址:https://pan.baidu.com/s/1dZIWtDjb5a9R-vbbC_ff0w
提取码:eopz
3、安装
tip:安装ES前提是已经安装好Java JDK并配置好 环境变量
1、选择自己的解压目录(我的是/usr) 将下载下来的包解压
tar -zxvf elasticsearch-6.5.0-linux-x86_64.tar -C /usr
2、配置文件修改
进入配置目录config
cd /usr/elasticsearch-6.5.0/config

对文件进行修改
vim elasticsearch.yml
修改以下内容
#
# ---------------------------------- Cluster -----------------------------------

cluster.name: my-application

# ------------------------------------ Node ------------------------------------

node.name: node-1

# ----------------------------------- Paths ------------------------------------
#
path.data: /usr/elasticsearch-6.5.0/data

path.logs: /usr/elasticsearch-6.5.0/logs


# ----------------------------------- Memory -----------------------------------
#
# Lock the memory on startup:
#
bootstrap.memory_lock: false

# ---------------------------------- Network -----------------------------------
#

network.host: 192.168.85.128

http.port: 9200

# --------------------------------- Discovery ----------------------------------

discovery.seed_hosts: ["192.168.85.128"]
4、尝试启动
进入ES目录,启动es ,不能在root用户下启动(由于安全问题es需要另创建一个用户),如果在root以下启动,会报错的。
创建用户组
groupadd es
创建用户并加入用户组
es:useradd -g es ljl
为新用户设置密码
passwd ljl
将es目录权限赋给 新建的用户
chown -R ljl:es elasticsearch-6.5.0/
进入新创建的用户 su ljl
cd/elasticsearch-6.5.0
执行启动命令
./bin/elasticsearch
注意:通常在第一次启动ES时候常见的几种错误
第一种错误:

		ERROR: [1] bootstrap checks failed
		max virtual memory areas vm.max_map_count [65530] is too low, increase to at least [262144]

	解决办法:

		su 进入root

		vim /etc/sysctl.conf

		添加参数	vm.max_map_count=262144
		参数大小 大于 262144

		修改完后执行以下命令
		sysctl -p

第二种错误:

		ERROR: [1] bootstrap checks failed
		[1]: max number of threads [3758] for user [es] is too low, increase to at least [4096]

	解决办法:

		切换到root用户

		  vim /etc/security/limits.conf

		 在末尾添加下面设置(参数值大于4096)
		* soft nproc 4096
		* hard nproc 4096


第三种错误:

		ERROR: [1] bootstrap checks failed
		[1]: max file descriptors [4096] for elasticsearch process is too low, increase to at least [65535]

	解决办法:

		  切换到root用户

		  vim /etc/security/limits.conf

		 在末尾添加下面设置(参数值大于65535)
	 	* soft nofile 65535
		* hard nofile 65535
5、启动成功后
关闭防火墙
systemctl stop firewalld
查看防火墙状态
firewall-cmd --stat
若是 no runing 则表示未运行防火墙  , runing 表示运行着
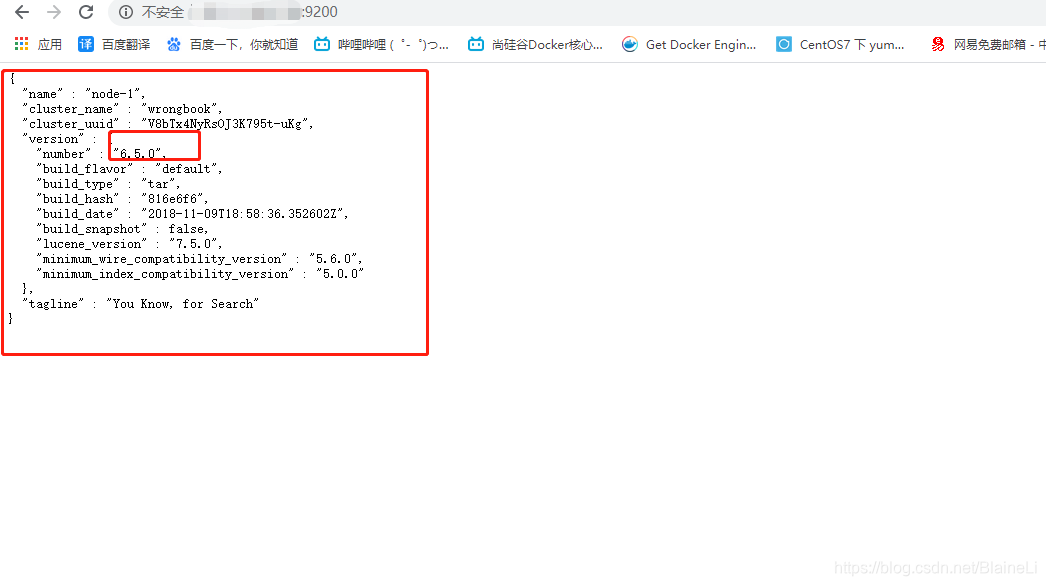
最后访问你的地址
http://IP:9200
若是网页返回如下json表示安装es成功


 被折叠的 条评论
为什么被折叠?
被折叠的 条评论
为什么被折叠?
 到【灌水乐园】发言


