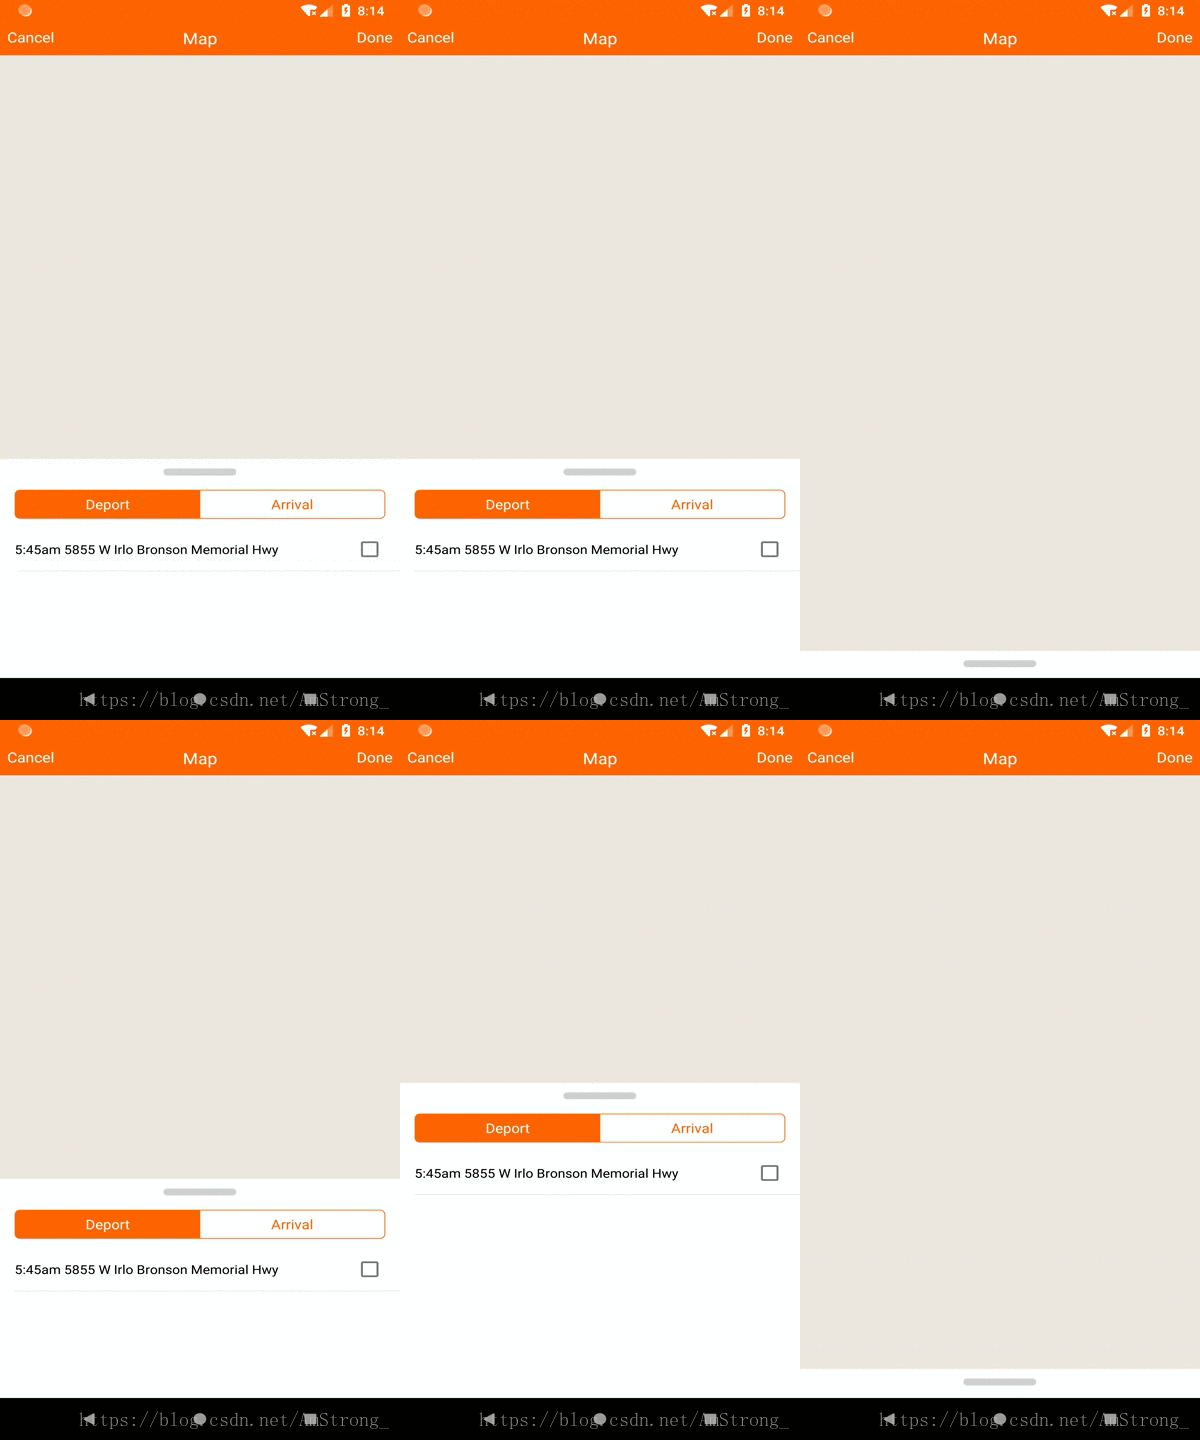
这个控件是仿制高德地图下面的可拖拽列表栏做的。实现主要就是一个LinearLayout响应用户手势拖拽,有全屏,半屏,和隐藏三个模式。依据拖拽到松手的位置的y坐标占屏幕的百分比来确定对应的模式位置,再利用动画移动到对应的模式位置。
完整的代码我会贴在文末。

一、确定三个模式的位置
我这里使用的是铺满contentView,占contentView的1/3,和全部在隐藏在下面只留一个拖拽条三个模式。contentView的概念我这里大概讲一下,android的布局是在decorView这个根布局下的,分为titleView和ContentView。
titleView放的是ActionBar等位置,如果设置noActionBar就没有titleView的位置了。
而contentView就是我们平时Activity里面onCreate中setContent的那个ContentView,相当于我们的内容布局的父布局,在这个控件我们计算主要依靠它来完成。
三个模式的height也就是Y坐标值是:
 switch (customMode) {
                    case TOP_MODE:
                        top = topHeight;
                        bottom = getHeight() + topHeight;
                        break;
                    case MIDDLE_MODE:
                        top = middleHeight;
                        bottom = getHeight() + middleHeight;
                        break;
                    case BOTTOM_MODE:
                        int topUp = contentViewHeight - indicatorHeightPx;
                        top = topUp;
                        bottom = getHeight() + topUp;
                        break;
                }
主要看一个top的赋值 这个top就是我们要设给onLayout的参数,控件的顶部的y坐标。
topHeight contentView里面除了这个控件之外 顶部还有其他控件占位置,我们需要加上这个控件的高度,不然会覆盖掉它,例如上面有一个自定义的标题栏没有加入到Toolbar的位置而是放在contentView里面,那么这个情况就需要被考虑。这个值我是由外部初始化的时候计算传入的。
middleHeight 计算方法:
contentViewHeight = ((Activity) getContext()).getWindow().
                    findViewById(Window.ID_ANDROID_CONTENT).getMeasuredHeight();
middleHeight = (contentViewHeight / 3) * 2;
上面说的是1/3但这里写的是2/3是因为android屏幕的Y坐标是向下的,我们需要在1/3的位置就需要让控件向下移动2/3。
topUp 相当于留一个indicatorHeightPx(那个灰色的长条)的位置 其他全部在屏幕下方。
OK,位置的计算就只有这些了。
二、拖拽控件
接下来就是主要的功能拖拽了。
这里需要用到手势类GestureDetector,不熟悉的同学可以去搜索一下看一看,它里面封装了各种手势的触发条件和触发回调,使用起来比自己重写onTouch再分类要有效率的多。它的使用就是在onTouch方法里将参数传递给它:
public boolean onTouch(View view, MotionEvent event) {
        mGestureDetector.onTouchEvent(event);
        return true;
    }
它的实现类:
    @Override
    public boolean onScroll(MotionEvent motionEvent, MotionEvent motionEvent1, float distanceX, float distanceY) {
        int y = (int) motionEvent1.getY();
        // 获取本次移动的距离
        int dy = y - y0;
        int top = getTop();
        int bottom = getBottom();
        if (top <= topHeight && dy < 0) {
            // 高出顶部 则不改变位置防止超出顶部
            return false;
        }
        layout(getLeft(), (top + dy),
                getRight(), (bottom + dy));
        isScrolling = true;
        return false;
    }

    @Override
    public boolean onFling(MotionEvent motionEvent, MotionEvent motionEvent1, float x, float speedY) {
        float v = motionEvent1.getRawY() - rawYDown;
        switch (customMode) {
            case TOP_MODE:
                animator = ObjectAnimator.ofFloat(DragUpDownLinearLayout.this, ANIMATOR_MODE,
                        getTranslationY(), getTranslationY() + (middleHeight - getY()));
                customMode = MIDDLE_MODE;
                break;
            case MIDDLE_MODE:
                if (v > 0) {
                    animator = ObjectAnimator.ofFloat(DragUpDownLinearLayout.this, ANIMATOR_MODE,
                            getTranslationY(), getTranslationY() + contentViewHeight - getY() - indicatorHeightPx);
                    customMode = BOTTOM_MODE;
                } else {
                    animator = ObjectAnimator.ofFloat(DragUpDownLinearLayout.this, ANIMATOR_MODE,
                            getTranslationY(), getTranslationY() - getY() + topHeight);
                    customMode = TOP_MODE;
                }
                break;
            case BOTTOM_MODE:
                animator = ObjectAnimator.ofFloat(DragUpDownLinearLayout.this, ANIMATOR_MODE,
                        getTranslationY(), getTranslationY() + (middleHeight - getY()));
                customMode = MIDDLE_MODE;
                break;
            default:
        }

        animator.setDuration(500);
        animator.start();
        // 动画结束时,将控件的translation偏移量转化为Top值,便于计算
        animator.addListener(new AnimatorListenerAdapter() {
            @Override
            public void onAnimationEnd(Animator animation) {
                super.onAnimationEnd(animation);
                float translationY = getTranslationY();
                setTranslationY(0);
                layout(getLeft(), (int) (getTop() + translationY),
                        getRight(), (int) (getBottom() + translationY));
                animator = null;
            }
        });
        isScrolling = false;
        hasFiling = true;
        return true;
    }
就使用了这两个方法。思路就是在onScroll里面响应拖拽调用layout方法不断修改布局位置,然后结束的时候通常情况下回触发onFiling方法,在这个方法里计算位置开始动画等将控件移动到指定的位置。


 本文介绍如何实现一个仿高德地图底部可拖拽列表的自定义View,详细讲解了确定布局模式、拖拽逻辑、事件分发冲突解决及初始化步骤。通过GestureDetector处理手势,动态调整布局位置并实现动画效果。
 最低0.47元/天 解锁文章


 被折叠的 条评论
为什么被折叠?


