 Android音乐播放器开发


一、开发环境
软件环境: Android Studio 4.1.3 + JDK1.8
API版本:API 16
操作系统:Windows 10
二、项目介绍
项目结构如下图所示:
项目名称为MySongPlayer
java目录存放着实现各种功能的java代码
res目录存放着各类资源文件,如图片、音频等,还有各类.xml布局文件
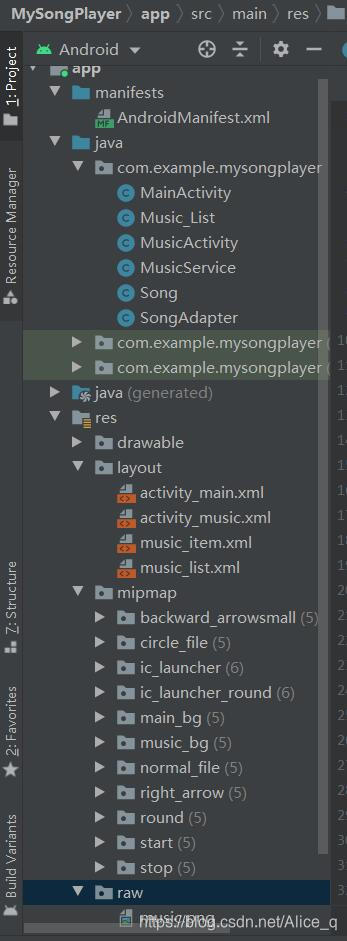
layout文件夹放的就是我们的布局文件
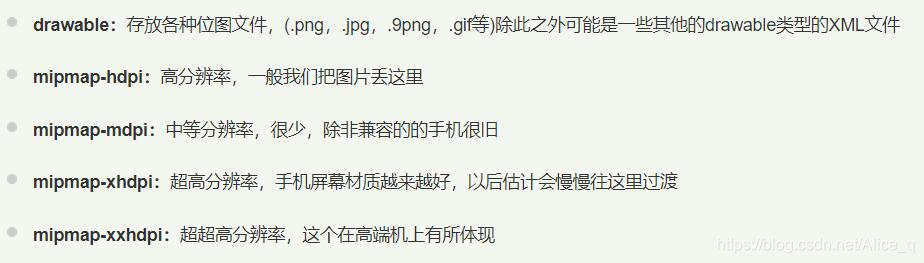
而drawable和mipmap文件夹介绍如下(来自菜鸟教程)
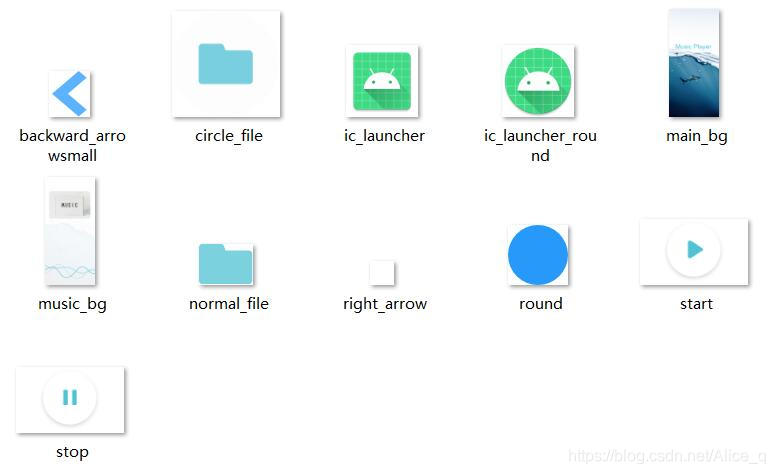
本次项目用到的图片大部分都在mipmap文件夹下,音乐目录图片在res里新建的raw文件夹下
三、开始主界面
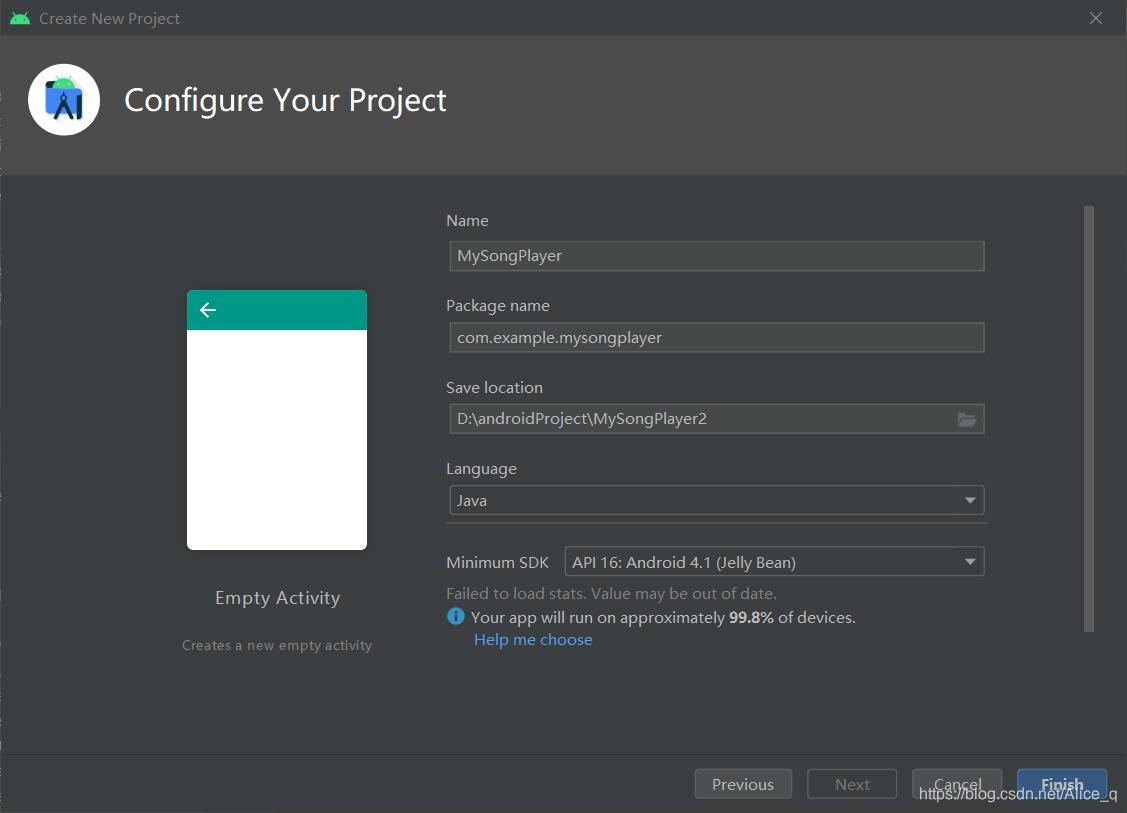
首先新建一个project
Language选择java
Minimum SDK选择推荐的API 16,下方的数字代表能兼容99.8%的设备
点击Finish
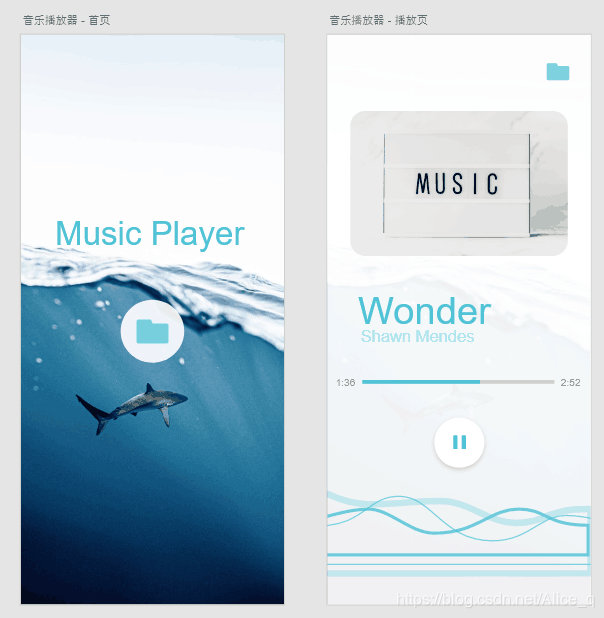
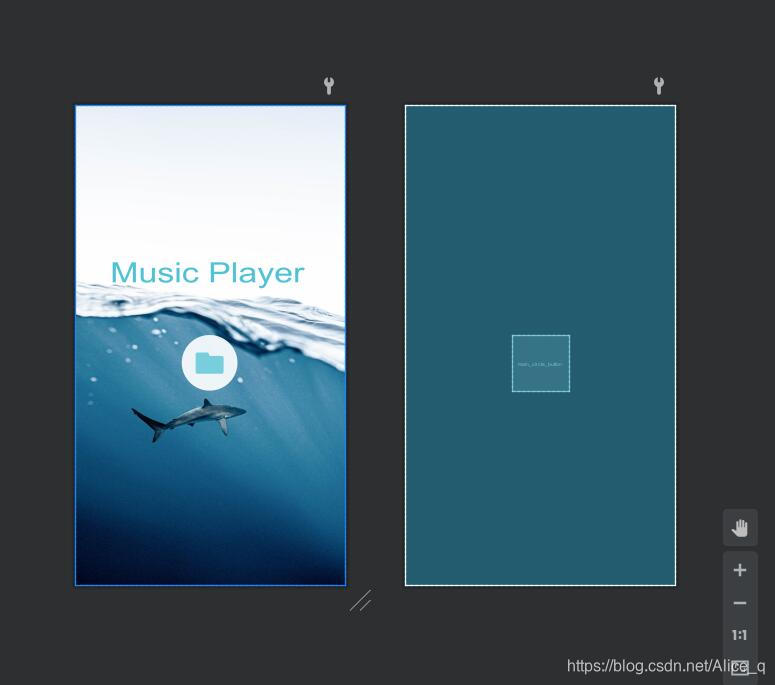
根据设计图分析首页内容
界面:一个背景+一个图片按钮
功能:点击图片按钮可以跳转到手机音乐列表
首先写界面
首页的布局文件为res - layout下默认生成的activity_main.xml
从这里可以切换代码和可视化工具的显示
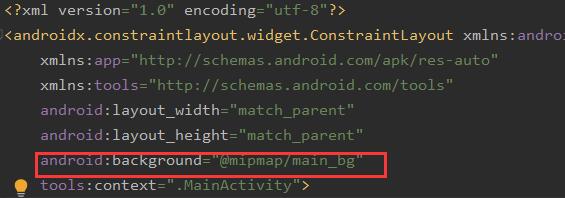
切换到Code 设置背景为mipmap中的素材图片
android:background="@mipmap/main_bg"
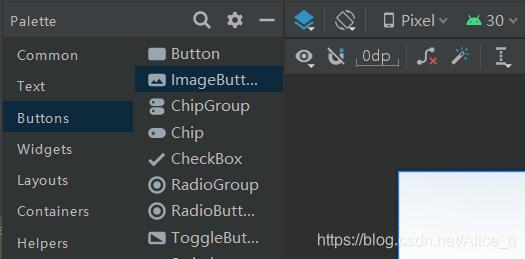
然后切换到可视化工具,从左边Palette里找到Buttons - ImageButton,选中拖动到右边,可以快速添加一个图片按钮
选中ImageButton
拖动方框点四个角可以放大和缩小按钮,也可以自己设定按钮大小参数
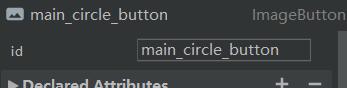
在右边设置其id为main_circle_button,便于我们在java代码里通过id来选中这个组件(注意选中的是否为按钮,当你后续点击了其他地方时,会默认跳转到布局的设置)
默认的ImageButton会在你自定义的图片外围出现一个方框背景,不太美观
切换到Code,将默认的src的那行代码删掉,重新将自定义图片设置为背景,方框就消失了(或者可以不改变src,将背景设置为透明)
android:background="@mipmap/circle_file"
接下来要给这个图片按钮设置位置。
虽然你将图片拖动到了你想要的位置,但是在运行的时候因为没有位置约束,图片会自动加载在左上角。
Android Studio 3.0 及以上支持使用ConstraintLayout构建自适应界面
官方指南ConstraintLayout
ConstraintLayout 可让您使用扁平视图层次结构(无嵌套视图组)创建复杂的大型布局。它与 RelativeLayout 相似,其中所有的视图均根据同级视图与父布局之间的关系进行布局,但其灵活性要高于 RelativeLayout,并且更易于与 Android Studio 的布局编辑器配合使用。
通过拖动四个边上的圆圈到你想设置约束的地方(想以谁为标准设置相对位置)
此处设置了左右和下三个约束
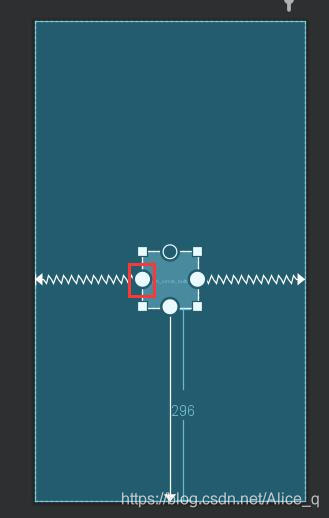
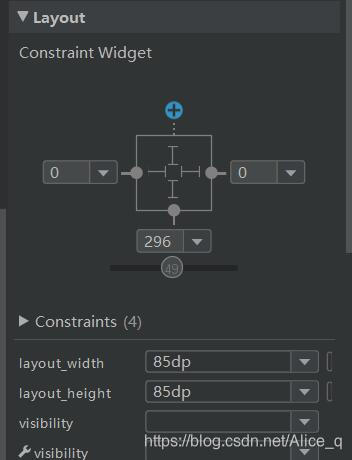
在右边可以修改约束的参数和图片按钮的宽高
参考设置如下
最终效果如图
activity_main.xml完整代码如下
<?xml version="1.0" encoding="utf-8"?>
<androidx.constraintlayout.widget.ConstraintLayout xmlns:android="http://schemas.android.com/apk/res/android"
    xmlns:app="http://schemas.android.com/apk/res-auto"
    xmlns:tools="http://schemas.android.com/tools"
    android:layout_width="match_parent"
    android:layout_height="match_parent"
    android:background="@mipmap/main_bg"
    tools:context=".MainActivity">

    <ImageButton
        android:id="@+id/main_circle_button"
        android:layout_width="85dp"
        android:layout_height="85dp"
        android:layout_marginBottom="296dp"
        android:background="@mipmap/circle_file"
        app:layout_constraintBottom_toBottomOf="parent"
        app:layout_constraintEnd_toEndOf="parent"
        app:layout_constraintHorizontal_bias="0.498"
        app:layout_constraintStart_toStartOf="parent" />
</androidx.constraintlayout.widget.ConstraintLayout>
然后是Activity的编写,Activity 是与用户交互的入口点,它表示拥有界面的单个屏幕
首页的对应的文件为java - com.example.mysongplayer下默认生成的MainActivity
为首页的按钮绑定点击事件(onClick),实现点击跳转至歌曲列表
为按钮绑定事件有两种方法:
1.java文件中通过java代码实现按钮功能的绑定
2.在界面设计的xml文件中,在相应的控件中直接绑定功能函数
此处采用方法1,先实例化按钮
ImageButton mButton = null;
进行功能事件绑定,在onCreate函数内
mButton = (ImageButton)findViewById(R.id.main_circle_button);
        mButton.setOnClickListener(new View.OnClickListener() {


            @Override
            public void onClick(View v) {


            	//下面是自己想要实现的功能
            	//此处实现跳转
                Intent intent = new Intent();
                //Music_List为跳转后到达的页面
                intent.setClass(MainActivity.this, Music_List.class);
                startActivity(intent);
            }
Intent是一个消息传递对象,可以通过多种方式促进组件之间的通信。此处用于启动Activity,Activity 表示应用中的一个屏幕。通过将 Intent 传递给startActivity(),您可以启动新的 Activity 实例。Intent 用于描述要启动的 Activity,并携带任何必要的数据。
MainActivity的完整代码如下
public class MainActivity extends AppCompatActivity {


    ImageButton mButton = null;

    @Override
    protected void onCreate(Bundle savedInstanceState) {


        super.onCreate(savedInstanceState);
        setContentView(R.layout.activity_main);
        mButton = (ImageButton)findViewById(R.id.main_circle_button);
        mButton.setOnClickListener(new View.OnClickListener() {


            @Override
            public void onClick(View v) {


                Intent intent = new Intent();
                intent.setClass(MainActivity.this, Music_List.class);
                startActivity(intent);
            }
        });
    }
}
四、显示歌曲列表
首先先写布局文件
歌曲列表需要一个一行一行显示的列表布局(List) + 每一行是如何显示的列表项布局(item)
在res - layout下右键新建Layout Resouse File,一个命名为music_list,一个命名为music_item
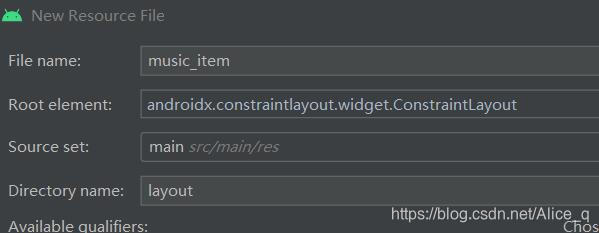
先编写music_item.xml 列表项布局
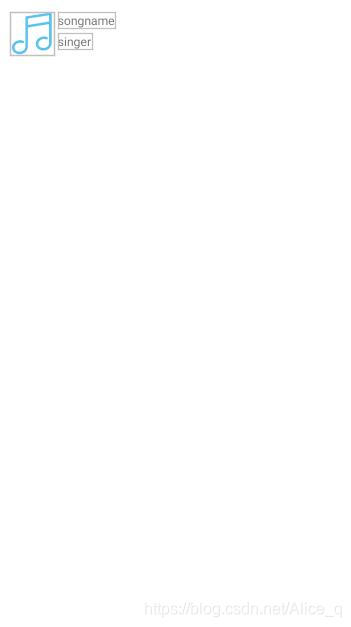
显示的效果如下

分析可得由图像+歌名+歌手组成
切换至Design可视化工具
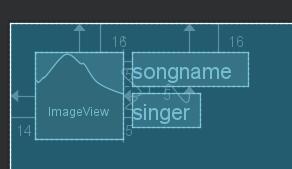
从左边找到一个ImageView(图像视图),用来显示图像的一个控件,拖入手机中偏左上角的位置,设置其id为song_cover,srcCompat设置为你设计的图片,此处设置大小为50dp x 50dp。
约束为离左边缘14dp,上边缘16dp
分别拖入两个TextView来显示歌名和歌手,设置id为song_name,song_singer。大小为wrap_content 即根据内容自动调整大小。
约束为左侧离ImageView的5dp,歌名离上边缘16dp,两个TextView之间相隔5dp
最终效果如下
music_item.xml 完整代码如下
<?xml version="1.0" encoding="utf-8"?>
<androidx.constraintlayout.widget.ConstraintLayout xmlns:android="http://schemas.android.com/apk/res/android"
    xmlns:app="http://schemas.android.com/apk/res-auto"
    xmlns:tools="http://schemas.android.com/tools"
    android:layout_width="match_parent"
    android:layout_height="match_parent">

    <ImageView
        android:id="@+id/song_cover"
        android:layout_width="50dp"
        android:layout_height="50dp"
        android:layout_marginStart="14dp"
        android:layout_marginLeft="14dp"
        android:layout_marginTop="16dp"
        app:layout_constraintStart_toStartOf="parent"
        app:layout_constraintTop_toTopOf="parent"
        app:srcCompat="@raw/music" />

    <TextView
        android:id="@+id/song_name"
        android:layout_width="wrap_content"
        android:layout_height="wrap_content"
        android:layout_marginStart="5dp"
        android:layout_marginLeft="5dp"
        android:layout_marginTop="16dp"
        android:text="songname"
        app:layout_constraintStart_toEndOf="@+id/song_cover"
        app:layout_constraintTop_toTopOf="parent" />

    <TextView
        android:id="@+id/song_singer"
        android:layout_width="wrap_content"
        android:layout_height="wrap_content"
        android:layout_marginStart="5dp"
        android:layout_marginLeft="5dp"
        android:layout_marginTop="5dp"
        android:text="singer"
        app:layout_constraintStart_toEndOf="@+id/song_cover"
        app:layout_constraintTop_toBottomOf="@+id/song_name" />
</androidx.constraintlayout.widget.ConstraintLayout>
下面编写music_list.xml
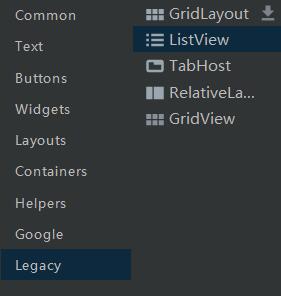
从左边Legacy中找到ListView拖入右边
按照它默认的占满整个屏幕就行
点击Infer Constraints 快速创建约束
到此音乐列表的布局就完成了
下面是 java 的编写
先创建一个类来存放歌曲信息
在java - com.example.mysongplayer 下右键new一个java class,命名为Song
public class Song {


    //用于存放歌曲的歌名、歌手等信息

    private String name;//歌曲名
    private String singer;//歌手
    private long size;//歌曲所占空间大小
    private int duration;//歌曲时间长度
    private String path;//歌曲地址
    private long  albumId;//图片id
    private long id;//歌曲id
    public Song(String name,String singer,String path,long size,long albumId,long id,int duration){


        this.name=name;
        this.singer=singer;
        this.path=path;
        this.size=size;
        this.albumId=albumId;
        this.id=id;
        this.duration=duration;
    }
    public Song(){


    }
    public long getAlbumId()
    {


        return albumId;
    }

    public void setAlbumId(long albumId)
    {


        this.albumId = albumId;
    }

    public long getId()
    {


        return id;
    }

    public void setId(long id)
    {


        this.id = id;
    }

    public String getName() {


        return name;
    }

    public void setName(String name) {


        this.name = name;
    }

    public String getSinger() {


        return singer;
    }

    public void setSinger(String singer) {


        this.singer = singer;
    }

    public long getSize() {


        return size;
    }

    public void setSize(long size) {


        this.size = size;
    }

    public int getDuration() {


        return duration;
    }
 最低0.47元/天 解锁文章


 2285
2285

 被折叠的 条评论
为什么被折叠?
被折叠的 条评论
为什么被折叠?
 到【灌水乐园】发言


