


引言
本次内容复杂、且报错较多,部分图片没有放在最终文档里,而部分报错放在文档中,最终也没有删去。解决报错比单纯对着代码跑一遍难度更大,也更有意义,故予以保留。

内容
1.0 内容准备
这一部分作为一些常用命令的存储,显然,我在搭建环境的过程中重新配置的一遍之前的内容。(呜呜呜破防了)
正文从1.1开始
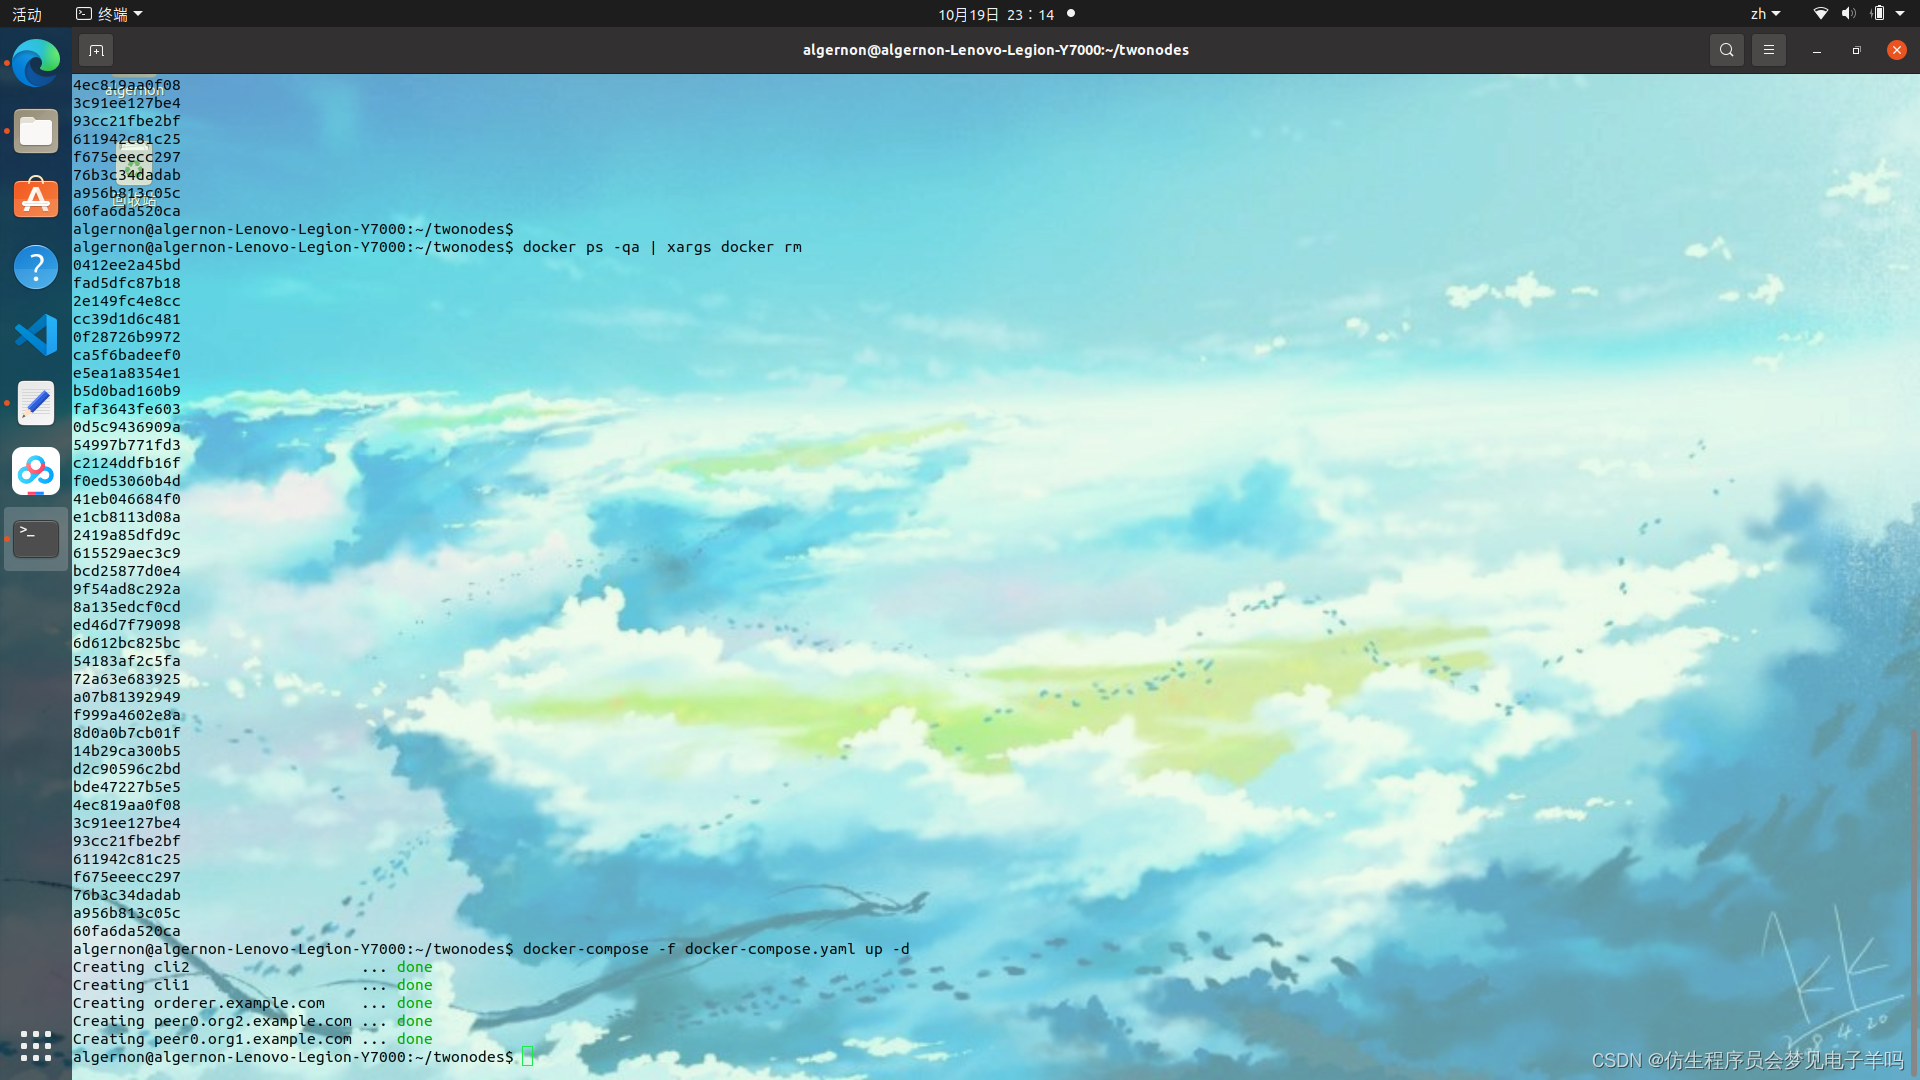
sudo docker rm $(sudo docker ps -aq)
https://blog.youkuaiyun.com/qq_28421553/article/details/126835125
$ mkdir -p $GOPATH/src/github.com/hyperledger/
$ cd $GOPATH/src/github.com/hyperledger/
$ git clone https://github.com/hyperledger/fabric.git
$ PROJECT_VERSION=2.2.8
$ LD_FLAGS="-X github.com/hyperledger/fabric/common/metadata.Version=${PROJECT_VERSION} \
            -X github.com/hyperledger/fabric/common/metadata.BaseDockerLabel=org.hyperledger.fabric \
            -X github.com/hyperledger/fabric/common/metadata.DockerNamespace=hyperledger \
            -X github.com/hyperledger/fabric/common/metadata.BaseDockerNamespace=hyperledger"

$ CGO_CFLAGS=" " go install -tags "" -ldflags "$LD_FLAGS" \
github.com/hyperledger/fabric/cmd/peer
https://hyperledger-fabric.readthedocs.io/zh_CN/release-2.2/install.html
# GOROOT
export GOROOT=/usr/local/go
# GOROOT bin
export PATH=$PATH:$GOROOT/bin
# GOPATH
export GOPATH=$HOME/go
# GOPATH bin
export PATH=$PATH:$GOPATH/bin
CGO_CFLAGS=" " go install -tags "" -ldflags "$LD_FLAGS" \
github.com/hyperledger/fabric/cmd/peer
1.1 生成证书及配置文件
https://hyperledger-fabric.readthedocs.io/zh_CN/release-2.2/developapps/developing_applications.html
代码来源:
https://sunkaiyuan.blog.youkuaiyun.com/article/details/121585240
利用cryptogen生成证书(构建一个网络所需要生成的所有证书文件):
crypto 词根---加密
gen 词根---证书
cryptogen(使用cryptogen命令生成组织结构和身份证书文件)
cryptogen
是用于生成 Hyperledger Fabric 密钥材料的实用程序,它是作为一种为测试目的预配置网络的方式提供的,它通常不会用于生产网络的操作
5个子命令:
help
generate 生成所有的证书命令
showtemplate 展示一个模板文件命令
extend
version
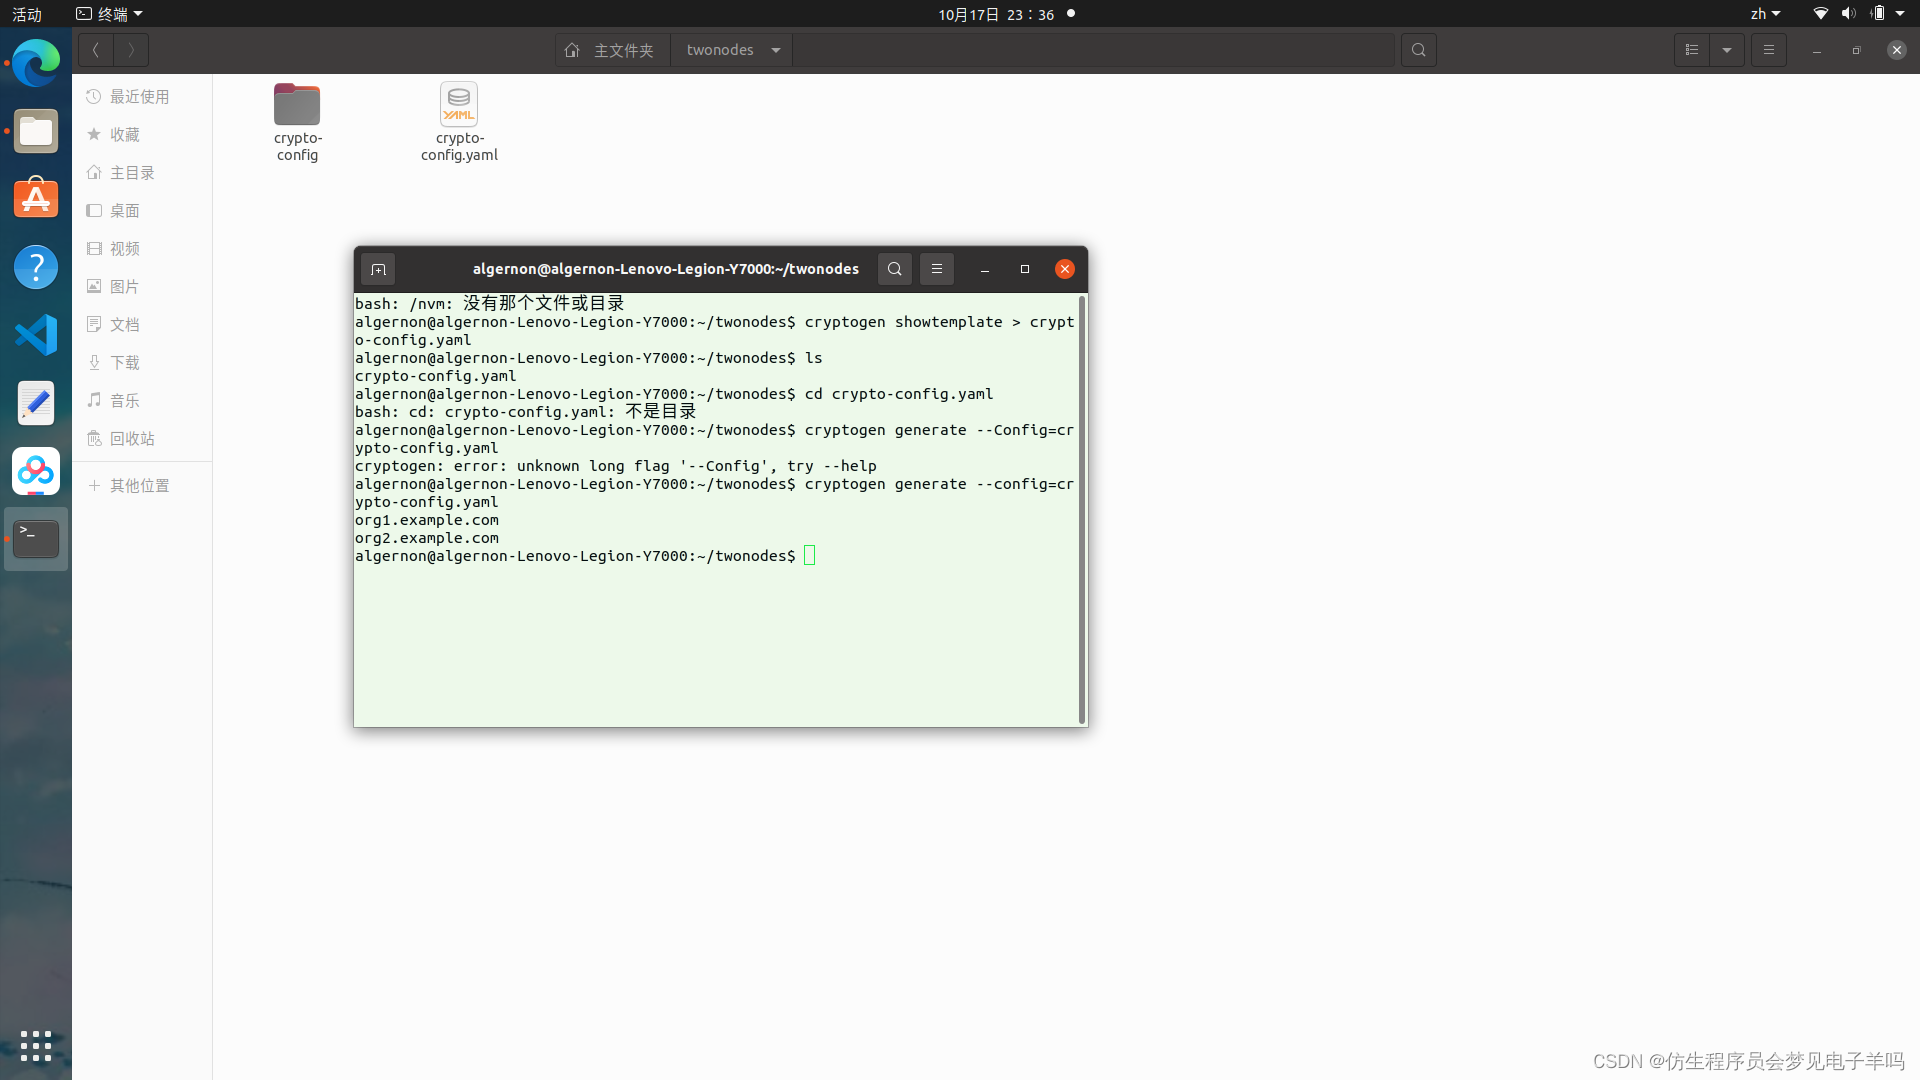
1、展示一个模板文件命令,随便找一个地新建一个文件夹 twonodes
# 输出到终端展示
root@aa:~/block/geneg/twonodes# cryptogen showtemplate
# 导出一个文件
root@aa:~/block/geneg/twonodes# cryptogen showtemplate > cryptogen-config.yaml
root@aa:~/block/geneg/twonodes# cat cryptogen-config.yaml
# ---------------------------------------------------------------------------
# "OrdererOrgs" - Definition of organizations managing orderer nodes
# ---------------------------------------------------------------------------
OrdererOrgs:
# ---------------------------------------------------------------------------
# Orderer
# (1)排序节点的置
# ---------------------------------------------------------------------------
- Name: Orderer # 排序节点的名称
Domain: example.com # 排序节点的域名
EnableNodeOUs: false # 是否使用OU配置,OU相当于组织下面的部门,我们的每个组织的下面有很多个节点,我们可以将一些节点作为类似于一个部门,
# 也就是说你的组织下面可以有好几个部门,每个部门下面有多个节点
# ---------------------------------------------------------------------------
# "Specs" - See PeerOrgs below for complete description
# ---------------------------------------------------------------------------
Specs:
- Hostname: orderer
# ---------------------------------------------------------------------------
# "PeerOrgs" - Definition of organizations managing peer nodes
# ---------------------------------------------------------------------------
PeerOrgs: (2)per节点的配置
# ---------------------------------------------------------------------------
# Org1
# ---------------------------------------------------------------------------
- Name: Org1 # 组织1节点的名称
Domain: org1.example.com # 组织1节点的域名
EnableNodeOUs: false # 是否开启OU配置
# ---------------------------------------------------------------------------
# "CA"
# ---------------------------------------------------------------------------
# Uncomment this section to enable the explicit definition of the CA for this
# organization. This entry is a Spec. See "Specs" section below for details.
# ---------------------------------------------------------------------------
# Note: Template and Specs are not mutually exclusive. You may define both
# sections and the aggregate nodes will be created for you. Take care with
# name collisions
# ---------------------------------------------------------------------------
Template:
Count: 1 # (3)在组织1下面生成1个节点
# Start: 5
# Hostname: {{.Prefix}}{{.Index}} # default
# SANS:
# - "{{.Hostname}}.alt.{{.Domain}}"
# ---------------------------------------------------------------------------
# "Users"
# ---------------------------------------------------------------------------
# Count: The number of user accounts _in addition_ to Admin
# ---------------------------------------------------------------------------
Users: # (4)在组织下面有节点的概念,Users-->就是真正操作节点的人的个数(操作终端的个数)
Count: 1
# ---------------------------------------------------------------------------
# Org2: See "Org1" for full specification
# ---------------------------------------------------------------------------
- Name: Org2
Domain: org2.example.com
EnableNodeOUs: false
Template:
Count: 1
Users:
Count: 1
2、生成证书文件,--config指定配置文件
root@aa:~/block/geneg/twonodes# cryptogen generate --config=cryptogen-config.yaml
# 生成了两个组织
org1.example.com
org2.example.com
root@aa:~/block/geneg/twonodes# ls
crypto-config cryptogen-config.yaml
root@aa:~/block/geneg/twonodes# cd crypto-config/
root@aa:~/block/geneg/twonodes/crypto-config# ls
# 生成了一个排序节点,一个peer节点,两个组织的信息
ordererOrganizations peerOrganizations
root@aa:~/block/geneg/twonodes/crypto-config# cd ordererOrganizations/
root@aa:~/block/geneg/twonodes/crypto-config/ordererOrganizations# ls
example.com
root@aa:~/block/geneg/twonodes/crypto-config/ordererOrganizations# cd example.com/
root@aa:~/block/geneg/twonodes/crypto-config/ordererOrganizations/example.com# ls
# 排序节点组织的所有证书文件
ca msp orderers tlsca users
这样我们就生成了组织结构,和所有的证书文件
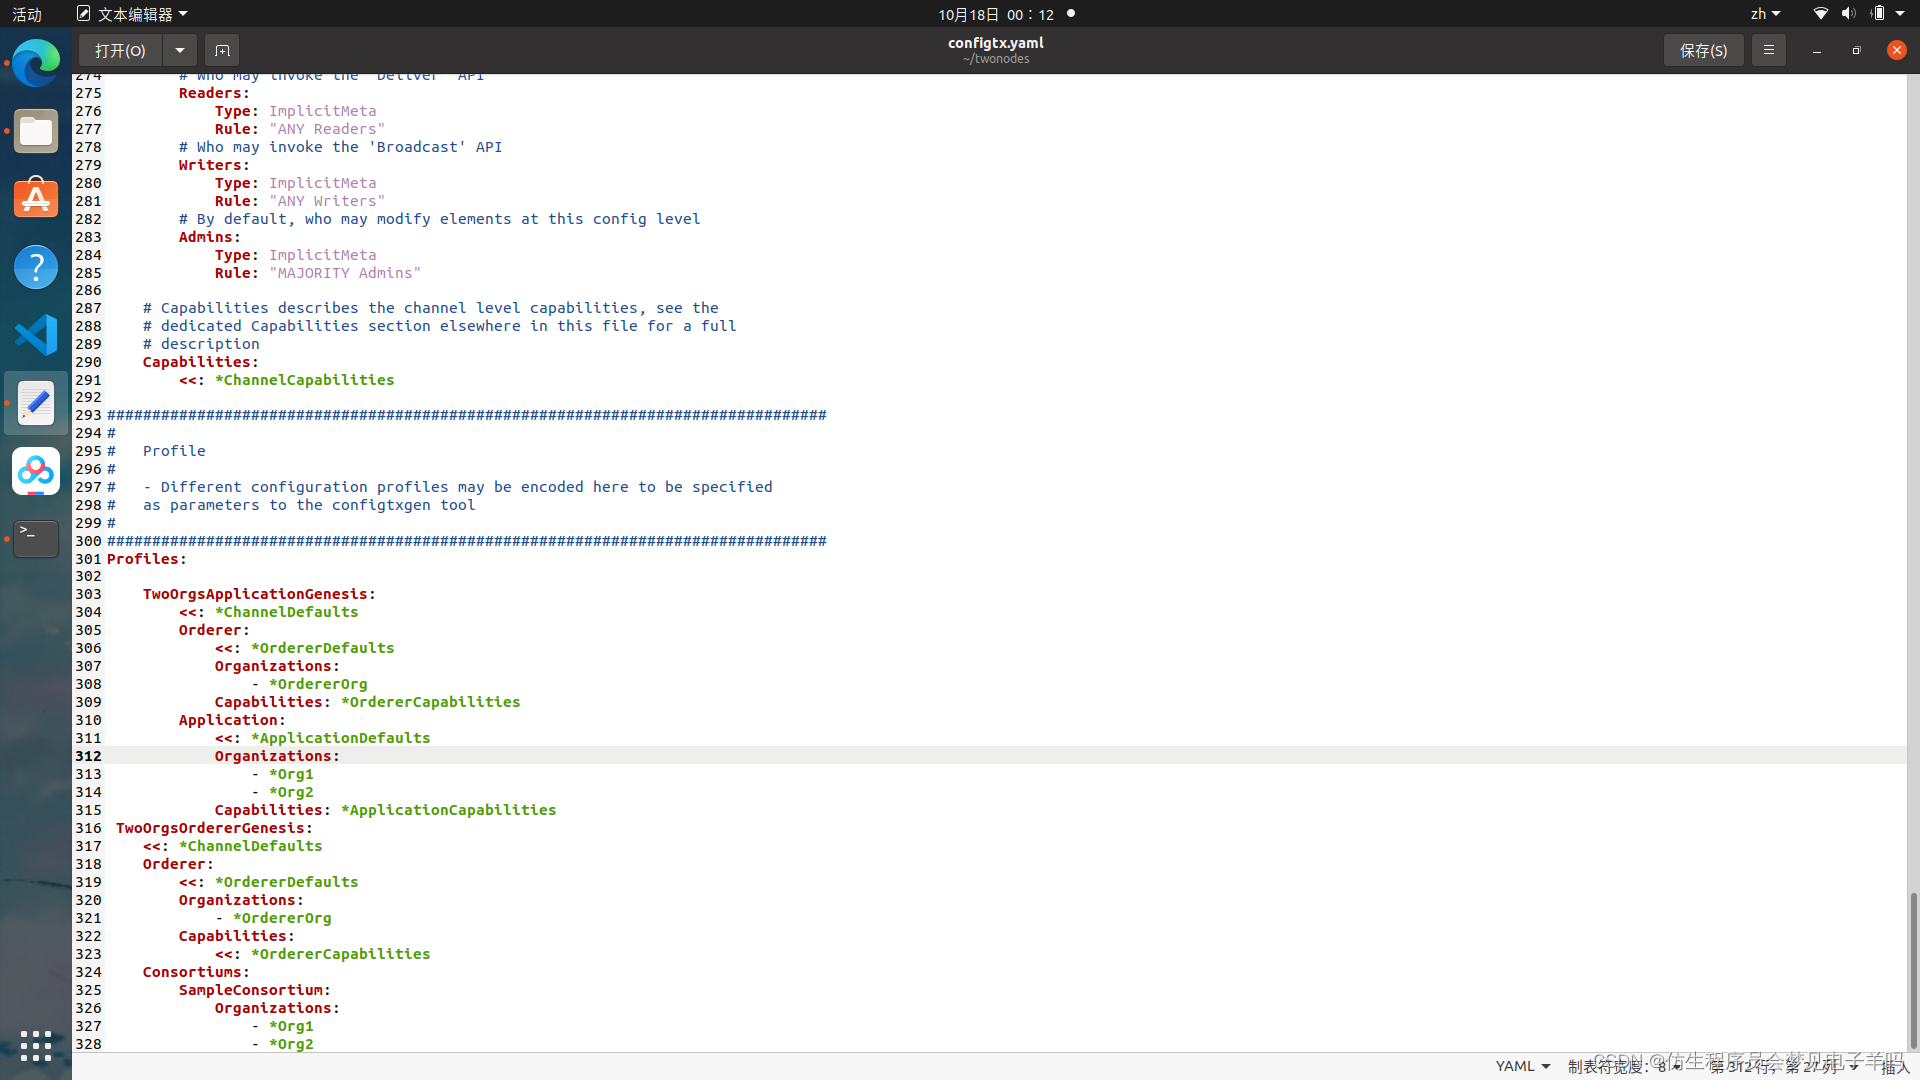
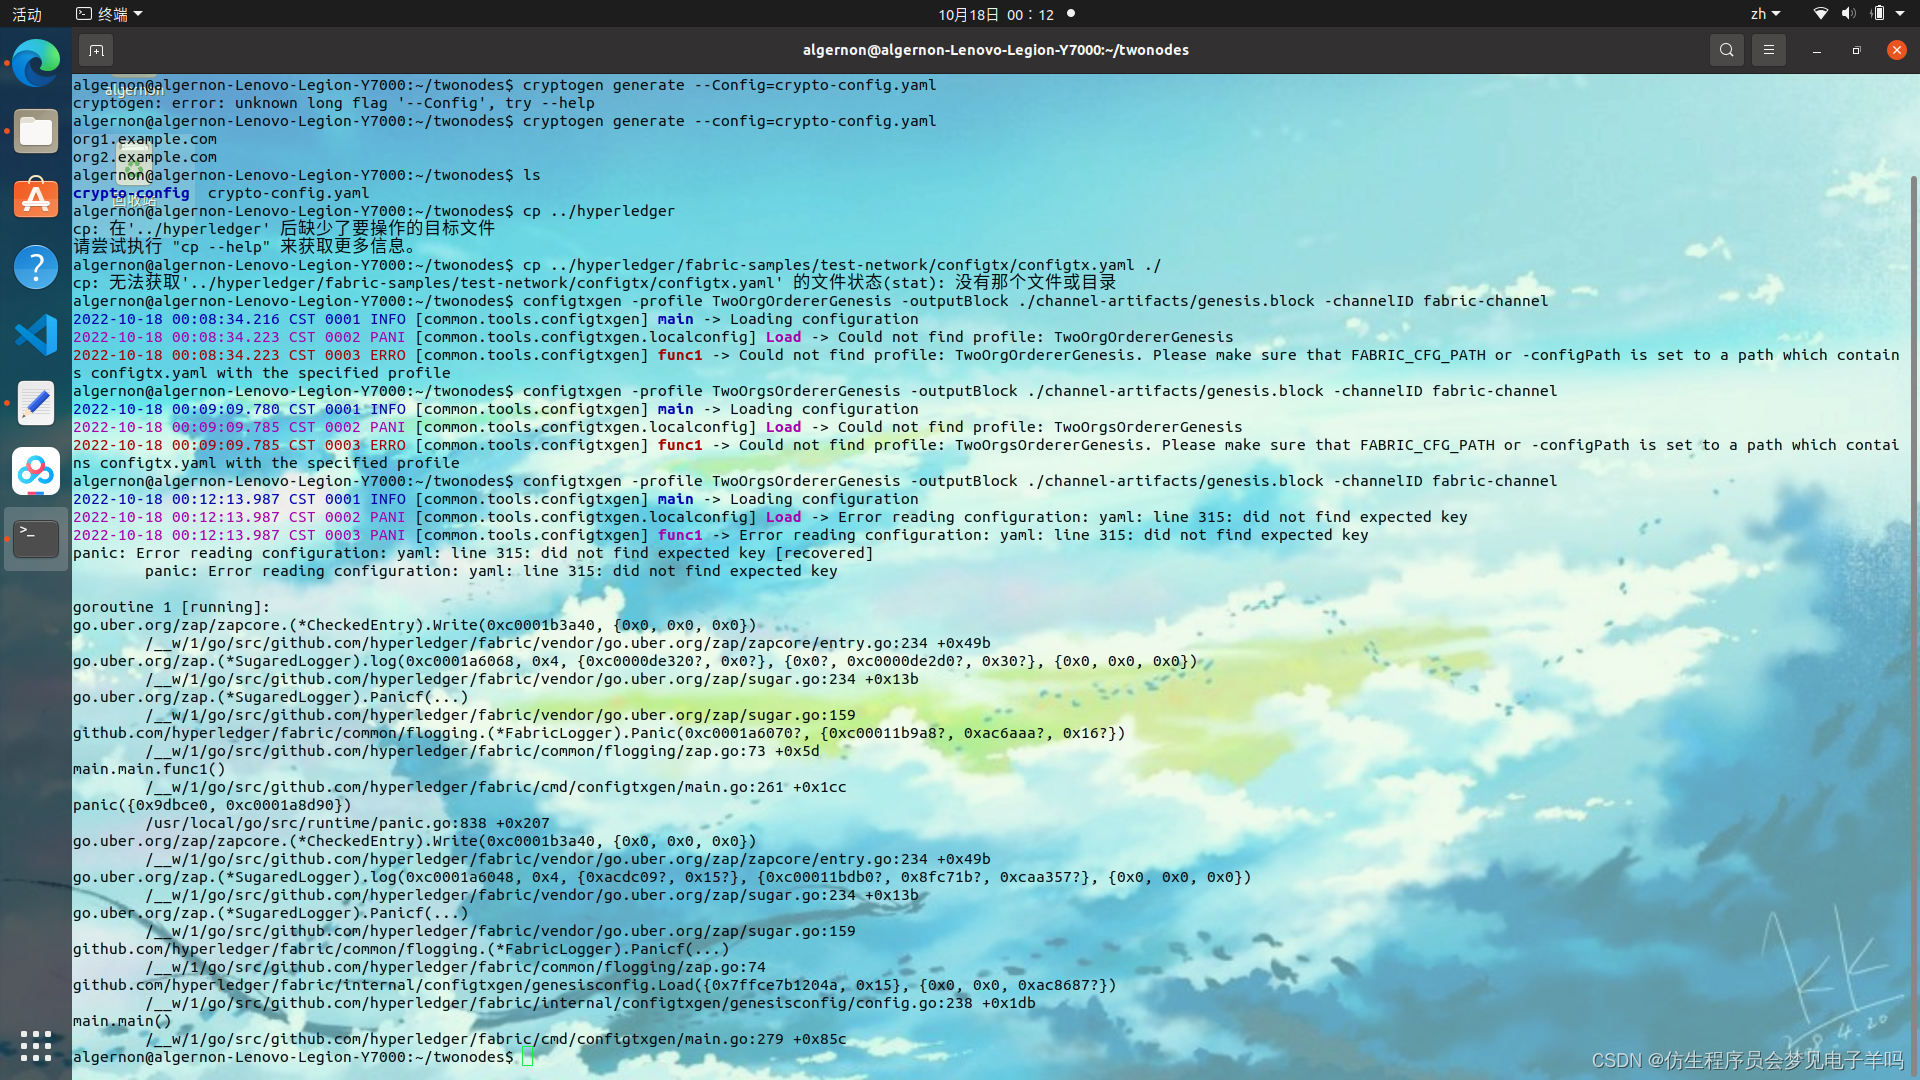
1.2 生成创世区块及通道文件
生成创世区块
configtxgen -profile TwoOrgsOrdererGenesis -outputBlock ./channel-artifacts/genesis.block -channelID fabric-channel
生成通道
configtxgen -profile TwoOrgsChannel -outputCreateChannelTX ./channel-artifacts/channel.tx -channelID mychannel
生成组织1的锚节点文件
configtxgen -profile TwoOrgsChannel -outputAnchorPeersUpdate ./channel-artifacts/Org1MSPanchors.tx -channelID mychannel -asOrg Org1MSP
生成组织2的锚节点文件
configtxgen -profile TwoOrgsChannel -outputAnchorPeersUpdate ./channel-artifacts/Org2MSPanchors.tx -channelID mychannel -asOrg Org2MSP
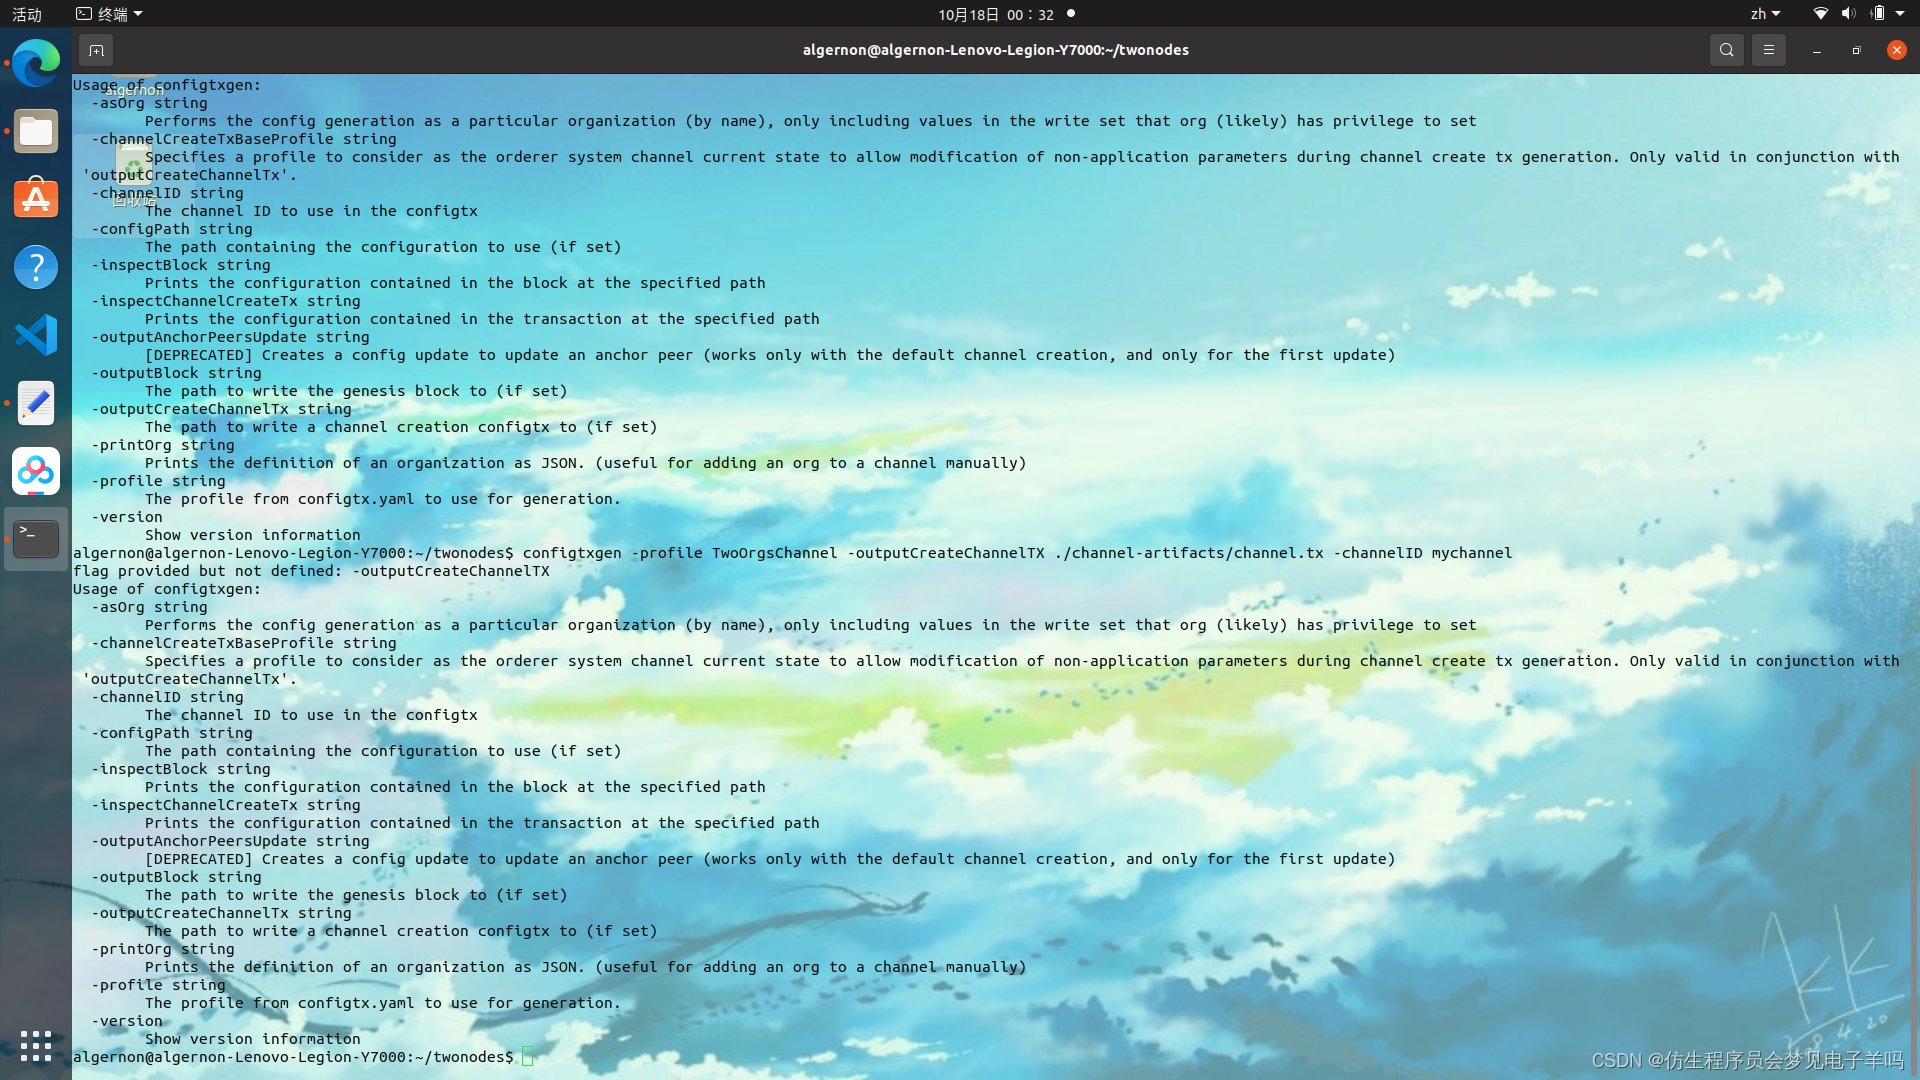
1.3 编写docker-compose文件
algernon@algernon-Lenovo-Legion-Y7000:~/twonodes$ configtxgen -profile TwoOrgsChannel -outputCreateChannelTX ./channel-artifacts/channel.tx -channelID mychannel
flag provided but not defined: -outputCreateChannelTX
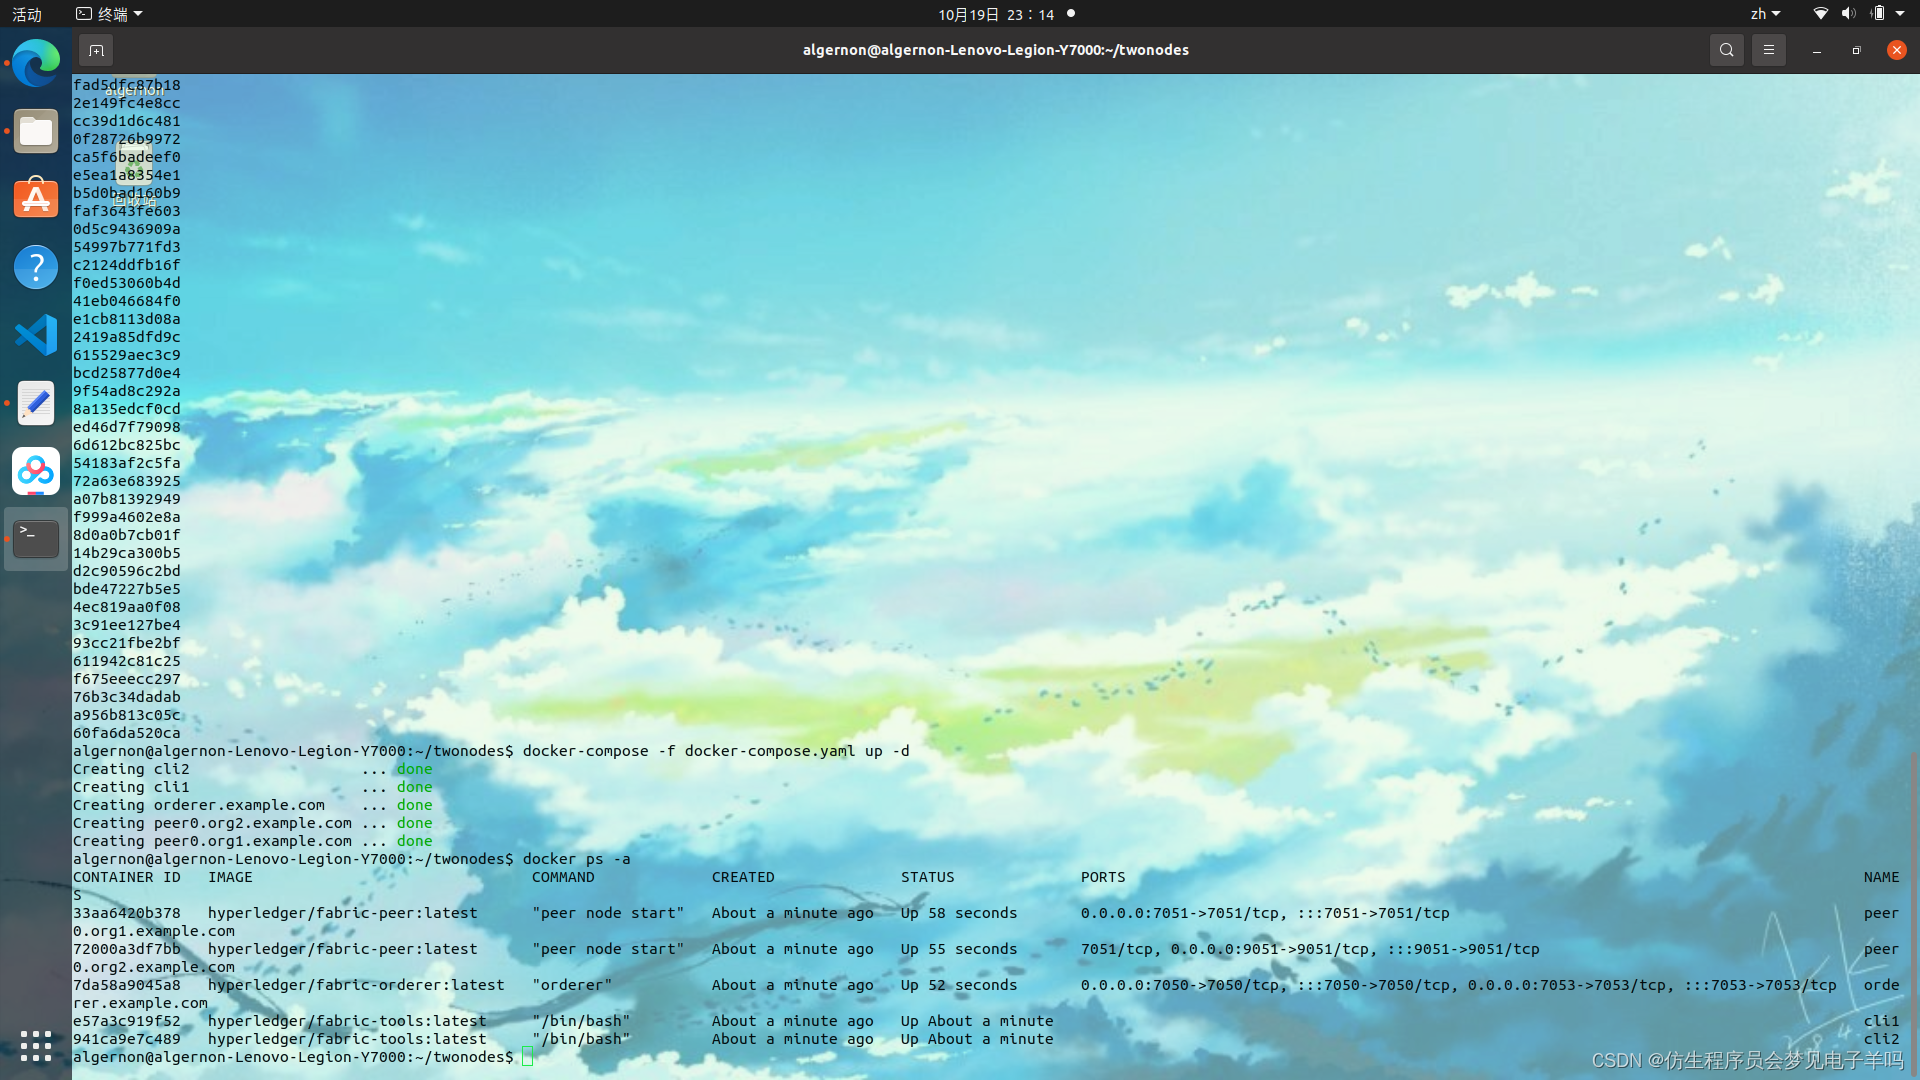
在raft-test目录下,新建docker-compose.yaml文件。文件内容如下面所示。
docker-compose.yaml文件内容
配置文件
version: '2.4'

volumes:
  orderer.example.com:
  peer0.org1.example.com:
  peer0.org2.example.com:

networks:
  test:
    name: twonodes_test

services:

  orderer.example.com:
    container_name: orderer.example.com
    image: hyperledger/fabric-orderer:latest
    labels:
        service: hyperledger-fabric
    environment:
      - FABRIC_LOGGING_SPEC=INFO
      - ORDERER_GENERAL_LISTENADDRESS=0.0.0.0
      - ORDERER_GENERAL_LISTENPORT=7050
      - ORDERER_GENERAL_LOCALMSPID=OrdererMSP
      - ORDERER_GENERAL_LOCALMSPDIR=/var/hyperledger/orderer/msp
      # enabled TLS
      - ORDERER_GENERAL_TLS_ENABLED=true
      - ORDERER_GENERAL_TLS_PRIVATEKEY=/var/hyperledger/orderer/tls/server.key
      - ORDERER_GENERAL_TLS_CERTIFICATE=/var/hyperledger/orderer/tls/server.crt
      - ORDERER_GENERAL_TLS_ROOTCAS=[/var/hyperledger/orderer/tls/ca.crt]
      - ORDERER_KAFKA_TOPIC_REPLICATIONFACTORY=1
      - ORDERER_KAFKA_VERBOSE=true
      - ORDERER_GENERAL_CLUSTER_CLIENTCERTIFICATE=/var/hyperledger/orderer/tls/server.crt
      - ORDERER_GENERAL_CLUSTER_CLIENTPRIVATEKEY=/var/hyperledger/orderer/tls/server.key
      - ORDERER_GENERAL_CLUSTER_ROOTCAS=[/var/hyperledger/orderer/tls/ca.crt]
      - ORDERER_GENERAL_BOOTSTRAPMETHOD=none
      - ORDERER_CHANNELPARTICIPATION_ENABLED=true
      - ORDERER_ADMIN_TLS_ENABLED=true
      - ORDERER_ADMIN_TLS_CERTIFICATE=/var/hyperledger/orderer/tls/server.crt
      - ORDERER_ADMIN_TLS_PRIVATEKEY=/var/hyperledger/orderer/tls/server.key
      - ORDERER_ADMIN_TLS_ROOTCAS=[/var/hyperledger/orderer/tls/ca.crt]
      - ORDERER_ADMIN_TLS_CLIENTROOTCAS=[/var/hyperledger/orderer/tls/ca.crt]
      - ORDERER_ADMIN_LISTENADDRESS=0.0.0.0:7053
#      - ORDERER_OPERATIONS_LISTENADDRESS=orderer.example.com:9443
#      - ORDERER_METRICS_PROVIDER=prometheus
    working_dir: /opt/gopath/src/github.com/hyperledger/fabric
    command: orderer
    volumes:
        - ./channel-artifacts/genesis.block:/var/hyperledger/orderer/orderer.genesis.block
        - ./crypto-config/ordererOrganizations/example.com/orderers/orderer.example.com/msp:/var/hyperledger/orderer/msp
        - ./crypto-config/ordererOrganizations/example.com/orderers/orderer.example.com/tls/:/var/hyperledger/orderer/tls
        - orderer.example.com:/var/hyperledger/production/orderer
    ports:
      - 7050:7050
      - 7053:7053
    networks:
      - test

  peer0.org1.example.com:
    container_name: peer0.org1.example.com
    image: hyperledger/fabric-peer:latest
    labels:
        service: hyperledger-fabric
    environment:
      #Generic peer variables
      - CORE_VM_ENDPOINT=unix:///host/var/run/docker.sock
      # the following setting starts chaincode containers on the same
      # bridge network as the peers
      # https://docs.docker.com/compose/networking/
      - CORE_VM_DOCKER_HOSTCONFIG_NETWORKMODE=twonodes_test
      - FABRIC_LOGGING_SPEC=INFO
      #- FABRIC_LOGGING_SPEC=DEBUG
      - CORE_PEER_TLS_ENABLED=true
      - CORE_PEER_PROFILE_ENABLED=true
      - CORE_PEER_TLS_CERT_FILE=/etc/hyperledger/fabric/tls/server.crt
      - CORE_PEER_TLS_KEY_FILE=/etc/hyperledger/fabric/tls/server.key
      - CORE_PEER_TLS_ROOTCERT_FILE=/etc/hyperledger/fabric/tls/ca.crt
      # Peer specific variabes
      - CORE_PEER_ID=peer0.org1.example.com
      - CORE_PEER_ADDRESS=peer0.org1.example.com:7051
      - CORE_PEER_LISTENADDRESS=0.0.0.0:7051
      - CORE_PEER_CHAINCODEADDRESS=peer0.org1.example.com:7052
      - CORE_PEER_CHAINCODELISTENADDRESS=0.0.0.0:7052
      - CORE_PEER_GOSSIP_BOOTSTRAP=peer0.org1.example.com:7051
      - CORE_PEER_GOSSIP_EXTERNALENDPOINT=peer0.org1.example.com:7051
      - CORE_PEER_LOCALMSPID=Org1MSP

    volumes:
        - /var/run/docker.sock:/host/var/run/docker.sock
        - ./crypto-config/peerOrganizations/org1.example.com/peers/peer0.org1.example.com/msp:/etc/hyperledger/fabric/msp
        - ./crypto-config/peerOrganizations/org1.example.com/peers/peer0.org1.example.com/tls:/etc/hyperledger/fabric/tls
        - peer0.org1.example.com:/var/hyperledger/production
    working_dir: /opt/gopath/src/github.com/hyperledger/fabric/peer
    command: peer node start
    ports:
      - 7051:7051
    networks:
      - test

  peer0.org2.example.com:
    container_name: peer0.org2.example.com
    image: hyperledger/fabric-peer:latest
    labels:
        service: hyperledger-fabric
    environment:
      #Generic peer variables
      - CORE_VM_ENDPOINT=unix:///host/var/run/docker.sock
      # the following setting starts chaincode containers on the same
      # bridge network as the peers
      # https://docs.docker.com/compose/networking/
      - CORE_VM_DOCKER_HOSTCONFIG_NETWORKMODE=twonodes_test
      - FABRIC_LOGGING_SPEC=INFO
      #- FABRIC_LOGGING_SPEC=DEBUG
      - CORE_PEER_TLS_ENABLED=true
      - CORE_PEER_PROFILE_ENABLED=true
      - CORE_PEER_TLS_CERT_FILE=/etc/hyperledger/fabric/tls/server.crt
      - CORE_PEER_TLS_KEY_FILE=/etc/hyperledger/fabric/tls/server.key
      - CORE_PEER_TLS_ROOTCERT_FILE=/etc/hyperledger/fabric/tls/ca.crt
      # Peer specific variabes
      - CORE_PEER_ID=peer0.org2.example.com
      - CORE_PEER_ADDRESS=peer0.org2.example.com:9051
      - CORE_PEER_LISTENADDRESS=0.0.0.0:9051
      - CORE_PEER_CHAINCODEADDRESS=peer0.org2.example.com:9052
      - CORE_PEER_CHAINCODELISTENADDRESS=0.0.0.0:9052
      - CORE_PEER_GOSSIP_EXTERNALENDPOINT=peer0.org2.example.com:9051
      - CORE_PEER_GOSSIP_BOOTSTRAP=peer0.org2.example.com:9051
      - CORE_PEER_LOCALMSPID=Org2MSP
    volumes:
      - /var/run/docker.sock:/host/var/run/docker.sock
      - ./crypto-config/peerOrganizations/org2.example.com/peers/peer0.org2.example.com/msp:/etc/hyperledger/fabric/msp
      - ./crypto-config/peerOrganizations/org2.example.com/peers/peer0.org2.example.com/tls:/etc/hyperledger/fabric/tls
      - peer0.org2.example.com:/var/hyperledger/production
    working_dir: /opt/gopath/src/github.com/hyperledger/fabric/peer
    command: peer node start
    ports:
      - 9051:9051
    networks:
      - test


  cli1:
    container_name: cli1
    image: hyperledger/fabric-tools:latest
    tty: true
    stdin_open: true
    environment:                            # 环境变量相关设置
      - GOPATH=/opt/gopath
      - CORE_VM_ENDPOINT=unix:///host/var/run/docker.sock
      - CORE_LOGGING_LEVEL=INFO
      - CORE_PEER_ID=cli1
      - CORE_PEER_ADDRESS=peer0.org1.example.com:7051
      - CORE_PEER_LOCALMSPID=Org1MSP
      - CORE_PEER_TLS_ENABLED=true
      - CORE_PEER_TLS_CERT_FILE=/opt/gopath/src/github.com/hyperledger/fabric/peer/crypto/peerOrganizations/org1.example.com/peers/peer0.org1.example.com/tls/server.crt
      - CORE_PEER_TLS_KEY_FILE=/opt/gopath/src/github.com/hyperledger/fabric/peer/crypto/peerOrganizations/org1.example.com/peers/peer0.org1.example.com/tls/server.key
      - CORE_PEER_TLS_ROOTCERT_FILE=/opt/gopath/src/github.com/hyperledger/fabric/peer/crypto/peerOrganizations/org1.example.com/peers/peer0.org1.example.com/tls/ca.crt
      - CORE_PEER_MSPCONFIGPATH=/opt/gopath/src/github.com/hyperledger/fabric/peer/crypto/peerOrganizations/org1.example.com/users/Admin@org1.example.com/msp
      #- FABRIC_LOGGING_SPEC=DEBUG
    working_dir: /opt/gopath/src/github.com/hyperledger/fabric/peer
    command: /bin/bash
    volumes:
        # 挂载目录,默认就行
        - /var/run/:/host/var/run/
        # 链码存放路径(go或者node.js写的链代码)
        - ./chaincode/go/:/opt/gopath/src/github.com/hyperledger/fabric-cluster/chaincode/go
        # 存放证书的路径
        - ./crypto-config:/opt/gopath/src/github.com/hyperledger/fabric/peer/crypto/
        # 生成的创世块和管道以及更新的锚节点文件存放的路径(tx和block后缀的文件)
        - ./channel-artifacts:/opt/gopath/src/github.com/hyperledger/fabric/peer/channel-artifacts
        # 注意:./channel-artifacts这种是指路径,需要本地有这个路径,或者改成自己的路径
    networks:
      - test

  cli2:
    container_name: cli2
    image: hyperledger/fabric-tools:latest
    tty: true
    stdin_open: true
    environment:                            # 环境变量相关设置
      - GOPATH=/opt/gopath
      - CORE_VM_ENDPOINT=unix:///host/var/run/docker.sock
      - CORE_LOGGING_LEVEL=INFO
      - CORE_PEER_ID=cli2
      - CORE_PEER_ADDRESS=peer0.org2.example.com:9051
      - CORE_PEER_LOCALMSPID=Org2MSP
      - CORE_PEER_TLS_ENABLED=true
      - CORE_PEER_TLS_CERT_FILE=/opt/gopath/src/github.com/hyperledger/fabric/peer/crypto/peerOrganizations/org2.example.com/peers/peer0.org2.example.com/tls/server.crt
      - CORE_PEER_TLS_KEY_FILE=/opt/gopath/src/github.com/hyperledger/fabric/peer/crypto/peerOrganizations/org2.example.com/peers/peer0.org2.example.com/tls/server.key
      - CORE_PEER_TLS_ROOTCERT_FILE=/opt/gopath/src/github.com/hyperledger/fabric/peer/crypto/peerOrganizations/org2.example.com/peers/peer0.org2.example.com/tls/ca.crt
      - CORE_PEER_MSPCONFIGPATH=/opt/gopath/src/github.com/hyperledger/fabric/peer/crypto/peerOrganizations/org2.example.com/users/Admin@org2.example.com/msp
      #- FABRIC_LOGGING_SPEC=DEBUG
    working_dir: /opt/gopath/src/github.com/hyperledger/fabric/peer
    command: /bin/bash
    volumes:
        # 挂载目录,默认就行
        - /var/run/:/host/var/run/
        # 链码存放路径(go或者node.js写的链代码)
        - ./chaincode/go/:/opt/gopath/src/github.com/hyperledger/fabric-cluster/chaincode/go
        # 存放证书的路径
        - ./crypto-config:/opt/gopath/src/github.com/hyperledger/fabric/peer/crypto/
        # 生成的创世块和管道以及更新的锚节点文件存放的路径(tx和block后缀的文件)
        - ./channel-artifacts:/opt/gopath/src/github.com/hyperledger/fabric/peer/channel-artifacts
        # 注意:./channel-artifacts这种是指路径,需要本地有这个路径,或者改成自己的路径
    networks:
      - test

1.4 通道操作 链码
代码来源:
https://sunkaiyuan.blog.youkuaiyun.com/article/details/124315270
docker exec -it cli1 bash
bash-5.1# peer channel create -o orderer.example.com:7050 -c mychannel -f ./channel-artifacts/channel.tx --tls true --cafile /opt/gopath/src/github.com/hyperledger/fabric/peer/crypto/ordererOrganizations/example.com/msp/tlscacerts/tlsca.example.com-cert.pem
docker exec -it cli1 bash
bash-5.1# peer channel create -o orderer.example.com:7050 -c mychannel -f ./channel-artifacts/channel.tx --tls true -- cafile /opt/gopath/src/github.com/hyperledger/fabric/peer/crypto/ordererOrganizations/example.com/mps/tlscacerts/tlsca.example.com-cert.pem
2022-10-19 15:59:10.071 UTC 0001 WARN [main] InitCmd -> CORE_LOGGING_LEVEL is no longer supported, please use the FABRIC_LOGGING_SPEC environment variable
2022-10-19 15:59:10.073 UTC 0002 WARN [main] SetOrdererEnv -> CORE_LOGGING_LEVEL is no longer supported, please use the FABRIC_LOGGING_SPEC environment variable
Error: failed to create deliver client for orderer: failed to load config for OrdererClient: unable to load orderer.tls.rootcert.file: open : no such file or directory
cd /opt/gopath/src/github.com/hyperledger/fabric/peer
配置一下hosts
vim /etc/hosts
因为我们的终端容器cli1和cli2要加入同一个通道,所以我们需要将cli1中生成的通道文件 mychannel.block复制到cli2中:
docker cp cli1:/opt/gopath/src/github.com/hyperledger/fabric/peer/mychannel.block ./
docker cp ./mychannel.block cli2:/opt/gopath/src/github.com/hyperledger/fabric/peer
root@aa:~/twonodes# docker cp cli1:/opt/gopath/src/github.com/hyperledger/fabric/peer
"docker cp" requires exactly 2 arguments.
See 'docker cp --help'.

Usage:  docker cp [OPTIONS] CONTAINER:SRC_PATH DEST_PATH|-
	docker cp [OPTIONS] SRC_PATH|- CONTAINER:DEST_PATH

Copy files/folders between a container and the local filesystem
root@aa:~/twonodes# docker cp cli1:/opt/gopath/src/github.com/hyperledger/fabric/peer/mychannel.block ./
root@aa:~/twonodes# ls
chaincode          configtx.yaml  crypto-config.yaml   mychannel.block
channel-artifacts  crypto-config  docker-compose.yaml
root@aa:~/twonodes# docker cp ./mychannel.block cli2:/opt/gopath/src/github.com/hyperledger/fabric/peer
root@aa:~/twonodes# docker exec -it cli2 bash
bash-5.1# ls
channel-artifacts  crypto             mychannel.block
bash-5.1#
bash-5.1# exit
exit
root@aa:~/twonodes#
将 cli1和 cli2加入通道 mychannel.block
$ docker exec -it cli1 bash
$ peer channel join -b mychannel.block
$ exit
$ docker exec -it cli2 bash
$ peer channel join -b mychannel.block
$ exit
root@aa:~/twonodes# docker exec -it cli1 bash
bash-5.1# peer channel join -b mychannel.block
2022-03-11 08:29:05.974 UTC [channelCmd] InitCmdFactory -> INFO 001 Endorser and orderer connections initialized
2022-03-11 08:29:06.048 UTC [channelCmd] executeJoin -> INFO 002 Successfully submitted proposal to join channel
bash-5.1# exit
exit
root@aa:~/twonodes# docker exec -it cli2 bash
bash-5.1# peer channel join -b mychannel.block
2022-03-11 08:29:32.601 UTC [channelCmd] InitCmdFactory -> INFO 001 Endorser and orderer connections initialized
2022-03-11 08:29:32.654 UTC [channelCmd] executeJoin -> INFO 002 Successfully submitted proposal to join channel
bash-5.1# exit
exit
root@aa:~/twonodes#
bash-5.1# peer channel create -o orderer.example.com:7050 -c mychannel -f ./channel-artifacts/channel.tx --tls true --cafile /opt/gopath/src/github.com/hyperledger/fabric/peer/crypto/ordererOrganizations/example.com/msp/tlscacerts/tlsca.example.com-cert.pem
2022-10-20 07:42:22.043 UTC 0001 WARN [main] InitCmd -> CORE_LOGGING_LEVEL is no longer supported, please use the FABRIC_LOGGING_SPEC environment variable
2022-10-20 07:42:22.044 UTC 0002 WARN [main] SetOrdererEnv -> CORE_LOGGING_LEVEL is no longer supported, please use the FABRIC_LOGGING_SPEC environment variable
2022-10-20 07:42:22.046 UTC 0003 INFO [channelCmd] InitCmdFactory -> Endorser and orderer connections initialized
Error: got unexpected status: BAD_REQUEST -- channel creation request not allowed because the orderer system channel is not defined
peer channel create -o orderer.example.com:7050 -c mychannel -f ./channel-artifacts/channel.tx --tls true --cafile /opt/gopath/src/github.com/hyperledger/fabric/peer/crypto/ordererOrganizations/example.com/msp/tlscacerts/tlsca.example.com-cert.pem
fabric-samples里有示例链码sacc.go,当然你可以编写自己的链码,这里只做演示,整个链码的生命周期
将链码复制到,项目的链码目录下 chaincode/go
root@aa:~/twonodes/chaincode/go# ls
sacc.go
打包链码-peer lifecycle chaincode package
root@aa:~/twonodes/chaincode/go# docker exec -it cli1 bash
bash-5.1# cd /opt/gopath/src/github.com/hyperledger/fabric-cluster/chaincode/go
bash-5.1# ls
sacc.go
# Go Modules国内加速镜像加速,并打包依赖到vender
bash-5.1# go env -w GO111MODULE=on
bash-5.1# go env -w GOPROXY=https://goproxy.cn,direct
bash-5.1# go mod init
bash-5.1# go mod vendor
bash-5.1# go env -w GO111MODULE=auto
bash-5.1# ls
go.mod   go.sum   sacc.go  vendor
# 回到工作目录,开始打包
bash-5.1# cd /opt/gopath/src/github.com/hyperledger/fabric/peer
bash-5.1# ls
channel-artifacts  crypto             mychannel.block
bash-5.1# peer lifecycle chaincode package sacc.tar.gz --path github.com/hyperledger/fabric-cluster/chaincode/go/ --label sacc_1
---------------------------------------------------
 sacc.tar.gz  打包的名称
 --path       链码所在的路径
 --label      链码的标签
---------------------------------------------------
bash-5.1# ls
channel-artifacts  crypto             mychannel.block    sacc.tar.gz
# 将生成的打包文件复制到cli2里
bash-5.1# exit
root@aa:~/twonodes# docker cp cli1:/opt/gopath/src/github.com/hyperledger/fabric/peer/sacc.tar.gz ./
root@aa:~/twonodes# ls
chaincode          configtx.yaml  crypto-config.yaml   mychannel.block
channel-artifacts  crypto-config  docker-compose.yaml  sacc.tar.gz
root@aa:~/twonodes# docker cp sacc.tar.gz cli2:/opt/gopath/src/github.com/hyperledger/fabric/peer
root@aa:~/twonodes# docker exec -it cli2 bash
bash-5.1# ls
channel-artifacts  crypto             mychannel.block    sacc.tar.gz
bash-5.1# exit
安装链码-peer lifecycle chaincode install
# 在每一个节点上都要安装
# 节点1上安装链码
docker exec -it cli1 bash
peer lifecycle chaincode install sacc.tar.gz
exit
peer lifecycle chaincode install sacc.tar.gz
exit
查询链码的package-id即序列号-peer lifecycle chaincode approveformyorg
# 查询链码的package-id,在组织批准链码的时候需要用到,其实在安装完链码之后,打印的日志就显示了package-id
root@aa:~/twonodes# docker exec -it cli1 bash
bash-5.1# ls
channel-artifacts  crypto             mychannel.block    sacc.tar.gz
bash-5.1# peer lifecycle chaincode queryinstalled
Installed chaincodes on peer:
Package ID: sacc_1:9ffa6d574bee9027d9ae02ad3c8a6fb3c7d0f65e86dcf887e6e33f7216571af8, Label: sacc_1
bash-5.1# exit
组织批准链码-peer lifecycle chaincode approveformyorg
# 每一个组织都要批准了这个链码,之后,这个链码才可以被安装在我们的通道上
# 组织批准链码命令如下:
peer lifecycle chaincode approveformyorg --channelID mychannel --name sacc --version 1.0 --init-required --package-id  --sequence 1 --tls true --cafile /opt/gopath/src/github.com/hyperledger/fabric/peer/crypto/ordererOrganizations/example.com/orderers/orderer.example.com/msp/tlscacerts/tlsca.example.com-cert.pem
---------------------------------------------------
 --channelID	  通道ID
 --name			 链码的名称
 --version        链码的版本号
 --init-required  链码是否需要初始化
 --package-id     链码的序列号
 --tls            tls验证
 --cafile         ca证书文件的路径
---------------------------------------------------
1.5 多机搭建
https://sxguan0529.gitbook.io/hyperledger-fabric/hyperledger-fabric-duo-ji-da-jian
生成Fabric证书
- 创建项目目录 在三台虚拟机上使用以下命令创建相同的项目目录(三台虚拟机项目路径要相同)。 cd ~/hyperledgermkdir multinodes
- 编写证书文件 首先使用以下命令进入项目目录。 cd ~/hyperledger/multinodes 使用以下命令将模板文件复制到当前目录下。 cryptogen showtemplate > crypto-config.yaml
将配置文件进行修改,修改如下。 OrdererOrgs:
Name: Orderer
Domain: example.com
EnableNodeOUs: trueSpecs:
- Hostname: orderer PeerOrgs:
Name: org1
Domain: org1.example.com
EnableNodeOUs: true
Template:
Count: 1
Users:
Count: 1Name: org2
Domain: org2.example.com
EnableNodeOUs: true
Template:
Count: 1
Users:
Count: 1
- 生成证书文件 使用以下命令生成证书文件。 cryptogen generate --config=crypto-config.yaml 使用ls命令查看生成的文件,可以看到生成了crypto-config文件,这里存放所有的证书文件。 ls crypto-config
crypto-config.yaml 使用scp命令将证书文件复制到其他两台虚拟机中(使用scp命令时会要求输入主机密码)。 scp -r
./crypto-config root@172.17.0.11:~/hyperledger/multinodes/ scp -r
./crypto-config root@172.17.0.12:~/hyperledger/multinodes/
复制后使用以下命令在其他两台虚拟机的multinodes目录下查看是否复制成功。 ls crypto-config
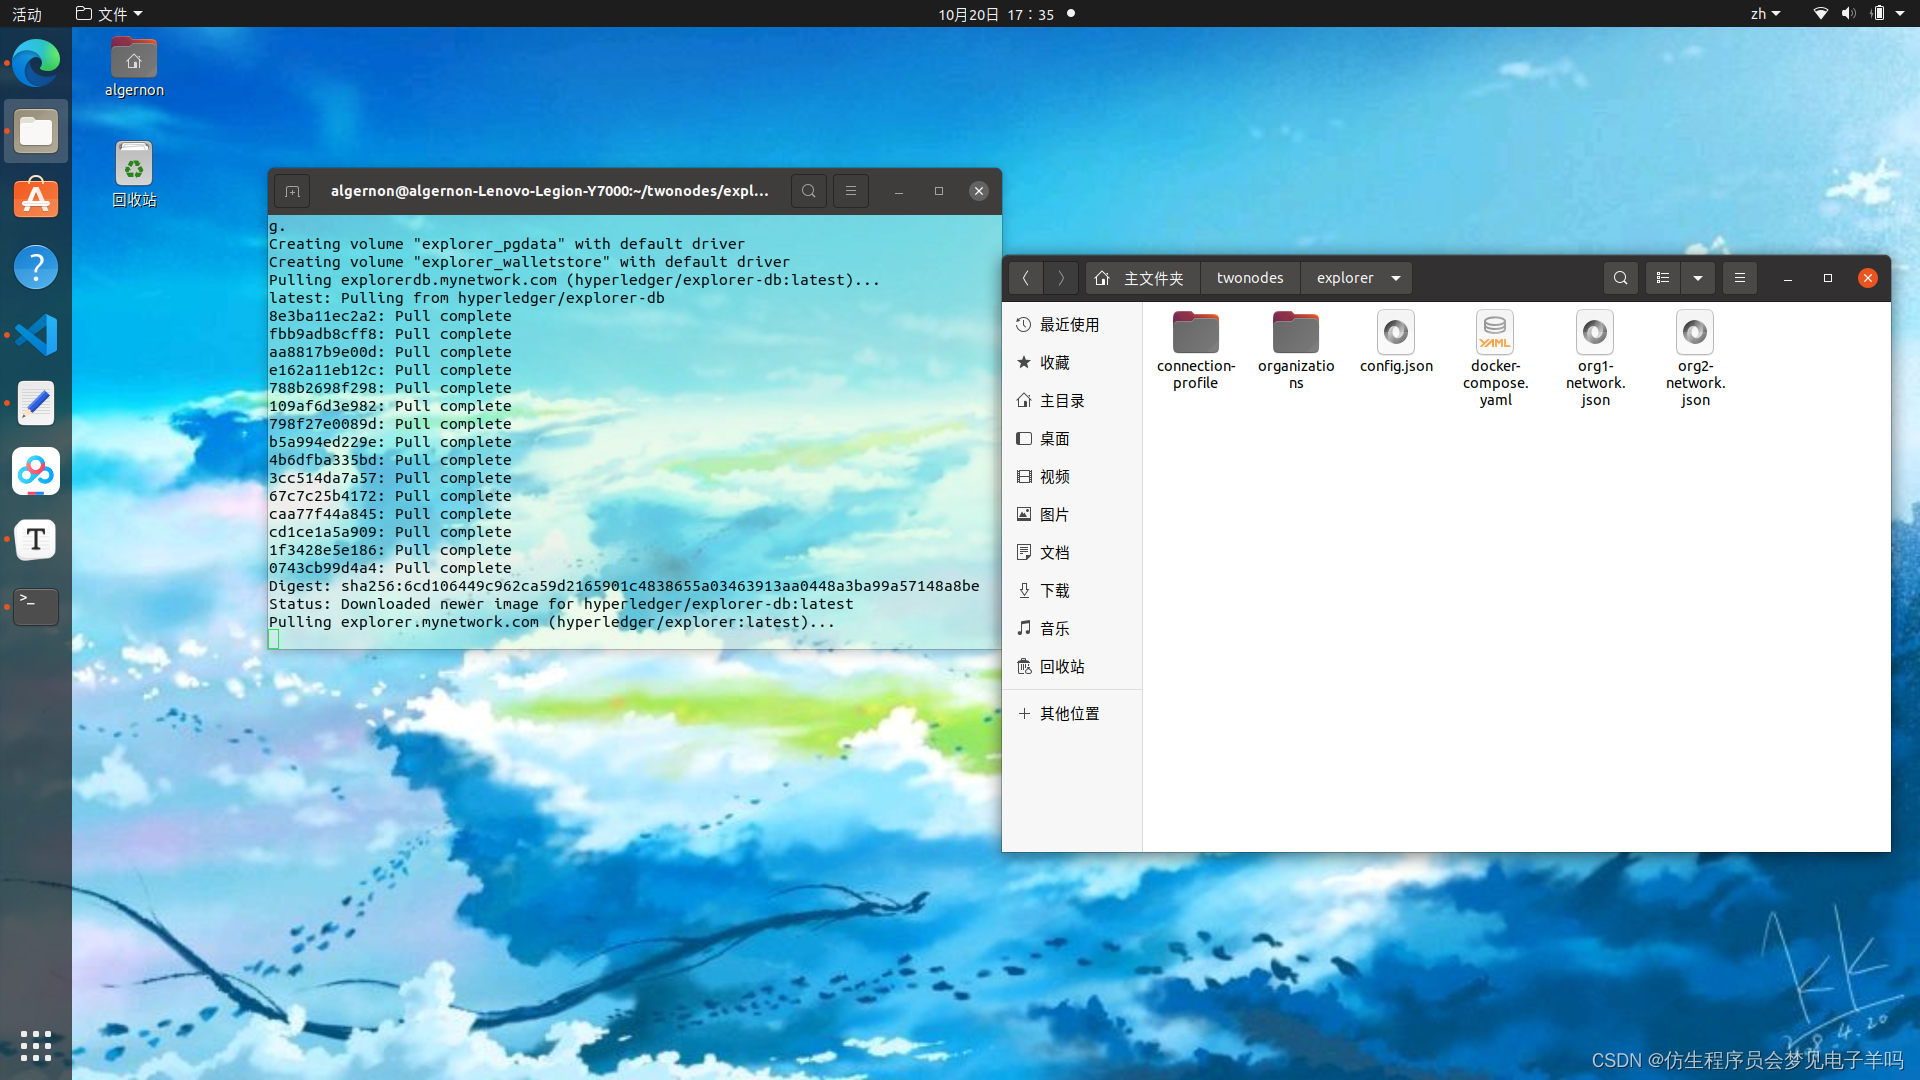
1.6 浏览器搭建
cd /opt/gopath/src/github.com/hyperledger/fabric-cluster/chaincode/go/sacc
{
	"network-configs": {
		"test-network": {
			"name": "Test Network",
			"profile": "./connection-profile/test-network.json"
		}
	},
	"license": "Apache-2.0"
}
https://raw.githubusercontent.com/hyperledger/blockchain-explorer/main/examples/net1/connection-profile/test-network.json -P connection-profile

# SPDX-License-Identifier: Apache-2.0
version: '2.1'

volumes:
  pgdata:
  walletstore:

networks:
  mynetwork.com:
    name: fabric_test

services:

  explorerdb.mynetwork.com:
    image: hyperledger/explorer-db:latest
    container_name: explorerdb.mynetwork.com
    hostname: explorerdb.mynetwork.com
    environment:
      - DATABASE_DATABASE=fabricexplorer
      - DATABASE_USERNAME=hppoc
      - DATABASE_PASSWORD=password
    healthcheck:
      test: "pg_isready -h localhost -p 5432 -q -U postgres"
      interval: 30s
      timeout: 10s
      retries: 5
    volumes:
      - pgdata:/var/lib/postgresql/data
    networks:
      - mynetwork.com

  explorer.mynetwork.com:
    image: hyperledger/explorer:latest
    container_name: explorer.mynetwork.com
    hostname: explorer.mynetwork.com
    environment:
      - DATABASE_HOST=explorerdb.mynetwork.com
      - DATABASE_DATABASE=fabricexplorer
      - DATABASE_USERNAME=hppoc
      - DATABASE_PASSWD=password
      - LOG_LEVEL_APP=info
      - LOG_LEVEL_DB=info
      - LOG_LEVEL_CONSOLE=debug
      - LOG_CONSOLE_STDOUT=true
      - DISCOVERY_AS_LOCALHOST=false
      - PORT=${PORT:-8080}
    volumes:
      - ${EXPLORER_CONFIG_FILE_PATH}:/opt/explorer/app/platform/fabric/config.json
      - ${EXPLORER_PROFILE_DIR_PATH}:/opt/explorer/app/platform/fabric/connection-profile
      - ${FABRIC_CRYPTO_PATH}:/tmp/crypto
      - walletstore:/opt/explorer/wallet
    ports:
      - ${PORT:-8080}:${PORT:-8080}
    depends_on:
      explorerdb.mynetwork.com:
        condition: service_healthy
    networks:
      - mynetwork.com
将区块链网络的证书文件整个目录复制到 explorer下,并重命名为organizations:
cd /root/block/geneg/twonodes/
cp -r crypto-config ../explorer/organizations
root@aa:~/block/geneg# cd /root/block/geneg/
root@aa:~/block/geneg# pwd
/root/block/geneg
root@aa:~/block/geneg# ls
twonodes
root@aa:~/block/geneg# mkdir explorer
root@aa:~/block/geneg# ls
explorer  twonodes
root@aa:~/block/geneg# cd explorer
root@aa:~/block/geneg/explorer# mkdir connection-profile
root@aa:~/block/geneg/explorer# ls
connection-profile
# SPDX-License-Identifier: Apache-2.0
version: '2.1'

volumes:
  pgdata:
  walletstore:

networks:
  mynetwork.com:
    external:
      name: twonodes_test

services:

  explorerdb.mynetwork.com:
    image: hyperledger/explorer-db:latest
    container_name: explorerdb.mynetwork.com
    hostname: explorerdb.mynetwork.com
    environment:
      - DATABASE_DATABASE=fabricexplorer
      - DATABASE_USERNAME=hppoc
      - DATABASE_PASSWORD=password
    healthcheck:
      test: "pg_isready -h localhost -p 5432 -q -U postgres"
      interval: 30s
      timeout: 10s
      retries: 5
    volumes:
      - pgdata:/var/lib/postgresql/data
    networks:
      - mynetwork.com

  explorer.mynetwork.com:
    image: hyperledger/explorer:latest
    container_name: explorer.mynetwork.com
    hostname: explorer.mynetwork.com
    environment:
      - DATABASE_HOST=explorerdb.mynetwork.com
      - DATABASE_DATABASE=fabricexplorer
      - DATABASE_USERNAME=hppoc
      - DATABASE_PASSWD=password
      - LOG_LEVEL_APP=info
      - LOG_LEVEL_DB=info
      - LOG_LEVEL_CONSOLE=debug
      - LOG_CONSOLE_STDOUT=true
      - DISCOVERY_AS_LOCALHOST=false
    volumes:
      - ./config.json:/opt/explorer/app/platform/fabric/config.json
      - ./connection-profile:/opt/explorer/app/platform/fabric/connection-profile
      - ./organizations:/tmp/crypto
      - walletstore:/opt/explorer/wallet
    ports:
      - 8080:8080
    depends_on:
      explorerdb.mynetwork.com:
        condition: service_healthy
    networks:
      - mynetwork.com
# 新建文件夹,用于存放区块链浏览器搭建过程中的配置文件
mkdir explorer
cd explorer
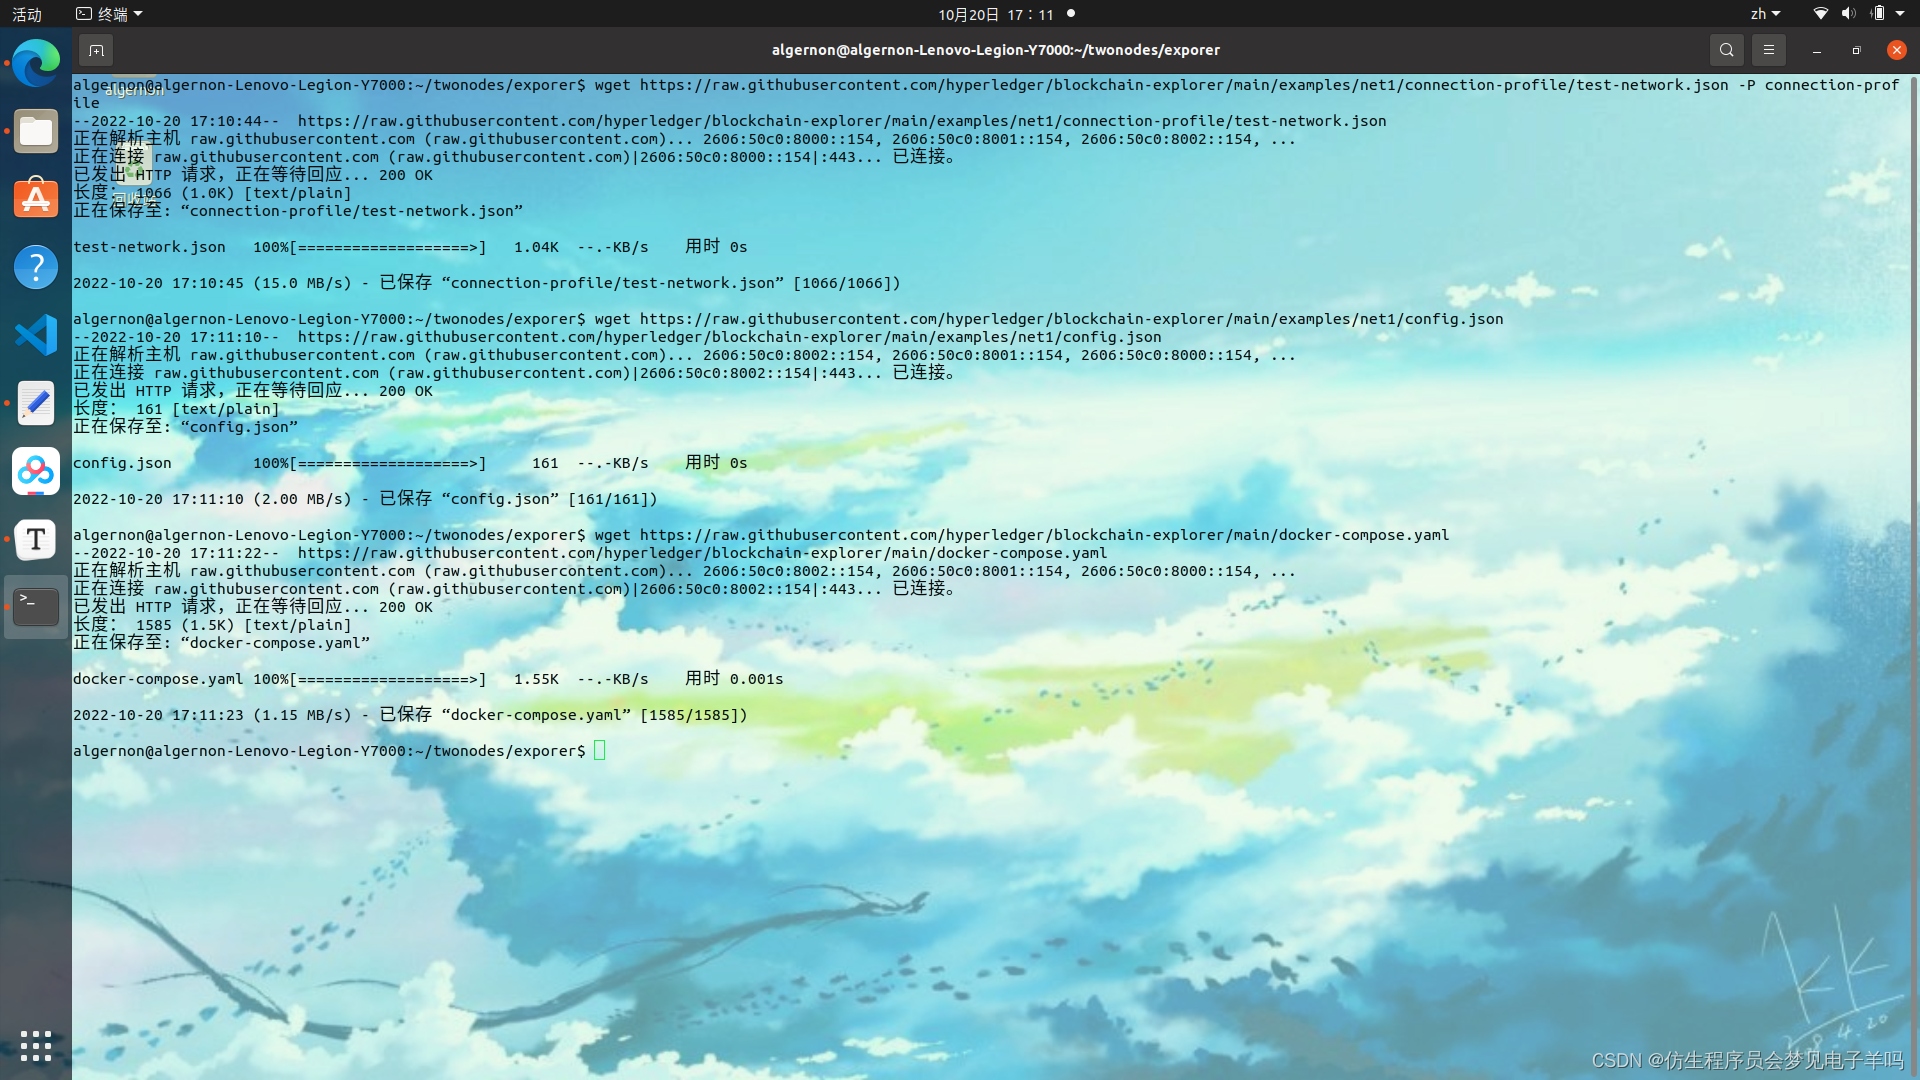
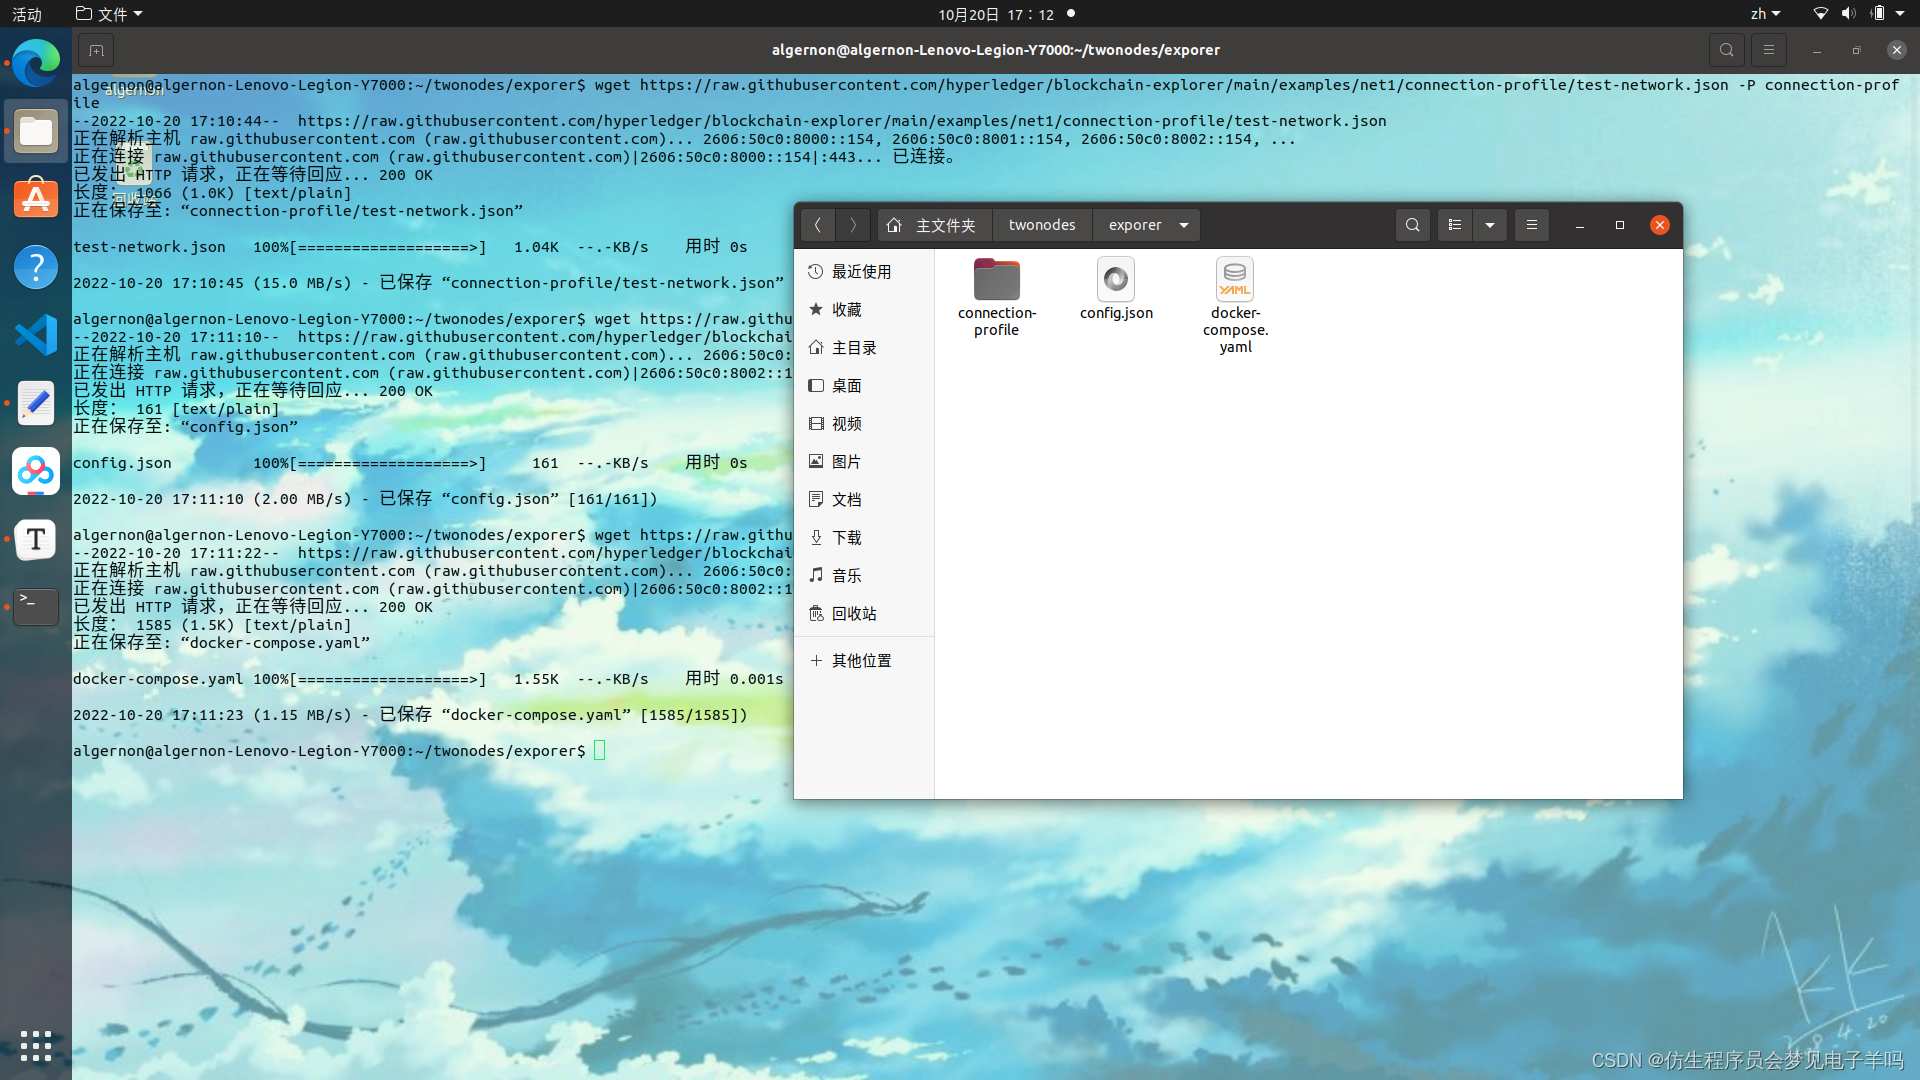
# wget配置文件,由于被墙,可能无法直接获取
wget https://raw.githubusercontent.com/hyperledger/blockchain-explorer/main/examples/net1/config.json
wget https://raw.githubusercontent.com/hyperledger/blockchain-explorer/main/examples/net1/connection-profile/test-network.json -P connection-profile
wget https://raw.githubusercontent.com/hyperledger/blockchain-explorer/main/docker-compose.yaml
# 解决方法,手动创建配置文件,并通过访问下面网址,将配置文件内容复制进去
{
	"network-configs": {
		"org1-network": {
			"name": "org1-network",
			"profile": "./connection-profile/org1-network.json"
		},
		"org2-network": {
			"name": "org2-network",
			"profile": "./connection-profile/org2-network.json"
		}
	},
	"license": "Apache-2.0"
}
cd /root/block/geneg/twonodes/
cp -r crypto-config ../explorer/organizations
root@kai:~/block/geneg# cd explorer
root@kai:~/block/geneg/explorer# pwd
/root/block/geneg/explorer
root@kai:~/block/geneg/explorer# ls
config.json connection-profile docker-compose.yaml organizations
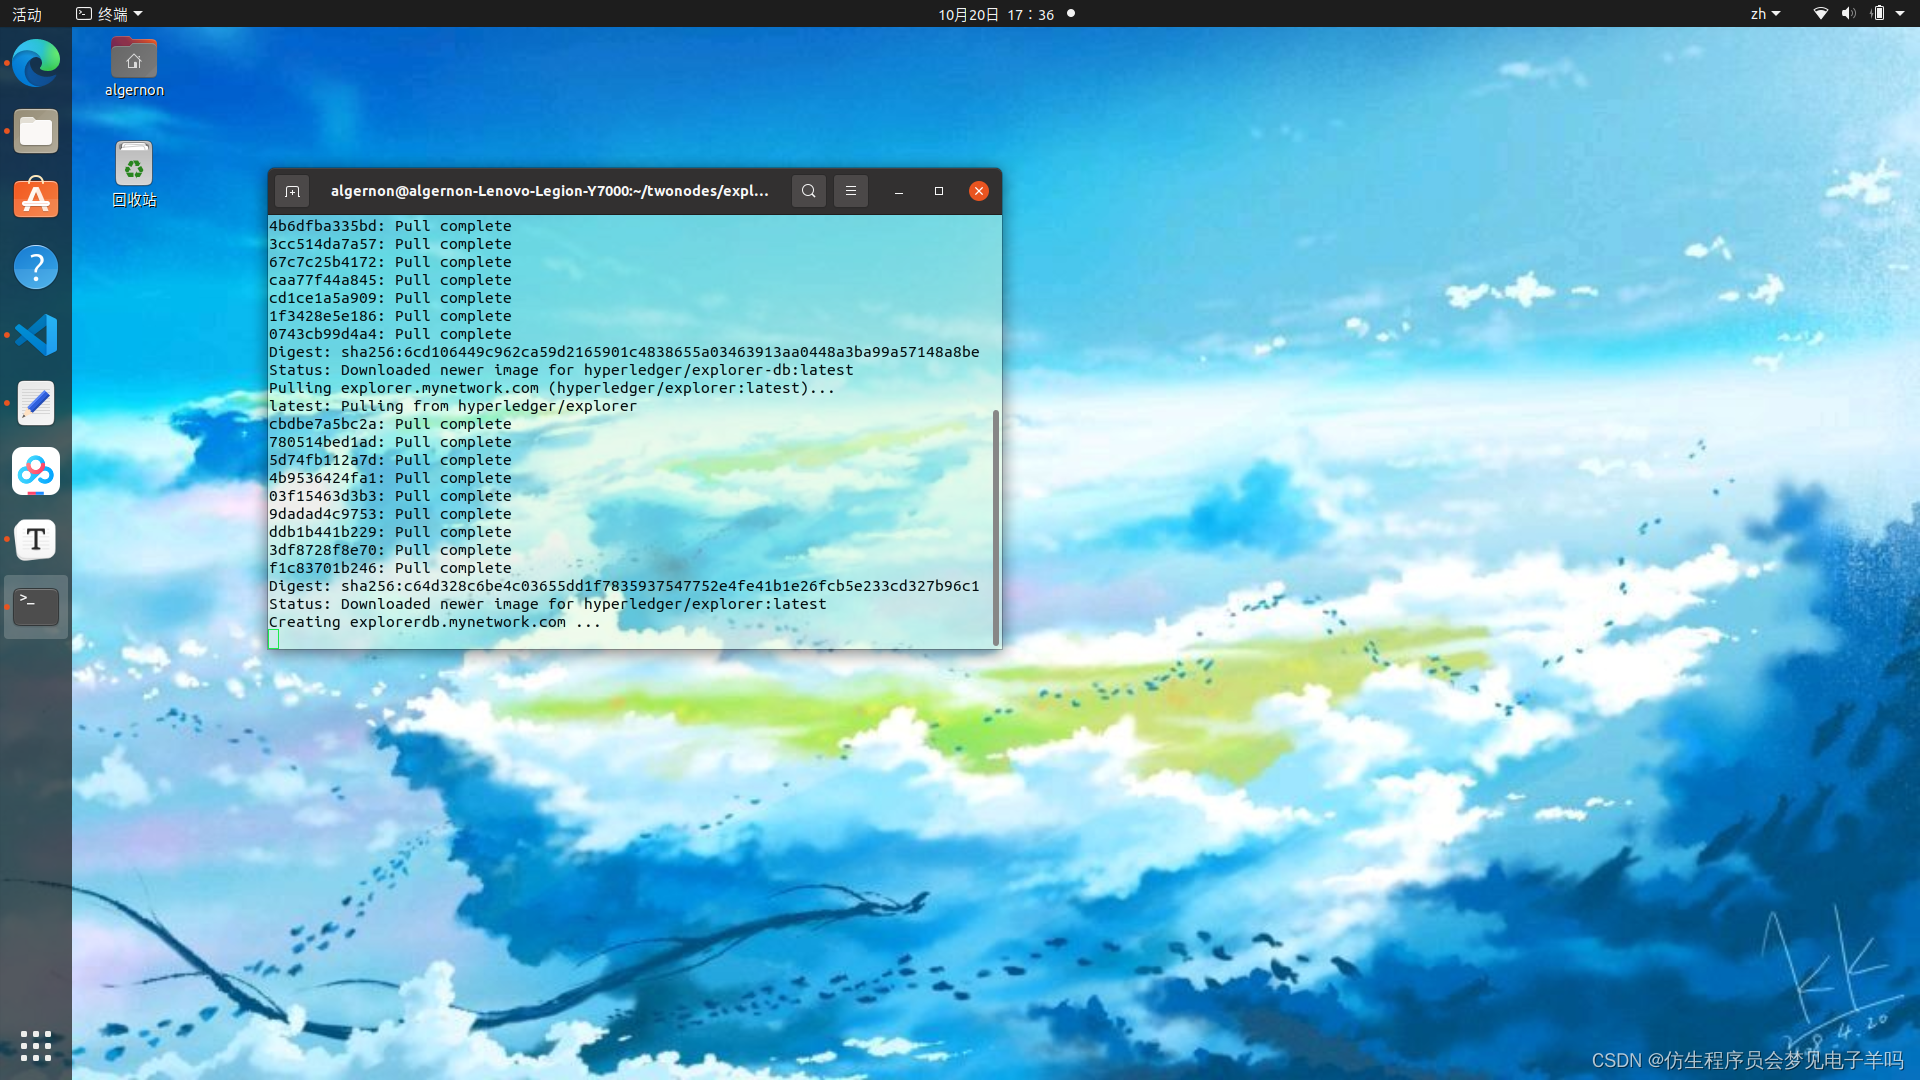
root@kai:~/block/geneg/explorer# docker-compose up -d
Recreating explorerdb.mynetwork.com ... done
Creating explorer.mynetwork.com ... done
root@kai:~/block/geneg/explorer# docker ps -a
hyperledger/explorer:latest
hyperledger/explorer-db:latest
总结
这次的实验内容和强度一个顶七个。
在debug的过程中,我把之前几乎所有的内容都重新做了一遍,从go语言的环境搭建到docker安装,因为这次视频里内容与实际版本有出入,在debug的过程中找了很久的文件。
我这里找了一个相对清晰且全面的版本:
https://blog.youkuaiyun.com/g950904/article/details/121143167?spm=1001.2014.3001.5506
私以为这个内容完全值得两周的时长,因为他的第一部分就是几乎之前所有内容的总和,虽然已经配置过了,但为了避免与文档代码有出入,又重新配置了一遍。
以下是总结的比较难的部分:
- go语言环境配置,因为后面涉及到默认opt/gopath/src的路径,如果在一开始配置环境变量放在usr/local下就会很麻烦,最后得重新下载go语言,配置环境变量。当然,fabric也是需要重装的。
- 内容准备。生成证书及文件,因为涉及到yaml文件的更改,而yaml文件对于格式要求很高。好几次我只是把名字改了或者路径改了都会报错,最终是复制其他部分的代码在此基础上修改。同样的内容一个报错一个不报,虽然最终文件成功运行,但第一次为什么会报错,百思不得其解。
- docker-compose文件的编写。这个是最难的,因为这个做好了,通道也就搭好了,之后的内容没有太多难度。但docker-compose文件涉及的内容很多,各种奇怪的报错都有,越改越错。从周末到周四,五天时间,查遍资料,血压升高,恨不得钻进电脑帮代码连接通道。debug的过程是相当痛苦的,尤其是不知道错在哪里,而网上又没有其他人踩雷,debug仿佛遍历整个过程,从文档里空格和引号添加有无,到每一条路径是否有效,就像尝试解开一个死结,倒不如重开一个系统重新配置。可惜我是双系统,如果像以前一样用vmware,两分钟就可以创建一个新的,现在物理机上有很多其他的文件,重开不亚于重装系统。

这次的任务流程,仅从结果上看,就是之前的5~6倍,以至于投入时间已经无法让进度线性增长,只要一卡进度立刻停滞,解决问题之后进度飞快,直到下一个治疗低血压的bug出现。
不过这周也学了很多,之前只是跟着代码做,现在为了debug,不得不对整体内容和细节有了解。尤其是各种yaml文件,不亲自改出bug是不会对文件的内容有理解的,而我的bug越改越多,早知道还是原版。
不过还是折磨,这几天凌晨两点睡觉,不是因为两点才完成一个内容,而是第二天有早八。事实上,有的bug即使通宵到第二天也解决不了,还得靠问。

这次学的可比前几次充实多得多得多了,一行代码背后是整个文件,如果一路顺风还好,只要一个环节出了问题,就意味着命令相关的所有内容都得啃一遍,不然找不出bug。当然,找出了也不一定能改。(这次内容值得两周的ddl)


 3115
3115

 被折叠的 条评论
为什么被折叠?
被折叠的 条评论
为什么被折叠?
 到【灌水乐园】发言


