


 本文详细介绍了如何下载并启动Nexus3服务,创建私有Maven仓库,以及通过脚本批量上传本地仓库到私服。此外,还讲解了验证上传成功的方法和项目中使用私服的settings文件配置。
局域网搭建Maven私服并批量上传依赖库
使用Nexus3搭建Maven私服
Nexus3下载
百度网盘地址: 密码:zktp
启动Nexus3服务
-
解压Nexus
tar -zxvf nexus-3.29.2-02-unix.tar.gz -C ~/nexus/解压后~/nexus下目录结构

-
启动Nexus
启动命令./nexus-3.29.2-02/bin/nexus start浏览器访问:http://localhost:8081/

查看admin用户初始密码cat sonatype-work/nexus3/admin.password登陆后会强制修改默认密码,并配置是否选择开启匿名访问。
创建私有仓库
-
创建blob商店
点击齿轮设置——>Blob Store——>Create Blob Store

-
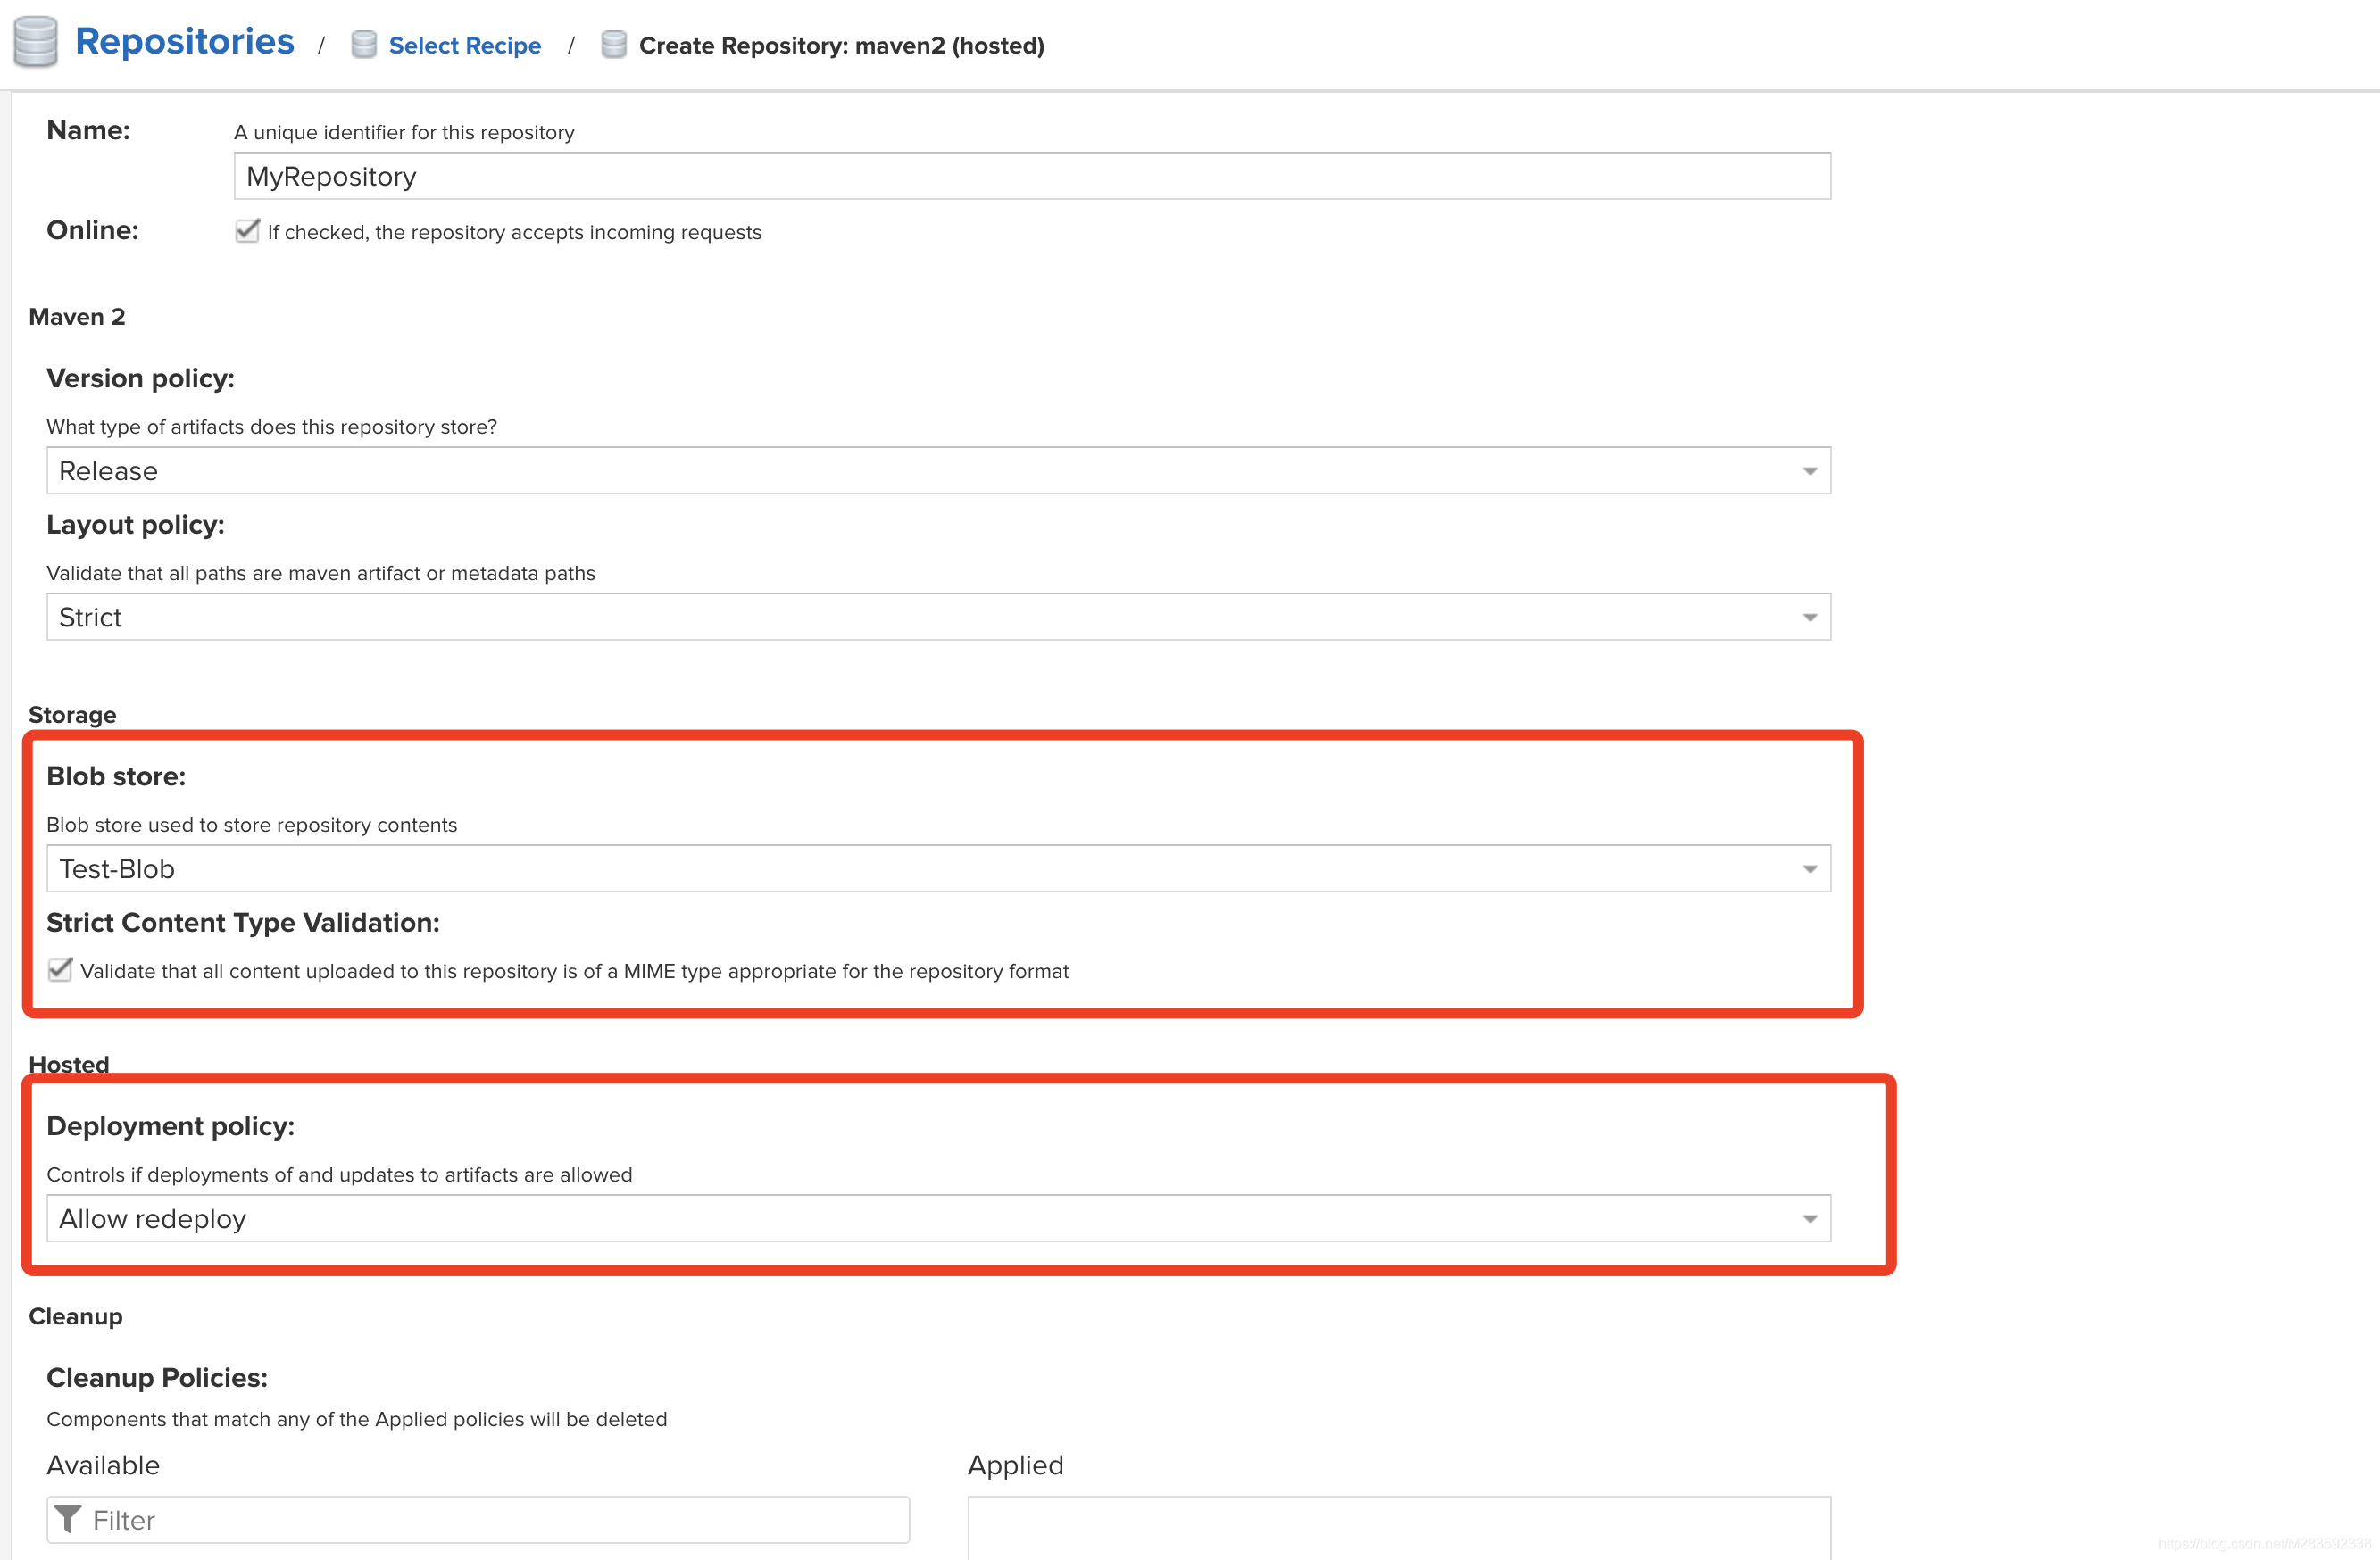
创建储存库
点击齿轮设置——>Repositories——>Create Repository——>选择Maven2(hosted)
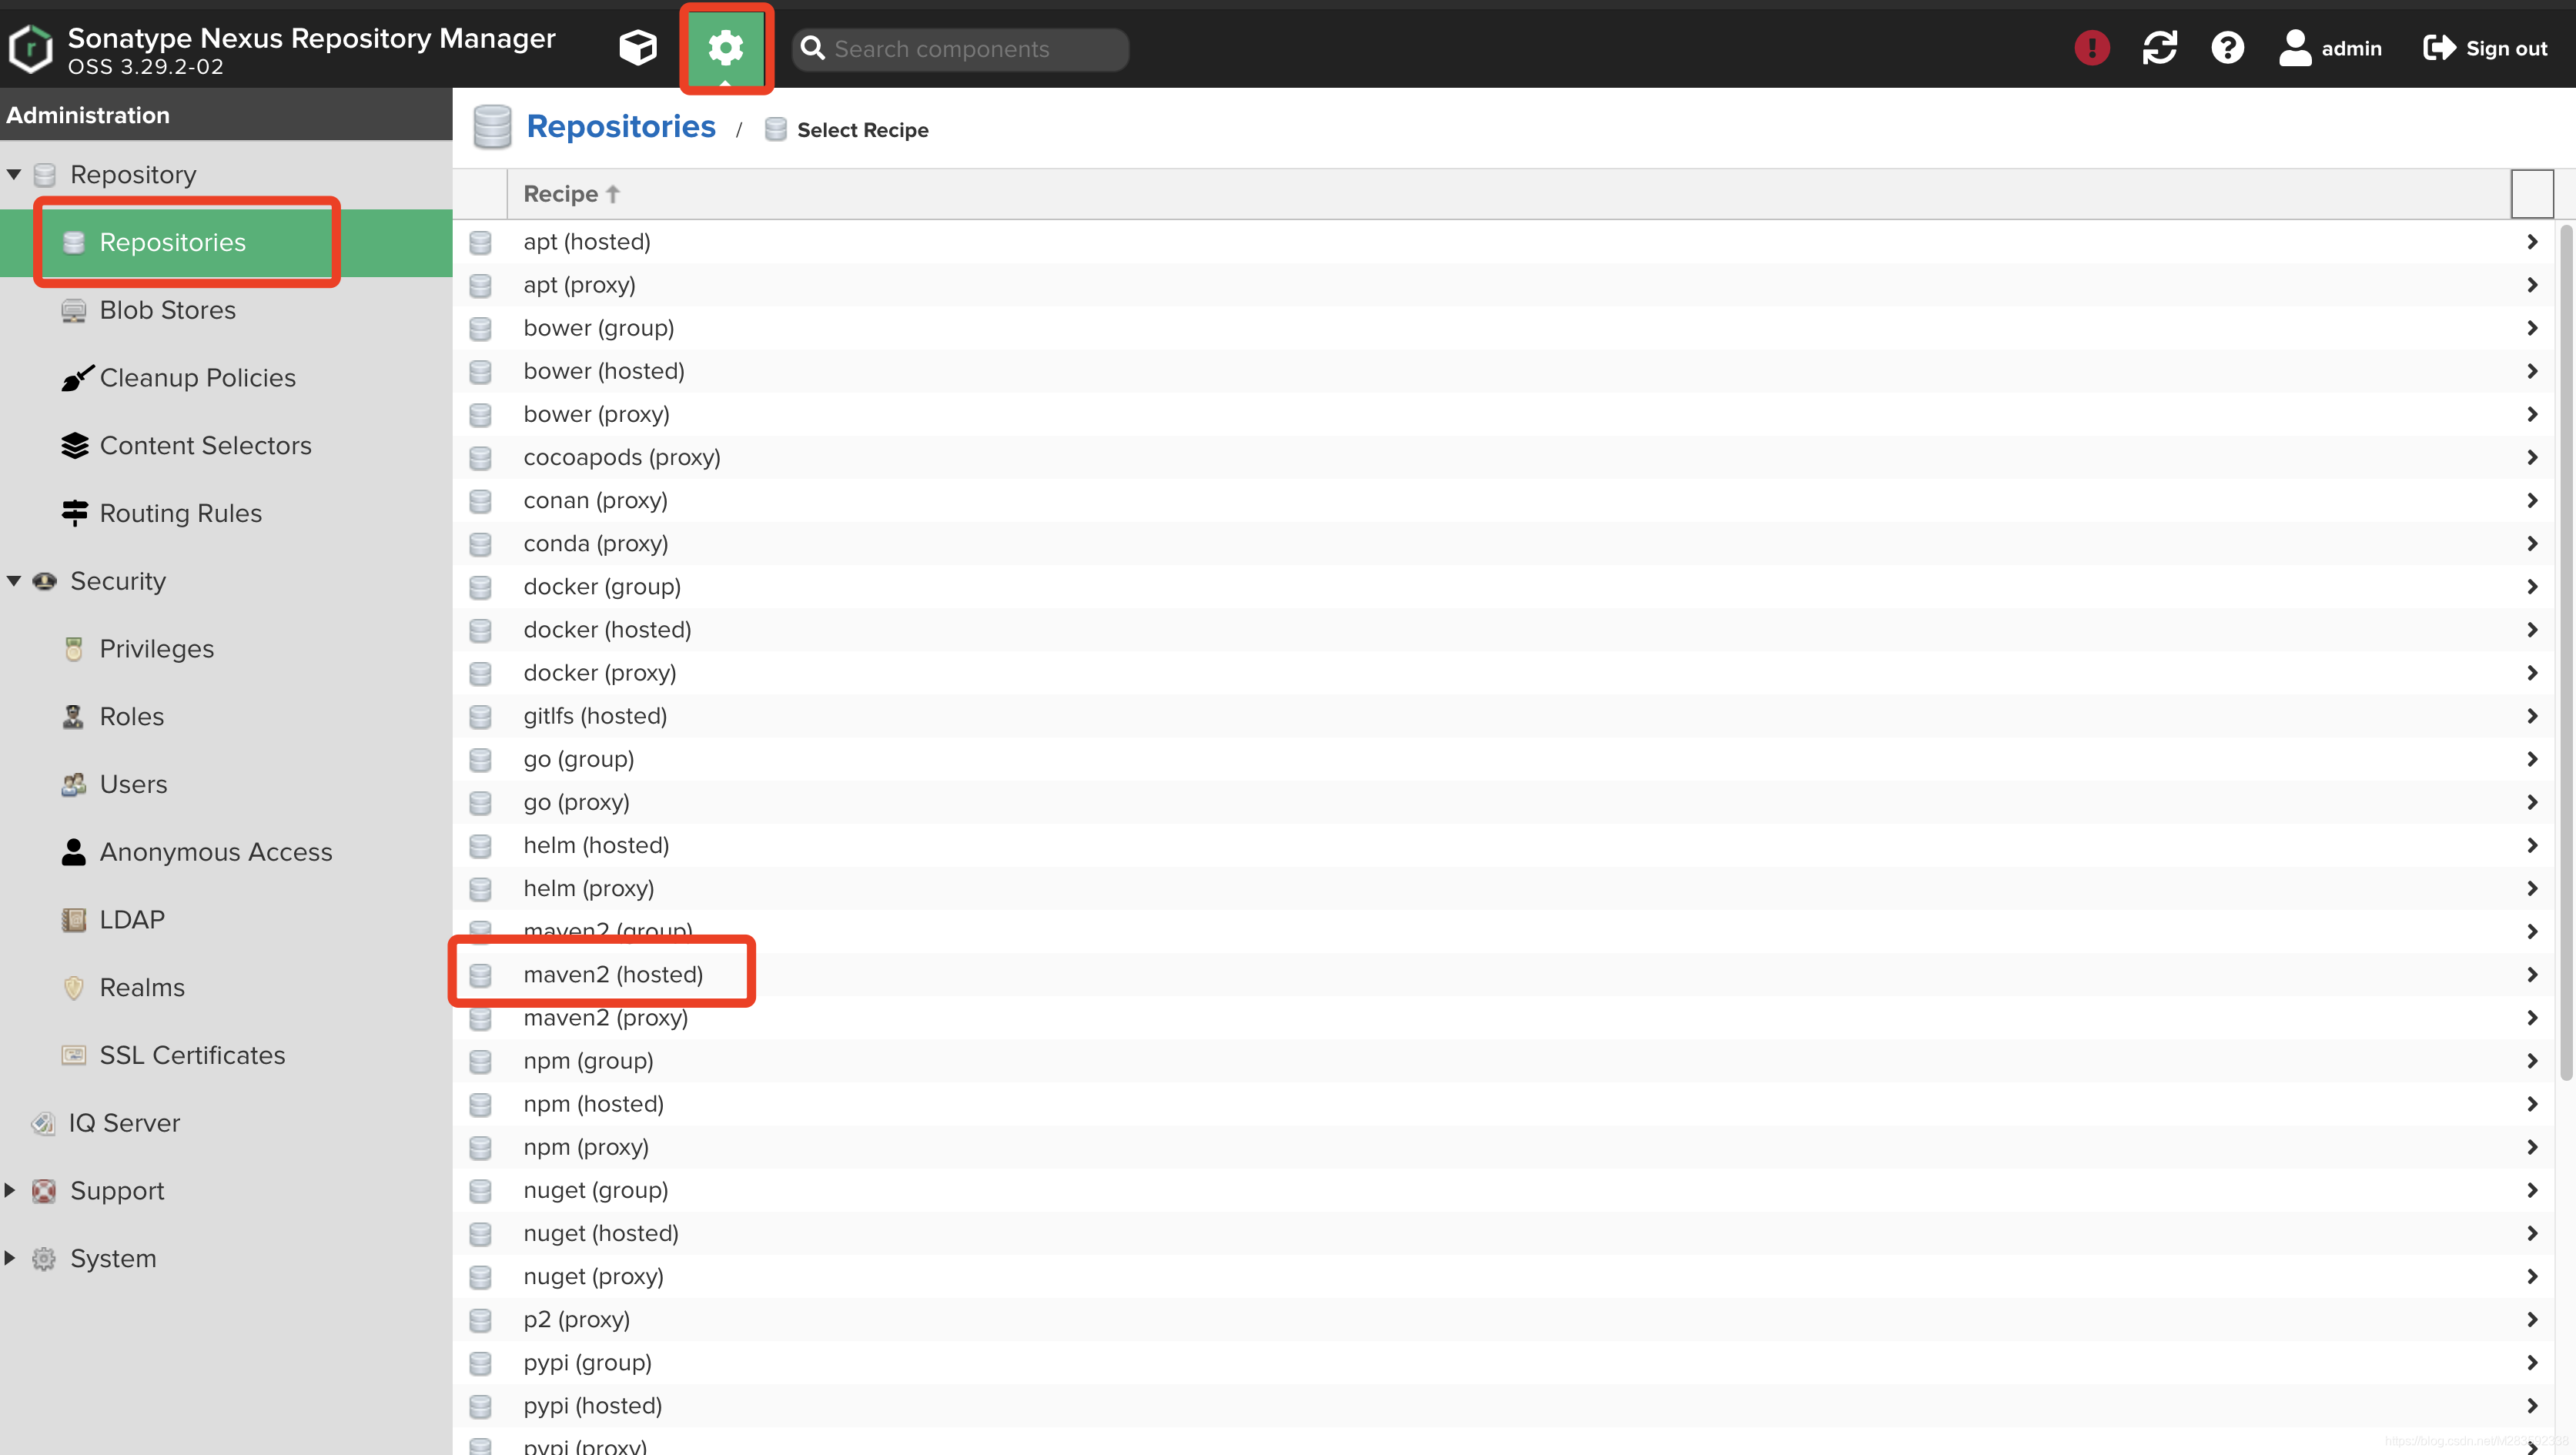
配置Repository时,Blob Store选择刚才创建的Blob Store,Hosted一定要选择为Allow redeploy(允许重新部署)。其他配置根据个人需求。
上传本地仓库至私服
Nexus自带上传jar包功能有单个上传页面,如果想批量上传就需要脚本来辅助。
-
创建mavenImport.sh脚本
#!/bin/bash # copy and run this script to the root of the repository directory containing files # this script attempts to exclude uploading itself explicitly so the script name is important # Get command line params while getopts ":r:u:p:" opt; do case $opt in r) REPO_URL="$OPTARG" ;; u) USERNAME="$OPTARG" ;; p) PASSWORD="$OPTARG" ;; esac done find . -type f -not -path './mavenimport.sh*' -not -path '*/.*' -not -path '*/^archetype-catalog.xml*' -not -path '*/^maven-metadata-local*.xml' -not -path '*/^maven-metadata-deployment*.xml' | sed "s|^./||" | xargs -I '{}' curl -u "$USERNAME:$PASSWORD" -X PUT -v -T {} ${REPO_URL}/{} ; -
将脚本cp至本地Maven库并赋予执行权限
chmod +x mavenImport.sh -
执行导入脚本
复制仓库连接
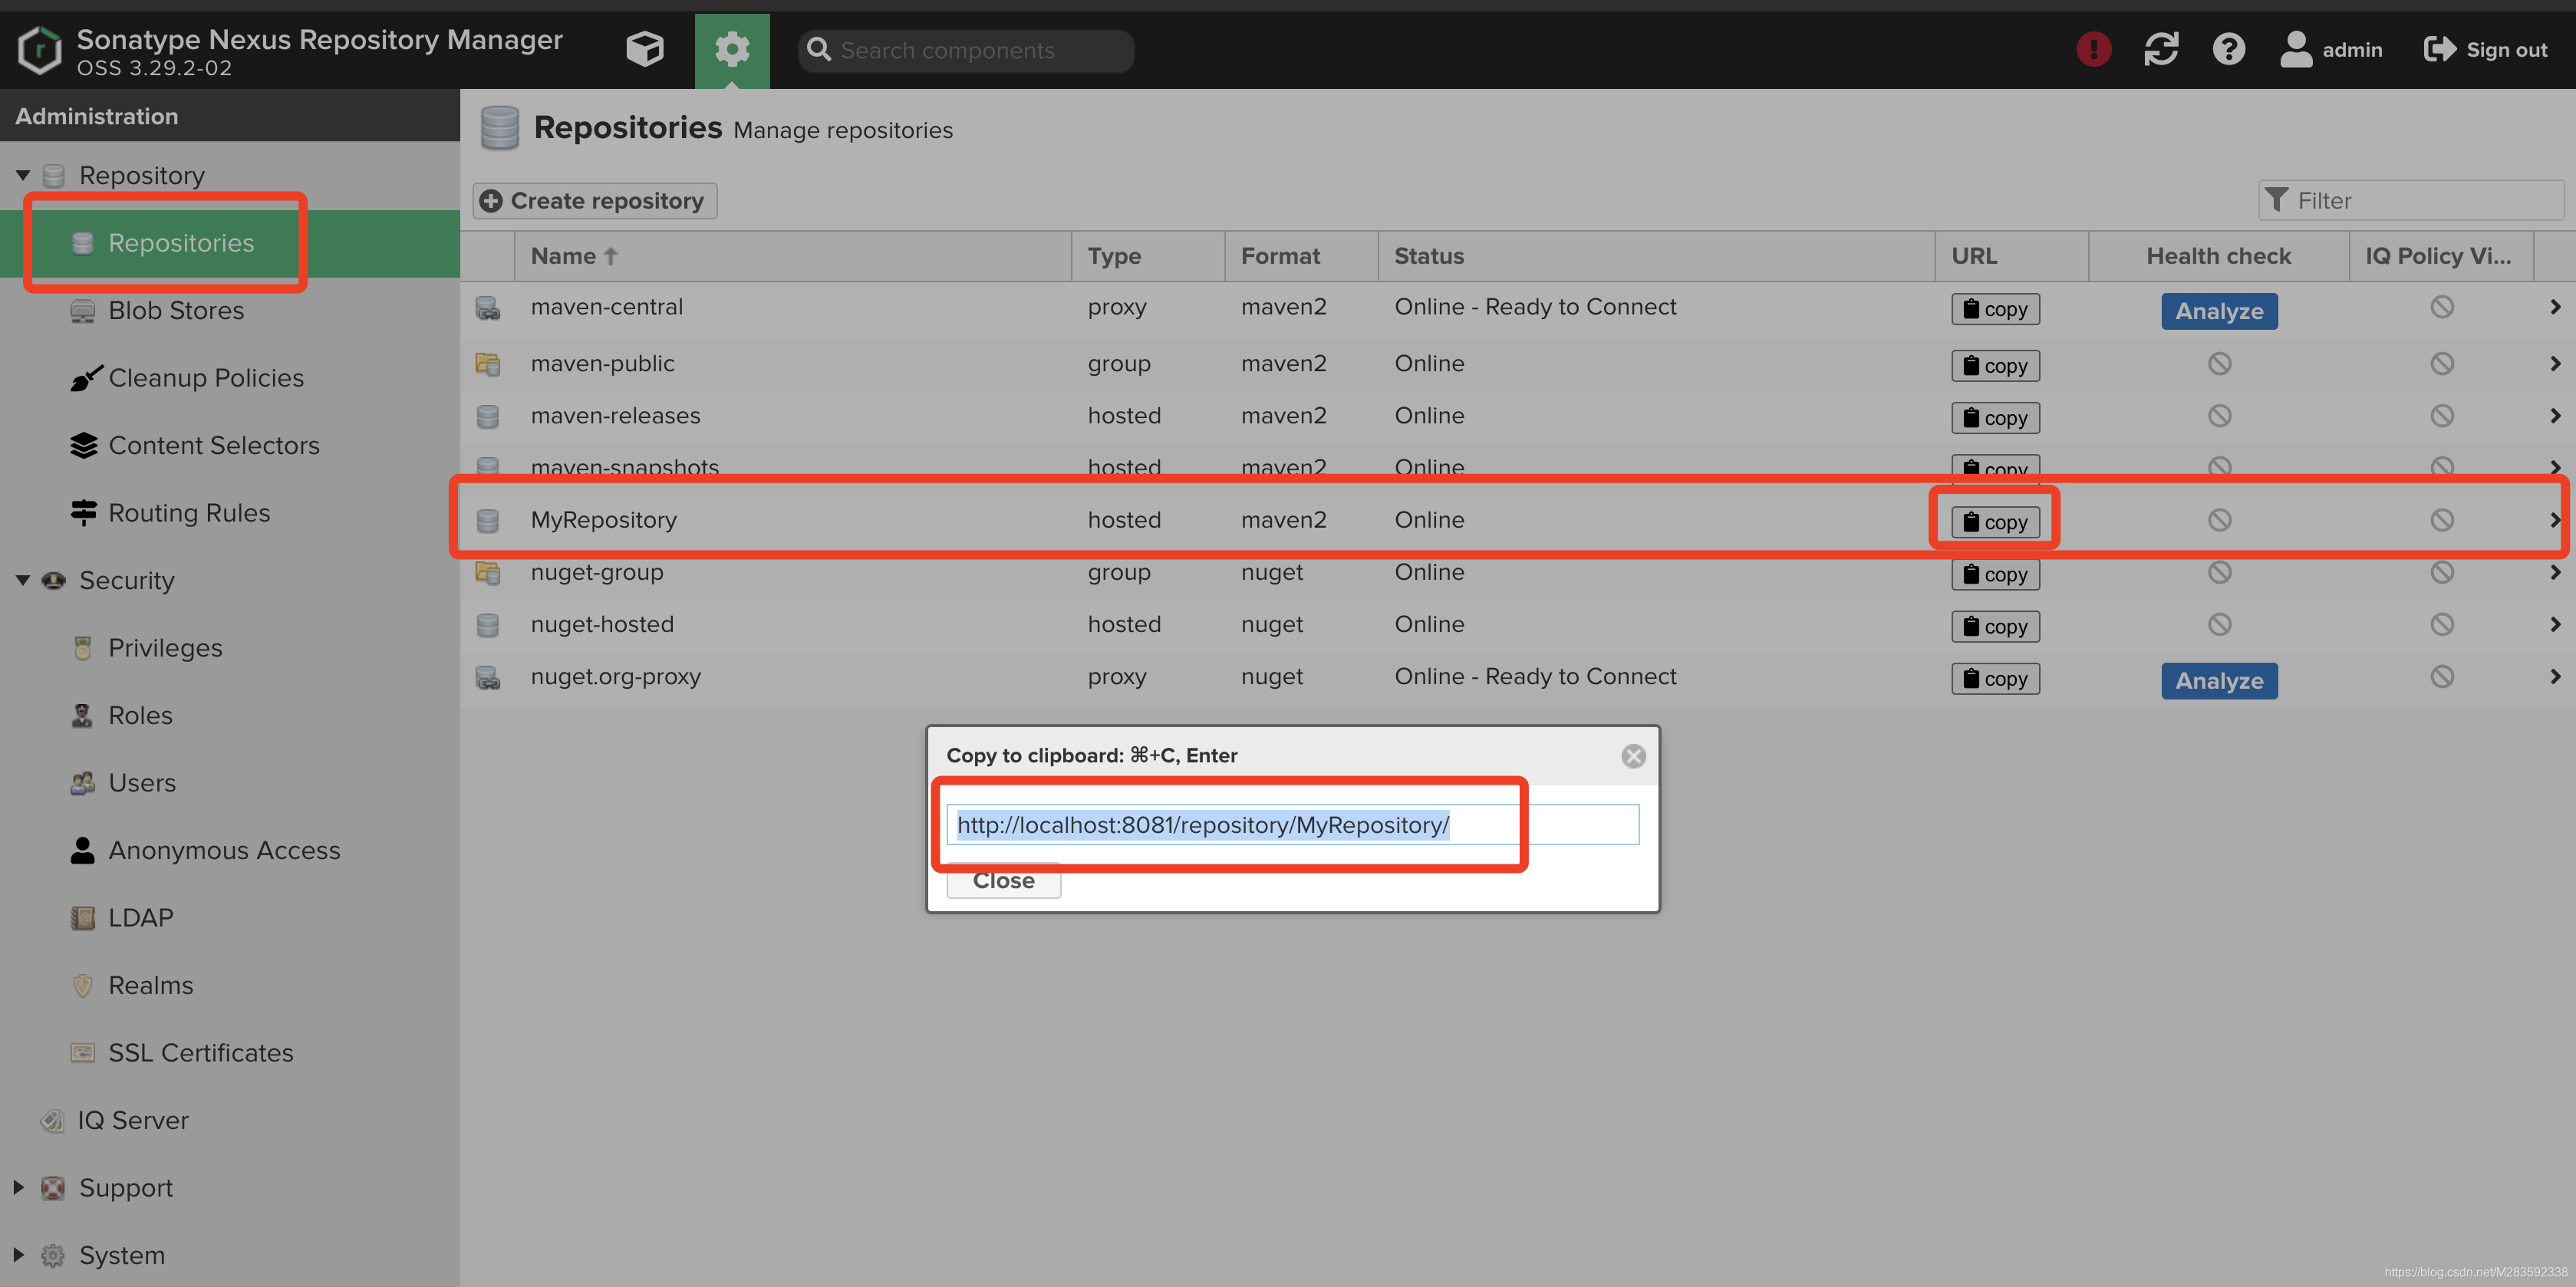
	# 仓库连接为自己创建的仓库地址
	./mavenImport.sh -u admin -p admin123 -r http://localhost:8081/repository/MyRepository/
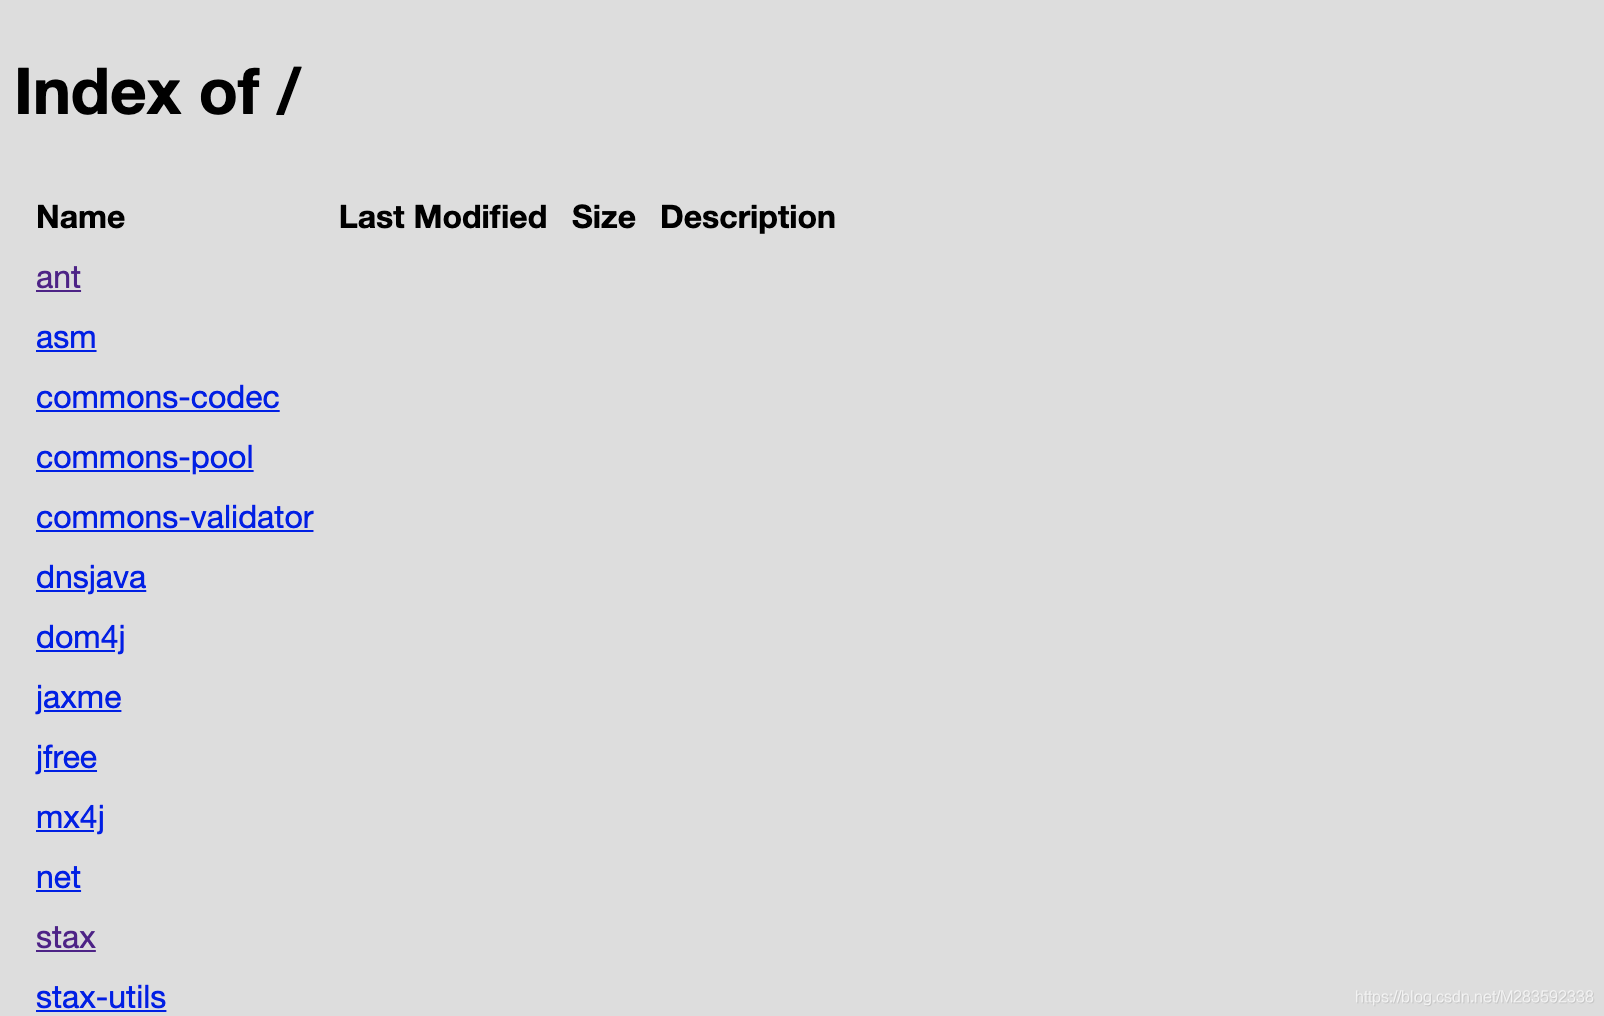
验证仓库是否上传成功
访问仓库地址http://localhost:8081/repository/MyRepository/,点击HTML index出现树状结构目录则为上传成功
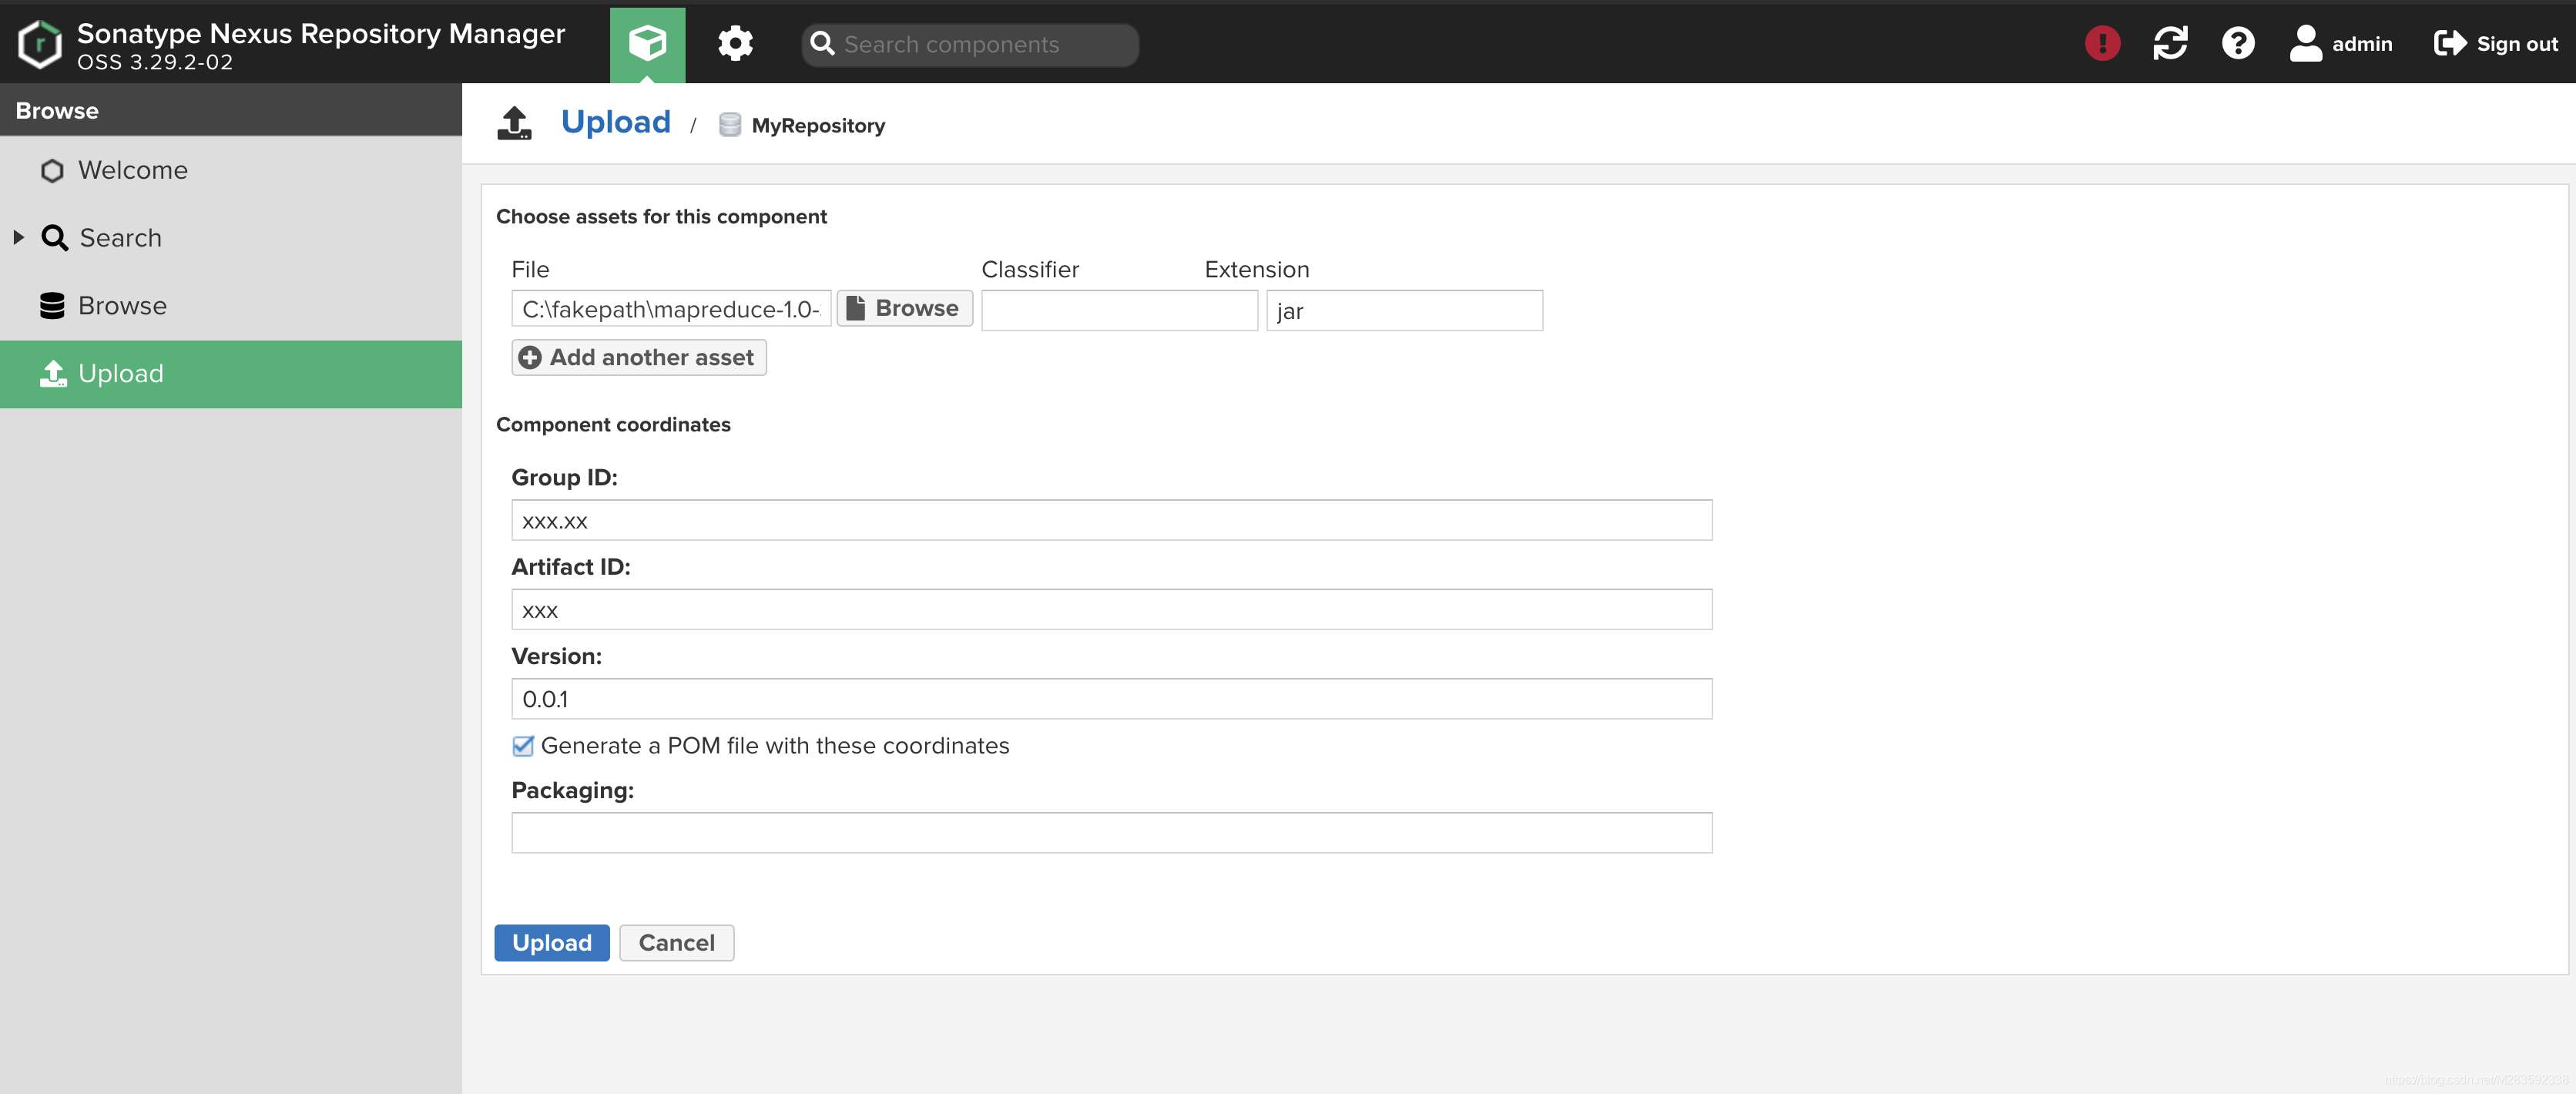
单个jar包上传
上传时勾选 Generate a POM file with these coordinates 生成相对应的POM文件
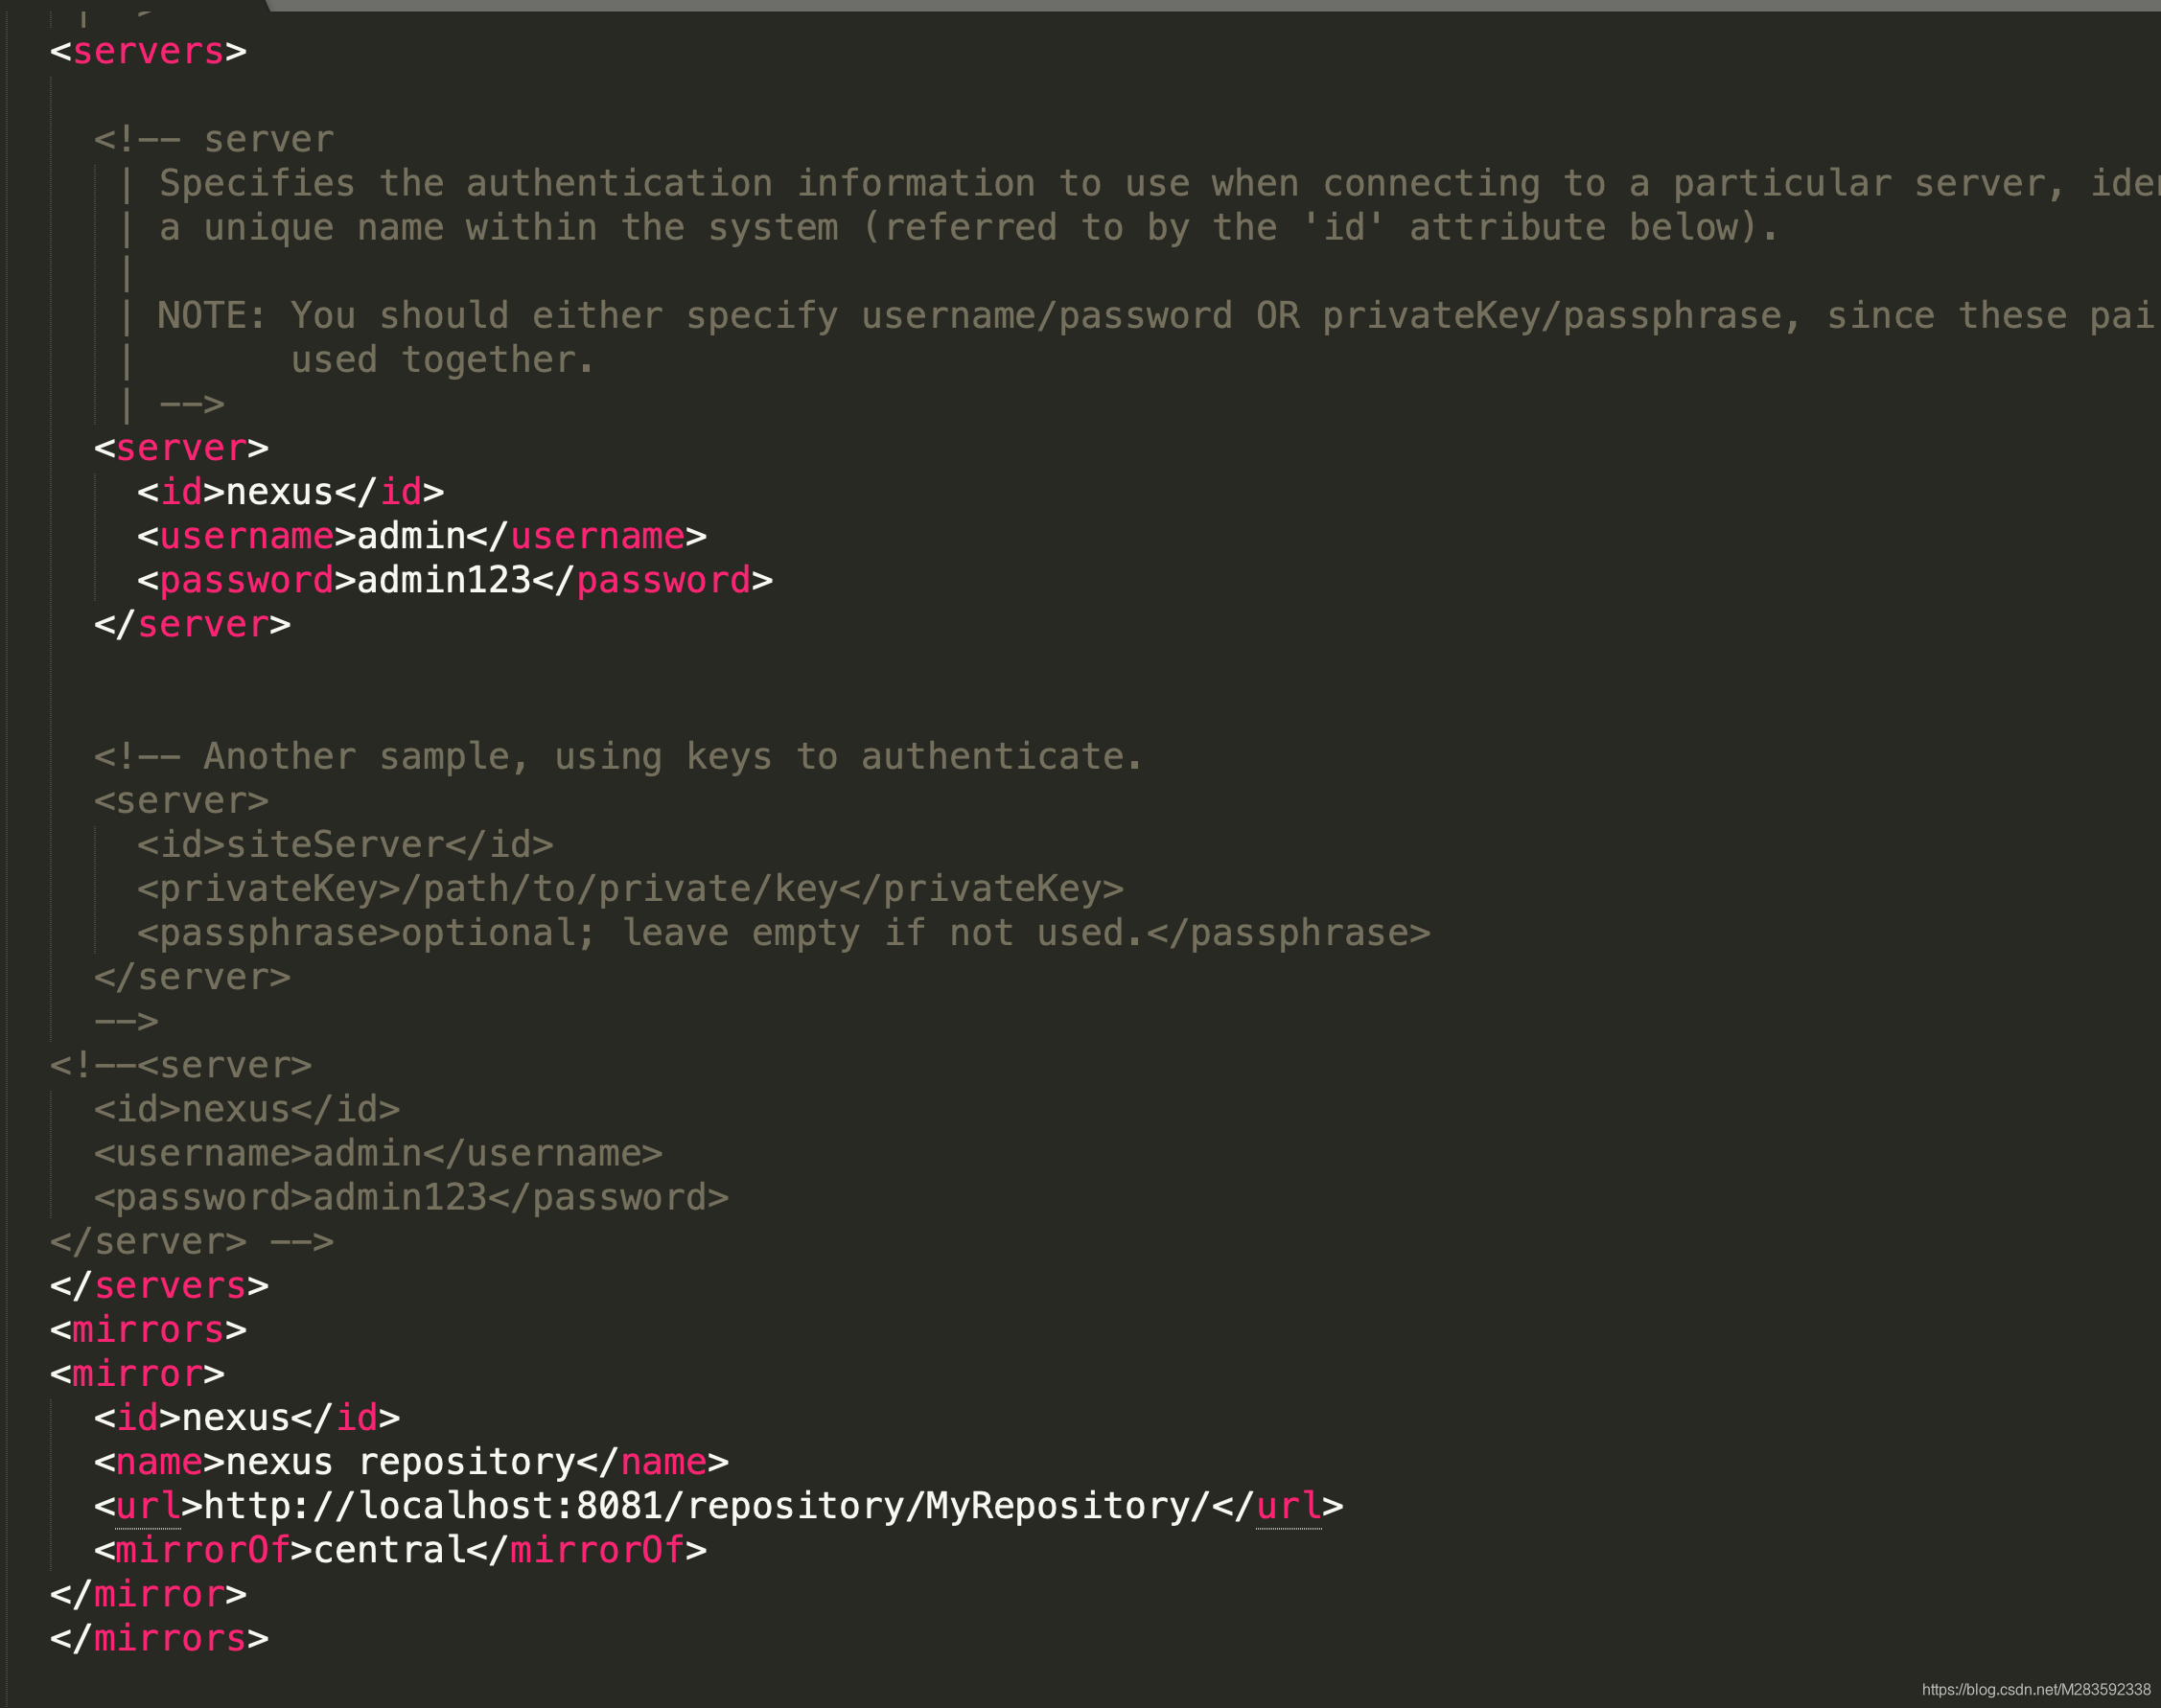
项目使用私服settings文件配置
加入servers和mirrors配置即可


 4663
4663


 到【灌水乐园】发言


