


Description
The cleaning of the Advantech IPC-610H workstation here only refers to the cleaning of the main box of the Advantech IPC-610H workstation, excluding the attached cables and display screens, etc. The cleaning work mainly refers to the dust removal and cleaning of the internal equipment of the workstation chassis.
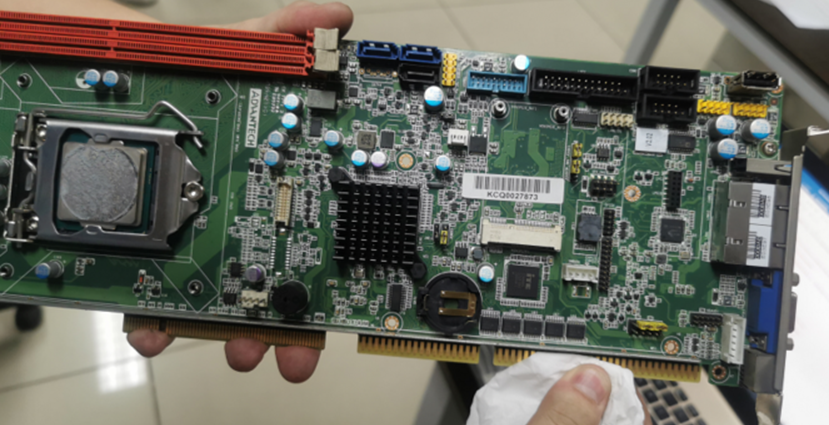
The Advantech IPC-610H workstation is a modular device, which is composed of an integrated motherboard (CPU, graphics card and memory cards are all on it), sound card, power module, hard disk and CD box, fan module, base plate, etc., so it is relatively easy to disassemble and install. The following steps can be executed.
This article is a sequel, the first part of which is Advantech IPC-610H Cleanup Example - Disassembly and Cleanup(English)
Advantech IPC-610H Cleanup Example - Disassembly and Cleanup(English)
Pay attention:
- Before cleaning up, please read this article carefully and follow the relevant instructions;
- Before cleaning, be sure to power off the workstation, unplug the power supply cable, and remove the motherboard button battery immediately after opening the case;
- This article is a guide for the complete disassembly and cleaning of the workstation. In the actual cleaning work, you can refer to this article for targeted cleaning (such as only cleaning the chassis fan);
- In view of the working environment, it is recommended to clean up at least once a year (after the power is off, you can use the blower to clean the chassis), and conduct a complete disassembly and assembly cleanup every two years (you need to disassemble the modules in the chassis according to the steps in this article, and clean them one by one. );
- Avoid multiple disassembly and assembly of the metal heat dissipation bracket of the motherboard, which will reduce the heat dissipation glue;
- This article is for reference only, please consult professionals for uncovered matters or special circumstances.
Statement:
This article is a summary of personal engineering experience, and does not represent universality and officiality.
Please respect intellectual property rights, please indicate the source when reprinting the blog.
Both the English and Chinese versions are my own creations, and the English version is reviewed by foreign colleagues after the translation is completed.
Special thanks to Mr. Ateeb ali javaid for his assistance and support in the process of writing and translating this guidebook into English.
Assembly process
-
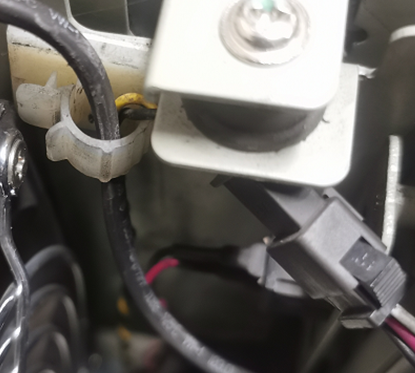
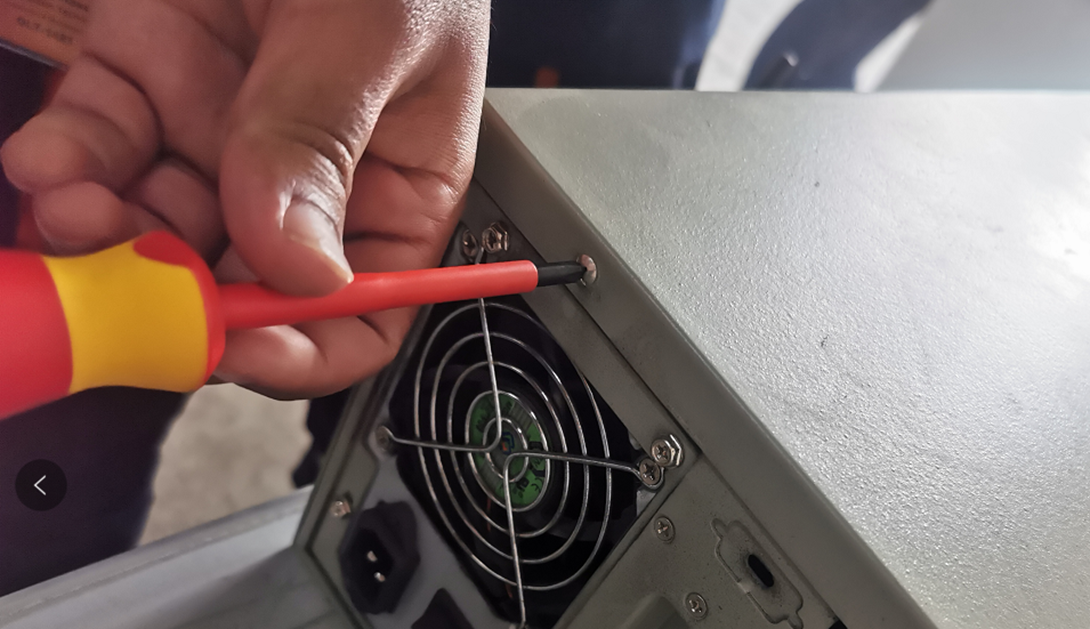
To install the chassis fan, first put the chassis fan bracket into the corresponding slot of the chassis, then snap the accessory cable of the chassis fan, and then tighten the bolts, install the chassis filter;
-
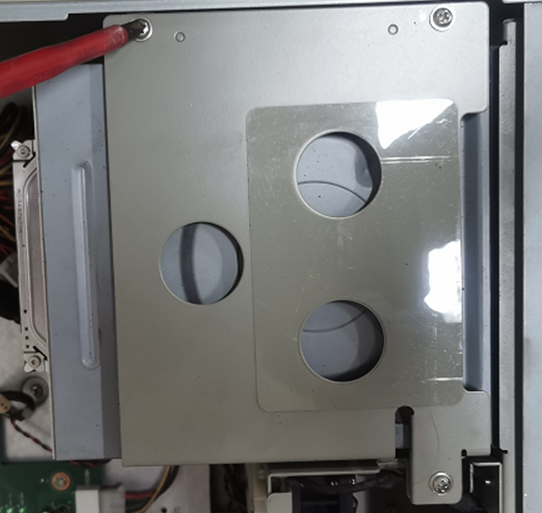
To install the hard disk and CD box, first fix the expansion box and 1 bolt at the bottom of the chassis, and then fix the three bolts on the upper part of the expansion box;
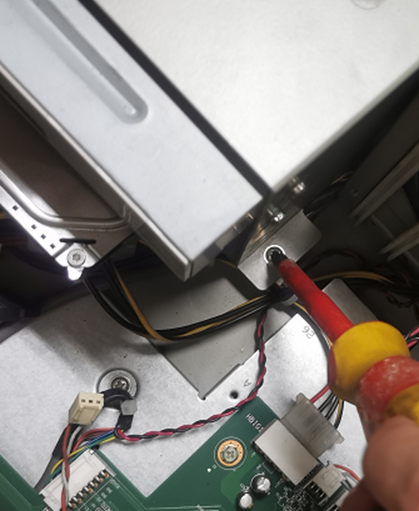
Note: Do not fasten tightly at the beginning. After the 3 bolts are in place, tighten them one by one.
-
Install the motherboard and place the motherboard on a softer object (such as a paper box):
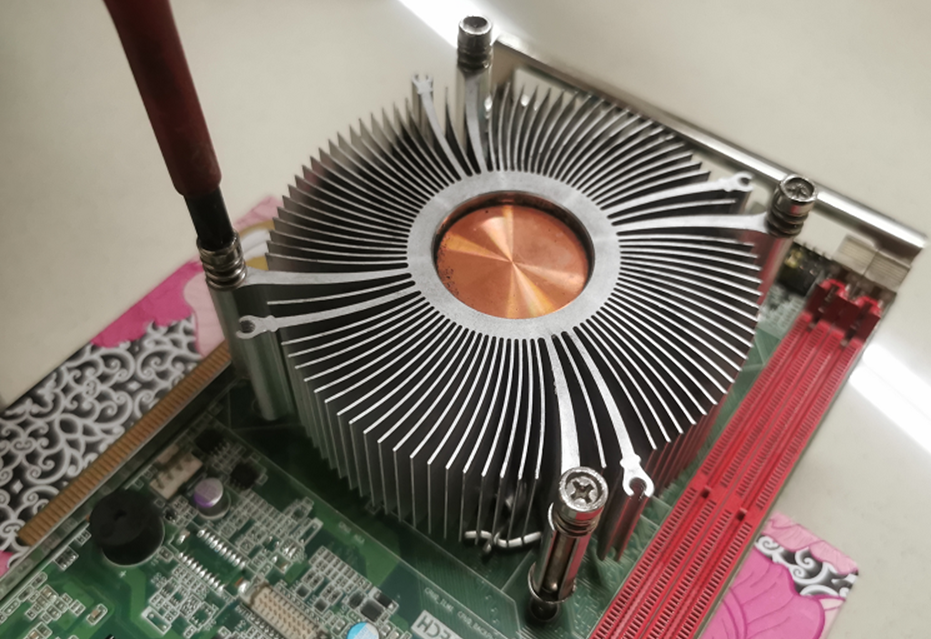
(1)Install the heat-dissipating metal bracket on the motherboard. When tightening the bolts, do not tighten one by one. First tighten each bolt partly, wait until all 4 are tightened, and then 4 in turn Tighten the bolts well (the purpose of this is to avoid that the hardness of the metal bracket is greater than that of the motherboard during the process of tightening the bolts, resulting in excessive torque and reducing the durability of the motherboard);
Note: Be careful not to let the heat-dissipating metal bracket touch the components on the motherboard when installing.
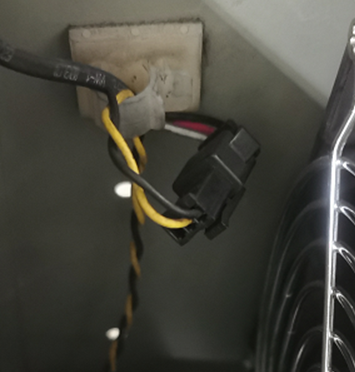
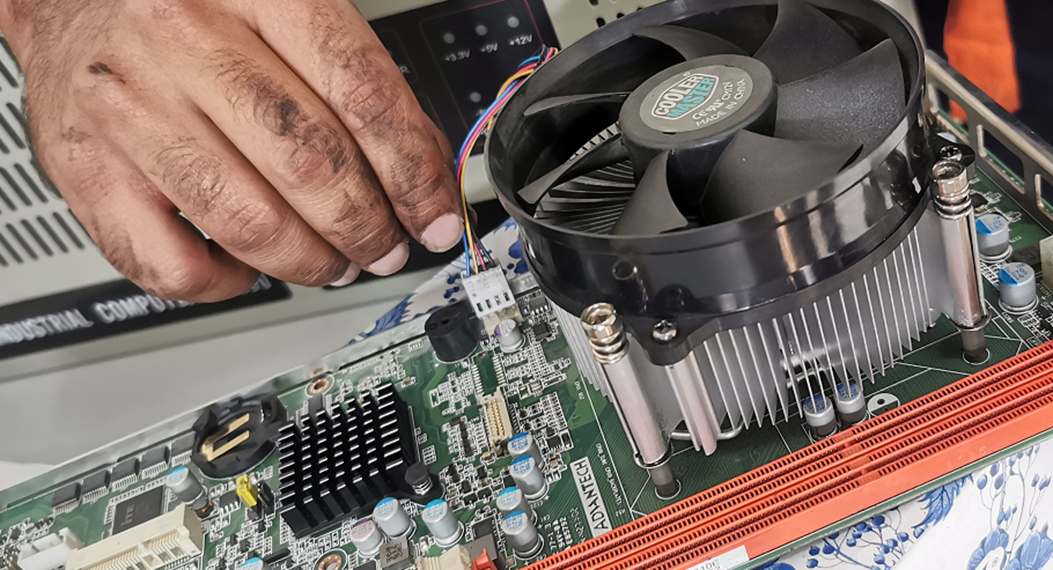
(2)Install the motherboard fan on the heat-dissipating metal bracket, fasten 4 bolts, and insert the fan cable into the corresponding slot of the motherboard;
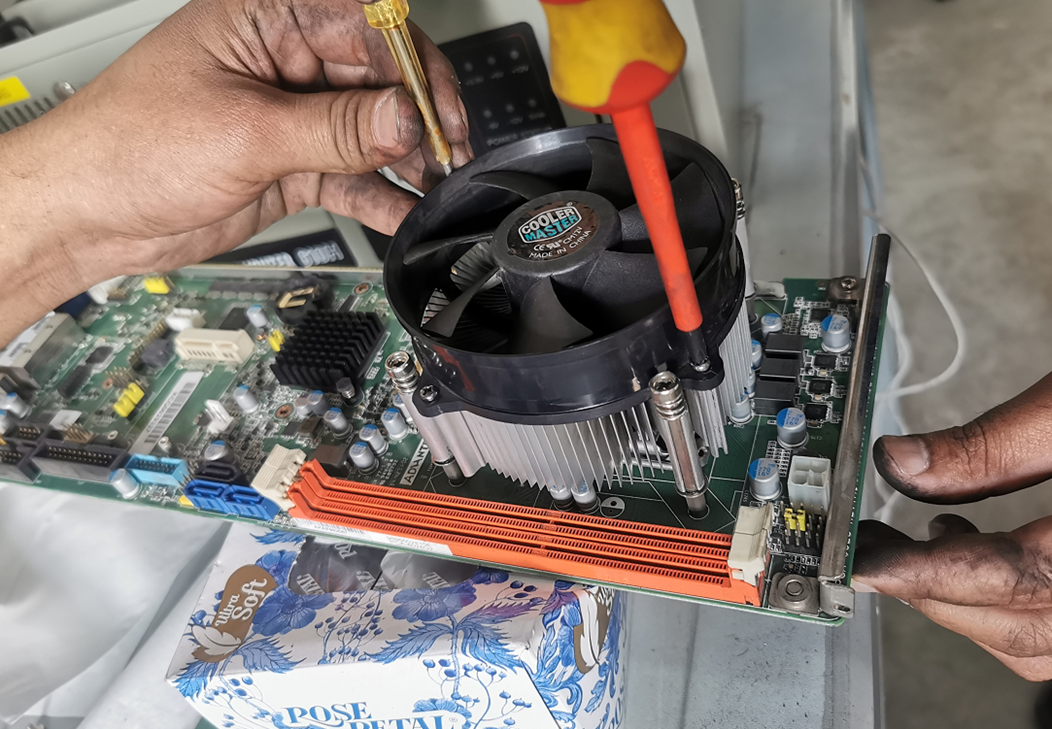
Note: The accessory cable of the fan must be able to reach the position of the corresponding slot on the motherboard.
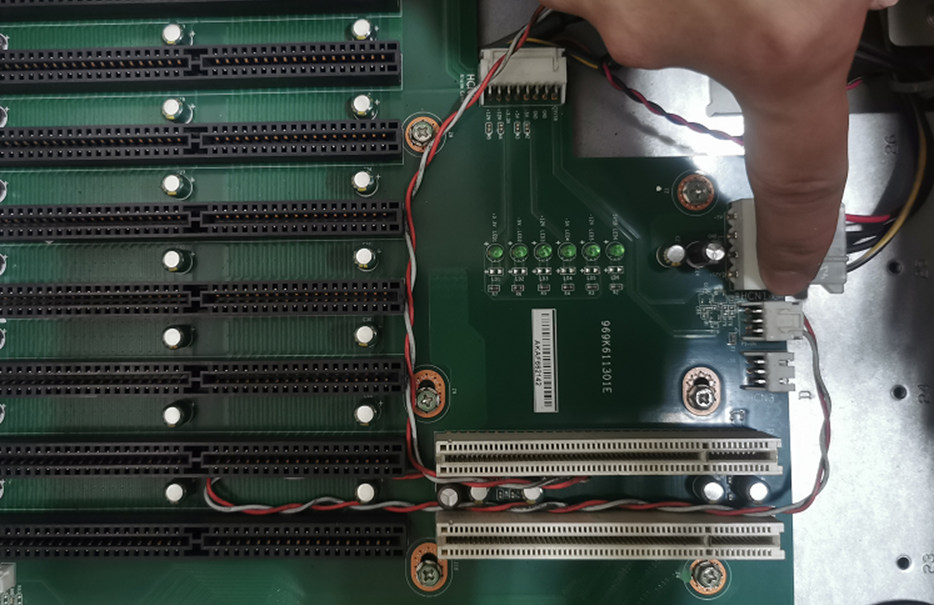
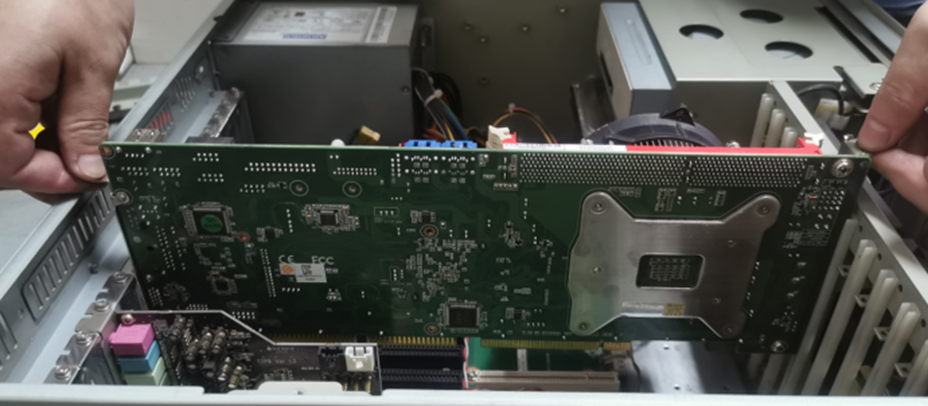
(3)Insert one end of the connection line from the base board to the main board into the base board and put it in the middle of the card slot;
(4)Wipe the pins of the motherboard with a clean paper towel, and then gently place the motherboard on the correct position of the chassis to check whether the pins of the motherboard correspond to the socket of the substrate. If so, press and insert the motherboard into the socket of the substrate correctly. Otherwise, adjust the position until it corresponds correctly, and tighten the 2 bolts between the motherboard and the chassis;
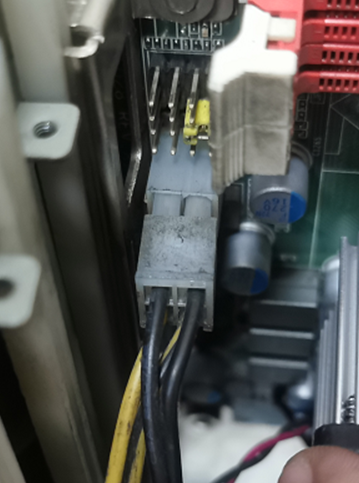
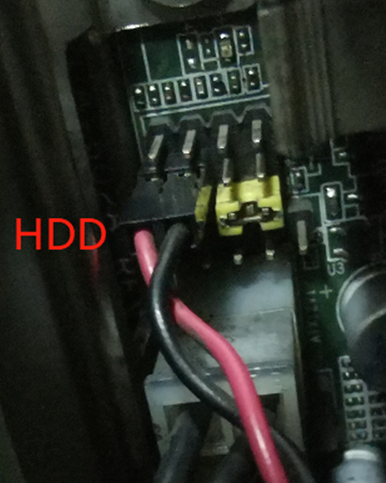
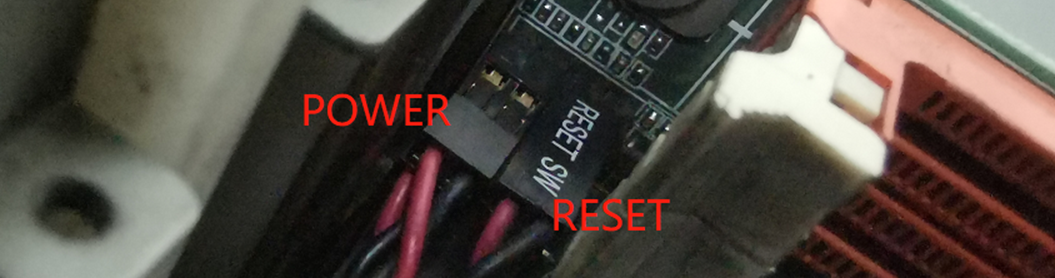
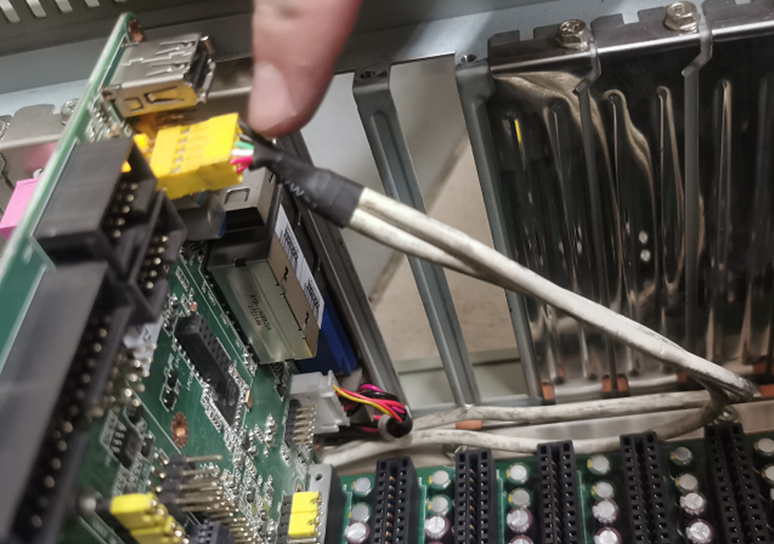
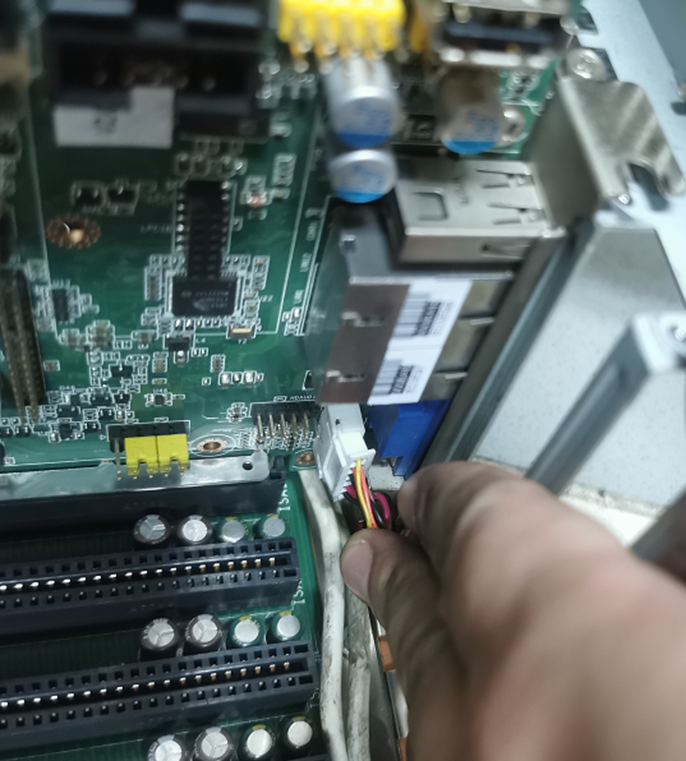
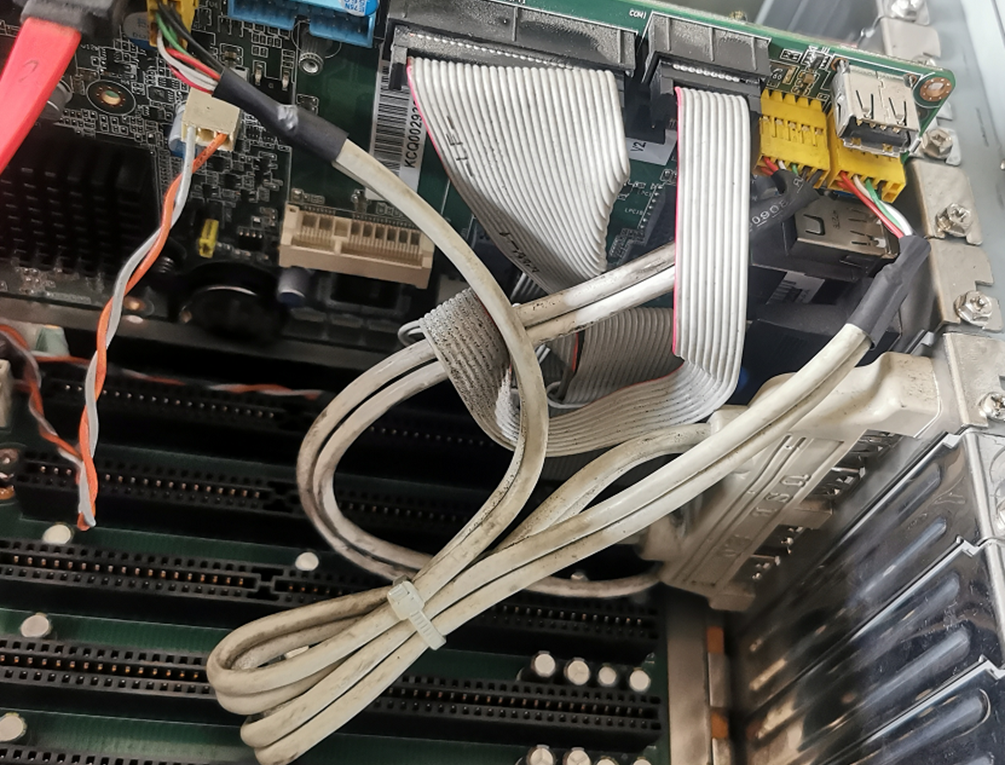
(5)Plug the cables between the main board and each expansion module:
①The cables between the motherboard and the power module, HDD status light, RESET control button, POWER ON control button;
②The cable between main board and base board;

③The cable between the motherboard and the hard disk;

④The cables between the motherboard and the chassis USB and keyboard expansion ports;
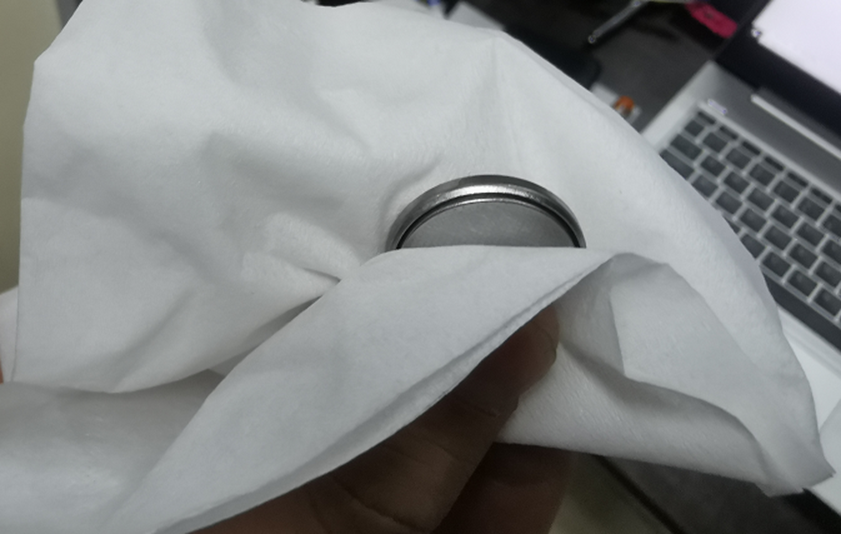
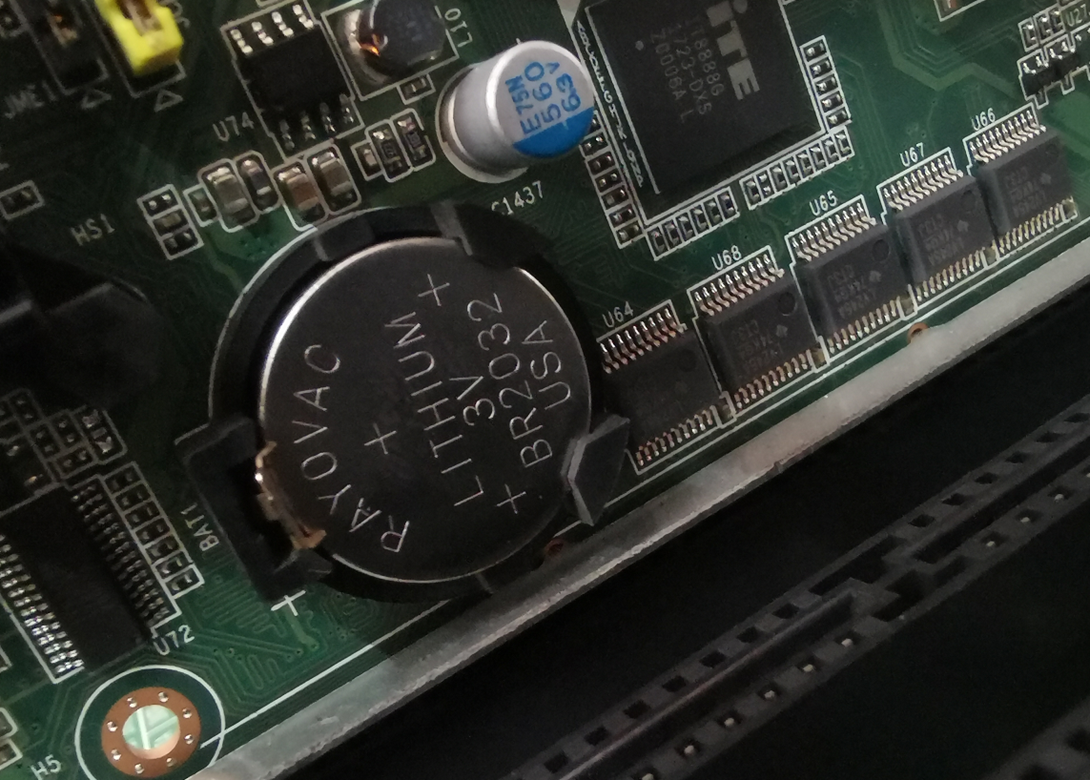
(6)Wipe the button battery of the motherboard with a paper towel, and place the button battery correctly on the corresponding position of the motherboard;
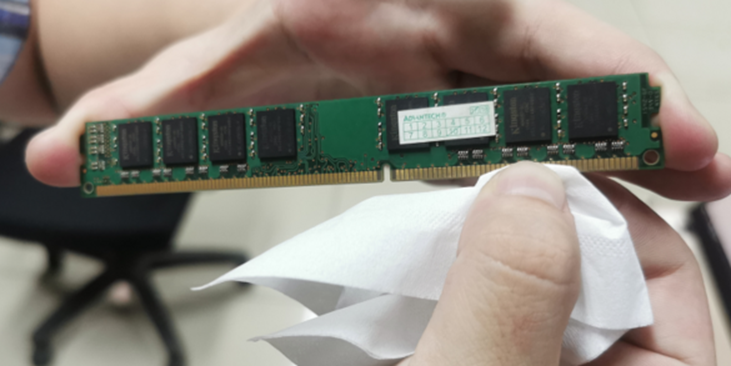
(7)Gently wipe the pins of the memory card with a paper towel, and insert the memory card into the memory card slot of the motherboard.
-
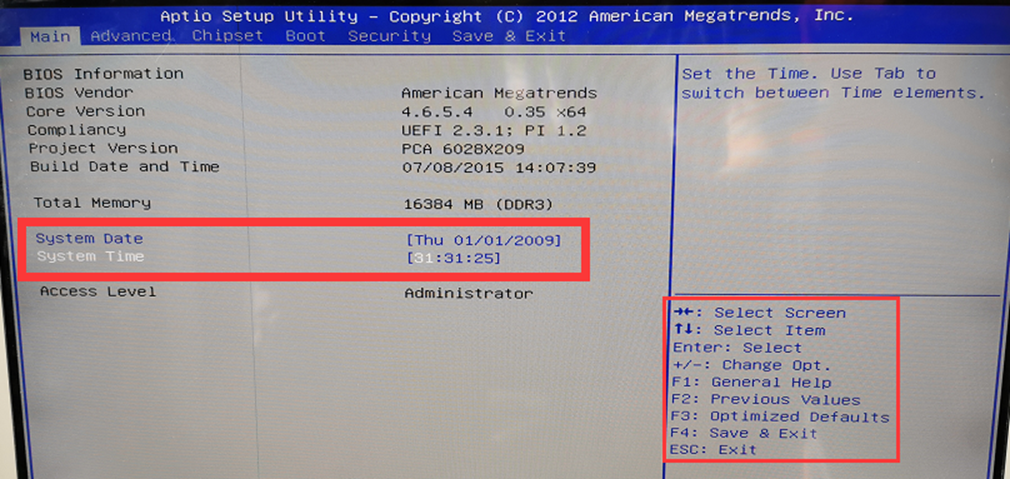
Check again whether the installed parts are installed according to the steps. After correct, connect the power supply, video, mouse and keyboard cables of the host, and press ESC or F2 to enter the BIOS system interface when powering on, modify the BIOS time, press F4 to save the configuration, and observe Whether the computer can be turned on normally, if it can be turned on normally, turn off the computer and turn it on again (without entering the BIOS), observe whether the computer can be turned on normally, if it is, turn off the computer and continue the assembly process;


-
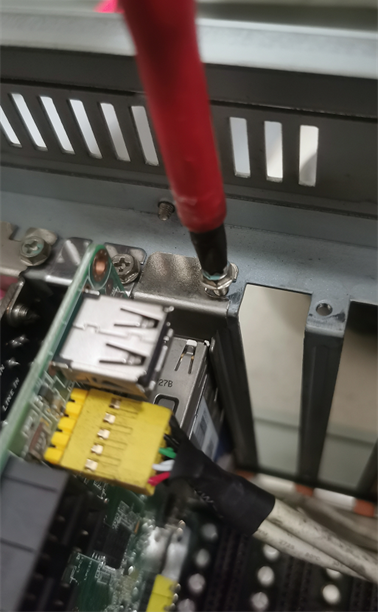
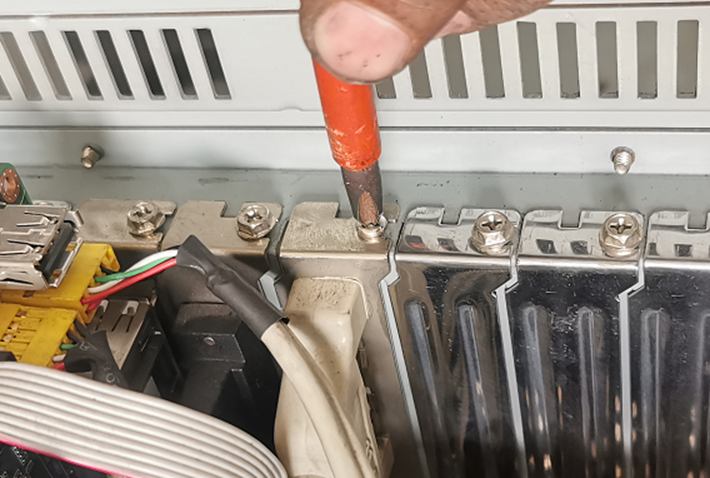
Install the video expansion interface and the USB expansion interface on the chassis, tighten the bolts, and insert the cables into the corresponding slots on the motherboard;
-
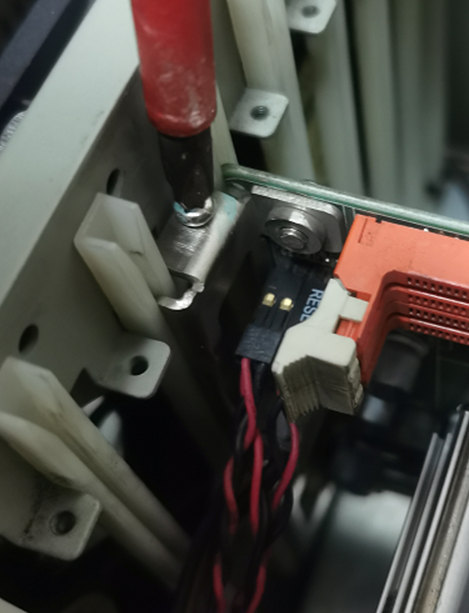
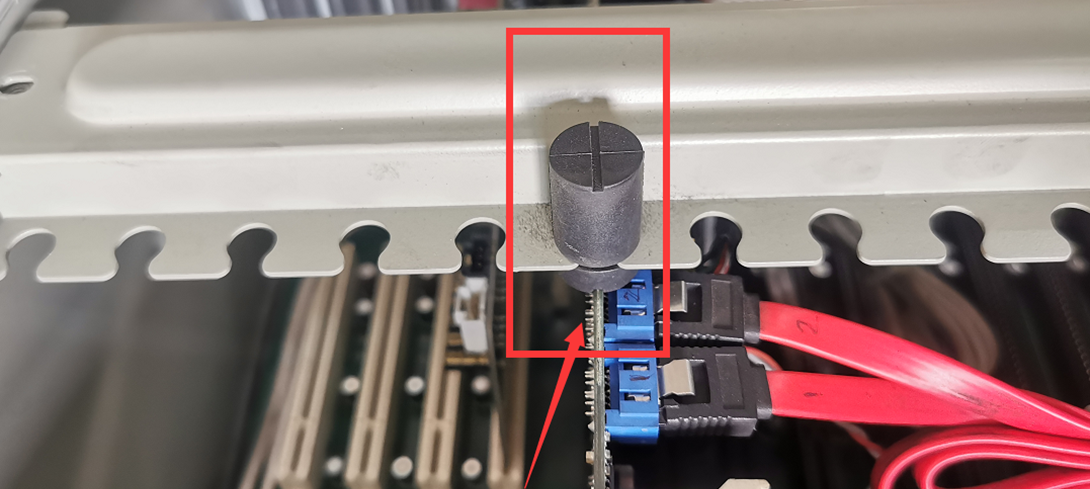
Install the fixed beam and tighten 2 bolts;
Note: There is a rubber column on the fixed beam, so that the groove of the rubber column corresponds to the edge of the main board.
-
Check whether all the modules and cables in the chassis are well connected, then install the chassis cover and tighten 2 bolts. Then recharge it to observe whether it can be turned on normally.
Some device information
The voltage of the button battery on the motherboard is 3V

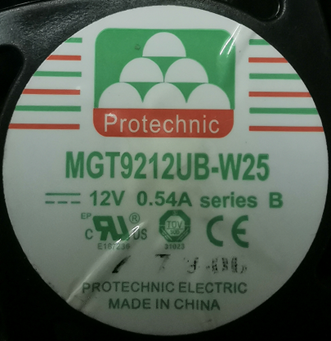
The voltage of the motherboard cooling fan is 12V
The memory card brand is Kingston, model is KVR16N11/8-SP, the frequency is 1600Mhz, and the size is 8GB. The two memory cards of the same computer must be of the same frequency, try to be the same brand and the same size.

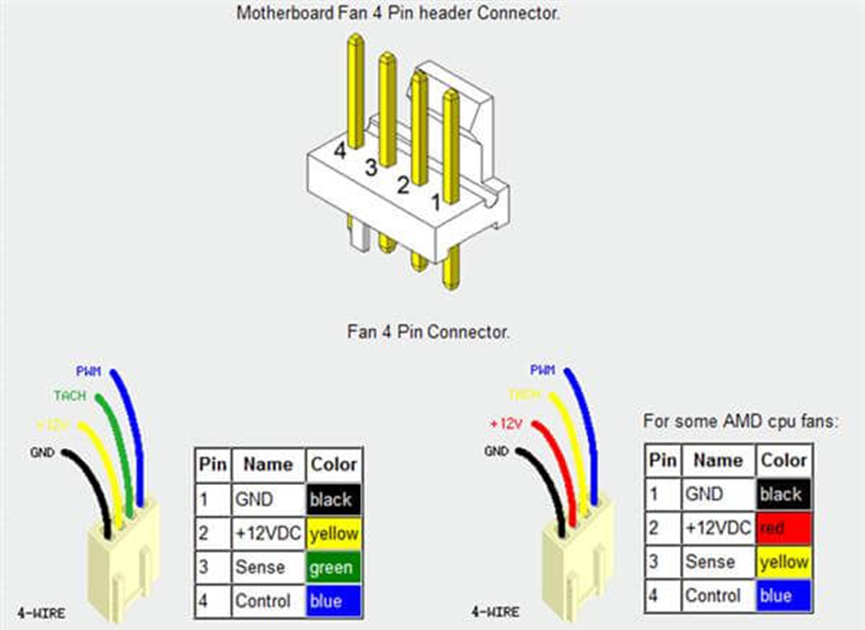
Fan terminal pin description:
Summary
The installation process is a reverse operation of dismantling, and it also needs to be very careful, congratulations on you have completed the cleaning of the industrial computer, give yourself a big savings.


 被折叠的 条评论
为什么被折叠?
被折叠的 条评论
为什么被折叠?
 到【灌水乐园】发言


