


 本文介绍了MMDetection的安装步骤。MMDetection是MMLab家族成员,依赖Pytorch和MMCV。安装前需先搭建Anaconda虚拟环境,再依次安装Pytorch、MMCV、MMDetection和MMDetection3D,同时给出了各步骤的安装要点及验证安装是否成功的方法。
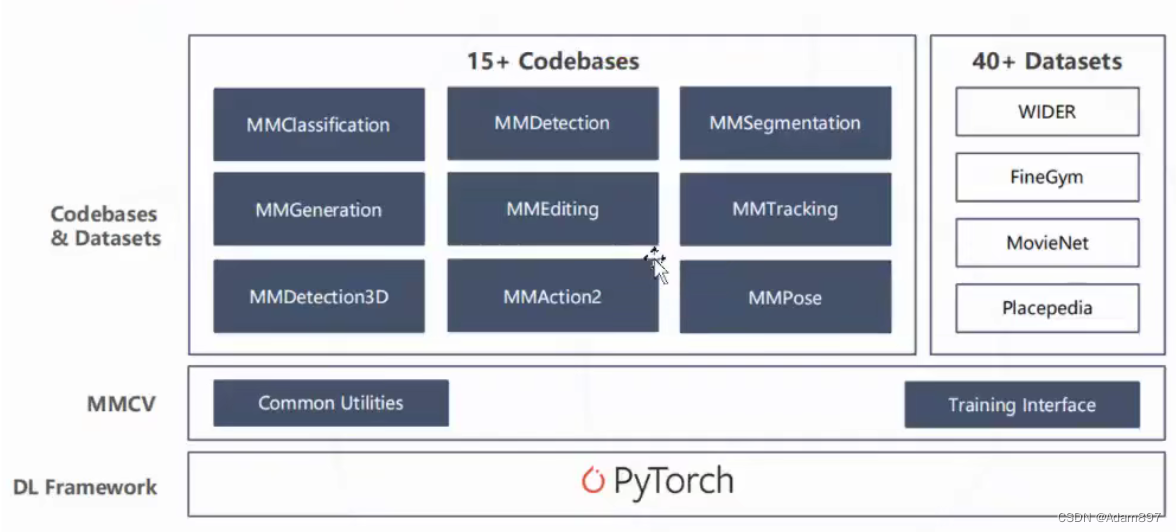
MMDetection概述
MMDetection是MMLab家族的一员,是由香港中文大学和商汤科技共同推出的,以一个统一的架构支撑了15个大方向的研究领域。MMDetection依赖Pytorch和MMCV,因此安装之前需要先安装这两个库。
Step1: Anaconda虚拟环境搭建
打开Anaconda Prompt,创建一个新的虚拟环境mmlab。注意我这里选择了python3.6,因为在python3.7下出现了mmdet3d.apis中的类无法无法import的情况(但mmdet3d可以import),暂时不清楚原因。
// An highlighted block
conda create -n mmlab python=3.6
然后切换到该环境下:
// An highlighted block
activate mmlab
Step2: Pytorch安装
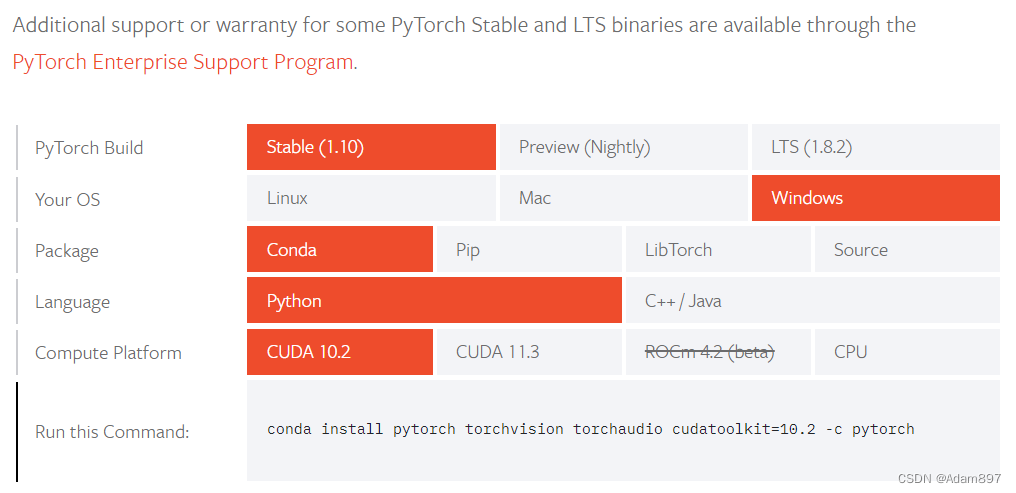
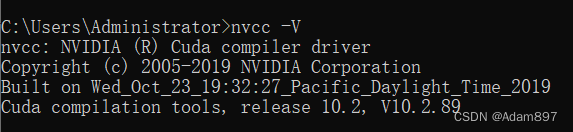
根据Pytorch官网的教程安装Pytorch,注意根据自己电脑的CUDA版本选择。在命令行运行nvcc -V查看当前cuda版本:
 另外,当前(2021.10.23)MMCV最新仅支持到pytorch-1.9,安装最新的pytorch1.10会导致MMDetection无法使用,因此安装的时候需要指定pytorch版本为1.9。
// An highlighted block
conda install pytorch==1.9.1 torchvision torchaudio cudatoolkit=10.2 -c pytorch
验证pytorch安装成功:

Step3: MMCV安装
MMCV有两mmcv-full和mmcv两个版本,两者差别在于是否包含CUDA操作,如果不需要使用CUDA可以安装mmcv,不过官方还是推荐安装完整版的mmcv-full,如果处于服务器这类无法联网的环境,可以参照官方说明使用源码安装:Build MMCV from source。
Step4: MMDetection安装
首先从github上下载mmdetection的源码,然后根据requirements.txt安装所需的依赖库,最后执行setup.py安装mmdetection。
// An highlighted block
git clone https://github.com/open-mmlab/mmdetection.git
cd mmdetection
pip install -r requirements.txt
python setup.py develop
官方提供了Demo验证安装是否成功,位于./demo文件夹下。先新建一个demo_test工程,下载预训练模型(下载链接)放至test_demo\checkpoints文件下,新建main.py并运行:
// An highlighted block
import os

from mmdet.apis import init_detector, inference_detector


def demo_mmdet():
    base_dir = r'D:\Program Files\Third_Part_Lib\mmdetection'       # mmdetection的安装目录

    config_file = os.path.join(base_dir, r'configs\faster_rcnn\faster_rcnn_r50_fpn_1x_coco.py')
    # download the checkpoint from model zoo and put it in `checkpoints/`
    # url: https://download.openmmlab.com/mmdetection/v2.0/faster_rcnn/faster_rcnn_r50_fpn_1x_coco/faster_rcnn_r50_fpn_1x_coco_20200130-047c8118.pth
    checkpoint_file = r'checkpoints\faster_rcnn_r50_fpn_1x_coco_20200130-047c8118.pth'

    # 根据配置文件和 checkpoint 文件构建模型
    model = init_detector(config_file, checkpoint_file, device='cuda:0')

    # 测试单张图片并展示结果
    img = os.path.join(base_dir, r'demo\demo.jpg') # 或者 img = mmcv.imread(img),这样图片仅会被读一次
    result = inference_detector(model, img)
    # 在一个新的窗口中将结果可视化
    model.show_result(img, result, out_file=None, show=True)


if __name__ == '__main__':
    demo_mmdet()
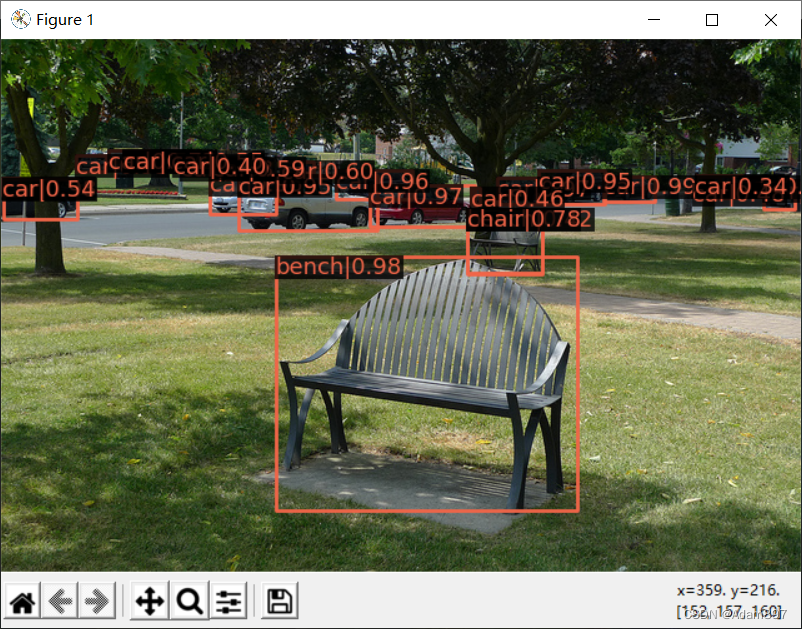
运行成功效果如下:
Step5: MMDetection3D安装
MMDetection3D依赖MMSegmentation,先安装MMSegmentation:
// An highlighted block
git clone https://github.com/open-mmlab/mmsegmentation.git
cd mmsegmentation
pip install -r requirements.txt
python setup.py develop
然后再安装MMDetection3D,这一步编译时间可能会久一点。
// An highlighted block
git clone https://github.com/open-mmlab/mmdetection3d.git
cd mmdetection3d
pip install -r requirements.txt
python setup.py develop
最后再利用官方提供的Demo,先下载预训练模型下载链接放至test_demo\checkpoints文件下,然后运行下面代码:
// An highlighted block
import os
from mmdet3d.apis import inference_detector, init_model, show_result_meshlab
def demo_mmdet3d():
base_dir = r'D:\Program Files\Third_Part_Lib\mmdetection3d' # mmdetection3d的安装目录
config_file = os.path.join(base_dir, r'configs\second/hv_second_secfpn_6x8_80e_kitti-3d-car.py')
# download the checkpoint from model zoo and put it in `checkpoints/`
# url: https://download.openmmlab.com/mmdetection/v2.0/faster_rcnn/faster_rcnn_r50_fpn_1x_coco/faster_rcnn_r50_fpn_1x_coco_20200130-047c8118.pth
checkpoint_file = r'checkpoints\hv_second_secfpn_6x8_80e_kitti-3d-car_20200620_230238-393f000c.pth'
# build the model from a config file and a checkpoint file
model = init_model(config_file, checkpoint_file, device='cuda:0')
# test a single bin
pcd = os.path.join(base_dir, r'demo/data/kitti/kitti_000008.bin')
result, data = inference_detector(model, pcd)
# show the results
show_result_meshlab(
data,
result,
'',
0,
show=True,
snapshot=False,
task='det')
if __name__ == '__main__':
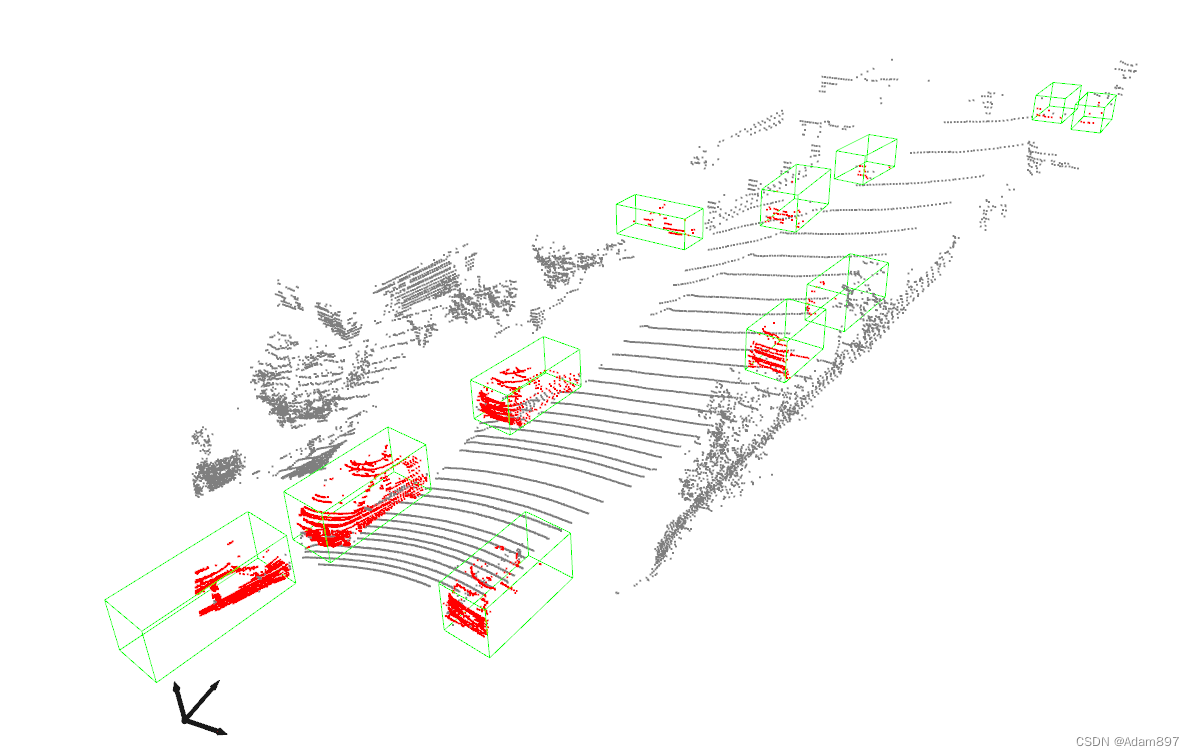
demo_mmdet3d()
运行成功效果如下:
转载:Link


 10万+
10万+

 被折叠的 条评论
为什么被折叠?
被折叠的 条评论
为什么被折叠?
 到【灌水乐园】发言


