


 文章讲述了如何在PyCharm中创建新项目,导入PyTorch并展示基本操作。同时,它提到了如何设置终端为CMD,以及安装Tensorboard、OpenCV、Scipy、Matplotlib和TQDM等库。在使用数据加载器时遇到的问题和解决方法也被提及,包括修改迭代器的调用方式以避免AttributeError。此外,还介绍了将图像转换为RGB模式进行处理的方法。
pycharm:
new Project

import torch
import numpy as np
arr=np.ones((3,3))
print("arr的数据类型为:"+str(arr.dtype))
t=torch.tensor(arr)
print(t)
terminal调出(pytorch)
1、file-settings-Tools-terminal-shell path改成cmd那个
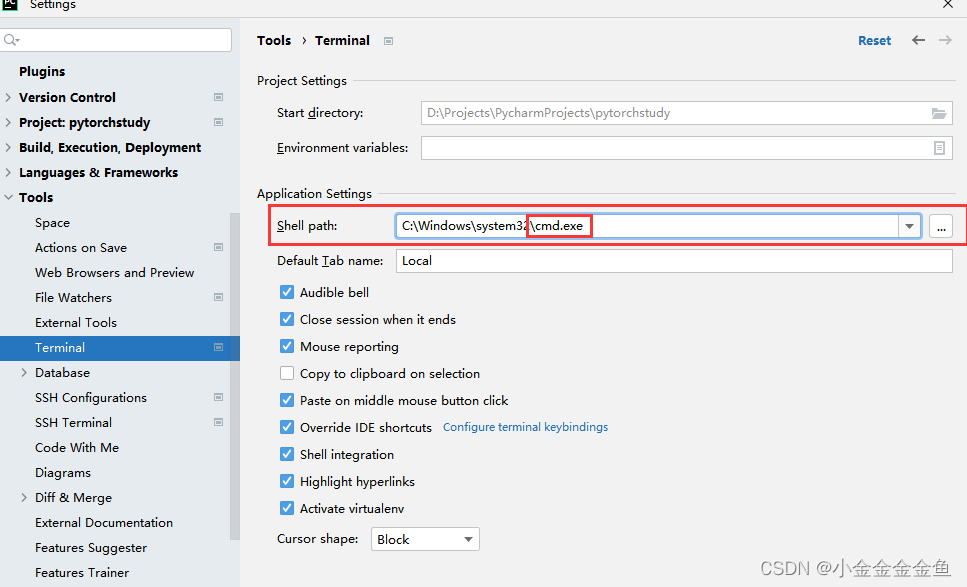
2、或者:在local旁边的下箭头选择command prompt 但是这个我没试过
重启pycharm就好了
tensorboard
要在(pytorch)里面下载
pip install tensorboard -i https://pypi.douban.com/simple/
,然后pip list就能看到
opencv-python
pip install opencv-python -i https://pypi.douban.com/simple/
scipy
pip install scipy -i https://pypi.douban.com/simple/
matplotlib
pip install matplotlib -i https://pypi.douban.com/simple/
tqdm
pip install tqdm -i https://pypi.douban.com/simple/
WZ老师代码
1、num_workers

2、.next()
AttributeError:‘_SingleProcessDataLoaderIter’ object has no attribute ‘next’
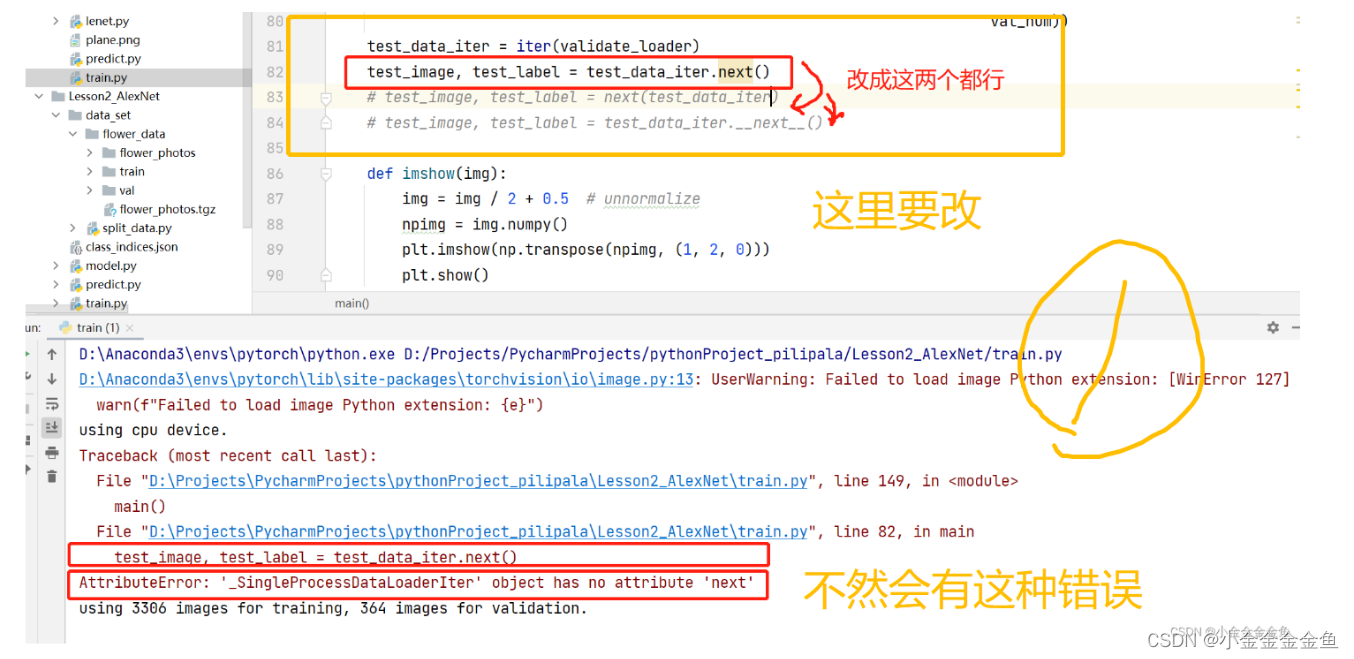
	# test_image, test_label = test_data_iter.next()
    test_image, test_label = next(test_data_iter)
    test_image, test_label = test_data_iter.__next__()
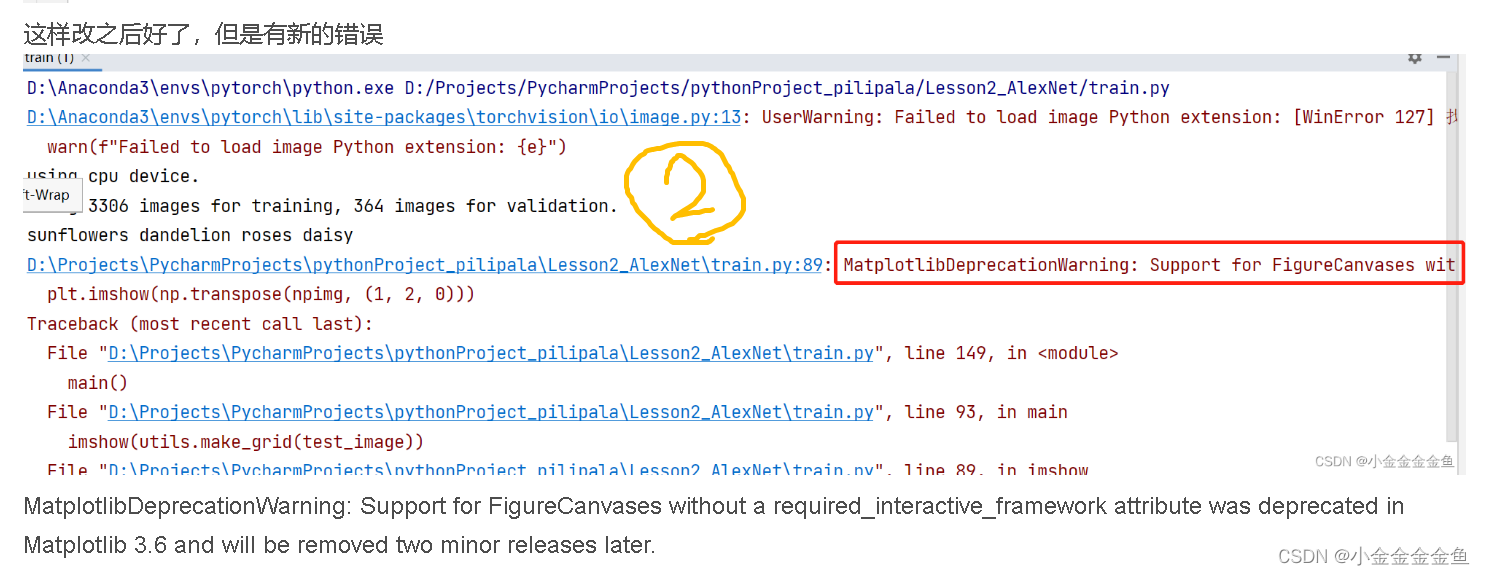
3、改matplotlib后端
紧接着出现新的错误
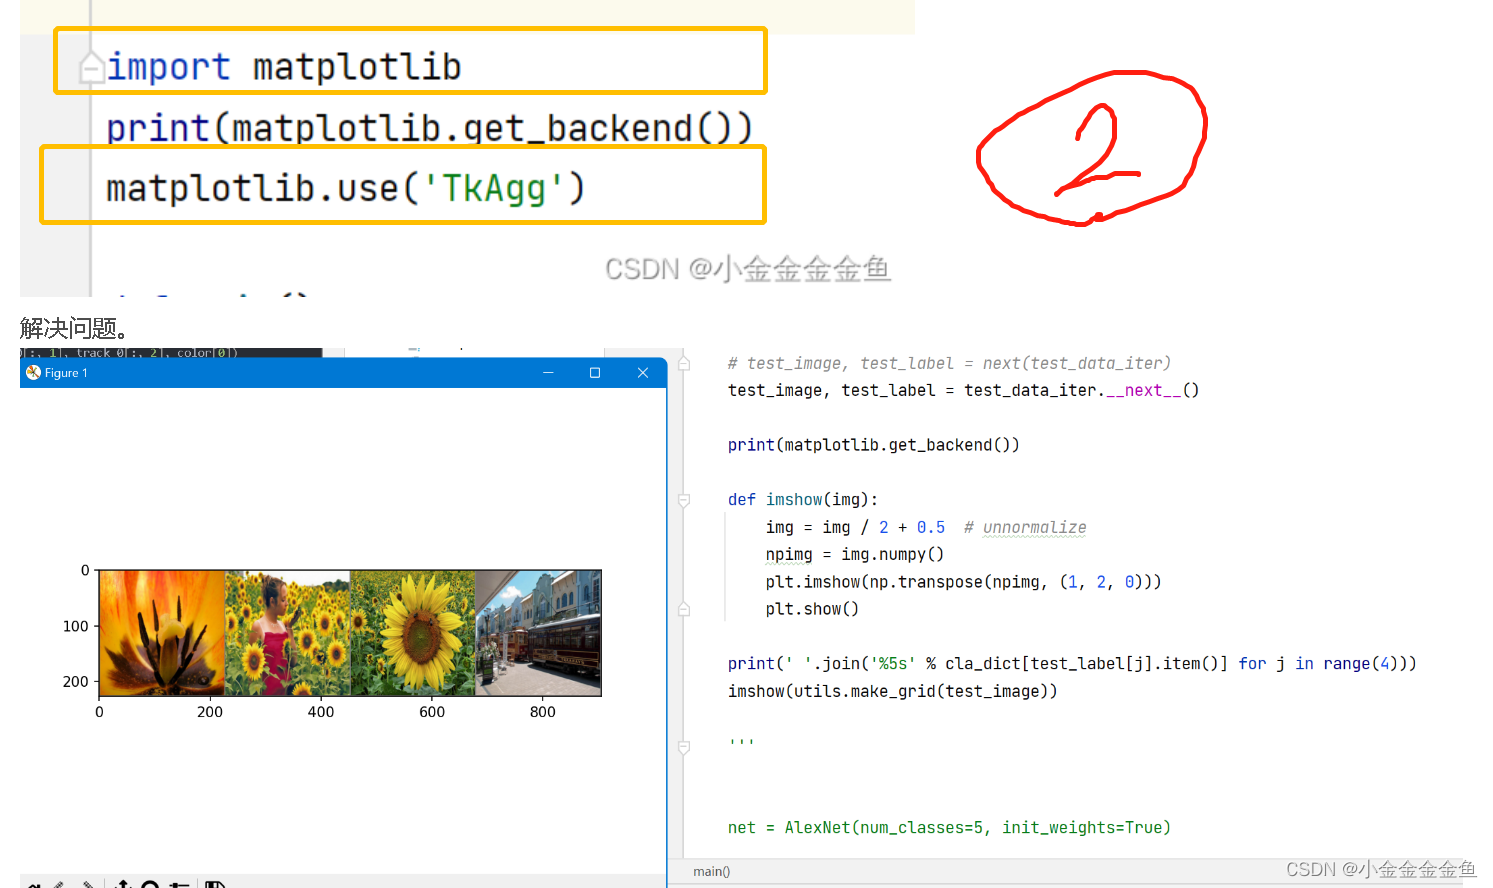
import matplotlib
print(matplotlib.get_backend())
matplotlib.use('TkAgg')
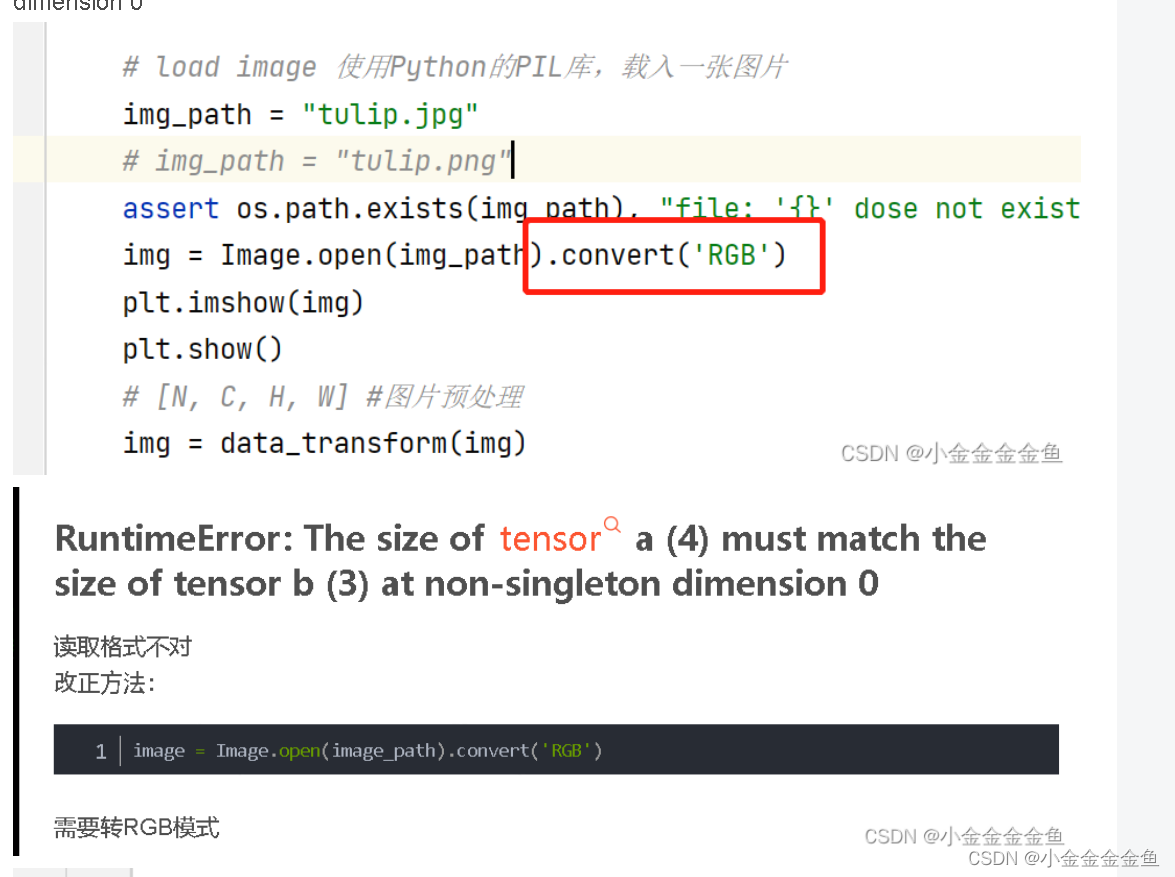
4、转RGB模式 predict
img = Image.open(img_path).convert('RGB')


 被折叠的 条评论
为什么被折叠?
被折叠的 条评论
为什么被折叠?
 到【灌水乐园】发言


