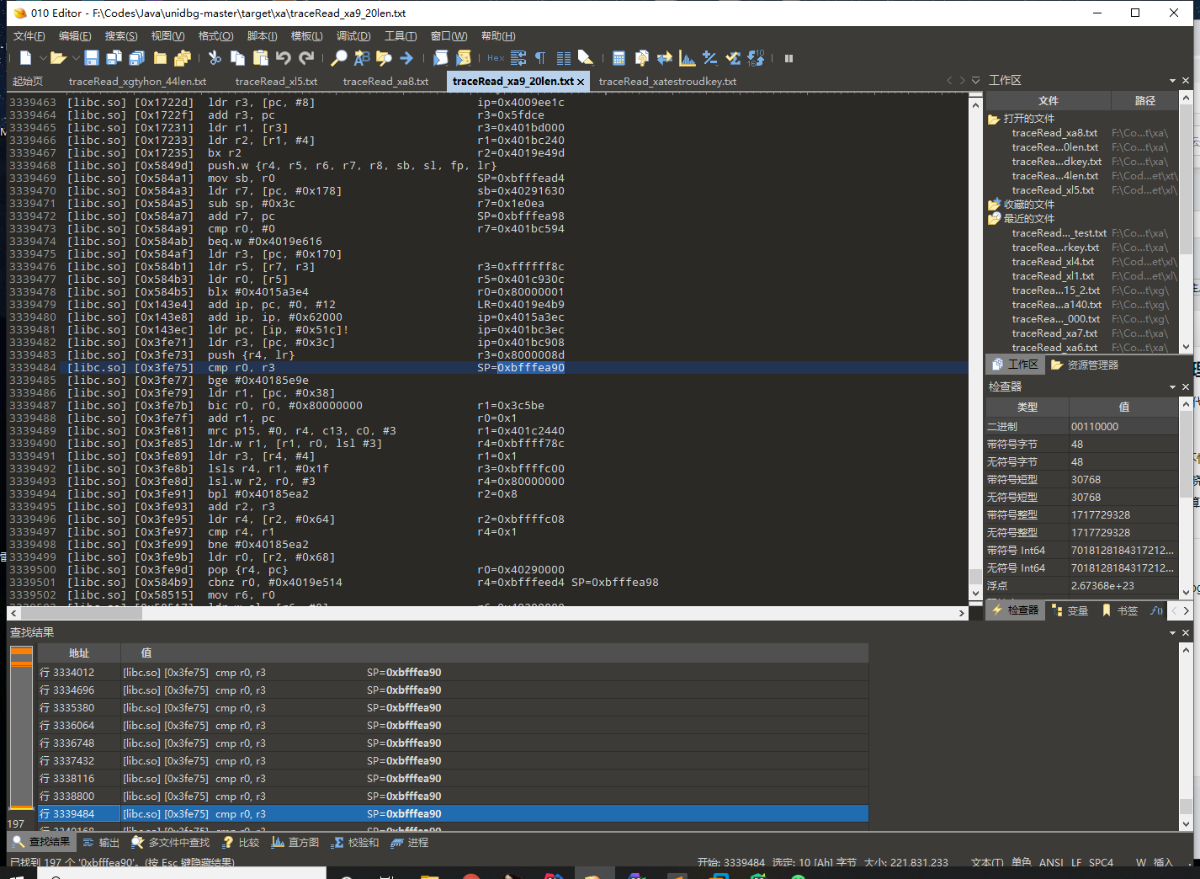
ps :Unidbg跟010Editor更配哦!
今天作者就来带大家以自身使用的经验去了解一下Unidbg!
上面那张图片呢,用的就是小弟魔改的UnidbgTraceCode出来的文件,通过Trace方法可以快速定位某个函数在指令级别的作用,帮助逆向人员更快的分析出想要的算法.
当然Unidbg能做的远远不止这些,本文并不是一篇科普文,所以本文假定读者都是有一定基础的同学.
如果你仔细观摩过Uniidbg源码的话,你会发现所有callJniMethodObject最终都会并入一个叫callFunction的函数.
那么我们在分析So的过程中,发现了一个非JNI函数能不能主动调用呢?
答案是:必须能.
这种好处的体现在于,逆向人员不必使用Jni函数去分析大量的无用代码,而是能精确的定位一个小的Func的具体作用,以及算法逻辑.

通过该函数我们能得到这个小函数在内部到底做了什么操作,并且能Trace出更精确的指令文件
| 1 2 3 4 5 6 7 8 9 10 11 | public final Number[] callFunction(Emulator<?> emulator, String symbolName, Object... args) {
Symbol symbol = findSymbolByName(symbolName, false);
if (symbol == null) {
throw new IllegalStateException("find symbol failed: " + symbolName);
}
if (symbol.isUndef()) {
throw new IllegalStateException(symbolName + " is NOT defined");
}
return symbol.call(emulator, args);
}
|
该函数的第一个参数毋庸置疑是当前的模拟器
| 1 | emulator = createARMEmulator();
|
第二个参数可以是导出函数名,或者是指定地址偏移
后面的参数就是个变长的参数列表,由逆向人员分析得到.
当然如果你是进行so内部函数调用的话,你大概率会填充一个指针,这里在给大家分享一段自己填充char* 类型的函数源码,别的类型参数同理,不在赘述.
| 1 2 3 4 5 6 7 8 9 10 11 12 13 14 15 16 17 18 19 20 21 22 23 24 25 26 27 28 29 30 31 | private static void CallVMPFunc(Module module,AndroidEmulator emulator){
try {
Symbol malloc = module.findSymbolByName("malloc");
Symbol free = module.findSymbolByName("free");
MemoryBlock block = MemoryAllocBlock.malloc(emulator,malloc,free,0x1000);
MemoryBlock namebyte = MemoryAllocBlock.malloc(emulator,malloc,free,0x1000);
UnidbgPointer blockpoint = block.getPointer();
UnidbgPointer namepoint = namebyte.getPointer();
String name = "magicillusion";
String data = "hello worid";
namepoint.write(name.getBytes());
blockpoint.write(data.getBytes());
Number[] ret = module.callFunction(emulator,0x13B30+1,namepoint,blockpoint,2);
UnidbgPointer ret1 = new UnidbgPointer(emulator,ret[0].intValue(),4);
String string = ret1.getString(0);
System.out.println("Number => " + (string));
} finally {
}
}
|
当然Unidbg还内置了多种HOOK框架,今天讲一个分析So比较实用的一款HookZz
| 1 2 3 4 5 6 7 8 9 10 11 12 13 14 15 16 17 18 19 20 21 22 23 24 25 26 27 28 29 30 31 32 33 34 35 36 37 38 39 40 41 42 43 44 45 46 47 48 | // 1. 获取HookZz对象
IHookZz hookZz = HookZz.getInstance(emulator); // 加载HookZz,支持inline hook,文档看https://github.com/jmpews/HookZz
// 2. enable hook
hookZz.enable_arm_arm64_b_branch(); // 测试enable_arm_arm64_b_branch,可有可无
index = 0;
hookZz.replace(module.findSymbolByName("lrand48"), new ReplaceCallback() {
@Override
public void postCall(Emulator<?> emulator, HookContext context) {
((EditableArm32RegisterContext)context).setR0(0x12345678);
int ptrace_args0 = context.getIntArg(0);
System.out.println("lrand48=" + ptrace_args0);
}
},true);
//aesdecode hook
hookZz.wrap((module.base)+0x39634+1, new WrapCallback<RegisterContext>() { // inline wrap导出函数
UnidbgPointer addr = null;
@Override
// 4. 方法执行前
public void preCall(Emulator<?> emulator, RegisterContext ctx, HookEntryInfo info) {
addr= ctx.getPointerArg(0);
UnidbgPointer pointerArg = ctx.getPointerArg(1);
UnidbgPointer pointer = pointerArg.getPointer(12);
int anInt = pointerArg.getInt(8);
byte[] byteArray = pointer.getByteArray(0, anInt);
String s =xuzi1(byteArray);
System.out.println("aes aesdecode= " + s);
}
@Override
// 5. 方法执行后
public void postCall(Emulator<?> emulator, RegisterContext ctx, HookEntryInfo info) {
byte[] aaaa = addr.getPointer(0).getPointer(12).getByteArray(0,0x30);
String s =xuzi1(aaaa);
System.out.println("aes aesdecode1= " + s);
}
});
|
同理,此框架也支持导出函数HOOK以及InlineHOOK 有了这个方法,在你分析一些函数的时候,可以充当Log的效果 或者强行改变一些函数的返回值让你更容易的分析,比如本例中笔者改变了Lrand48的返回值,让函数每次都强行返回0x12345678,这样在逆向分析的时候能让一些不确定性变成可控性.


 716
716

 被折叠的 条评论
为什么被折叠?
被折叠的 条评论
为什么被折叠?
 到【灌水乐园】发言


