


6.1 使用CSS设置字体样式
6.1.1.字体类型
CSS提供font-family属性来控制文本的字体类型
格式如下:font-family:字体名称;
参数;字体名称按优先顺序排列,以逗号隔开。如果字体名称包含空格,则应用引号括起。
说明:用font-family属性可控制显示字体。不同的操作系统,其字体名是不同的。对于
Windows 系统,其字体名就如Word中的“字体”列表中所列出的字体名称。
6.1.2.字体大小
在CSS样式中使用font-size属性设置字体的大小,其值可以是绝对值也可以是相对值。常见的有“px”(绝对位)、“pt”(绝对单位)、“em”(相对单位)和“%”(相对单位)等。
语法:font-size:绝对尺寸|相对尺寸;
参数:绝对字体尺寸是根据对象字体进行调节的,包括xx-mall、x-small,small、me-dium,large,x-large 和xx-large的7种字体尺寸,这些尺寸都没有精确定义,只是相对而言的,在不同的设备下,这些关键字可能会显示不同的字号
相对尺寸是利用百分比或者em以相对父元素大小的方式来设置字体尺寸。
<!DOCTYPE html>
<html>
	<head>
		<meta charset="utf-8" />
		<title></title>
		<style>
			h1{
				font-family: fangsong;/*字体类型*/
				font-size: 25px;/*字体大小*/
			}
		</style>
	</head>
	<body>
		<h1>江西运用工程职业学院</h1>

		<p>校训: 爱国明志 敢为人先</p>
	</body>
</html>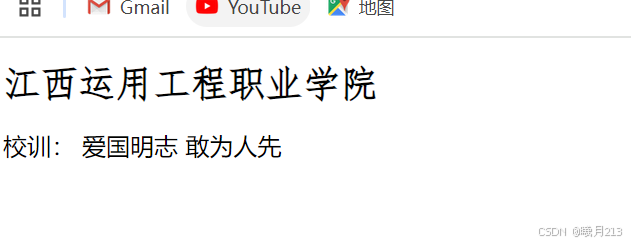
6.1.3.字体粗细
CSS样式中使用 font-weight 属性设置字体的粗细,它包含normal、bold、bolder、lighter、100、200、300、400、500、600、700、800和900多个属性值。
语法:
font-weight: bold | number | normal | lighter |100-900;
参数:normal 表示默认字体,bold 表示粗体,bolder 表示粗体再加粗,lighter 表示比默认字体还细,100~900共分为9个层次(100、200、…、900,数字越小字体越细、数字越大字体越粗,数字值400相当于关键字normal,700等价于bold)。
说明:设置文本字体的粗细
6.1.4.字体倾斜
CSS 中的font-style 属性用来设置字体的倾斜。
语法:
font-style:normal | italic | oblique;
参数:normal为“正常”(默认值),italic为“斜体”,oblique为“倾斜体”
说明:设置文本字体的倾斜。
示例1:
<!DOCTYPE html>
<html>
<head>
<meta charset="utf-8" />
<title></title>
<style>
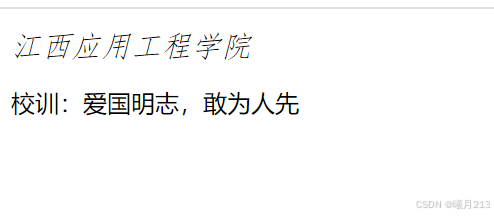
h1{
font-family: fangsong;
font-size: 20px;
font-weight: 100;
font-style: italic;
}
</style>
</head>
<body>
<h1>江西应用工程学院</h1>
<p>校训:爱国明志,敢为人先</p>
</body>
</html>
示例2
<!DOCTYPE html>
<html>
<head>
<meta charset="utf-8" />
<title></title>
<style>
h1{
font-family: fangsong;
font-size: 20px;
font-weight: 100;
font-style: italic;
}
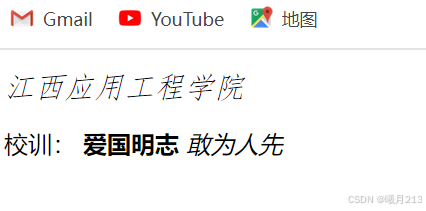
#id1{
font-weight: 900;
}
#id2{
font-style: italic;
}
</style>
</head>
<body>
<h1>江西应用工程学院</h1>
<p>校训:
<span id="id1">爱国明志</span>
<span id="id2">敢为人先</span>
</p>
</body>
</html>
6.2 使用CSS设置文本样式
6.2.1.文本水平对齐方式
使用 text-align 属性可以设置元素中文本的水平对齐方式。
语法:text-align:left | right | center | justify;
参数:left 为左对齐,right为右对齐,center 为居中,justify为两端对齐。
说明:设置对象中文本的对齐方式。
<!DOCTYPE html>
<html>
	<head>
		<meta charset="utf-8" />
		<title>第六章 元素应用 CSS</title>
		<style>
			h1{
				font-family: 黑体;
				text-align: center;
			}

		</style>
	</head>
	<body>
		<h1>江西应用工程职业学院</h1>
		<p>校训:爱国明志 敢为人先</p>
		<p>江西应用工程职业学院系一所经江西省政府批准、中国教育部备案、面向全国招生的国有公办全日制普通高职院校,隶属江西省教育厅。求实创新、扬帆远航,在新时代的奋进中,江西应用工程职业学院承扬传统,开拓新天。江西应用工程职业学院将始终肩负培育国家金蓝领人才、服务社会发展进步的历史使命与社会责任,再谱现代职业教育大学继承与创新并进、光荣与理想融会的新篇章!</p>
	</body>
</html>
6.2.2.行高
段落中两行文本之间垂直的距离称为行高。在HTML中是无法控制行高的,在CSS样式中,使用line-height 属性控制行与行之间的垂直间距。
语法:line-height: length | normal;
参数:length为由百分比数字或由数值、单位标识符组成的长度值,允许为负值。其百分比取值是基于字体的高度尺寸。normal为默认行高。
说明:设置对象的行高。
<!DOCTYPE html>
<html>
	<head>
		<meta charset="utf-8" />
		<title></title>
		<style>
			h1{
				font-family: fangsong;
				font-size: 25px;

				font-weight: 500;
				font-style: italic;

				text-align: center;
			}
			#id1{
				font-weight: 800;
				font-size: 10px;
			}
			#id2{
				font-style: italic;
			}
			p{
				line-height: 200%;/*行高*/
			}
		</style>

	</head>
	<body>
		<h1>江西运用工程职业学院</h1>

		<p>校训: <span id="id1">爱国明志</span>
		 <span id="id2">敢为人先</span>
		 <p>江西应用工程职业学院系一所经江西省政府批准、中国教育部备案、面向全国招生的国有公办全日制普通高职院校,隶属江西省教育厅。
		 求实创新、扬帆远航,在新时代的奋进中,江西应用工程职业学院承扬传统,开拓新天。
		 江西应用工程职业学院将始终肩负培育国家金蓝领人才、服务社会发展进步的历史使命与社会责任,再谱现代职业教育大学继承与创新并进、
		 光荣与理想融会的新篇章!</p>
		</p>
	</body>
</html>
6.2.3 文本修饰
使用CSS样式可以对文本进行简单的修饰,text属性所提供的text-decoration属性,主要实现文本加下划线、顶线、删除线及文本闪烁等效果。
语法:text-decoration: underline | blink | overline | line-through | none;
参数:underline 为下划线,blink 为闪烁,overline 为上划线,line-through 为贯穿线,none为无装饰。
说明:设置对象中文本的修饰。对象a、u、ins的文本修饰默认值为underline。对象strike、s、del的默认值是line-through。如果应用的对象不是文本,则此属性不起作用。
<!DOCTYPE html>
<html>
	<head>
		<meta charset="utf-8" />
		<title></title>
		<style>
			h1{
				font-family: fangsong;
				font-size: 20px;
				font-weight: 100;
				font-style: italic;
				text-align: center;
			}
			#id1{
				font-weight: 900;
			}
			#id2{
				font-style: italic;
			}
			#id3{
				text-decoration: underline;
			}
			#id4{
				text-decoration: overline;
			}
			#id5{
				text-decoration: line-through;
			}
			p{
				line-height: 200%;
			}
		</style>
	</head>
	<body>
		<h1>江西应用工程职业学院</h1>
		<p>校训:
		<span id="id1">爱国明志</span>
		<span id="id2">敢为人先</span>
		</p>
		<p>
		<span id="id3">
			江西应用工程职业学院</span>系一所经江西省政府批准、中国教育部备案、面向全国招生的国有公办全日制普通高职院校,隶属江西省教育厅。求实创新、扬帆远航,在新时代的奋进中,
		<span id="id4">
			江西应用工程职业学院</span>承扬传统,开拓新天。
		<span id="id5">
		江西应用工程业学院</span>将始终肩负培育国家金蓝领人才、服务社会发展进步的历史使命与社会责任,再谱现代职业教育大学继承与创新并进、光荣与理想融会的新篇章!
		</p>
	</body>
</html>

6.2.4.段落首行缩进
首行缩进是指段落的第一行从左向右缩进一定的距离,而首行以外的其他行保持不变,其目的是便于阅读和区分文章整体结构。
在Web页面中,将段落的第一行进行缩进,同样是一种最常用的文本格式化效果。在CSS样式中text-indent 属性可以方便地实现文本缩进。可以为所有块级元素应用text-indent,但不能应用于行级元素。如果想把一个行级元素的第一行缩进,可以用左内边距或外边距创造这种效果。
语法:text-indent:length;
参数:length为百分比数字或由浮点数字、单位标识符组成的长度值,允许为负值。
说明:设置对象中的文本段落的缩进。本属应用于整块的内容。
6.2.5.首字下沉
在许多文档的排版中经常出现首字下沉的效果,所谓首字下沉是指设置段落的第一行第
一个字的字体变大,并且向下一定的距离,而段落的其他部分保持不变。
在CSS样式中伪对象“:first-letter”可以实现对象内第一个字符的样式控制。
<!DOCTYPE html>
<html>
	<head>
		<meta charset="utf-8" />
		<title></title>
		<style>
			h1{
				font-family: fangsong;/*字体类型*/
				font-size: 25px;/*字体大小*/

				font-weight: 500;/*字体粗细*/
				font-style: italic;/*字体倾斜*/

				text-align: center;/*居中对齐*/
			}
			#id1{
				font-weight: 800;
				font-size: 10px;
			}
			#id2{
				font-style: italic;
			}
			/*p{
				line-height: 200%;/*行高*/
			}*/
			#id3{
				text-decoration: underline;/*下划线*/
			}
			#id4{
				text-decoration: overline;/*上划线*/
			}
			#id5{
				text-decoration: line-through;/*贯穿线*/
			}
			.first{
				text-indent: 2em;/*首行缩进*/
			}
			.second::first-letter{/*首字下沉*/
				float: left;/*浮动*/
				font-size: 2em;/*下沉*/
				font-weight: 800;/*加粗*/
			}
		</style>

	</head>
	<body>
		<h1>江西运用工程职业学院</h1>

		<p class="first">校训: <span id="id1">爱国明志</span>
		 <span id="id2">敢为人先</span>
		 <p class="second"><span id="id3">江西应用工程职业学院系一所经江西省政府批准、中国教育部备案、面向全国招生的国有公办全日制普通高职院校,隶属江西省教育厅。</span>
		 求实创新、扬帆远航,在新时代的奋进中,<span id="id4">江西应用工程职业学院承扬传统,开拓新天。</span>
		 <span id="id5">江西应用工程职业学院将始终肩负培育国家金蓝领人才、服务社会发展进步的历史使命与社会责任,再谱现代职业教育大学继承与创新并进、
		 光荣与理想融会的新篇章!</span>
		 </p>
		</p>
	</body>
</html>
6.2.6.字符间距
leter-spacing为字符间距属性,可以设置字符与字符间的距离。
语法:letter-spacing: length | normal;
参数:normal为默认值,定义字符间的标准间距。length 表示由浮点数字和单位标识符
组成的长度值,允许为负值。
说明:该属性定义元素中字符之间插入多少空白符。如果指定为长度值,会调整字符之
间的标准间距,允许指定负长度值,这会让字符之间变得更拥挤。
示例:
<!DOCTYPE html>
<html>
	<head>
		<meta charset="utf-8" />
		<title></title>
		<style>
			h1{
				font-family: fangsong;
				font-size: 20px;
				font-weight: 100;
				font-style: italic;
				text-align: center;
			}
			#id1{
				font-weight: 900;
			}
			#id2{
				font-style: italic;
			}
			#id3{
				text-decoration: underline;
			}
			#id4{
				text-decoration: overline;
			}
			#id5{
				text-decoration: line-through;
			}
			p{
				font-family: arial,"times new roman";
				text-indent: 2em;
			}
			.first{
				text-indent: 2em;
			}
			.second::first-letter{
				float: left;
				font-size: 2em;
				font-weight: 900;
			}
			.first{
				letter-spacing: 2em;
			}
		</style>
	</head>
	<body>
		<h1>江西应用工程职业学院</h1>
		<p class="first">校训:
		<span id="id1">爱国明志</span>
		<span id="id2">敢为人先</span>
		</p>
		<p class="second">
		<span id="id3">
			江西应用工程职业学院</span>系一所经江西省政府批准、中国教育部备案、面向全国招生的国有公办全日制普通高职院校,隶属江西省教育厅。求实创新、扬帆远航,在新时代的奋进中,
		<span id="id4">
			江西应用工程职业学院</span>承扬传统,开拓新天。
		<span id="id5">
		江西应用工程业学院</span>将始终肩负培育国家金蓝领人才、服务社会发展进步的历史使命与社会责任,再谱现代职业教育大学继承与创新并进、光荣与理想融会的新篇章!
		</p>
	</body>
</html>

6.2.7.文本的截断
在CSS样式中text-overflow属性可以实现文本的截断效果,该属性包含clip和ellipsis两个属性值。前者表示简单的裁切,不显示省略标记(…);后者表示当文本溢出时显示省略标记(…)。
语法:text-overflow:clip | ellipsis;
参数:clip定义简单的裁切,不显示省略标记。ellipsis 定义当文本溢出时显示省略标记。
说明:设置文本的截断。要实现溢出文本显示省略号的效果,除了使用text-overflow属性以外,还必须配合white-space:nowrap(强制文本在一行内显示)和 overflow:hidden溢出内容为隐藏)同时使用才能实现。
<!DOCTYPE html>
<html>
	<head>
		<meta charset="utf-8" />
		<title></title>
		<style>
			h1{
				font-family: fangsong;
				font-size: 20px;
				font-weight: 100;
				font-style: italic;
				text-align: center;
			}
			#id1{
				font-weight: 900;
			}
			#id2{
				font-style: italic;
			}
			#id3{
				text-decoration: underline;
			}
			#id4{
				text-decoration: overline;
			}
			#id5{
				text-decoration: line-through;
			}
			p{
				font-family: arial,"times new roman";
				text-indent: 2em;
			}
			.first{
				text-indent: 2em;
			}
			.second::first-letter{
				float: left;
				font-size: 2em;
				font-weight: 900;
			}
			.first{
				letter-spacing: 2em;
			}
			.second{
				width: 300px;
				height: 50px;
				overflow: hidden;
				text-overflow:ellipsis;
				white-space: nowrap;
			}
		</style>
	</head>
	<body>
		<h1>江西应用工程职业学院</h1>
		<p class="first">校训:
		<span id="id1">爱国明志</span>
		<span id="id2">敢为人先</span>
		</p>
		<p class="second">
		<span id="id3">
			江西应用工程职业学院</span>系一所经江西省政府批准、中国教育部备案、面向全国招生的国有公办全日制普通高职院校,隶属江西省教育厅。求实创新、扬帆远航,在新时代的奋进中,
		<span id="id4">
			江西应用工程职业学院</span>承扬传统,开拓新天。
		<span id="id5">
		江西应用工程业学院</span>将始终肩负培育国家金蓝领人才、服务社会发展进步的历史使命与社会责任,再谱现代职业教育大学继承与创新并进、光荣与理想融会的新篇章!
		</p>
	</body>
</html>

6.2.8.文本的颜色
在CSS样式中,对文本增加颜色修饰十分简单,只需添加color 属性即可。
color 属性的语法: color:颜色值;
这里颜色值可以使用多种书写方式:
color:red; /*规定颜色值为颜色名称的颜色*/
color:#000000; /*规定颜色值为十六进制值的颜色*/
color:rgb(0,0,255); /*规定颜色值为rgb代码的颜色*/
color:rgb(0%,0%,80%); /*规定颜色值为rgb百分数的颜色※/
<!DOCTYPE html>
<html>
	<head>
		<meta charset="utf-8">
		<title>文本颜色的设置</title>
		<style type="text/css">
			body{
				color: blue;
			}
			h1{
				font-family: 黑体;
				color: #333;
			}
			p{
				font-family: Arial,"times new roman";
			}
			p.red{
				color: rgb(255, 0, 0);
			}
		</style>
	</head>
	<body>
		<h1>经营理念</h1>
		<p class="red">用户是上帝, 也是我们的衣食父母, 坚持用户利益至上,
		不断倾听和深刻理解用户需求, 不断给用户惊喜,
		不断提供超预期的体验和服务, 不断创造新的用户价值。
		</p>
		<p>由于在body中定义了文本颜色为蓝色,没有应用任何样式的普通段落的文字为蓝色。</p>
	</body>
</html>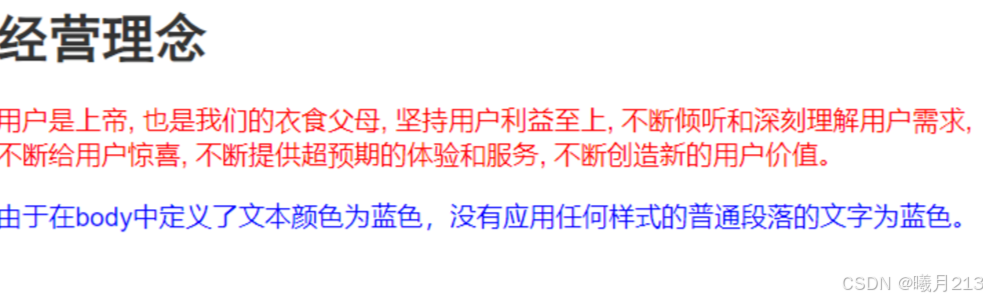
6.2.9.文本的背景颜色
在HTML中,可以使用标签的bgcolor 属性设置网页的背景颜色。而在CSS里,不仅可以background-color 属性来设置网页背景颜色,还可以设置文本的背景颜色。
语法:background-color:color | transparent
参数:color 用于指定颜色。transparent 表示透明的意思,也是浏览器的默认值。
说明:background-color不能继承,默认值是transparent。如果一个元素没有指定背景色,那么背景就是透明的,这样其父元素的背景才能看见。
<!DOCTYPE html>
<html>
	<head>
		<meta charset="utf-8" />
		<title></title>
		<style>
			h1{
				font-family: fangsong;/*字体类型*/
				font-size: 25px;/*字体大小*/

				font-weight: 500;/*字体粗细*/
				font-style: italic;/*字体倾斜*/

				text-align: center;/*居中对齐*/
			}
			#id1{
				font-weight: 800;
				font-size: 10px;
			}
			#id2{
				font-style: italic;
			}
			/*p{
				line-height: 200%;/*行高*/
			}*/
			#id3{
				text-decoration: underline;/*下划线*/
			}
			#id4{
				text-decoration: overline;/*上划线*/
			}
			#id5{
				text-decoration: line-through;/*贯穿线*/
			}
			.first{
				text-indent: 2em;/*首行缩进*/
			}
			.second::first-letter{/*首字下沉*/
				float: left;/*浮动*/
				font-size: 2em;/*下沉*/
				font-weight: 800;/*加粗*/
			}
			.first{/*字符间距*/
				letter-spacing: 200px;
			}
			.second{/*文本的截断*/
				width: 300px;/*设置截断的宽度*/
				height: 50px;/*设置截断的高度*/
				overflow: hidden;/*溢出隐藏*/
				white-space: nowrap;/*强制文本在第一行显示*/
				text-overflow: ellipsis;/*当文本溢出是显示省略号(......)*/
			}
			h1{
				color: #ff0000;/*文本颜色*/
			}
			.first{
				background-color: #ff0000;/*背景颜色*/
			}
		</style>

	</head>
	<body>
		<h1>江西运用工程职业学院</h1>

		<p class="first">校训: <span id="id1">爱国明志</span>
		 <span id="id2">敢为人先</span>
		 <div><p class="second"><span id="id3">江西应用工程职业学院系一所经江西省政府批准、中国教育部备案、面向全国招生的国有公办全日制普通高职院校,隶属江西省教育厅。</span>
		 求实创新、扬帆远航,在新时代的奋进中,<span id="id4">江西应用工程职业学院承扬传统,开拓新天。</span>
		 <span id="id5">江西应用工程职业学院将始终肩负培育国家金蓝领人才、服务社会发展进步的历史使命与社会责任,再谱现代职业教育大学继承与创新并进、
		 光荣与理想融会的新篇章!</span>
		 </p></div>
		</p>
	</body>
</html>

6.3 使用CSS设置图像样式
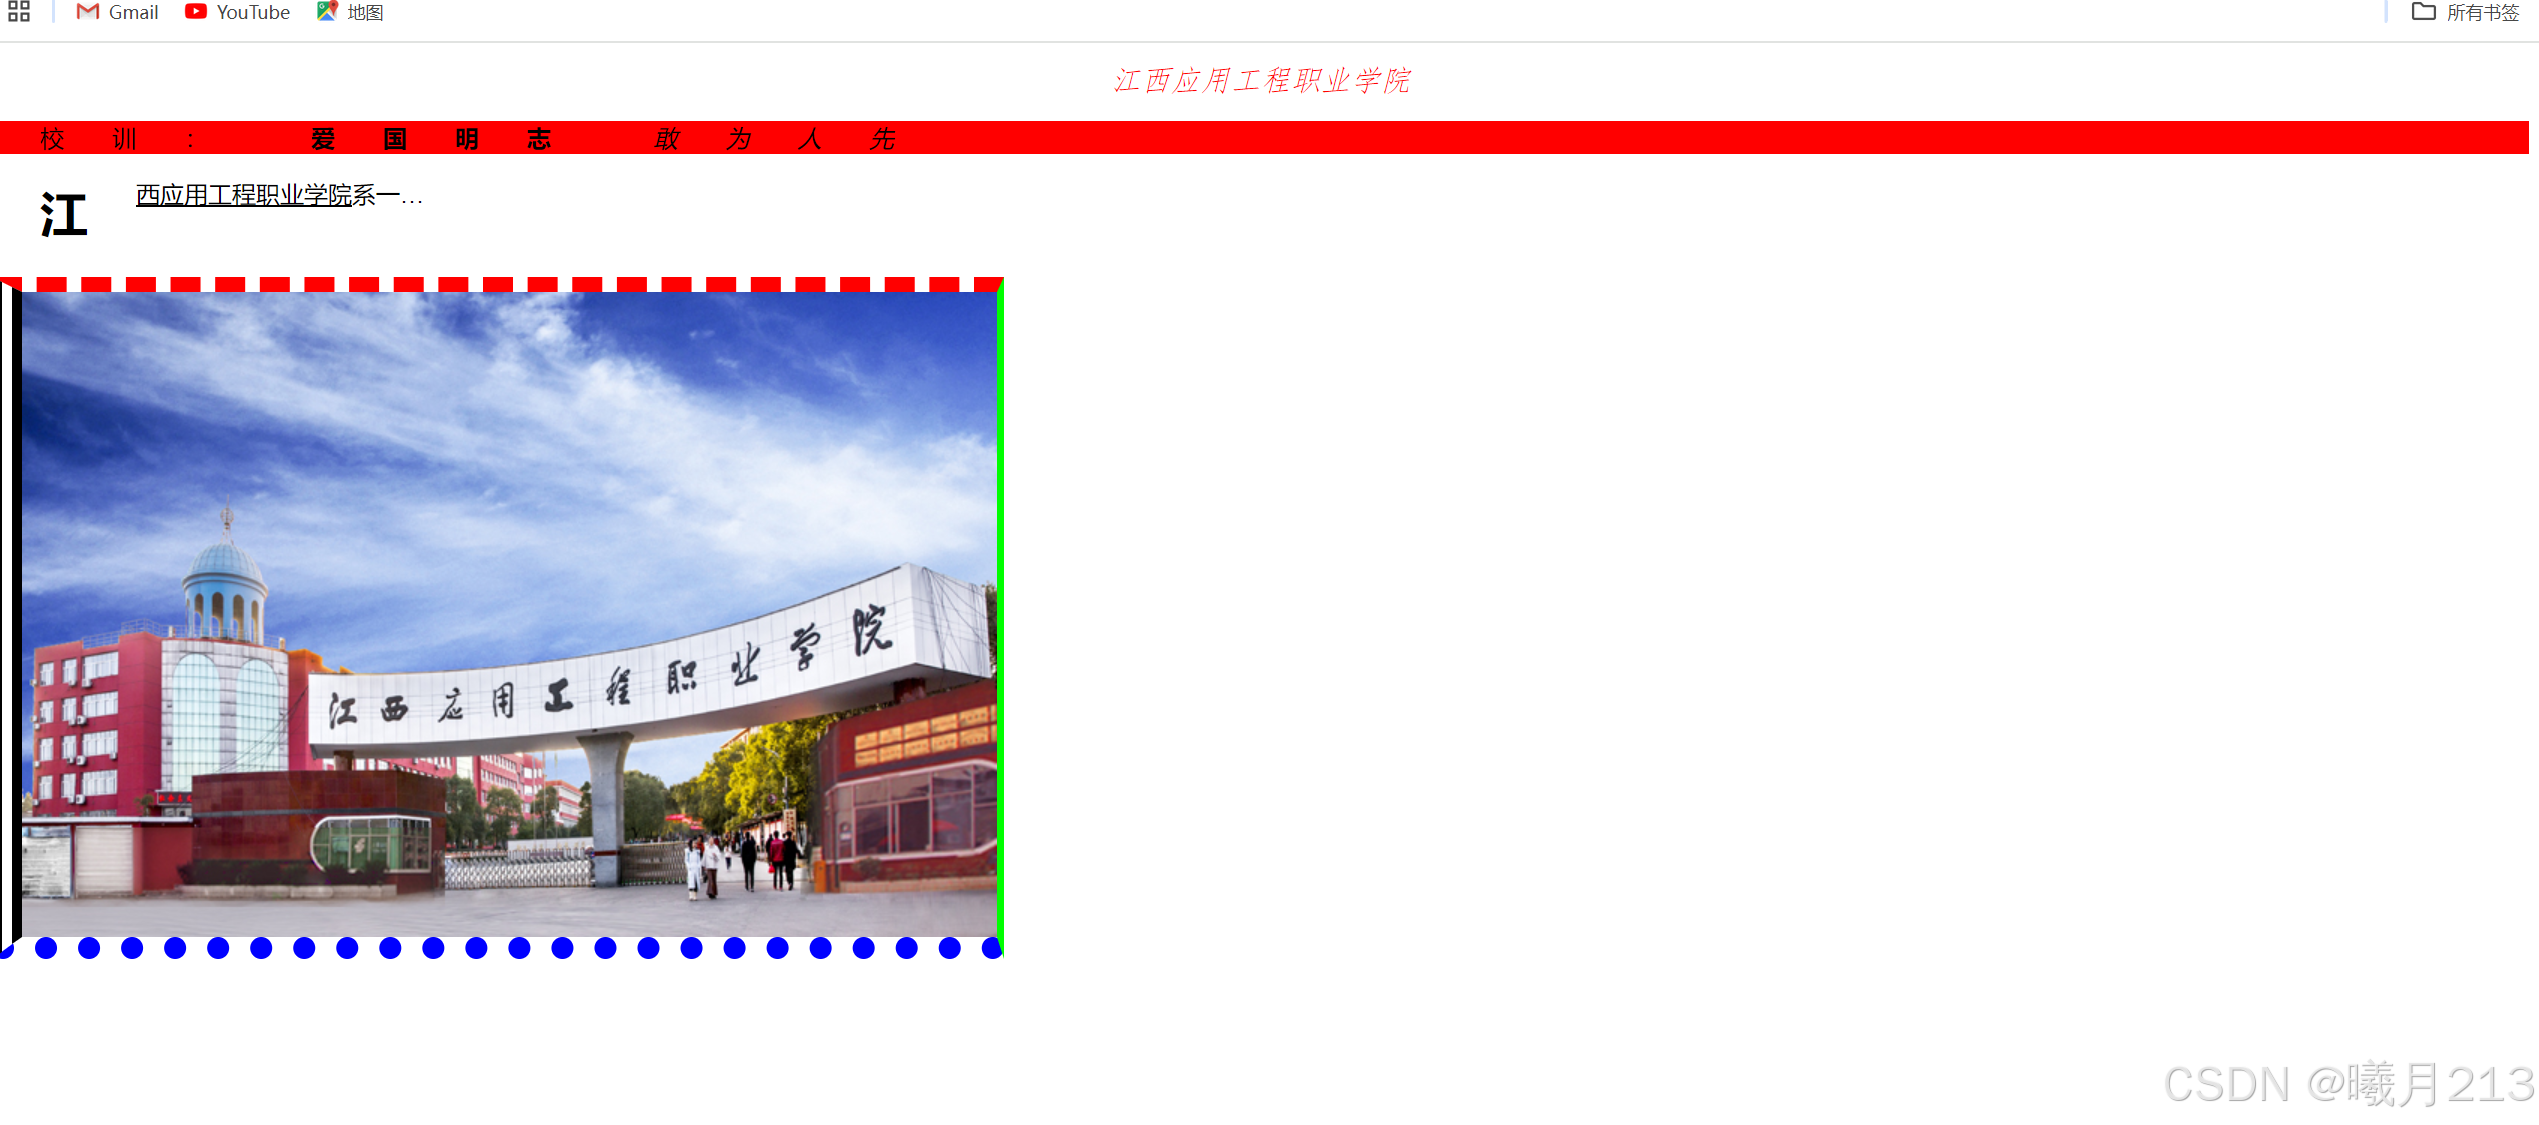
6.3.1.设置图像边框
图像的边框就是利用border 属性作用于图像元素而呈现的效果。在HTML中可以直接通过<img>标记的border 属性值为图像添加边框,属性值为边框的粗细,以像素为单位,从而控制边框的粗细。当设置border 属性值为0时,则显示为没有边框。
<!DOCTYPE html>
<html>
	<head>
		<meta charset="utf-8" />
		<title></title>
		<style>
			h1{
				font-family: fangsong;
				font-size: 20px;
				font-weight: 100;
				font-style: italic;
				text-align: center;
				color: red;
			}
			#id1{
				font-weight: 900;
			}
			#id2{
				font-style: italic;
			}
			#id3{
				text-decoration: underline;
			}
			#id4{
				text-decoration: overline;
			}
			#id5{
				text-decoration: line-through;
			}
			p{
				font-family: arial,"times new roman";
				text-indent: 2em;
			}
			.second::first-letter{
				float: left;
				font-size: 2em;
				font-weight: 900;
			}
			.first{
				text-indent: 2em;
				/*背景颜色*/
				background-color: #FF0000;
				letter-spacing: 2em;
			}
			.second{
				width: 300px;
				height: 50px;
				overflow: hidden;
				text-overflow:ellipsis;
				white-space: nowrap;
			}
			img{

				border-color: #FF0000 #00ff00 #0000ff #000000;
				border-width: 10px 5px 15px 20px;
				border-style: dashed solid dotted double;
			}
		</style>
	</head>
	<body>
		<h1>江西应用工程职业学院</h1>
		<p class="first">校训:
		<span id="id1">爱国明志</span>
		<span id="id2">敢为人先</span>
		</p>
		<p class="second">
		<span id="id3">
			江西应用工程职业学院</span>系一所经江西省政府批准、中国教育部备案、面向全国招生的国有公办全日制普通高职院校,隶属江西省教育厅。求实创新、扬帆远航,在新时代的奋进中,
		<span id="id4">
			江西应用工程职业学院</span>承扬传统,开拓新天。
		<span id="id5">
		江西应用工程业学院</span>将始终肩负培育国家金蓝领人才、服务社会发展进步的历史使命与社会责任,再谱现代职业教育大学继承与创新并进、光荣与理想融会的新篇章!
		</p>
		<img src="img/d9edb10b513b7078bb7a051a433dba5.png">
	</body>
</html>
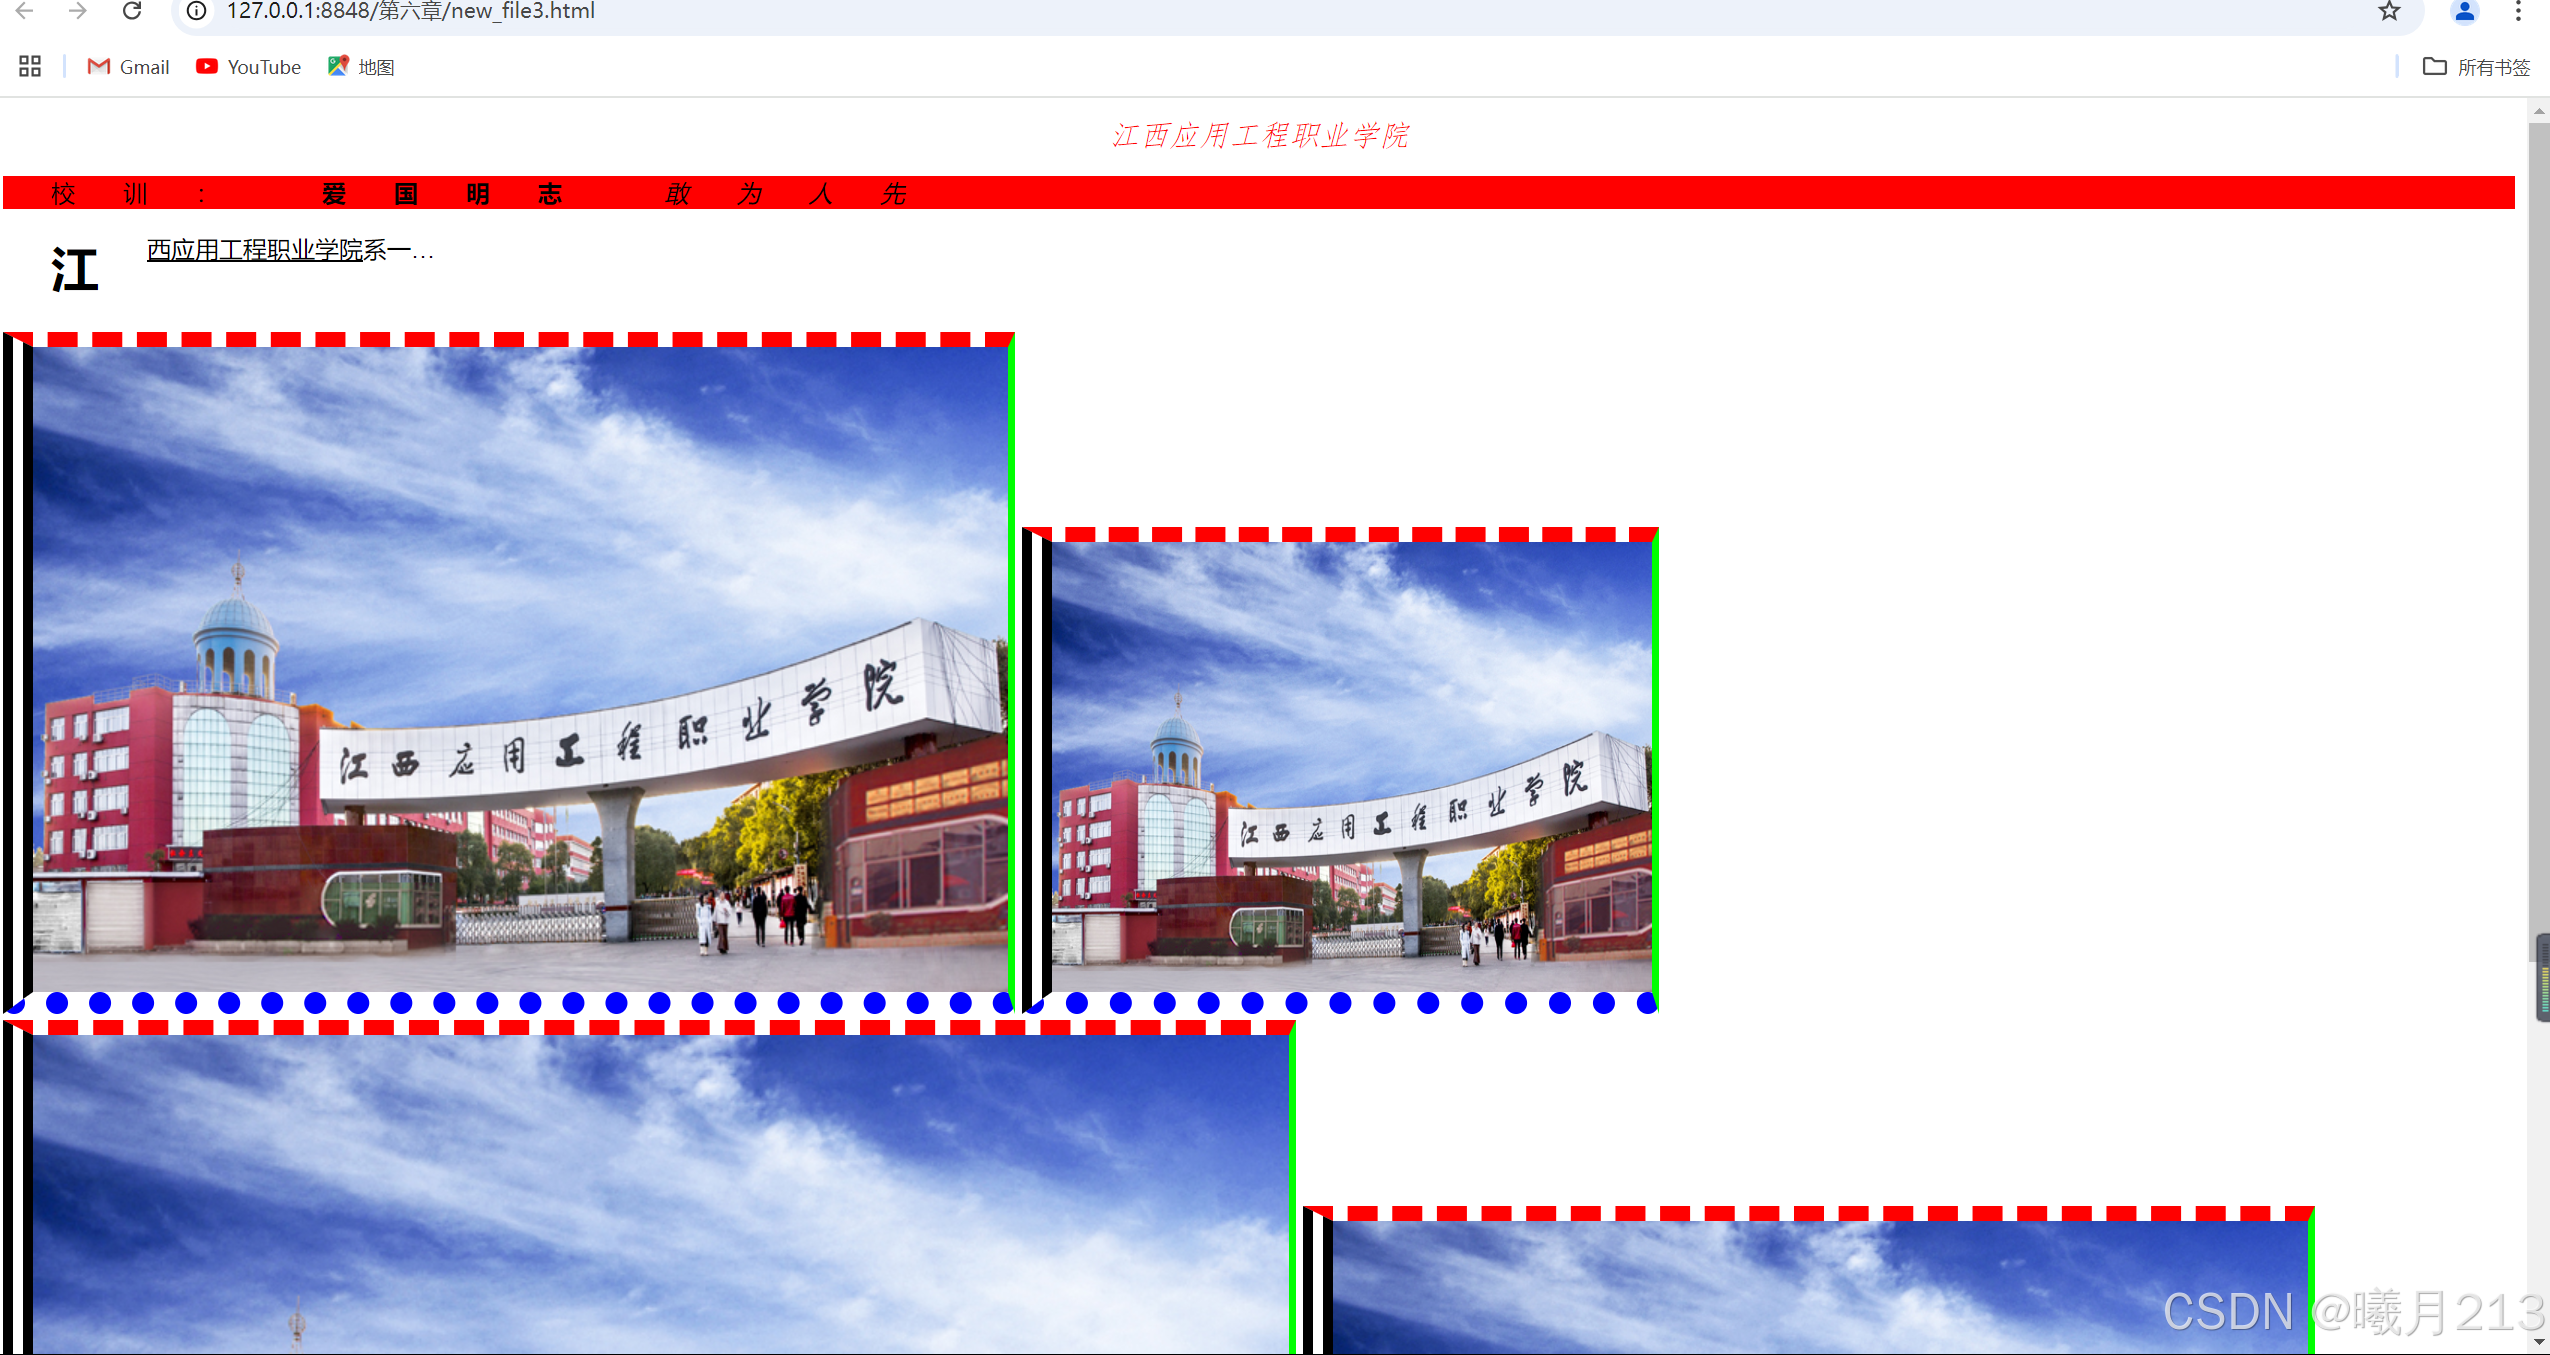
6.3.2.图像缩放
使用CSS样式控制图像的大小,可以通过 width 和height 两个属性来实现。需要注意的是,当width 和height 两个属性的取值使用百分比数值时,它是相对于父元素而言的,如果将这两个属性设置为相对于body的宽度或高度,就可以实现当浏览器窗口改变时,图像大小也发生相应变化的效果。
<!DOCTYPE html>
<html>
	<head>
		<meta charset="utf-8" />
		<title></title>
		<style>
			h1{
				font-family: fangsong;
				font-size: 20px;
				font-weight: 100;
				font-style: italic;
				text-align: center;
				color: red;
			}
			#id1{
				font-weight: 900;
			}
			#id2{
				font-style: italic;
			}
			#id3{
				text-decoration: underline;
			}
			#id4{
				text-decoration: overline;
			}
			#id5{
				text-decoration: line-through;
			}
			p{
				font-family: arial,"times new roman";
				text-indent: 2em;
			}
			.second::first-letter{
				float: left;
				font-size: 2em;
				font-weight: 900;
			}
			.first{
				text-indent: 2em;
				/*背景颜色*/
				background-color: #FF0000;
				letter-spacing: 2em;
			}
			.second{
				width: 300px;
				height: 50px;
				overflow: hidden;
				text-overflow:ellipsis;
				white-space: nowrap;
			}
			img{

				border-color: #FF0000 #00ff00 #0000ff #000000;
				border-width: 10px 5px 15px 20px;
				border-style: dashed solid dotted double;
			}
			#img2{
				width: 400px;
				height: 300px;
			}
			#img3{
				width: 50%;
				height: 50%;
		</style>
	</head>
	<body>
		<h1>江西应用工程职业学院</h1>
		<p class="first">校训:
		<span id="id1">爱国明志</span>
		<span id="id2">敢为人先</span>
		</p>
		<p class="second">
		<span id="id3">
			江西应用工程职业学院</span>系一所经江西省政府批准、中国教育部备案、面向全国招生的国有公办全日制普通高职院校,隶属江西省教育厅。求实创新、扬帆远航,在新时代的奋进中,
		<span id="id4">
			江西应用工程职业学院</span>承扬传统,开拓新天。
		<span id="id5">
		江西应用工程业学院</span>将始终肩负培育国家金蓝领人才、服务社会发展进步的历史使命与社会责任,再谱现代职业教育大学继承与创新并进、光荣与理想融会的新篇章!
		</p>
		<img src="img/d9edb10b513b7078bb7a051a433dba5.png" id="img1">
		<img src="img/d9edb10b513b7078bb7a051a433dba5.png"id="img2">
		<img src="img/d9edb10b513b7078bb7a051a433dba5.png"id="img3">
		<img src="img/d9edb10b513b7078bb7a051a433dba5.png"id="img4">
	</body>
</html>
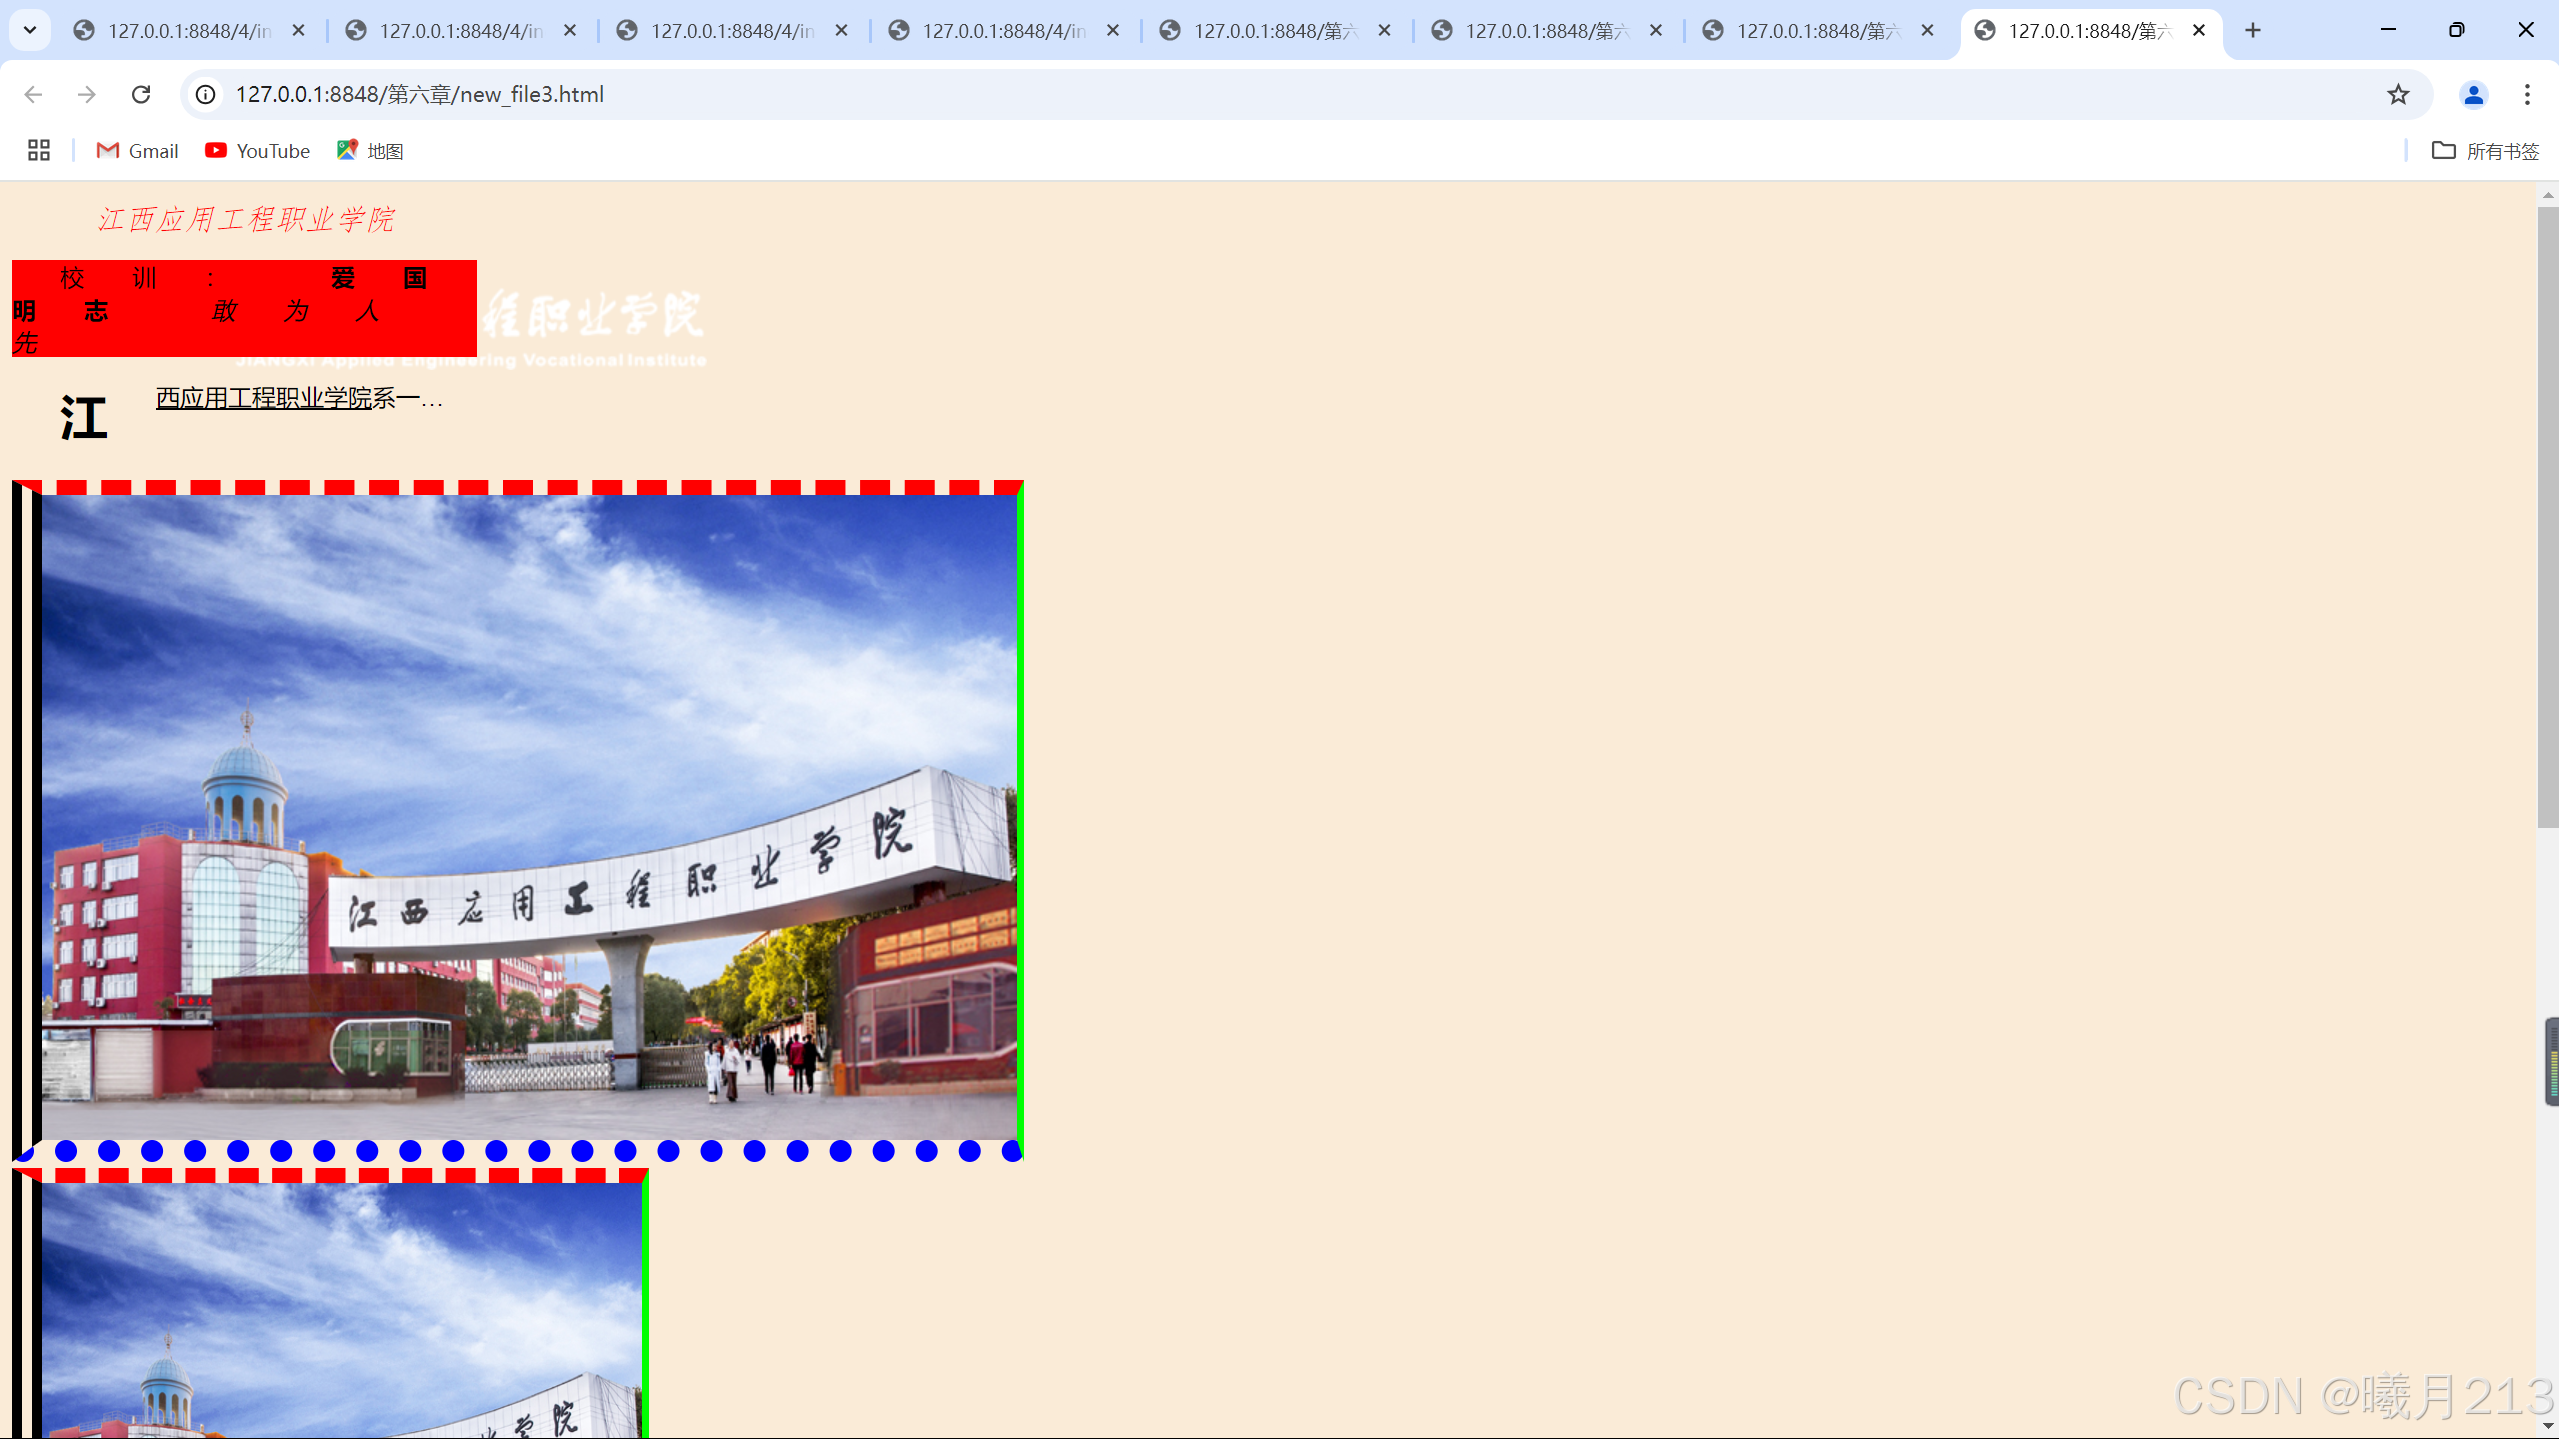
6.3.3.设置背景图像
在网页设计中,无论是单一的纯色背景,还是加载的背景图片,都能够给整个页面带来丰富的视觉效果。CSS除了可以设置背景颜色,还可以用background-image来设置背景图像。
语法: background-image:url(url) | none;
参数:url 表示要插入背景图像的路径。nome 表示不加载图像
说明:设置对象的背景图像。若把图像添加到整个浏览器窗口,可以将其添加到<body>标签中。
<!DOCTYPE html>
<html>
	<head>
		<meta charset="utf-8" />
		<title></title>
		<style>
			h1{
				font-family: fangsong;
				font-size: 20px;
				font-weight: 100;
				font-style: italic;
				text-align: center;
				color: red;
			}
			#id1{
				font-weight: 900;
			}
			#id2{
				font-style: italic;
			}
			#id3{
				text-decoration: underline;
			}
			#id4{
				text-decoration: overline;
			}
			#id5{
				text-decoration: line-through;
			}
			p{
				font-family: arial,"times new roman";
				text-indent: 2em;
			}
			.second::first-letter{
				float: left;
				font-size: 2em;
				font-weight: 900;
			}
			.first{
				text-indent: 2em;
				/*背景颜色*/
				background-color: #FF0000;
				letter-spacing: 2em;
			}
			.second{
				width: 300px;
				height: 50px;
				overflow: hidden;
				text-overflow:ellipsis;
				white-space: nowrap;
			}
			img{

				border-color: #FF0000 #00ff00 #0000ff #000000;
				border-width: 10px 5px 15px 20px;
				border-style: dashed solid dotted double;
			}
			#img2{
				width: 400px;
				height: 300px;
			}
			#img3{
				width: 50%;
				height: 50%;
			}
			body{
				height: 310px;
				width: 310px;
				background-color: antiquewhite;
				background-image:url(img/backgound.png);
			}

		</style>
	</head>
	<body>
		<h1>江西应用工程职业学院</h1>
		<p class="first">校训:
		<span id="id1">爱国明志</span>
		<span id="id2">敢为人先</span>
		</p>
		<p class="second">
		<span id="id3">
			江西应用工程职业学院</span>系一所经江西省政府批准、中国教育部备案、面向全国招生的国有公办全日制普通高职院校,隶属江西省教育厅。求实创新、扬帆远航,在新时代的奋进中,
		<span id="id4">
			江西应用工程职业学院</span>承扬传统,开拓新天。
		<span id="id5">
		江西应用工程业学院</span>将始终肩负培育国家金蓝领人才、服务社会发展进步的历史使命与社会责任,再谱现代职业教育大学继承与创新并进、光荣与理想融会的新篇章!
		</p>
		<img src="img/d9edb10b513b7078bb7a051a433dba5.png" id="img1"><br/>
		<img src="img/d9edb10b513b7078bb7a051a433dba5.png" id="img2"><br/>
		<img src="img/d9edb10b513b7078bb7a051a433dba5.png" id="img3"><br/>
		<img src="img/d9edb10b513b7078bb7a051a433dba5.png" id="img4">
	</body>
</html>

6.3.4设置背景重复
背景重复(background-repeat)属性的主要作用是设置背景图片以何种方式在网页中显示。通过背景重复,设计人员使用很小的图片就可以填充整个页面,有效地减少图片字节的大小。
在默认情况下,图像会自动向水平和竖直两个方向平铺。如果不希望平铺,或者只希望沿着一个方向平铺,可以使用background-repeat属性来控制。
语法: background-repeat: repeat | no-repeat | repeat-x | repeat-y;
参数:repeat 表示背景图像在水平和垂直方向平铺,是默认值;repeat-x表示背景图像在水平方向平铺;repeat-y表示背景图像在垂直方向平铺;no-repeat 表示背景图像不平铺。说明:设置对象的背景图像是否平铺及如何平铺,必须先指定对象的背景图像。
<!DOCTYPE html>
<html>
	<head>
		<meta charset="utf-8" />
		<title></title>
		<style>
			h1{
				font-family: fangsong;
				font-size: 20px;
				font-weight: 100;
				font-style: italic;
				text-align: center;
				color: red;
			}
			#id1{
				font-weight: 900;
			}
			#id2{
				font-style: italic;
			}
			#id3{
				text-decoration: underline;
			}
			#id4{
				text-decoration: overline;
			}
			#id5{
				text-decoration: line-through;
			}
			p{
				font-family: arial,"times new roman";
				text-indent: 2em;
			}
			.second::first-letter{
				float: left;
				font-size: 2em;
				font-weight: 900;
			}
			.first{
				text-indent: 2em;
				/*背景颜色*/
				background-color: #FF0000;
				letter-spacing: 2em;
			}
			.second{
				width: 300px;
				height: 50px;
				overflow: hidden;
				text-overflow:ellipsis;
				white-space: nowrap;
			}
			img{

				border-color: #FF0000 #00ff00 #0000ff #000000;
				border-width: 10px 5px 15px 20px;
				border-style: dashed solid dotted double;
			}
			#img2{
				width: 400px;
				height: 300px;
			}
			#img3{
				width: 50%;
				height: 50%;
			}
			body{
				height: 310px;
				width: 310px;
				background-color: antiquewhite;
				background-image:url(img/backgound.png);
				background-repeat: repeat-x;
			}

		</style>
	</head>
	<body>
		<h1>江西应用工程职业学院</h1>
		<p class="first">校训:
		<span id="id1">爱国明志</span>
		<span id="id2">敢为人先</span>
		</p>
		<p class="second">
		<span id="id3">
			江西应用工程职业学院</span>系一所经江西省政府批准、中国教育部备案、面向全国招生的国有公办全日制普通高职院校,隶属江西省教育厅。求实创新、扬帆远航,在新时代的奋进中,
		<span id="id4">
			江西应用工程职业学院</span>承扬传统,开拓新天。
		<span id="id5">
		江西应用工程业学院</span>将始终肩负培育国家金蓝领人才、服务社会发展进步的历史使命与社会责任,再谱现代职业教育大学继承与创新并进、光荣与理想融会的新篇章!
		</p>
		<img src="img/d9edb10b513b7078bb7a051a433dba5.png" id="img1"><br/>
		<img src="img/d9edb10b513b7078bb7a051a433dba5.png" id="img2"><br/>
		<img src="img/d9edb10b513b7078bb7a051a433dba5.png" id="img3"><br/>
		<img src="img/d9edb10b513b7078bb7a051a433dba5.png" id="img4">
	</body>
</html>

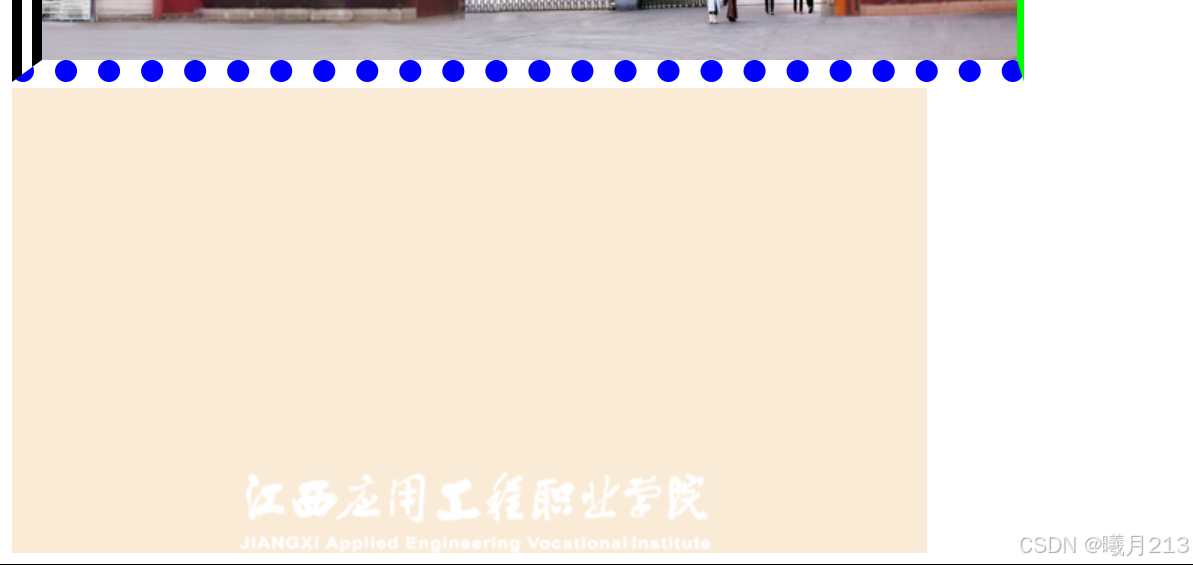
6.3.5.背景图像定位
当在网页中插入背景图像时,每一次插入的位置,都是位于网页的左上角,可以通过background-position 属性来改变图像的插入位置。
语法:
background-position: length | length;
background-position : positional | position;
参数:length为百分比或者由数字和单位标识符组成的长度值,position可取top、center、bottom、left、right之一。
说明:利用百分比和长度来设置图像位置时,都要指定两个值,并且这两个值都要用空格隔开,一个代表水平位置,一个代表垂直位置。水平位置的参考点是网页页面的左边,垂直位置的参考点是网页页面的上边。关键字在水平方向的主要有left、center、right,关键字在垂直方向的主要有top、center、bottom。水平方向和垂直方向相互搭配使用。
6.3.5.1.使用关键字进行背景定位
top:将背景图像同元素的顶部对齐。
bottom:将背景图像同元素的底部对齐。
left:将背景图像同元素的左边对齐。
right:将背景图像同元素的右边对齐。
center:将背景图像相对于元素水平居中或垂直居中。
<!DOCTYPE html>
<html>
	<head>
		<meta charset="utf-8" />
		<title></title>
		<style>
			h1{
				font-family: fangsong;
				font-size: 20px;
				font-weight: 100;
				font-style: italic;
				text-align: center;
				color: red;
			}
			#id1{
				font-weight: 900;
			}
			#id2{
				font-style: italic;
			}
			#id3{
				text-decoration: underline;
			}
			#id4{
				text-decoration: overline;
			}
			#id5{
				text-decoration: line-through;
			}
			p{
				font-family: arial,"times new roman";
				text-indent: 2em;
			}
			.second::first-letter{
				float: left;
				font-size: 2em;
				font-weight: 900;
			}
			.first{
				text-indent: 2em;
				/*背景颜色*/
				background-color: #FF0000;
				letter-spacing: 2em;
			}
			.second{
				width: 300px;
				height: 50px;
				overflow: hidden;
				text-overflow:ellipsis;
				white-space: nowrap;
			}
			img{

				border-color: #FF0000 #00ff00 #0000ff #000000;
				border-width: 10px 5px 15px 20px;
				border-style: dashed solid dotted double;
			}
			#img2{
				width: 400px;
				height: 300px;
			}
			#img3{
				width: 50%;
				height: 50%;
			}
			body{
				height: 310px;
				width: 310px;
				background-color: antiquewhite;
				background-image:url(img/backgound.png);
				background-repeat: no-repeat;
				background-position: center bottom;
			}

		</style>
	</head>
	<body>
		<h1>江西应用工程职业学院</h1>
		<p class="first">校训:
		<span id="id1">爱国明志</span>
		<span id="id2">敢为人先</span>
		</p>
		<p class="second">
		<span id="id3">
			江西应用工程职业学院</span>系一所经江西省政府批准、中国教育部备案、面向全国招生的国有公办全日制普通高职院校,隶属江西省教育厅。求实创新、扬帆远航,在新时代的奋进中,
		<span id="id4">
			江西应用工程职业学院</span>承扬传统,开拓新天。
		<span id="id5">
		江西应用工程业学院</span>将始终肩负培育国家金蓝领人才、服务社会发展进步的历史使命与社会责任,再谱现代职业教育大学继承与创新并进、光荣与理想融会的新篇章!
		</p>
		<img src="img/d9edb10b513b7078bb7a051a433dba5.png" id="img1"><br/>
		<img src="img/d9edb10b513b7078bb7a051a433dba5.png" id="img2"><br/>
		<img src="img/d9edb10b513b7078bb7a051a433dba5.png" id="img3"><br/>
		<img src="img/d9edb10b513b7078bb7a051a433dba5.png" id="img4">
	</body>
</html>

6.3.5.2.使用长度进行背景定位
长度参数可以对背景图像的位置进行更精确的控制,实际上定位的是图像左上角相对于
元素左上角的位置。
<!DOCTYPE html>
<html>
	<head>
		<meta charset="utf-8" />
		<title></title>
		<style>
			h1{
				font-family: fangsong;
				font-size: 20px;
				font-weight: 100;
				font-style: italic;
				text-align: center;
				color: red;
			}
			#id1{
				font-weight: 900;
			}
			#id2{
				font-style: italic;
			}
			#id3{
				text-decoration: underline;
			}
			#id4{
				text-decoration: overline;
			}
			#id5{
				text-decoration: line-through;
			}
			p{
				font-family: arial,"times new roman";
				text-indent: 2em;
			}
			.second::first-letter{
				float: left;
				font-size: 2em;
				font-weight: 900;
			}
			.first{
				text-indent: 2em;
				/*背景颜色*/
				background-color: #FF0000;
				letter-spacing: 2em;
			}
			.second{
				width: 300px;
				height: 50px;
				overflow: hidden;
				text-overflow:ellipsis;
				white-space: nowrap;
			}
			img{

				border-color: #FF0000 #00ff00 #0000ff #000000;
				border-width: 10px 5px 15px 20px;
				border-style: dashed solid dotted double;
			}
			#img2{
				width: 400px;
				height: 300px;
			}
			#img3{
				width: 50%;
				height: 50%;
			}
			body{
				height: 310px;
				width: 310px;
				background-color: antiquewhite;
				background-image:url(img/backgound.png);
				background-repeat: no-repeat;
				background-position: 150px 70px;

		</style>
	</head>
	<body>
		<h1>江西应用工程职业学院</h1>
		<p class="first">校训:
		<span id="id1">爱国明志</span>
		<span id="id2">敢为人先</span>
		</p>
		<p class="second">
		<span id="id3">
			江西应用工程职业学院</span>系一所经江西省政府批准、中国教育部备案、面向全国招生的国有公办全日制普通高职院校,隶属江西省教育厅。求实创新、扬帆远航,在新时代的奋进中,
		<span id="id4">
			江西应用工程职业学院</span>承扬传统,开拓新天。
		<span id="id5">
		江西应用工程业学院</span>将始终肩负培育国家金蓝领人才、服务社会发展进步的历史使命与社会责任,再谱现代职业教育大学继承与创新并进、光荣与理想融会的新篇章!
		</p>
		<img src="img/d9edb10b513b7078bb7a051a433dba5.png" id="img1"><br/>
		<img src="img/d9edb10b513b7078bb7a051a433dba5.png" id="img2"><br/>
		<img src="img/d9edb10b513b7078bb7a051a433dba5.png" id="img3"><br/>
		<img src="img/d9edb10b513b7078bb7a051a433dba5.png" id="img4">
	</body>
</html>
6.3.5.3.使用百分比进行背景定位
使用百分比进行背景定位,其实是将背景图像的百分比指定的位置和元素的百分比值置对齐。也就是说,百分比定位改变了背景图像和元素的对齐基点,不再像使用关键字或长度单位定位时,使用背景图像和元素的左上角为对齐基点。
<!DOCTYPE html>
<html>
	<head>
		<meta charset="utf-8" />
		<title></title>
		<style>
			h1{
				font-family: fangsong;
				font-size: 20px;
				font-weight: 100;
				font-style: italic;
				text-align: center;
				color: red;
			}
			#id1{
				font-weight: 900;
			}
			#id2{
				font-style: italic;
			}
			#id3{
				text-decoration: underline;
			}
			#id4{
				text-decoration: overline;
			}
			#id5{
				text-decoration: line-through;
			}
			p{
				font-family: arial,"times new roman";
				text-indent: 2em;
			}
			.second::first-letter{
				float: left;
				font-size: 2em;
				font-weight: 900;
			}
			.first{
				text-indent: 2em;
				/*背景颜色*/
				background-color: #FF0000;
				letter-spacing: 2em;
			}
			.second{
				width: 300px;
				height: 50px;
				overflow: hidden;
				text-overflow:ellipsis;
				white-space: nowrap;
			}
			img{

				border-color: #FF0000 #00ff00 #0000ff #000000;
				border-width: 10px 5px 15px 20px;
				border-style: dashed solid dotted double;
			}
			#img2{
				width: 400px;
				height: 300px;
			}
			#img3{
				width: 50%;
				height: 50%;
			}
			.bg{
				height: 310px;
				width: 610px;
				background-color: antiquewhite;
				background-image:url(img/backgound.png);
				background-repeat: no-repeat;
				/*background-position: left top;
				background-position:100px 50px;*/
				background-position: 50% 100%;
			}

		</style>
	</head>
	<body>
		<h1>江西应用工程职业学院</h1>
		<p class="first">校训:
		<span id="id1">爱国明志</span>
		<span id="id2">敢为人先</span>
		</p>
		<p class="second">
		<span id="id3">
			江西应用工程职业学院</span>系一所经江西省政府批准、中国教育部备案、面向全国招生的国有公办全日制普通高职院校,隶属江西省教育厅。求实创新、扬帆远航,在新时代的奋进中,
		<span id="id4">
			江西应用工程职业学院</span>承扬传统,开拓新天。
		<span id="id5">
		江西应用工程业学院</span>将始终肩负培育国家金蓝领人才、服务社会发展进步的历史使命与社会责任,再谱现代职业教育大学继承与创新并进、光荣与理想融会的新篇章!
		</p>
		<img src="img/d9edb10b513b7078bb7a051a433dba5.png" id="img1"><br/>
		<img src="img/d9edb10b513b7078bb7a051a433dba5.png" id="img2"><br/>
		<img src="img/d9edb10b513b7078bb7a051a433dba5.png" id="img3"><br/>
		<img src="img/d9edb10b513b7078bb7a051a433dba5.png" id="img4">
		<div class="bg">
		</div>
	</body>
</html>
6.4 使用CSS设置表单样式
6.4.1.使用CSS修饰常用的表单元素
6.4.1.1.修饰文本域
文本域主要用于采集用户在其中编辑的信息,通过CSS样式可以对文本域内的字体、颜色以及背景图像加以控制。
<!DOCTYPE html>
<html>
	<head>
		<meta charset="utf-8" />
		<title>第六章 元素应用 CSS</title>
		<style type="text/css">
			.text1{
				border: 1px solid #f60;
				color: #03c;
			}
			.text2{
				height: 20px;
				padding-left: 20px;
				border: 1px solid #c3c;
				background: #fff url(img/password_bg.JPG) left center no-repeat;
			}
			.area{
				border: 1px solid #00f;
				overflow: auto;
				width: 99%;
				height: 100px;
			}
		</style>
	</head>
	<body>
		<p>
			<input type="text1" name="nourmal"/>默认样式的文本域
		</p>
		<p>
			<input type="text" name="chbd" value="输入的文字显示为蓝色" class="text1"/>改变边框颜色和文字的文本域,看起来更加醒目
		</p>
		<p>
			<input type="password" name="pass" class="text2"/>增加了背景同图片的文本域,看起来更加形象直观
		</p>
		<p>
			<textarea name="cha" cols="45" rows="area">改变边框颜色的多行文本域</textarea>
		</p>
	</body>
</html>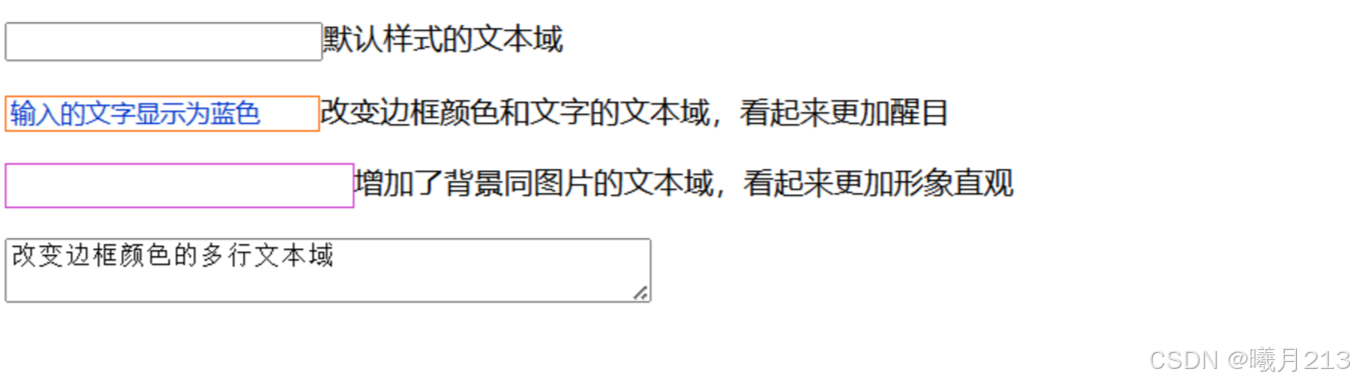
6.4.1.2.修饰按钮
按钮主要用于控制表单。通过CSS样式可以对按钮的字体、颜色、边框以及背景图像加以控制。
<!DOCTYPE html>
<html>
	<head>
		<meta charset="utf-8">
		<title></title>
		<style type="text/css">
			.btn01{
				background: url(img/btn_bg02.jpg) repeat-x;
				border: 1px solid #f00;
				height: 32px;
				font-weight: bold;
				padding-top: 2px;
				cursor: pointer;
				font-size: 14px;
				color: #fff;
			}
			.btn02{
				background: url(img/btn_bg03.jpg) 0 0 no-repeat;
				width: 107px;
				height: 37px;
				border: none;
				font-size: 14px;
				font-weight: bold;
				color: #d84700;
				cursor: pointer;
			}
		</style>


	</head>
	<body>
		<p>
		<input name="button" type="submit" value="提交"/>
		默认风格的“提交”按钮
		</p>
		<p>
			<input name="button01" type="submit"
			class="btn01" id="button01" value="自适应宽度按钮"/>
			自适应宽度按钮
		</p>
		<p>
			<input name="botton02" type="submit"class="btn02" id="button02"value="免费注册"/>
			固定背景图片按钮
		</p>
	</body>
</html>

6.4.1.3.制作登录表单
<!DOCTYPE html>
<html>
<head>
<meta charset="utf-8" />
<title>第六章 元素应用 CSS</title>
<style type="text/css">
.login{
margin: 0 auto;
width: 280px;
padding: 14px;
border: dashed 2px #b7ddf2;
}
.login *{
margin: 0;
padding: 0;
font-family: 宋体;
font-size: 12px;
line-height: 1.5em;
}
.login h2{
text-align: center;
font-size: 18px;
font-weight: bold;
margin-bottom: 10px;
padding-bottom: 5px;
border-bottom: solid 1px #b7ddf2;
}
.login.content{
padding: 5px;
}
.login.frm_cont{
margin-bottom: 8px;
}
.login.username input,.login.password input{
width: 180px;
height: 18px;
padding: 2px 0px 2px 18px;
border: solid 1px #aacfe4;
}
.login.username input{
background: #fff url(img/username.JPG) no-repeat left center;
}
.login.password input{
background: #fff url(img/lock.JPG)no-repeat left center;
}
.login.btns{
text-align: center;
}
</style>
</head>
<body>
<div class="login">
<h2>用户登录</h2>
<div class="content">
<form action="" method="post">
<div class="frm_cont username">用户名:
<label for="username"></label>
<input type="text" name="username" id="username"/>
</div>
<div class="frm_cont password">密 码
<label for="password"></label>
<input type="password" name="password" id="password"/>
</div>
<div class="btns">
<input type="submit" name="button1" id="button1" value="登录"/>
<input type="button" name="button2" id="button2" value="注册"/>
</div>
</form>
</div>
</div>
</body>
</html>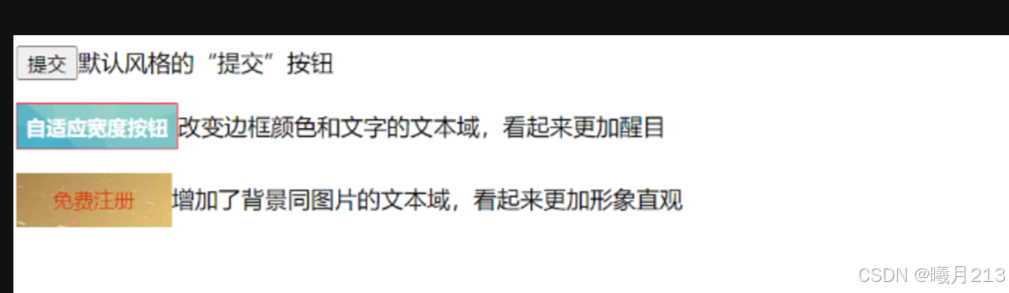
6.5 综合案例——商城的注册页面
<!DOCTYPE html>
<html>
	<head>
		<meta charset="utf-8">
		<title></title>
		<style>
			*{
				margin:0;
				padding:0;
			}
			body{
				font-size:12px;
				color:#333;
			}
			ol,ul{
				list-style: none;
			}
			img,a{
				border: 0;
				text-decoration: none;
			}
			a{
				color: #333;
			}
			a:hover{
				color: #f00;
			}
			.loginLogo{
				width: 100%;
				border-bottom: #efefef 1px solid;
			}
			.logoMid{
				width: 1040px;
				margin: 0 auto;
			}
			.loginReg{
				height: 30px;
				line-height: 30px;
				text-align: right;
			}
			.loginReg a{
				color: #7bc144;
			}
			.loginReg a:hover{
				color: #f00;
			}
			.loginBox{
				width: 1050px;
				margin: 30px auto;
				position: relative;
			}
			.regList label{
				float: left;
				width: 105px;
				margin-right: 10px;
				text-align: right;
				color: #999;
			}
			.regList input{
				margin: 0;
				padding: 0;
				width: 283px;
				height: 33px;
				border: 3738400 1px solid;
				background:#feffdf;
				padding-left: 3px;
			}
			.regList.yanzheng{
				width: 135px;
			}
			.regList img{
				left: 260px;
				position: absolute;
			}
			.xieyi{
				height: 30px;
				line-height: 30px;
				font-size: 12px;
				padding-left: 115px;
			}
			.xieyi input{
				position: relative;
				top: 2px;
			}
			.xieyi a{
				color: #7bc144;
			}
			.reg{
				padding-left: 115px;
				margin-top: 10px;
			}
			.chengnuo{
				position: absolute;
				right: 0;
				top: 0;
			}
		</style>
		<link type="text/css" href="CSS/style.css" rel="stylesheet"/>
	</head>
	<body style="background: #fff;">
		<div class="loginLogo">
			<div class="logoMid">
				<h1 class="logo" style="height: 71px;padding-top: 10px">
					<a href="index.html">
						<img src="../img/logo.jpg"/>
					</a>
				</h1>
				<div class="loginBox">
					<img src="../img/chengguo.jpg" width="295" height="393" class="chengnuo"/>
					<form action="#.html" method="get" class="reg">
						<div class="regList">
							<label><span class="red">*</span>用户名</label>
							<input type="text"/><span style="color: #999;">请输入邮箱/用户名/手机号</span>
						</div>
						<div class="regList">
							<label><span class="red">*</span>请设置密码</label>
							<input type="text"/>
						</div>
						<div class="regList">
							<label><span class="password"></span>请确认密码</label>
							<input type="text"/>
						</div>
						<div class="regList">
							<label><span class="red"></span>验证码</label>
							<input type="text" class="yanzheng"/>
							<img src="../img/yanzheng.jpg" width="103" height="38"/>
						</div>
						<div class="xieyi">
							<input type="checkbox"/>我已阅读并同意<a href="#">商城用户注册协议</a>
						</div>
						<div class="reg">
							<input type="image" src="../img/reg.jpg"/>
						</div>
					</form>
					<div class="clears"></div>
				</div>
			</div>
		</div>
	</body>
</html>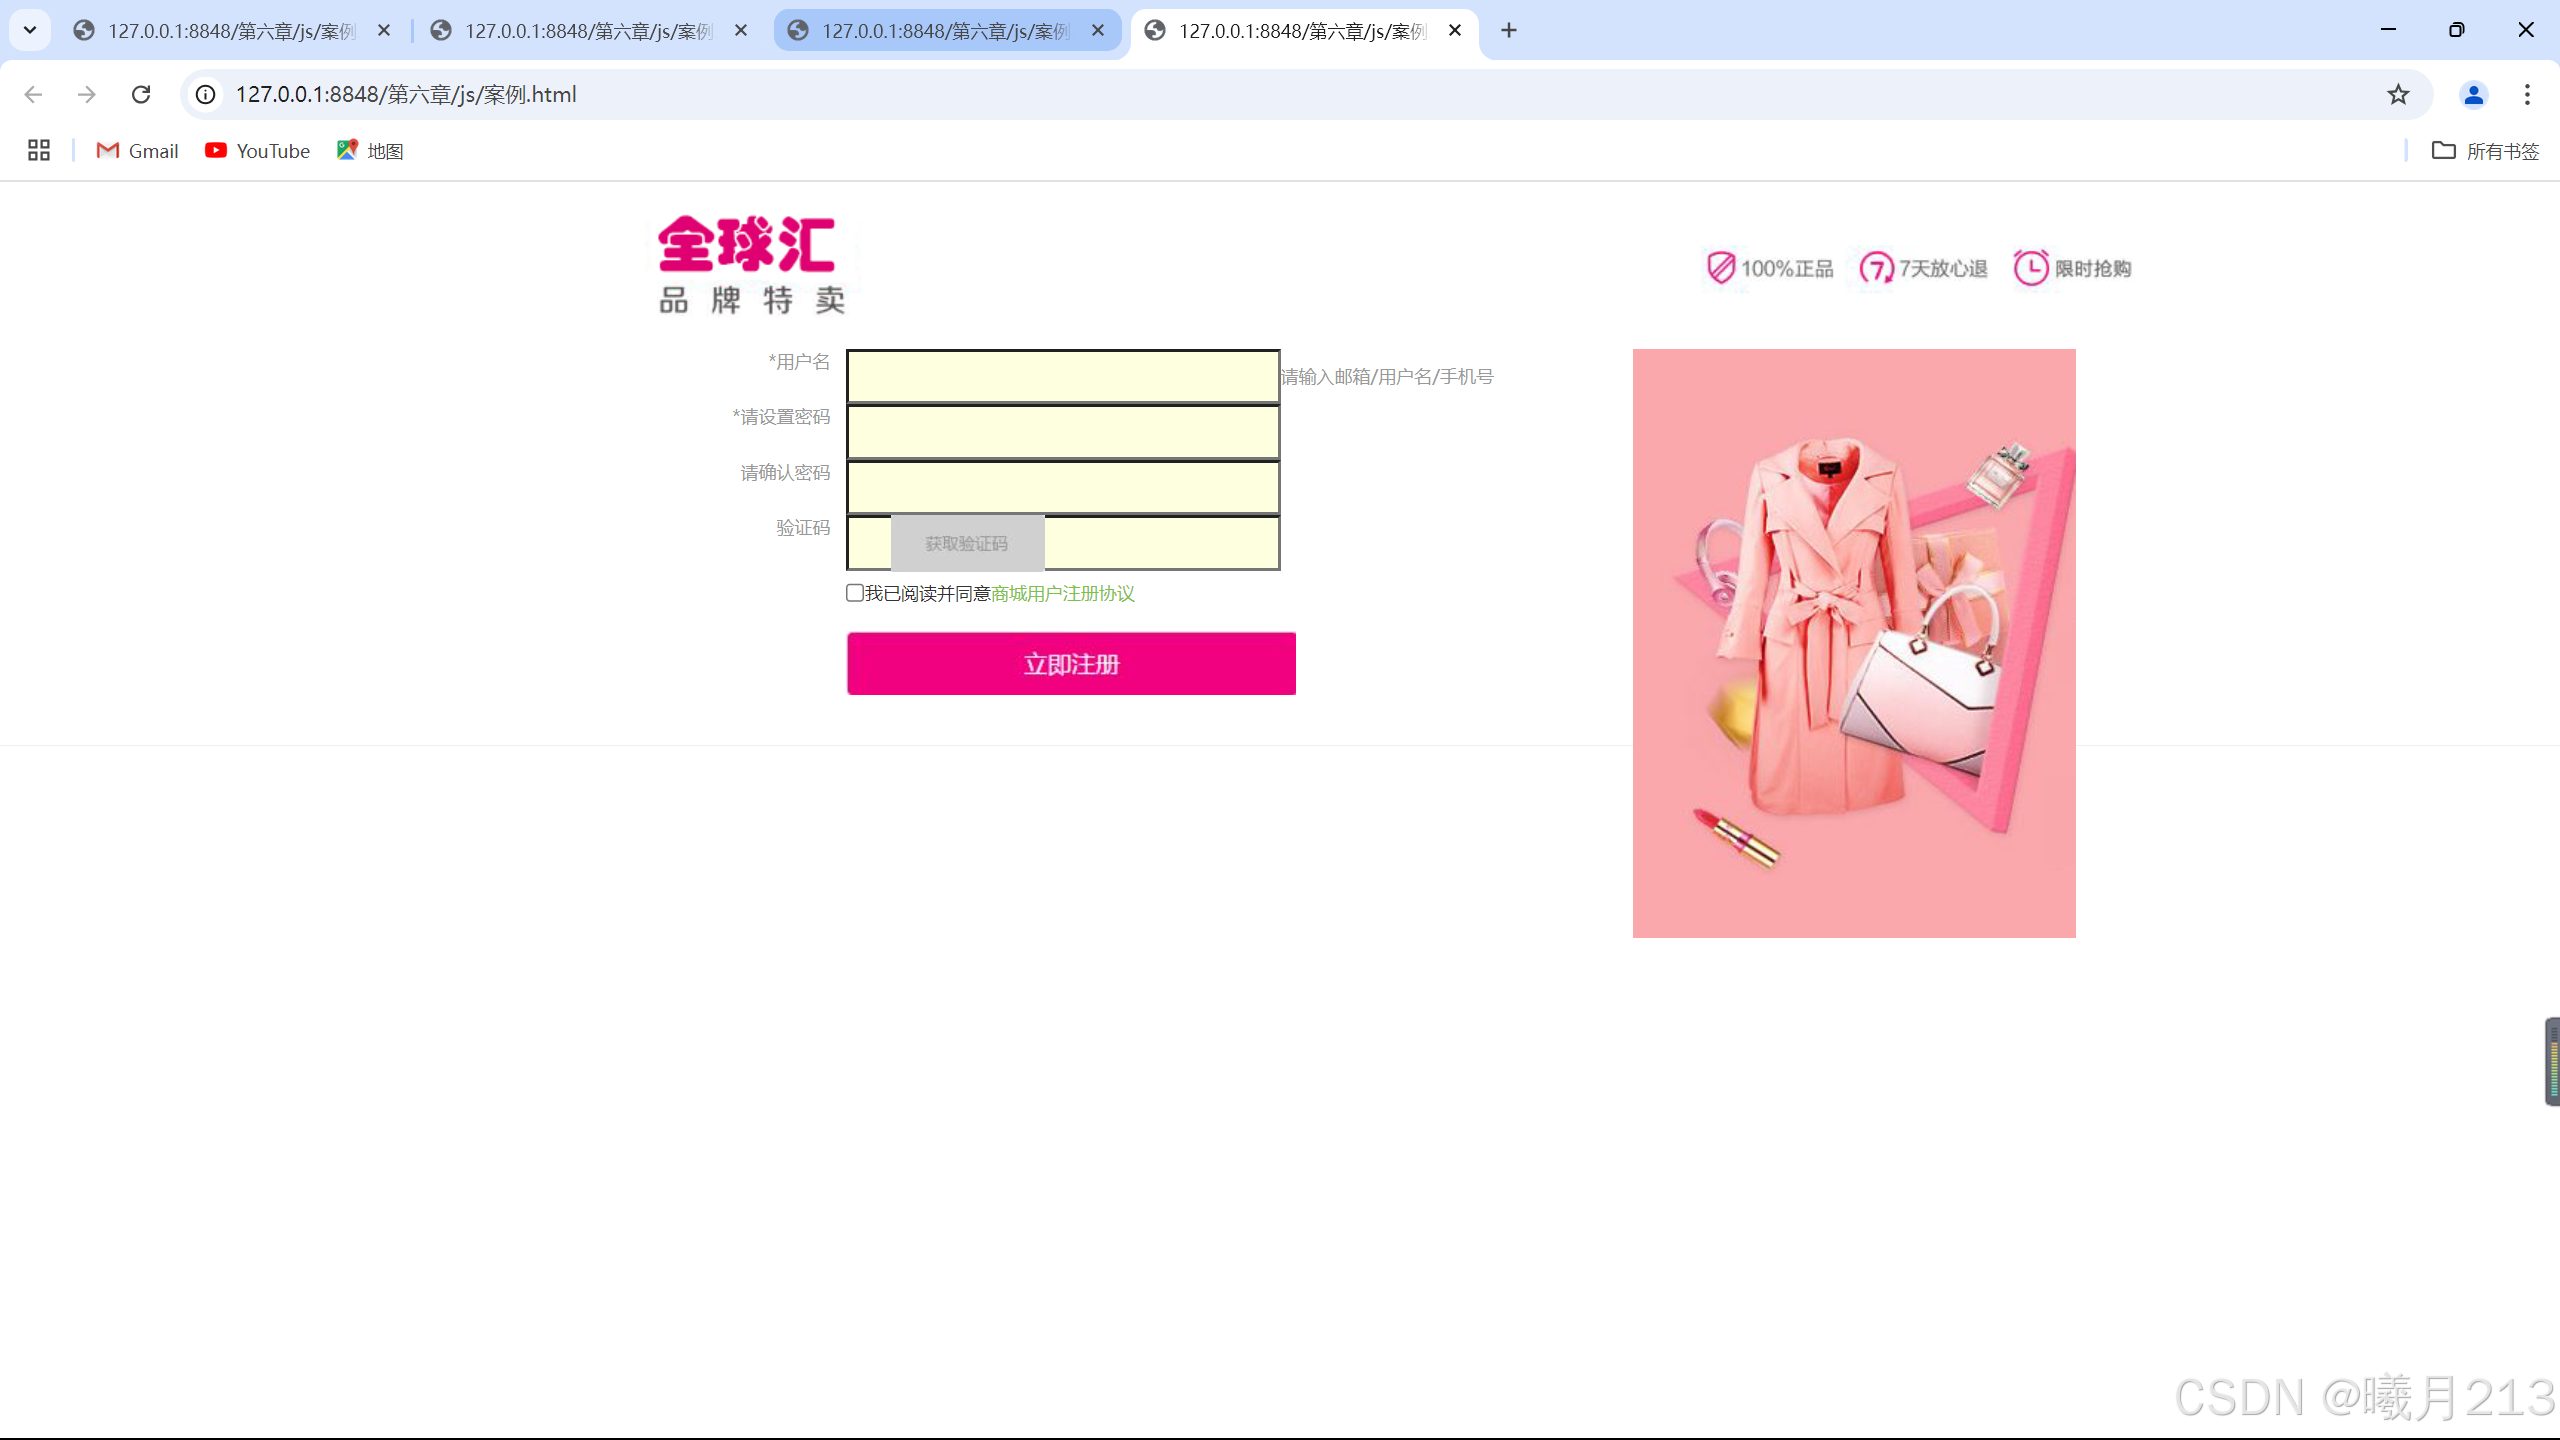


 被折叠的 条评论
为什么被折叠?
被折叠的 条评论
为什么被折叠?
 到【灌水乐园】发言


