


// 计算上一张卡片的偏移值
if (this.isIndexValid(left)) {
  this.cardsOffset[left] = this.getMaxOffset(left);
}
// 计算当前卡片的偏移值
if (this.isIndexValid(target)) {
  this.cardsOffset[target] = this.getMaxOffset(target) / 2;
}
// 下一张片的偏移值
if (this.isIndexValid(right)) {
  this.cardsOffset[right] = 0;
}
}
1. 滑动跟手实现


滑动swiper组件动态位置更新原理和上一步静态位置获取原理一样,只不过在滑动过程通过相应的回调函数实时位置更新。 在以下这三个swiper回调接口中,分别实现卡片跟手、离手、导航点切换时的卡片**偏移量更新**。


| 接口名 | 基本功能 |
| --- | --- |
| onGestureSwipe | 在页面跟手滑动过程中,逐帧触发该回调。 |
| onAnimationStart | 切换动画开始时触发该回调。 |
| onChange | 子组件索引变化时触发该事件。 |


具体api接口信息查看:[Swiper事件]( )。


* 在onGestureSwiper回调中,根据手指滑动的距离实时维护卡片的偏移量。
.onGestureSwipe((index, event) => {
let currentOffset = event.currentOffset;
// 获取当前卡片(居中)的原始偏移量
let maxOffset = this.getMaxOffset(index) / 2;
// 实时维护卡片的偏移量列表,做到跟手效果
if (currentOffset < 0) {
// 向左偏移
/*
* 此处计算原理为:按照比例设置卡片的偏移量。
* 当前卡片居中,向左滑动后将在左边,此时卡片偏移量即为 maxOffset * 2(因为向右对齐)。
* 所以手指能够滑动的最大距离(this.displayWidth)所带来的偏移量即为 maxOffset。
* 易得公式:卡片实时偏移量 = (手指滑动长度 / 屏幕宽度) * 卡片最大可偏移量 + 当前偏移量。
* 之后的计算原理相同,将不再赘述。
*/
this.cardsOffset[index] = (-currentOffset / this.displayWidth) * maxOffset + maxOffset;
if (this.isIndexValid(index + 1)) {
// 下一个卡片的偏移量
let maxOffset = this.getMaxOffset(index + 1) / 2;
this.cardsOffset[index + 1] = (-currentOffset / this.displayWidth) * maxOffset;
}
if (this.isIndexValid(index - 1)) {
// 上一个卡片的偏移量
let maxOffset = this.getMaxOffset(index - 1) / 2;
this.cardsOffset[index - 1] = (currentOffset / this.displayWidth) * maxOffset + 2 * maxOffset;
}
} else if (currentOffset > 0) {
// 向右滑动
this.cardsOffset[index] = maxOffset - (currentOffset / this.displayWidth) * maxOffset;
if (this.isIndexValid(index + 1)) {
let maxOffset = this.getMaxOffset(index + 1) / 2;
this.cardsOffset[index + 1] = (currentOffset / this.displayWidth) * maxOffset;
}
if (this.isIndexValid(index - 1)) {
let maxOffset = this.getMaxOffset(index -1) / 2;
this.cardsOffset[index - 1] = 2 * maxOffset - (currentOffset / this.displayWidth) * maxOffset;
}
}
})
* 在onAnimationStart回调中,计算手指离开屏幕时卡片的偏移量,避免产生突变的偏移量。
.onAnimationStart((_, targetIndex) => {
this.calculateOffset(targetIndex);
})
这里的 calculateOffset 函数即步骤1中维护卡片偏移量的函数。


* 在onChange回调中提前计算Swiper滑动后卡片的位置。
.onChange((index) => {
logger.info(TAG, Target index: ${index});
this.calculateOffset(index);
})
计算方式同上一步。


1. 图片预览效果实现


图片预览动效是通过**共享元素转场**结合**全屏模态**实现的。 通过geometryTransition属性绑定两个需要“一镜到底”的组件(本案例中的图片),结合模态窗口转场即可。
// 以下代码仅展示关键部分,详请查看源码
Row() {
Image(this.cardInfo.src)
.objectFit(ImageFit.Cover)
.borderRadius($r(‘app.integer.photo_radius’))
// TODO 知识点:geometryTransition通过id参数绑定两个组件转场关系,实现一镜到底动画
.geometryTransition(this.cardIndex.toString(), { follow: true })
.transition(TransitionEffect.OPACITY.animation({ duration: Constants.DURATION, curve: Curve.Friction }))
}
…
.bindContentCover(
this.isPhotoShow,
this.photoShowBuilder(this.cardInfo.src, this.cardIndex.toString()),
{ backgroundColor: KaTeX parse error: Expected 'EOF', got '}' at position 87: …ansition.ALPHA }̲ ) ... // 全屏模态组…r(‘app.integer.photo_radius’))
.geometryTransition(id, { follow: true })
.width($r(‘app.string.photo_preview_width’))
.transition(TransitionEffect.opacity(Constants.OPACITY))
}
…
.onClick(() => {
animateTo({
duration: Constants.DURATION,
curve: Curve.Friction
}, () => {
this.isPhotoShow = !this.isPhotoShow;
})
})
}
#### 高性能知识点


* 本示例使用了LazyForEach进行数据懒加载以降低内存占用。
* Swiper组件的onGestureSwipe事件是个高频回调,注意在里面不要调用冗余操作和耗时操作。


#### 工程结构&模块类型
cardswiperanimation // har包
├─components
│ ├─mainpage
│ │ └─ CardSwiper.ets // 卡片滑动组件入口
│ ├─model
│ │ └─ CardModel.ets // 定义卡片类型
│ ├─viewmodel
│ └─ CardViewModel.ets // 定义卡片组件
├─utils
│ ├─ Constants.ets // 常量数据
#### 模块依赖
* [routermodule]( )
### 最后
有很多小伙伴不知道学习哪些鸿蒙开发技术?不知道需要重点掌握哪些鸿蒙应用开发知识点?而且学习时频繁踩坑,最终浪费大量时间。所以有一份实用的**鸿蒙(HarmonyOS NEXT)资料**用来跟着学习是非常有必要的。
**这份鸿蒙(HarmonyOS NEXT)资料包含了鸿蒙开发必掌握的核心知识要点,内容包含了**(**ArkTS、ArkUI开发组件、Stage模型、多端部署、分布式应用开发、音频、视频、WebGL、OpenHarmony****多媒体技术、Napi组件、OpenHarmony内核、Harmony南向开发、鸿蒙项目实战等等)鸿蒙(HarmonyOS NEXT)**技术知识点。
希望这一份鸿蒙学习资料能够给大家带来帮助,有需要的小伙伴自行领取,**限时开源,先到先得~无套路领取!!**
**如果你是一名有经验的资深Android移动开发、Java开发、前端开发、对鸿蒙感兴趣以及转行人员,可以直接领取这份资料**
**获取这份完整版高清学习路线,请点击→**[纯血版全套鸿蒙HarmonyOS学习资料]( )****
### **鸿蒙(HarmonyOS NEXT)最新学习路线**
****
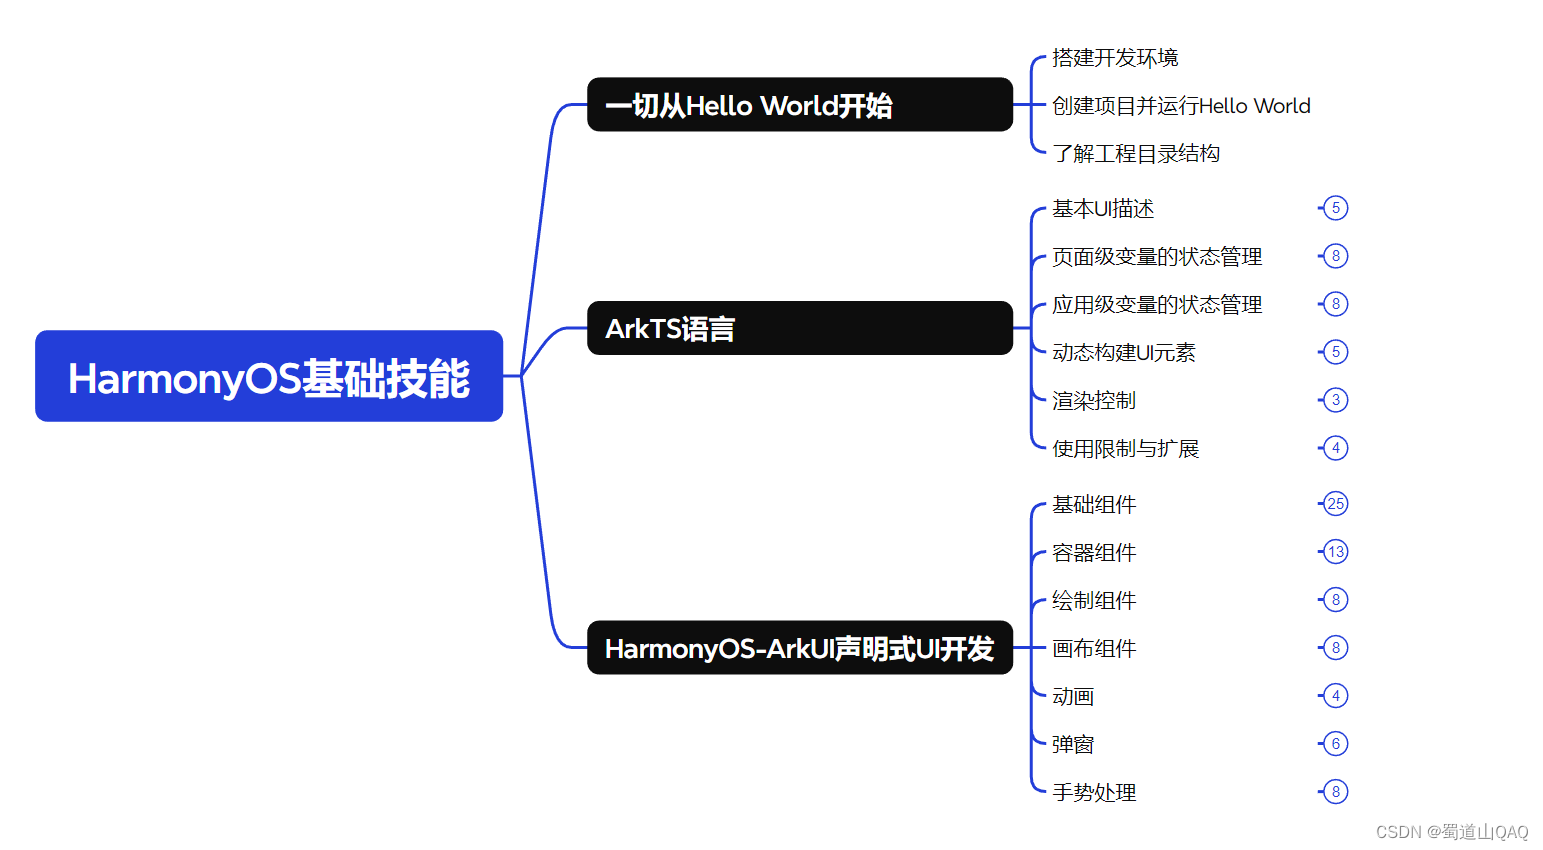
* **HarmonOS基础技能**
* **HarmonOS就业必备技能** 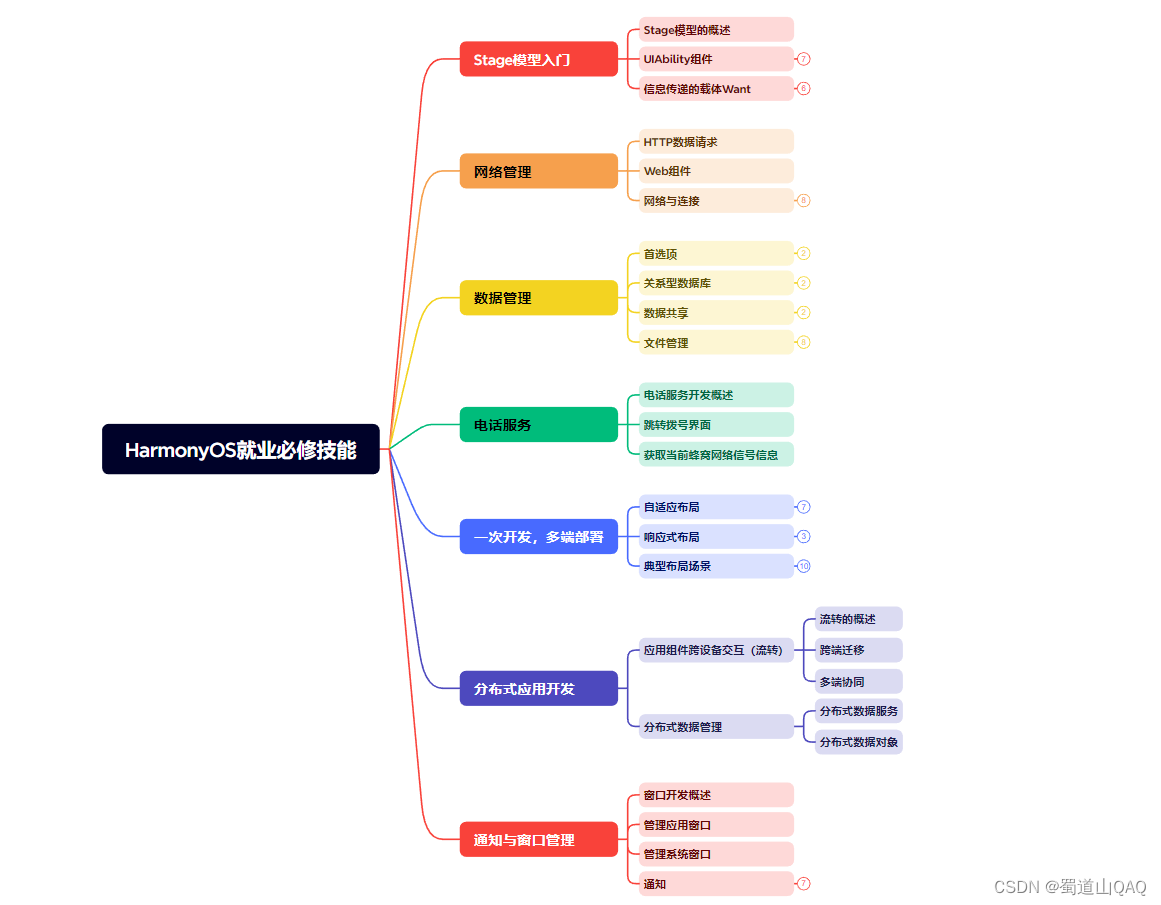
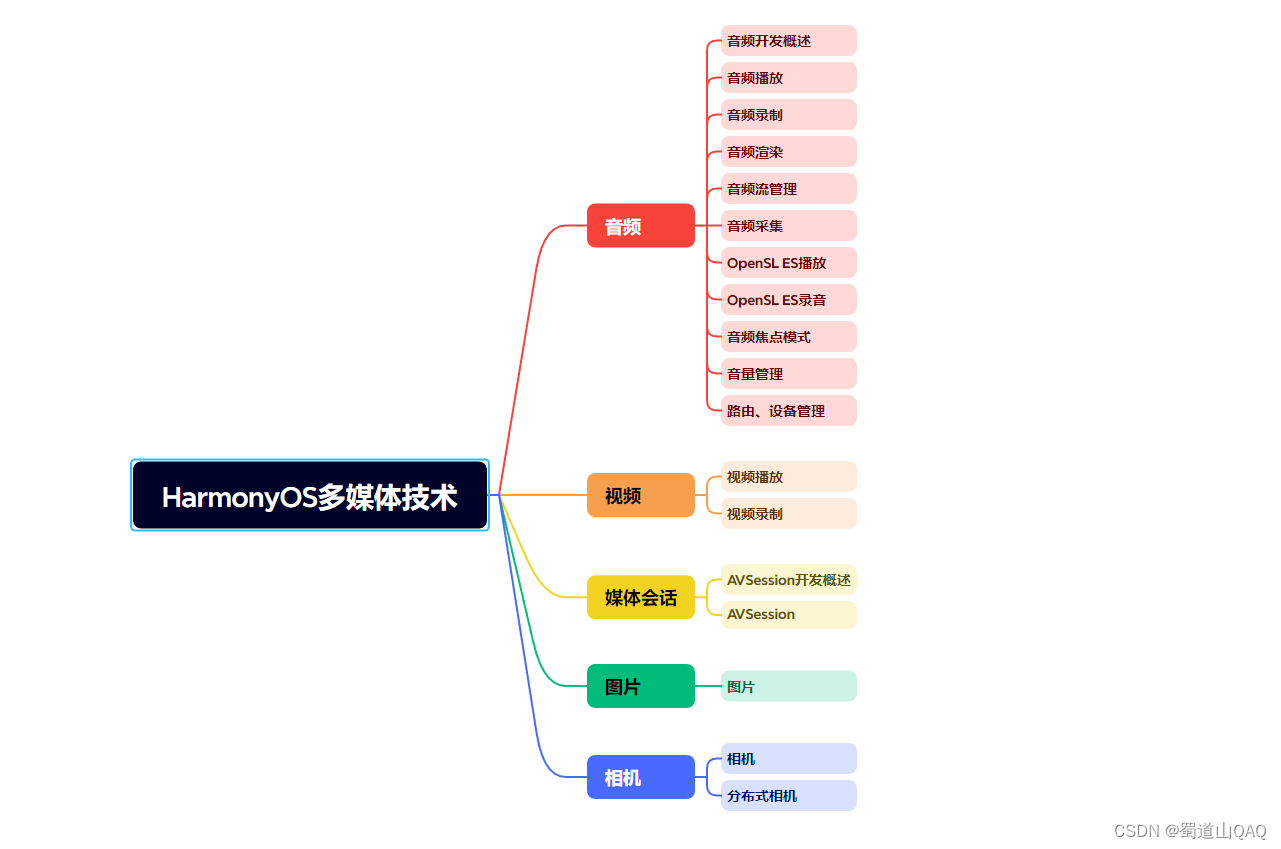
* **HarmonOS多媒体技术**
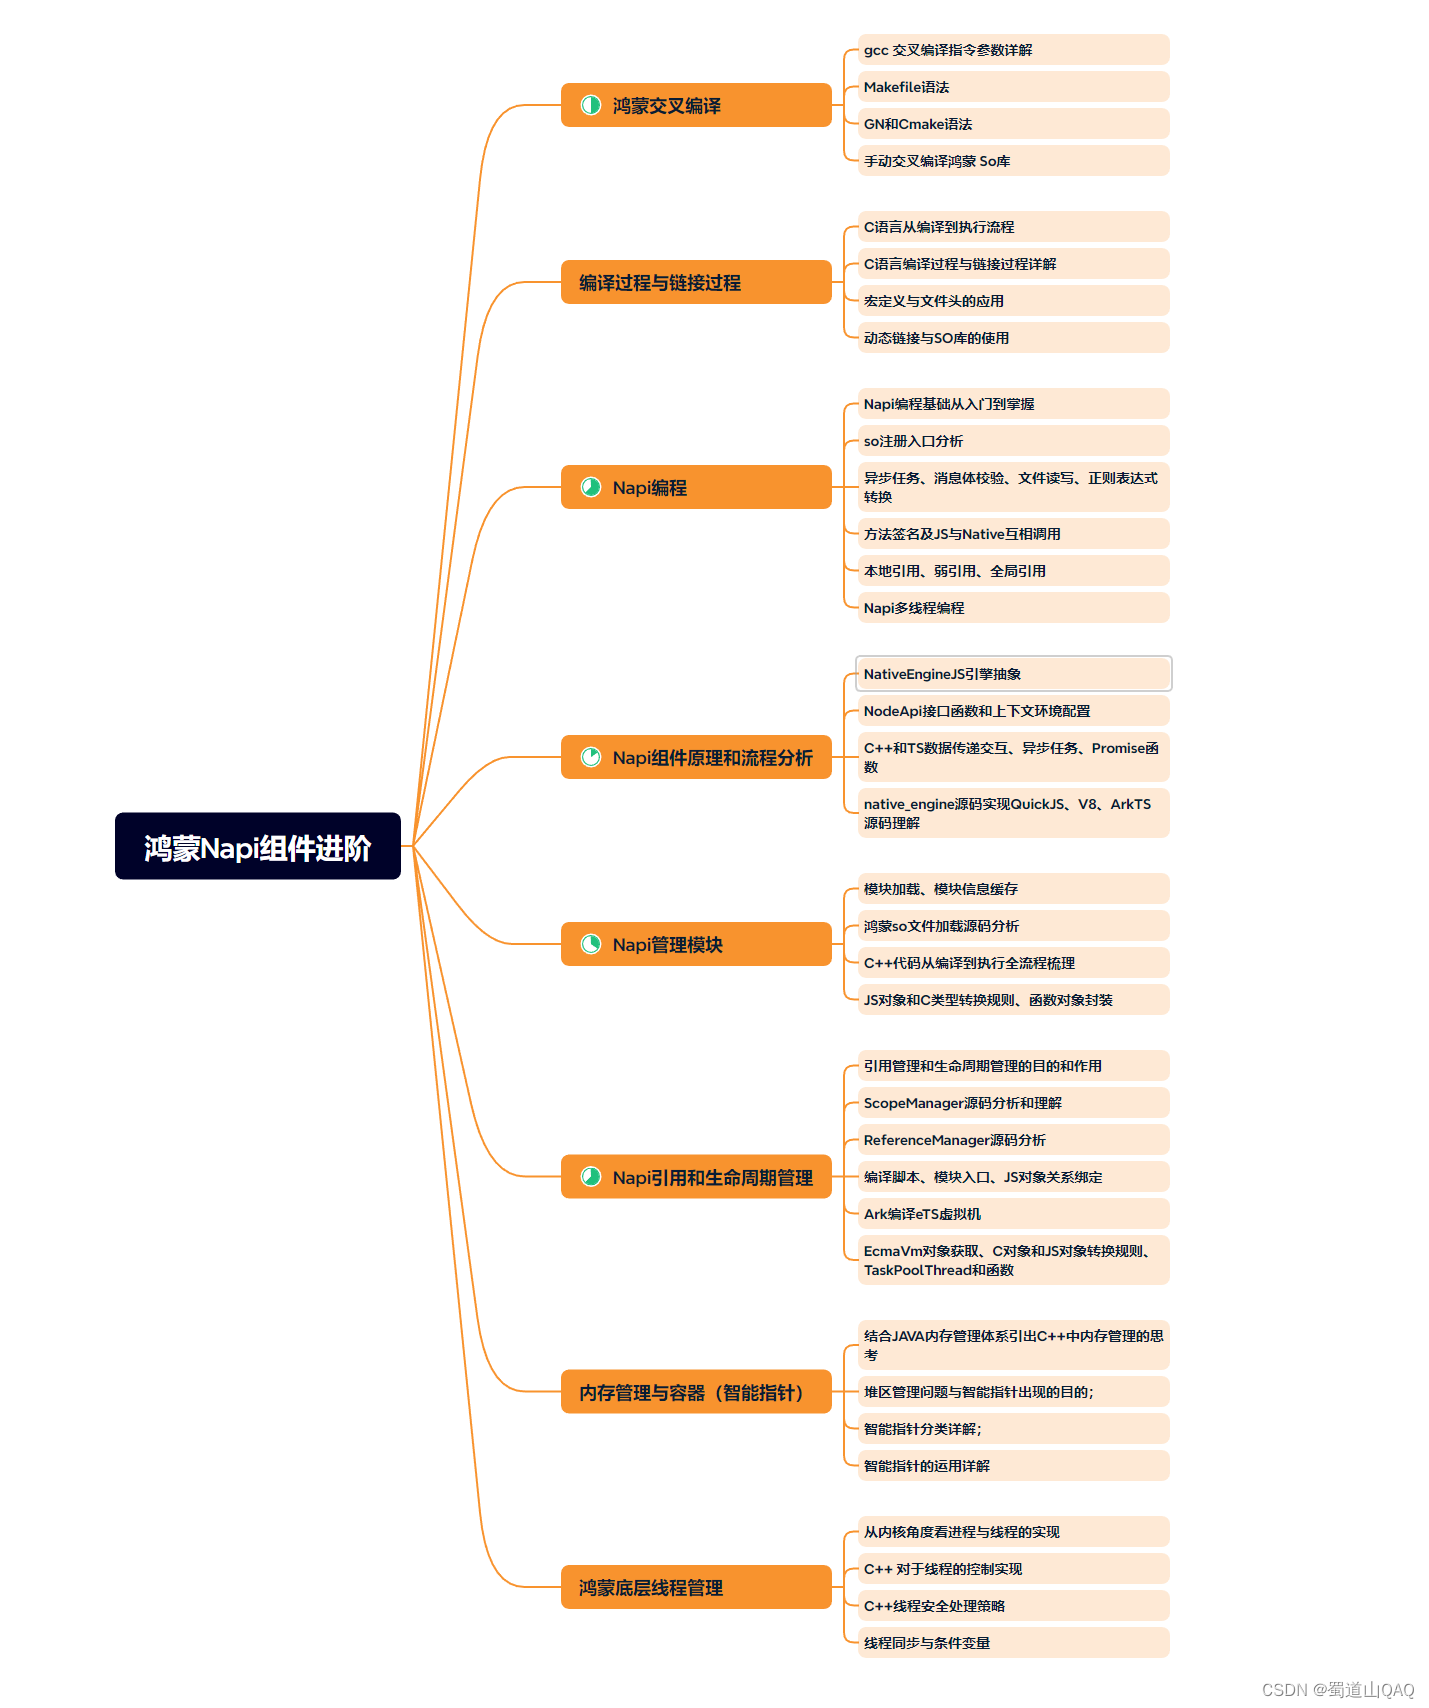
* **鸿蒙NaPi组件进阶**
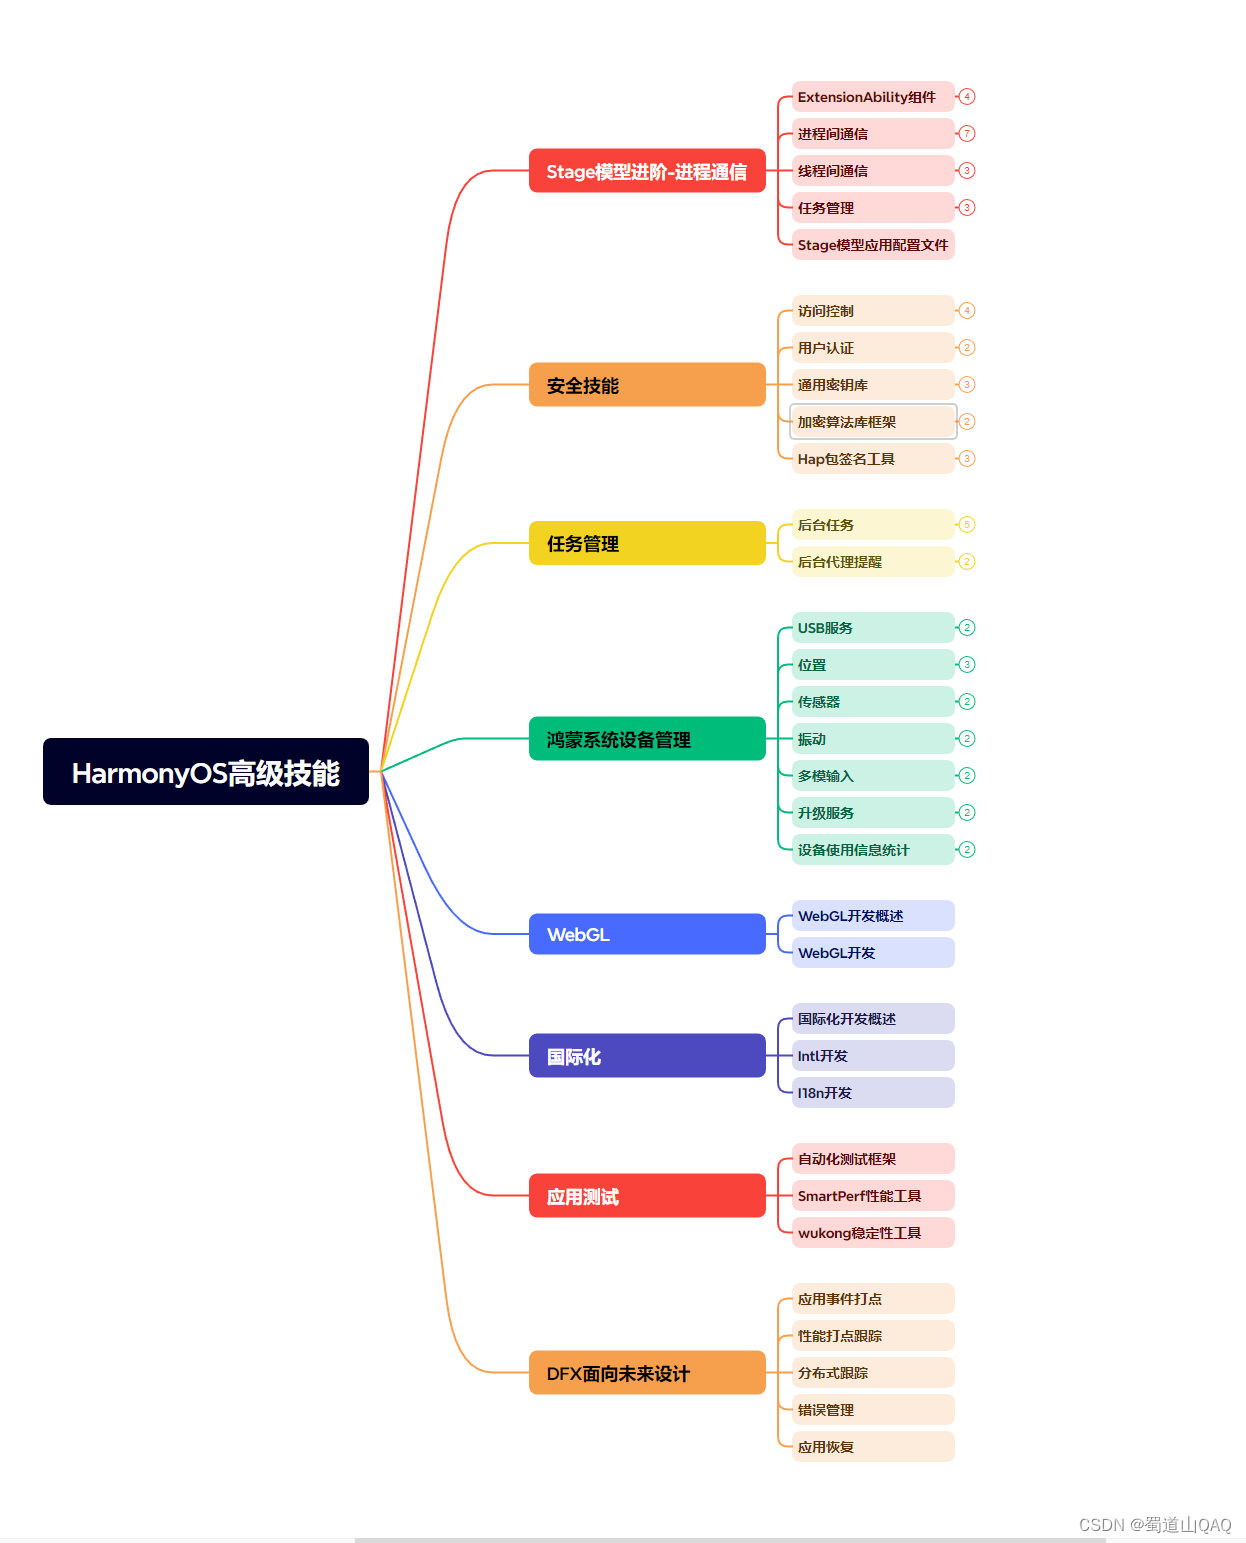
* **HarmonOS高级技能**
* **初识HarmonOS内核**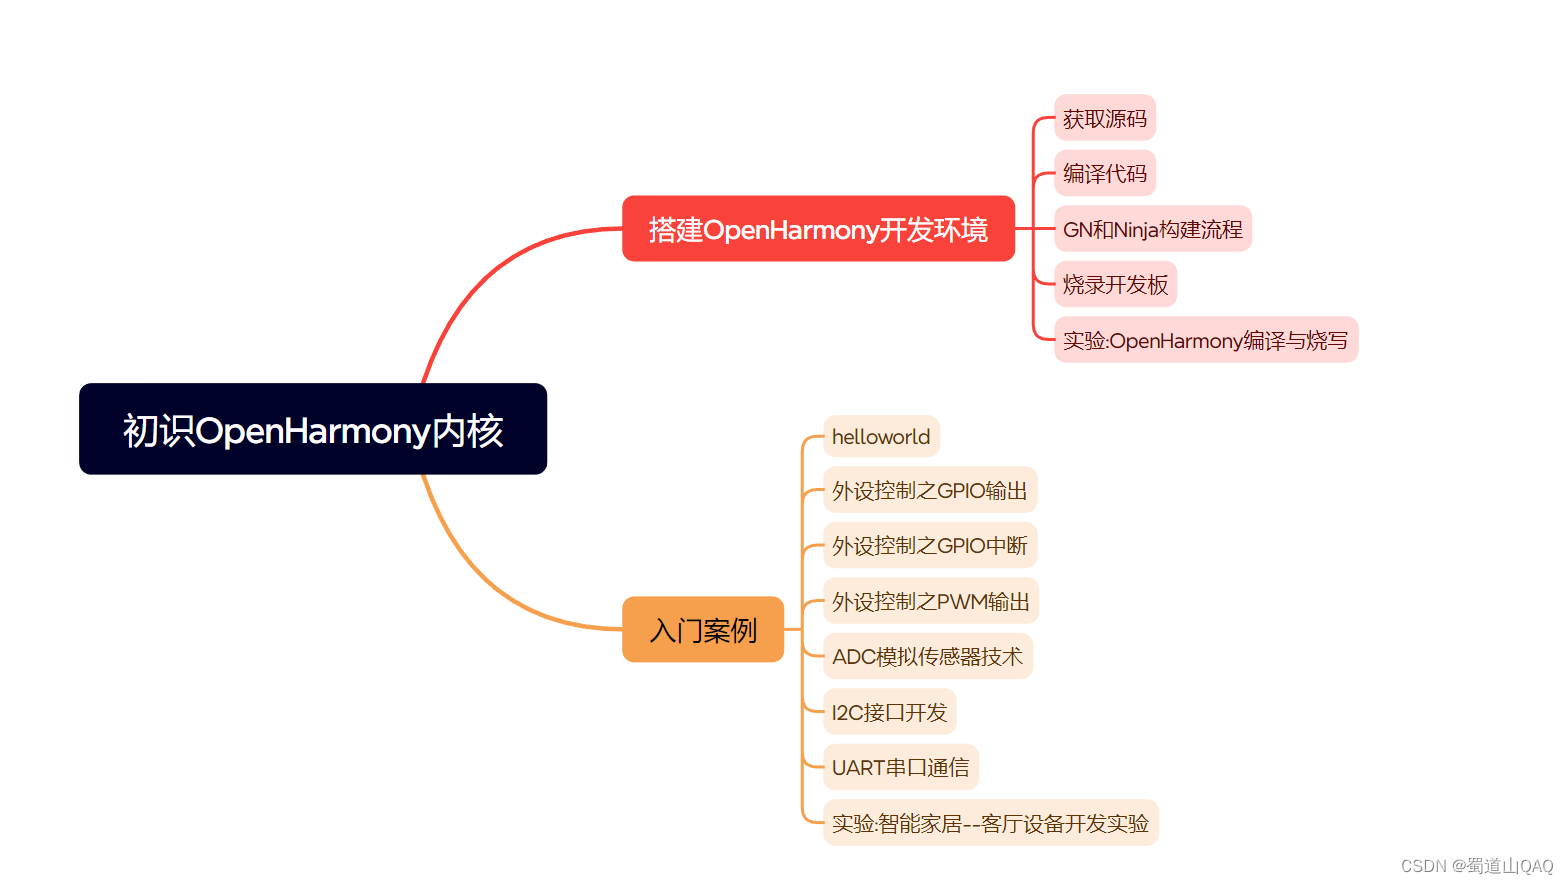
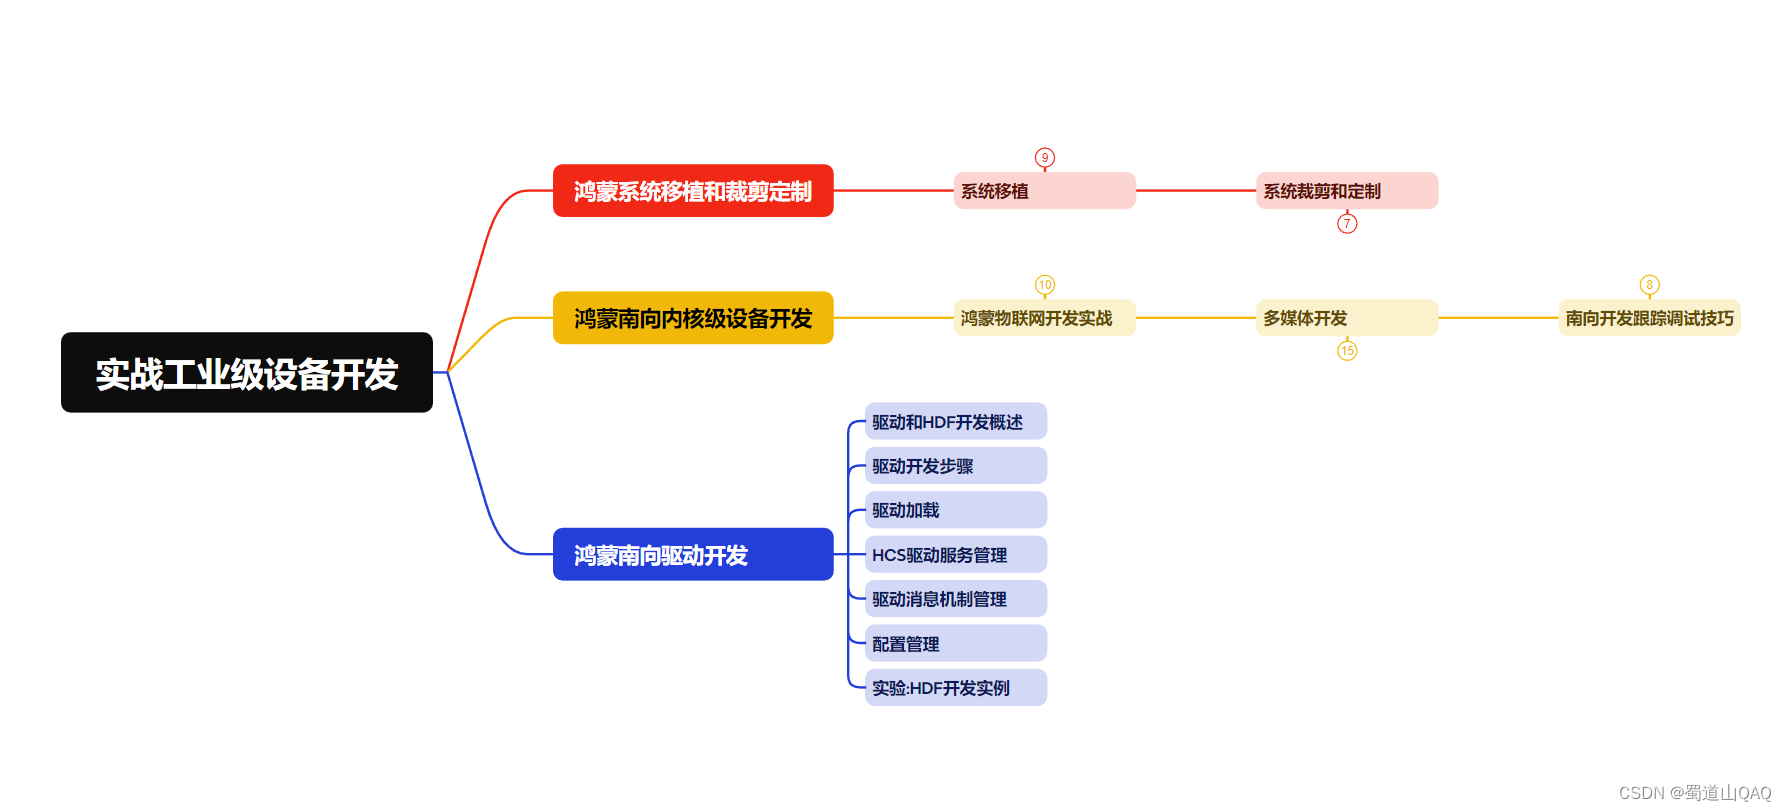
* **实战就业级设备开发**
有了路线图,怎么能没有学习资料呢,小编也准备了一份联合鸿蒙官方发布笔记整理收纳的一套系统性的**鸿蒙(OpenHarmony )学习手册(共计1236页)**与**鸿蒙(OpenHarmony )开发入门教学视频**,内容包含:**ArkTS、ArkUI、Web开发、应用模型、资源分类…等知识点。**
**获取以上完整版高清学习路线,请点击→[纯血版全套鸿蒙HarmonyOS学习资料]( )**
#### **《鸿蒙 (OpenHarmony)开发入门教学视频》**

#### 《鸿蒙生态应用开发V2.0白皮书》

#### **《鸿蒙 (OpenHarmony)开发基础到实战手册》**
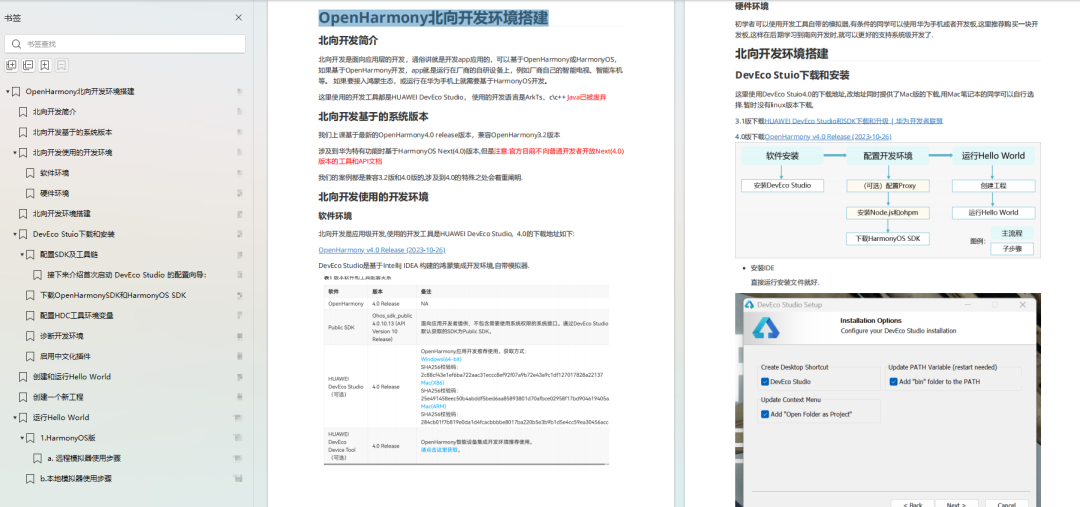
OpenHarmony北向、南向开发环境搭建
#### **《鸿蒙开发基础》**
* ArkTS语言
* 安装DevEco Studio
* 运用你的第一个ArkTS应用
* ArkUI声明式UI开发
* .……
#### **《鸿蒙开发进阶》**
* Stage模型入门
* 网络管理
* 数据管理
* 电话服务
* 分布式应用开发
* 通知与窗口管理
* 多媒体技术
* 安全技能
* 任务管理
* WebGL
* 国际化开发
* 应用测试
* DFX面向未来设计
* 鸿蒙系统移植和裁剪定制
* ……
#### **《鸿蒙进阶实战》**
* ArkTS实践
* UIAbility应用
* 网络案例
* ……


 1395
1395

 被折叠的 条评论
为什么被折叠?
被折叠的 条评论
为什么被折叠?
 到【灌水乐园】发言


