


目录
1.Springboot数据层开发
1.1数据源自动管理
引入jdbc的依赖和springboot的应用场景
<dependency>
   <groupId>org.springframework.boot</groupId>
   <artifactId>spring-boot-starter-jdbc</artifactId>
</dependency>
<dependency>
   <groupId>org.apache.commons</groupId>
   <artifactId>commons-dbcp2</artifactId>
</dependency>

<dependency>
   <groupId>mysql</groupId>
   <artifactId>mysql-connector-java</artifactId>
   <scope>runtime</scope>
</dependency>
让我们使用yaml方式配置,创建application.yaml
spring:
  datasource:
    username: root
    password: root
    url: jdbc:mysql://localhost:3306/boot_demo
    driver-class-name: com.mysql.jdbc.Driver
    type: com.zaxxer.hikari.HikariDataSource
在默认情况下, 数据库连接可以使用DataSource池进行自动配置
- 如果Hikari可用, Springboot将使用它。
- 如果Commons DBCP2可用, 我们将使用它。
我们可以自己指定数据源配置,通过type来选取使用哪种数据源
spring:
  datasource:
    username: root
    password: root
    url: jdbc:mysql://localhost:3306/boot_demo
    driver-class-name: com.mysql.jdbc.Driver
    type: com.zaxxer.hikari.HikariDataSource
   # type: org.apache.commons.dbcp2.BasicDataSource
1.2配置druid数据源
引入druid的依赖
<dependency>
   <groupId>com.alibaba</groupId>
   <artifactId>druid</artifactId>
   <version>1.0.9</version>
</dependency>
<dependency>
   <groupId>log4j</groupId>
   <artifactId>log4j</artifactId>
   <version>1.2.15</version>
</dependency>
修改spring.datasource.type=com.alibaba.druid.pool.DruidDataSource
在application.yaml中加入
spring:
  datasource:
    username: root
    password: root
    url: jdbc:mysql://localhost:3306/boot_demo
    driver-class-name: com.mysql.jdbc.Driver
    type: com.alibaba.druid.pool.DruidDataSource
    initialSize: 5
    minIdle: 5
    maxActive: 20
    maxWait: 60000
    timeBetweenEvictionRunsMillis: 60000
    minEvictableIdleTimeMillis: 300000
    validationQuery: SELECT 1 FROM DUAL
    testWhileIdle: true
    testOnBorrow: false
    testOnReturn: false
    poolPreparedStatements: true
    filters: stat,wall,log4j
    maxPoolPreparedStatementPerConnectionSize: 20
    useGlobalDataSourceStat: true
    connectionProperties: druid.stat.mergeSql=true;druid.stat.slowSqlMillis=500
创建数据源注册类
@Configuration
public class DruidConfig {
@ConfigurationProperties(prefix = "spring.datasource")
@Bean
public DataSource dataSource(){
return new DruidDataSource();
}
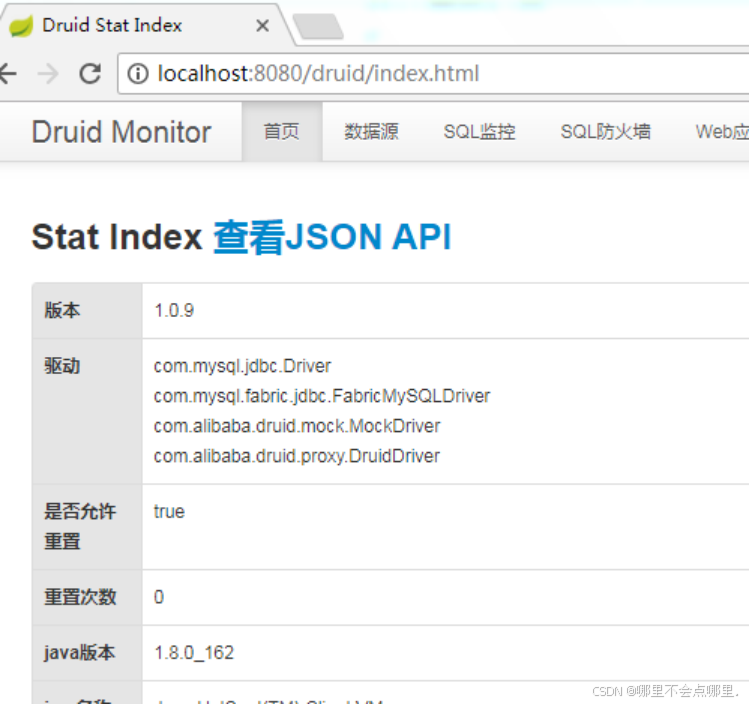
}配置druid运行期监控
@Configuration
public class DruidConfig {

    @ConfigurationProperties(prefix = "spring.datasource")
    @Bean
    public DataSource dataSource(){
        return new DruidDataSource();
    }

    @Bean
    public ServletRegistrationBean statViewServlet(){
        ServletRegistrationBean bean = new ServletRegistrationBean(new StatViewServlet(),
                "/druid/*");
        Map<String,String> initParams = new HashMap<>();
        initParams.put("loginUsername","root");
        initParams.put("loginPassword","root");
        initParams.put("allow","");//默认就是允许所有访问
        initParams.put("deny","192.168.15.21");
        bean.setInitParameters(initParams);
        return bean;
    }

    //2、配置一个web监控的filter
    @Bean
    public FilterRegistrationBean webStatFilter(){
        FilterRegistrationBean bean;
        bean = new FilterRegistrationBean();
        bean.setFilter(new WebStatFilter());
        Map<String,String> initParams = new HashMap<>();
        initParams.put("exclusions","*.js,*.css,/druid/*");
        bean.setInitParameters(initParams);
        bean.setUrlPatterns(Arrays.asList("/*"));
        return bean;
    }
}
打开监控页面
1.3springboot整合jdbcTemplate
在数据源建表
SET FOREIGN_KEY_CHECKS=0;

-- ----------------------------
-- Table structure for tx_user
-- ----------------------------
DROP TABLE IF EXISTS `tx_user`;
CREATE TABLE `tx_user` (
  `username` varchar(10) DEFAULT NULL,
  `userId` int(10) NOT NULL,
  `password` varchar(10) DEFAULT NULL,
  PRIMARY KEY (`userId`)
) ENGINE=InnoDB DEFAULT CHARSET=utf8;
创建Controller
@Controller
public class TestController {

    @Autowired
    JdbcTemplate jdbcTemplate;

    @ResponseBody
    @RequestMapping("/query")
    public List<Map<String, Object>> query(){
        List<Map<String, Object>> maps = jdbcTemplate.queryForList("SELECT * FROM tx_user");
        return maps;
    }

}
启动springboot访问
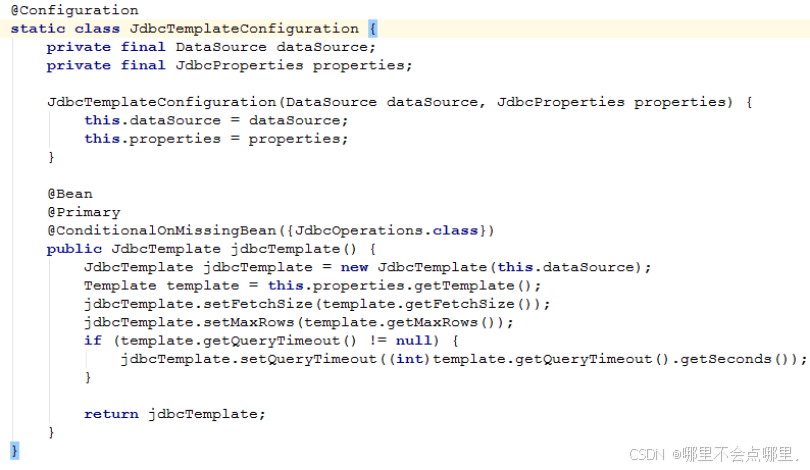
Springboot中提供了JdbcTemplateAutoConfiguration的自动配置
org.springframework.boot.autoconfigure.jdbc.JdbcTemplateAutoConfiguration,\
JdbcTemplateAutoConfiguration源码:
1.4Springboot整合mybatis注解版
<dependency>
   <groupId>org.mybatis.spring.boot</groupId>
   <artifactId>mybatis-spring-boot-starter</artifactId>
   <version>1.3.1</version>
</dependency>
步骤:
1)、配置数据源相关属性(见上一节Druid)
2)、给数据库建表
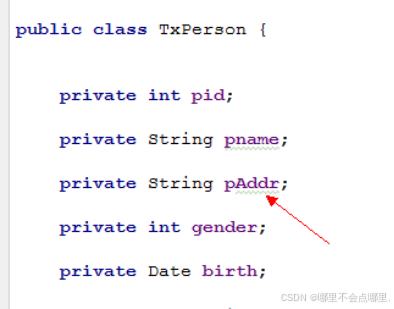
3)、创建JavaBean
public class TxPerson {

    private int pid;

    private String pname;

    private String addr;

    private int gender;

    private Date birth;

}
4)创建Mapper
@Mapper
public interface TxPersonMapper {
@Select("select * from tx_person")
public List<TxPerson> getPersons();
@Select("select * from tx_person t where t.pid = #{id}")
public TxPerson getPersonById(int id);
@Options(useGeneratedKeys =true, keyProperty = "pid")
@Insert("insert into tx_person(pid, pname, addr,gender, birth)" +
" values(#{pid}, #{pname}, #{addr},#{gender}, #{birth})")
public void insert(TxPerson person);
@Delete("delete from tx_person where pid = #{id}")
public void update(int id);
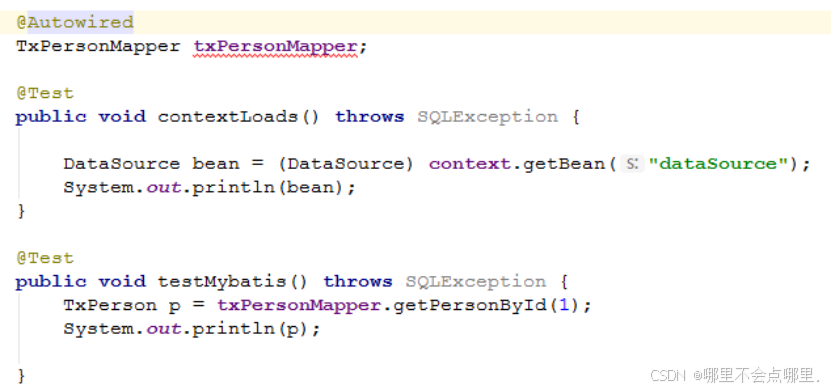
}单元测试
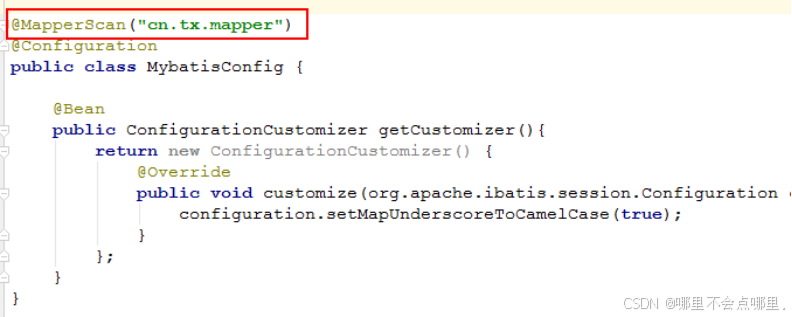
解决驼峰模式和数据库中下划线不能映射的问题。

@Configuration
public class MybatisConfig {

    @Bean
    public ConfigurationCustomizer getCustomizer(){
        return new ConfigurationCustomizer() {
            @Override
            public void customize(org.apache.ibatis.session.Configuration configuration) {
                configuration.setMapUnderscoreToCamelCase(true);
            }
        };
    }
}
查询结果
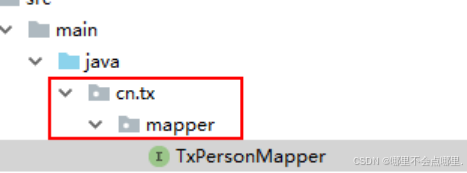
TxPerson{pid=1, pname='张三', pAddr='北京', gender=1, birth=Thu Jun 14 00:00:00 CST 2018}我们同样可以在mybatis的接口上不加@Mapper注解,通过扫描器注解来扫描
Mapper接口存放在cn.tx.mapper下
1.5Springboot整合mybatis配置文件
创建sqlMapConfig.xml配置文件
<?xml version="1.0" encoding="UTF-8" ?>
<!DOCTYPE configuration
        PUBLIC "-//mybatis.org//DTD Config 3.0//EN"
        "http://mybatis.org/dtd/mybatis-3-config.dtd">

<configuration>
</configuration>
创建映射文件PersonMapper.xml
<?xml version="1.0" encoding="UTF-8" ?>
         <!DOCTYPE mapper PUBLIC "-//mybatis.org//DTD Mapper 3.0//EN"
        "http://mybatis.org/dtd/mybatis-3-mapper.dtd">

<mapper namespace="cn.tx.mapper.TxPersonMapper">
    <select id="getPersons" resultType="TxPerson">
        select * from tx_person
    </select>
</mapper>
在application.yaml中配置mybatis的信息
mybatis:
  config-location: classpath:mybatis/sqlMapConfig.xml
  mapper-locations: classpath:mybatis/mapper/*.xml
  type-aliases-package: cn.tx.springboot.jdbc_demo1
2.Springboot开发企业信息管理系统
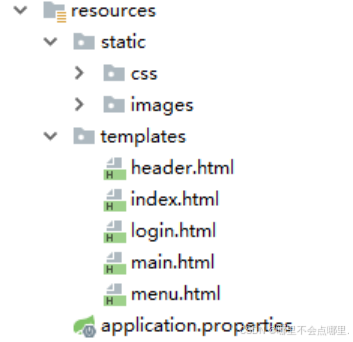
2.1引入资源
1.创建项目引入页面原型
2.引入maven的依赖和starters
<dependency>
   <groupId>org.springframework.boot</groupId>
   <artifactId>spring-boot-starter-web</artifactId>
</dependency>

<dependency>
   <groupId>org.springframework.boot</groupId>
   <artifactId>spring-boot-starter-test</artifactId>
   <scope>test</scope>
</dependency>

<dependency>
   <groupId>org.springframework.boot</groupId>
   <artifactId>spring-boot-devtools</artifactId>
   <optional>true</optional>
</dependency>

<dependency>
   <groupId>org.springframework.boot</groupId>
   <artifactId>spring-boot-starter-thymeleaf</artifactId>
</dependency>

<dependency>
   <groupId>org.webjars</groupId>
   <artifactId>jquery</artifactId>
   <version>3.3.1</version>
</dependency>

<dependency>
   <groupId>org.mybatis.spring.boot</groupId>
   <artifactId>mybatis-spring-boot-starter</artifactId>
   <version>1.3.1</version>
</dependency>

<dependency>
   <groupId>com.alibaba</groupId>
   <artifactId>druid</artifactId>
   <version>1.0.9</version>
</dependency>

<dependency>
   <groupId>log4j</groupId>
   <artifactId>log4j</artifactId>
   <version>1.2.15</version>
</dependency>

<dependency>
   <groupId>mysql</groupId>
   <artifactId>mysql-connector-java</artifactId>
   <scope>runtime</scope>
</dependency>
2.2thymeleaf模板处理
创建mvc的配置类TxMvcConfig
@Configuration
@MapperScan("cn.tx.springboot.mapper")
public class TxMvcConfig implements WebMvcConfigurer{

    @Override
    public void addViewControllers(ViewControllerRegistry registry) {
        registry.addViewController("/toLogin").setViewName("login");
        registry.addViewController("/header").setViewName("header");
        registry.addViewController("/index").setViewName("index");
        registry.addViewController("/menu").setViewName("menu");
        registry.addViewController("/add").setViewName("add");
    }

    @Override
    public void addInterceptors(InterceptorRegistry registry) {

        List<String> excludePatterns = new ArrayList<String>();
        excludePatterns.add("/css/**");
        excludePatterns.add("/images/**");
        excludePatterns.add("/toLogin");
        excludePatterns.add("/login");
        registry.addInterceptor(new LoginInterceptor())
                .addPathPatterns("/**")
                .excludePathPatterns(excludePatterns);
    }
}
2.3创建数据库环境
1.创建数据库执行脚本
SET FOREIGN_KEY_CHECKS=0;

-- ----------------------------
-- Table structure for my_user
-- ----------------------------
DROP TABLE IF EXISTS `my_user`;
CREATE TABLE `my_user` (
  `pid` int(11) NOT NULL AUTO_INCREMENT,
  `username` varchar(255) DEFAULT NULL,
  `password` varchar(255) DEFAULT NULL,
  `p_addr` varchar(255) DEFAULT NULL,
  `gender` int(11) DEFAULT NULL,
  `birth` date DEFAULT NULL,
  PRIMARY KEY (`pid`)
) ENGINE=InnoDB AUTO_INCREMENT=5 DEFAULT CHARSET=utf8;

-- ----------------------------
-- Records of my_user
-- ----------------------------
INSERT INTO `my_user` VALUES ('1', 'zhangsan', '123', '北京', '1', '2020-06-14');
2.配置druid数据源
spring:
  datasource:
    username: root
    password: root
    url: jdbc:mysql://localhost:3306/boot_demo
    driver-class-name: com.mysql.jdbc.Driver
    type: com.alibaba.druid.pool.DruidDataSource
    initialSize: 5
    minIdle: 5
    maxActive: 20
    maxWait: 60000
    timeBetweenEvictionRunsMillis: 60000
    minEvictableIdleTimeMillis: 300000
    validationQuery: SELECT 1 FROM DUAL
    testWhileIdle: true
    testOnBorrow: false
    testOnReturn: false
    poolPreparedStatements: true
    filters: stat,wall,log4j
    maxPoolPreparedStatementPerConnectionSize: 20
    useGlobalDataSourceStat: true
    connectionProperties: druid.stat.mergeSql=true;druid.stat.slowSqlMillis=500
3.创建数据源的配置类
@Configuration
public class DruidConfig {
    @ConfigurationProperties(prefix = "spring.datasource")
    @Bean
    public DataSource dataSource(){
        return new DruidDataSource();
    }

}
2.4编写数据层
1.创建mybatis的配置类MybatisConfig
@Configuration
public class MybatisConfig {

    @Bean
    public ConfigurationCustomizer getCustomizer(){
        return new ConfigurationCustomizer() {
            @Override
            public void customize(org.apache.ibatis.session.Configuration configuration) {
                configuration.setMapUnderscoreToCamelCase(true);
            }
        };
    }

}2.创建数据层UserMapper
public interface MyUserMapper {

    @Options(useGeneratedKeys = true, keyProperty = "pid")
    @Insert("insert into my_user(pid, username, password, p_addr, gender, birth)values(" +
            "#{pid}, #{username}, #{password}, #{pAddr}, #{gender}, #{birth})")
    public  void insert(MyUser user) ;

    @Select("select * from my_user")
    public List<MyUser> selectUsers();

    @Select("select * from my_user t where t.username = #{username} and t.password = #{password}")
    public MyUser selectUsersById(Map<String, String> map);


    @Select("select * from my_user t where t.pid = #{pid}")
    public MyUser selectUsersById1(int userId);

    @Update("update  my_user set " +
            "username = #{username}," +
            "password=#{password}, " +
            "p_addr= #{pAddr}, " +
            "gender=#{gender}, " +
            "birth=#{birth} " +
            "where pid = #{pid}")
    public  void update(MyUser user) ;

    @Delete("delete from my_user  where pid = #{pid}")
    public  void delete(int pid) ;

}
2.5编写Service
public interface MyUserService {

    public  void insert(MyUser user) ;

    public  void update(MyUser user) ;

    public List<MyUser> selectUsers();

    public MyUser selectUsersById(Map<String, String> map);

    public MyUser selectUsersById1(int userId);

    public  void delete(int pid) ;

}
2.6页面处理
1. main页面处理
<html lang="en" xmlns:th="http://www.thymeleaf.org">
<head>
<meta http-equiv="Content-Type" content="text/html; charset=utf-8" />
<title>首页</title>
</head>

<frameset cols="*" rows="136, *" id="frame_main"  border="0">
    <frame src="header" noresize="noresize" name="header">

    <frameset cols="240, *">
       <frame th:src="@{/menu}" name="menu" />
       <frame th:src="@{/main}" name="main">
    </frameset>
</frameset>
<a th:href="@{/add}">添加</a>
<table class="mt" align="center">
<tr >
<td >用户名</td>
<td >密码</td>
<td >地址</td>
<td >生日</td>
<td >操作</td>
</tr>
<tr th:each="user:${users}">
<td th:text="${user.username}"></td>
<td th:text="${user.password}"></td>
<td th:text="${user.pAddr}"></td>
<td th:text="${#calendars.format(user.birth,'yyyy-MM-dd')}"></td>
<td>
<a th:href="@{/getUser(pid=${user.pid})}" >修改</a>
<a th:href="@{/delete(pid=${user.pid})}" >删除</a>
</td>
</tr>
</table>2.添加页面处理
引入thymeleaf命名空间后
    <form th:action="@{/save}" method="post">
       <table class="mt" align="center">
           <tr >
               <td >用户名</td>
               <td><input name="username" type="text"/></td>
           </tr>
           <tr >
               <td >密码</td>
               <td><input name="password" type="password"/></td>

           </tr>
           <tr >
               <td >地址</td>
               <td><input name="pAddr" type="text"/></td>
           </tr>
           <tr >
               <td >生日</td>
               <td><input name="birth" type="text"/></td>

           </tr>
           <tr >
               <td >性别</td>
               <td><input name="gender" type="text"/></td>
           </tr>
           <tr >
               <td ></td>
               <td><input  type="submit"/></td>
           </tr>
       </table>
    </form>
3.修改页面处理
    <form th:action="@{/update}" method="post">
       <input type="hidden" name="pid" th:value="${user.pid}"/>
       <table class="mt" align="center">
           <tr >
               <td >用户名</td>
               <td><input name="username" type="text" th:value="${user.username}"/></td>
           </tr><tr >
               <td >密码</td>
               <td><input name="password" type="password" th:value="${user.password}"/></td>
           </tr><tr >
               <td >地址</td>
               <td><input name="pAddr" type="text" th:value="${user.pAddr}"/></td>
           </tr>
           <tr >
               <td >地址</td>
               <td><input name="gender" type="text" th:value="${user.gender}"/></td>
           </tr>
           <tr >
               <td >生日</td>
               <td><input name="birth" type="text" th:value="${#calendars.format(user.birth, 'yyyy-MM-dd')}"/></td>
           </tr><tr >
               <td ></td>
               <td><input  type="submit"/></td>
           </tr>
       </table>
    </form>
2.7用户登录
<!DOCTYPE html PUBLIC "-//W3C//DTD XHTML 1.0 Transitional//EN" "http://www.w3.org/TR/xhtml1/DTD/xhtml1-transitional.dtd">
<html lang="en" xmlns:th="http://www.thymeleaf.org">
<head>
<meta http-equiv="Content-Type" content="text/html; charset=utf-8" />
<title>用户登录</title>
<!--<link href="css/login.css" rel="stylesheet" type="text/css" />-->
<link th:href="@{/css/login.css}" rel="stylesheet" type="text/css" />
<script th:src="@{/webjars/jquery/3.3.1/jquery.js}"></script>
<script>
   function login1() {
      $("form").submit();
   }

</script>
</head>
<body>

    <div id="login">

        <div id="top">
            <div id="top_left"><img src="images/login_03.gif" /></div>
           <div id="top_center"></div>
       </div>
       <form th:action="@{/login}" method="post">
          <div id="center">
              <div id="center_left"></div>
              <div id="center_middle">
                  <div style="text-align: center; color: red" th:text="${tip}"></div>
                  <div id="user">用 户
                   <input type="text" name="username" />
                  </div>
                  <div id="password">密   码
                   <input type="password" name="password" />
                  </div>
                  <div id="btn">
                     <a href="#" onclick="login1()">登录</a>
                     <a href="#">清空</a>
                  </div>
              </div>
              <div id="center_right"></div>
          </div>
       </form>
       <div id="down">
            <div id="down_left">
               <div id="inf">
                       <span class="inf_text">版本信息</span>
                  <span class="copyright">信息管理系统 v2.0</span>
               </div>
           </div>
           <div id="down_center"></div>
       </div>
   </div>
</body>
</html>
登录的Controller逻辑
@PostMapping("/login")
public String login(HttpSession session, String username, String password, Model model) {
    Map<String, String> map = new HashMap<String, String>();
    map.put("username", username);
    map.put("password", password);
    MyUser user = userService.selectUsersById(map);
    if (user != null){
        session.setAttribute("user", user);
        return "redirect:index";
    }else{
        model.addAttribute("tip","用户名或者密码错误");
        return "login";
    }
}
Header模板页面
<div id="main">
   <div id="welcome">欢迎你回来
        <span th:text="${session.user.username}" th:if="${not #strings.isEmpty(session.user)}"></span>
        <a target="_top" th:text="请登录" th:href="@{/toLogin}" th:if="${#strings.isEmpty(session.user)}"></a>
        <img src="images/clock.gif" /> 学习是最好的投资</div>
    <div id="adminop">
        <ul>
            <li><a href="#">站点首页</a></li>
            <li><a href="javascript:parent.location.reload();">管理首页</a></li>
            <li><a href="javascript:parent.location.reload();">退出管理</a></li>
            <li><a href="#">站点首页</a></li>
        </ul>
    </div>
</div>


 被折叠的 条评论
为什么被折叠?
被折叠的 条评论
为什么被折叠?
 到【灌水乐园】发言


