


${ msg }
4、完善HelloControll

package com.itzheng.springmvc.controller;
import org.springframework.stereotype.Controller;
import org.springframework.web.bind.annotation.RequestMapping;
import org.springframework.web.servlet.ModelAndView;
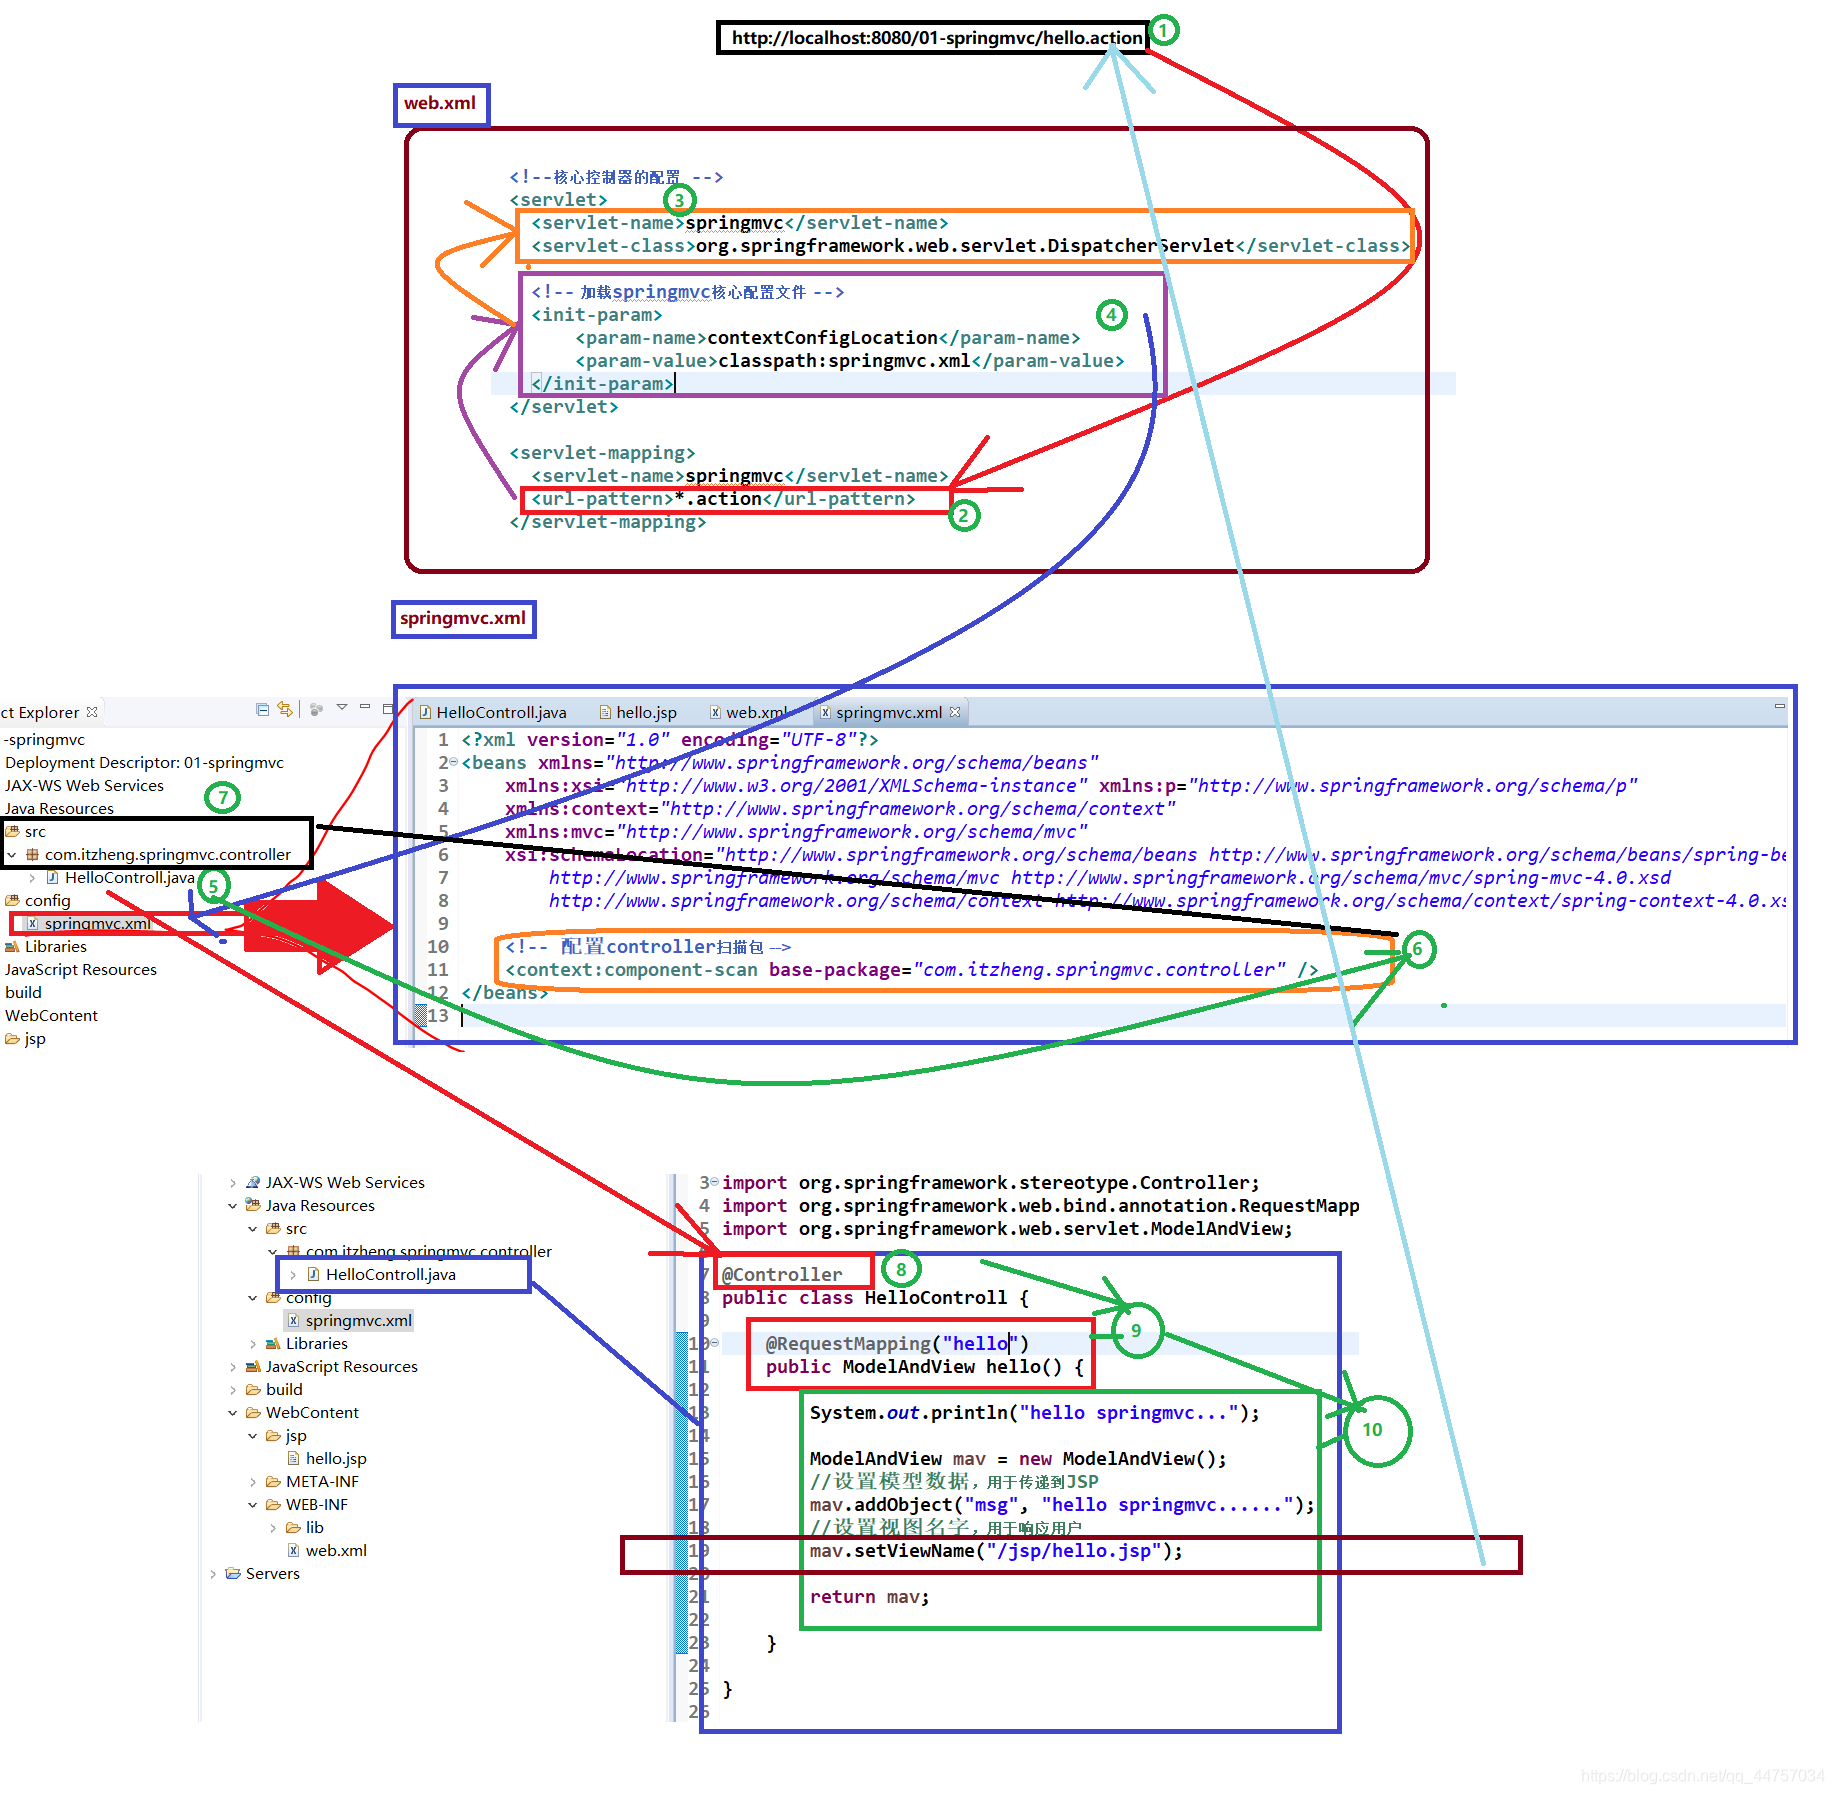
@Controller
public class HelloControll {
@RequestMapping(“hello”)
public ModelAndView hello() {
System.out.println(“hello springmvc…”);
ModelAndView mav = new ModelAndView();
//设置模型数据,用于传递到JSP
mav.addObject(“msg”, “hello springmvc…”);
//设置视图名字,用于响应用户
mav.setViewName(“/jsp/hello.jsp”);
return mav;
}
}
5、配置spring相关的配置文件


<beans xmlns=“http://www.springframework.org/schema/beans”
xmlns:xsi=“http://www.w3.org/2001/XMLSchema-instance” xmlns:p=“http://www.springframework.org/schema/p”
xmlns:context=“http://www.springframework.org/schema/context”
xmlns:mvc=“http://www.springframework.org/schema/mvc”
xsi:schemaLocation="http://www.springframework.org/schema/beans http://www.springframework.org/schema/beans/spring-beans-4.0.xsd
http://www.springframework.org/schema/mvc http://www.springframework.org/schema/mvc/spring-mvc-4.0.xsd
http://www.springframework.org/schema/context http://www.springframework.org/schema/context/spring-context-4.0.xsd">
<context:component-scan base-package=“com.itzheng.springmvc.controller” />
6、在web.xml当中配置前端控制器
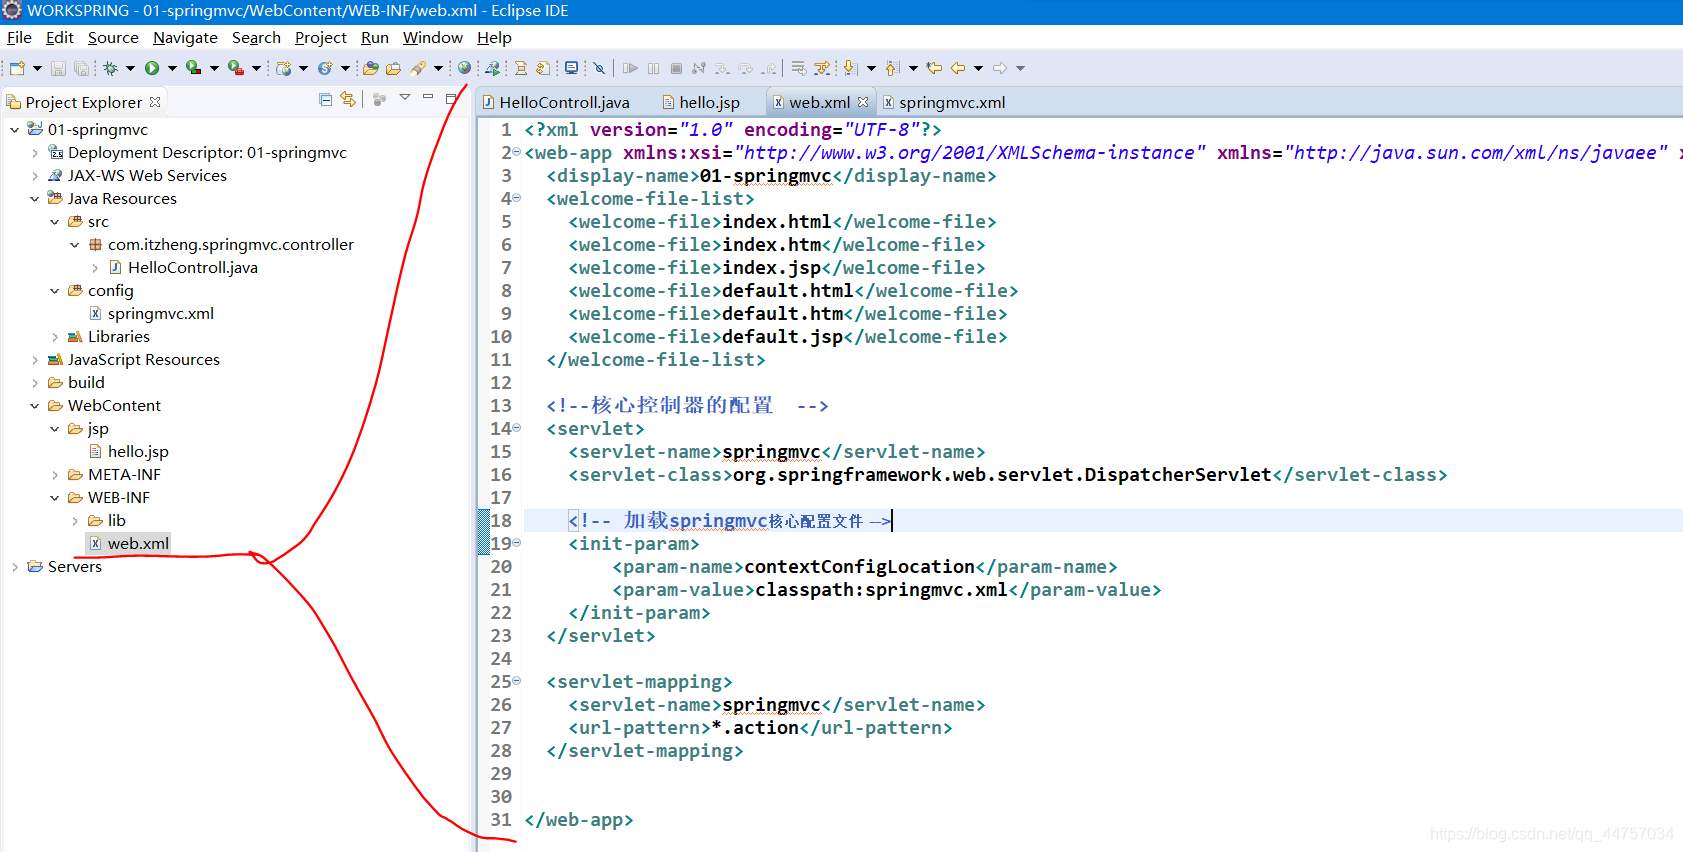
01-springmvc
index.html
index.htm
index.jsp
default.html
default.htm
default.jsp
springmvc
org.springframework.web.servlet.DispatcherServlet
contextConfigLocation
classpath:springmvc.xml
springmvc
*.action
7、运行项目
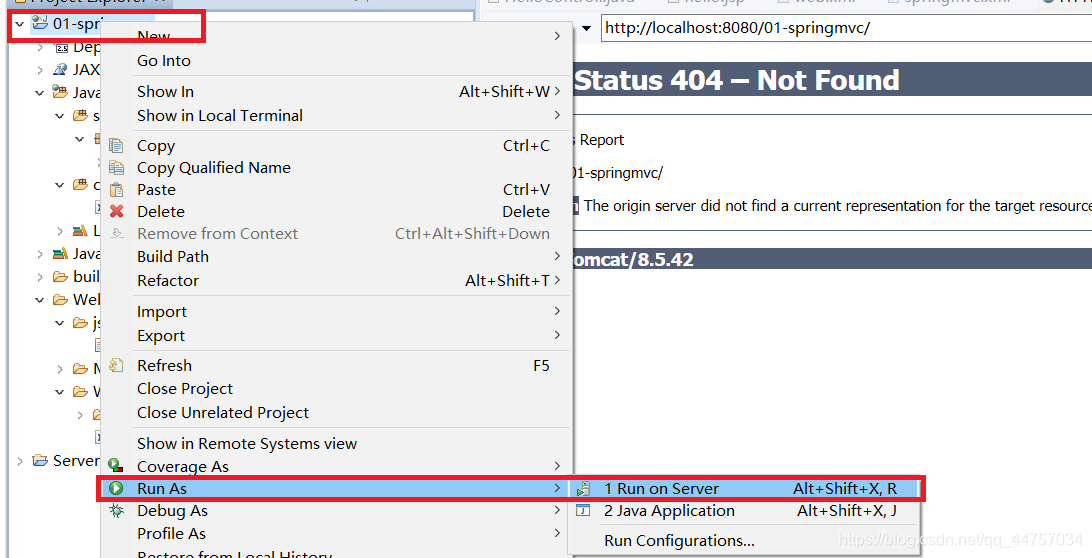
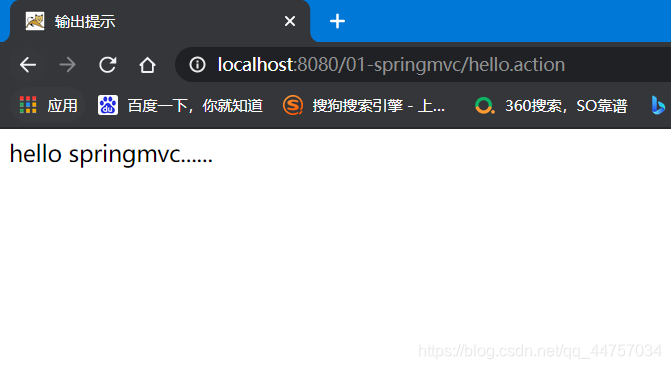
访问项目
http://localhost:8080/01-springmvc/hello.action
| | |
| — | — |
| SpringMVC快速入门(1)SpringMVC介绍、SpringMVC入门创建工程,SpringMVC执行流程 | |
| SpringMVC快速入门(2)商品列表的加载 | |
| SpringMVC快速入门(3)默认组件加载 | |
总结
这个月马上就又要过去了,还在找工作的小伙伴要做好准备了,小编整理了大厂java程序员面试涉及到的绝大部分面试题及答案,希望能帮助到大家
]( ) | |
| SpringMVC快速入门(2)商品列表的加载 | |
| SpringMVC快速入门(3)默认组件加载 | |
总结
这个月马上就又要过去了,还在找工作的小伙伴要做好准备了,小编整理了大厂java程序员面试涉及到的绝大部分面试题及答案,希望能帮助到大家
[外链图片转存中…(img-6rm8k87S-1718732874404)]
[外链图片转存中…(img-fcmBFMQ9-1718732874404)]


 被折叠的 条评论
为什么被折叠?
被折叠的 条评论
为什么被折叠?
 到【灌水乐园】发言


