场景描述
添加水印是一个比较常见的功能,下面列举一些遇到的业务需求:
-
场景一:在页面背景上添加全局水印
-
场景二:保存图片添加水印
-
场景三:拍照添加水印
-
场景四:window级别的全局水印
方案描述
场景一:
在页面背景上添加全局水印
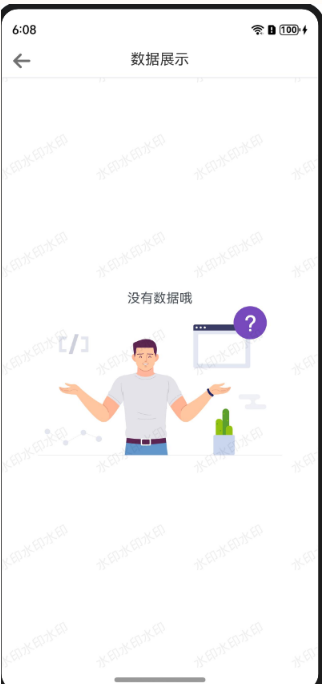
效果图:

方案
页面全局水印的实现思路是使用透明背景的canvas画布绘制文字水印,在使用Stack组件叠加在page跟容器上
方式一:使用canvas进行绘制
Stack({ alignContent: Alignment.Center }) {

Column() {

Text("没有数据哦").fontColor("#495057")

Image($r("app.media.empty")).width(300)

}

Canvas(this.context)

.width("100%")

.height("100%")

.hitTestBehavior(HitTestMode.Transparent)

.onReady(() => {

this.context.fillStyle = '#10000000'

this.context.font = "16vp"

this.context.textAlign = "center"

this.context.textBaseline = "middle"

// 在这里绘制文字水印,也可以是图片水印

for (let i = 0; i < this.context.width / 120; i++) {

this.context.translate(120, 0)

let j = 0

for (; j < this.context.height / 120; j++) {

this.context.rotate(-Math.PI / 180 * 30)

// 此处水印数据是写死的,具体请替换为自己的水印

this.context.fillText("水印水印水印", -60, -60)

this.context.rotate(Math.PI / 180 * 30)

this.context.translate(0, 120)

}

this.context.translate(0, -120 * j)

}

})

}.layoutWeight(1)
方式二:使用overlay属性绘制
方式二思路与方式一实现思路一致,该方式可以讲水印组件单独拧出来,在其他使用时使用overlay属性来使用,实现效果与方式一一致
@Builder

Watermark() {

Canvas(this.context)

.width("100%")

.height("100%")

.hitTestBehavior(HitTestMode.Transparent)

.onReady(() => {

this.context.fillStyle = '#10000000'

this.context.font = "16vp"

this.context.textAlign = "center"

this.context.textBaseline = "middle"

// 在这里绘制文字水印,也可以是图片水印

for (let i = 0; i < this.context.width / 120; i++) {

this.context.translate(120, 0)

let j = 0

for (; j < this.context.height / 120; j++) {

this.context.rotate(-Math.PI / 180 * 30)

// 此处水印数据是写死的,具体请替换为自己的水印

this.context.fillText("水印水印水印", -60, -60)

this.context.rotate(Math.PI / 180 * 30)

this.context.translate(0, 120)


 最低0.47元/天 解锁文章


 577
577

 被折叠的 条评论
为什么被折叠?


