


目录
1、前端vue的搭建
建立项目的过程略
开启一个建立好的vue项目用npm run dev
关闭一个vue项目可在终端操作:ctrl+c
需要注意的几点
1、在建立项目的时候、可以选择路由选项。后续就不需要再次安装路由。
2、安装axios npm install --save axios vue-axios
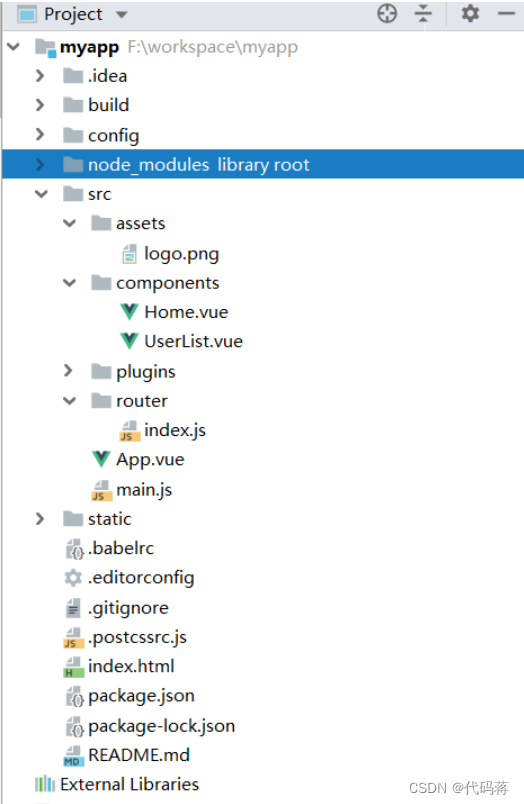
前端项目结构样式
main.js、这个是整个项目的入口、要使用的在这里引入
// The Vue build version to load with the `import` command
// (runtime-only or standalone) has been set in webpack.base.conf with an alias.
import Vue from 'vue'
import './plugins/axios'
import App from './App'
import router from './router'

Vue.config.productionTip = false

/* eslint-disable no-new */
new Vue({
  el: '#app',
  router,
  components: { App },
  template: '<App/>'
})
Vue.js
在这里可以定义跳转到其他页面的连接
<template>
  <div id="app">

    <router-link to="/user">book</router-link>
    <router-view/>
  </div>
</template>

<script>
export default {
  name: 'App'
}
</script>

<style>
#app {
  font-family: 'Avenir', Helvetica, Arial, sans-serif;
  -webkit-font-smoothing: antialiased;
  -moz-osx-font-smoothing: grayscale;
  text-align: center;
  color: #2c3e50;
  margin-top: 60px;
}
</style>
配置的路由
在这里配置各个页面跳转的路由
import Vue from 'vue'
import Router from 'vue-router'

import UserList from '../components/UserList'
import Home from '../components/Home'


Vue.use(Router)

export default new Router({
  routes: [

  {
    path:'/user',
    component:UserList
    },
    {
      path:'/',
      component:Home
    }
  ]
})
组件1、
<template>
    <div>
      这里是首页
    </div>
</template>

<script>
    export default {
        name: "Home"
    }
</script>

<style scoped>

</style>
组件2
(每个组件之间都可以和后台数据交互通过axios)
提示: const _this =this变量的设置,否则会和回调函数搞混
这里和后台进行连接是通过url。这里的url是访问某一个接口的url,就相当于和某个方法进行打通
<template>
    <div>
      <table class="_table">
        <tr class="_tr">
          <td>姓名</td>
          <td>年龄</td>
          <td>邮箱</td>
        </tr>
        <tr v-for="item in books ">
          <td>{
  {item.bookAuthor}}</td>
          <td>{
  {item.bookName}}</td>
          <td>{
  {item.price}}</td>
        </tr>
      </table>

    </div>
</template>

<script>
    export default {
        name: "UserList",
      data(){
          return{
            books:[
              {
                bookName:'jav
最低0.47元/天 解锁文章


 3438
3438

 被折叠的 条评论
为什么被折叠?
被折叠的 条评论
为什么被折叠?
 到【灌水乐园】发言


