


定义一个按钮触发事件openManualInput
<el-button type="primary" @click="openManualInput">手工录入</el-button>这个触发的方法主要是清空数据,清空之后打开弹窗,然后可以往里面添加数据
const openManualInput = () => {
  // 1. 重置表单数据(直接操作 .value)
  newDevice.value = {
    label: '',
    code: '',
    parentCode: null
  };

  // 2. 清空错误提示
  codeError.value = '';

  // 3. 打开弹窗
  dialogVisible.value = true;

  // 4. 自动聚焦到输入框(使用 Vue 提供的 nextTick)
  nextTick(() => {
    const input = document.querySelector('.el-dialog [autofocus]');
    if (input) input.focus();
  });
};
弹窗的代码
<el-dialog v-model="dialogVisible" title="手工录入设备">
  <el-form :model="newDevice" label-width="100px" :rules="rules" ref="deviceForm" >
    <!-- 设备名称 -->
    <el-form-item label="设备名称" required prop="label">
      <el-input v-model="newDevice.label" placeholder="请输入设备名称" />
    </el-form-item>

    <!-- 设备编码(需唯一) -->
    <el-form-item label="设备编码" required prop="code">
      <el-input
        v-model="newDevice.code"
        placeholder="请输入唯一编码"
        @blur="validateCode"
      />

    </el-form-item>


     <el-form-item label="父节点">
      <el-tree-select
        v-model="newDevice.parentCode"
        :data="menulist"
        node-key="code"
        :props="{ label: 'label', children: 'children' }"
        placeholder="请选择父节点(不选则为根节点)"
        clearable
      />
    </el-form-item>
  </el-form>

  <div slot="footer">
    <el-button @click="dialogVisible = false">取消</el-button>
    <el-button type="primary" @click="submitDevice">确 定</el-button>
  </div>
</el-dialog> 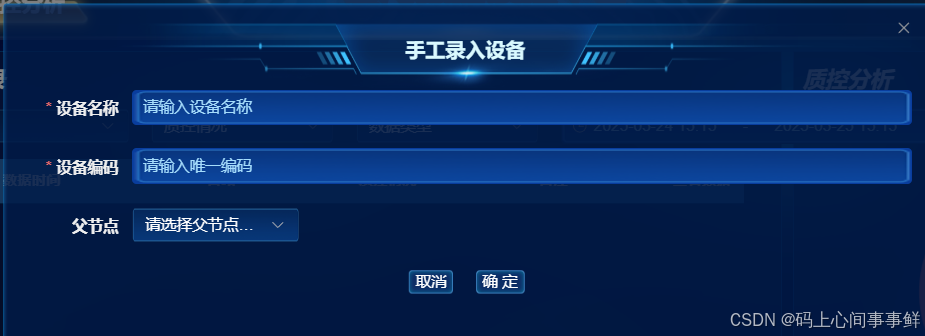
因为这里的设备数据是树状的,可能会有子设备,所以采用树状存储
一、对话框核心结构
<el-dialog v-model="dialogVisible" title="手工录入设备">- 双向绑定机制
v-model="dialogVisible"实现对话框显示/隐藏的双向绑定- 底层原理:相当于
:visible.sync="dialogVisible"的语法糖 - 当点击关闭按钮时,自动更新
dialogVisible为false
二、表单数据绑定
<el-form :model="newDevice" label-width="100px" :rules="rules" ref="deviceForm">-
数据模型绑定
:model="newDevice"将表单整体绑定到newDevice对象- 数据对象应包含:
{ label: '', code: '', parentCode: '' } ref="deviceForm"用于后续表单验证方法调用
-
验证规则配置
:rules="rules"接收验证规则对象-
这段代码定义了一个校验器函数,用于验证输入值是否已存在。具体功能如下:

接收三个参数:_(未使用),value(输入值),callback(回调函数)。
调用checkNameExists(value)检查名字是否存在。
如果名字已存在,通过callback返回错误信息“名字已存在”;否则调用callback()表示校验通过。
触发条件为blur和change事件。
const rules = reactive({
  label: [
    {
      validator: (_, value, callback) => {
        if (checkNameExists(value)) {
          callback(new Error('名字已存在'));
        } else {
          callback();
        }
      },
      trigger: ['blur', 'change']
    }
  ],
  code: [
    {
      validator: (_, value, callback) => {
        if (checkCodeExists(value)) {
          callback(new Error('编码已存在'));
        } else {
          callback();
        }
      },
      trigger: ['blur', 'change']
    }
  ]
})
三、表单字段详解
1. 设备名称输入
<el-form-item label="设备名称" required prop="label">
  <el-input v-model="newDevice.label" placeholder="请输入设备名称" />
</el-form-item>prop="label"对应rules中的验证规则required属性自动添加红色星号标识- 双向绑定直接关联
newDevice.label
2. 设备编码输入
<el-form-item label="设备编码" required prop="code">
  <el-input
    v-model="newDevice.code"
    placeholder="请输入唯一编码"
    @blur="validateCode"
  />
</el-form-item>@blur事件触发离焦验证- 建议的验证逻辑:

3. 树形选择组件
<el-tree-select
  v-model="newDevice.parentCode"
  :data="menulist"
  node-key="code"
  :props="{ label: 'label', children: 'children' }"
/>- 树形选择实现
- 使用Element UI Tree组件封装的树形选择器
node-key="code"指定节点唯一标识字段- 数据结构要求:
menulist: [ { code: '001', label: '父节点1', children: [ { code: '001-1', label: '子节点1' } ] } ] - 选择结果将存储父节点的
code值到newDevice.parentCode
四、表单提交控制
<div slot="footer">
  <el-button @click="dialogVisible = false">取消</el-button>
  <el-button type="primary" @click="submitDevice">确 定</el-button>
</div>
3. 表单验证
await deviceForm.value.validate();
alert(1111);
4. 构造新节点
const newNode = {
  code: newDevice.value.code,
  label: newDevice.value.label,
  children: []
};
5. 树形结构操作
if (newDevice.parentCode) {
  // 查找父节点逻辑
  const findParent = (nodes) => {
    for (const node of nodes) {
      if (node.code === newDevice.value.parentCode) {
        if (!node.children) node.children = [];
        node.children.push(newNode);
        return true;
      }
      if (node.children && findParent(node.children)) return true;
    }
    return false;
  };
  findParent(menulist.value);
} else {
  // 作为根节点插入
  menulist.value.push(newNode);
}
6. 重置状态
dialogVisible.value = false;
newDevice.value = { label: '', code: '', parentCode: null };
代码特点分析
流程图解
开始
  │
  ├─ 表单验证 → 失败 → 错误处理
  │
  └─ 验证通过 → 创建节点 → 查找父节点位置
                   │
                   ├─ 有父节点 → 插入到父children
                   │
                   └─ 无父节点 → 作为根节点
                           │
                           └─ 重置表单/关闭弹窗
这个函数典型应用于管理系统中的树形数据维护场景,如设备分类、组织架构、菜单管理等需要层级结构管理的功能模块。
- 提交方法示例
const submitDevice = async () => {
  try {
    // 先进行表单校验

    await deviceForm.value.validate();
    alert(1111);
    // 构造新节点对象
    const newNode = {
      code: newDevice.value.code,
      label: newDevice.value.label,
      children: []
    };

    // 查找父节点并插入
    if (newDevice.parentCode) {
      const findParent = (nodes) => {
        for (const node of nodes) {
          if (node.code === newDevice.value.parentCode) {
            if (!node.children) node.children = [];
            node.children.push(newNode);
            return true;
          }
          if (node.children && findParent(node.children)) return true;
        }
        return false;
      };
      findParent(menulist.value);
    } else {
      // 作为根节点插入
     menulist.value.push(newNode);
    }

    // 重置表单
    dialogVisible.value = false;
    newDevice.value = { label: '', code: '', parentCode: null };
  }
   catch (err) {
    console.log('校验未通过:', err);
    console.log('具体验证错误:', err); // 打印错误详情
    ElMessage.error('请检查必填项') // 添加ElementUI错误提示
  }}
1. 函数定义
const submitDevice = async () => { - 定义一个异步箭头函数
submitDevice,用于处理设备提交逻辑 -
2. 错误处理结构
try { // ... } catch (err) { console.log('校验未通过:', err); ElMessage.error('请检查必填项') } - 使用
try/catch捕获同步/异步错误 - 错误时打印日志并显示ElementUI的错误提示
deviceForm.value.validate():调用ElementUI表单组件的异步验证方法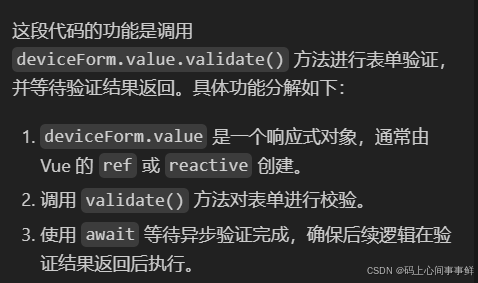
await:等待验证完成,验证失败会抛出错误alert(1111):调试用提示,正式环境应移除- 创建符合树形结构要求的新节点对象
- 包含:
- code:设备唯一标识
- label:显示名称
- children:空数组用于子节点
- 存在父节点:
- 递归遍历
menulist树结构 - 找到对应父节点后插入新节点
- 自动初始化children数组(防御性编程)
- 递归遍历
- 无父节点:
- 直接作为根节点插入数组
- 关闭弹窗对话框
- 清空表单数据,准备下次输入
-
响应式数据管理:
- 使用
.value访问(可能来自Vue3 Composition API或Vue2.7+) - 操作
menulist.value树形数据,会触发视图更新
- 使用
-
树形结构操作:
- 深度优先递归搜索
- 支持动态子节点初始化
- 支持多级嵌套插入
-
潜在优化点:
- 递归算法可能影响性能(大数据量时)
- 缺少code唯一性校验
- 直接修改原始数据(可考虑深拷贝避免副作用)
-
业务逻辑:
- 实现设备信息的树形结构管理
- 支持多层级设备分类
- 表单驱动的数据提交
五、数据流向示意图
dialogVisible(控制显示)
  ↑↓
el-dialog
  |
newDevice(数据对象)
  ├─ label → 设备名称
  ├─ code → 设备编码
  └─ parentCode → 树形选择值
  ↓
el-form → 提交 → 后端接口


 被折叠的 条评论
为什么被折叠?
被折叠的 条评论
为什么被折叠?
 到【灌水乐园】发言


