


view机text常用视图容器组件
view
属性说明
| 属性名 | 类型 | 默认值 | 说明 |
|---|---|---|---|
| hover-class | String | none | 指定按下去的样式类。当 hover-class="none" 时,没有点击态效果 |
| hover-stop-propagation | Boolean | false | 指定是否阻止本节点的祖先节点出现点击态,App、H5、支付宝小程序、百度小程序不支持(支付宝小程序、百度小程序文档中都有此属性,实测未支持) |
| hover-start-time | Number | 50 | 按住后多久出现点击态,单位毫秒 |
| hover-stay-time | Number | 400 | 手指松开后点击态保留时间,单位毫秒 |
text组件
文本组件。用于包裹文本内容。
| 属性名 | 类型 | 默认值 | 说明 | 平台差异说明 |
|---|---|---|---|---|
| selectable | Boolean | false | 文本是否可选 | |
| user-select | Boolean | false | 文本是否可选 | 微信小程序 |
| space | String | 显示连续空格 | 钉钉小程序不支持 | |
| decode | Boolean | false | 是否解码 | 百度、钉钉小程序不支持 |
属性 HarmonyOS Next 兼容性
| 名称 | HarmonyOS Next 兼容性 |
|---|---|
| selectable | HBuilderX 4.23 |
| space | HBuilderX 4.23 |
| decode | HBuilderX 4.23 |
space 值说明
| 值 | 说明 |
|---|---|
| ensp | 中文字符空格一半大小 |
| emsp | 中文字符空格大小 |
| nbsp | 根据字体设置的空格大小 |
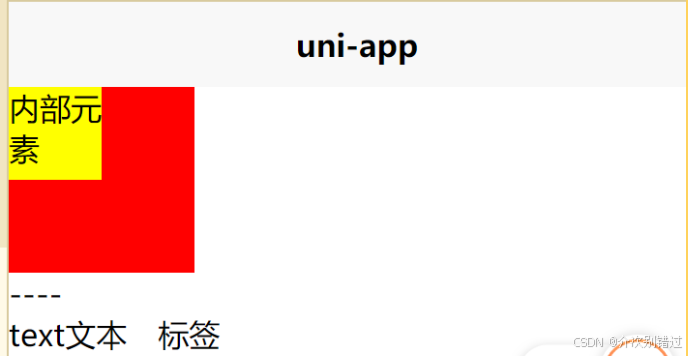
<template>
<view class="box" hover-class="boxHover">
	<view class="inner" hover-class="innerHover" hover-stop-propagation>
		内部元素
	</view>
</view>
<view>----</view>
<text selectable space="emsp">text文本              标签</text>
</template>

<script setup>

</script>

<style lang="scss">
.box{
	width: 200rpx;
	height: 200rpx;
	background-color: red;
}
.boxHover{
	width: 500rpx;
	height: 500rpx;
background-color: blue;
}

.inner{
width: 100rpx;
height: 100rpx;
background-color: yellow;
}
.innerHover{
	width:150rpx;
	height: 150rpx;
	background-color: green;
}

</style>
scroll-view可滚动视图区域组件
<template>
<scroll-view scroll-x class="scrollView">
	<view class="box">scroll子元素</view>
	<view class="box">scroll子元素</view>
	<view class="box">scroll子元素</view>
	<view class="box">scroll子元素</view>
	<view class="box">scroll子元素</view>
	<view class="box">scroll子元素</view>
	<view class="box">scroll子元素</view>
	<view class="box">scroll子元素</view>
	<view class="box">scroll子元素</view>
	<view class="box">scroll子元素</view>
	<view class="box">scroll子元素</view>
	<view class="box">scroll子元素</view>
	<view class="box">scroll子元素</view>
</scroll-view>
</template>

<script setup>

</script>

<style lang="scss">
.scrollView{
	width: 80%;
	height: 220px;
	border:1px solid red;
	white-space: nowrap;
	.box{
		width: 100px;
		height: 100px;
		background: green;
		display: inline-block;
		border: 1px solid blue;
		margin: 5px;
	}

}
</style>
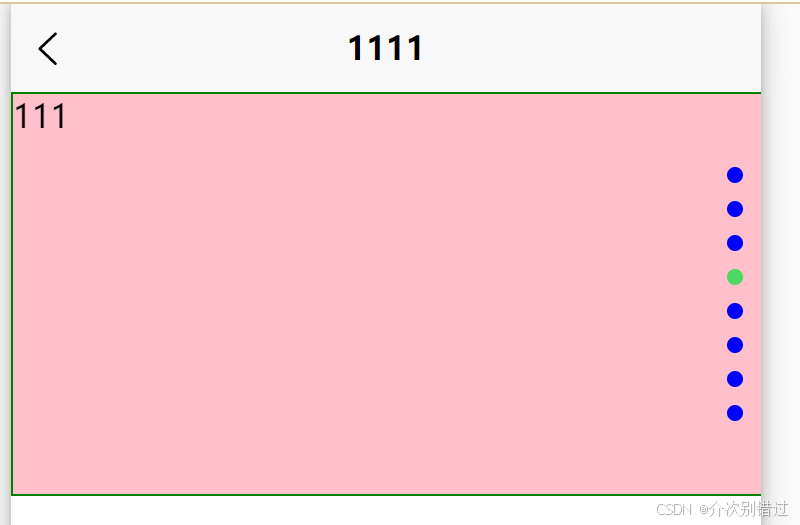
swiper滑块视图容器的用法
<template>
	<view>
		<swiper indicator-dots indicator-color="blue" indicator-active-color="#4cd964" circular
		autoplay="" vertical="" duration="50000000000000"
		>
			<swiper-item>111</swiper-item>
			<swiper-item>11122</swiper-item>
			<swiper-item>11133</swiper-item>
			<swiper-item>111444</swiper-item>
			<swiper-item>111444</swiper-item>
			<swiper-item>111444</swiper-item>
			<swiper-item>111444</swiper-item>
			<swiper-item>111444</swiper-item>
		</swiper>
	</view>
</template>

<script>
	export default {
		data() {
			return {

			}
		},
		methods: {

		}
	}
</script>

<style lang="scss">
swiper{
	width: 100vw;
	height: 200px;
	border: 1px solid green;
	swiper-item{
		width: 100%;
		height: 100%;
		background-color: pink;
	}
	swiper-item:nth-child(2n){
		background-color: orange;
	}
}


</style>
navigator路由与页面跳转
<navigator url="/pages/demo2/demo2">跳转到demo2</navigator>
常用的表单组件button和input
<button type="primary" :loading="false" :disabled="false">按钮</button><input type="number" placeholder="请输入搜索内容" />vue3的模板语法插值表达式用法
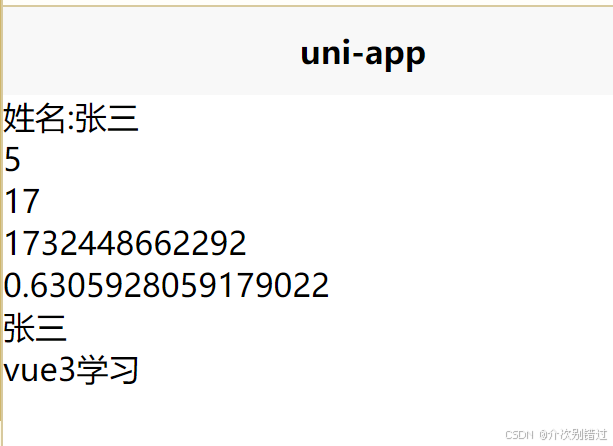
<template>
<view>姓名:张三</view>
<view>{{2+3}}</view>
<view>{{a+11}}</view>
<view>{{Date.now()}}</view>
<view>{{Math.random()}}</view>
<view>{{1<2?'张三':'李四'}}</view>
<view>{{fn()}}</view>
</template>

<script setup>
const a=6;
function fn(){
	return "vue3学习"
}

</script>

<style lang="scss">

</style>
使用ref定义响应式数据变量
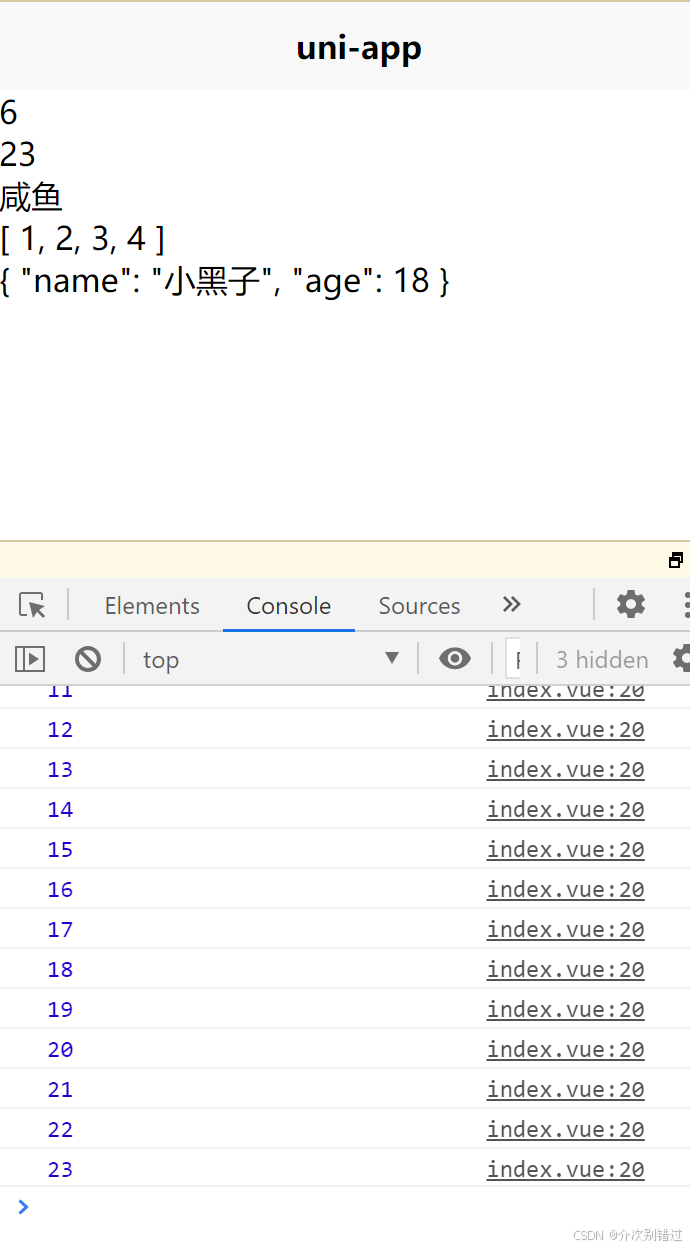
<template>
<view>{{num1}}</view>
<view>{{num2}}</view>
<view>{{test}}</view>
<view>{{arr}}</view>
<view>{{obj}}</view>
</template>

<script setup>
import { ref } from 'vue';
let num1=6
// setInterval(()=>{
// 	num1++;
// 	console.log(num1)
// },1000)
//响应式
let num2=ref(10);
setInterval(()=>{
	num2.value++;
	console.log(num2.value)
},1000)
let test=ref("咸鱼")
let arr=ref([1,2,3,4]);
let obj=ref({name:"黑子",age:18})
obj.value.name="小黑子"


</script>

<style lang="scss">

</style>
v-bind指令配合图片轮播案例
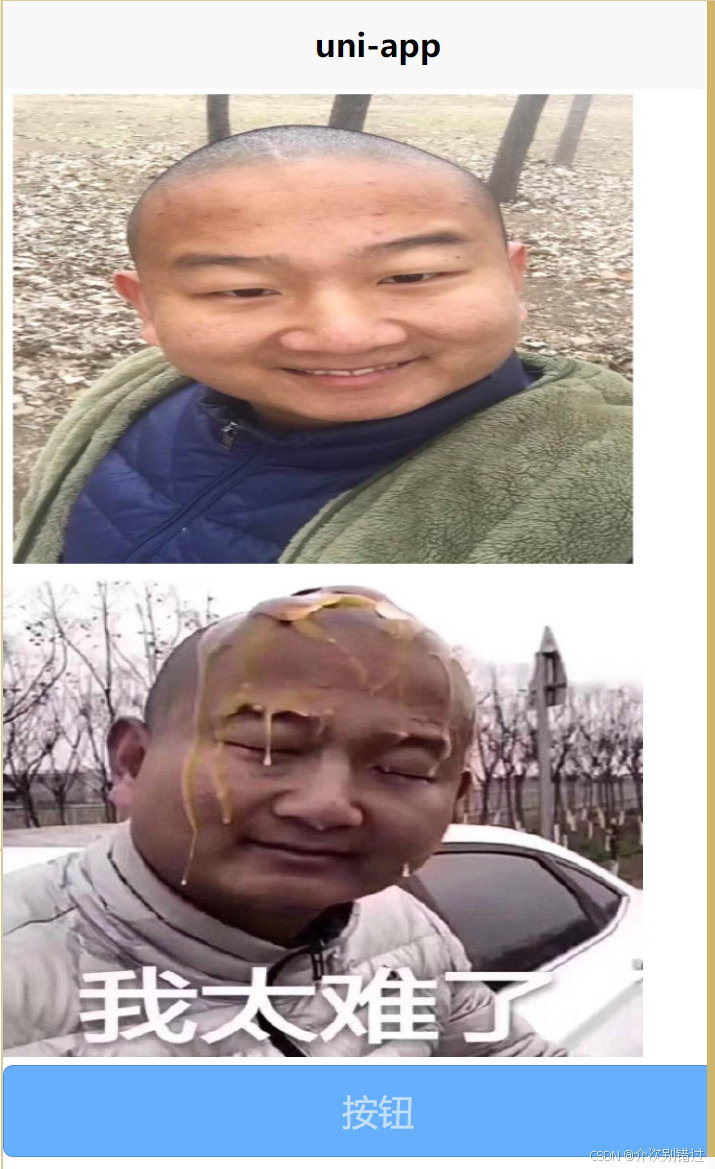
<template>
	<image v-bind:src="pic" mode=""></image>
	<image :src="arrs[2]" mode=""></image>
<button type="primary" :loading="false" disabled="false">按钮</button>
</template>

<script setup>
	import {
		ref
	} from "vue";
	const arrs = ref(["../../static/1.png", "../../static/2.jpg", "../../static/3.jpg", "../../static/4.jpg"])
	const pic = ref("../../static/1.png")
	let i=0;
	setInterval(()=>{
		i++;
		pic.value=arrs.value[i%4]
	},1000)

</script>

<style lang="scss">

</style>
class类和style内联样式的绑定

<template>
	<image v-bind:src="pic" mode=""></image>
	<image :src="arrs[2]" mode=""></image>
<button type="primary" :loading="false" disabled="false">按钮</button>
//多个样式切换
//响应式
<view class="box" :class="{active:isActive}" >
	v-bind指令多个样式切换
</view>
//三元表达式
<view class="box" :class="isActive?'active':''"></view>
<view class="box" style="width: 300px;">
	内联样式权重更高
</view>
<view class="box" :style="{width: '400px',height:100+'px',fontSize:size+'px'}">
	内联样式三目运算方法
</view>
</template>

<script setup>
	import {
		ref
	} from "vue";
	const isActive=ref(true);
	const arrs = ref(["../../static/1.png", "../../static/2.jpg", "../../static/3.jpg", "../../static/4.jpg"])
	const pic = ref("../../static/1.png")
	const size=ref(30)
	let i=0;
	setInterval(()=>{
		i++;
		size.value+=i;
		pic.value=arrs.value[i%4]
		//
		isActive.value=!isActive.value;
	},1000)

</script>

<style lang="scss">
.box{
	width: 200px;
	height: 200px;
	background: orange;
	font-size: 20px;
}
.active{
	background: green ;
	color: white;
}

</style>
原生事件监听及组件内置事件处理
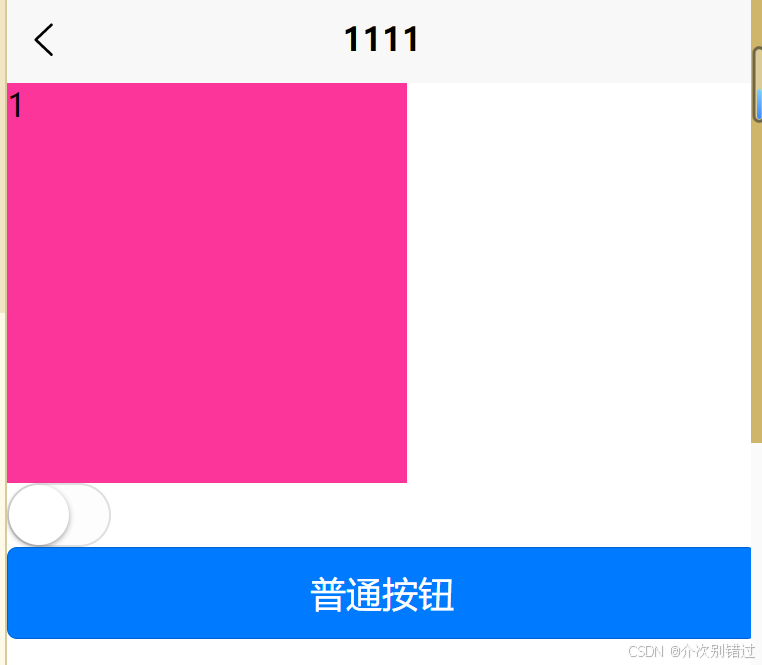
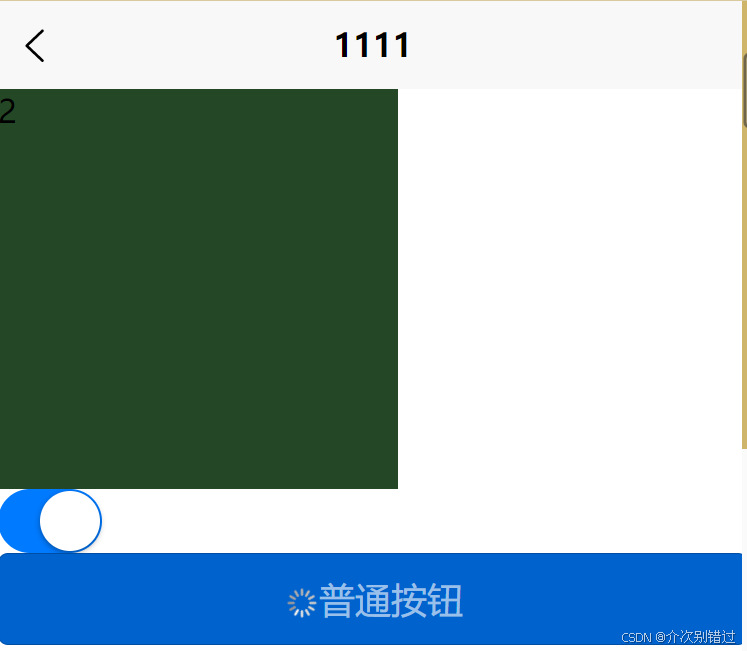
<template>
<view class="box" @click="onClick" :style="{background:color}">
{{num}}
</view>
<switch :checked="false" @change="onChange" />

<button type="primary" :loading="isLoading">普通按钮</button>
</template>

<script setup>
import {proxyRefs, ref} from "vue";
const num=ref(1);
const color=ref("#fc359a");
const isLoading=ref(false);
function onClick(){
	num.value++;
	color.value="#"+String(Math.random()).substring(3,9);
	// isLoading.value=true;
	console.log(String(Math.random()).substring(3,9))
}
function onChange(e){
	console.log(e.detail)
	isLoading.value=e.detail.value;
}

</script>

<style lang="scss">
.box{
	width: 200px;
	height: 200px;
	background: orange;
}


</style>
创建自定义模板快速创建uniapp的vue3页面结构
<template>
	<view class="">

	</view>
</template>
<script setup>

</script>
<style lang="scss" scoped>

</style>
v-if条件渲染及v-show的选择对比
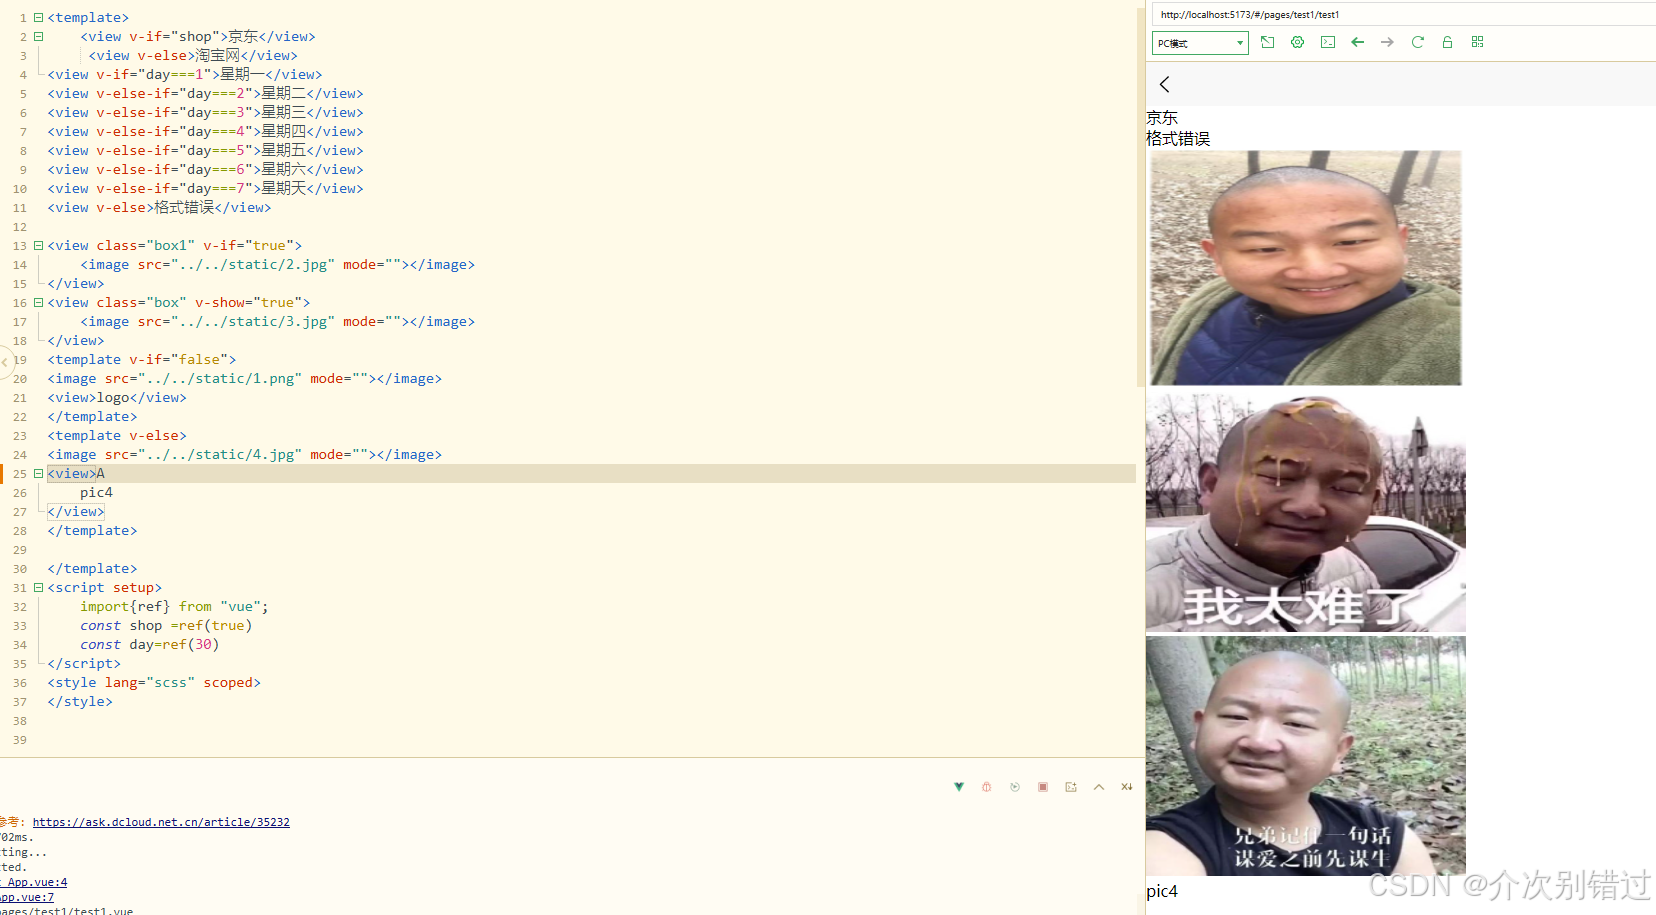
<template>
	<view v-if="shop">京东</view>
     <view v-else>淘宝网</view>
<view v-if="day===1">星期一</view>
<view v-else-if="day===2">星期二</view>
<view v-else-if="day===3">星期三</view>
<view v-else-if="day===4">星期四</view>
<view v-else-if="day===5">星期五</view>
<view v-else-if="day===6">星期六</view>
<view v-else-if="day===7">星期天</view>
<view v-else>格式错误</view>

<view class="box1" v-if="true">
	<image src="../../static/2.jpg" mode=""></image>
</view>
<view class="box" v-show="true">
	<image src="../../static/3.jpg" mode=""></image>
</view>
<template v-if="false">
<image src="../../static/1.png" mode=""></image>
<view>logo</view>
</template>
<template v-else>
<image src="../../static/4.jpg" mode=""></image>
<view>A
	pic4
</view>
</template>

</template>
<script setup>
	import{ref} from "vue";
	const shop =ref(true)
	const day=ref(30)
</script>
<style lang="scss" scoped>
</style>
v-for列表渲染的用法
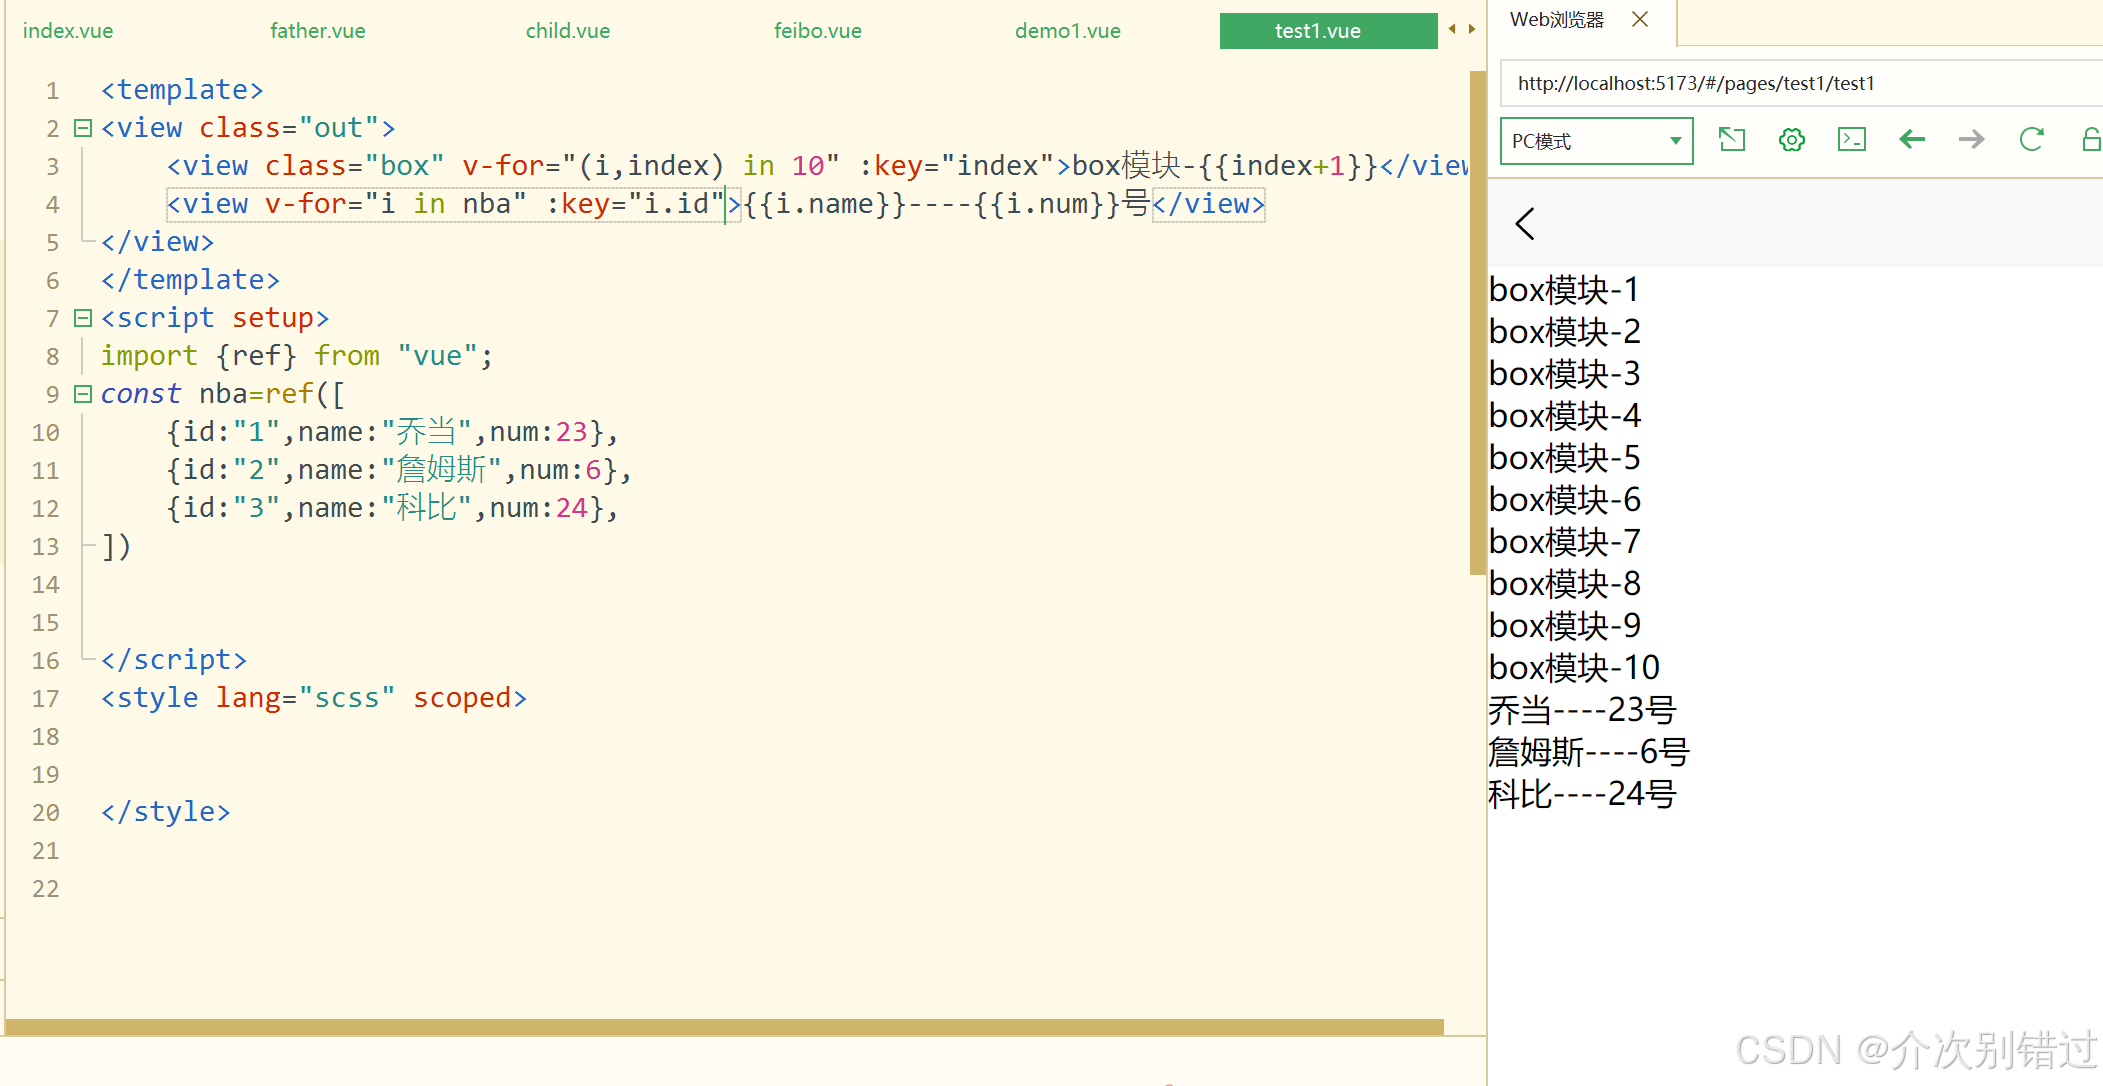
<template>
<view class="out">
	<view class="box" v-for="(i,index) in 10" :key="index">box模块-{{index+1}}</view>
	<view v-for="i in nba" :key="i.id">{{i.name}}----{{i.num}}号</view>
</view>
</template>
<script setup>
import {ref} from "vue";
const nba=ref([
	{id:"1",name:"乔当",num:23},
	{id:"2",name:"詹姆斯",num:6},
	{id:"3",name:"科比",num:24},
])


</script>
<style lang="scss" scoped>


</style>
[购物车案例]for循环为什么使用key
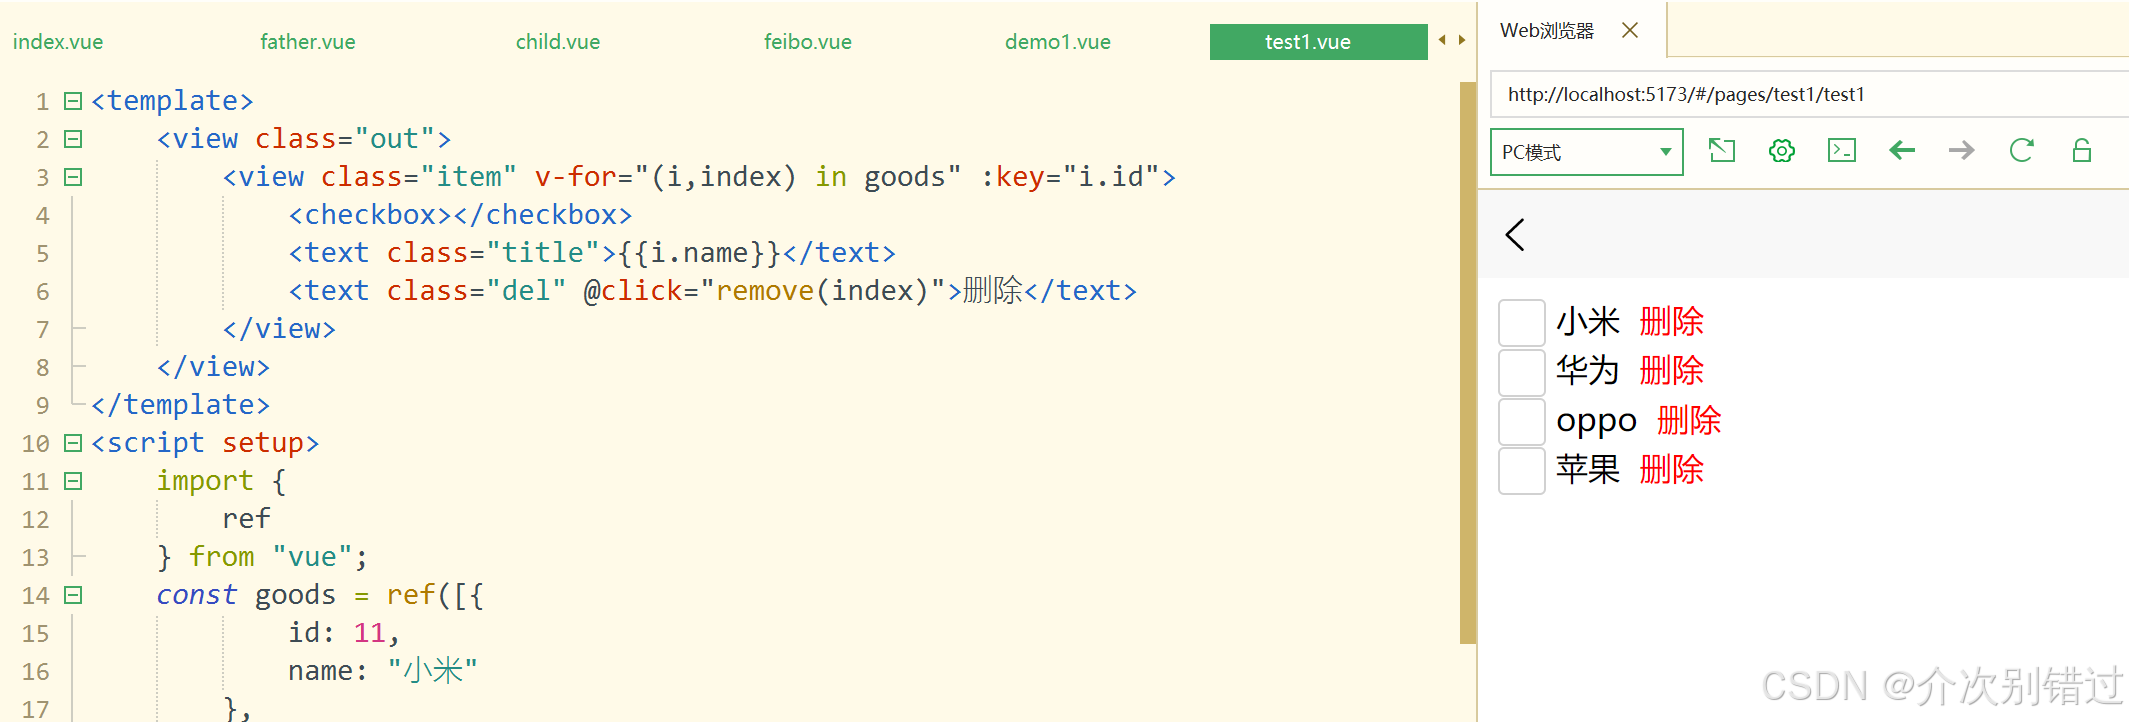
<template>
	<view class="out">
		<view class="item" v-for="(i,index) in goods" :key="i.id">
			<checkbox></checkbox>
			<text class="title">{{i.name}}</text>
			<text class="del" @click="remove(index)">删除</text>
		</view>
	</view>
</template>
<script setup>
	import {
		ref
	} from "vue";
	const goods = ref([{
			id: 11,
			name: "小米"
		},
		{
			id: 22,
			name: "华为"
		},
		{
			id: 33,
			name: "oppo"
		},
		{
			id: 44,
			name: "苹果"
		},
	])

	function remove(e) {
		console.log(e);
		goods.value.splice(e, 1)
	}
</script>
<style lang="scss" scoped>
	.out {
		padding: 10px;

		.item {
			padding: 0px 0;

			.del {
				padding-left: 10px;
				color: red;
			}
		}
	}
</style>
【小鸡案例】表单focus和blur事件用法
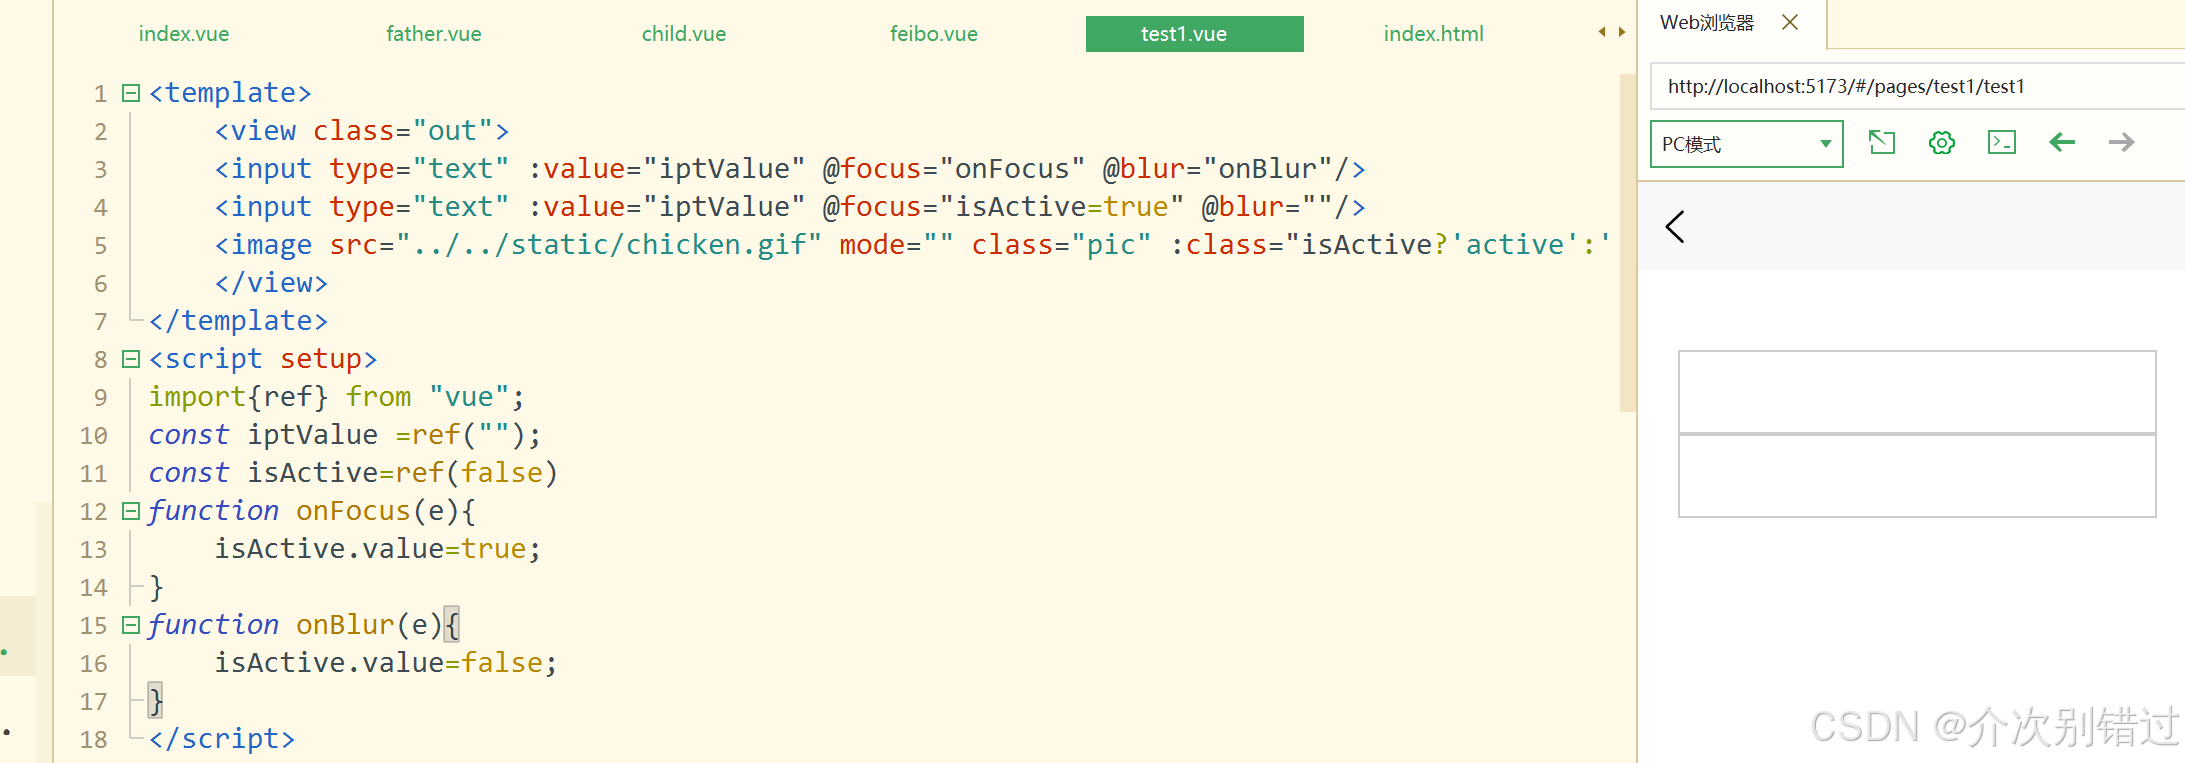
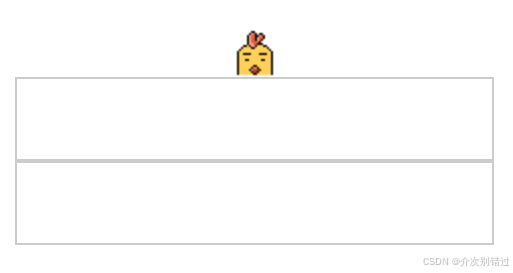
<template>
	<view class="out">
	<input type="text" :value="iptValue" @focus="onFocus" @blur="onBlur"/>
	<input type="text" :value="iptValue" @focus="isActive=true" @blur=""/>
	<image src="../../static/chicken.gif" mode="" class="pic" :class="isActive?'active':''"></image>
	</view>
</template>
<script setup>
import{ref} from "vue";
const iptValue =ref("");
const isActive=ref(false)
function onFocus(e){
	isActive.value=true;
}
function onBlur(e){
	isActive.value=false;
}
</script>
<style lang="scss" scoped>
	.out {
		padding: 0 20px;
		margin-top: 40px;
		position: relative;
		input{
		border: 1px solid #ccc;
			height: 40px;
			position: relative;
			z-index: 2;
			background: #fff;
		}
		.pic{
			width: 24px;
			height: 24px;
			z-index: 1;
			position: absolute;
			top: 0px;
			left: calc(50% - 12px);
			transition: top 0.3s;
		}
		.pic.active{
			top: -24px;
		}
	}
</style>as
v-model双向绑定的实现原理
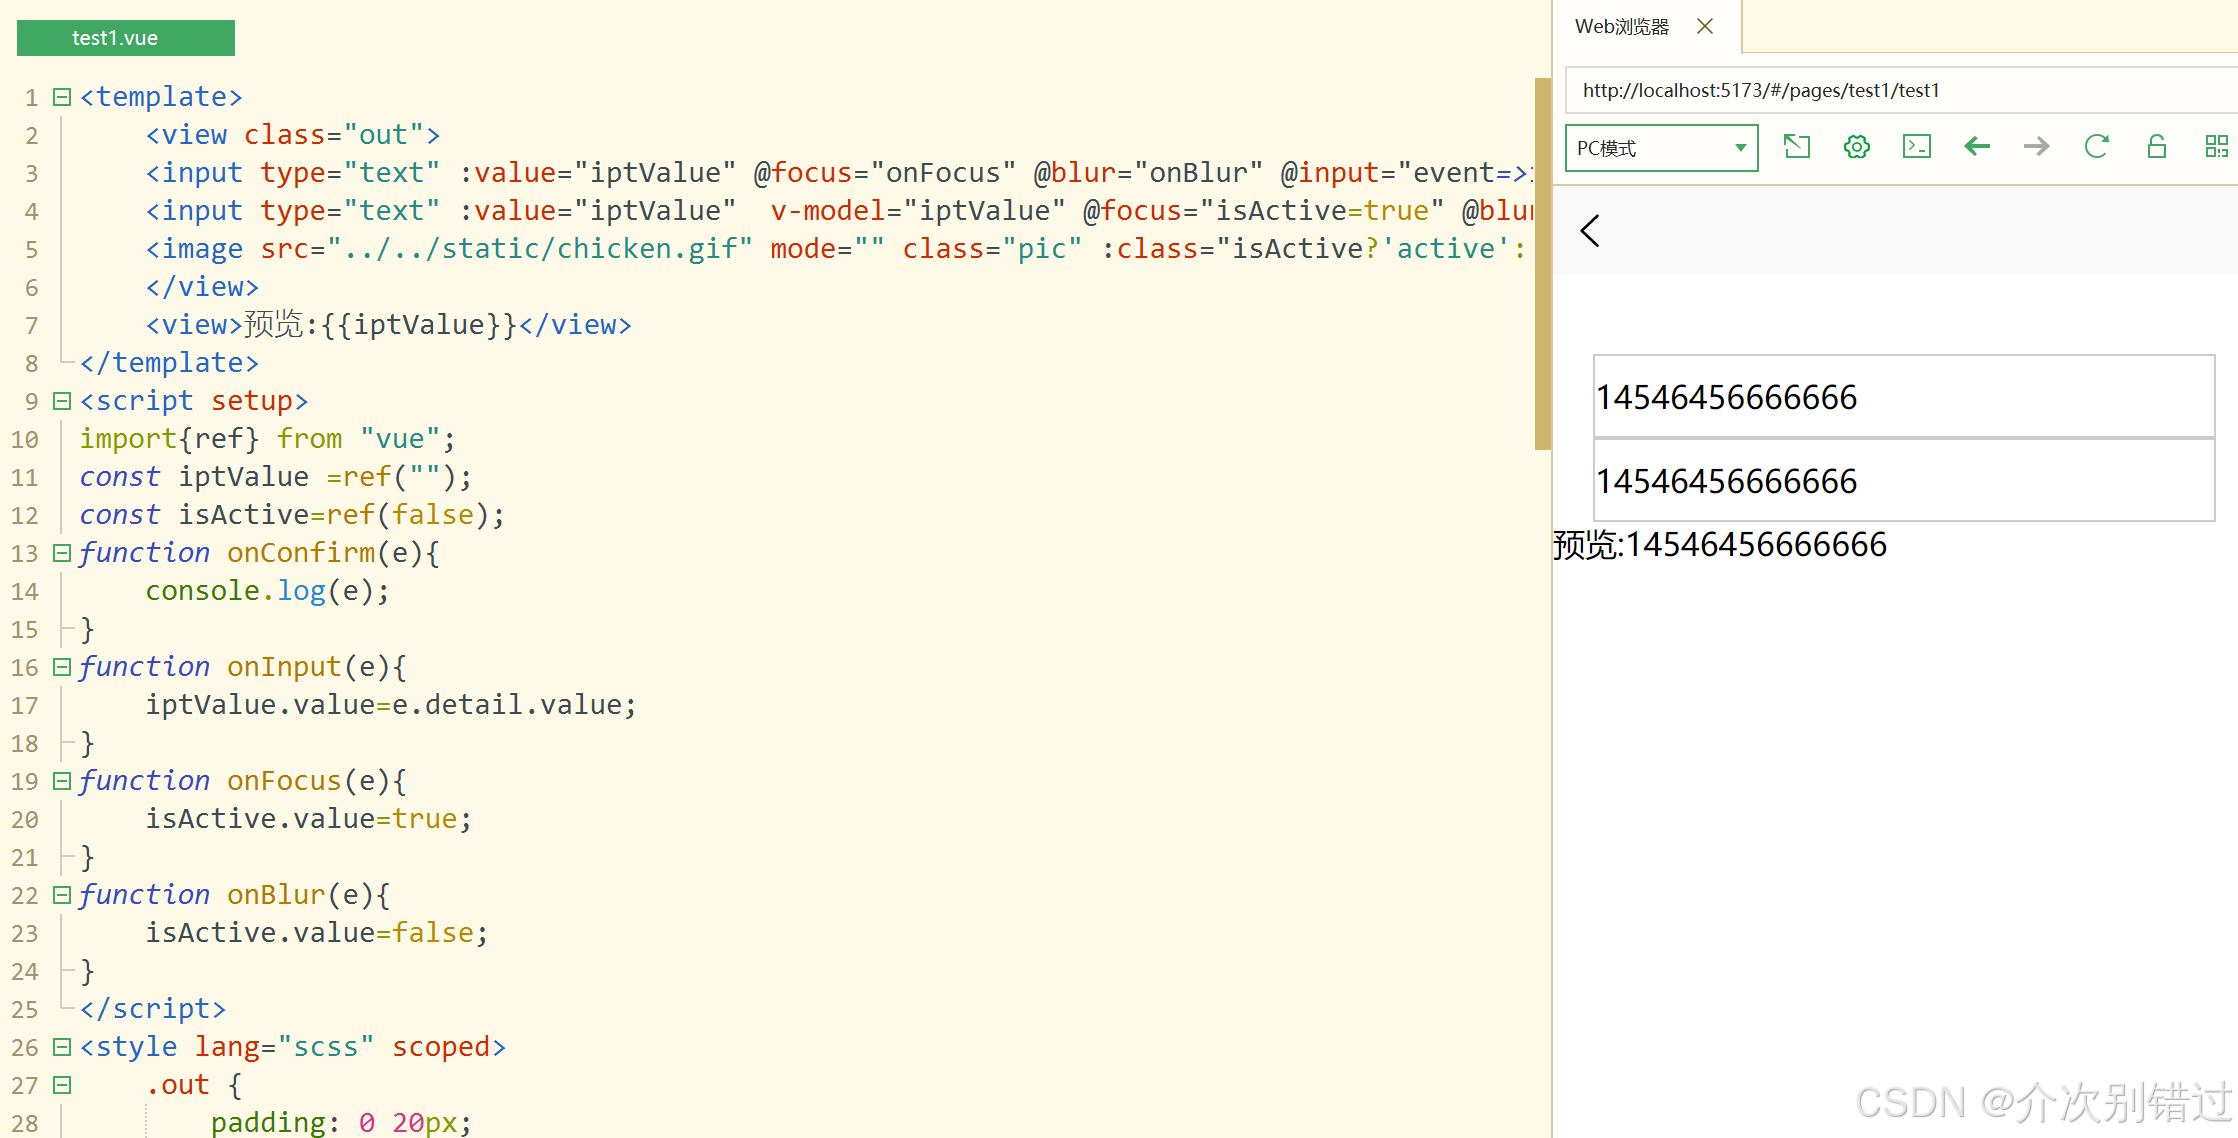
<template>
	<view class="out">
	<input type="text" :value="iptValue" @focus="onFocus" @blur="onBlur" @input="event=>iptValue=event.detail.value" @confirm="onConfirm"/>
	<input type="text" :value="iptValue"  v-model="iptValue" @focus="isActive=true" @blur=""/>
	<image src="../../static/chicken.gif" mode="" class="pic" :class="isActive?'active':''"></image>
	</view>
	<view>预览:{{iptValue}}</view>
</template>
<script setup>
import{ref} from "vue";
const iptValue =ref("");
const isActive=ref(false);
function onConfirm(e){
	console.log(e);
}
function onInput(e){
	iptValue.value=e.detail.value;
}
function onFocus(e){
	isActive.value=true;
}
function onBlur(e){
	isActive.value=false;
}
</script>
<style lang="scss" scoped>
	.out {
		padding: 0 20px;
		margin-top: 40px;
		position: relative;
		input{
		border: 1px solid #ccc;
			height: 40px;
			position: relative;
			z-index: 2;
			background: #fff;
		}
		.pic{
			width: 24px;
			height: 24px;
			z-index: 1;
			position: absolute;
			top: 0px;
			left: calc(50% - 12px);
			transition: top 0.3s;
		}
		.pic.active{
			top: -24px;
		}
	}
</style>as
【热梗案例】知识点阶段性综合汇总
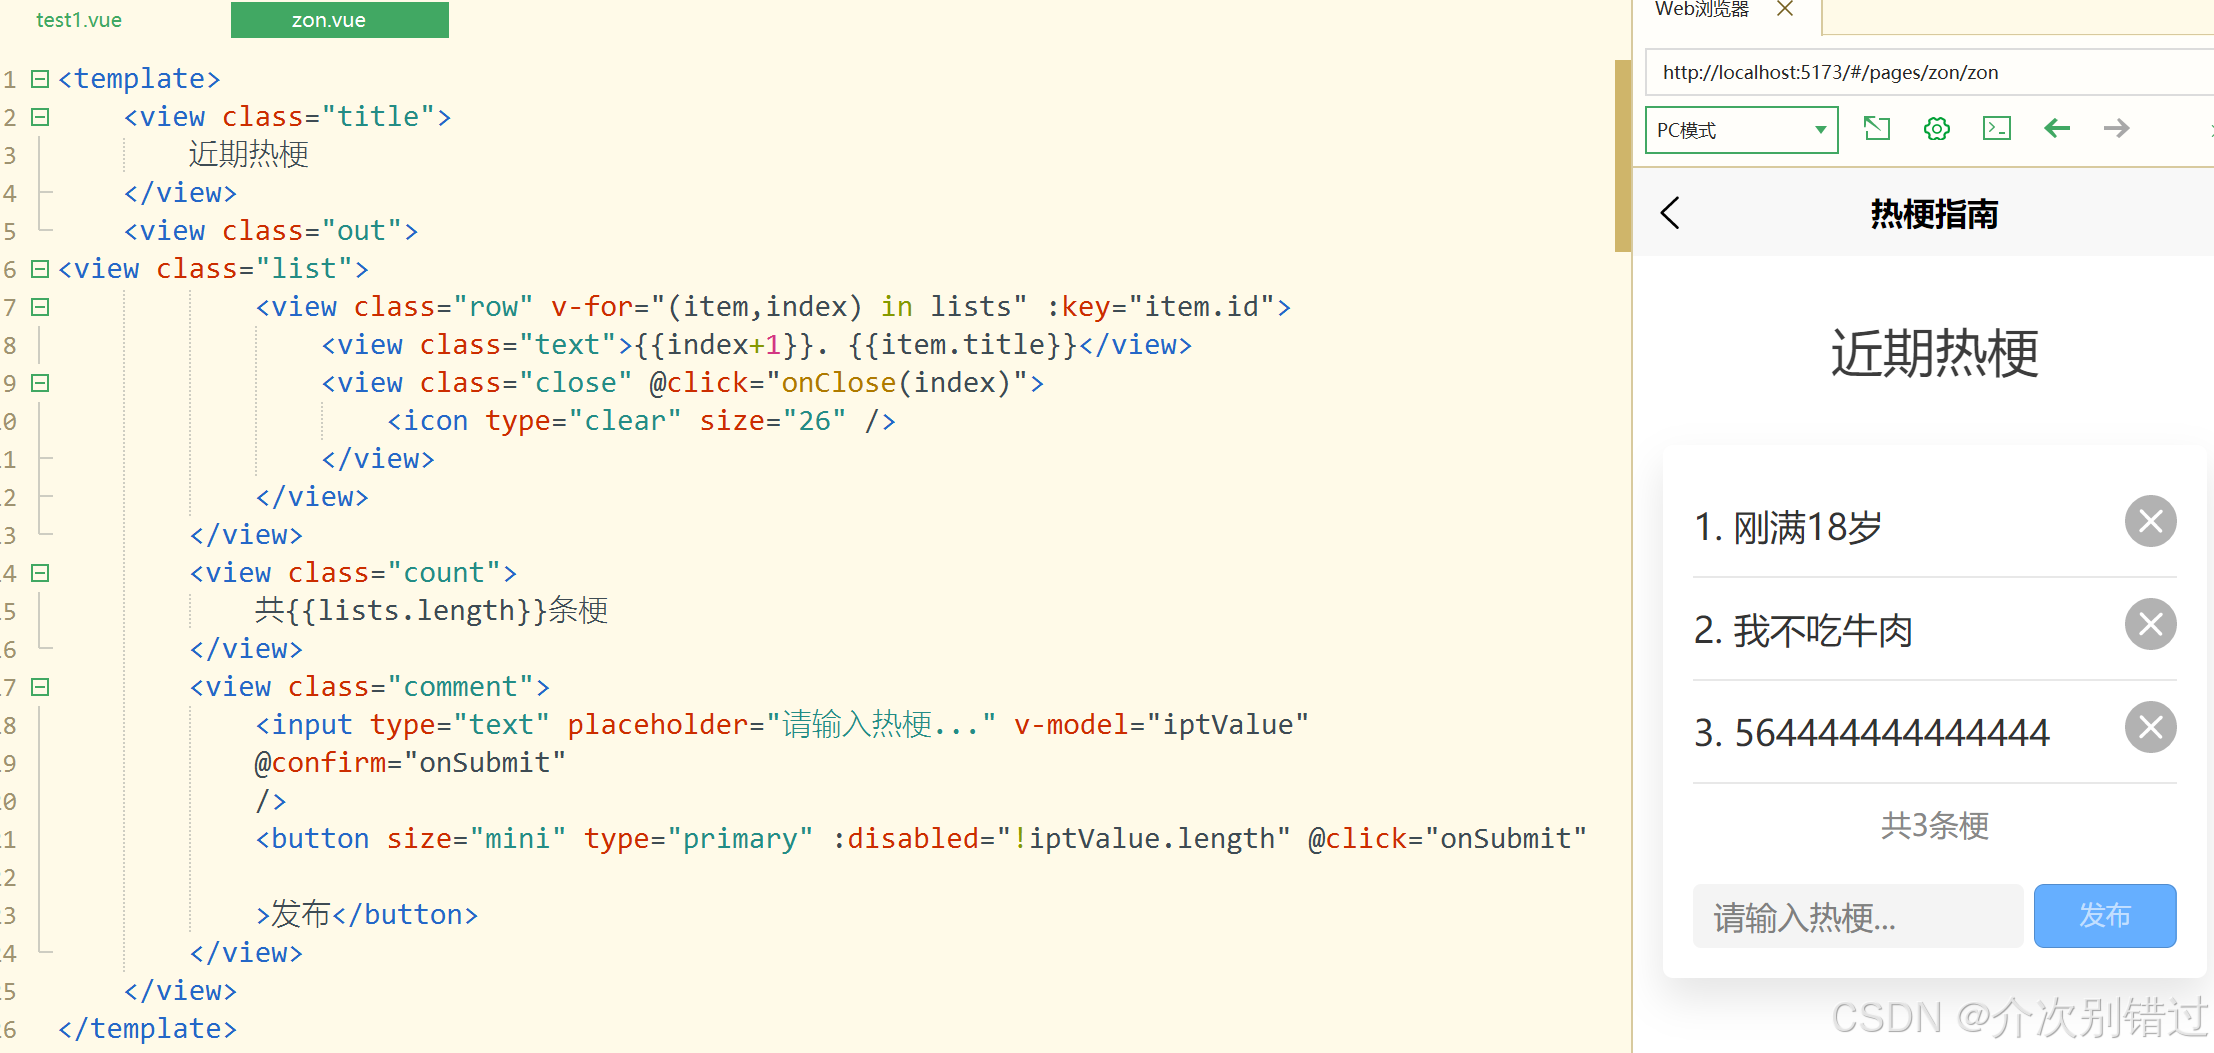
<template>
	<view class="title">
		近期热梗
	</view>
	<view class="out">
<view class="list">
			<view class="row" v-for="(item,index) in lists" :key="item.id">
				<view class="text">{{index+1}}. {{item.title}}</view>
				<view class="close" @click="onClose(index)">
					<icon type="clear" size="26" />
				</view>
			</view>
		</view>
		<view class="count">
			共{{lists.length}}条梗
		</view>
		<view class="comment">
			<input type="text" placeholder="请输入热梗..." v-model="iptValue"
			@confirm="onSubmit"
			/>
			<button size="mini" type="primary" :disabled="!iptValue.length" @click="onSubmit"

			>发布</button>
		</view>
	</view>
</template>

<script setup>
	import {
		ref
	} from "vue";
	const iptValue = ref("");
	const lists = ref([{
			id: 111,
			title: "刚满18岁"
		},
		{
			id: 222,
			title: "我不吃牛肉"
		},
		{
			id: 333,
			title: "遥遥领先"
		},
		{
			id: 444,
			title: "哪里贵了"
		}
	])
	const onClose = function(index) {
		lists.value.splice(index, 1)
	}
	const onSubmit = function() {
		lists.value.push({
			id: Date.now(),
			title: iptValue.value
		});
		iptValue.value = "";
	}
</script>

<style lang="scss" scoped>
	.title {
		font-size: 26px;
		text-align: center;
		color: #3c3c3c;
		padding: 30px 0 15px;
	}

	.out {
		width: 90vw;
		margin: 15px auto;
		box-shadow: 0 10px 20px rgba(0, 0, 0, 0.1);
		border-radius: 5px;
		padding: 15px;
		box-sizing: border-box;

		.list {
			.row {
				padding: 10px 0;
				border-bottom: 1px solid #e8e8e8;
				display: flex;
				justify-content: space-between;
				align-items: center;
				font-size: 18px;
				color: #333;

				.text {
					padding-right: 5px;
					box-sizing: border-box;
				}
			}
		}

		.count {
			padding: 10px 0;
			font-size: 15px;
			color: #888;
			text-align: center;
		}

		.comment {
			display: flex;
			margin-top: 10px;

			input {
				flex: 4;
				background: #f4f4f4;
				margin-right: 5px;
				height: 100%;
				height: 32px;
				border-radius: 4px;
				padding: 0 10px;
				color: #333;
			}

			button {
				flex: 1;
			}
		}
	}
</style>
computed计算属性用法及方法对比
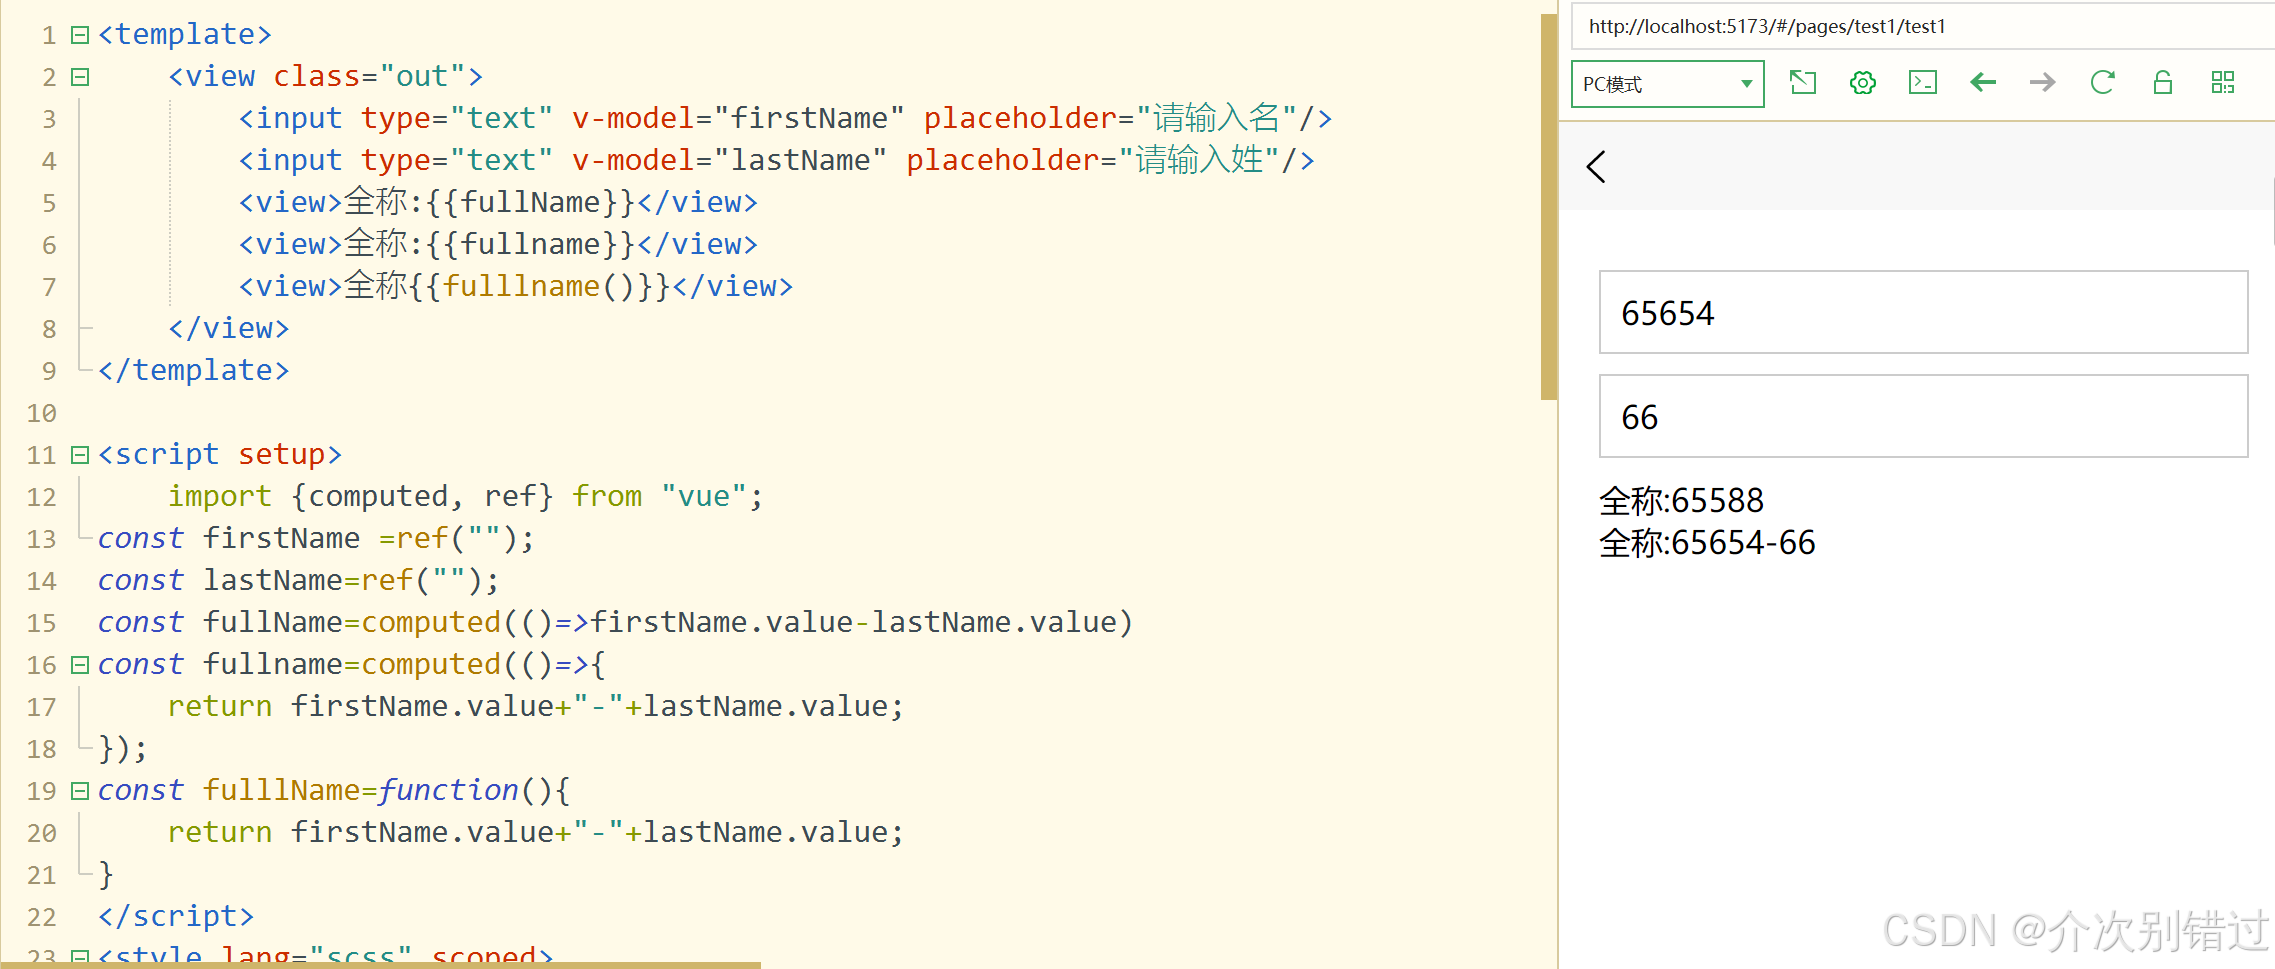
<template>
	<view class="out">
		<input type="text" v-model="firstName" placeholder="请输入名"/>
		<input type="text" v-model="lastName" placeholder="请输入姓"/>
		<view>全称:{{fullName}}</view>
		<view>全称:{{fullname}}</view>
		<view>全称{{fulllname()}}</view>
	</view>
</template>

<script setup>
	import {computed, ref} from "vue";
const firstName	=ref("");
const lastName=ref("");
const fullName=computed(()=>firstName.value-lastName.value)
const fullname=computed(()=>{
	return firstName.value+"-"+lastName.value;
});
const fulllName=function(){
	return firstName.value+"-"+lastName.value;
}
</script>
<style lang="scss" scoped>
	.out{
	padding: 20px;
	input{
		border: 1px solid #ccc;
		height: 40px;
		padding: 0 10px;
		margin: 10px 0;
	}
	}
</style>
【计价案例】计算属性配合循环遍历统计总价
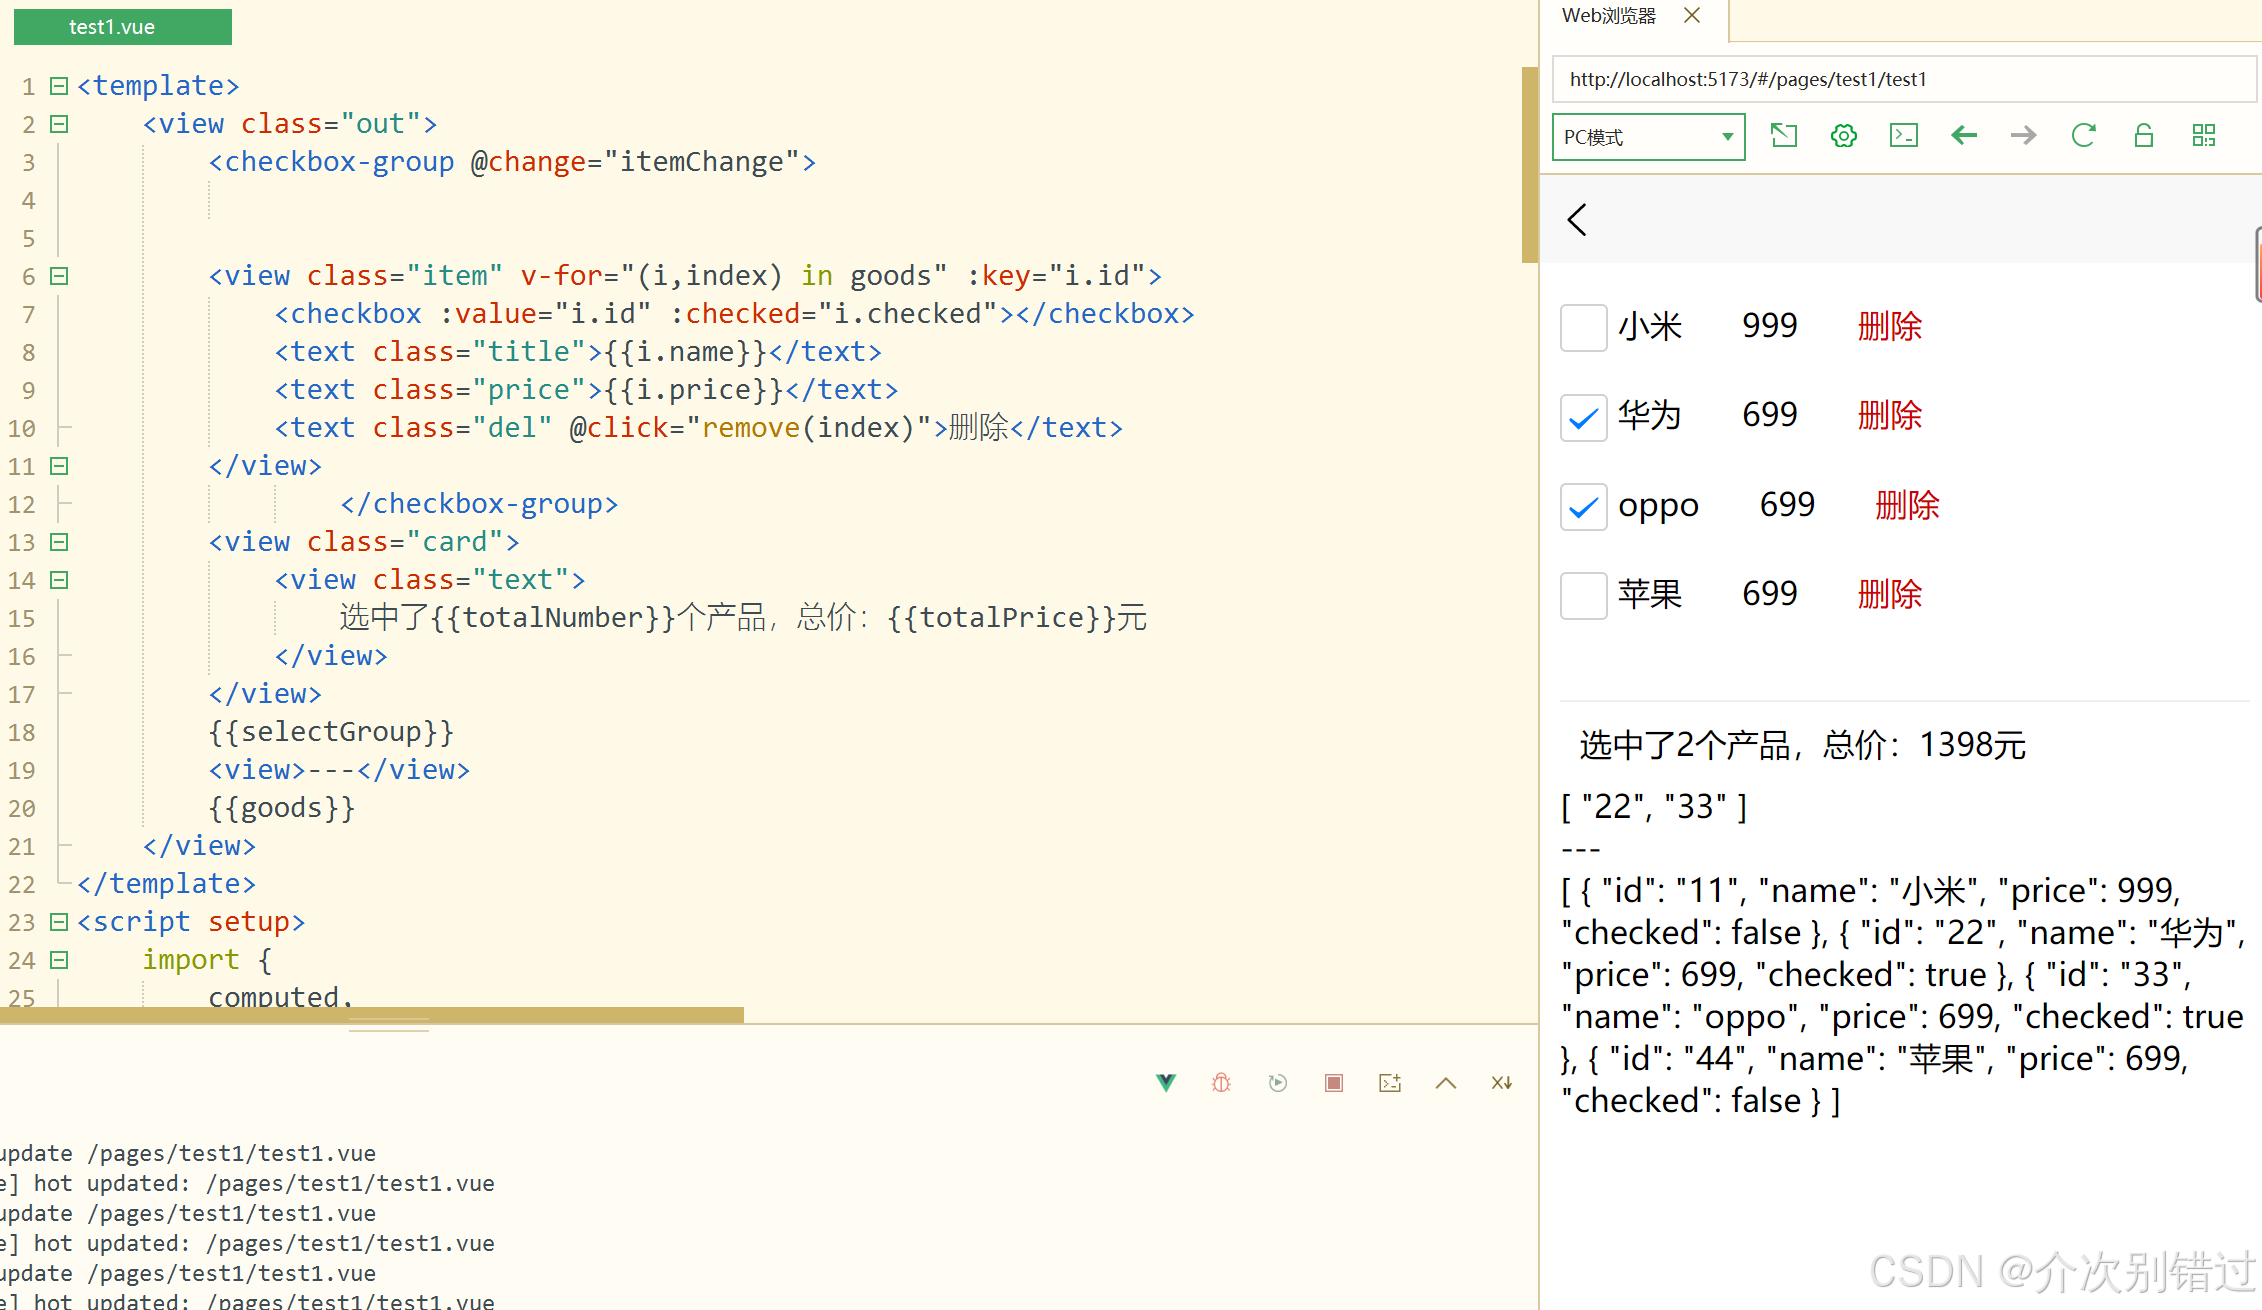
<template>
	<view class="out">
		<checkbox-group @change="itemChange">


		<view class="item" v-for="(i,index) in goods" :key="i.id">
			<checkbox :value="i.id" :checked="i.checked"></checkbox>
			<text class="title">{{i.name}}</text>
			<text class="price">{{i.price}}</text>
			<text class="del" @click="remove(index)">删除</text>
		</view>
				</checkbox-group>
		<view class="card">
			<view class="text">
				选中了{{totalNumber}}个产品,总价:{{totalPrice}}元
			</view>
		</view>
		{{selectGroup}}
		<view>---</view>
		{{goods}}
	</view>
</template>
<script setup>
	import {
		computed,
		ref
	} from "vue";
	const goods = ref([{
			id: "11",
			name: "小米",
			price:999,
			checked:false,
		},
		{
			id: "22",
			name: "华为",
			price:699,
			checked:false,
		},
		{
			id: "33",
			name: "oppo",
			price:699,
			checked:false,
		},
		{
			id: "44",
			name: "苹果",
			price:699,
			checked:false,
		},
	])
const selectGroup=ref([]);
const totalNumber=computed(()=>selectGroup.value.length);
const totalPrice=computed(()=>{
	return goods.value.filter(item=>item.checked).reduce((prev,curr)=>prev+curr.price,0)
});
	function remove(e) {
		console.log(e);
		goods.value.splice(e, 1)
	}
	function itemChange(e){
		selectGroup.value=e.detail.value;
		goods.value.forEach(item=>{
			item.checked=selectGroup.value.includes(item.id);
		})
	};
</script>
<style lang="scss" scoped>
	.out {
		padding: 10px;

		.item {
			padding: 10px 0;

			.price {
				margin-left: 30px;
			}

			.del {
				color: #c00;
				margin-left: 30px;
			}
		}
		.card{
			margin-top:30px;
			border-top:1px solid #eee ;
			padding: 10px;
		}
	}
</style>
watch和watchEffect监听的使用
在Vue3中,computed和watch都是用于响应式地处理数据变化的工具,但它们有一些重要的异同点。
异同点如下:
计算属性 (Computed):
- 计算属性是基于它们的依赖进行缓存的。只有在依赖发生变化时,计算属性才会重新计算,可以避免不必要的重复计算。
- 计算属性适用于派生出一些新的数据,比如对数据进行过滤、排序、格式化等操作。
- 计算属性可以像普通属性一样使用,而不需要在模板中调用方法。
- 计算属性中的函数必须有return返回值
监听属性 (Watch):
- 监听属性允许我们在数据变化时执行异步操作或复杂的逻辑。
- 监听属性适用于对数据变化做出响应,比如在数据变化时发送请求、处理副作用等。
- 监听属性可以监听一个或多个数据的变化,并在数据变化时执行相应的操作。
- 监听属性中的函数不是必须要用return返回值。
相似之处:
- 计算属性和监听属性都可以依赖于响应式数据。
- 它们都可以用于监测数据的变化,并作出相应的处理。
总的来说,计算属性适用于派生出新的数据,而监听属性适用于在数据变化时执行异步操作或复杂逻辑。
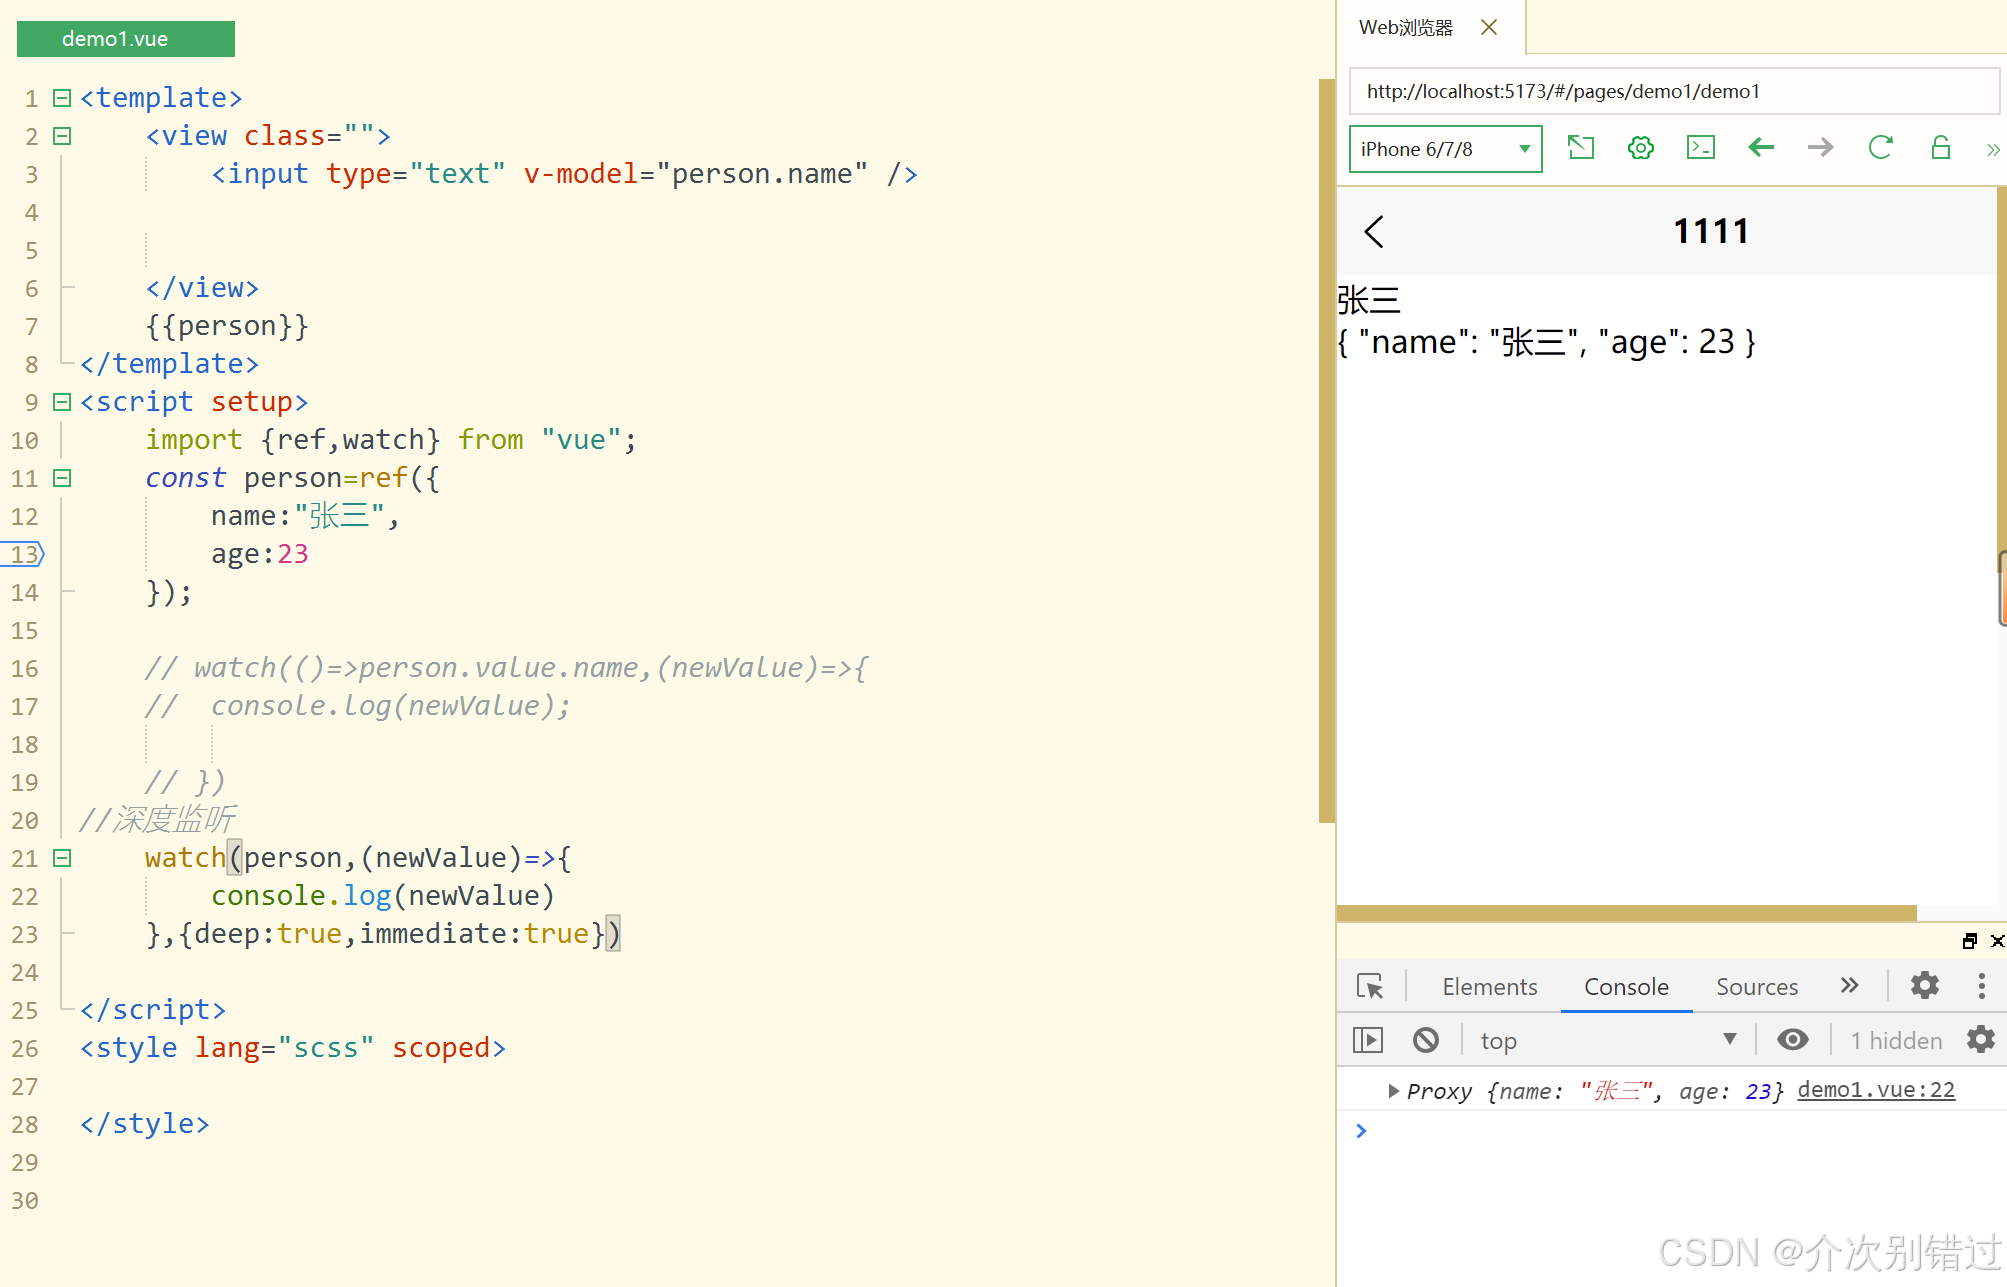
<template>
	<view class="">
		<input type="text" v-model="person.name" />


	</view>
	{{person}}
</template>
<script setup>
	import {ref,watch} from "vue";
	const person=ref({
		name:"张三",
		age:23
	});

	// watch(()=>person.value.name,(newValue)=>{
	// 	console.log(newValue);

	// })
//深度监听
	watch(person,(newValue)=>{
		console.log(newValue)
	},{deep:true,immediate:true})

</script>
<style lang="scss" scoped>

</style>
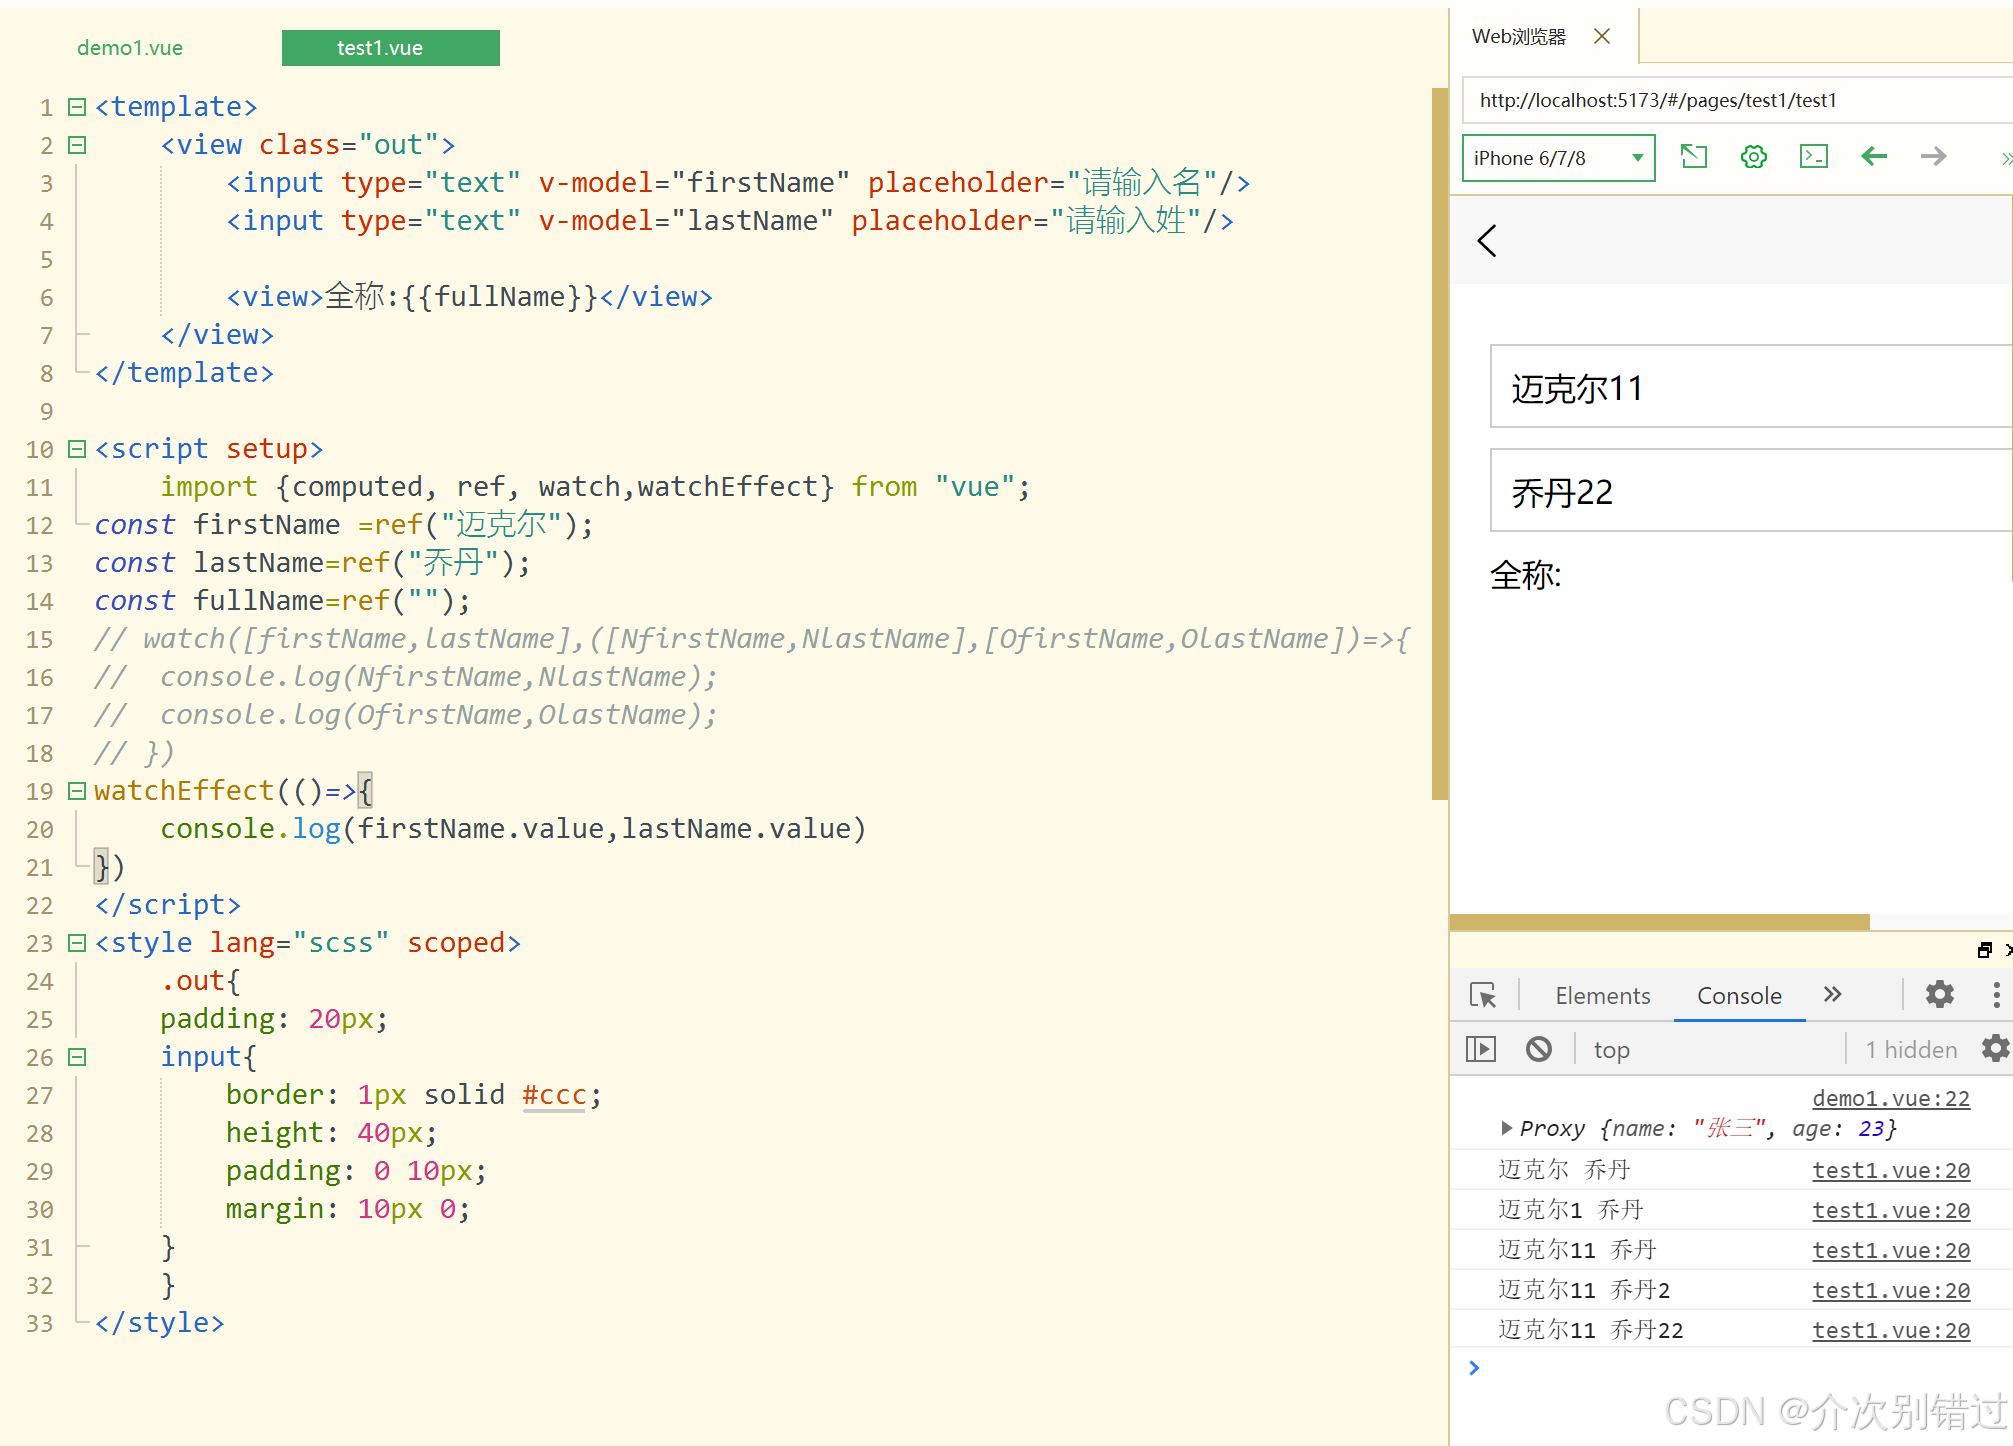
<template>
	<view class="out">
		<input type="text" v-model="firstName" placeholder="请输入名"/>
		<input type="text" v-model="lastName" placeholder="请输入姓"/>

		<view>全称:{{fullName}}</view>
	</view>
</template>

<script setup>
	import {computed, ref, watch,watchEffect} from "vue";
const firstName	=ref("迈克尔");
const lastName=ref("乔丹");
const fullName=ref("");
// watch([firstName,lastName],([NfirstName,NlastName],[OfirstName,OlastName])=>{
// 	console.log(NfirstName,NlastName);
// 	console.log(OfirstName,OlastName);
// })
watchEffect(()=>{
	console.log(firstName.value,lastName.value)
})
</script>
<style lang="scss" scoped>
	.out{
	padding: 20px;
	input{
		border: 1px solid #ccc;
		height: 40px;
		padding: 0 10px;
		margin: 10px 0;
	}
	}
</style>
uniapp创建组件、vue官方文档的差异对比以及在组件中通过Props进行数据传递
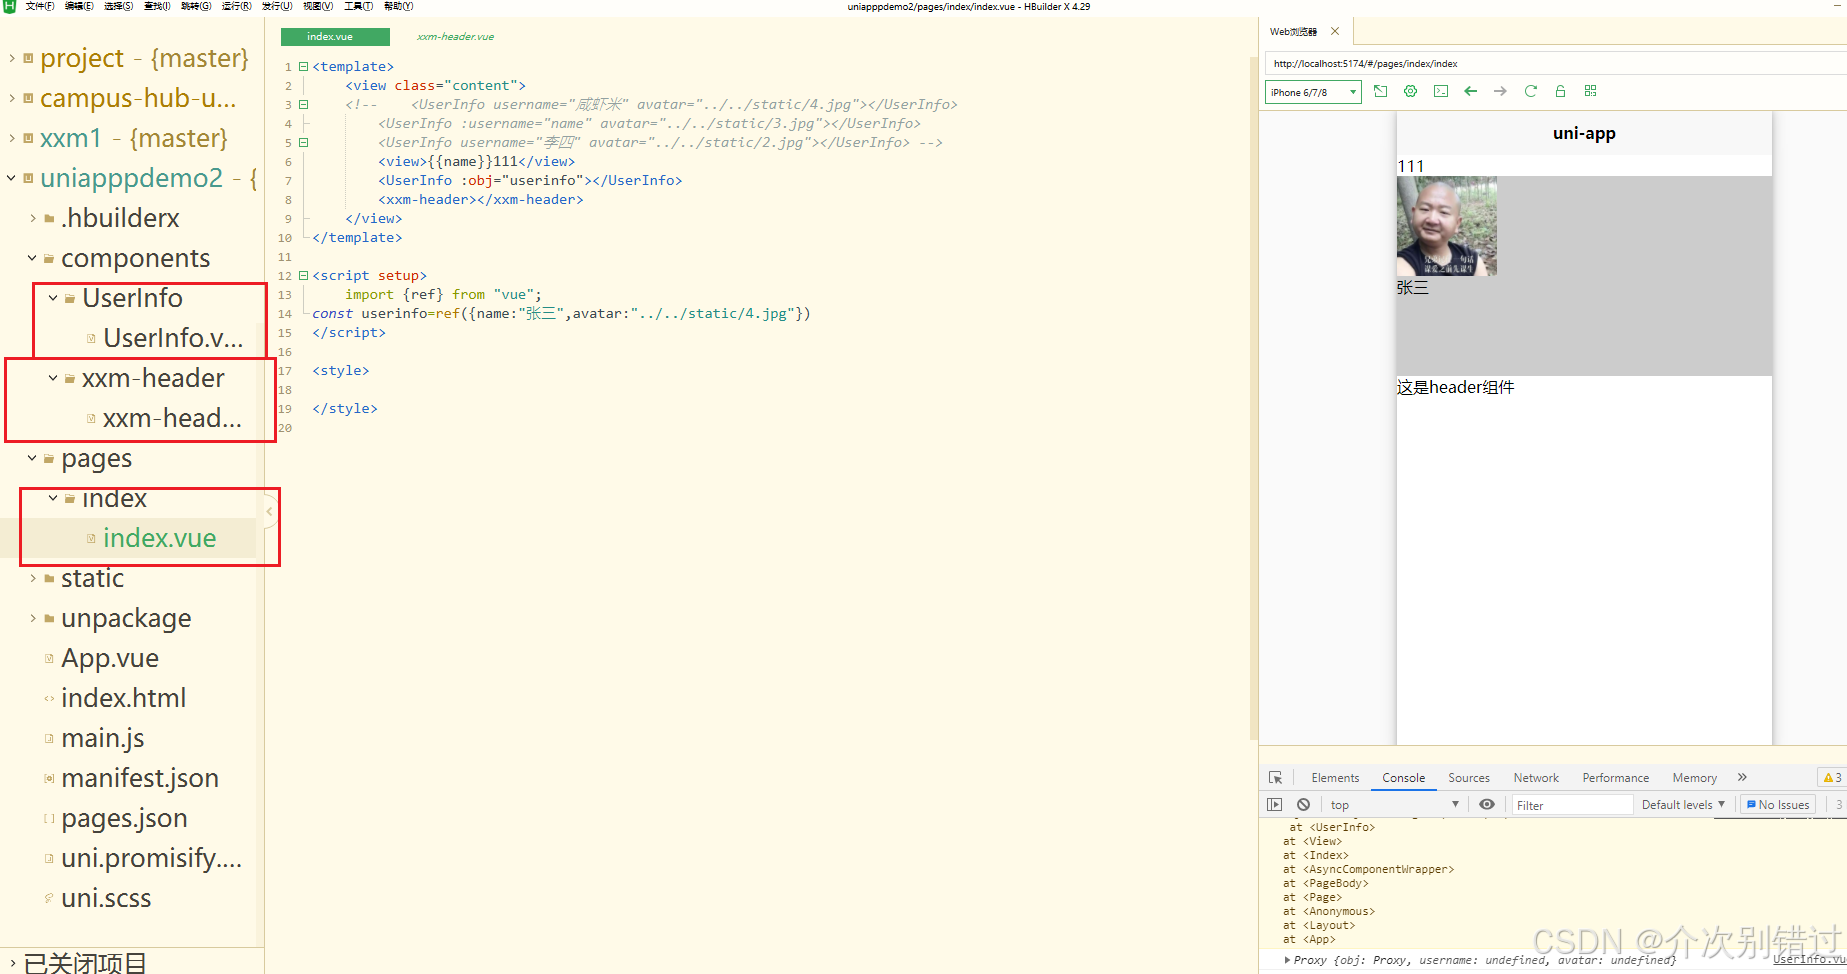
<template>
	<view class="content">
	<!-- 	<UserInfo username="咸虾米" avatar="../../static/4.jpg"></UserInfo>
		<UserInfo :username="name" avatar="../../static/3.jpg"></UserInfo>
		<UserInfo username="李四" avatar="../../static/2.jpg"></UserInfo> -->
		<view>{{name}}111</view>
		<UserInfo :obj="userinfo"></UserInfo>
		<xxm-header></xxm-header>
	</view>
</template>

<script setup>
	import {ref} from "vue";
const userinfo=ref({name:"张三",avatar:"../../static/4.jpg"})
</script>

<style>

</style>
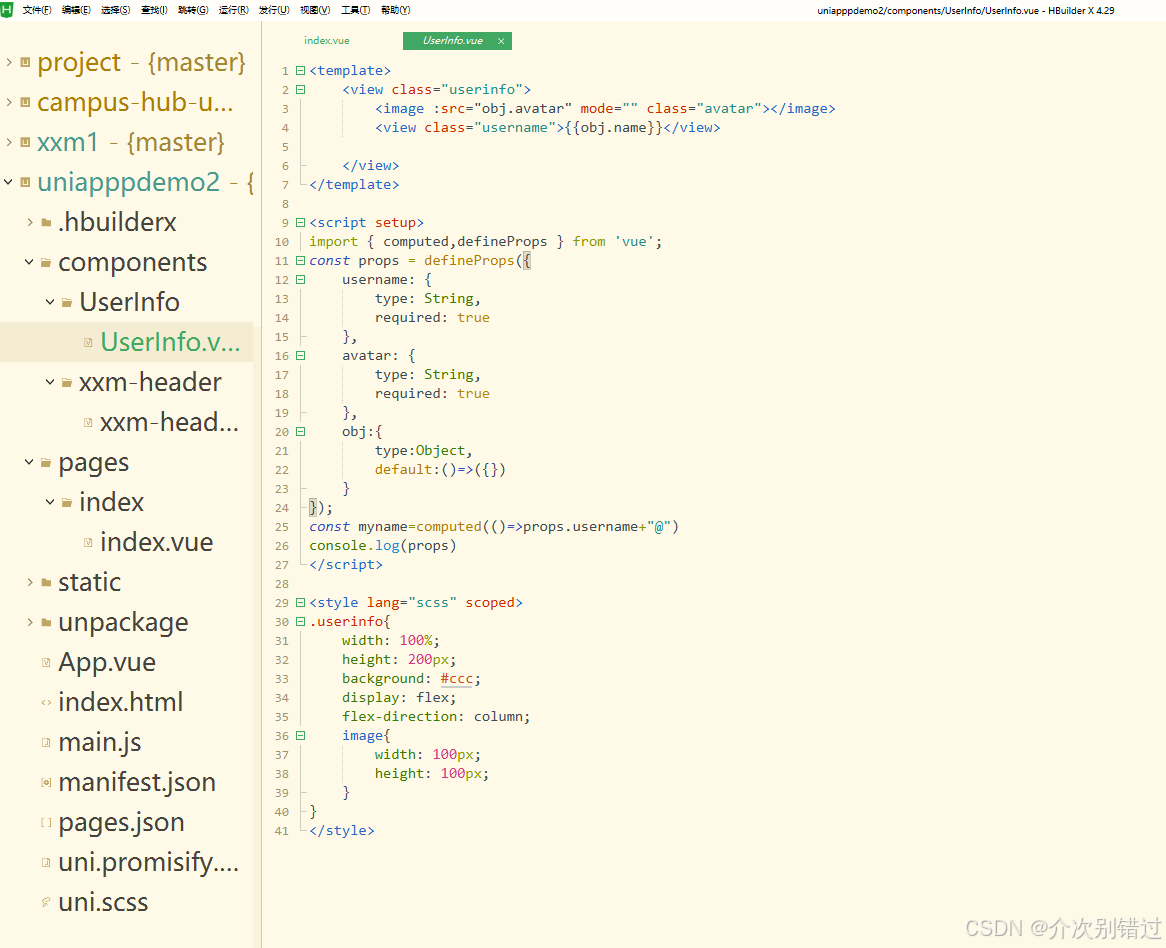
<template>
	<view class="userinfo">
		<image :src="obj.avatar" mode="" class="avatar"></image>
		<view class="username">{{obj.name}}</view>

	</view>
</template>

<script setup>
import { computed,defineProps } from 'vue';
const props = defineProps({
	username: {
		type: String,
		required: true
	},
	avatar: {
		type: String,
		required: true
	},
	obj:{
		type:Object,
		default:()=>({})
	}
});
const myname=computed(()=>props.username+"@")
console.log(props)
</script>

<style lang="scss" scoped>
.userinfo{
	width: 100%;
	height: 200px;
	background: #ccc;
	display: flex;
	flex-direction: column;
	image{
		width: 100px;
		height: 100px;
	}
}
</style>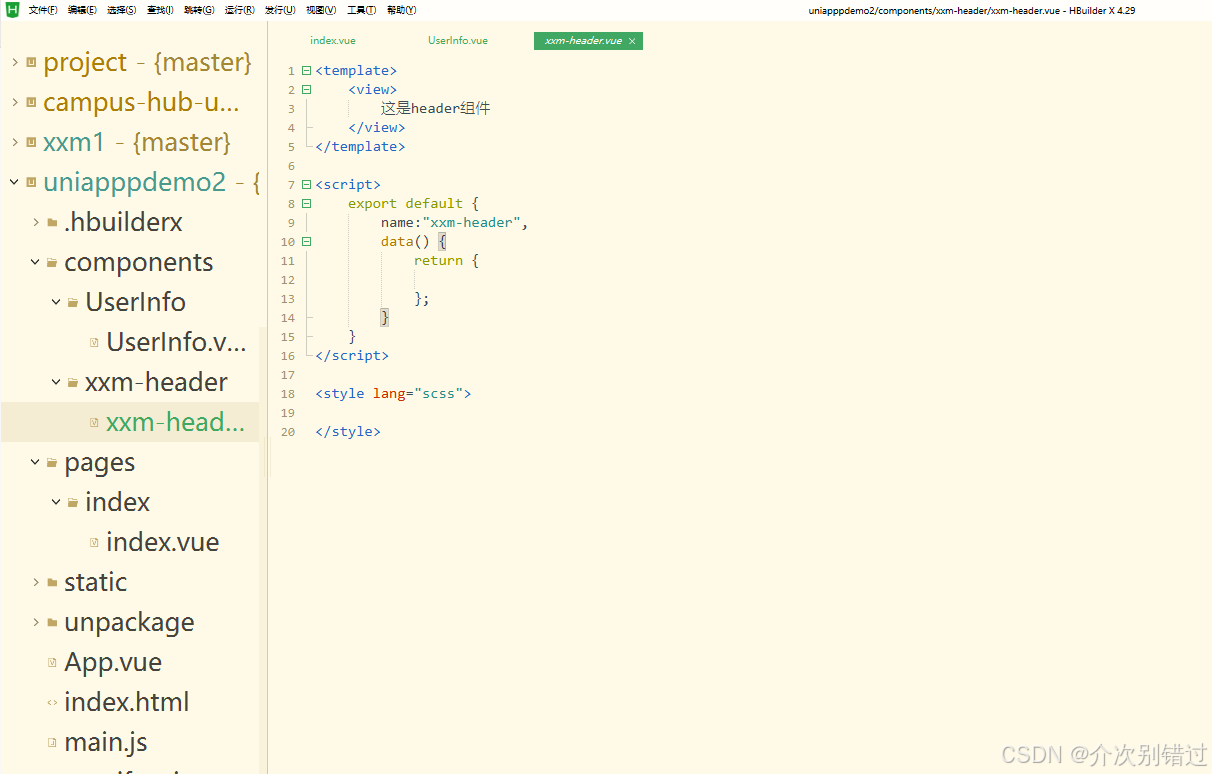
<template>
	<view>
		这是header组件
	</view>
</template>

<script>
	export default {
		name:"xxm-header",
		data() {
			return {

			};
		}
	}
</script>

<style lang="scss">

</style>
Prop校验与prop默认值用法及循环遍历数组对象
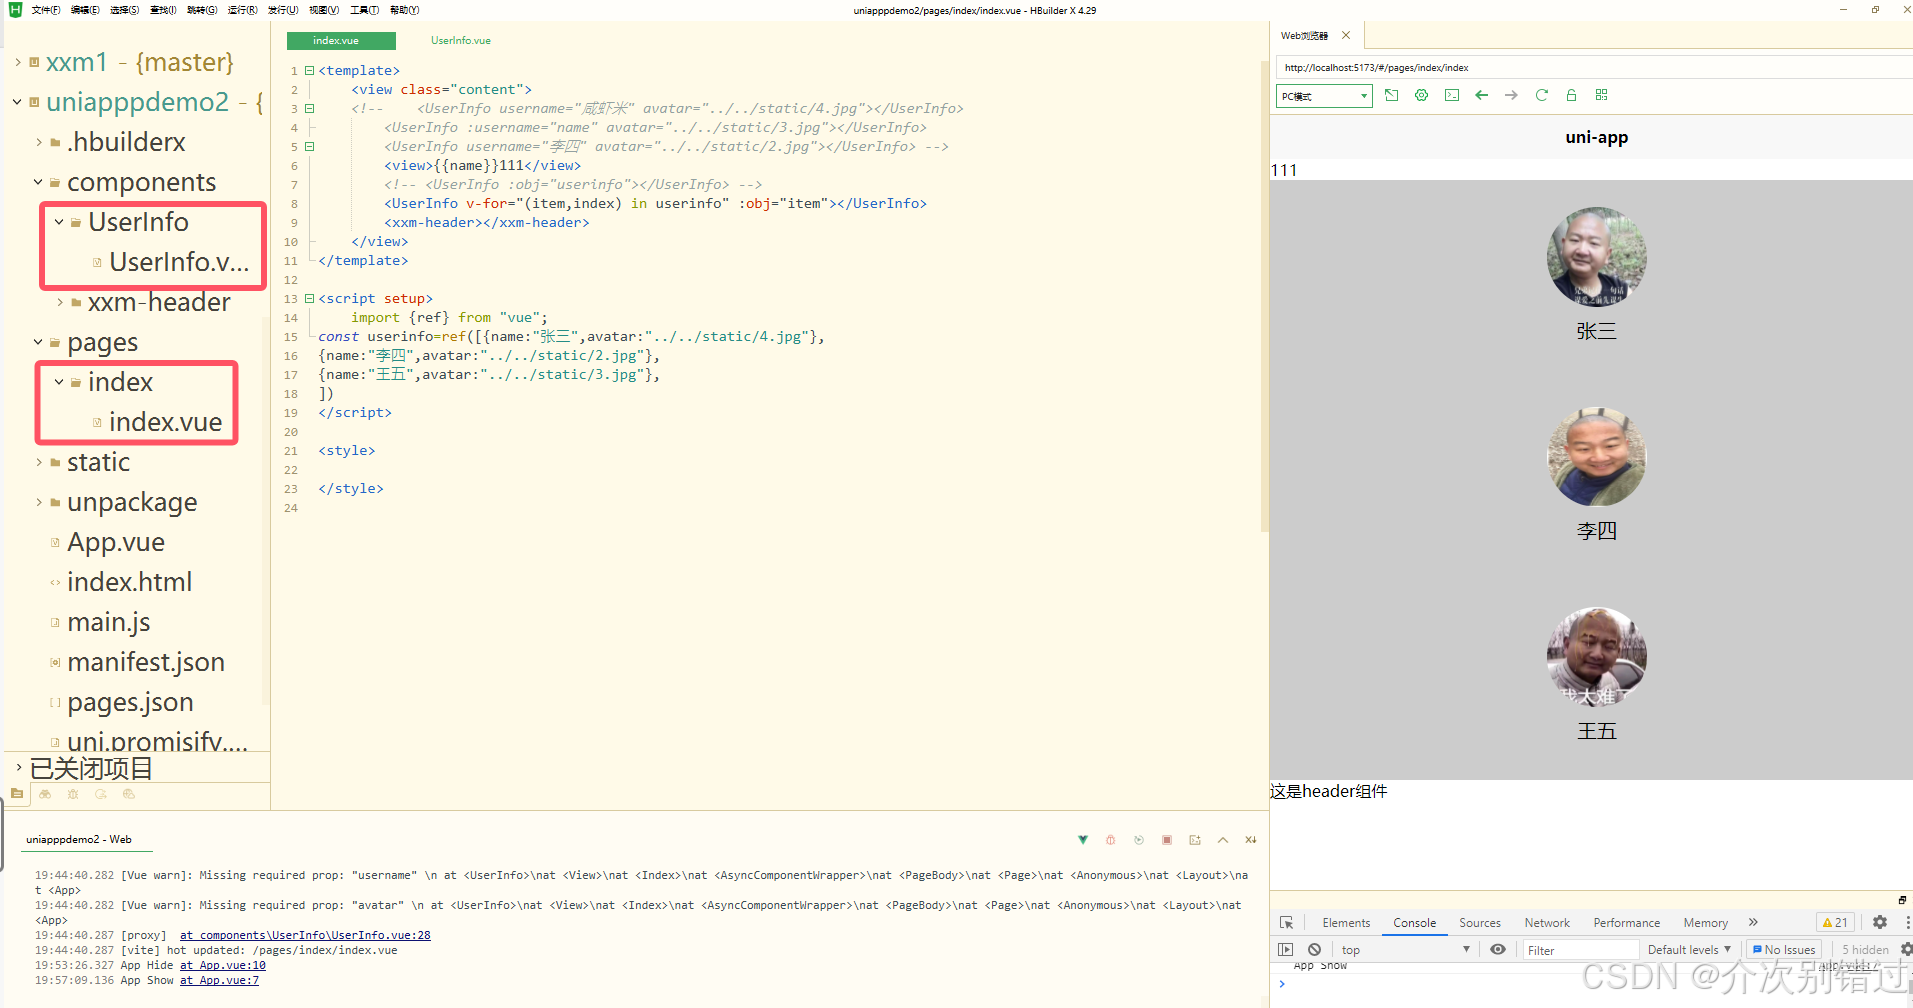
<template>
	<view class="content">
	<!-- 	<UserInfo username="咸虾米" avatar="../../static/4.jpg"></UserInfo>
		<UserInfo :username="name" avatar="../../static/3.jpg"></UserInfo>
		<UserInfo username="李四" avatar="../../static/2.jpg"></UserInfo> -->
		<view>{{name}}111</view>
		<!-- <UserInfo :obj="userinfo"></UserInfo> -->
		<UserInfo v-for="(item,index) in userinfo" :obj="item"></UserInfo>
		<xxm-header></xxm-header>
	</view>
</template>

<script setup>
	import {ref} from "vue";
const userinfo=ref([{name:"张三",avatar:"../../static/4.jpg"},
{name:"李四",avatar:"../../static/2.jpg"},
{name:"王五",avatar:"../../static/3.jpg"},
])
</script>

<style>

</style>
<template>
	<view class="userinfo">
		<image :src="obj.avatar" mode="" class="avatar"></image>
		<view class="username">{{obj.name}}</view>

	</view>
</template>

<script setup>
import { computed,defineProps } from 'vue';
const props = defineProps({
	username: {
		type: String,
		required: true
	},
	avatar: {
		type: String,
		required: true
	},
	obj:{
		type:Object,
		default:()=>{
			return {name:"匿名",avatar:"../../static/logo.png"}
		}
	}
});
const myname=computed(()=>props.username+"@")
console.log(props)
</script>

<style lang="scss" scoped>
.userinfo{
	width: 100%;
	height: 200px;
	background: #ccc;
	display: flex;
	flex-direction: column;
	align-items: center;
	justify-content: center;
	image{
		width: 100px;
		height: 100px;
		border-radius: 50%;
	}
	.username{
		padding: 10px 0;
		font-size: 20px;
	}
}
</style>
插槽Slots及具名插槽实现组件高度定制化
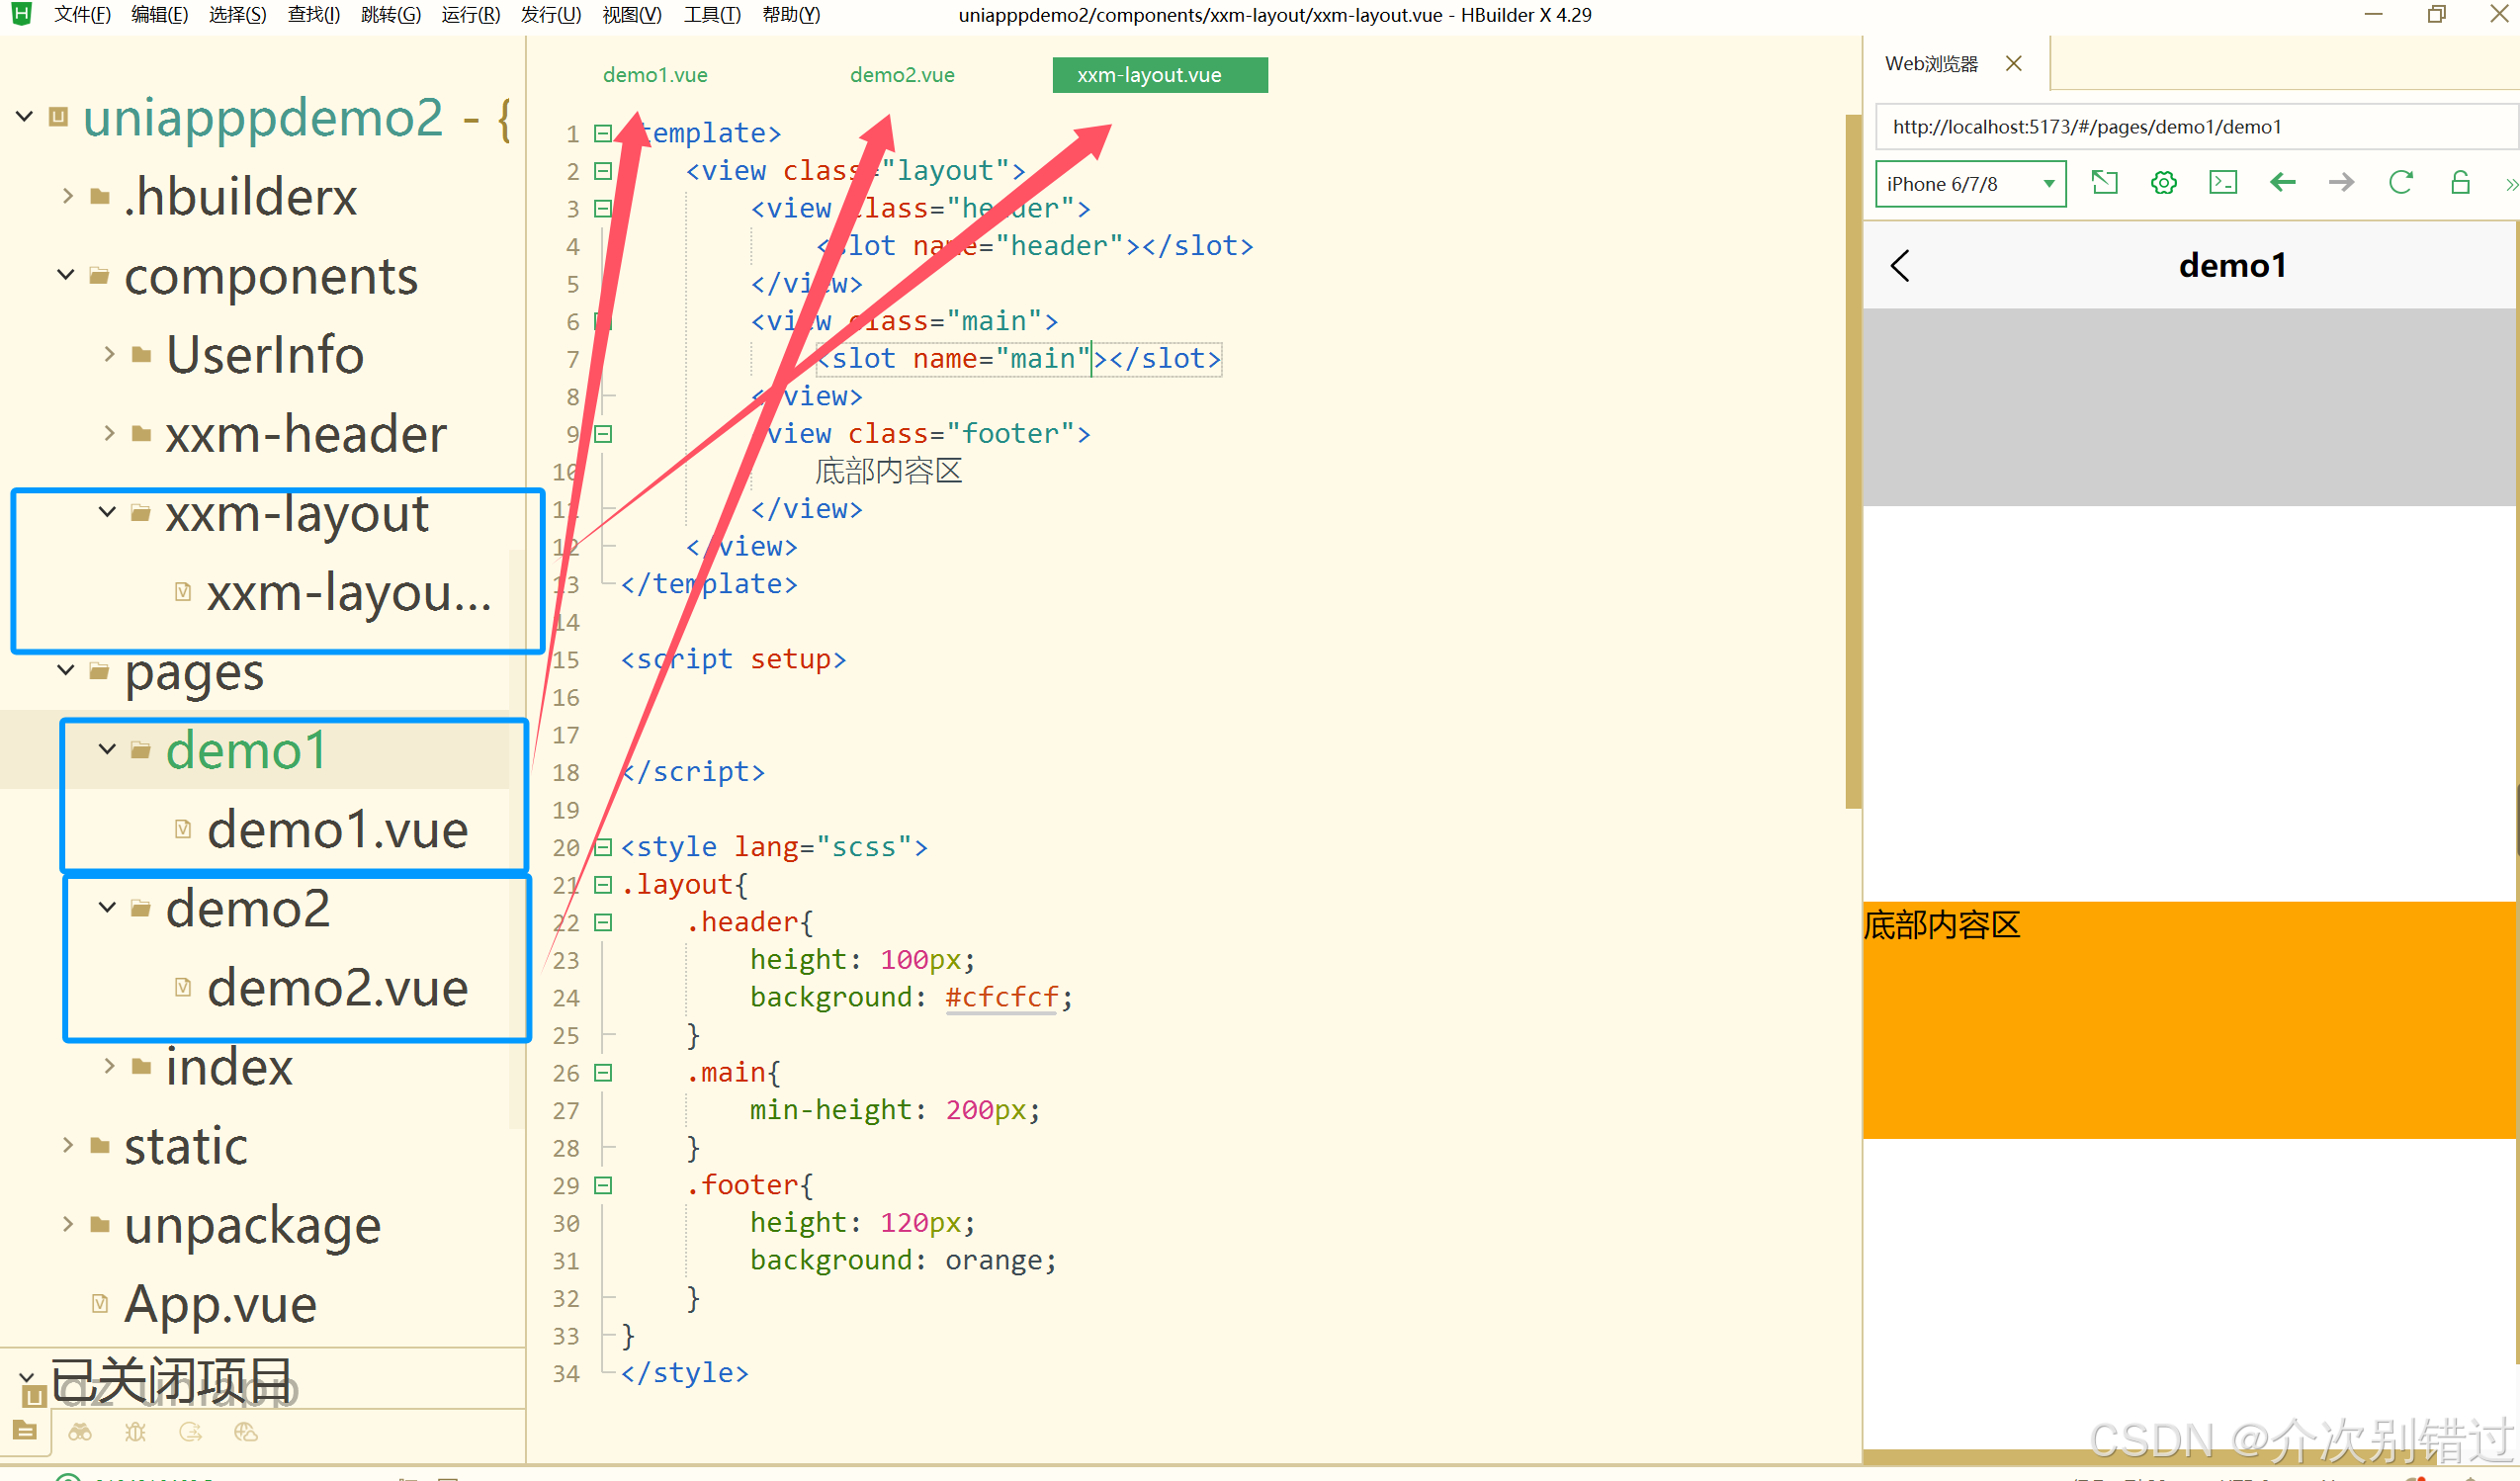
demo1.vue
<template>
	<view class="">
		<xxm-layout>
			<view class="row" v-for="(item,index) in 10">每一行{{item}}</view>
		</xxm-layout>
	</view>
</template>
<script setup>

</script>
<style lang="scss" scoped>

</style>
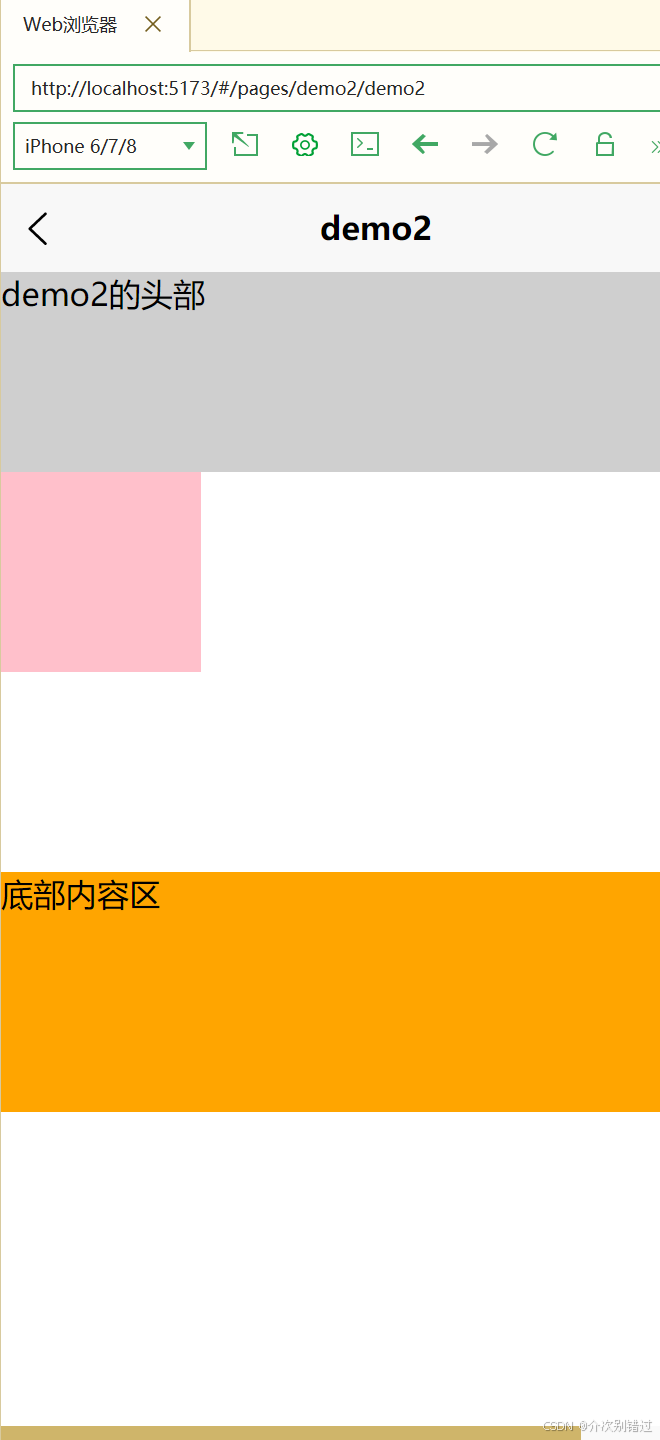
demo2.vue
<template>
	<view class="">
		<xxm-layout>
			<template #header>
				demo2的头部
			</template>
			<template #main>
				<view class="main">

				</view>
			</template>
		</xxm-layout>
	</view>
</template>
<script setup>

</script>
<style lang="scss" scoped>
	.main {
		width: 100px;
		height: 100px;
		background: pink;
	}

	.box1 {
		width: 100px;
		height: 100px;
		background: pink;
	}

	.box2 {
		width: 130px;
		height: 130px;
		background: green;
	}
</style>
xxm-layout.vue
<template>
	<view class="layout">
		<view class="header">
			<slot name="header"></slot>
		</view>
		<view class="main">
			<slot name="main"></slot>
		</view>
		<view class="footer">
			底部内容区
		</view>
	</view>
</template>

<script setup>


</script>

<style lang="scss">
.layout{
	.header{
		height: 100px;
		background: #cfcfcf;
	}
	.main{
		min-height: 200px;
	}
	.footer{
		height: 120px;
		background: orange;
	}
}
</style>
组件中emit的声明触发事件

<template>
	<view class="">
		<xxm-child @add="onAdd" @change="onChange"></xxm-child>
		<view class="box" :style="{background:color,fontSize:size+'px',}">num:{{num}}</view>
	</view>
</template>
<script setup>
	import{ref} from "vue"
	const num=ref(0)
	const color=ref('#ccc')
	const size=ref(12)
	const onAdd=function(e){
		console.log(e);
		num.value=e;
		color.value="#"+String(e).substring(3,6)
	}
	const onChange=function(e){
		console.log(e);
		size.value=e;
	}
</script>
<style lang="scss" scoped>
	.box{
		width: 200px;
		height: 200px;
		background: red;
	}
</style>
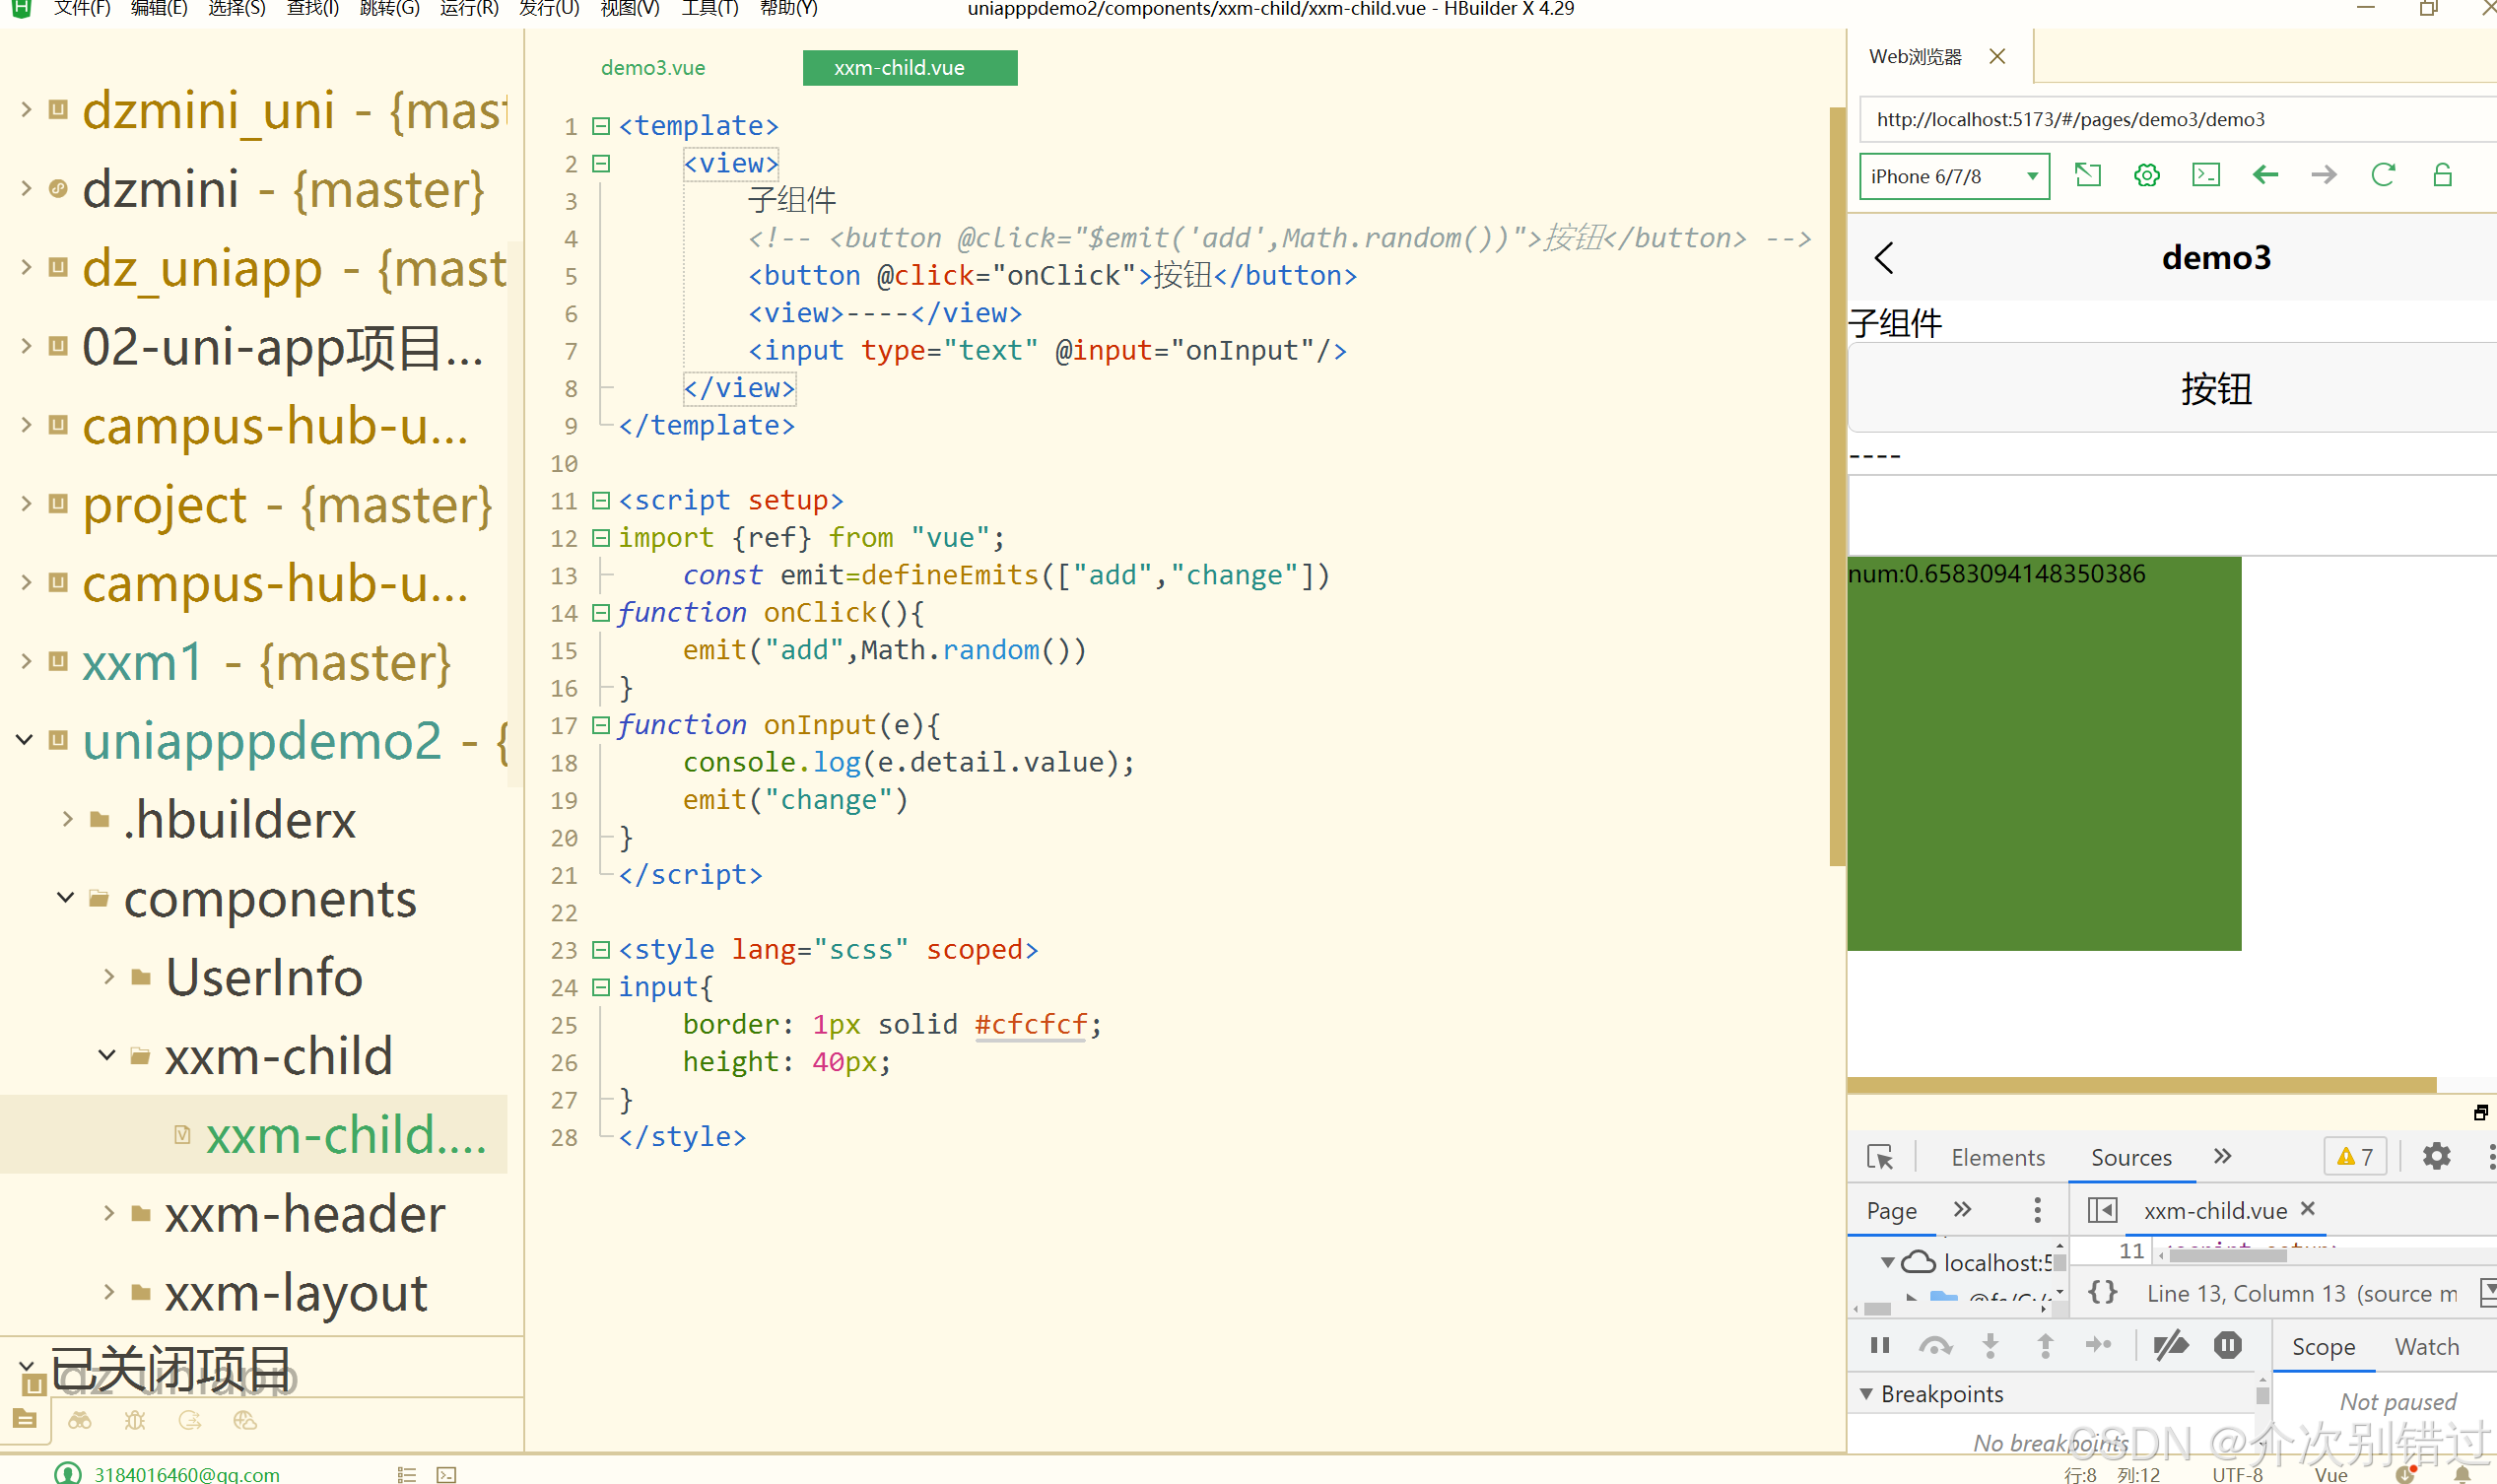
<template>
	<view>
		子组件
		<!-- <button @click="$emit('add',Math.random())">按钮</button> -->
		<button @click="onClick">按钮</button>
		<view>----</view>
		<input type="text" @input="onInput"/>
	</view>
</template>

<script setup>
import {ref} from "vue";
	const emit=defineEmits(["add","change"])
function onClick(){
	emit("add",Math.random())
}
function onInput(e){
	console.log(e.detail.value);
	emit("change")
}
</script>

<style lang="scss" scoped>
input{
	border: 1px solid #cfcfcf;
	height: 40px;
}
</style>
vue3组合式API中的组件的生命周期函数(钩子函数)
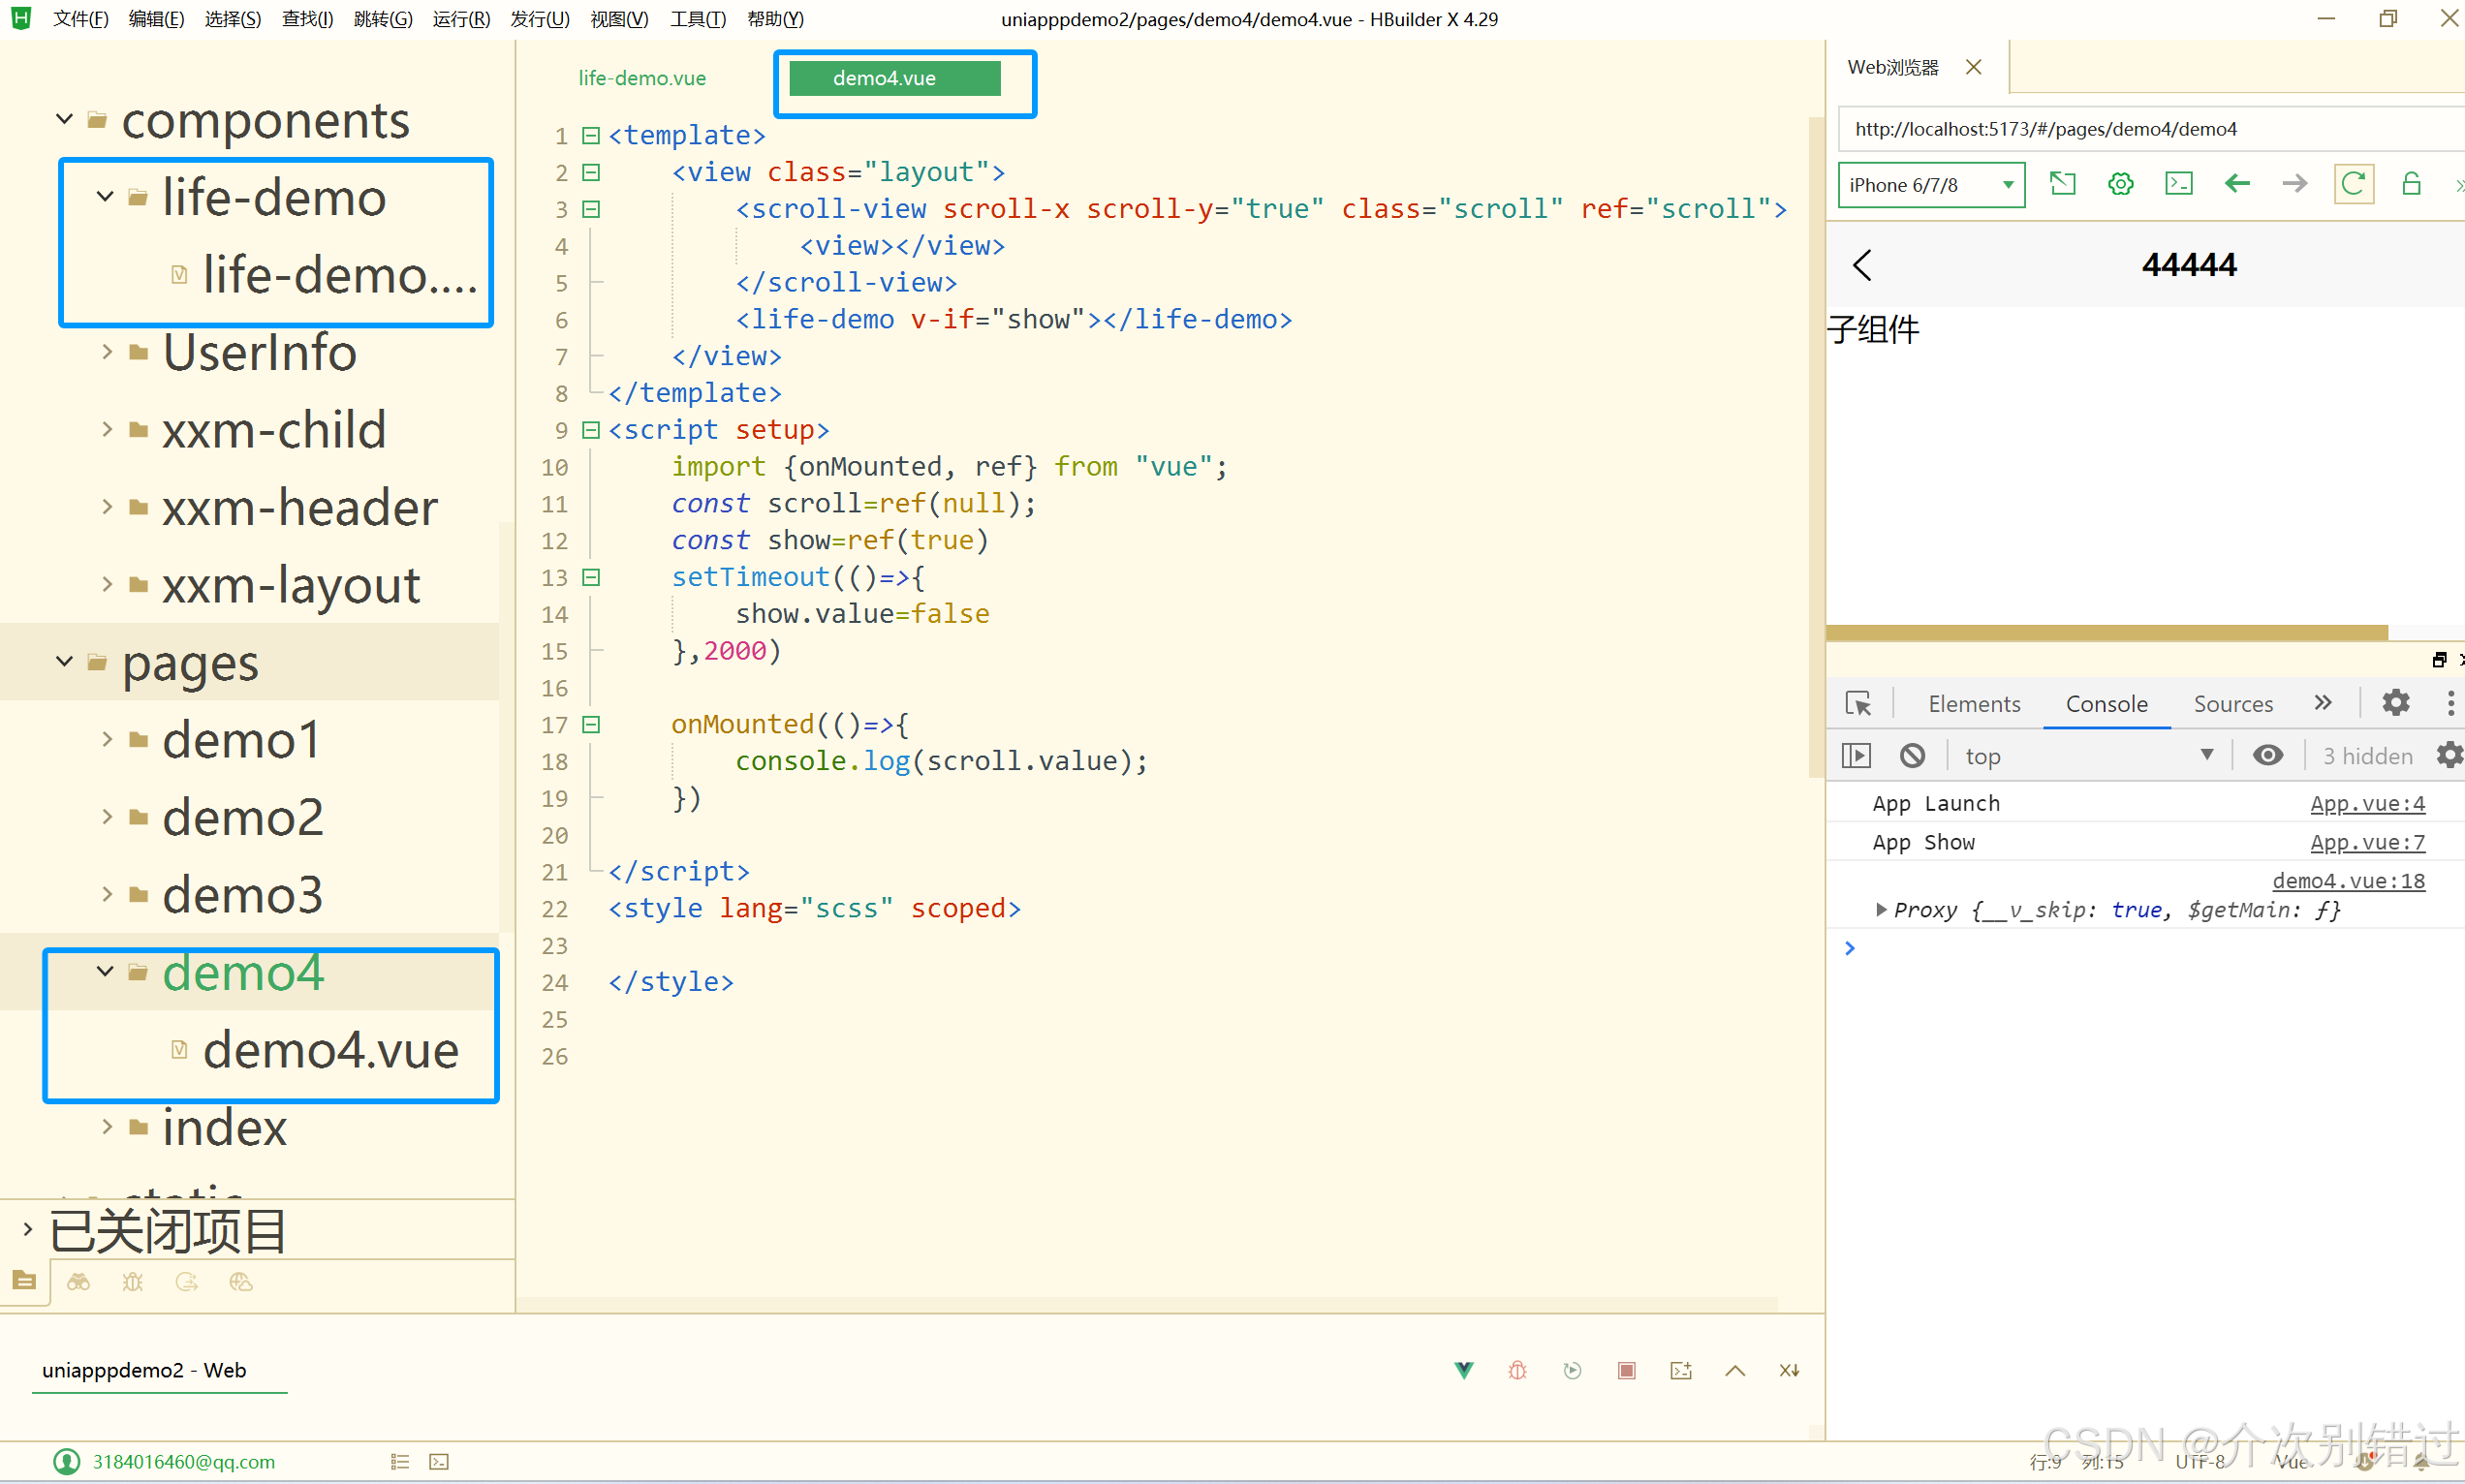
<template>
	<view class="layout">
		<scroll-view scroll-x scroll-y="true" class="scroll" ref="scroll">
			<view></view>
		</scroll-view>
		<life-demo v-if="show"></life-demo>
	</view>
</template>
<script setup>
	import {onMounted, ref} from "vue";
	const scroll=ref(null);
	const show=ref(true)
	setTimeout(()=>{
		show.value=false
	},2000)

	onMounted(()=>{
		console.log(scroll.value);
	})

</script>
<style lang="scss" scoped>

</style>
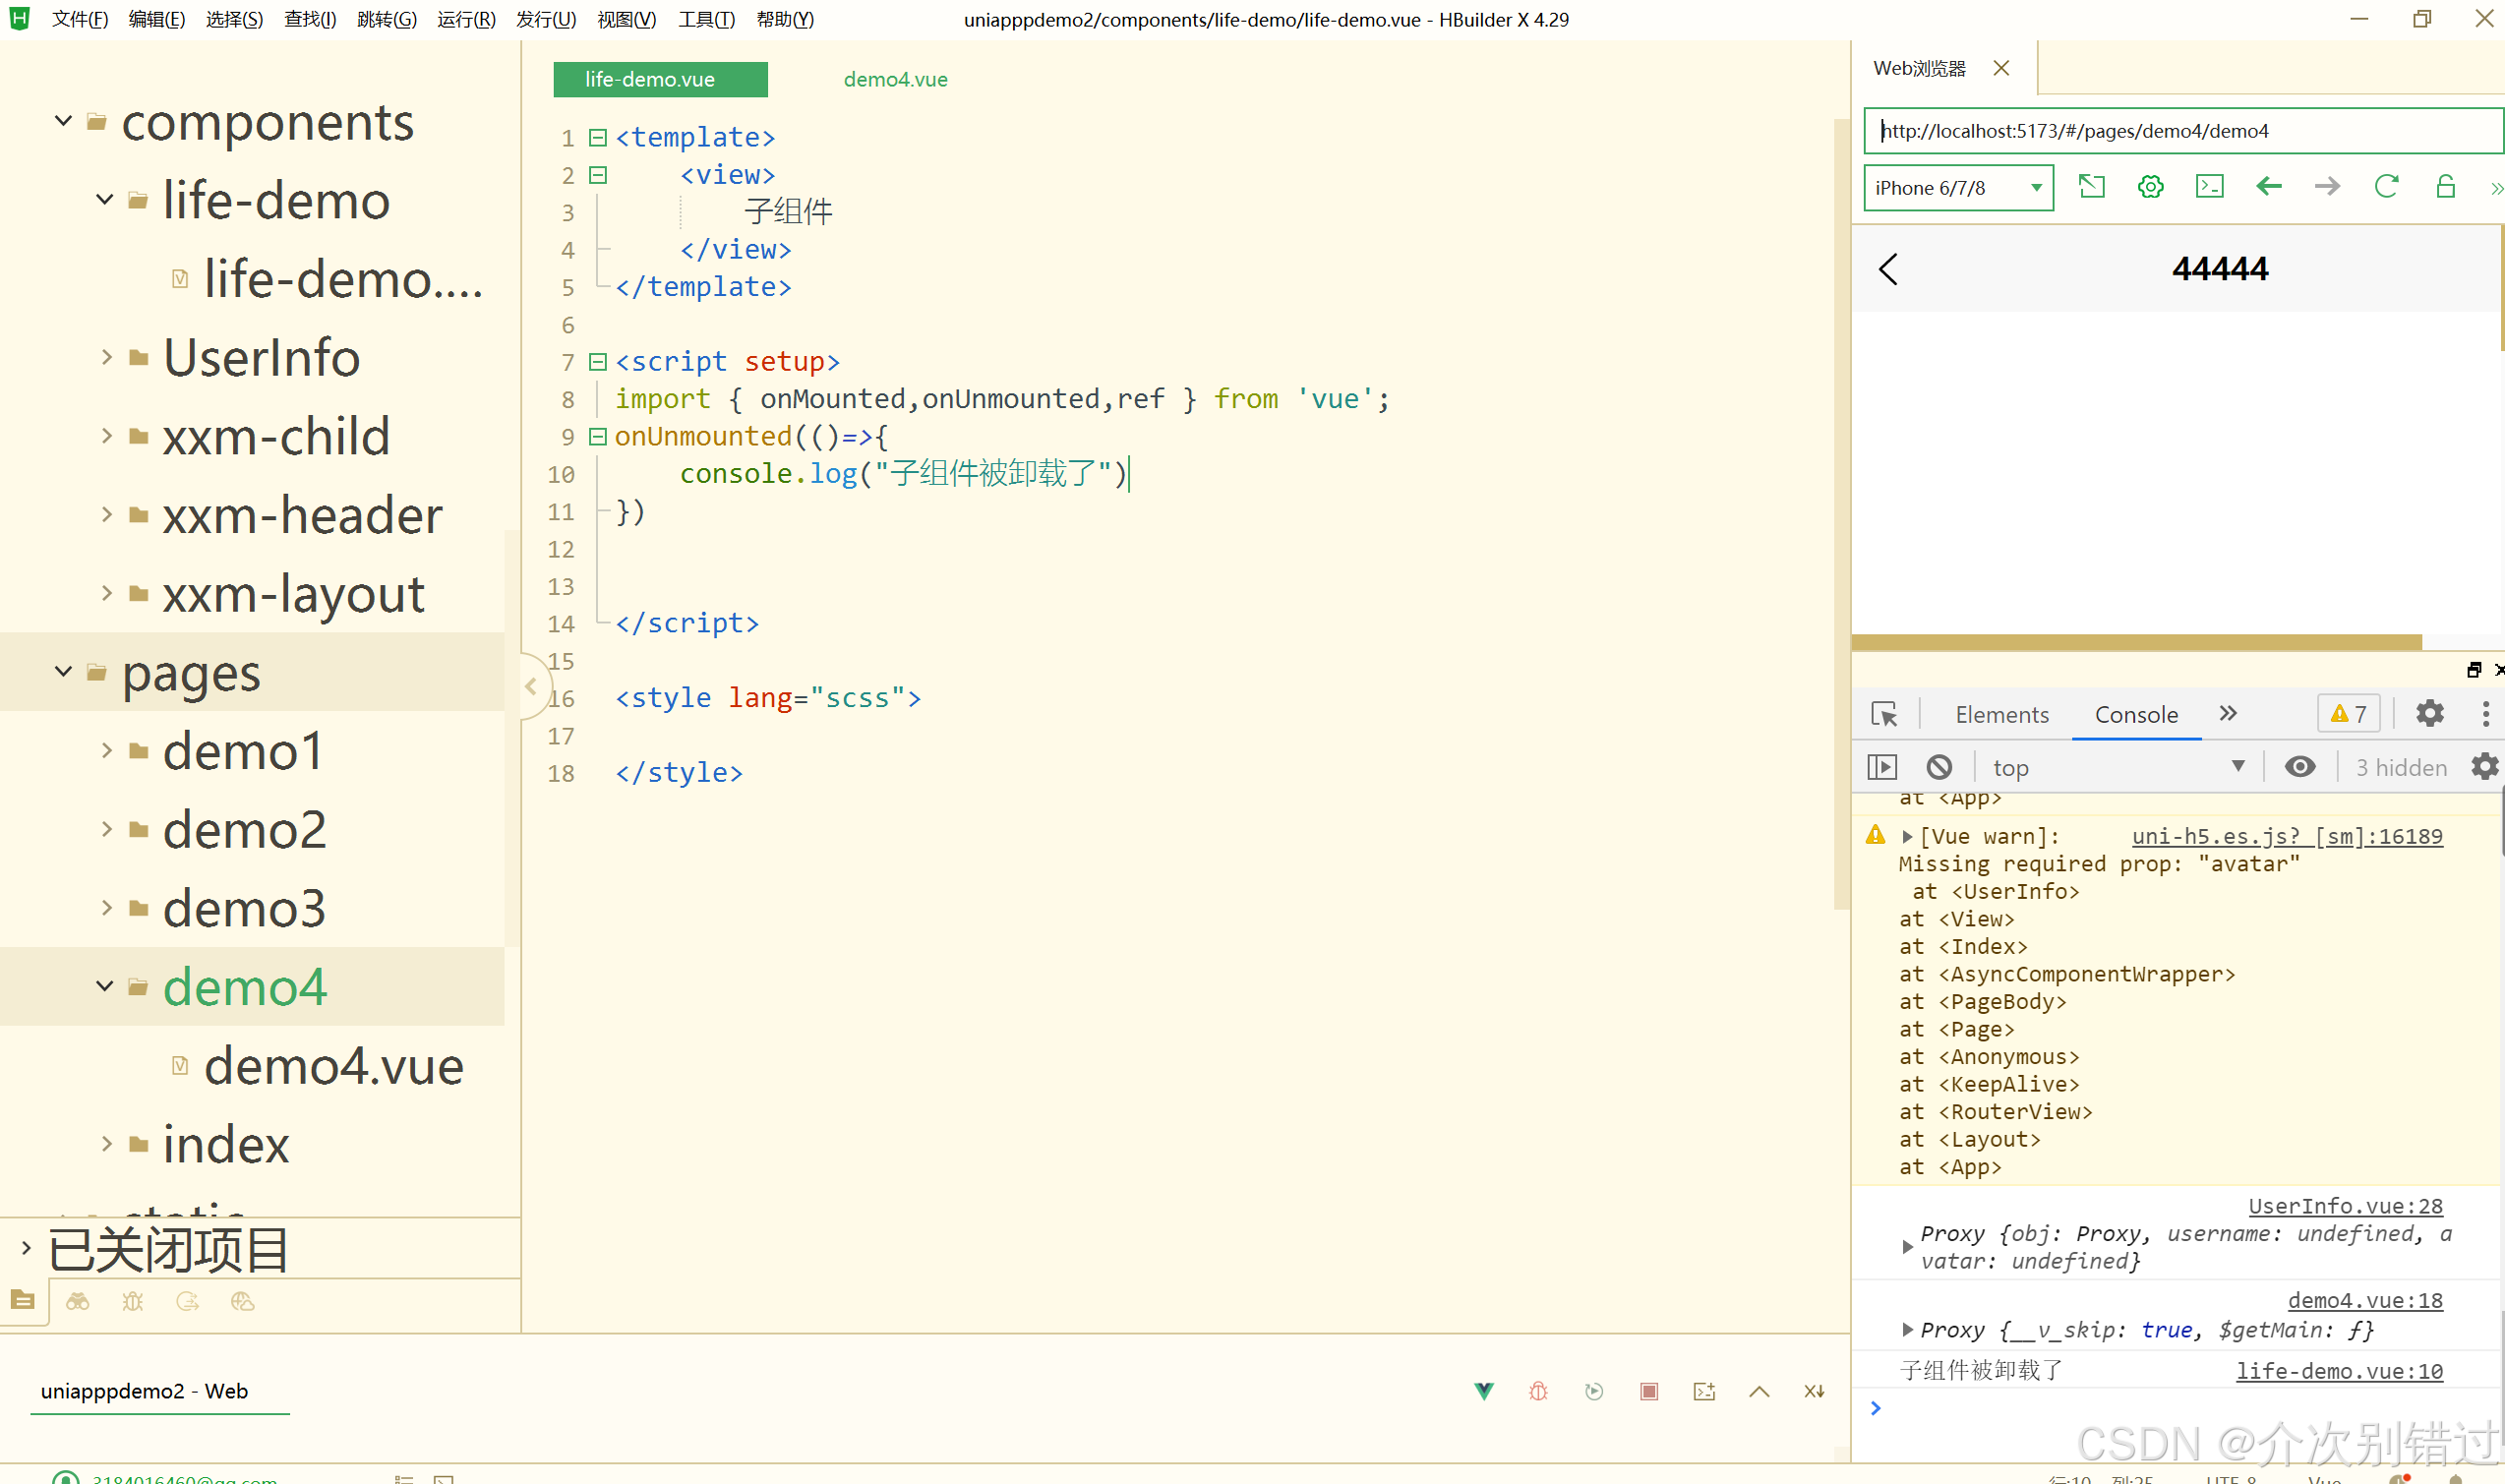
<template>
	<view>
		子组件
	</view>
</template>

<script setup>
import { onMounted,onUnmounted,ref } from 'vue';
onUnmounted(()=>{
	console.log("子组件被卸载了")
})


</script>

<style lang="scss">

</style>
使用defineExpose暴漏子组件的属性及方法
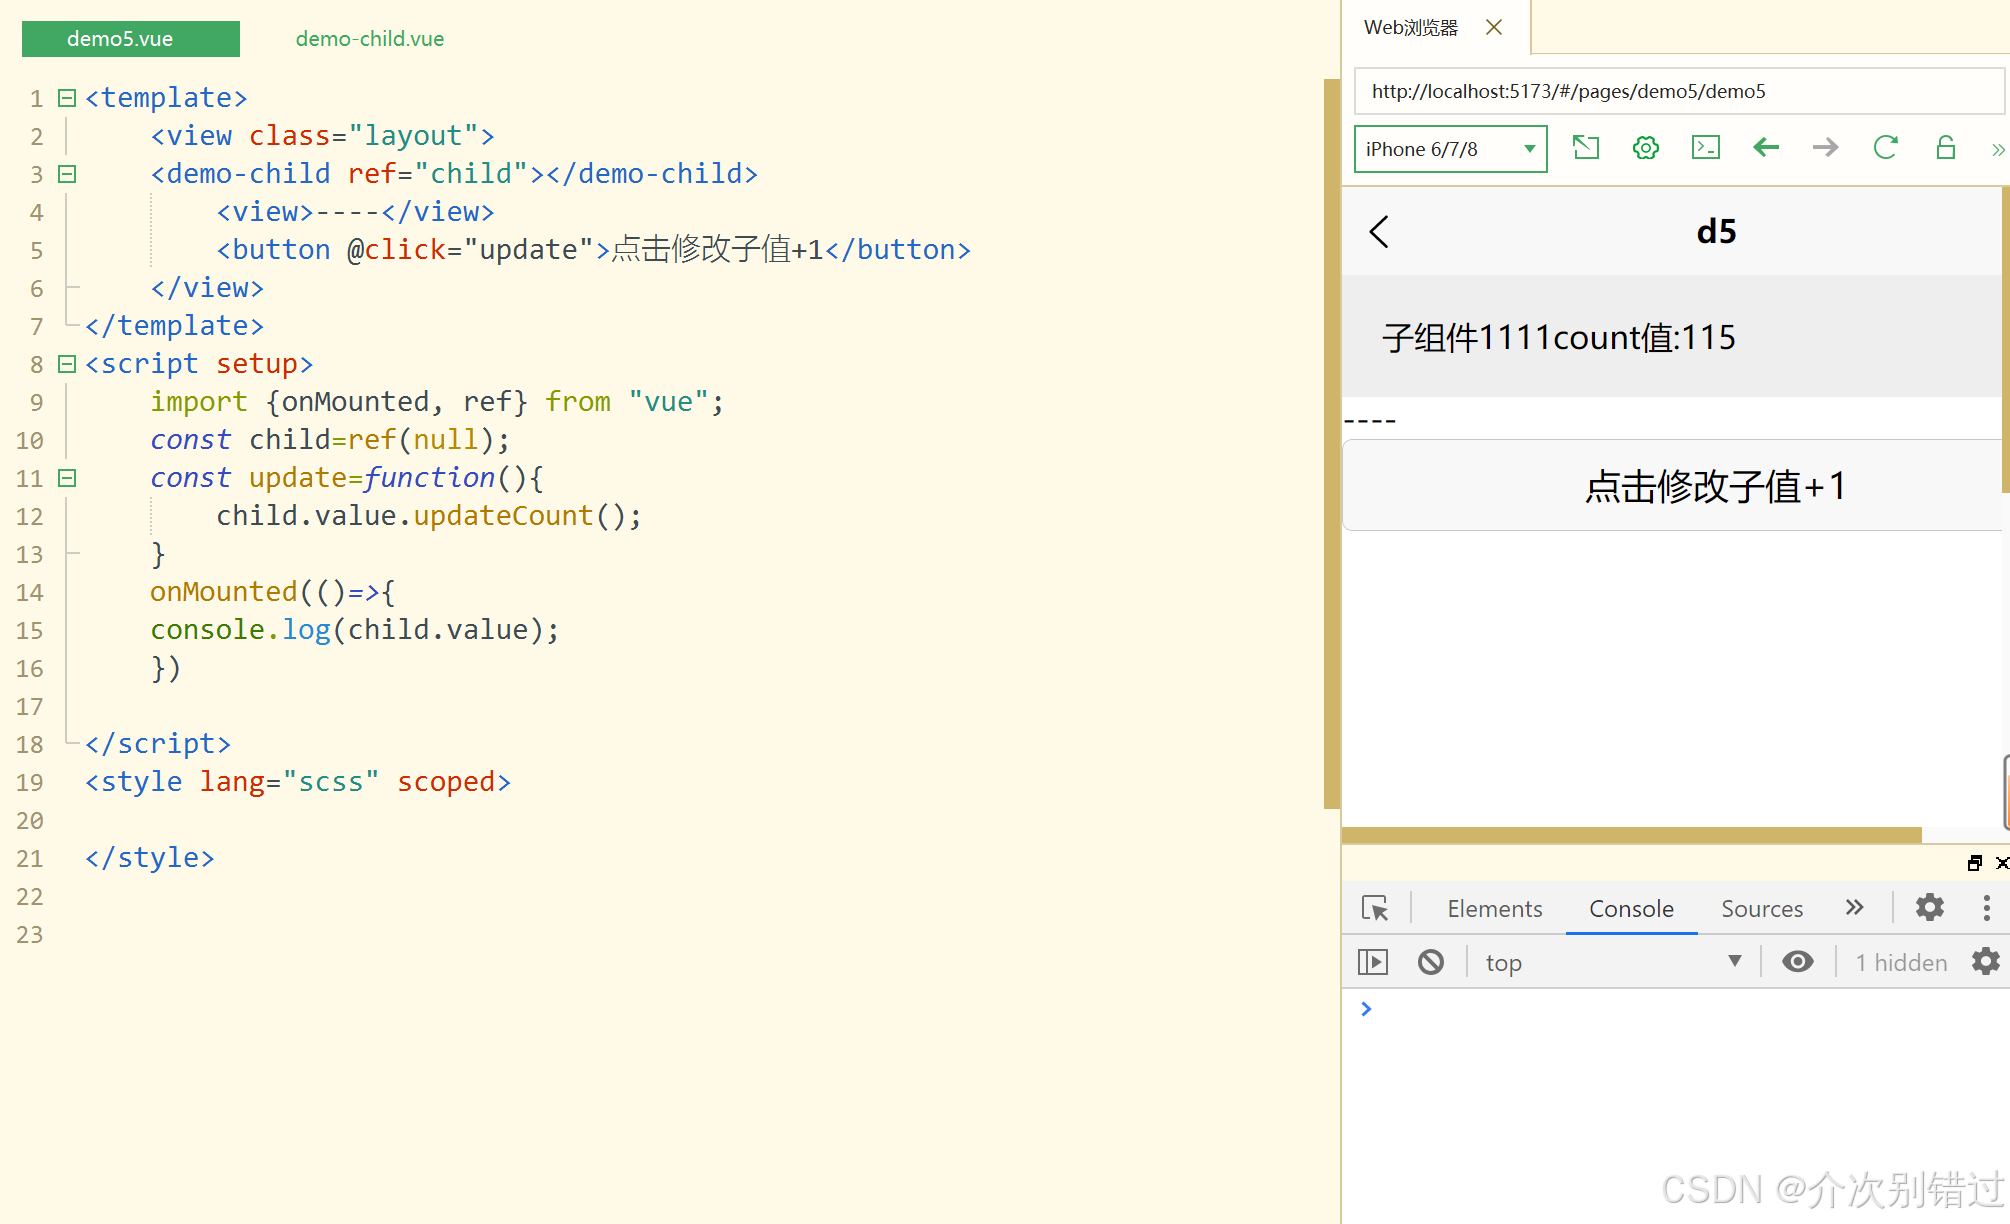

<template>
	<view class="layout">
	<demo-child ref="child"></demo-child>
		<view>----</view>
		<button @click="update">点击修改子值+1</button>
	</view>
</template>
<script setup>
	import {onMounted, ref} from "vue";
	const child=ref(null);
	const update=function(){
		child.value.updateCount();
	}
	onMounted(()=>{
	console.log(child.value);
	})

</script>
<style lang="scss" scoped>

</style>
<template>
<view class="out">
子组件1111count值:{{count}}
</view>
</template>
<script setup>
import {ref} from "vue";
const count=ref(100)
const updateCount=function(){
count.value++
}
defineExpose({
count,
str:"闲虾米",
updateCount,
})
</script>
<style lang="scss" scoped>
.out{
padding: 20px;
background: #eee;
}
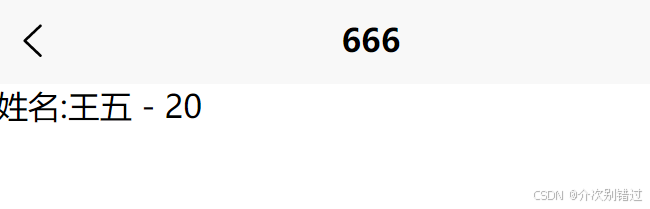
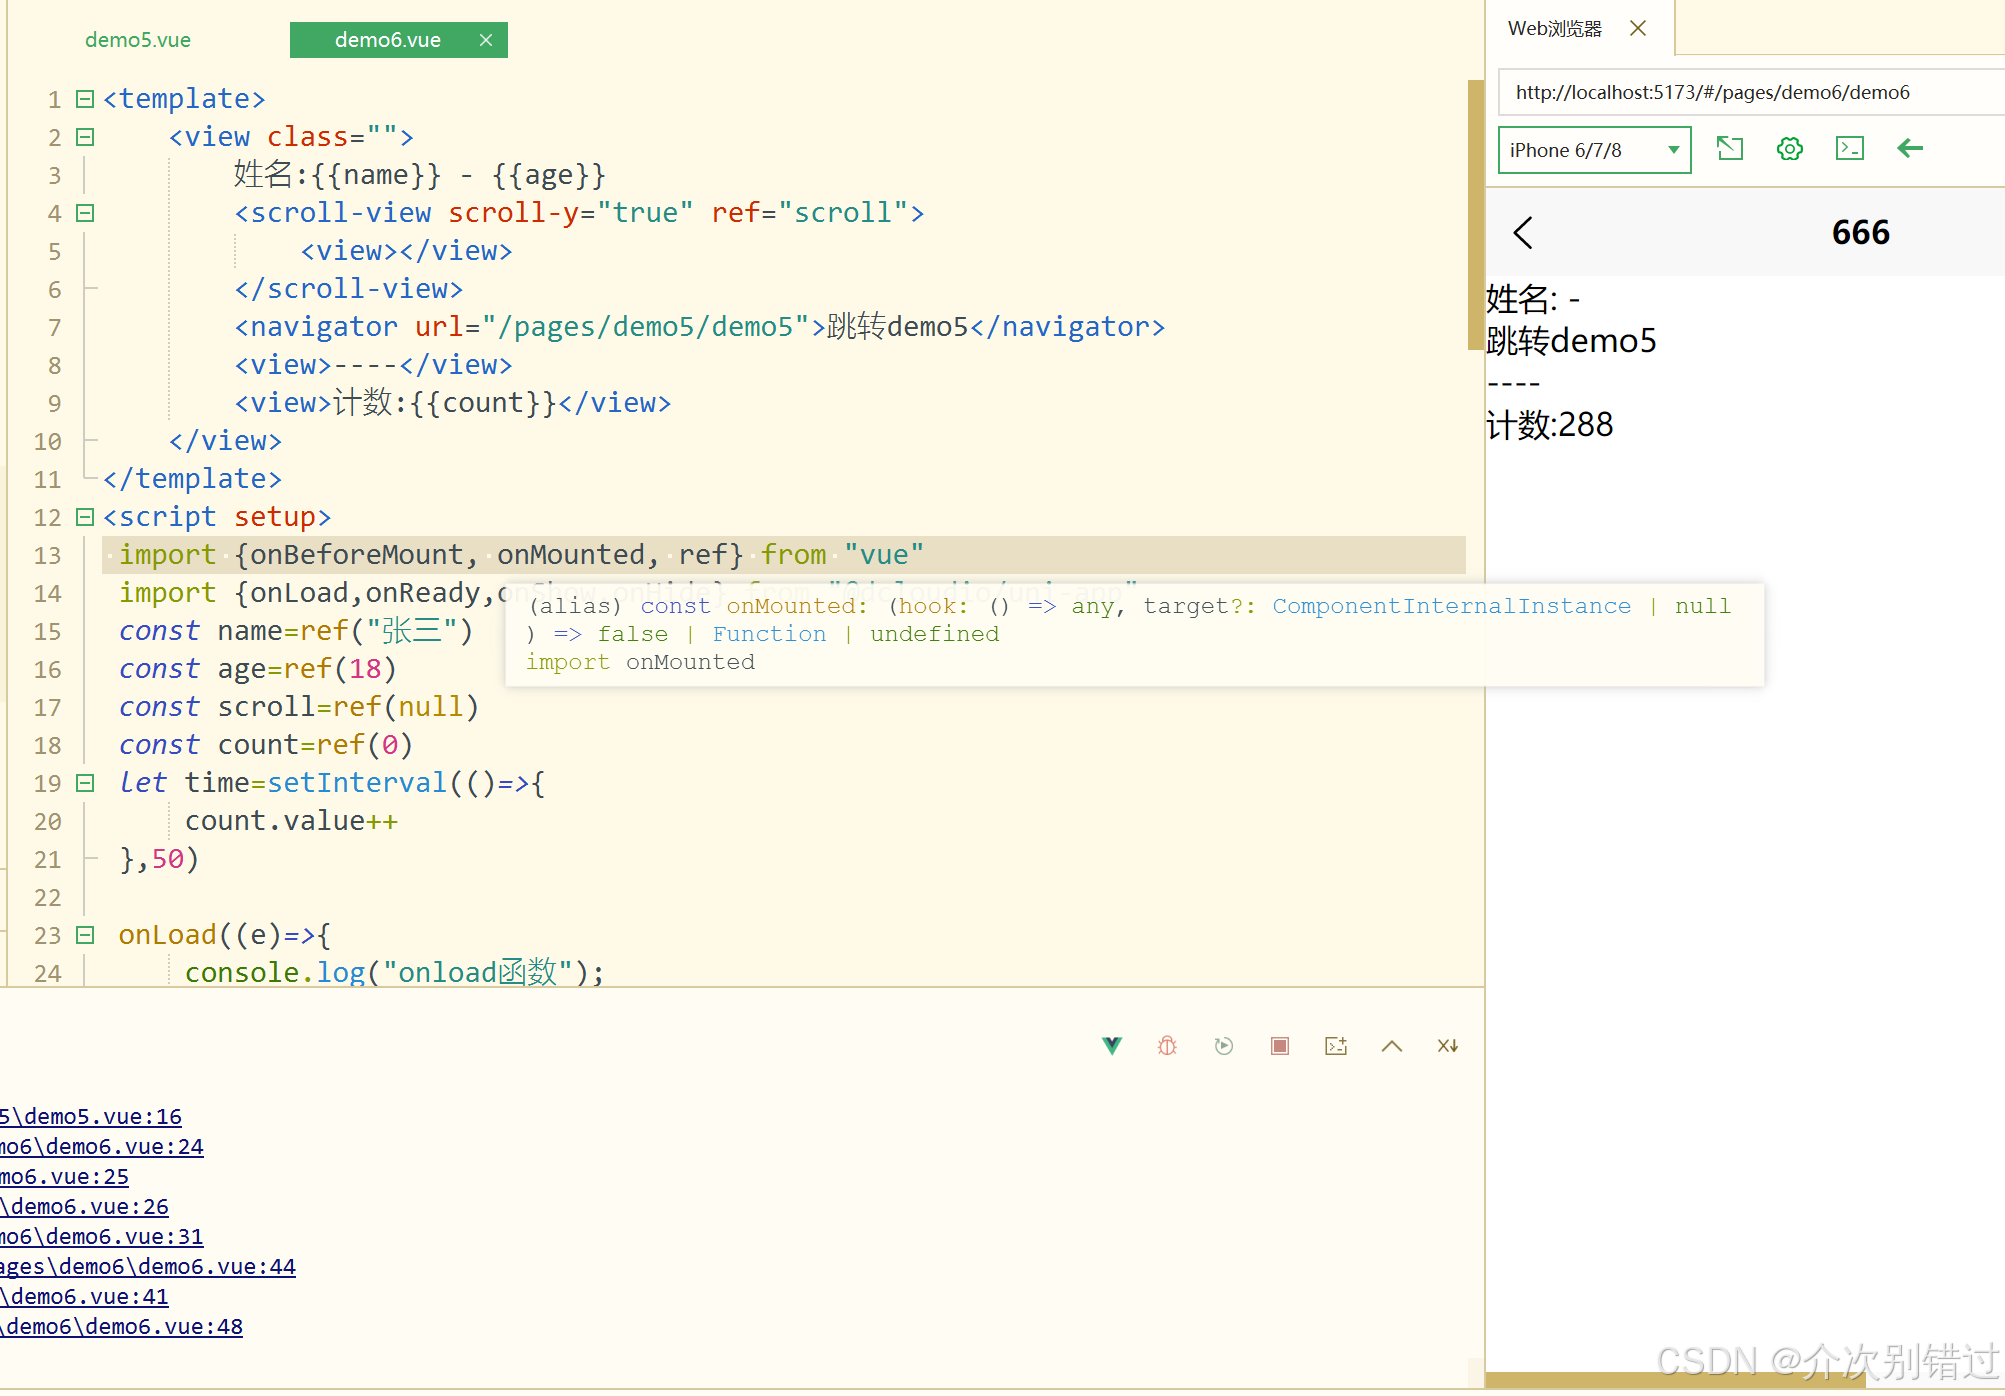
</style>页面生命周期onLoad和onReady在vue3组合式api中的使用
<navigator url="/pages/demo6/demo6?name=王五&age=20">跳转到demo6</navigator>
<template>
	<view class="">
		姓名:{{name}} - {{age}}
		<scroll-view scroll-y="true" ref="scroll">
			<view></view>
		</scroll-view>
	</view>
</template>
<script setup>
 import {ref} from "vue"
 import {onLoad,onReady} from "@dcloudio/uni-app"
 const name=ref("张三")
 const age=ref(18)
 const scroll=ref(null)
 onLoad((e)=>{
	 console.log("onload函数");
	 console.log(scroll.value)
	 console.log(e);
	 name.value=e.name;
	 age.value=e.age;
 })
onReady((e)=>{
	console.log(scroll.value);
})

</script>
<style lang="scss" scoped>

</style>
onShow和onHide钩子的对比和执行顺序
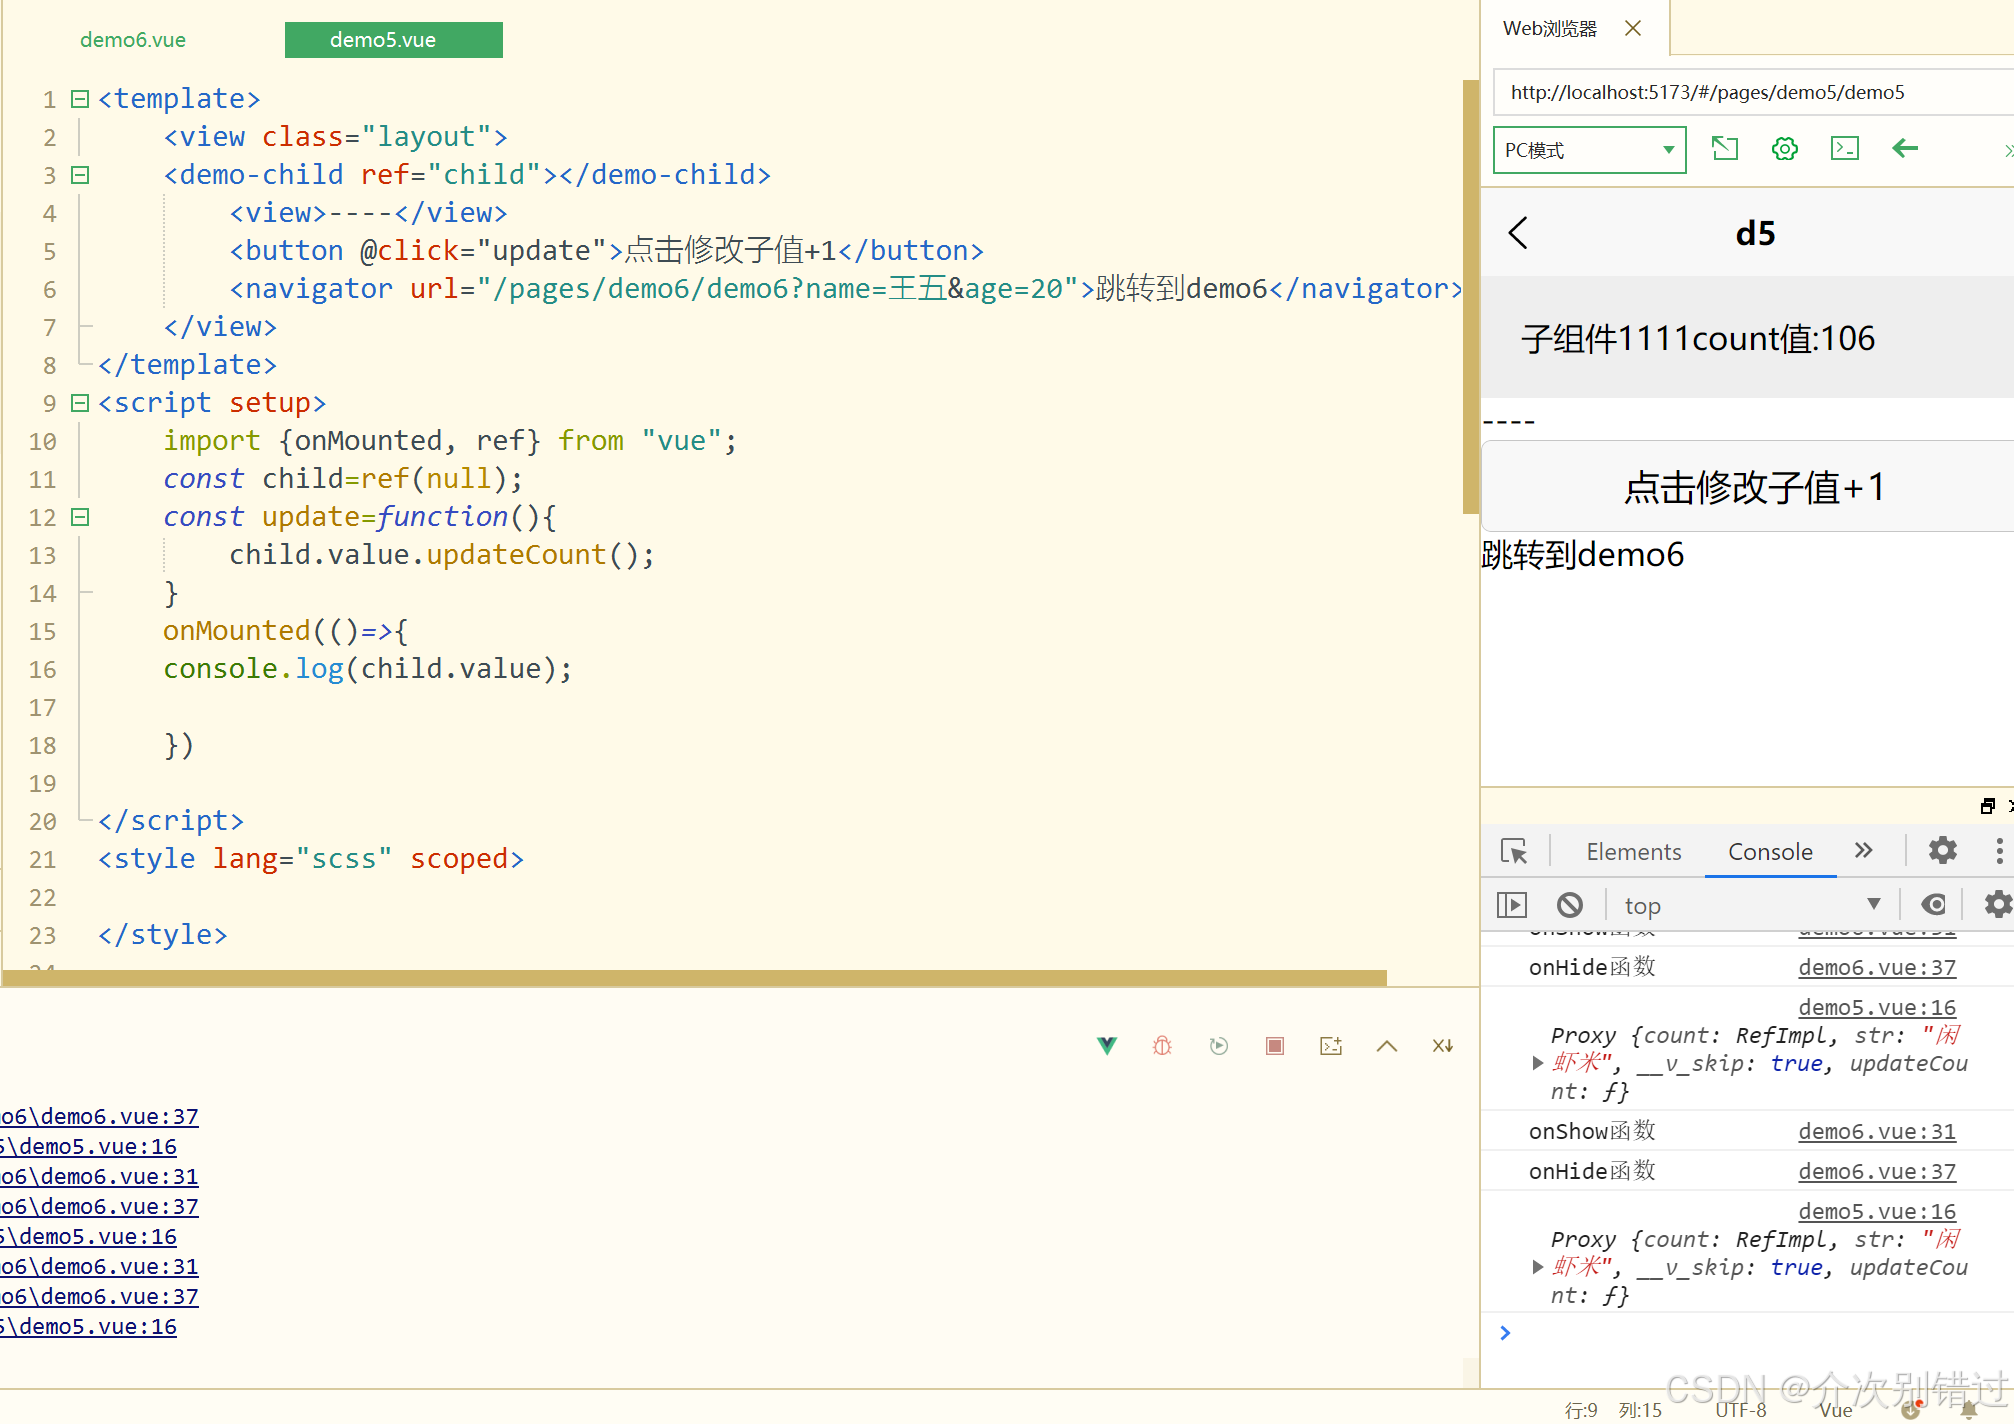
<template>
	<view class="layout">
	<demo-child ref="child"></demo-child>
		<view>----</view>
		<button @click="update">点击修改子值+1</button>
		<navigator url="/pages/demo6/demo6?name=王五&age=20">跳转到demo6</navigator>
	</view>
</template>
<script setup>
	import {onMounted, ref} from "vue";
	const child=ref(null);
	const update=function(){
		child.value.updateCount();
	}
	onMounted(()=>{
	console.log(child.value);

	})

</script>
<style lang="scss" scoped>

</style>
<template>
	<view class="">
		姓名:{{name}} - {{age}}
		<scroll-view scroll-y="true" ref="scroll">
			<view></view>
		</scroll-view>
		<navigator url="/pages/demo5/demo5">跳转demo5</navigator>
		<view>----</view>
		<view>计数:{{count}}</view>
	</view>
</template>
<script setup>
 import {onBeforeMount, onMounted, ref} from "vue"
 import {onLoad,onReady,onShow,onHide} from "@dcloudio/uni-app"
 const name=ref("张三")
 const age=ref(18)
 const scroll=ref(null)
 const count=ref(0)
 let time=setInterval(()=>{
	 count.value++
 },50)

 onLoad((e)=>{
	 console.log("onload函数");
	 console.log(scroll.value)
	 console.log(e);
	 name.value=e.name;
	 age.value=e.age;
 })
 onShow(()=>{
	 console.log("onShow函数");
  time=setInterval(()=>{
  	 count.value++
  },50)
 })
 onHide(()=>{
	 console.log("onHide函数");
	 clearInterval(time)
 })
onReady((e)=>{
	console.log("onReady");
})
onBeforeMount(()=>{
	console.log("onBeforeMount函数")
})
onMounted(()=>{

	console.log("onMounted函数");
})
</script>
<style lang="scss" scoped>

</style>
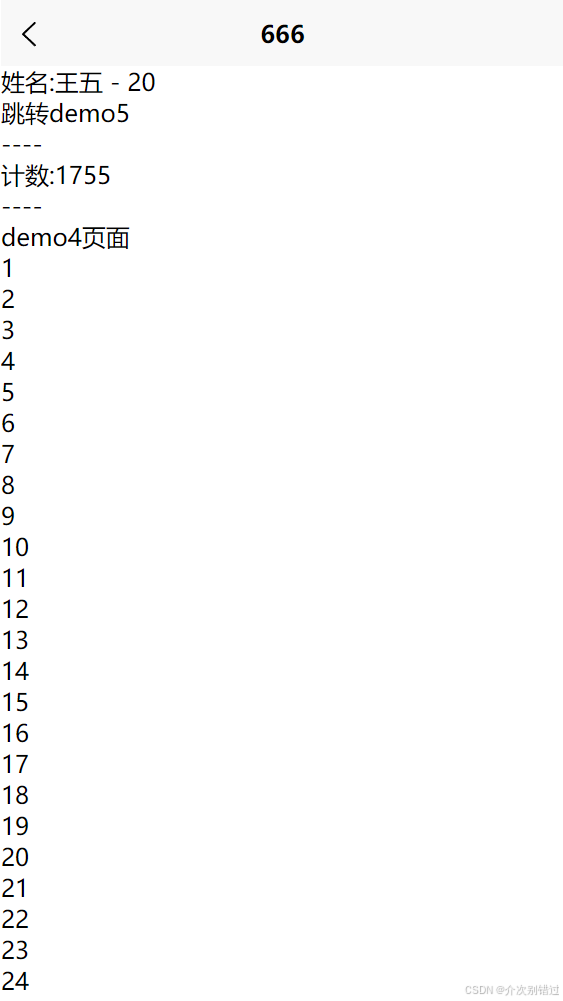
onUnload页面卸载和onPageScroll监听页面滚动
<template>
<view class="">
姓名:{{name}} - {{age}}
<scroll-view scroll-y="true" ref="scroll">
<view></view>
</scroll-view>
<navigator url="/pages/demo5/demo5">跳转demo5</navigator>
<view>----</view>
<view>计数:{{count}}</view>
<view>----</view>
<navigator open-type="reLaunch" url="/pages/demo4/demo4">demo4页面</navigator>
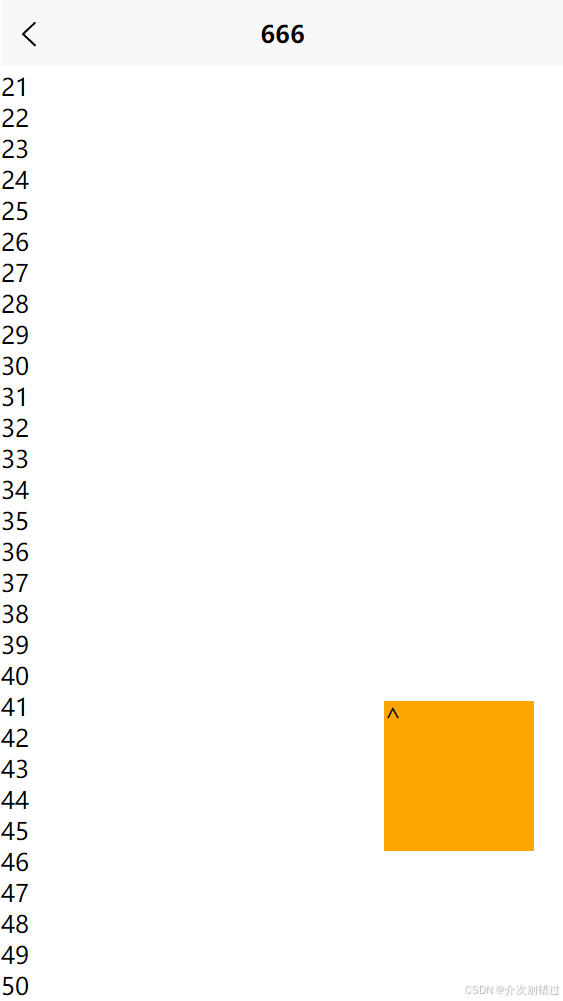
<view v-for="item in 50">{{item}}</view>
<view class="fixed" v-if="fixed">^</view>
</view>
</template>
<script setup>
import {onBeforeMount, onMounted, ref} from "vue"
import {onLoad,onReady,onShow,onHide,onUnload,onPageScroll} from "@dcloudio/uni-app"
const name=ref("张三")
const age=ref(18)
const scroll=ref(null)
const count=ref(0)
const fixed=ref(false)
let time=setInterval(()=>{
count.value++
},50)
onLoad((e)=>{
console.log("onload函数");
console.log(scroll.value)
console.log(e);
name.value=e.name;
age.value=e.age;
})
onShow(()=>{
console.log("onShow函数");
time=setInterval(()=>{
count.value++
},50)
})
onHide(()=>{
console.log("onHide函数");
clearInterval(time)
})
onReady((e)=>{
console.log("onReady");
})
onBeforeMount(()=>{
console.log("onBeforeMount函数")
})
onMounted(()=>{
console.log("onMounted函数");
})
onUnload(()=>{
console.log("卸载页面")
})
onPageScroll((e)=>{
console.log(e.scrollTop);
// if(e.scrollTop>200){
// fixed.value=true
// }else{
// fixed.value=false
// }
fixed.value=e.scrollTop>200
})
</script>
<style lang="scss" scoped>
.fixed{
width: 100px;
height: 100px;
background: orange;
position: fixed;
bottom: 100px;
right:20px;
}
</style>
响应式单位rpx及搭配使用UI产品工具
rpx和px的区别
rpx单位是微信小程序中css的尺寸单位,rpx可以根据屏幕宽度进行自适应。
规定屏幕宽为750rpx。如在 iPhone6 上,屏幕宽度为375px,共有750个物理像素,则750rpx = 375px = 750物理像素,1rpx = 0.5px
设备 rpx换算px (屏幕宽度/750) px换算rpx (750/屏幕宽度)
iPhone5 1rpx = 0.42px 1px = 2.34rpx
iPhone6 1rpx = 0.5px 1px = 2rpx
iPhone6s 1rpx = 0.552px 1px = 1.81rpx
@import导入css样式及scss变量用法与static目录
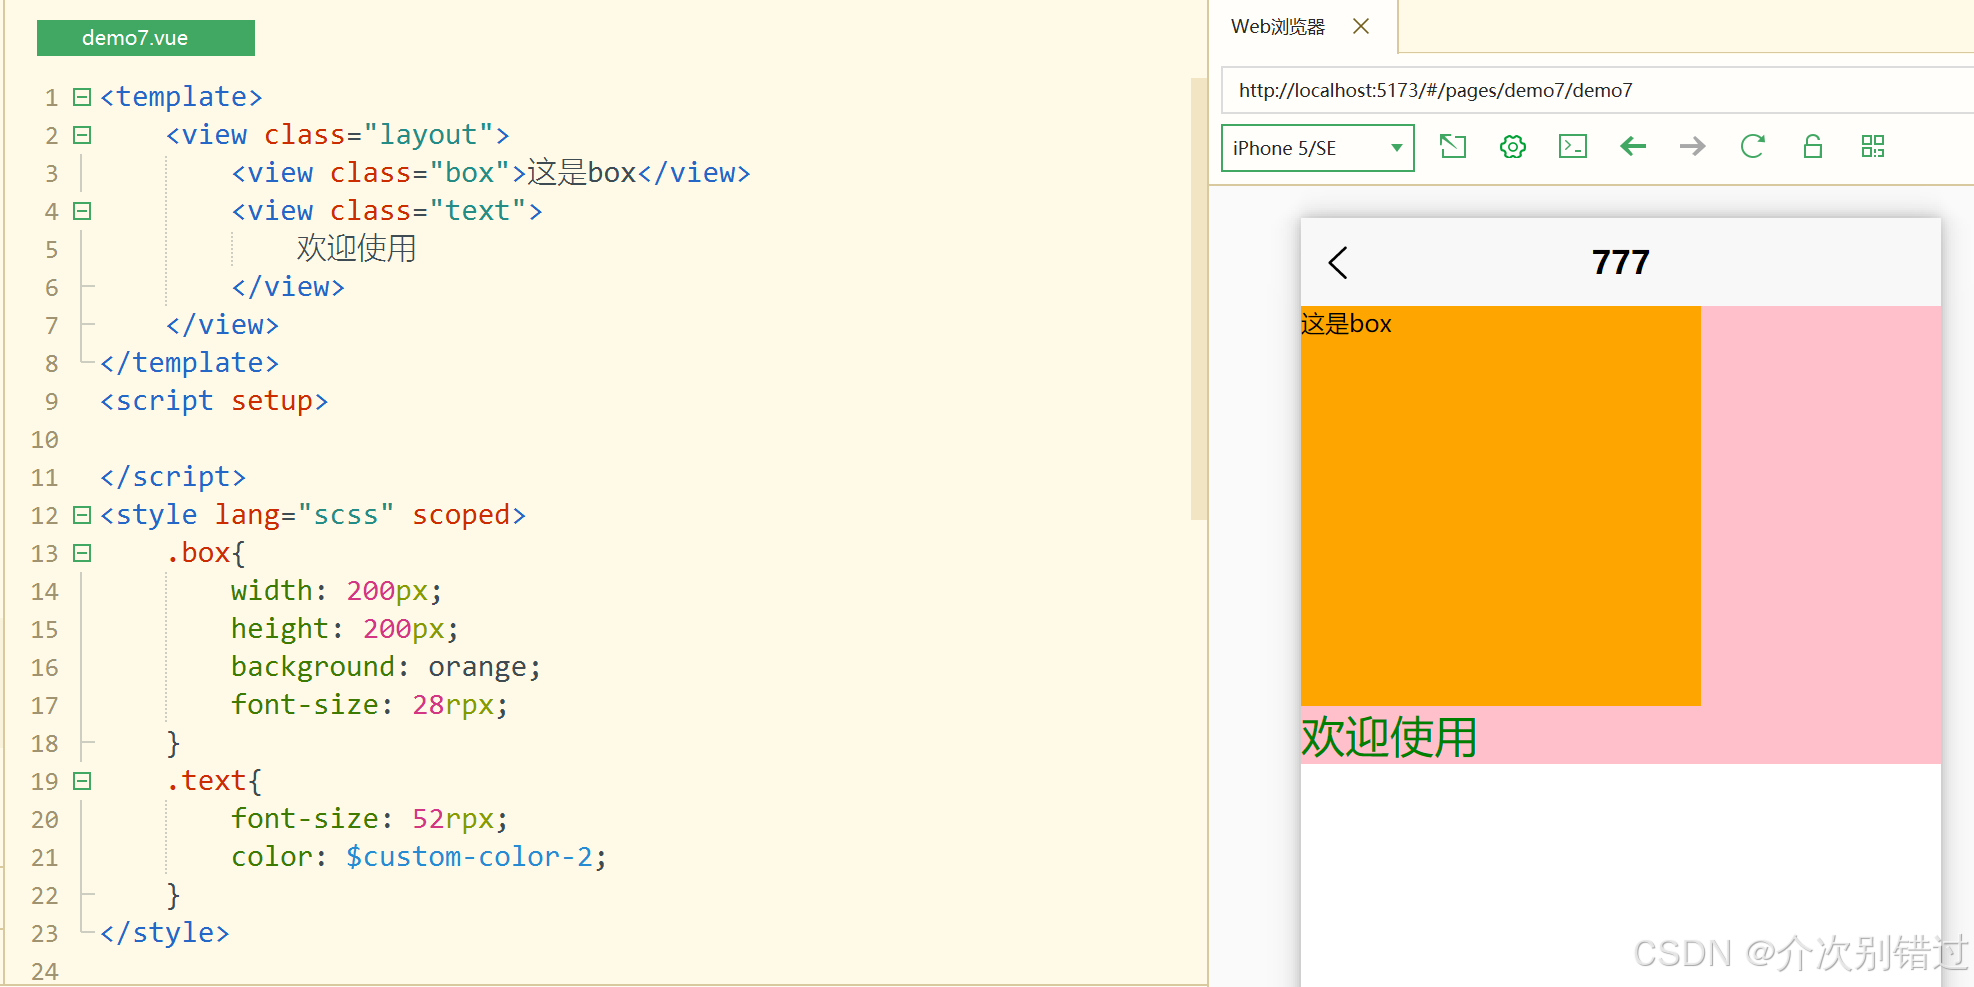
<template>
	<view class="layout">
		<view class="box">这是box</view>
		<view class="text">
			欢迎使用
		</view>
	</view>
</template>
<script setup>

</script>
<style lang="scss" scoped>
	.box{
		width: 200px;
		height: 200px;
		background: orange;
		font-size: 28rpx;
	}
	.text{
		font-size: 52rpx;
		color: $custom-color-2;
	}
</style>
uni.scss
@import "@/common/scss/self.scss";
self.scss
$custom-color-1:red;
$custom-color-2:green;
$custom-color-3:#35570f;
pages.json页面路由globalStyle的属性
<template>
	<view class="content">
	<image src="../../static/logo.png" mode=""></image>
	<view class="" v-for="item in 100">
		{{item}}
	</view>
	</view>
</template>

<script setup>
import  {onReachBottom} from "@dcloudio/uni-app"
onReachBottom(()=>{
	console.log("到底了")
})

</script>

<style>
.content{
	display: flex;
	flex-direction: column;
	align-items: center;
	justify-content: center;
}
</style>
pages设置页面路径及窗口表现
{
"pages": [ //pages数组中第一项表示应用启动页,参考:https://uniapp.dcloud.io/collocation/pages
{
"path": "pages/index/index",
"style": {
"navigationBarTitleText": "uni-app"
}
},
{
"path": "pages/user/user",
"style": {
"navigationBarTitleText": "用户中心"
}
},
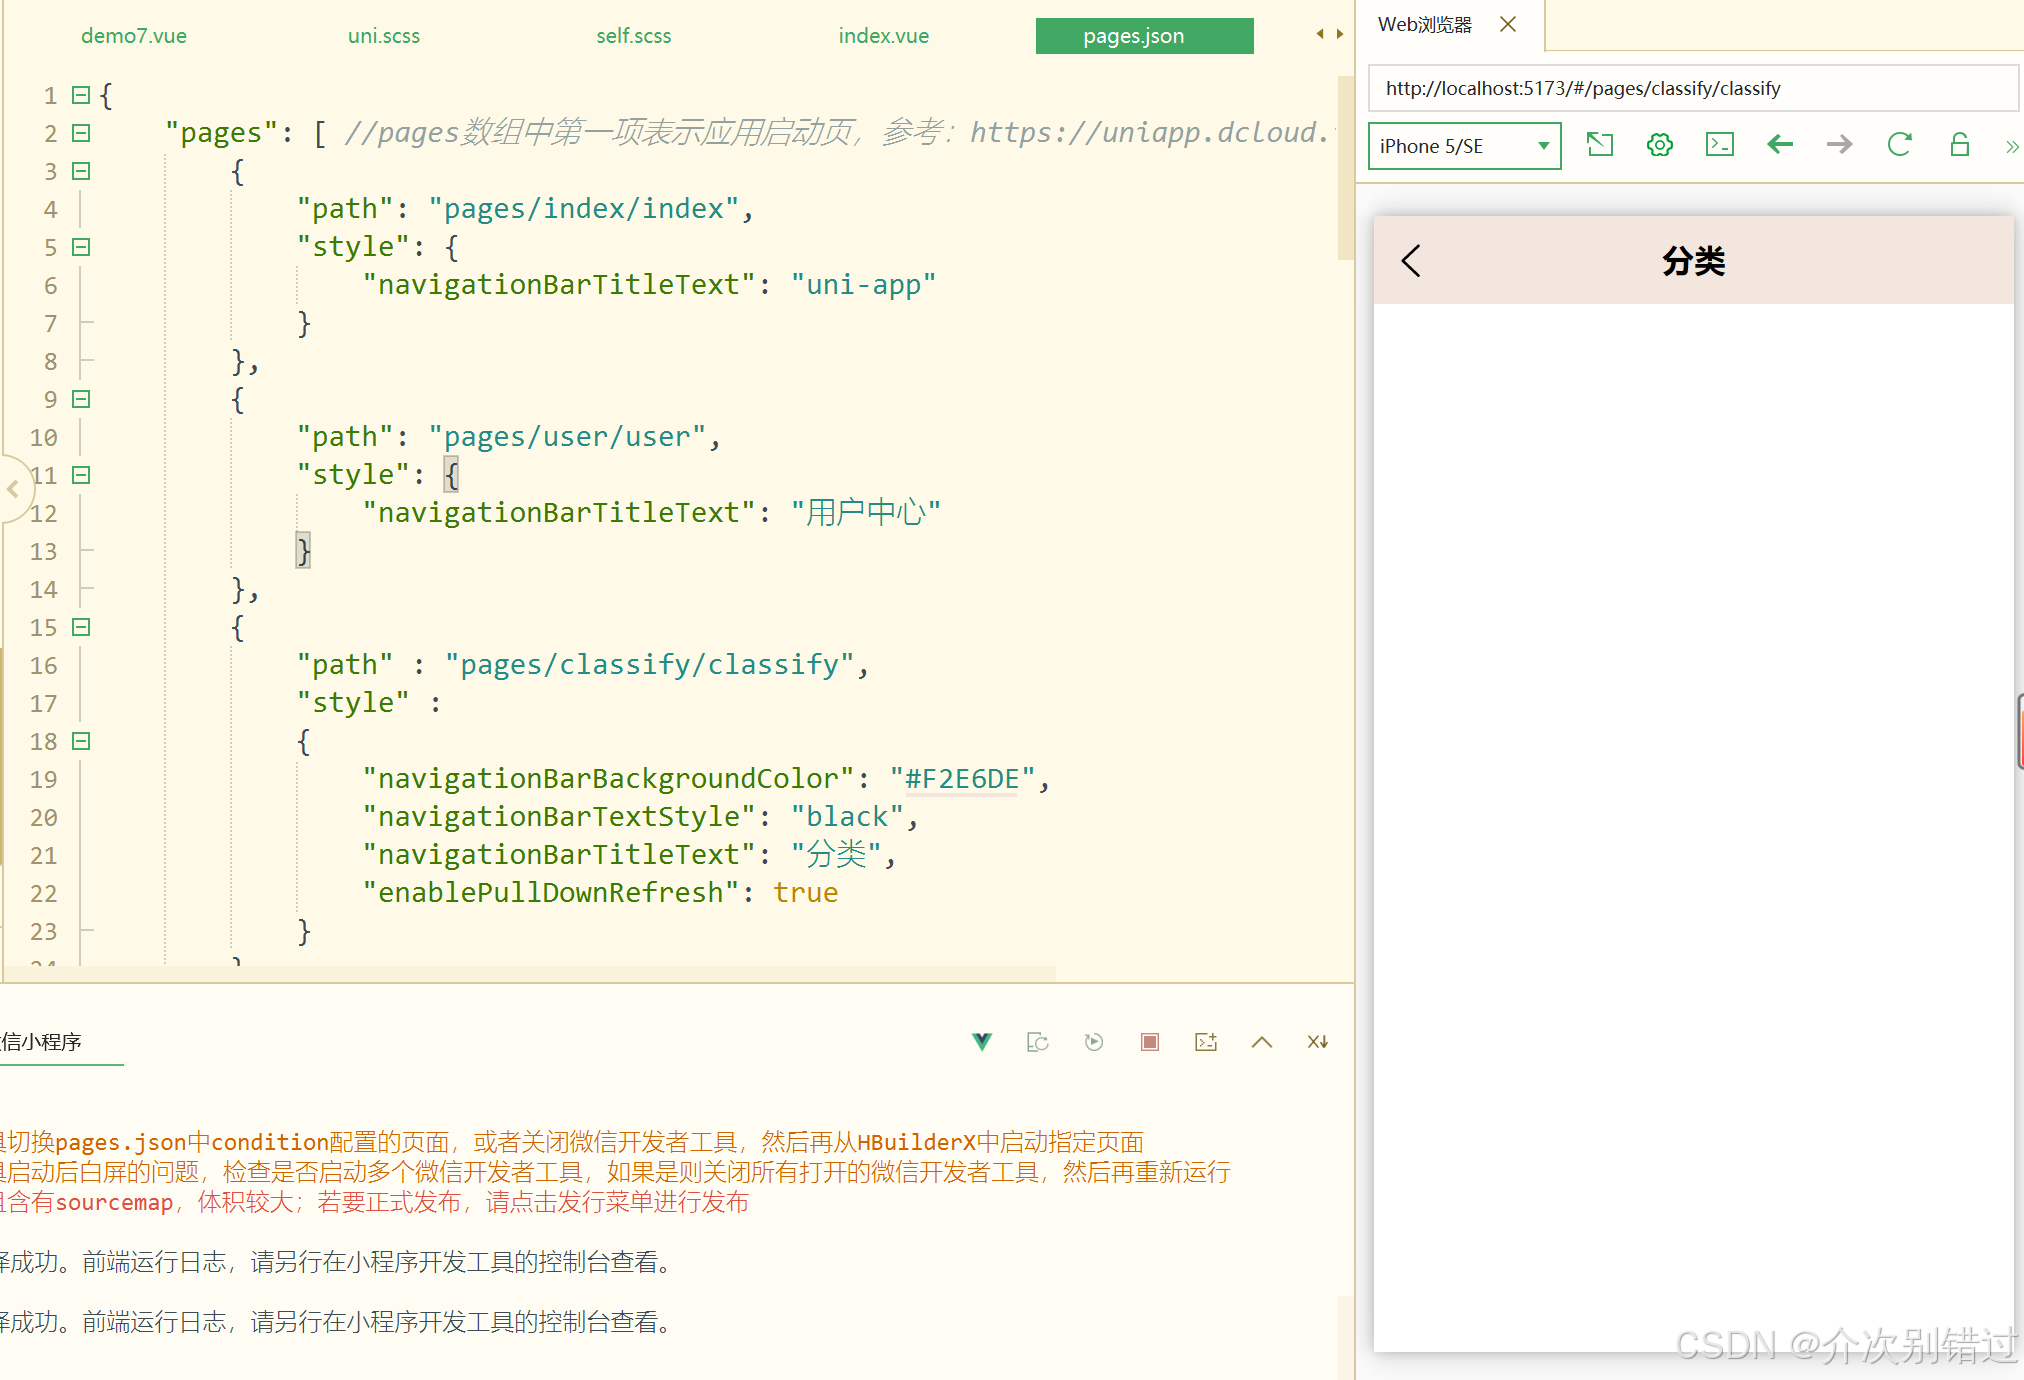
{
"path" : "pages/classify/classify",
"style" :
{
"navigationBarBackgroundColor": "#F2E6DE",
"navigationBarTextStyle": "black",
"navigationBarTitleText": "分类",
"enablePullDownRefresh": true
}
},
{
"path" : "pages/demo1/demo1",
"style" :
{
"navigationBarTitleText" : "demo1"
}
},
{
"path" : "pages/demo2/demo2",
"style" :
{
"navigationBarTitleText" : "demo2"
}
},
{
"path" : "pages/demo3/demo3",
"style" :
{
"navigationBarTitleText" : "demo3"
}
},
{
"path" : "pages/demo4/demo4",
"style" :
{
"navigationBarTitleText" : "44444"
}
},
{
"path" : "pages/demo5/demo5",
"style" :
{
"navigationBarTitleText" : "d5"
}
},
{
"path" : "pages/demo6/demo6",
"style" :
{
"navigationBarTitleText" : "666"
}
},
{
"path" : "pages/demo7/demo7",
"style" :
{
"navigationBarTitleText" : "777"
}
}
],
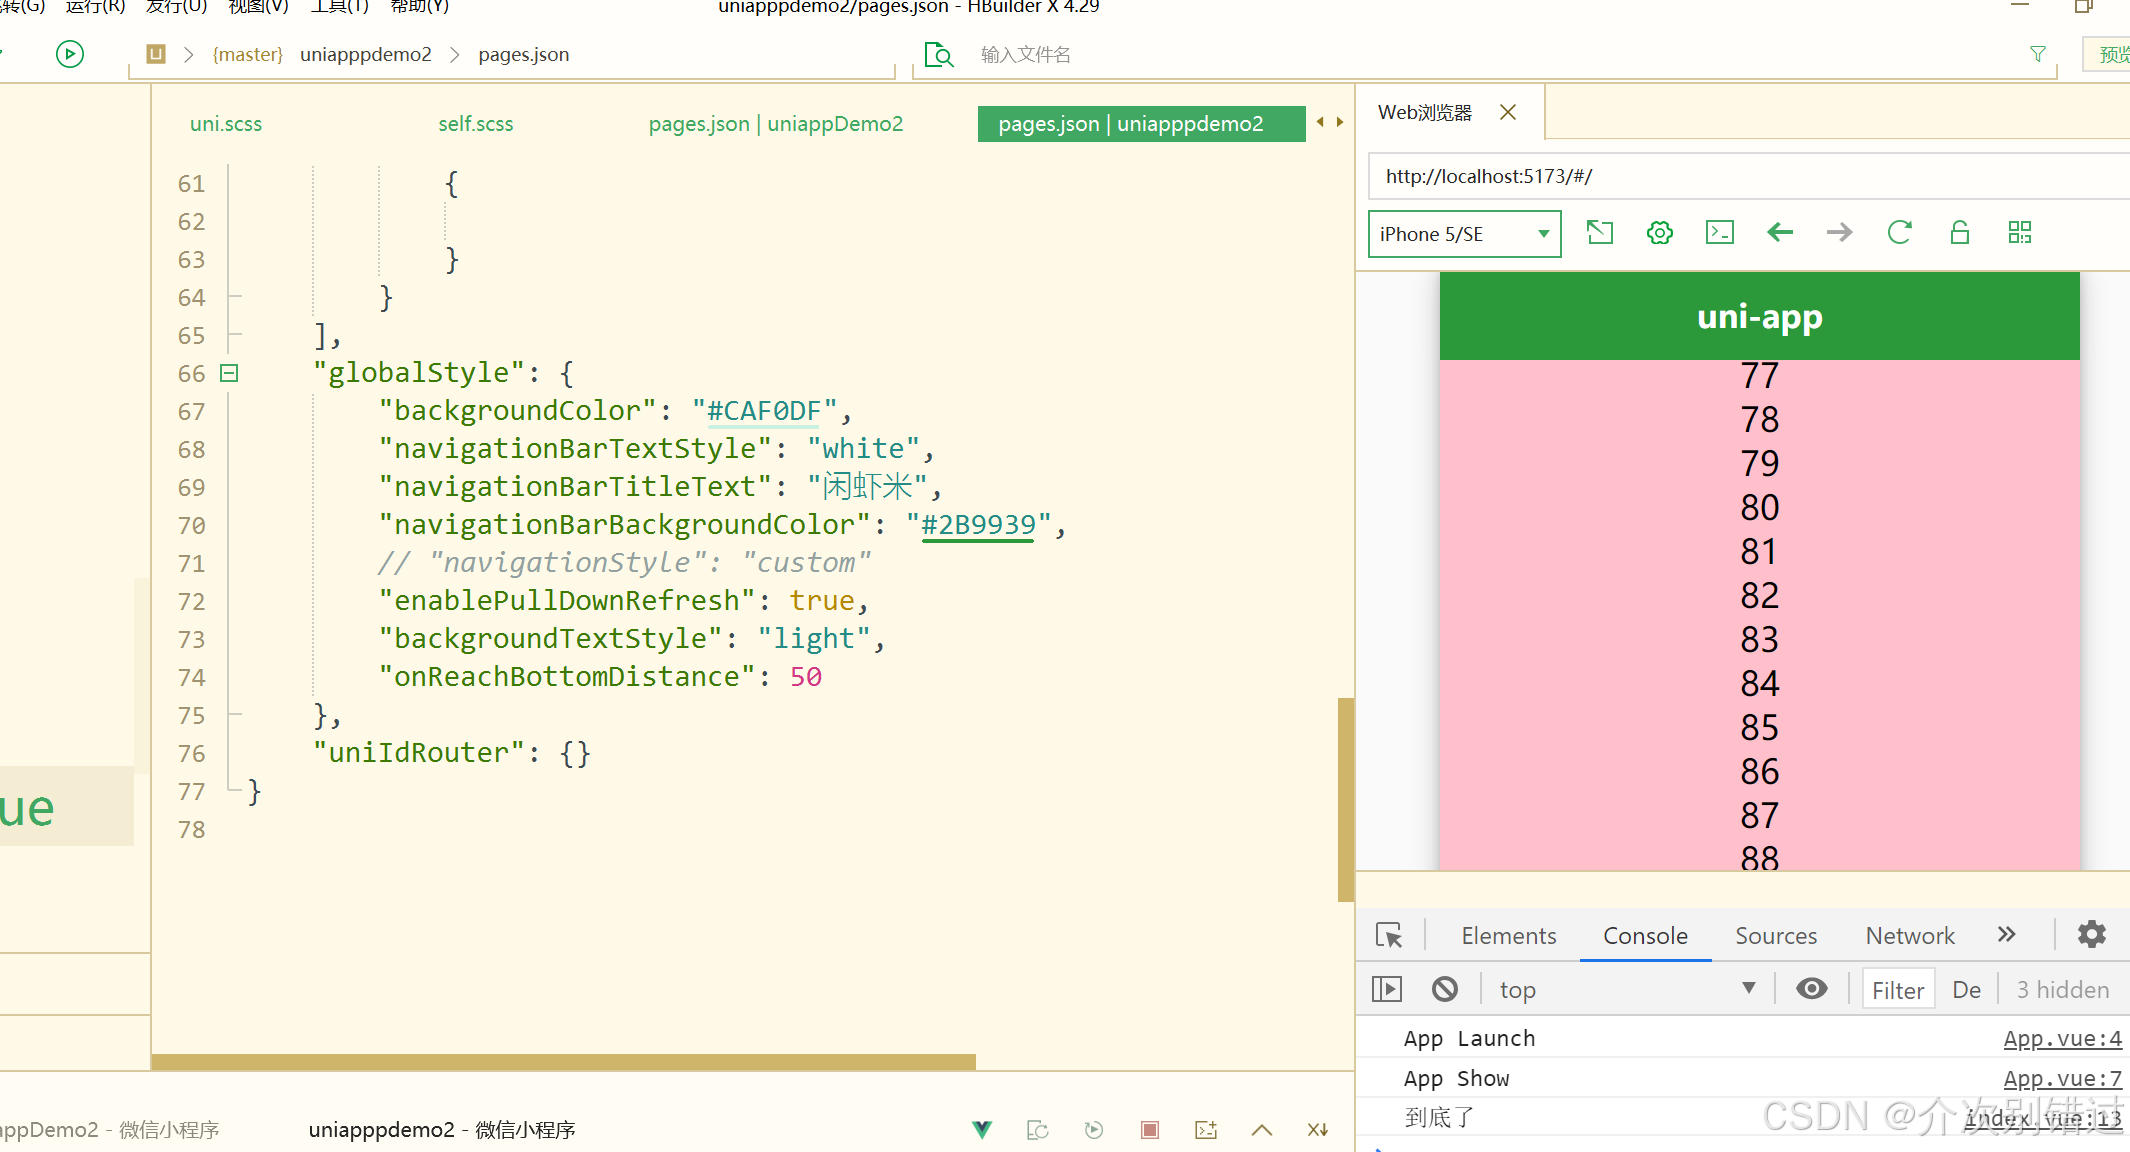
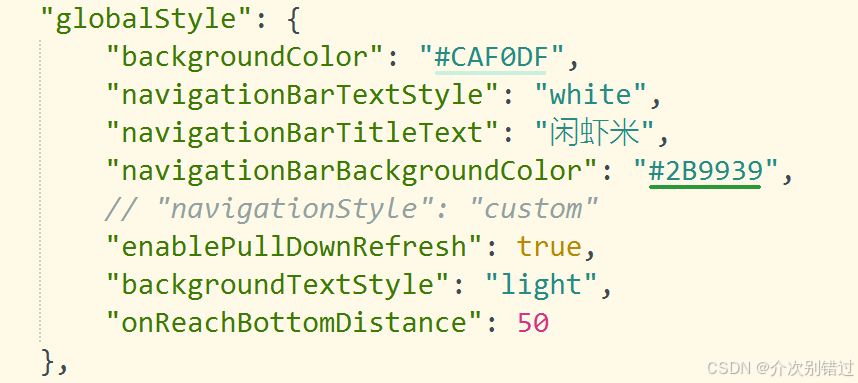
"globalStyle": {
"backgroundColor": "#CAF0DF",
"navigationBarTextStyle": "white",
"navigationBarTitleText": "闲虾米",
"navigationBarBackgroundColor": "#2B9939",
// "navigationStyle": "custom"
"enablePullDownRefresh": true,
"backgroundTextStyle": "light",
"onReachBottomDistance": 50
},
"uniIdRouter": {}
}
tabBar设置底部菜单选项及iconfont图标
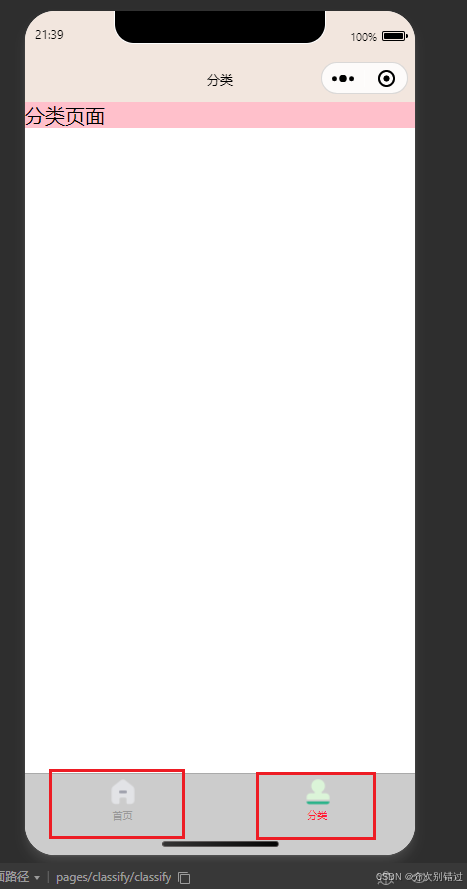
"tabBar": {
"color": "#999",
"selectedColor": "#fe1c32",
"backgroundColor": "#ccc",
"borderStyle": "black",
// "position": "top",
"list": [
{
"pagePath": "pages/index/index",
"text": "首页",
"iconPath": "static/tabBar/home.png",
"selectedIconPath": "static/tabBar/home-h.png"
},{
"pagePath": "pages/classify/classify",
"text": "分类",
"iconPath": "static/tabBar/user.png",
"selectedIconPath": "static/tabBar/user-h.png"
}
]
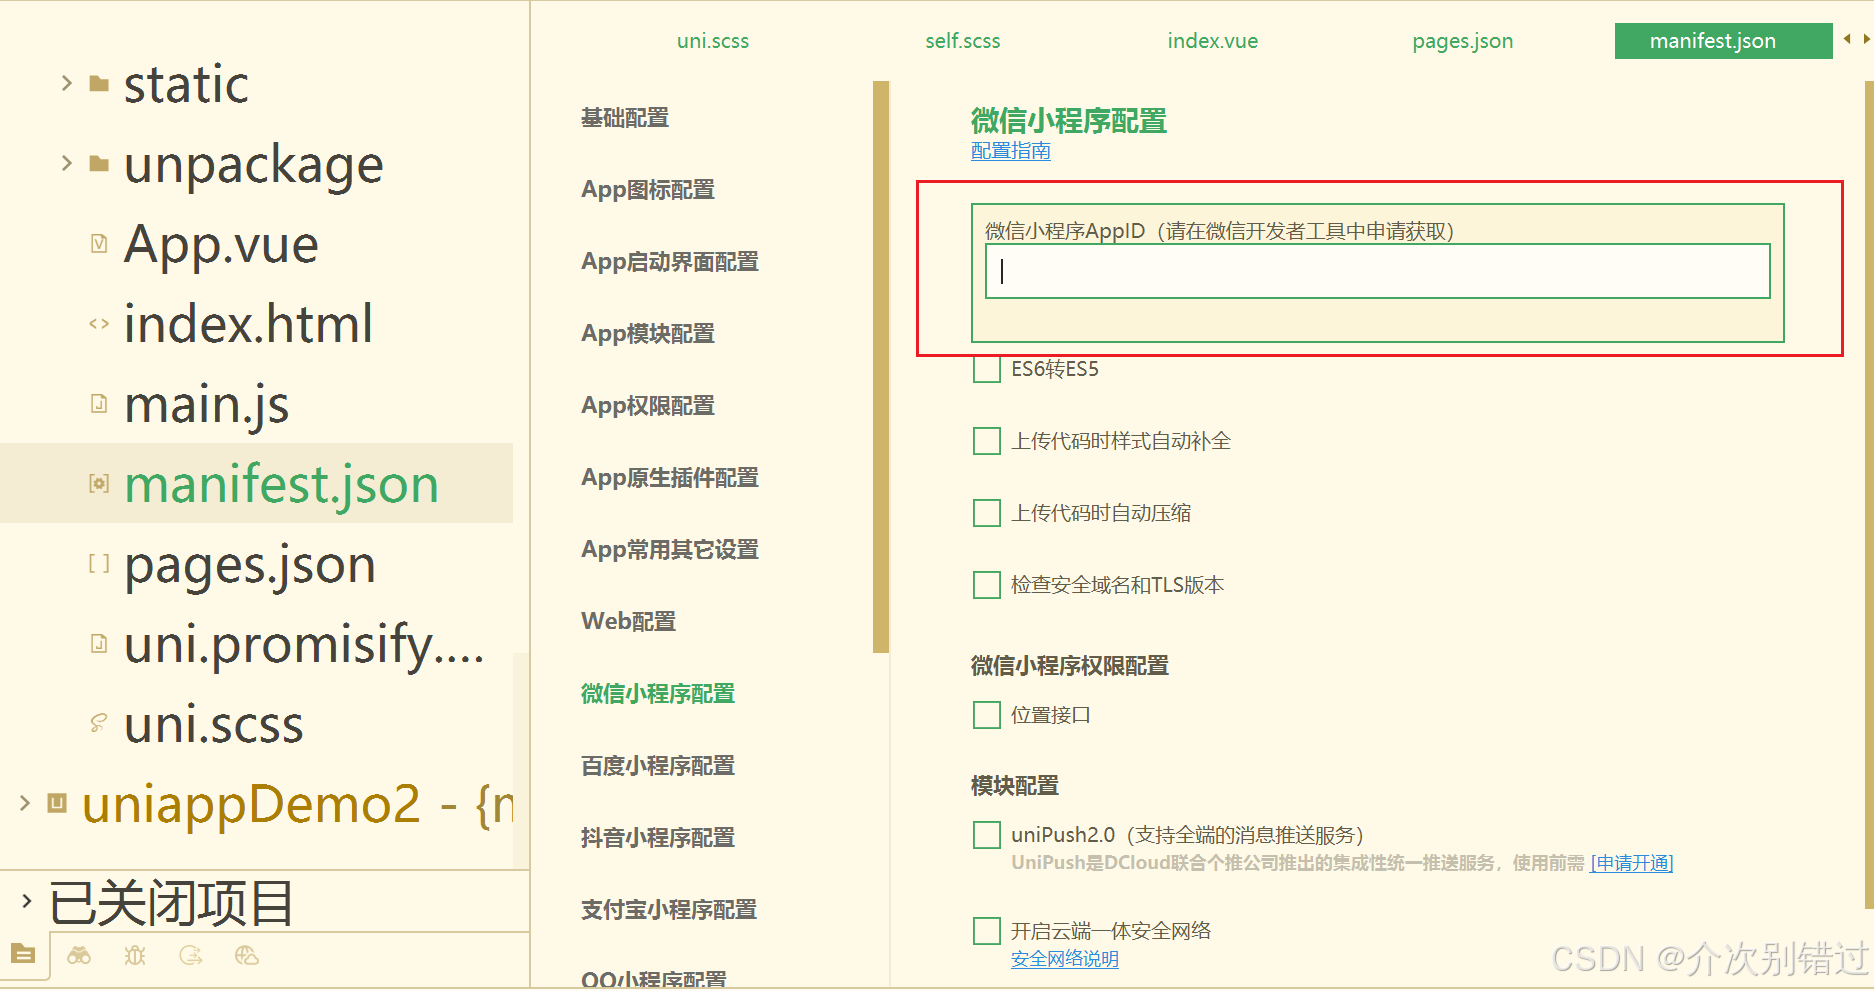
},manifest.json配置和注册微信小程序a ppid
vite.config中安装插件unplugin-auto-import自动导入vue和uniapp
开发uniapp使用Vue3组合式API版本,如何实现从vue模块中自动导入
uni-api交互反馈showToast的用法
showLoading加载和showModal模态框示例
showActionsheet从底部向上弹出操作菜单
动态设置页面导航条的样式
setTabBar设置TabBar和下拉刷新API
tabBar设置底部菜单选项以及iconfont图标,setTabBar设置TabBar和下拉刷新API
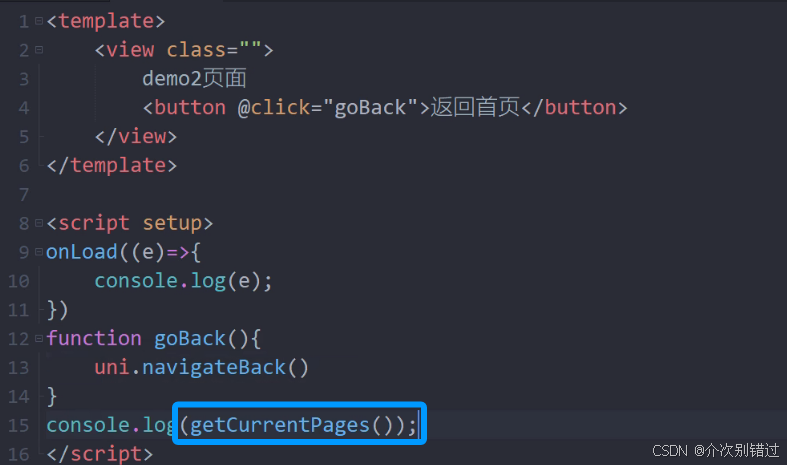
页面和路由APl-navigateTo及页面栈getCurrentPages
uniapp路由与页面跳转详解:API调用与Navigator组件实战
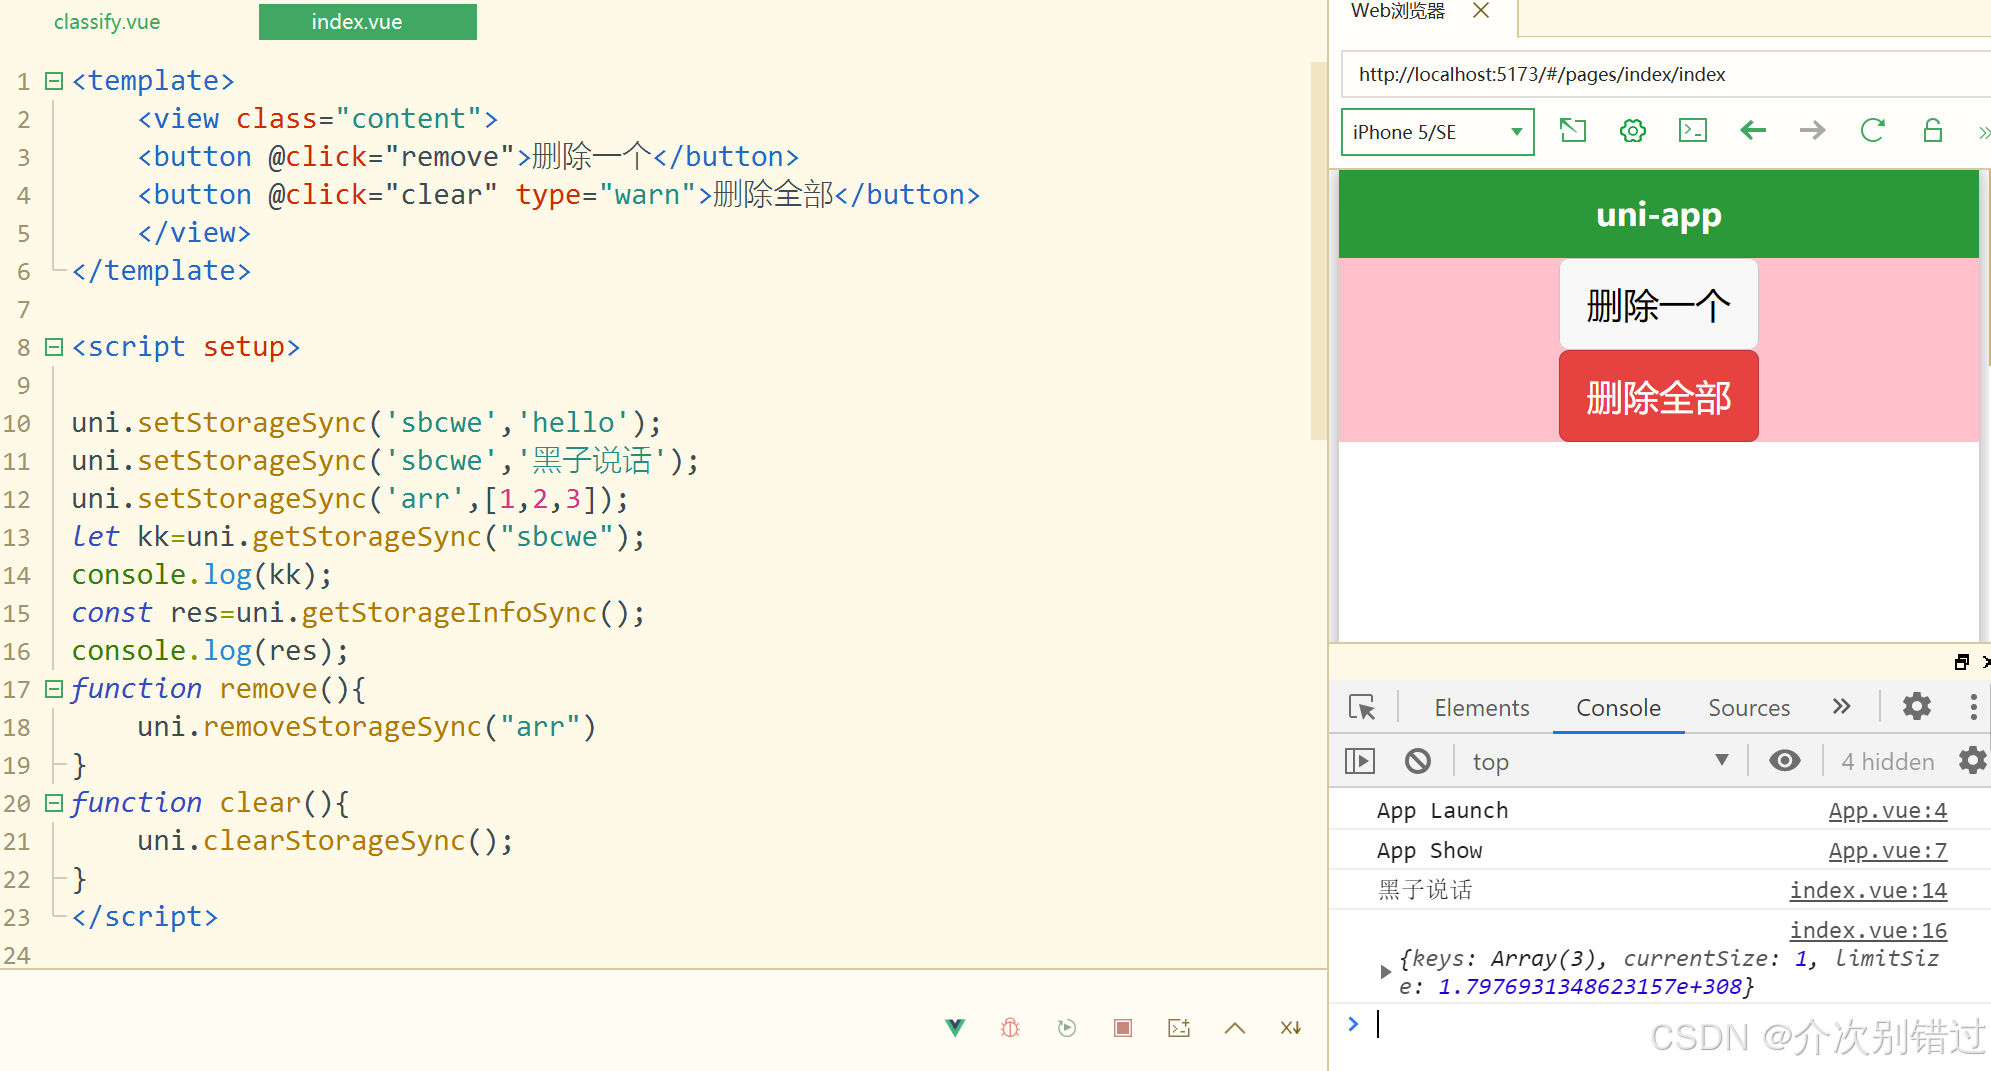
StorageSync数据缓存API
<template>
	<view class="content">
	<button @click="remove">删除一个</button>
	<button @click="clear" type="warn">删除全部</button>
	</view>
</template>

<script setup>

uni.setStorageSync('sbcwe','hello');
uni.setStorageSync('sbcwe','黑子说话');
uni.setStorageSync('arr',[1,2,3]);
let kk=uni.getStorageSync("sbcwe");
console.log(kk);
const res=uni.getStorageInfoSync();
console.log(res);
function remove(){
	uni.removeStorageSync("arr")
}
function clear(){
	uni.clearStorageSync();
}
</script>

<style>
.content{
	display: flex;
	flex-direction: column;
	align-items: center;
	justify-content: center;
}
</style>
uni.request发起网络请求3种回调结果调用
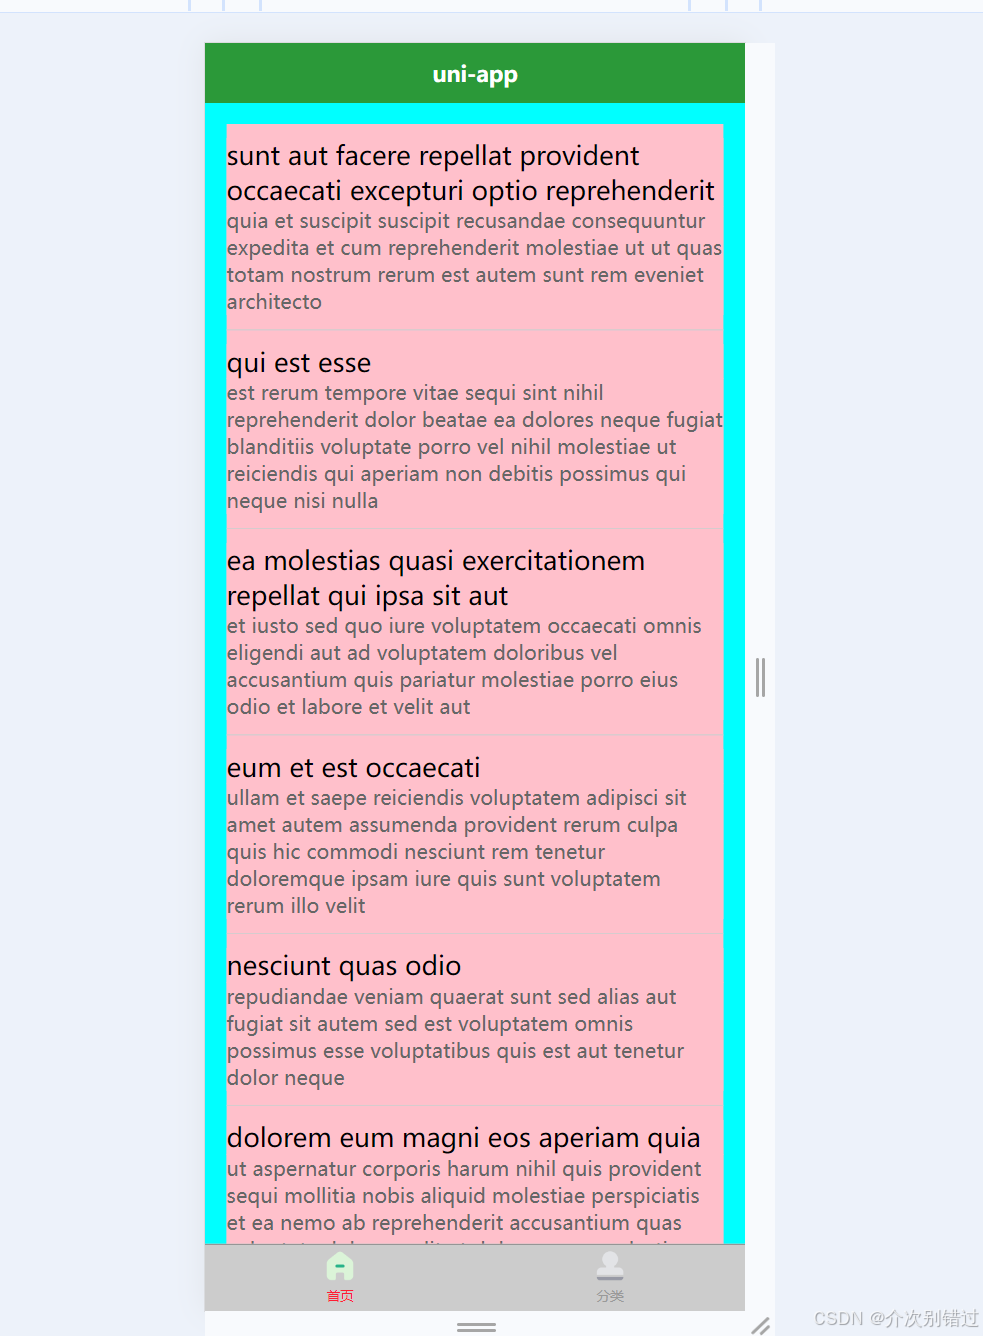
<template>
	<view class="layout">
		<view class="row" v-for="item in arrs" :key="item.id">
			<view class="title">{{item.title}}</view>
			<view class="content">{{item.body}}</view>
		</view>
	</view>
	<button @click="request">获取</button>
</template>

<script setup>
import {ref} from "vue";
let arrs=ref([]);

// function request(){
// 	uni.request({
// 		url:"https://jsonplaceholder.typicode.com/posts",
// 		success:res=>{
// 			console.log(res)
//            arrs.value=res.data
// 		}
// 	})
// }
// function request(){
// 	uni.request({
// 		url:"https://jsonplaceholder.typicode.com/posts",
// 	}).then(res=>{
// 		arrs.value=res.data
// 	})
// }

async function request(){
	let res=await uni.request({
		url:"https://jsonplaceholder.typicode.com/posts",
	})
	arrs.value=res.data
}

request();
</script>

<style>
.layout{
	padding: 30rpx;
	background-color: aqua;
	.row{
		border-bottom: 1px solid #cfcfcf;
		padding: 20rpx 0;

		.title{
			font-size: 36rpx;
		}
		.content{
			font-size: 28rpx;
			color: #666;
		}
	}
}
</style>
request各种不同类型的参数详解
<template>
	<view class="layout">
		<view class="row" v-for="item in arrs" :key="item.id">
			<view class="title">{{item.title}}</view>
			<view class="content">{{item.body}}</view>
		</view>
	</view>
	<button @click="request">获取</button>
</template>

<script setup>
import {ref} from "vue";
let arrs=ref([]);

// function request(){
// 	uni.request({
// 		url:"https://jsonplaceholder.typicode.com/posts",
// 		success:res=>{
// 			console.log(res)
//            arrs.value=res.data
// 		}
// 	})
// }
// function request(){
// 	uni.request({
// 		url:"https://jsonplaceholder.typicode.com/posts",
// 	}).then(res=>{
// 		arrs.value=res.data
// 	})
// }

// async function request(){
// 	let res=await uni.request({
// 		url:"https://jsonplaceholder.typicode.com/posts",
// 	})
// 	arrs.value=res.data
// }

// function request(){
// 	uni.request({
// 		url:"https://jsonplaceholder.typicode.com/posts/3",
// 		success: (res) => {
// 			console.log(res)
// 		}
// 	})
// }
// function request(){
// 	uni.request({
// 		url:"https://jsonplaceholder.typicode.com/posts?id=3&userId=1",
// 		success: (res) => {
// 			console.log(res)
// 			arrs.value=res.data
// 		}
// 	})
// }
function request(){
	uni.showLoading()
	uni.request({
		url:"https://jsonplaceholder.typicode.com/posts",
		data:{
		id:5,
		userId:1
		},
		header:{
			token:"44564",
			"content-type":"application/x-www-form-urlencode"
		},
		method:"GET",
		timeout:1000,
		success: (res) => {
			console.log(res)
			arrs.value=res.data
		},
		fail:err=> {
			console.log("超时");
			console.log(err);
		},
		complete() {
			uni.hideLoading();
		}

	})
}

request();
</script>

<style>
.layout{
	padding: 30rpx;
	background-color: aqua;
	.row{
		border-bottom: 1px solid #cfcfcf;
		padding: 20rpx 0;

		.title{
			font-size: 36rpx;
		}
		.content{
			font-size: 28rpx;
			color: #666;
		}
	}
}
</style>


 被折叠的 条评论
为什么被折叠?
被折叠的 条评论
为什么被折叠?
 到【灌水乐园】发言


