


目录)
MyBatis是什么?
- MyBatis是对JDBC的再一次封装,因此是比JDBC更简单的持久层框架。
- MyBatis之前是apache的一个开源项目:iBatis,之后2010年这个项⽬由apache迁移到了google code,并且改名为MyBatis 。2013年11⽉迁移到Github
- 中国官网
- 这个框架主要作用于三层架构的
持久层:
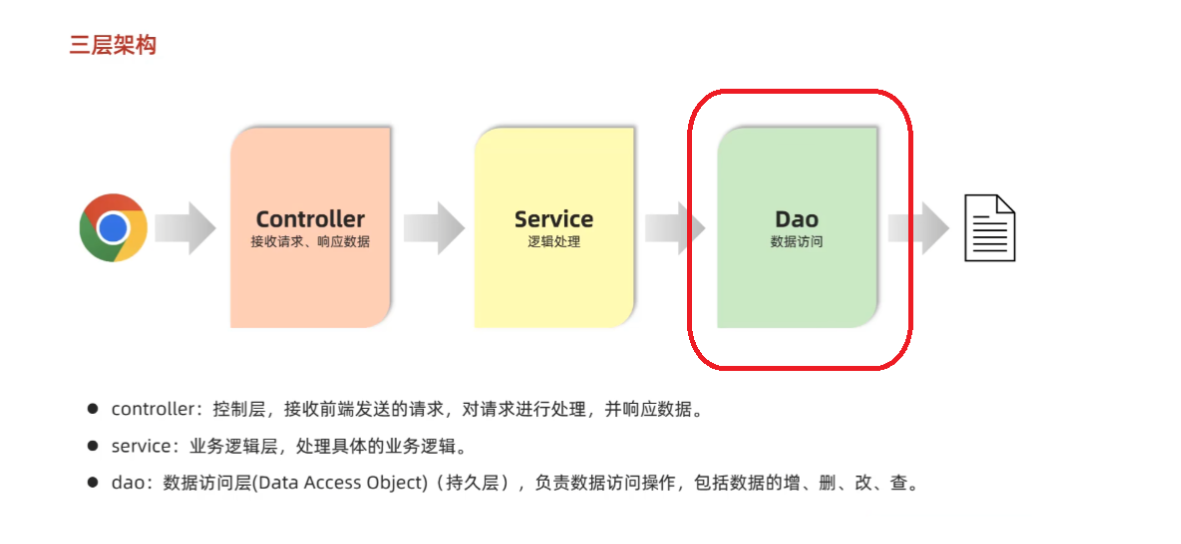
简单来说,它使用代码来实现程序和数据库之间的交互的。(增删查改)
MyBatis快速入门
以MySQL为例演示
目标:
- 使用MyBatis的注解进行增删查改
- 使用MyBatis的配置进行增删查改
一、准备工作
1、创建spring项目
1):导入以下依赖,一个都不能少:

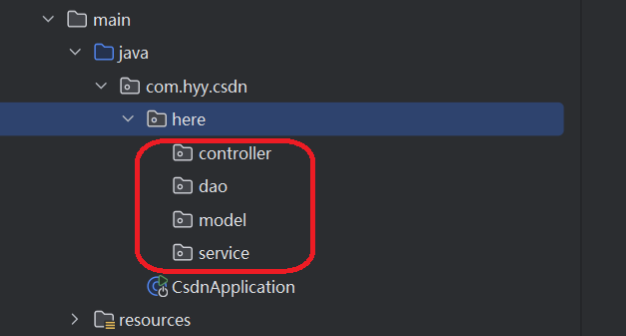
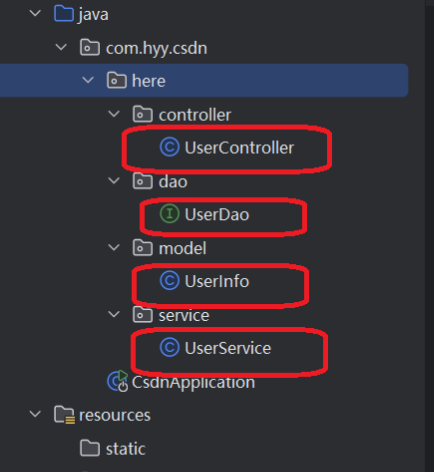
2):java路径下创建四个包,一个都不能少:
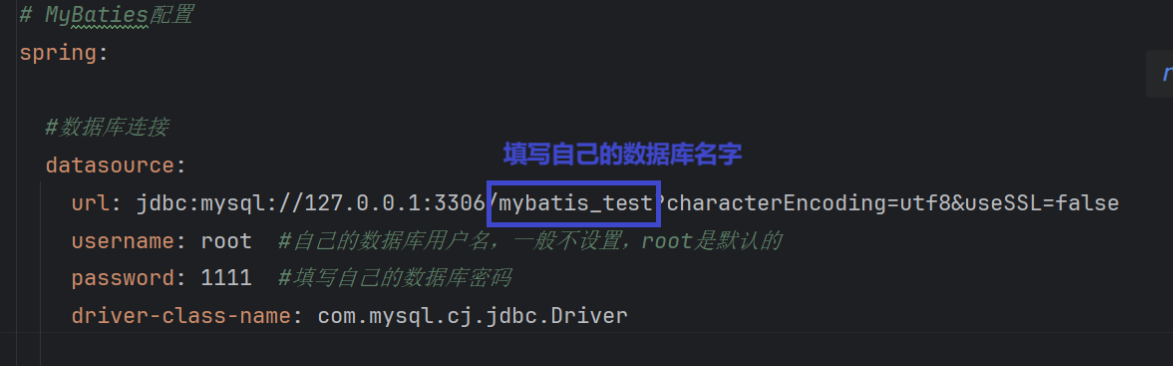
3):在resources路径下,找到application.yml,配置数据库连接:
# MyBaties配置
spring:

  #数据库连接
  datasource:
    url: jdbc:mysql://127.0.0.1:3306/mybatis_test?characterEncoding=utf8&useSSL=false
    username: root
    password: 1111
    driver-class-name: com.mysql.cj.jdbc.Driver
注意:
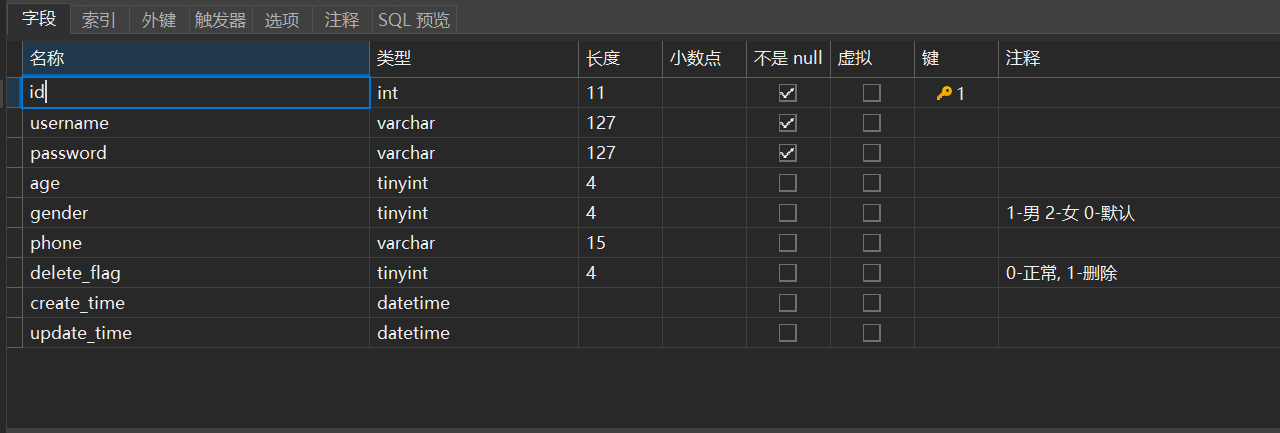
2、Mock数据
捏造虚假数据,用于测试,字段包含这些:
3、写一个接口测试(获取数据库所有信息)
1):创建如下几个类:
2):UserInfo:
@Data
public class UserInfo {

    //数据库的查询,自动会根据这个对象属性中的名字进行匹配!!!!
    private Integer id;         // 用户ID
    private String username;    // 用户名
    private String password;    // 密码
    private Integer age;        // 年龄
    private Integer gender;     // 性别
    private String phone;       // 手机号码
    private Integer deleteFlag; // 删除标志
    private Date createTime;    // 创建时间
    private Date updateTime;    // 更新时间


}
3):UserDao
@Mapper
public interface UserDao {

    @Select("select * from user_info")
    List<UserInfo> getAll();
}
4):UserService
@Service
public class UserService {

    @Autowired
    private UserDao userDao;

    public List<UserInfo> getAll(){
        return userDao.getAll();
    }
}
5):UserController
@RequestMapping("/p1")
@RestController
public class UserController {

    @Autowired
    private UserService userService;

    @RequestMapping("/p2")
    public List<UserInfo> getList(){
        List<UserInfo> list=userService.getAll();
        return list;
    }
}
6):测试
URL:
http://127.0.0.1:8080/p1/p2
成功:
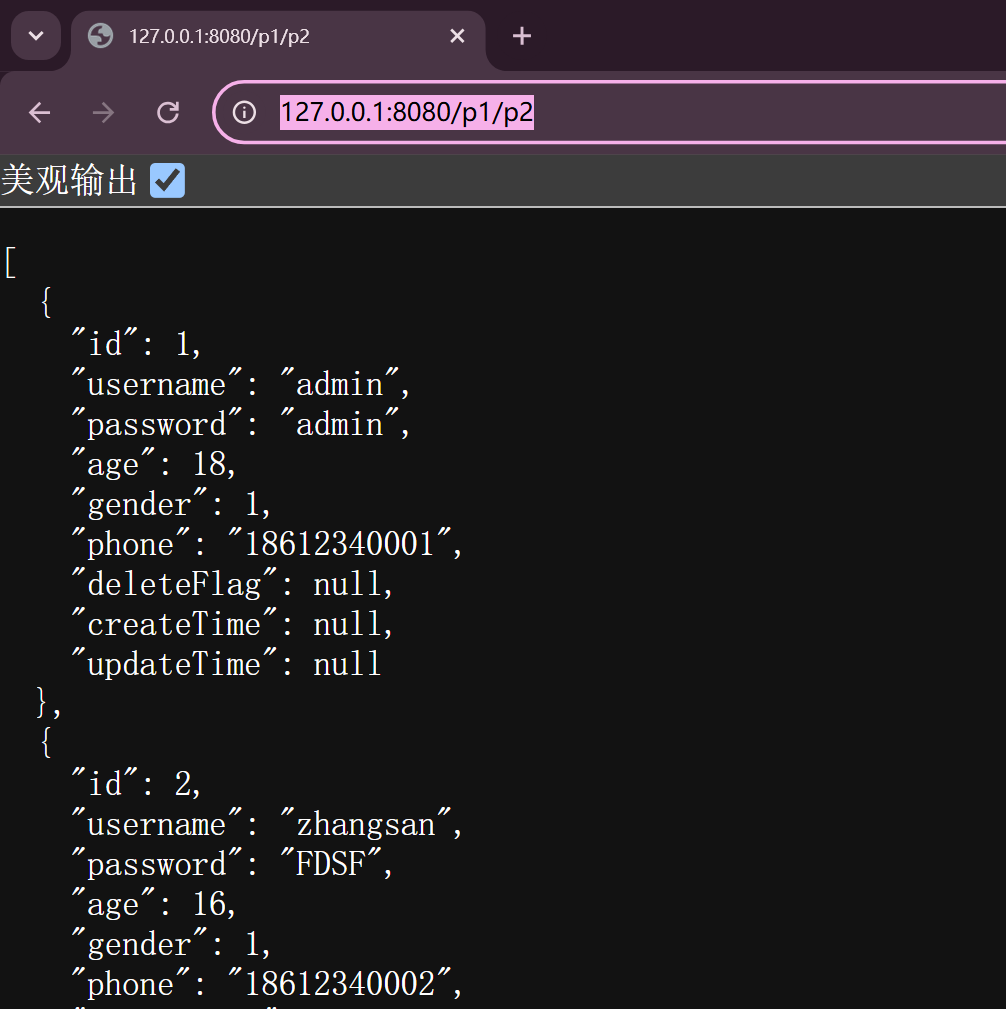
实际上我们刚才就完成了一次数据库连接!
二、注解进行CURD
SELECT
1、直接查询
@Select(“写SQL即可”)
@Mapper
public interface UserDao {
    @Select("select * from user_info")
    List<UserInfo> getAll();
}
2、参数映射(AS)
使用数据库的AS关键字,对数据库中的字段进行重命名,映射到Java对象属性
@Mapper
public interface UserDao {

 @Select("select id, username, password, age, gender, phone, " +
            "delete_flag as deletFlag," +
            " create_time as createTime, " +
            "update_time upDateTime " +
            "from user_info")
    List<UserInfo> selectAll2();
}
3、参数映射(Result)
//参数映射方法2 @Results
    @Results(id = "baseMap", value = {
            @Result(column = "delete_time", property = "deleteTime"),
            @Result(column="create_time",property="createTime"),
            @Result(column = "delete_flag",property = "deleteFlag"),
    })
    @Select("select * from user_info")
    List<UserInfo> selectAll3();

    //如果下面还要进行参数映射,直接@ResultMap("baseMap")即可
    @ResultMap("baseMap")
    @Select("select * from user_info where id=#{idd}")
    List<UserInfo> selectAll4(Integer idd);
INSERT
方法一:
@Mapper
public interface UserDao {
  //按照属性插入即可,注意非空字段一定要加上
    @Options(useGeneratedKeys = true,keyProperty ="id")//这个注解可以获取数据库的自增id,然后返回到Java的映射的对象的字段上(id)
    @Insert("insert into user_info (id,username,`password`,create_time)" +
            " values (#{id},#{username},#{password},#{createTime})")
    Integer insert(UserInfo userInfo);
}
方法二:
可以进行参数绑定:
@Mapper
public interface UserDao {
  //方法二:
    @Insert("insert into user_info (id,username,`password`,create_time)" +
            " values (#{u.id},#{u.username},#{u.password},#{u.createTime})")
    Integer insert2(@Param("u") UserInfo userInfo);
}
UPDATE
@Mapper
public interface UserDao {
     //更新方法一:
    //参数是字段
    @Update("update user_info set password=#{password} where id=#{id}")
    Integer updateById(Integer id, String password);

    //更新方法二:
    //传递对象,注意SQL语句中涉及的字段传递的对象必须也要设置。不设置程序能正常执行,但是没有修改数据库中的对应值!!
    @Update("update user_info set create_time=#{createTime} where id=#{id}")
    Integer updateByObject(UserInfo userInfo);
}
DELETE
@Mapper
public interface UserDao {
     //删除
    @Delete("delete from user_info where id=#{id}")
    Integer deleteById(Integer id);
}
三、配置进行CURD
1、准备工作
找到这个文件:
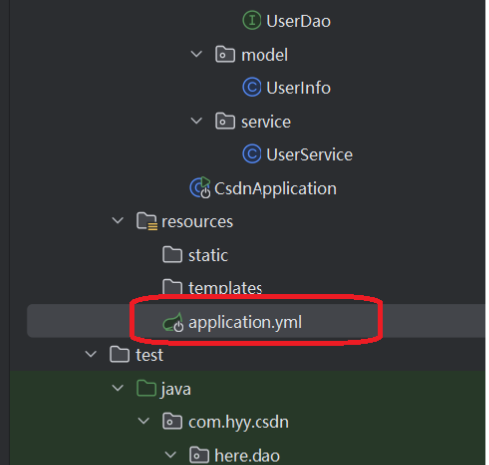
添加这个配置:
mybatis:

  #用于xml写SQL语句
  #配置mybaties xml的文件路径 在resource/dao 创建所有表的xml文件,同时建立的文件夹后面必须名字是Dao.xml
  mapper-locations: classpath:dao/**Dao.xml
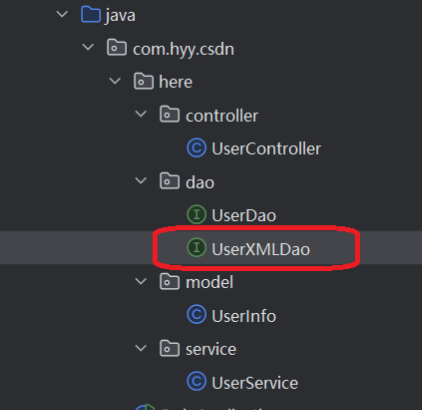
找到这个路径,再创建一个接口:
然后再对resources路径下创建一个xml文件:
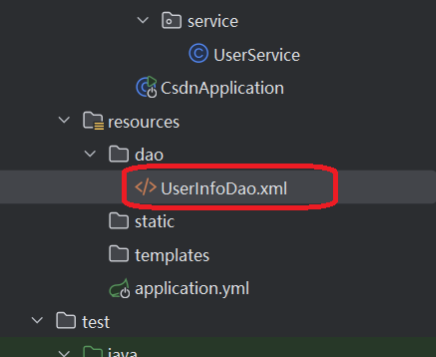
然后对这个文件进行配置:
<?xml version="1.0" encoding="UTF-8"?>
<!DOCTYPE mapper PUBLIC "-//mybatis.org//DTD Mapper 3.0//EN" "http://mybatis.org/dtd/mybatis-3-mapper.dtd">
<mapper namespace="com.hyy.csdn.here.dao.UserXMLDao">


</mapper>
注意:namespace的值是刚才创建的接口UserXMLDao的类路径!
2、SELECT
这里默认UserXMLDao这样定义:
public interface UserXMLDao {

    //查询所有用户的所有字段
    List<UserInfo> test();

}
方法一:
<?xml version="1.0" encoding="UTF-8"?>
<!DOCTYPE mapper PUBLIC "-//mybatis.org//DTD Mapper 3.0//EN" "http://mybatis.org/dtd/mybatis-3-mapper.dtd">
<mapper namespace="com.hyy.csdn.here.dao.UserXMLDao">


    <select id="test" resultType="com.hyy.csdn.here.model.UserInfo">
        select * from user_info
    </select>

</mapper>
方法二:
 <!--    右边不用写resultType 直接写resultMap即可-->
    <!--    进行参数映射-->
    <resultMap id="baseMap" type="com.hyy.csdn.here.model.UserInfo">
        <!--        如果有主键,建议用<id property column> 当然<result>也可以,但是不建议,可能产生某些功能错误!!!-->
        <id property="id" column="id"></id>
        <result property="deleteFlag" column="delete_flag"></result>
        <result property="createTime" column="create_time"></result>
        <result property="updateTime" column="update_time"></result>
    </resultMap>
    <select id="test" resultMap="baseMap">
            select * from user_info
    </select>
3、INSERT
方法一:
<!--    这里的useGenerateKeys和注解的Options是一样的,只是语法不同,都是获取自增ID-->
    <insert id="test" useGeneratedKeys="true" keyProperty="id">
        insert into user_info (username,`password`,age,create_time)
        values (#{username},#{password},#{age},#{createTime})
    </insert>
方法二:
参数映射:
    <insert id="test" useGeneratedKeys="true" keyProperty="id">
        insert into user_info (username,`password`,age,create_time)
        values (#{u.username},#{u.password},#{u.age},#{u.createTime})
    </insert>
4、UPDATA
方法一:
    <update id="test">
        update user_info
        set password=#{password}
        where id=#{id}
    </update>
注意对应的方法的参数要修改:
//根据id修改密码
 Integer test(Integer id,String password);
方法二:
直接用对象传递:
//根据id修改密码
 Integer test(UserInfo userInfo);
xml的配置和方法一是相同的。但是要注意xml中涉及的字段,userInfo这个对象的字段中一定要设置!!
5、DELETE
根据id删除信息:
    <update id="test">
       delete from user_info
              where id=#{id}
    </update>
对应的方法签名也要求改:
Integer test(Integer id);


 15万+
15万+

 被折叠的 条评论
为什么被折叠?
被折叠的 条评论
为什么被折叠?
 到【灌水乐园】发言


