


Servlet 是一种实现动态页面的技术。是一组 Tomcat 提供给程序猿的 API,帮助程序猿简单高效的开发一个 web app。
一、Hello Servlet
1、创建项目
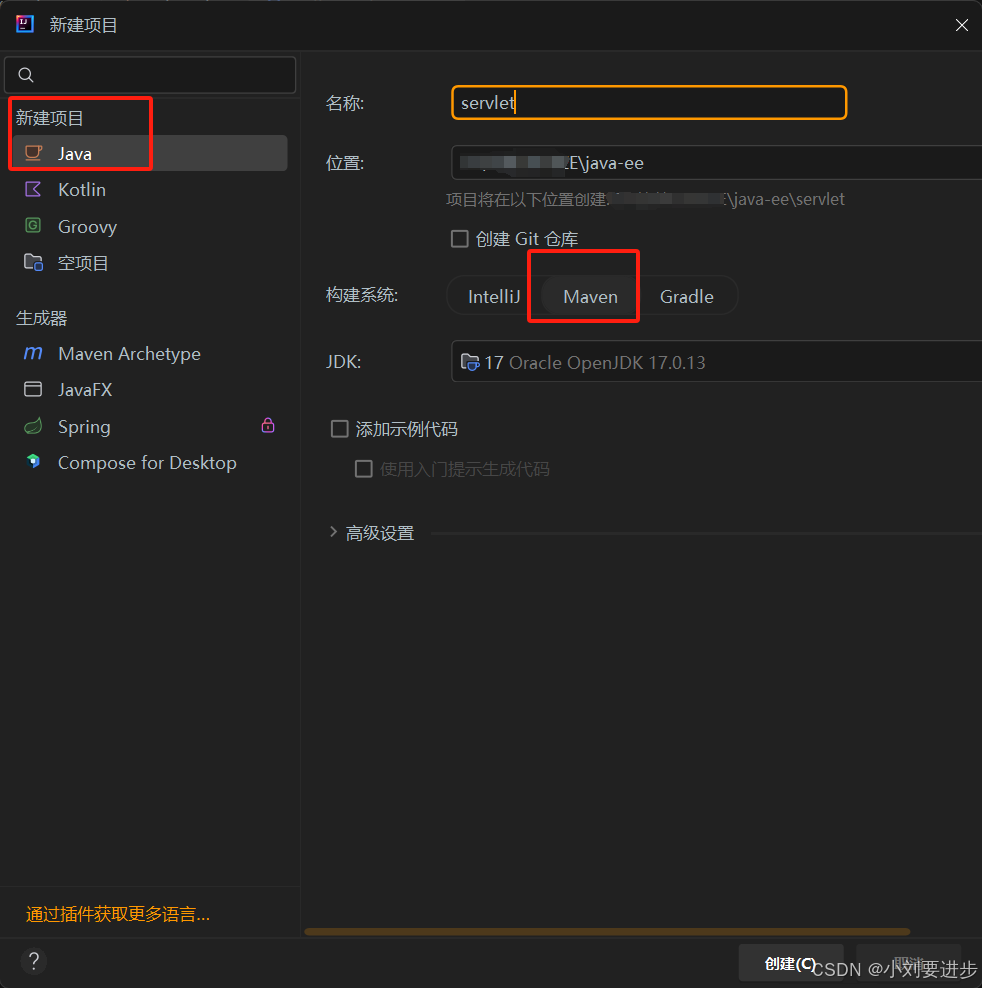
2、引入依赖
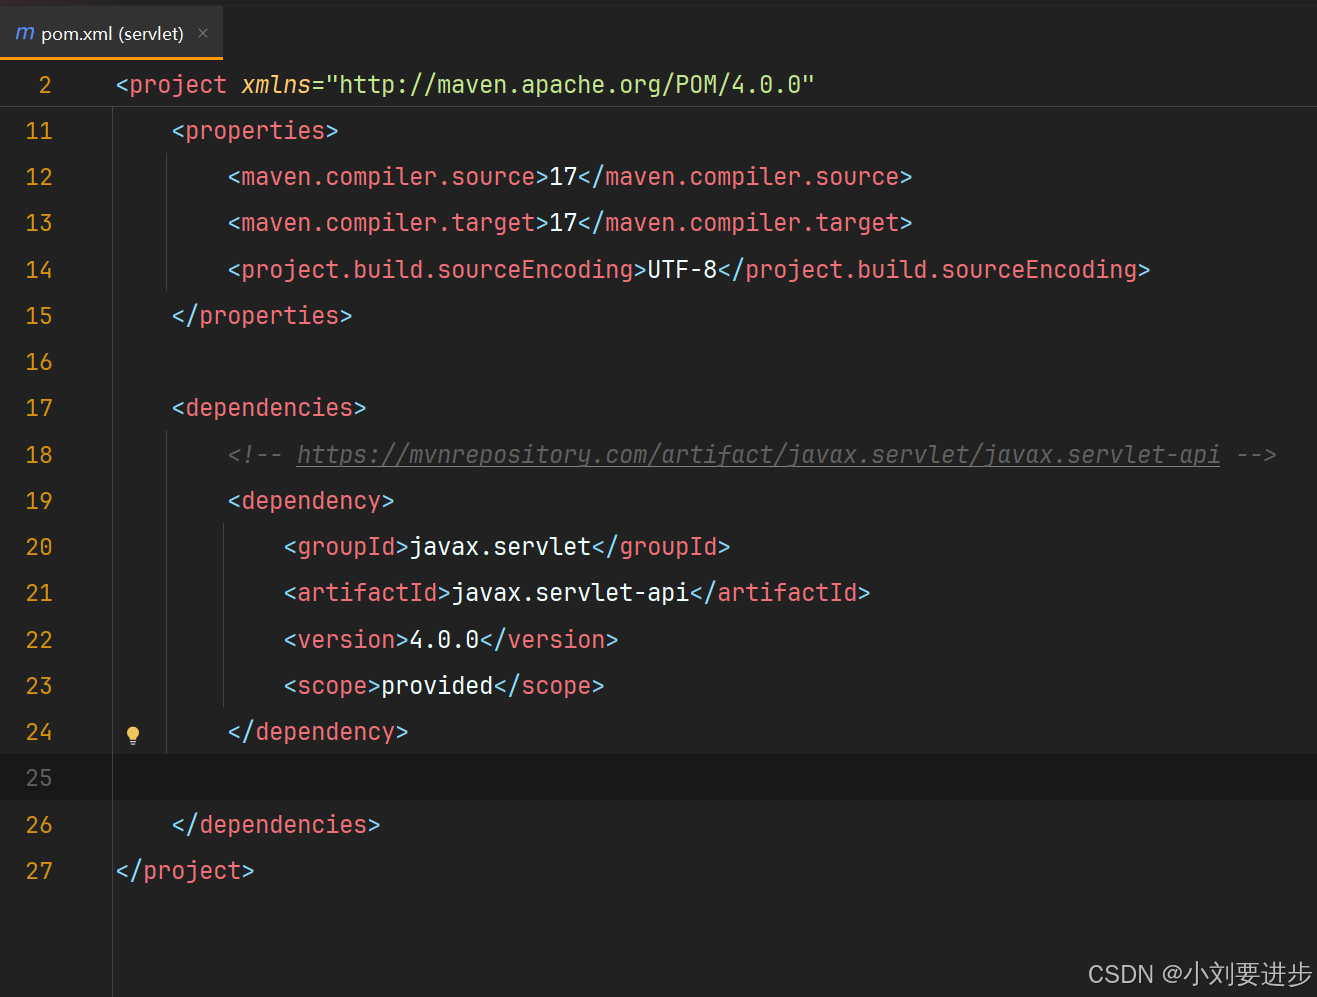
我们需要在 pom.xml 中引入 Servlet API 依赖的 jar 包。
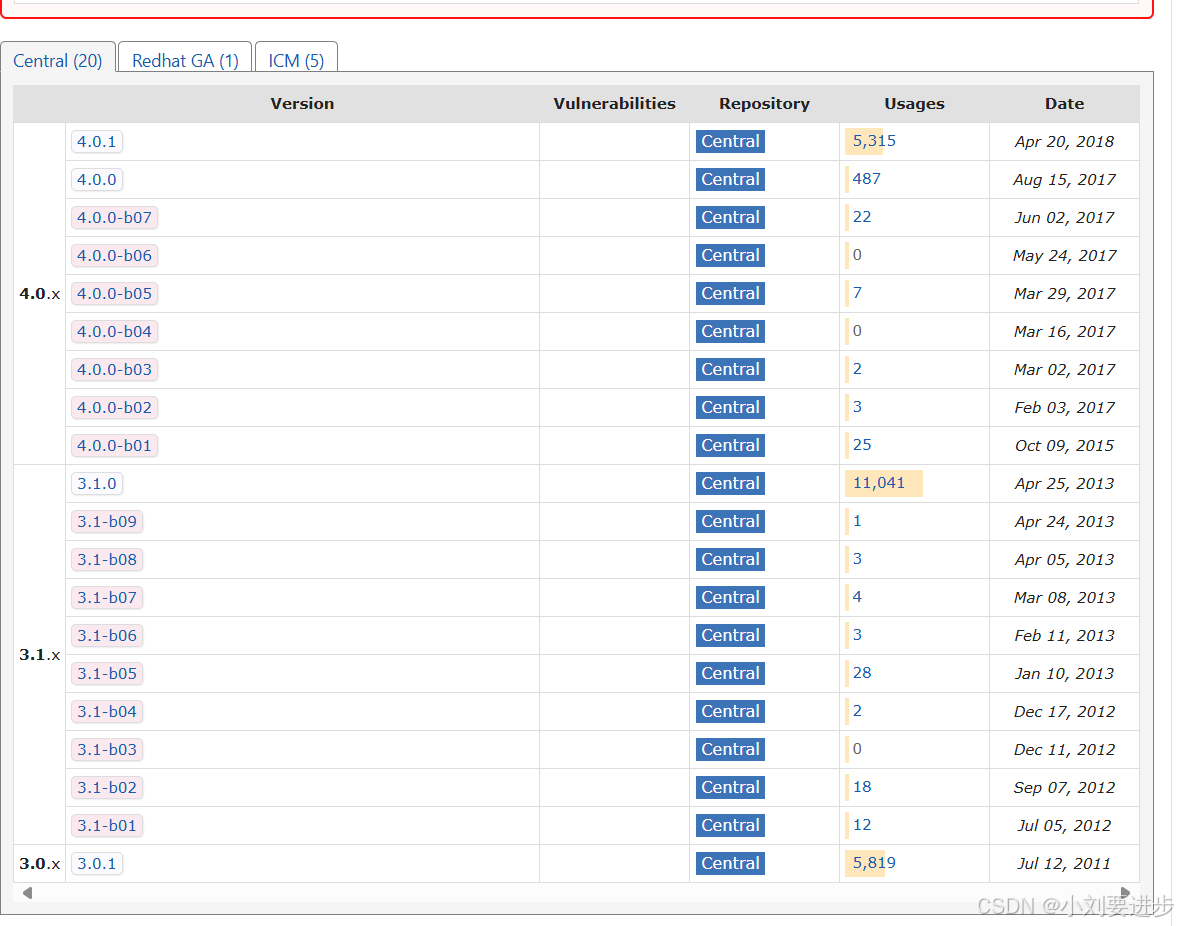
(1)在中央仓库中搜索 "servlet" 。

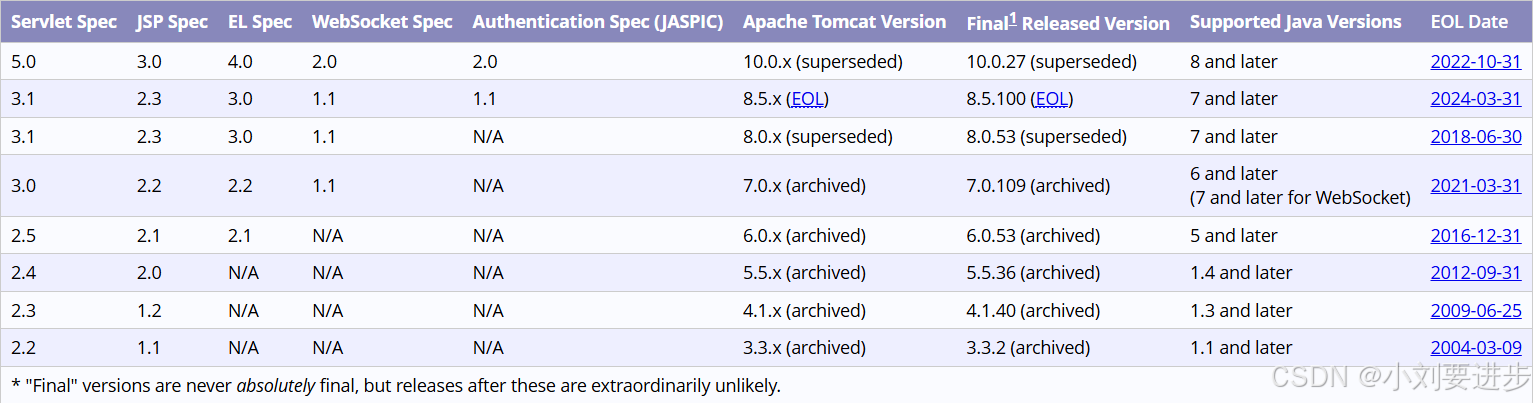
(2)选择版本,Servlet 的版本需要与 Tomcat 匹配。
可以在Apache Tomcat® - Which Version Do I Want?查询版本对应关系:
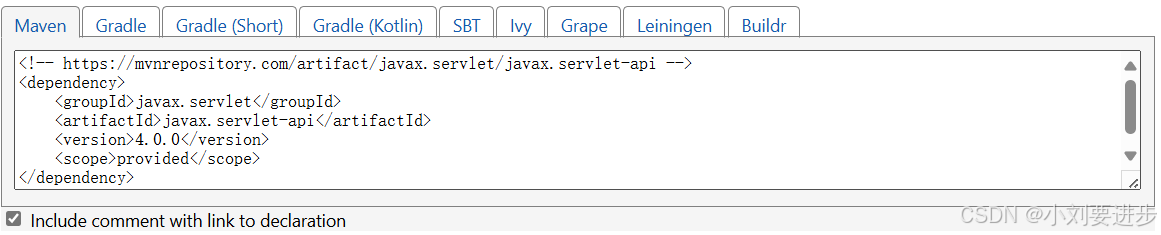
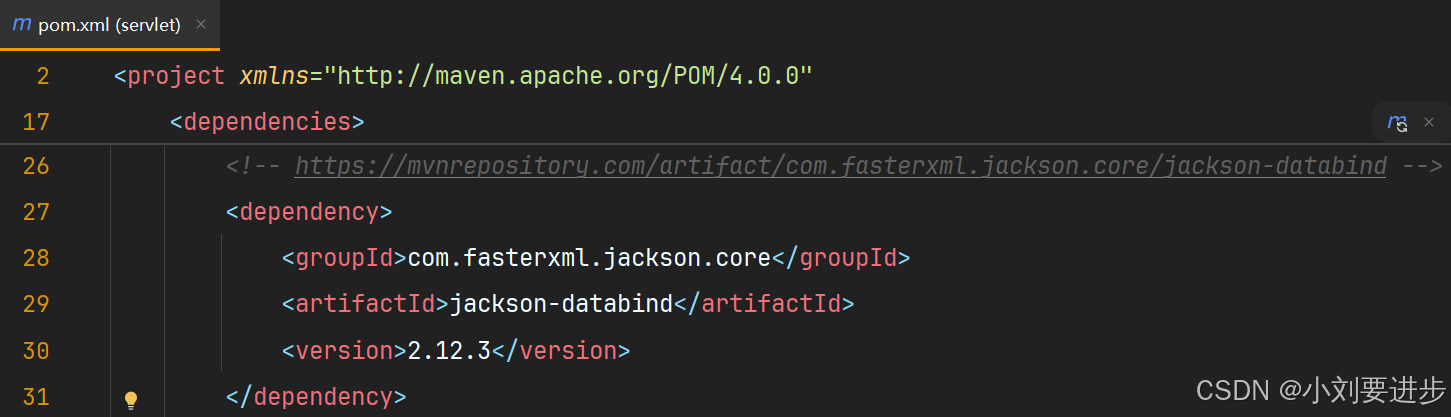
(3)把中央仓库中提供的 xml 复制到项目的 pom.xml 中的 <dependencies> 标签内,<dependencies> 标签内部放置的都是项目依赖的 jar 包,Maven 会自动下载依赖到本地。
 3、创建目录
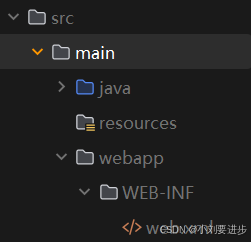
在 main 目录下创建 webapp,然后在 webapp 目录下创建 WEB-INF ,最后在 WEB-INF 目录下创建 web.xml。
编写 web.xml。拷贝以下代码。
<!DOCTYPE web-app PUBLIC
"-//Sun Microsystems, Inc.//DTD Web Application 2.3//EN"
"http://java.sun.com/dtd/web-app_2_3.dtd" >
<web-app>
  <display-name>Archetype Created Web Application</display-name>
</web-app>
4、编写代码
在 java 目录下创建类 HelloServlet ,并继承父类 HttpServlet。
@WebServlet("/hello")
public class HelloServlet extends HttpServlet {
    @Override
    protected void doGet(HttpServletRequest req, HttpServletResponse resp) throws ServletException, IOException {
        System.out.println("hello servlet");
        resp.getWriter().write("hello servlet");
    }
}
- 在这个类上方加上 @WebServlet("/hello") 注解,表示 Tomcat 收到的请求中,路径为 /hello 的请求才会调用 HelloServlet 这个类的代码。
- doGet 方法会在 Tomcat 收到 GET 请求时触发,两个参数分别表示收到的 HTTP 请求和要构造的 HTTP 响应。
- resp.getWriter() 会获取到一个流对象,通过这个流对象可以写入一些数据,写入的数据会被构造成一个 HTTP 响应的 body 部分, Tomcat 会把整个响应转换成字符串,通过 socket 写回给浏览器。
乱码问题
如果我们在响应代码中写入中文,例如:
@WebServlet("/hello")
public class HelloServlet extends HttpServlet {
    @Override
    protected void doGet(HttpServletRequest req, HttpServletResponse resp) throws ServletException, IOException {
        System.out.println("hello servlet");
        resp.getWriter().write("你好 servlet");
    }
}
此时访问页面时,会出现乱码。
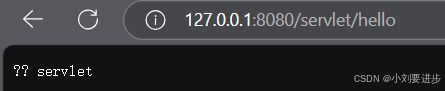
这是因为没有显式的指定编码方式,浏览器不能正确识别编码,出现的乱码情况。可以在代码中,通过 resp.setContentType("text/html; charset=utf-8"); 显式的指定编码方式。

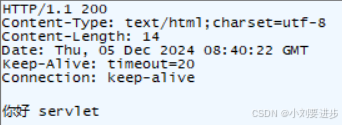
此时通过抓包可以看到, 当加上了 resp.setContentType("text/html; charset=utf-8"); 代码之
后, 响应中多了 Content-Type 字段, 内部指定了编码方式. 浏览器看到这个字段就能够正确解析中文了。
5、打包程序
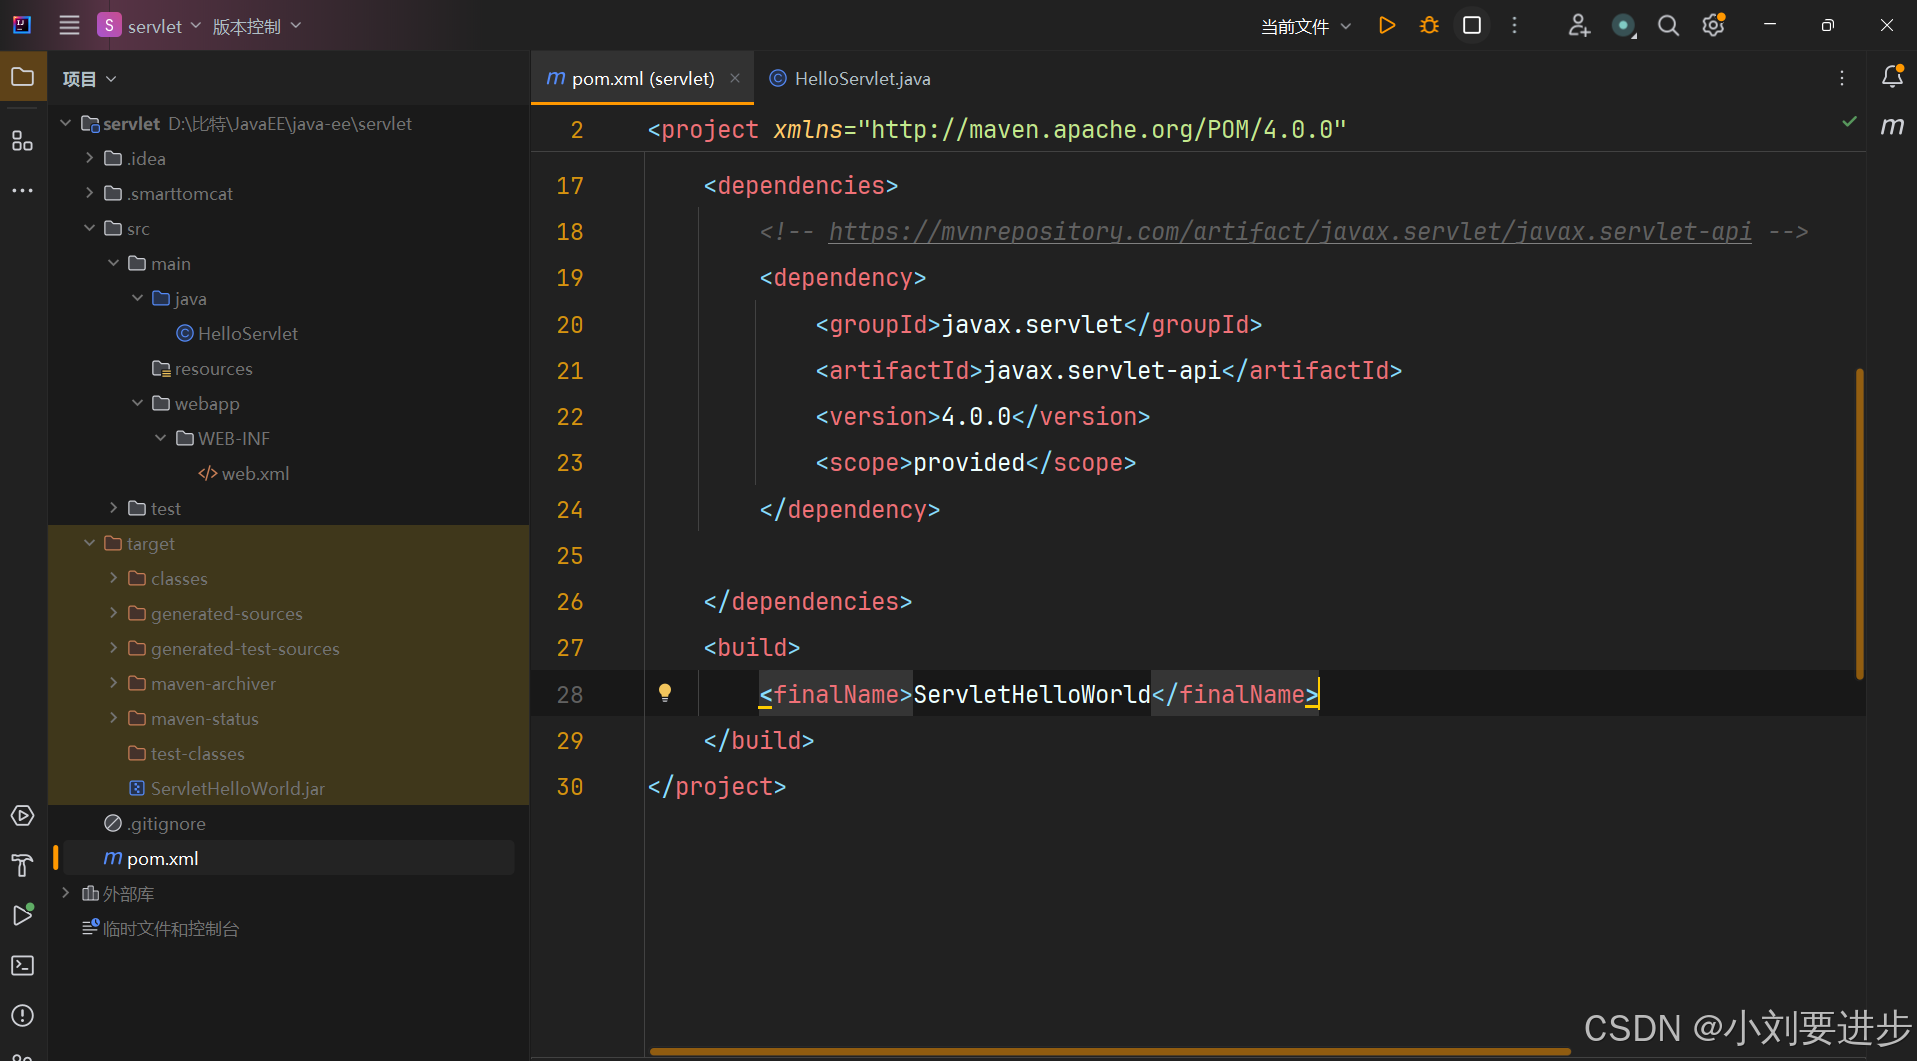
在 pom.xml 中新增一个 packing 标签,表示打包的方式是打一个 war 包。
<packaging>war</packaging>在 pom.xml 中再新增一个 build 标签,内置一个 finalName 标签,表示打出的 war 包的名字是 HelloServlet。
<build>
    <finalName>ServletHelloWorld</finalName>
</build> 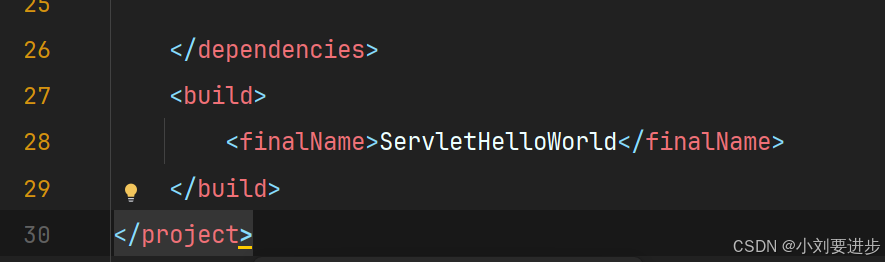
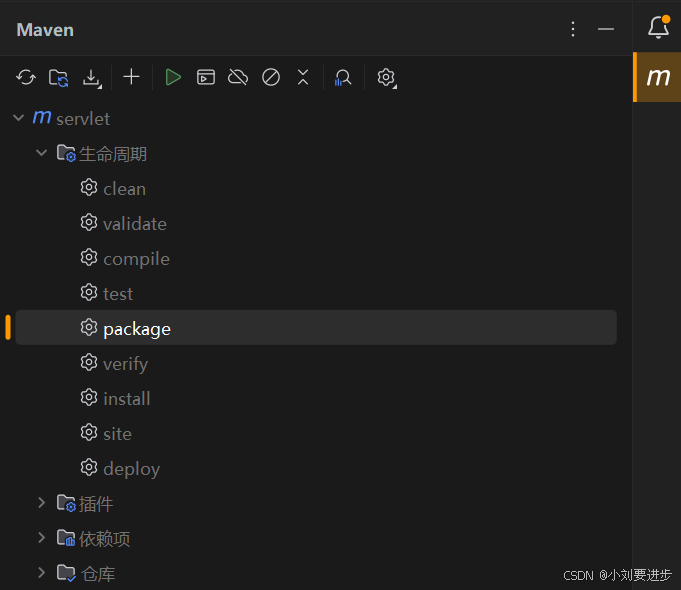
在 maven 中,展开 Lifecycle 双击 package 打包。(如果右侧看不到 Maven 窗口,可以通过 菜单->View->Tool Window->Maven 打开)
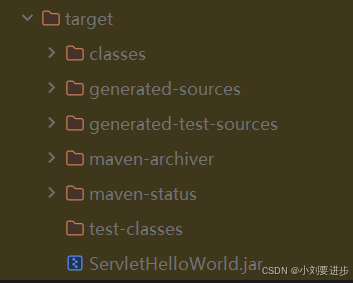
打包成功后可以在 target 目录下看到生成了一个 jar 包。
6、部署文件
把 war 包拷贝到 Tomcat 的 webapps 目录下。 (Tomcat 下载网址)启动 Tomcat , Tomcat 就会自动把 war 包解压缩。
7、验证程序
通过浏览器访问 http://127.0.0.1:8080/servlet/hello 即可看到结果。
二、使用 Smart Tomcat 插件
通过使用插件,可以更方便的完成部署操作。
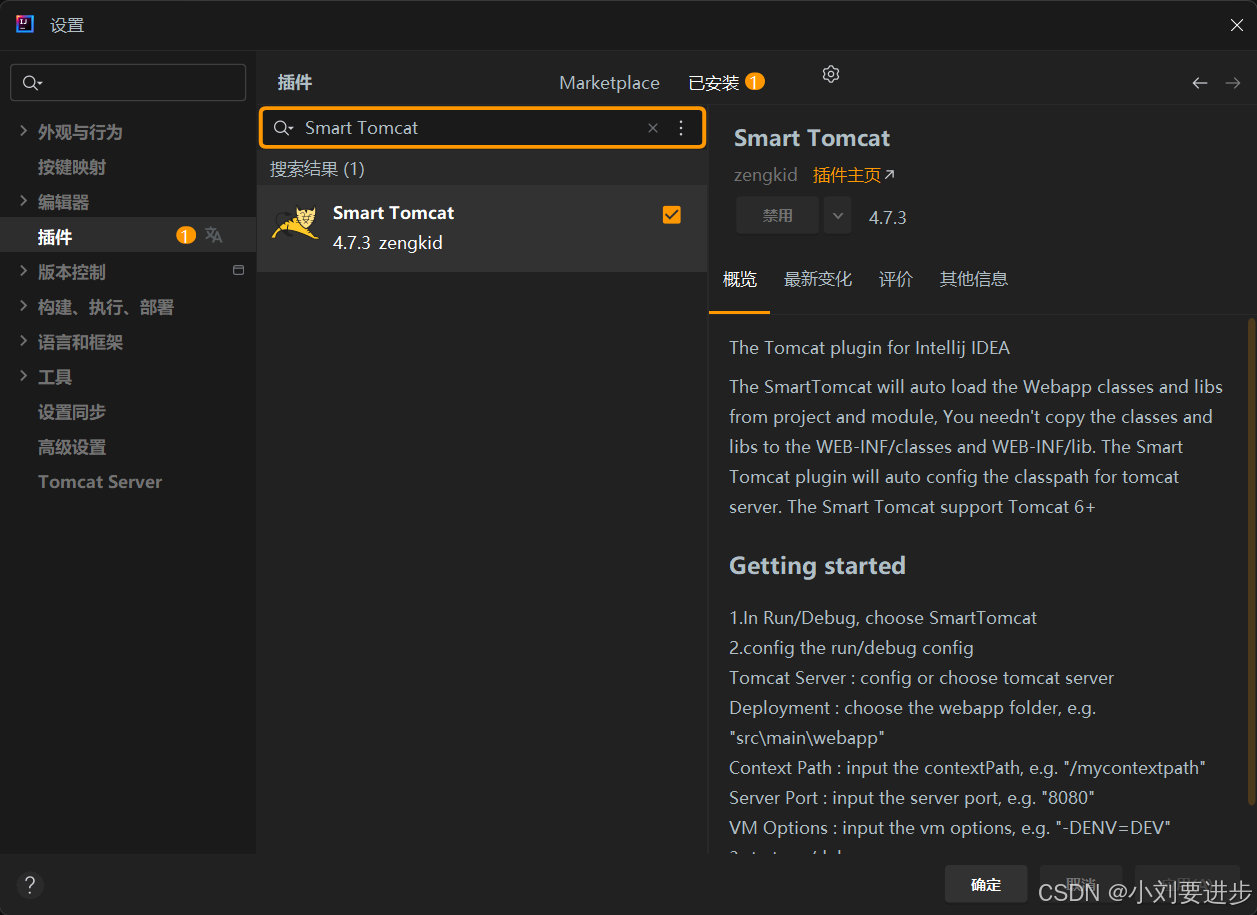
1、安装
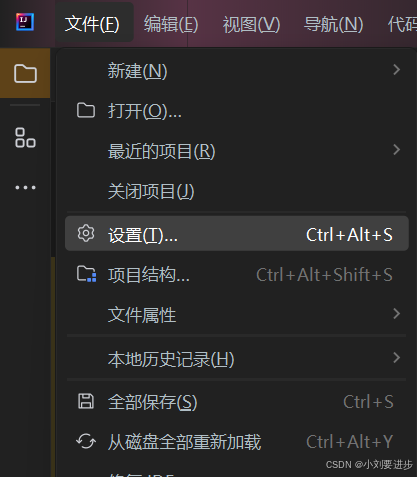
(1)文件 -> 设置
(2)插件 -> 搜索“Smart Tomcat” -> 安装(此处是已经安装好的样子,安装好后可能需要重启IDEA)
2、配置插件
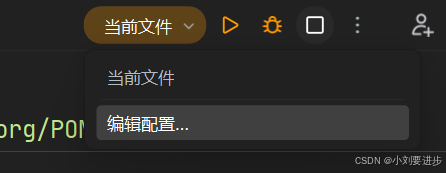
(1)点击右侧当前文件,点击配置文件
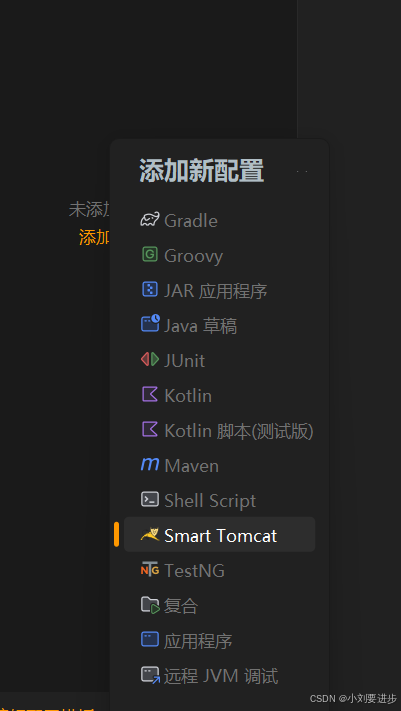
(2)添加新配置,选择 Smart Tomcat。
(3)name 可以随意填写;Tomcat Server 一栏选择 Tomcat 所在目录;Context Path 默认填写的值是项目名称,会影响到后面访问页面。
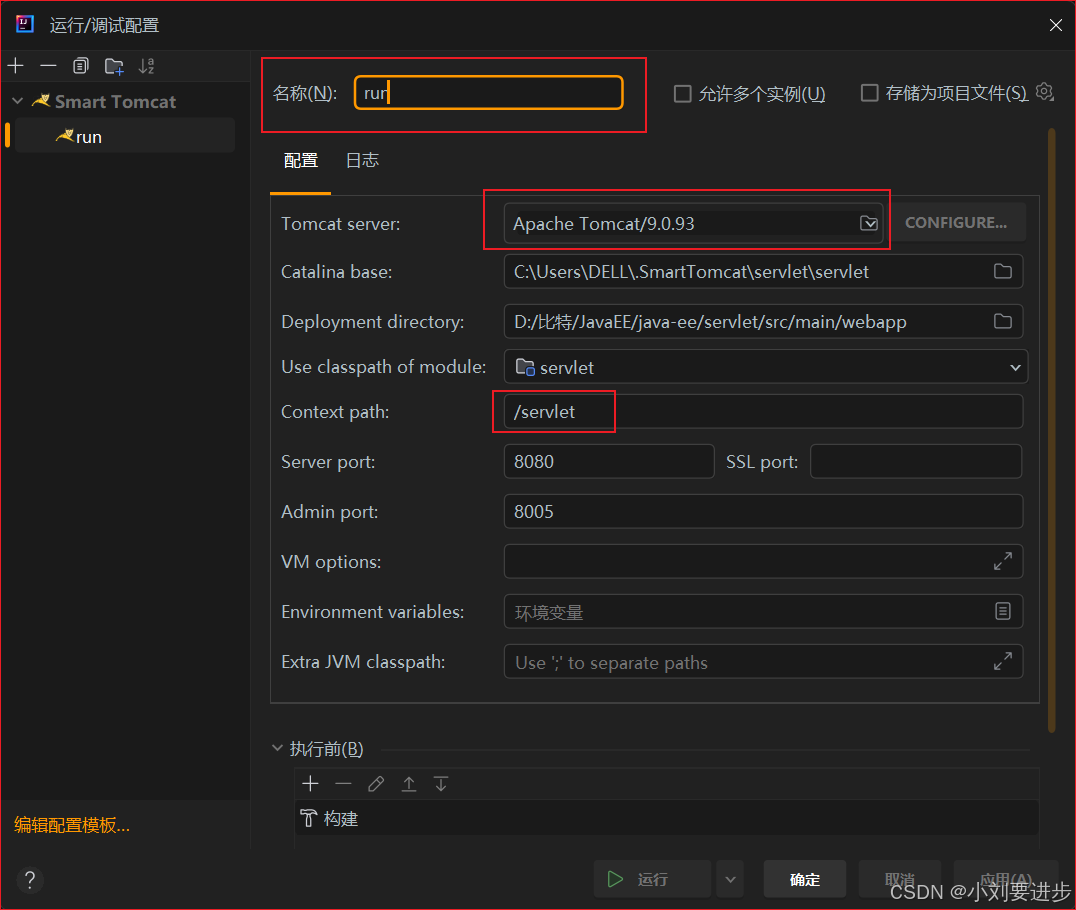
(4)点击 ok 即可
3、使用插件
(1)完成插件的配置后,右上角会变成这样:
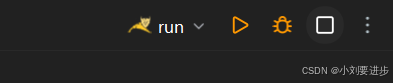
点击三角号,IDEA 就会自动进行编译、部署、启动 Tomcat 的过程。
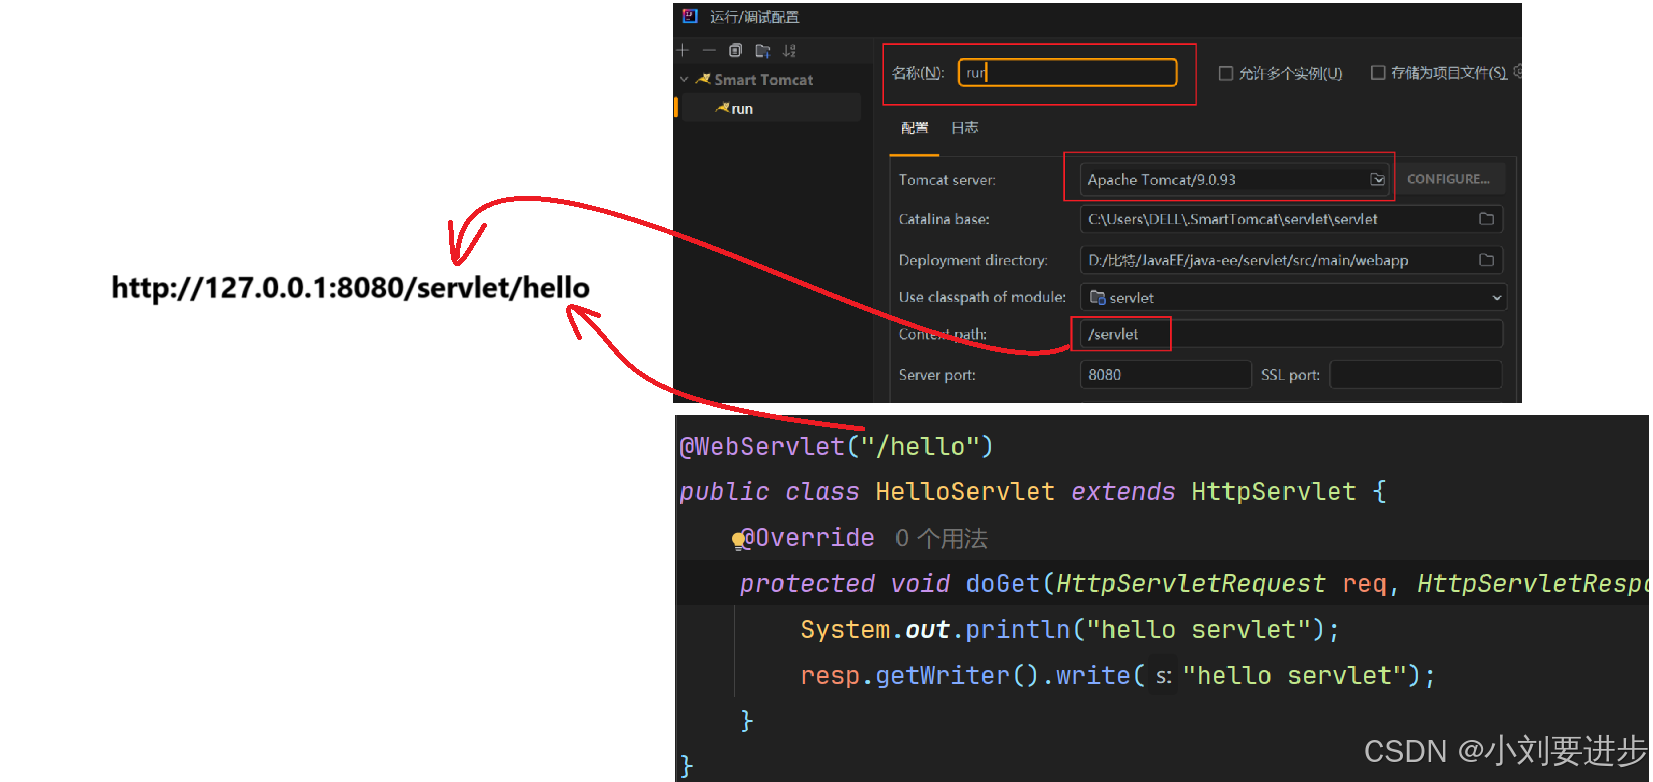
(2)访问页面
在浏览器中使用 http://127.0.0.1:8080/servlet/hello 访问页面。
(3)路径的对应关系
三、常见访问出错
404
404 表示用户访问的资源不存在。大概率是 URL 的路径写的不正确。
错误1:少写了 Context Path
错误2:少写了 Servlet Path
错误3:Servlet Path 写的和 URL 不匹配
错误4:web.xml 写错了
405
405 表示对应的 HTTP 请求方法没有实现。
500
往往是 Servlet 代码中抛出异常导致的。可以通过页面上的异常信息,找出代码中存在的问题。
“无法访问此网站”
一般是 Tomcat 启动就失败了。
错误1:Servlet Path 写错了,如:"/hello" 错写成 "hello"。
直接下载文件
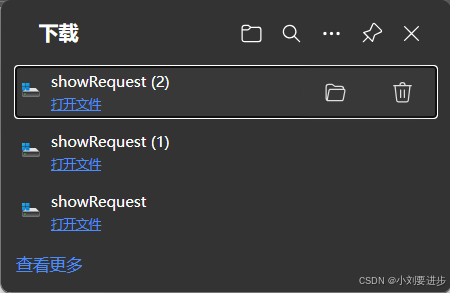
ContentType 写错了。
![]()
四、Servlet API 使用
1、HttpServlet
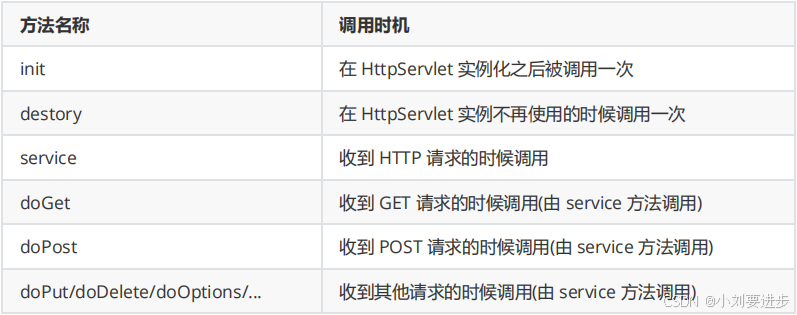
1.1 处理 GET 请求
(1)创建 MethodServlet.java,创建 doGet 方法。
@WebServlet("/method")
public class MethodServlet extends HttpServlet {
    @Override
    protected void doGet(HttpServletRequest req, HttpServletResponse resp) throws ServletException, IOException {
        System.out.println("GET response");
        resp.getWriter().write("GET response");
    }
}
(2)创建 testMethod.html,放到 webapp 目录中。
<!DOCTYPE html>
<html lang="en">

<head>
    <meta charset="UTF-8">
    <meta name="viewport" content="width=device-width, initial-scale=1.0">
    <title>Document</title>
</head>

<body>
    <button onclick="sendGet()">发送 GET 请求</button>
    <script>
        function sendGet() {
            ajax({
                method: 'GET',
                url: 'method',
                callback: function (body, status) {
                    console.log(body);
                }
            });
        }
        // 把之前封装的 ajax 函数拷贝过来
        function ajax(args) {
            var xhr = new XMLHttpRequest();
            xhr.onreadystatechange = function () {
                // 0: 请求未初始化
                // 1: 服务器连接已建立
                // 2: 请求已接收
                // 3: 请求处理中
                // 4: 请求已完成,且响应已就绪
                if (xhr.readyState == 4) {
                    args.callback(xhr.responseText, xhr.status)
                }
            }
            xhr.open(args.method, args.url);
            if (args.contentType) {
                xhr.setRequestHeader('Content-type', args.contentType);
            }
            if (args.body) {
                xhr.send(args.body);
            } else {
                xhr.send();
            }
        }
    </script>
</body>

</html>
(3)部署程序,使用 http://127.0.0.1:8080/servlet/testMethod.html 访问页面。

(4)点击 "发送 GET 请求" 按钮,即可在控制台看到响应内容。
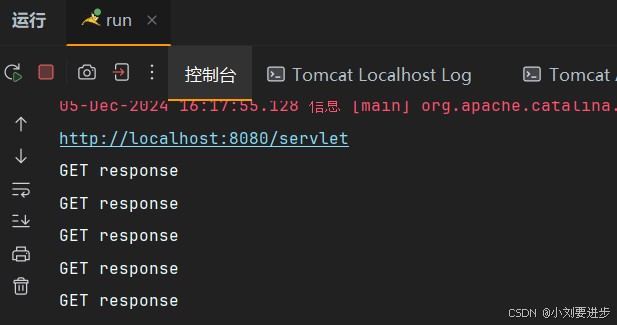
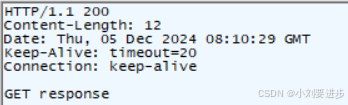
(5)观察 Fiddle 抓包
当浏览器中输入 URL 之后,浏览器先给服务器发送了一个 HTTP GET 请求
![]()
当点击 "发送 GET 请求" 按钮,浏览器又通过 ajax 给服务器发送了一个 HTTP GET 请求

服务器 GET 处理请求后返回的响应报文
1.2 处理 POST 请求
(1)在 MethodServlet.java 中,新增 doPost 方法。
    @Override
    protected void doPost(HttpServletRequest req, HttpServletResponse resp) throws ServletException, IOException {
        resp.setContentType("test/html; charset=utf-8");
        System.out.println("POST 响应");
        resp.getWriter().write("POST 响应");
    }
(2)在 testMethod.html 中,新增一个按钮,和对应的点击事件处理函数。
<button onclick="sendPost()">发送 POST 请求</button>
<script>
function sendPost() {
ajax({
method: 'POST',
url: 'method',
callback: function (body, status) {
console.log(body);
}
})
}
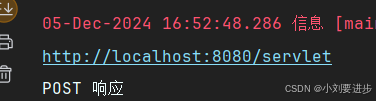
</script>(3)重新部署程序,使用 URL http://127.0.0.1:8080/servlet/testMethod.html 访问页面。

点击 "发送 POST 请求" 按钮,可以在控制台中看到结果。
2、HttpServletRequest
当 Tomcat 通过 Socket API 读取 HTTP 请求(字符串),并且按照 HTTP 协议的格式把字符串解析成 HttpServletRequest 对象。
2.1 打印请求信息
(1)创建 ShowRequest 类
@WebServlet("/showRequest")
public class ShowRequest extends HttpServlet {
    @Override
    protected void doGet(HttpServletRequest req, HttpServletResponse resp) throws ServletException, IOException {
        resp.setContentType("text/html; charset=utf-8");
        StringBuilder respBody = new StringBuilder();
        respBody.append(req.getProtocol()).append("<br>");  // 请求协议的名称和版本
        respBody.append(req.getMethod()).append("<br>");    // 请求方法的名称
        respBody.append(req.getRequestURI()).append("<br>");    // 从协议名称直到 HTTP 请求的第一行的查询字符串中的请求 URL
        respBody.append(req.getContextPath()).append("<br>");   // 指示请求上下文的请求 URI 部分
        respBody.append(req.getQueryString()).append("<br>");   // 包含在路径后的请求 URL 中的查询字符串

        respBody.append("<h3>headers:</h3>");
        Enumeration<String> headerNames = req.getHeaderNames(); // 一个枚举,在该请求中包含的所有的头名
        while (headerNames.hasMoreElements()) {
            String headerName = headerNames.nextElement();
            respBody.append(headerName).append(" ");
            respBody.append(req.getHeader(headerName)).append("<br>"); // 以字符串的形式返回指定的请求头的值
        }
        resp.getWriter().write(respBody.toString());
    }
}
(2)部署程序
在浏览器通过 URL http://127.0.0.1:8080/servlet/showRequest 访问,可以看到
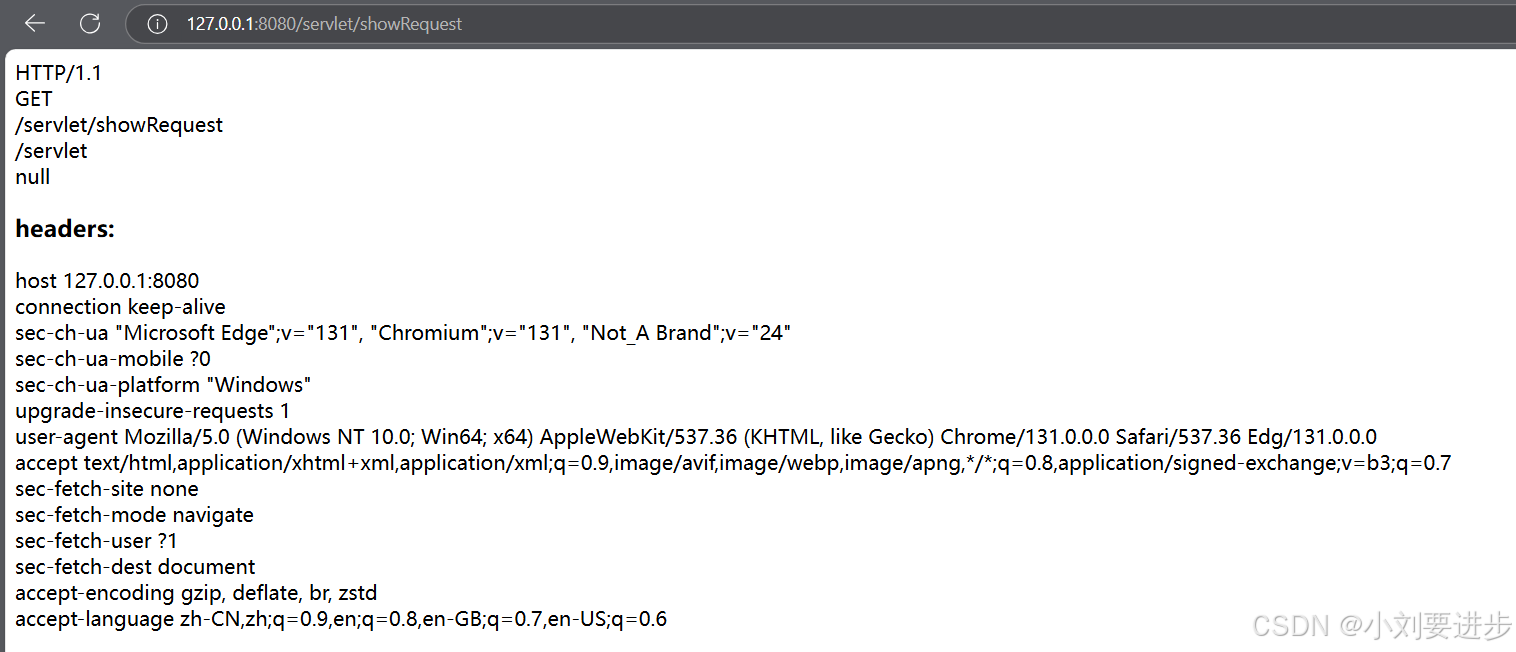
2.2 获得 GET 请求中的参数
(1)创建 GetParameter 类
@WebServlet("/getParameter")
public class GetParameter extends HttpServlet {
    @Override
    protected void doGet(HttpServletRequest req, HttpServletResponse resp) throws ServletException, IOException {
        resp.setContentType("text/html; charset=utf-8");

        String userId = req.getParameter("userId");
        String classId = req.getParameter("classId");
        resp.getWriter().write("userId: " + userId + ", classId: " + classId);
    }
}
(2)部署程序
在浏览器中通过 http://127.0.0.1:8080/servlet/getParameter 访问,可以看到
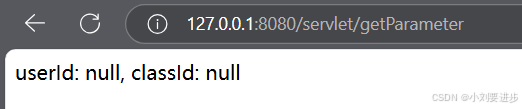
如果通过 http://127.0.0.1:8080/servlet/getParameter?userId=123&classId=456 访问,可以看到

说明服务器已经获取到客户端传递过来的参数。
2.3 获取 POST 请求中的参数(form表单)
POST 请求的参数一般通过 body 传递给服务器. body 中的数据格式有很多种. 如果是采用 form 表单的形式,仍然可以通过 getParameter 获取参数的值。
(1)创建 PostParameter 类
@WebServlet("/postParameter")
public class PostParameter extends HttpServlet {
    @Override
    protected void doPost(HttpServletRequest req, HttpServletResponse resp) throws ServletException, IOException {
        resp.setContentType("text/html; charset=utf-8");
        String userId = req.getParameter("userId");
        String classId = req.getParameter("classId");
        resp.getWriter().write("userId: " + userId + ", classId" + classId);
    }
}
(2)在 webapp 目录中创建 testPost.html
<!DOCTYPE html>
<html lang="en">
<head>
    <meta charset="UTF-8">
    <meta name="viewport" content="width=device-width, initial-scale=1.0">
    <title>Document</title>
</head>
<body>
    <form action="postParameter" method="POST">
        <input type="text" name="userId">
        <input type="text" name="classId">
        <input type="submit" value="提交">
    </form>
</body>
</html>
(3)部署程序
通过 URL http://127.0.0.1:8080/servlet/testPost.html 访问,可以看到 HTML

在输入框中输入内容,点击提交

可以看到跳转到了新的页面,并显示出了刚刚传入的数据。

2.4 获取 POST 请求中的参数(JOSN)
(1)创建 PostParameterJosn 类
@WebServlet("/postParameterJson")
public class PostParameterJson extends HttpServlet {
    @Override
    protected void doPost(HttpServletRequest req, HttpServletResponse resp) throws ServletException, IOException {
        resp.setContentType("text/html; charset=utf-8");
        String body = readBody(req);
        System.out.println(body);
    }

    private String readBody(HttpServletRequest req) throws IOException {
        int contentLength = req.getContentLength(); // 以字节为单位返回请求主体的长度,并提供输入流,或者如果长度未知,则返回 -1
        byte[] buffer = new byte[contentLength];
        InputStream inputStream = req.getInputStream();
        inputStream.read(buffer);
        return new String(buffer, "utf-8");
    }
}
(2)创建 testPostJosn.html
<!DOCTYPE html>
<html lang="en">

<head>
    <meta charset="UTF-8">
    <meta name="viewport" content="width=device-width, initial-scale=1.0">
    <title>Document</title>
</head>

<body>
    <button onclick="sendJson()">发送 JSON 格式 POST 请求</button>
    <script>
        function sendJson() {
            ajax({
                url: 'postParameterJson',
                method: 'POST',
                contentType: 'application/json; charset=utf-8',
                body: JSON.stringify({ userId: 123, classId: 456 }),
                callback: function (body, status) {
                    console.log(body);
                }
            });
        }
        // 把之前封装的 ajax 函数拷贝过来
        function ajax(args) {
            var xhr = new XMLHttpRequest();
            xhr.onreadystatechange = function () {
                // 0: 请求未初始化
                // 1: 服务器连接已建立
                // 2: 请求已接收
                // 3: 请求处理中
                // 4: 请求已完成,且响应已就绪
                if (xhr.readyState == 4) {
                    args.callback(xhr.responseText, xhr.status)
                }
            }
            xhr.open(args.method, args.url);
            if (args.contentType) {
                xhr.setRequestHeader('Content-type', args.contentType);
            }
            if (args.body) {
                xhr.send(args.body);
            } else {
                xhr.send();
            }
        }
    </script>
</body>

</html>
(3)部署程序
在浏览器中通过 http://127.0.0.1:8080/servlet/testPostJson.html 访问,可以看到

点击按钮,则浏览器就会给服务器发送一个 POST 请求,body 中带有 JSON 格式。
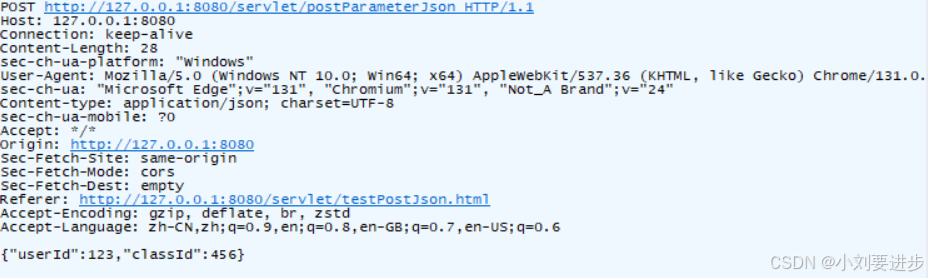
服务器收到这个结果之后,可以在控制台中看到

2.5 获取 POST 请求中的参数(jackson)
引入 Jackson 这个库, 进行 JSON 解析。
(1)在中央仓库中搜索 Jackson,选择 Jackson Databind。
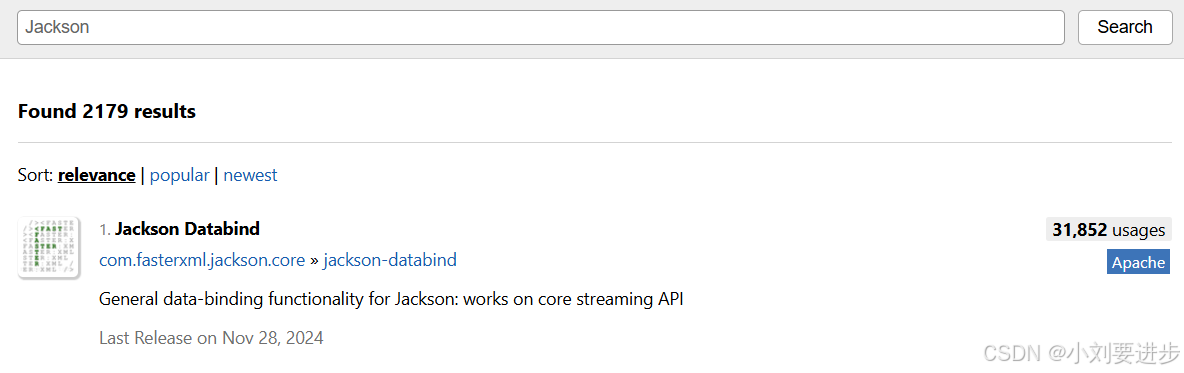
(2)把中央仓库中的依赖配置添加到 pom.xml 中
(3)修改 PostParameterJson 类中的代码
// 创建一个新的类表示 JSON 数据,属性的名字需要和 JSON 字符串中的 key 一致。
class JsonData {
    public String userId;
    public String classId;
}

@WebServlet("/postParameterJson")
public class PostParameterJson extends HttpServlet {
    @Override
    protected void doPost(HttpServletRequest req, HttpServletResponse resp) throws ServletException, IOException {
        resp.setContentType("text/html; charset=utf-8");
        String body = readBody(req);
        // 创建 ObjectMapper 对象。这是 Jackson 中的核心类
        ObjectMapper objectMapper = new ObjectMapper();
        // 通过 readValue 方法把 body 这个字符串转成 JsonData 对象
        JsonData jsonData = objectMapper.readValue(body, JsonData.class);
        System.out.println("userId: " + jsonData.userId + ", classId: " + jsonData.classId);
    }

    private String readBody(HttpServletRequest req) throws IOException {
        int contentLength = req.getContentLength(); // 以字节为单位返回请求主体的长度,并提供输入流,或者如果长度未知,则返回 -1
        byte[] buffer = new byte[contentLength];
        InputStream inputStream = req.getInputStream();
        inputStream.read(buffer);
        return new String(buffer, "utf-8");
    }
}
(4)部署程序

3、HttpServletResponse
3.1 设置状态码
(1)创建 StatusServlet 类
@WebServlet("/statusServlet")
public class StatusServlet extends HttpServlet {
    @Override
    protected void doGet(HttpServletRequest req, HttpServletResponse resp)
            throws IOException {
        String statusString = req.getParameter("status");
        if (statusString != null) {
            resp.setStatus(Integer.parseInt(statusString));    // 设置状态码
       }
        resp.getWriter().write("status: " + statusString);
   }
}
(2)部署程序
在浏览器中通过 URL http://127.0.0.1:8080/servlet/statusServlet?status=200 访问,可以看到

3.2 自动刷新
(1)创建 AutoRefreshServlet 类
@WebServlet("/autoRefreshServlet")
public class AutoRefreshServlet extends HttpServlet {
    @Override
    protected void doGet(HttpServletRequest req, HttpServletResponse resp) throws  IOException {
        resp.setHeader("Refresh", "1"); // 设置一个带有给定的名称和值的 header。如果 name 已经存在,则覆盖旧的值
        long timeStamp = new Date().getTime();
        resp.getWriter().write("timeStamp: " + timeStamp);
   }
}
(2)部署程序
通过 URL http://127.0.0.1:8080/servlet/autoRefreshServlet 访问,可以看到浏览器每秒钟自动刷新一次

3.3 重定向
(1)创建 RedirectServlet 类
@WebServlet("/redirectServlet")
public class RedirectServlet extends HttpServlet {
@Override
protected void doGet(HttpServletRequest req, HttpServletResponse resp) throws IOException {
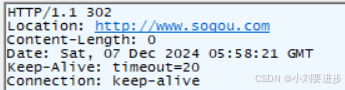
resp.sendRedirect("http://www.sogou.com"); // 使用指定的重定向位置 URL 发送临时重定向响应到客户端。
}
}(2)部署程序
通过 URL http://127.0.0.1:8080/servlet/redirectServlet 访问,可以看到,页面自动跳转到 搜狗主页 了。
(3)抓包结果
五、常用代码片段
web.xml
<!DOCTYPE web-app PUBLIC
        "-//Sun Microsystems, Inc.//DTD Web Application 2.3//EN"
                "http://java.sun.com/dtd/web-app_2_3.dtd" >
<web-app>
           <display-name>Archetype Created Web Application</display-name>
</web-app>
读取请求报头
@WebServlet("/getParameter")
public class GetParameter extends HttpServlet {
    @Override
    protected void doGet(HttpServletRequest req, HttpServletResponse resp)
         throws ServletException, IOException {
  String contentType = req.getHeader("Content-Type");
        // 或者使用
        String contentType = req.getContentType();
   }
}
读取 GET 请求的 query string
@WebServlet("/getParameter")
public class GetParameter extends HttpServlet {
    @Override
    protected void doGet(HttpServletRequest req, HttpServletResponse resp)
         throws ServletException, IOException {
        String userId = req.getParameter("userId");
        String classId = req.getParameter("classId");
   }
}
读取 POST 请求的 body
@WebServlet("/postParameter")
public class PostParameter extends HttpServlet {
    @Override
    protected void doPost(HttpServletRequest req, HttpServletResponse resp)
            throws ServletException, IOException {
        resp.setContentType("text/html; charset=utf-8");
        req.setCharacterEncoding("utf-8");
        String userId = req.getParameter("userId");
        String classId = req.getParameter("classId");
        resp.getWriter().write("userId: " + userId + ", " + "classId: " +
                classId);
   }
}
设置状态码
@WebServlet("/statusServlet")
public class StatusServlet extends HttpServlet {
    @Override
    protected void doGet(HttpServletRequest req, HttpServletResponse resp)
            throws ServletException, IOException {
        resp.setStatus(200);
   }
}
设置响应报头
HTTP 响应报头中的 Refresh 字段, 可以控制浏览器自动刷新的时机。
@WebServlet("/autoRefreshServlet")
public class AutoRefreshServlet extends HttpServlet {
    @Override
    protected void doGet(HttpServletRequest req, HttpServletResponse resp)
            throws ServletException, IOException {
        resp.setHeader("Refresh", "1");
   }
}
重定向
@WebServlet("/redirectServlet")
public class RedirectServlet extends HttpServlet {
    @Override
    protected void doGet(HttpServletRequest req, HttpServletResponse resp)
            throws ServletException, IOException {
        resp.sendRedirect("http://www.sogou.com");
   }
}
登陆页面
<form action="login" method="POST">
    <input type="text" name="username">
    <input type="password" name="password">
    <input type="submit" value="提交">
</form>
创建新 Session
@WebServlet("/login")
public class LoginServlet extends HttpServlet {
    @Override
    protected void doPost(HttpServletRequest req, HttpServletResponse resp)
            throws ServletException, IOException {
        HttpSession session = req.getSession(true);
        session.setAttribute("username", "admin");
        session.setAttribute("loginCount", "0");
   }
}
获取已有 Session
@WebServlet("/login")
public class LoginServlet extends HttpServlet {
    HttpSession session = req.getSession(false);
    if (session == null) {
        // 用户没有登陆, 重定向到 login.html
        resp.sendRedirect("login.html");
        return;
   }
    // 如果已经登陆, 则从 Session 中取出数据
            String userName = (String)session.getAttribute("username");
    String countString = (String)session.getAttribute("loginCount");
}
上传文件
@MultipartConfig
@WebServlet("/upload")
public class UploadServlet extends HttpServlet {
    @Override
    protected void doPost(HttpServletRequest req, HttpServletResponse resp)
            throws ServletException, IOException {
        Part part = req.getPart("MyImage");
        System.out.println(part.getSubmittedFileName());
        System.out.println(part.getContentType());
        System.out.println(part.getSize());
        part.write("d:/MyImage.jpg");
        resp.getWriter().write("upload ok");
   }
}
<form action="upload" enctype="multipart/form-data" method="POST">
<input type="file" name="MyImage">
<input type="submit" value="提交图片">
</form>


 2196
2196

 被折叠的 条评论
为什么被折叠?
被折叠的 条评论
为什么被折叠?
 到【灌水乐园】发言


