


 本文详细介绍了Java NIO的核心组件,包括Buffer、Channel和Selector。Buffer作为数据容器,有多种类型如ByteBuffer,具备容量、位置、限制等概念,并提供了flip、clear等方法;Channel是双向数据传输通道,如FileChannel,需配合Buffer进行数据读写;Selector允许单线程处理多个Channel,提高效率。此外,还提到了charset编码解码在NIO中的应用。
NIO在jdk1.4引入,是面向块(缓冲区)编程,而IO是面向流编程
面向块(缓冲区)编程:
数据的读写必须经过缓冲区
我们可以使用Buffer所对应的子类将数据从通道(Channel)流向缓冲区
从缓冲区写到通道叫做读取缓冲区
过程图分析

NIO主要有三大核心部分:
Channel(通道)
Buffer(缓冲区)
Selector(选择器)
还有一个charset(编码)了解下
Buffer(缓冲区)
Buffer是一个抽象类,针对缓冲区封装的一个类,提供相应的方法来操作这个缓冲区
子类
ByteBuffer, CharBuffer, DoubleBuffer, FloatBuffer, IntBuffer, LongBuffer, ShortBuffer
核心类
ByteBuffer和CharBuffer
ByteBuffer有一个子类 MappedByteBuffer
MappedByteBuffer类能够将文件直接映射到内存中,这样我们就可以像访问内存一样访问文件,非常方便
获取Buffer
获取ByteBuffer
static ByteBuffer allocate(int capacity)分配一个新的字节缓冲区。
static ByteBuffer allocateDirect(int capacity)分配新的直接字节缓冲区。
二者获取Buffer的区别
1.创建普通Buffer成本低,读写的效率不高
2.因为创建直接Buffer成本高,所以我们一般用在Buffer生存周期较长的时候使用
3.只有ByteBuffer才能够创建直接Buffer,其他的Buffer对象是不能够创建
4.如果创建了直接Buffer但是我又想要使用其他Buffer的功能,可以将ByteBuffer转换成其他Buffer
例如:asIntBuffer()
四个非常重要的概念
capacity: 缓冲区的容量,不可以为负数,一旦创建了就不能够改变
limit :无效缓冲区的第一个位置索引,limit后面的数据既不可读,也不可写
position :下一个可以被读取或者写入的缓冲区位置索引
mark:标记索引,该索引能够用于下次读取或者写入,它只能够在0-position之间
四个系数的关系:
0 < mark < postion < limit < capacity
五个方法
1、flip(): 将写模式切换为读模式, 将limit的值改为postion的值,同时将postion归0
特点: 就是为下一次数据的读取做好准备
2、clear(): 将读模式切换为写模式,将limit改为capacity的值,同时将postion归0
特点: 就是为下一次数据的写入做好准备
3、put(): 相对读取,向Buffer中存储数据
4、get(): 相对读取,从Buffer中获取数据
5、mark(): 设置标记位
reset(): 重置
hasRemaining(): 判断当前位置和limit之间是否还有元素可处理
绝对读取和相对读取的关系
绝对读取: get(index) 不会影响position的位置
相对读取: put() get() 会影响,每次读取一次,指针后移
举例代码如下
import java.nio.ByteBuffer;
import java.nio.CharBuffer;
import java.nio.IntBuffer;
public class NIODemo {
	public static void main(String[] args) {
		// ByteBuffer buffer = ByteBuffer.allocate(5);
		ByteBuffer buffer2 = ByteBuffer.allocateDirect(10);
		CharBuffer buffer = CharBuffer.allocate(8);
		// 准备向Buffer中写数据 写模式
		System.out.println("capacity:" + buffer.capacity()); // 8
		System.out.println("limit:" + buffer.limit()); // 8
		System.out.println("position:" + buffer.position()); // 0

		buffer.put('x');
		buffer.put('y');
		buffer.put('r');
		System.out.println("------------------------");

		System.out.println("capacity:" + buffer.capacity()); // 8
		System.out.println("limit:" + buffer.limit()); // 8
		System.out.println("position:" + buffer.position()); // 3

		System.out.println("------------------------");
		// 切换模式 ,limit变为position的位置然后将position变为0
		//将写模式切换成读模式
		buffer.flip();
		System.out.println("capacity:" + buffer.capacity()); // 8
		System.out.println("limit:" + buffer.limit()); // 3
		System.out.println("position:" + buffer.position()); // 0

		System.out.println("------------------------");
		char ch = 0;
		ch = buffer.get();
		System.out.println(ch);//x

		buffer.mark();// mark: 1

		ch = buffer.get();
		System.out.println(ch);//y

		System.out.println("------------------------");
		System.out.println("capacity:" + buffer.capacity()); // 8
		System.out.println("limit:" + buffer.limit()); // 3
		System.out.println("position:" + buffer.position()); // 2

		System.out.println("------------------------");
		ch = buffer.get();
		System.out.println(ch);//r

//		ch = buffer.get();
//		System.out.println(ch); 再读取的话报错 java.nio.BufferUnderflowException
		System.out.println("---------++---------------");
		buffer.reset();//重置
		//以上读取代码存在重复,循环改进
		ch = 0;
		while (buffer.hasRemaining()) {
			ch = buffer.get();
			System.out.println((char) ch);
		}

		System.out.println("------------------");
		buffer.clear(); // 将postion 清 0 ,将limit = capacity

		System.out.println("capacity:" + buffer.capacity()); // 8
		System.out.println("limit:" + buffer.limit()); // 8
		System.out.println("position:" + buffer.position()); // 0

		// 注意: 调用clear方法只是将读模式改为写模式,并不会清空缓冲区的数据,再写入数据会替换之前的数据
		System.out.println(buffer.get(1));//y
		System.out.println("执行绝对读取之后Buffer的position位置:" + buffer.position());//o

	}
}
Channel(通道)
Channel原理类似于传统的流对象, FileInputStream FileOutputStream
3个主要的区别
1.程序如果想要读取Channel中的数据,不能够直接读写,必须经过Buffer 【唯一性】
2.通过Channel通道既能够读取也能够写入数据 【双向性】
3.Channel能够将指定的部分或者全部文件映射到内存中
全部映射MappedByteBuffer
部分文件映射
Java中为Channel提供了如下常用的类
FileChannel 和文件相关的通道
DatagramChannel 和UDP协议传输数据相关的通道
SocketChannel 针对TCP协议客户端Socket提供的通道
获取FileChannel对象
和文件相关的普通流有哪些?
FileInputStream
FileOutputStream
RandomAccessFile
常用的方法
read() : 将Channel中的数据读取到Buffer中
write() : 向Buffer中写入数据
map(): 将channel中的数据全部或者部分映射到Buffer中
inChannel.map(mode, position, size)
MappedByteBuffer mappBuffer = inChannel.map(MapMode.READ_ONLY, 0, srcFile.length());
举例代码如下
public class NIODemo03 {
	public static void main(String[] args) throws IOException {
		//封装文件路径
		File srcFile = new File("nio.txt");
		//创建字节输入流对象
		FileInputStream fis = new FileInputStream(srcFile);
		//创建字节输出流对象
		FileOutputStream fos = new FileOutputStream(new File("nio4.txt"));

		// 获取Channel对象
		FileChannel inChannel = fis.getChannel();
		FileChannel outChannel = fos.getChannel();

		// 获取Buffer对象
		ByteBuffer buffer = ByteBuffer.allocate(10);

		// 将inChannel中的数据读取到Buffer中
//		int len = inChannel.read(buffer);
//		System.out.println(len);
//		byte[] bys = buffer.array();
//		System.out.println(new String(bys, 0, len));
//		//	切换成读模式
//		buffer.flip();
//		len = inChannel.read(buffer);
//		System.out.println(len);
//		System.out.println(new String(buffer.array(), 0, len));
//		buffer.flip();
//
//		len = inChannel.read(buffer);
//		System.out.println(len);
//		System.out.println(new String(buffer.array(), 0, len));
//		buffer.flip();

		int len = 0;
		while ((len = inChannel.read(buffer)) != -1) {
			buffer.flip();
			System.out.print(new String(buffer.array(), 0, len));
		}

		while ((inChannel.read(buffer)) != -1) {
			buffer.flip(); // 为取出数据做好准备
			outChannel.write(buffer);
			buffer.clear();
		}

//		3.Channel能够将指定的部分或者全部文件映射到内存中
//		java.nio.channels.NonWritableChannelException
//		java.nio.channels.NonReadableChannelException
		MappedByteBuffer mapBuffer = inChannel.map(MapMode.READ_WRITE, 0, srcFile.length());
		byte[] array = mapBuffer.array();
		System.out.println(new String(array));
	}
}
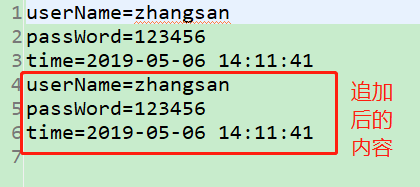
需求:随机访问文件流来获取Channel对象并且实现文件的追加写入
代码实现
import java.io.RandomAccessFile;
import java.nio.MappedByteBuffer;
import java.nio.channels.FileChannel;
import java.nio.channels.FileChannel.MapMode;
public class NIODemo {
	public static void main(String[] args) throws Exception {
		RandomAccessFile raf = new RandomAccessFile("nio.txt", "rw");
		FileChannel channel = raf.getChannel();

		MappedByteBuffer mappedByteBuffer = channel.map(MapMode.READ_ONLY, 0, raf.length());

		channel.position(raf.length()); // seek

		channel.write(mappedByteBuffer);
	}
}
Selector(选择器)
Selector运行单线程处理多个Channel,如果你的应用打开了多个通道,但每个连接的流量都很低,使用Selector就会很方便。
例如在一个聊天服务器中。要使用Selector, 得向Selector注册Channel,然后调用它的select()方法。这个方法会一直阻塞直到某个注册的通道有事件就绪。一旦这个方法返回,线程就可以处理这些事件。
事件的例子如:新的连接进来、数据接收等。
charset(编码)
java.nio.charset包中提供了Charset类,它继承了Comparable接口;
还有CharsetDecoder、CharsetEncoder编码和解码的类,它们都是继承Object类。
Java中的字符使用Unicode编码,每个字符占用两个字节,16个二进制位,向ByteBuffer中存放数据的时候需要考虑字符的编码,从中读取的时候也需要考虑字符的编码方式,也就是编码和解码。
编码
		String s = "Hello中国";
		byte[] bys = s.getBytes("utf-8");
		// [72, 101, 108, 108, 111, -42, -48, -71, -6]
		// [72, 101, 108, 108, 111, -28, -72, -83, -27, -101, -67]
		System.out.println(Arrays.toString(bys));
解码
// Hello涓浗
String data = new String(bys, "gbk");//如果编码和解码的charset不一样,便会导致乱码
System.out.println(data);
举例代码如下
import java.io.UnsupportedEncodingException;
import java.nio.ByteBuffer;
import java.nio.CharBuffer;
import java.nio.charset.CharacterCodingException;
import java.nio.charset.Charset;
import java.nio.charset.CharsetDecoder;
import java.nio.charset.CharsetEncoder;
import java.util.Arrays;
public class NIODemo {
	public static void main(String[] args) throws UnsupportedEncodingException, CharacterCodingException {
//		编码 字符/字符数组/字符串 --> 数值
//		1.创建编码表对象
		Charset utf8 = Charset.forName("utf-8");
		Charset gbk = Charset.forName("gbk");

		//2.创建编码器对象或者解码器对象
		CharsetEncoder utf8Encoder = utf8.newEncoder();
		CharsetDecoder utf8Decoder = utf8.newDecoder();

		CharsetEncoder gbkEncoder = gbk.newEncoder();
		CharsetDecoder gbkDecoder = gbk.newDecoder();

		// 3.创建需要编码或者解码的数据源,数据源一定要是Buffer
		CharBuffer charBuffer = CharBuffer.allocate(10);
		charBuffer.put("Hello中国");
		charBuffer.flip();
		System.out.println("======编码========");
		ByteBuffer byteBuffer = utf8Encoder.encode(charBuffer);

		for (int i = 0; i < byteBuffer.limit(); i++) {
			System.out.println(byteBuffer.get(i));
		}

		System.out.println("======解码========");
		CharBuffer charBuffer2 = gbkDecoder.decode(byteBuffer);
		System.out.println(charBuffer2);
	}
}
File 文件的路径的抽象表现形式
jdk1.7提供了一些非常方便的工具类 Paths Files Path(抽象的路径表现形式)
//获取文件路径
Path path = Paths.get("D:\\zhouym");
System.out.println(path.startsWith("D://"));
System.out.println(path.isAbsolute());
System.out.println(path.getNameCount());
//通过paths拷贝文件,返回的是拷贝过程时间
long time = Files.copy(Paths.get("nio.txt"), new FileOutputStream("nioooo.txt"));
System.out.println(time);
//通过FileStore获取盘符或者文件的容量
FileStore fileStore = Files.getFileStore(Paths.get("C:"));
System.out.println(fileStore.getTotalSpace()/1024/1024/1024);//换算成GB为单位的容量
利用NIO来遍历文件,基于事件驱动的方式遍历文件
import java.io.IOException;
import java.nio.file.FileVisitResult;
import java.nio.file.FileVisitor;
import java.nio.file.Files;
import java.nio.file.Path;
import java.nio.file.Paths;
import java.nio.file.SimpleFileVisitor;
import java.nio.file.attribute.BasicFileAttributes;
public class NIODemo {
	public static void main(String[] args) throws IOException {
		FileVisitor<Path> visitor = new SimpleFileVisitor<Path>() {
			@Override
			public FileVisitResult preVisitDirectory(Path path, BasicFileAttributes attrs) throws IOException {
				System.out.println("正准备访问" + path + "文件");
				return FileVisitResult.CONTINUE;
			}

			@Override
			public FileVisitResult visitFile(Path path, BasicFileAttributes attrs) throws IOException {
				System.out.println("正在访问" + path + "文件");
				if (path.endsWith("NIODemo.java")) {
					System.out.println("找到了Java文件,可以停止查找了");
					return FileVisitResult.TERMINATE;
				}
				return FileVisitResult.CONTINUE;
			}

			@Override
			public FileVisitResult visitFileFailed(Path path, IOException exc) throws IOException {
				return FileVisitResult.SKIP_SIBLINGS;
			}

			@Override
			public FileVisitResult postVisitDirectory(Path path, IOException exc) throws IOException {
				return FileVisitResult.CONTINUE;
			}
		};

		Files.walkFileTree(Paths.get("D:\\zhouym"), visitor);
	}
}
使用NIO的WatchService监控文件系统变化
import java.nio.file.FileSystems;
import java.nio.file.Paths;
import java.nio.file.StandardWatchEventKinds;
import java.nio.file.WatchEvent;
import java.nio.file.WatchKey;
import java.nio.file.WatchService;
import java.util.List;
public class NIODemo {
	public static void main(String[] args) throws Exception {
		// 获取文件系统的WatchService对象
		WatchService watchService = FileSystems.getDefault().newWatchService();

		Paths.get("c:").register(watchService, StandardWatchEventKinds.ENTRY_CREATE,
				StandardWatchEventKinds.ENTRY_DELETE, StandardWatchEventKinds.ENTRY_MODIFY,
				StandardWatchEventKinds.OVERFLOW);
		// 通过wachService来监听文件系统
		while (true) {
			WatchKey key = watchService.take();
			List<WatchEvent<?>> pollEvents = key.pollEvents();
			for (WatchEvent<?> watchEvent : pollEvents) {
				System.out.println(watchEvent.context() + "发生了" + watchEvent.kind() + "事件");
			}

			boolean reset = key.reset();
			if (!reset) {
				break;
			}
		}
	}
}


 747
747

 被折叠的 条评论
为什么被折叠?
被折叠的 条评论
为什么被折叠?
 到【灌水乐园】发言


