


 本文介绍了使用Spring Boot整合Elasticsearch的开发过程。包括创建Spring Boot工程并引入Spring Data Elasticsearch,配置Elasticsearch地址和端口,创建ES实体类、Repository类、配置类和Controller类,设置中文分词,最后启动程序创建索引、上传数据并进行查询测试。
1.创建springboot工程,引入Springdata-elasticsearch
spring-data-elasticsearch:3.1.8.RELEASE 版本
		<dependency>
			<groupId>org.springframework.boot</groupId>
			<artifactId>spring-boot-starter-data-elasticsearch</artifactId>
		</dependency>
2.在application.properties配置elasticsearch的地址和端口信息,这个端口不是9200,默认为9300的,因为9300倍占用,所以我用的9600,myes是我的es安装时候设置的名字。
##es地址
spring.data.elasticsearch.cluster-name=myes
spring.data.elasticsearch.cluster-nodes=ip:9600
3.环境配置好了就可以开发了,创建ES实体类User
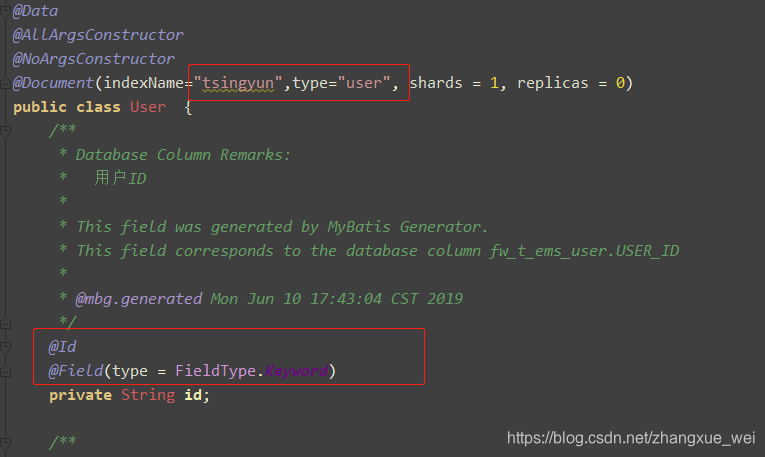
需注意:
1.这三个注解必须有
2.主键id必须用@ID标注
3.需要中文分词的需要进行单独配置
4.indexname是索引名,type是您的type名字
@Data
@AllArgsConstructor
@NoArgsConstructor
4.中文分词设置,前提是您的es已经安装了中文分词ik插件
中文分词有两种形式:
ik_max_word:会将文本做最细粒度的拆分
ik_smart:会将文本做最粗粒度的拆分
为extendstr1字段设置中文分词支持
	@Field(type = FieldType.Text, analyzer = "ik_max_word",searchAnalyzer ="ik_max_word"
    private String extendstr1;
5.创建springdata-elasticsearch为我们提供方法的Repository类,需要继承ElasticsearchRepository类
public interface UserRepository extends ElasticsearchRepository<User,String> {
    Iterable<User> findByExtendstr1(String extendstr1);
}
6.创建es配置类ESConfig,作用是扫描es的Repository类
@Configuration
@EnableElasticsearchRepositories(basePackages = "com.tsingyun.repository")
public class ESConfig {
}
7.创建controller类实现增删改查
@RestController
@RequestMapping("/user")
public class UserController {
    @Autowired
    private ElasticsearchTemplate elasticsearchTemplate;
    @Autowired
    UserRepository userRepository;

    /**
     * @description:  创建INDEX和TYPE
     * @author: ZhangXueWei
     * @date: 2019/6/18 18:04
     * @param:
     * @return:
     * @throws:
     */
    @PostMapping("/createIndex")
    public void createIndex() {
        elasticsearchTemplate.createIndex(User.class);
    }

    /**
     * @description:  1.如果第一次访问没有索引则将创建序列和类型,并添加数据
     *                2.此接口也提供修改,通过id覆盖信息
     * @author: ZhangXueWei
     * @date: 2019/6/18 18:04
     * @param:
     * @return:
     * @throws:
     */
    @PostMapping("/addIndex")
    public void addIndex(User user) {
        userRepository.save(user);
    }

    /**
     * @description: 通过ID删除文档记录
     * @author: ZhangXueWei
     * @date: 2019/6/18 18:24
     * @param: [id]
     * @return: void
     * @throws:
     */
    @DeleteMapping("/delUserById")
    public void delUserById(@RequestParam(value = "id", defaultValue = "") String id) {
        userRepository.deleteById(id);
    }

    /**
     * @description:  获取所有的文档数据
     * @author: ZhangXueWei
     * @date: 2019/6/18 18:04
     * @param:
     * @return:
     * @throws:
     */
    @GetMapping("/getAll")
    public ResponseEntity<Iterable> getAll() {
        Iterable<User> all = userRepository.findAll();
        return new ResponseEntity<>(all, HttpStatus.OK);
    }

    /**
     * @description:  根据指定字段extendstr1查询文档,中文分词查询
     * @author: ZhangXueWei
     * @date: 2019/6/18 18:04
     * @param:
     * @return:
     * @throws:
     */
    @GetMapping("/getDocByText")
    public ResponseEntity<Iterable> getDocByText(@RequestParam(value = "text", defaultValue = "") String text) {
        Iterable<User> list = userRepository.findByExtendstr1(text);
        return  new ResponseEntity<>(list, HttpStatus.OK);
    }
8.启动程序,在kibana上执行GET /tsingyun/user/_mapping,发现index已经创建好了,且中文分词剩生效了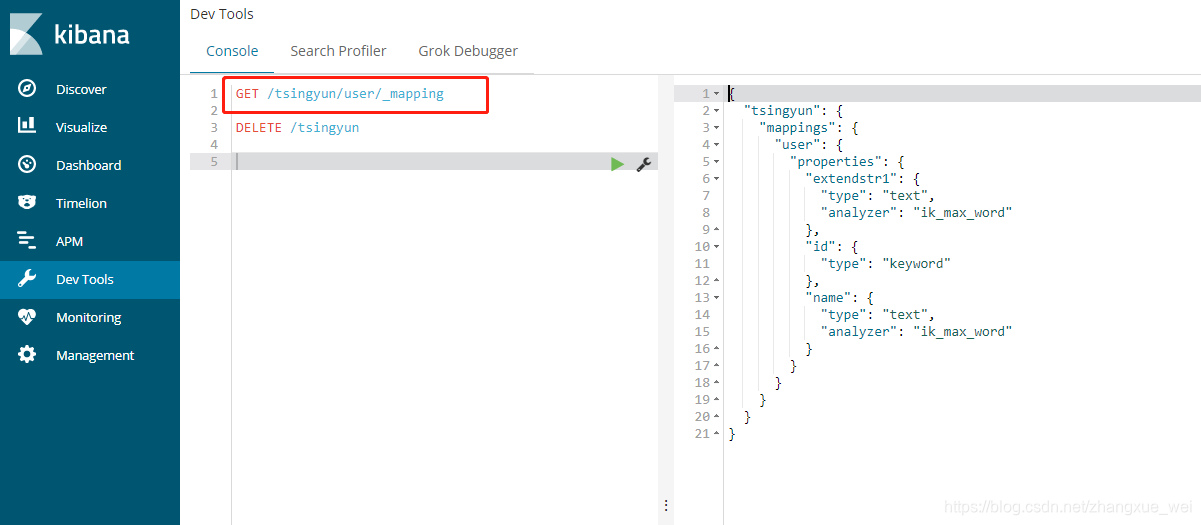
9.上传几条数据
localhost:8888/user/addIndex?id=1001&name=赵&extendstr1=html开发工程师
localhost:8888/user/addIndex?id=1002&name=张三&extendstr1=java工程师
localhost:8888/user/addIndex?id=1003&name=王五&extendstr1=一个前端工程师
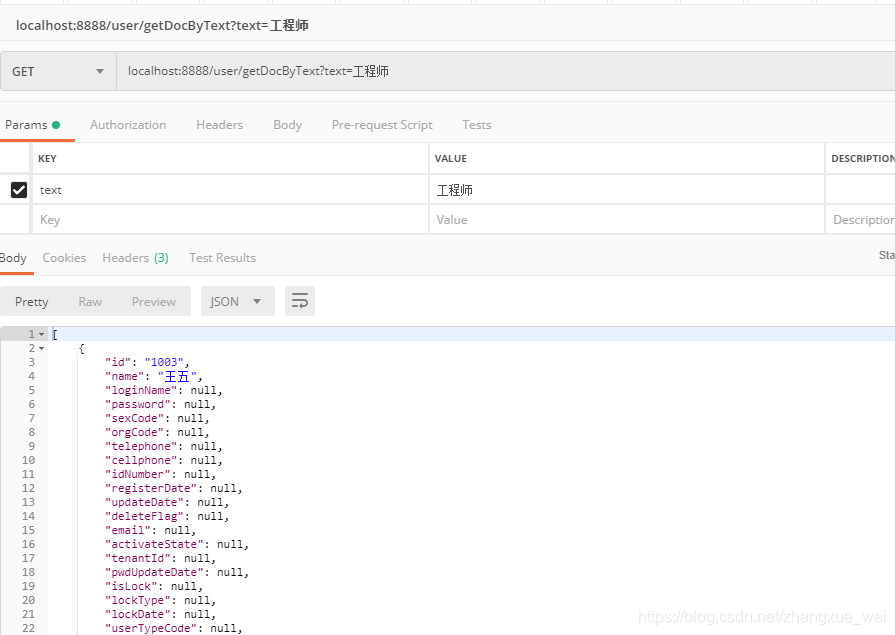
10.测试查询localhost:8888/user/getDocByText?text=工程师


 1134
1134

 被折叠的 条评论
为什么被折叠?
被折叠的 条评论
为什么被折叠?
 到【灌水乐园】发言


