


 本文详细介绍了 Android 开发中常用的 UI 控件,包括线性布局 LinearLayout、相对布局 RelativeLayout、文本视图 TextView、按钮 Button、编辑文本框 EditText、单选按钮 RadioButton、复选框 CheckBox、图像视图 ImageView、列表视图 ListView 和网格视图 GridView 的使用方法。
原视频链接: https://www.bilibili.com/video/BV1Rt411e76H
软件安装与下载链接: https://blog.youkuaiyun.com/xuw_xy/article/details/89524335/
笔记部分:(为了自己能记住,后期回忆有印象)
1.LinearLayout(线性布局)
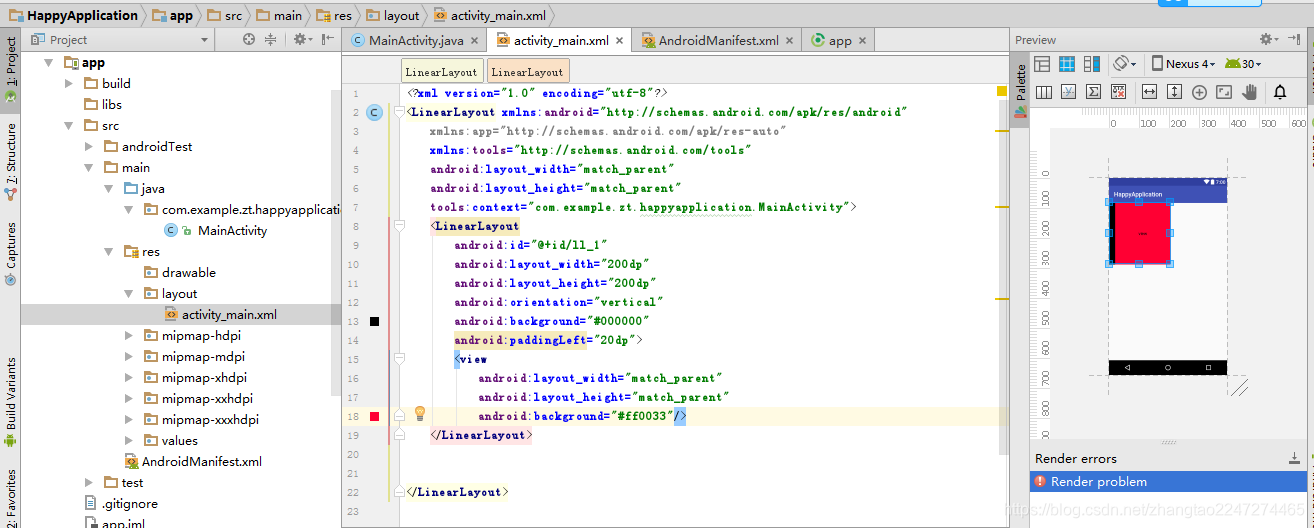

这里颜色直接设置成#000,然后按小方框选颜色。
match_parent表示让当前控件的大小和父布局的大小一样,也就是由父布局来决定当前控件的大小
wrap_content表示让当前的控件大小能够刚好包含里面的内容,也就是由控件内容决定当前控件的大小
垂直布局: android:orientation=“vertical”
水平布局:android:orientation=“horizontal”
LinearLayout默认水平排列
内边距padding:android:padding=“10dp”
android:paddingBottom=“10dp”
外边距margin:android:layout_margin=“10dp”
android:layout_marginLeft=“10dp”
对齐方式: android:gravity=“center”
android:gravity=“bottom”
weight权重问题
<View
android:layout_weight=“1”
android:layout_width=“50dp”
android:layout_height=“match_parent” />
< View
android:layout_weight=“1”
android:layout_width=“match_parent”
android:layout_height=“match_parent” />
这里有一个点:weight表示权重如果两个模块都是1则两个平分父布局,各占1/2。如果其中一个android:layout_width="50dp"这样已经占了一部分,则总的先减去这个已占得然后两个再根据权重平分。
2.RelativeLayout(相对布局)
android:layout_alignParentBottom="true"靠父空间底部对齐
android:layout_alignParentRight="true"靠父空间右部对齐
android:layout_toRightOf=@id/view_1"格式:靠view_1这个模块Right右对齐
android:layout_belowOf=@id/view_1"下对齐
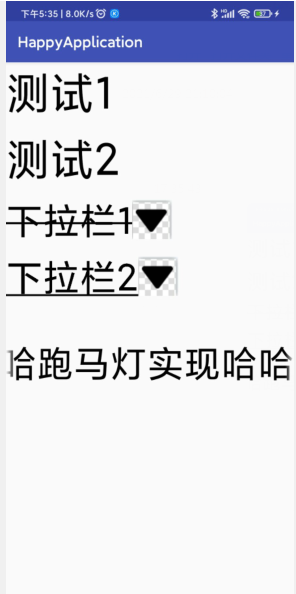
3.TextView
练习运行效果图:
TextViewActivity里的代码
1.截图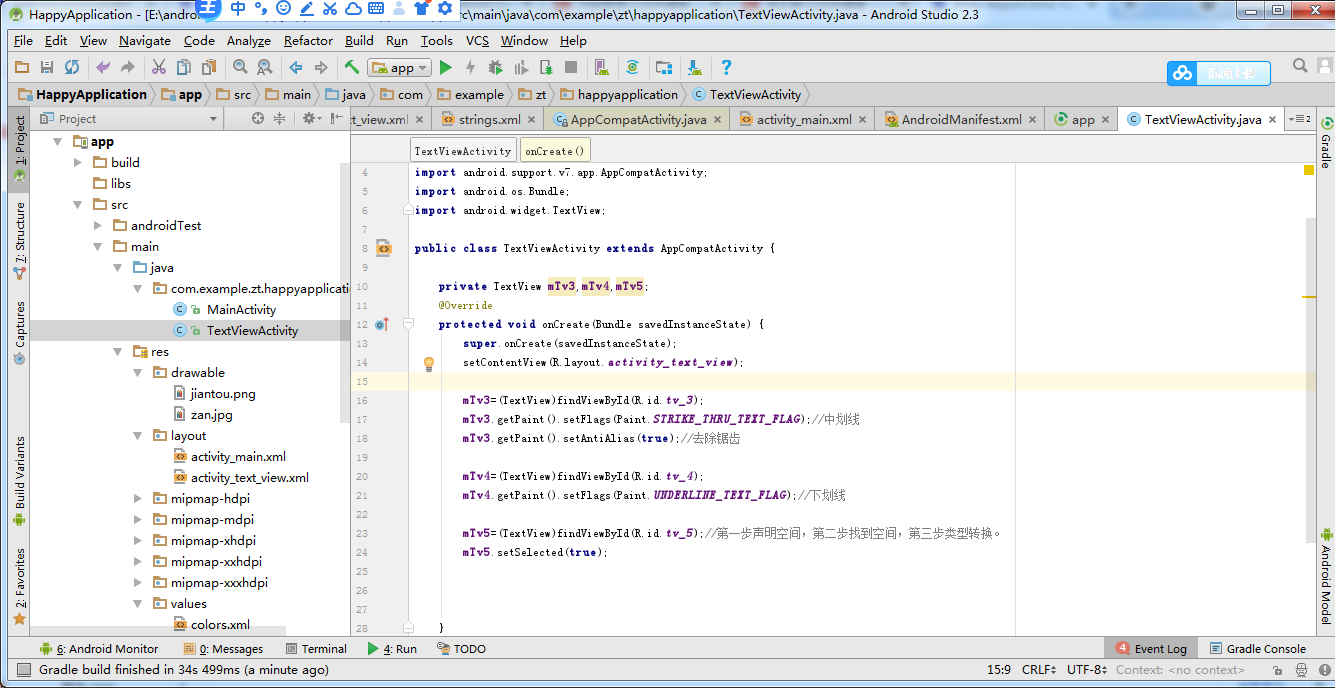
2.代码
package com.example.zt.happyapplication;

import android.graphics.Paint;
import android.support.v7.app.AppCompatActivity;
import android.os.Bundle;
import android.widget.TextView;

public class TextViewActivity extends AppCompatActivity {


    private TextView mTv3,mTv4,mTv5;
    @Override
    protected void onCreate(Bundle savedInstanceState) {


        super.onCreate(savedInstanceState);
        setContentView(R.layout.activity_text_view);

        mTv3=(TextView)findViewById(R.id.tv_3);
        mTv3.getPaint().setFlags(Paint.STRIKE_THRU_TEXT_FLAG);//中划线
        mTv3.getPaint().setAntiAlias(true);//去除锯齿

        mTv4=(TextView)findViewById(R.id.tv_4);
        mTv4.getPaint().setFlags(Paint.UNDERLINE_TEXT_FLAG);//下划线

        mTv5=(TextView)findViewById(R.id.tv_5);//第一步声明空间,第二步找到空间,第三步类型转换。
        mTv5.setSelected(true);
    }
}
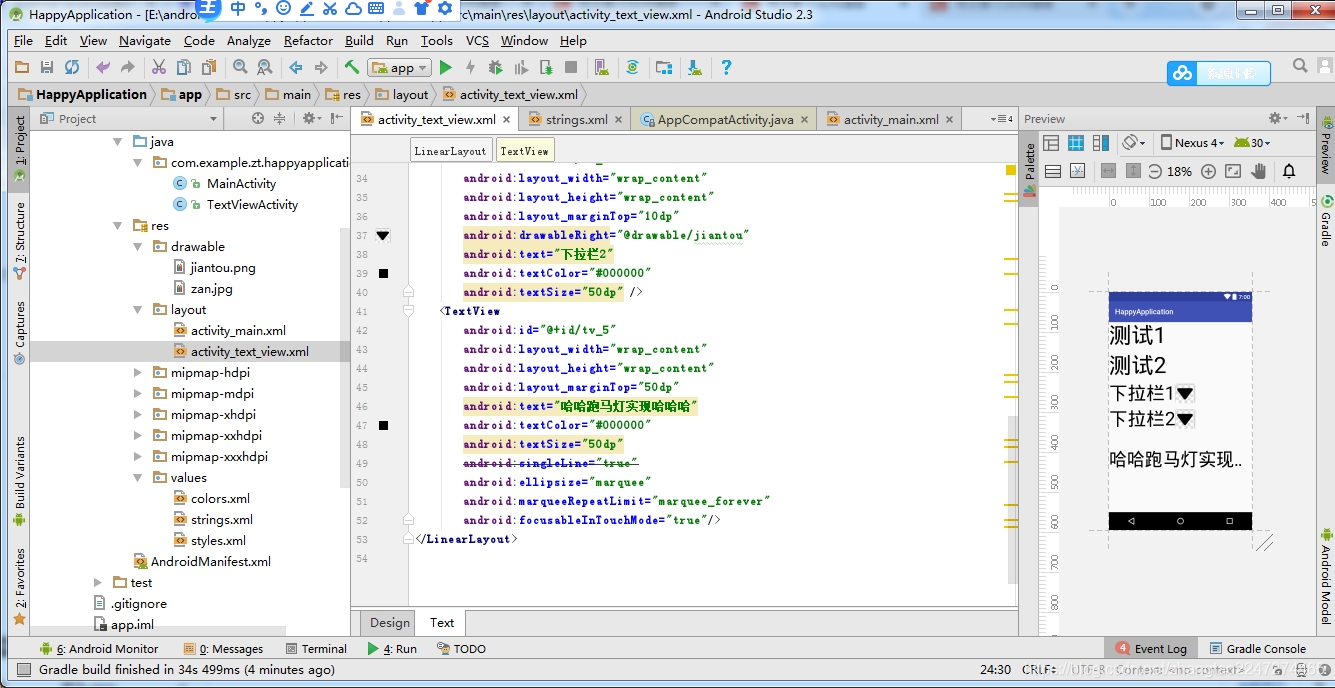
activity_text_view.xml
1.截图
2.代码
<?xml version="1.0" encoding="utf-8"?>
<LinearLayout xmlns:android="http://schemas.android.com/apk/res/android"
    xmlns:app="http://schemas.android.com/apk/res-auto"
    xmlns:tools="http://schemas.android.com/tools"
    android:layout_width="match_parent"
    android:layout_height="match_parent"
   android:orientation="vertical">
    <TextView
        android:id="@+id/tv_1"
        android:layout_width="wrap_content"
        android:layout_height="wrap_content"
        android:text="测试1"
        android:textColor="#000000"
        android:textSize="60dp"/>
    <TextView
        android:id="@+id/tv_2"
        android:layout_width="wrap_content"
        android:layout_height="wrap_content"
        android:text="测试2"
        android:textColor="#000000"
        android:textSize="60dp"
        android:layout_marginTop="10dp"/>
    <TextView
        android:id="@+id/tv_3"
        android:layout_width="wrap_content"
        android:layout_height="wrap_content"
        android:layout_marginTop="10dp"
        android:drawableRight="@drawable/jiantou"
        android:text="下拉栏1"
        android:textColor="#000000"
        android:textSize="50dp" />
    <TextView
        android:id="@+id/tv_4"
        android:layout_width="wrap_content"
        android:layout_height="wrap_content"
        android:layout_marginTop="10dp"
        android:drawableRight="@drawable/jiantou"
        android:text="下拉栏2"
        android:textColor="#000000"
        android:textSize="50dp" />
    <TextView
        android:id="@+id/tv_5"
        android:layout_width="wrap_content"
        android:layout_height="wrap_content"
        android:layout_marginTop="50dp"
        android:text="哈哈跑马灯实现哈哈哈"
        android:textColor="#000000"
        android:textSize="50dp"
        android:singleLine="true"
        android:ellipsize="marquee"
        android:marqueeRepeatLimit="marquee_forever"
        android:focusableInTouchMode="true"/>
</LinearLayout>
4.Button
效果图
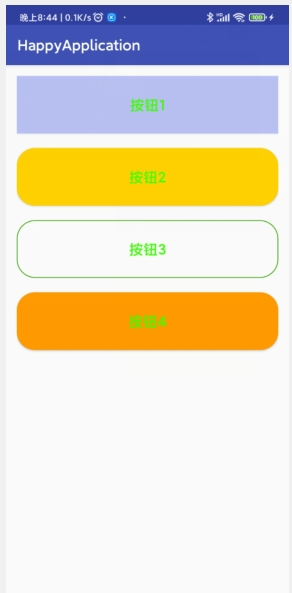
activity_button.xml代码
<?xml version="1.0" encoding="utf-8"?>
<RelativeLayout xmlns:android="http://schemas.android.com/apk/res/android"
    xmlns:app="http://schemas.android.com/apk/res-auto"
    xmlns:tools="http://schemas.android.com/tools"
    android:layout_width="match_parent"
    android:layout_height="match_parent"
    android:padding="15dp">
    <Button
        android:id="@+id/btn_1"
        android:layout_width="match_parent"
        android:layout_height="80dp"
        android:text="按钮1"
        android:textSize="20sp"
        android:textColor="#3cff00"
        android:background="#aaaab5ff"/>
    <Button
        android:id="@+id/btn_2"
        android:layout_width="match_parent"
        android:layout_height="80dp"
        android:text="按钮2"
        android:textSize="20sp"
        android:textColor="#3cff00"
        android:background="@drawable/bg_btn2"
        android:layout_below="@+id/btn_1"
        android:layout_marginTop="20dp"/>
    <Button
        android:id="@+id/btn_3"
        android:layout_width="match_parent"
        android:layout_height="80dp"
        android:text="按钮3"
        android:textSize="20sp"
        android:textColor="#3cff00"
        android:background="@drawable/bg_btn3"
        android:layout_below="@+id/btn_2"
        android:layout_marginTop="20dp"/>
    <Button
        android:id="@+id/btn_4"
        android:layout_width="match_parent"
        android:layout_height="80dp"
        android:text="按钮4"
        android:textSize="20sp"
        android:textColor="#3cff00"
        android:background="@drawable/bg_btn4"
        android:layout_below="@+id/btn_3"
        android:onClick="showToast"
        android:layout_marginTop="20dp"/>
</RelativeLayout>
ButtonActivity代码
package com.example.zt.happyapplication;
import android.support.v7.app.AppCompatActivity;
import android.os.Bundle;
import android.view.View;
import android.widget.Button;
import android.widget.Toast;
public class ButtonActivity extends AppCompatActivity {


    private Button mBtn3;
    @Override
    protected void onCreate(Bundle savedInstanceState) {


        super.onCreate(savedInstanceState);
        setContentView(R.layout.activity_button);
        mBtn3=(Button)findViewById(R.id.btn_3);
        mBtn3.setOnClickListener(new View.OnClickListener() {


            @Override
            public void onClick(View v) {


                Toast.makeText(ButtonActivity.this,"btn3被点击了",Toast.LENGTH_SHORT).show();
            }
        });
    }
    public void showToast(View view)
    {


        Toast.makeText(this,"我被点击了",Toast.LENGTH_SHORT).show();
    }
}
activity_main.xml
<?xml version="1.0" encoding="utf-8"?>
<LinearLayout xmlns:android="http://schemas.android.com/apk/res/android"
    xmlns:app="http://schemas.android.com/apk/res-auto"
    xmlns:tools="http://schemas.android.com/tools"
    android:layout_width="match_parent"
    android:layout_height="match_parent"
    android:orientation="vertical">
    <Button
        android:id="@+id/btn_textview"
        android:layout_width="match_parent"
        android:layout_height="wrap_content"
        android:text="Textview"/>
    <Button
        android:id="@+id/btn_button"
        android:layout_width="match_parent"
        android:layout_height="wrap_content"
       android:text="button"/>
    </LinearLayout>
MainActivity
**
package com.example.zt.happyapplication;
import android.content.Intent;
import android.support.v7.app.AppCompatActivity;
import android.os.Bundle;
import android.view.View;
import android.widget.Button;
public class MainActivity extends AppCompatActivity {


    private Button mBtnTextView;
    private Button mbtnButton;
    @Override
    protected void onCreate(Bundle savedInstanceState) {


        super.onCreate(savedInstanceState);
        setContentView(R.layout.activity_main);
        mBtnTextView = (Button) findViewById(R.id.btn_textview);
        mBtnTextView.setOnClickListener(new View.OnClickListener() {


            @Override
            public void onClick(View v) {


                //跳转到TextView演示界面
                Intent intent=new Intent(MainActivity.this,TextViewActivity.class);
                startActivity(intent);
            }
        });
        mbtnButton=(Button)findViewById(R.id.btn_button) ;
        mbtnButton.setOnClickListener(new View.OnClickListener() {


            @Override
            public void onClick(View v) {


                //跳转到Button演示界面
                Intent intent=new Intent(MainActivity.this,ButtonActivity.class);
                startActivity(intent);
            }
        });
    }
}
**
5.EditText&简单登录界面制作
效果图:
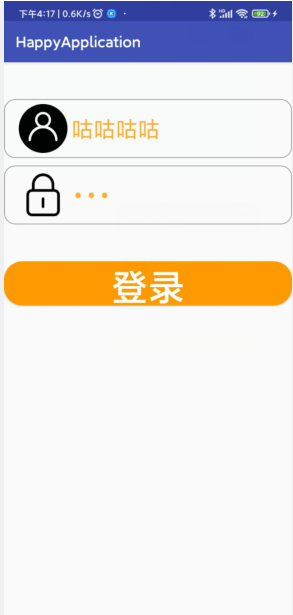
activity_edit_text.xml
<?xml version="1.0" encoding="utf-8"?>
<RelativeLayout xmlns:android="http://schemas.android.com/apk/res/android"
    xmlns:app="http://schemas.android.com/apk/res-auto"
    xmlns:tools="http://schemas.android.com/tools"
    android:layout_width="match_parent"
    android:layout_height="match_parent">
    <EditText
        android:id="@+id/et_1"
        android:layout_width="match_parent"
        android:layout_height="80dp"
        android:textSize="30sp"
        android:textColor="#FFAD33"
        android:hint="用户名:"
        android:background="@drawable/bg_username"
        android:paddingLeft="20dp"
        android:paddingRight="20dp"
        android:drawablePadding="5dp"
        android:drawableLeft="@drawable/username"
        android:layout_marginTop="50dp"/>
    <EditText
        android:id="@+id/et_2"
        android:layout_width="match_parent"
        android:layout_height="80dp"
        android:textSize="30sp"
        android:textColor="#FFAD33"
        android:inputType="textPassword"
        android:hint="密码:"
        android:layout_below="@+id/et_1"
        android:layout_marginTop="10dp
最低0.47元/天 解锁文章


 1357
1357


 被折叠的 条评论
为什么被折叠?
被折叠的 条评论
为什么被折叠?
 到【灌水乐园】发言


