


 本文档详细介绍了如何在基于SpringBoot的web项目中,取消内置Tomcat并使用外置Tomcat进行启动。主要步骤包括在pom.xml中移除spring-boot-starter-tomcat,引入javax.servlet-api,让启动类继承SpringBootServletInitializer并重写configure方法,配置外置Tomcat以及在IDE中设置Run/Debug Configurations。同时,提到了如何处理应用上下文路径和打war包的过程。
记录:270
场景:使用Maven管理的基于SpringBoot的web工程,取消内置Tomcat启动,使用外置Tomcat启动,使用war包方式打包。
1.在pom.xml中引入核心依赖
(1)在spring-boot-starter-web依赖中去掉spring-boot-starter-tomcat依赖
(2)引入javax.servlet-api依赖。
<dependencies>
  <dependency>
    <groupId>org.springframework.boot</groupId>
    <artifactId>spring-boot-starter-web</artifactId>
    <exclusions>
      <exclusion>
        <groupId>org.springframework.boot</groupId>
        <artifactId>spring-boot-starter-tomcat</artifactId>
      </exclusion>
    </exclusions>
  </dependency>
  <dependency>
    <groupId>javax.servlet</groupId>
    <artifactId>javax.servlet-api</artifactId>
  </dependency>
</dependencies>
2.启动类
启动类继承SpringBootServletInitializer和重写该类的configure方法。
@SpringBootApplication
public class ExampleApplication extends SpringBootServletInitializer {
  public static void main(String[] args) {
    SpringApplication.run(ExampleApplication.class);
  }
  @Override
  protected SpringApplicationBuilder configure(SpringApplicationBuilder builder) {
    return builder.sources(ExampleApplication.class);
  }
}
注意:如果需要引入自定义的配置文件,可以使用@ImportResource注解。
比如:需导入
/src/main/resources/custom-bean.xml;
/src/main/resources/config/custom-redis.xml;
在启动类上加注解:
@ImportResource({"classpath:custom-bean.xml","classpath:config/*.xml"})
3.ExampleController
ExampleController测试使用。
@RestController
@RequestMapping("/exam")
public class ExampleController {
  @GetMapping("/getCity")
  public String getCityInfo() {
      return "杭州";
  }
}
4.application.yml
如果使用war包方式,那么application.yml中的如下配置会失效,会默认使用外置Tomcat的相关端口和路径信息。
server:
  port: 18081
  servlet:
    context-path: /example-demo
5.配置外置Tomcat
如果不执行第5步,那么直接启动会报错:
Unable to start ServletWebServerApplicationContext due to missing ServletWebServerFactory bean。
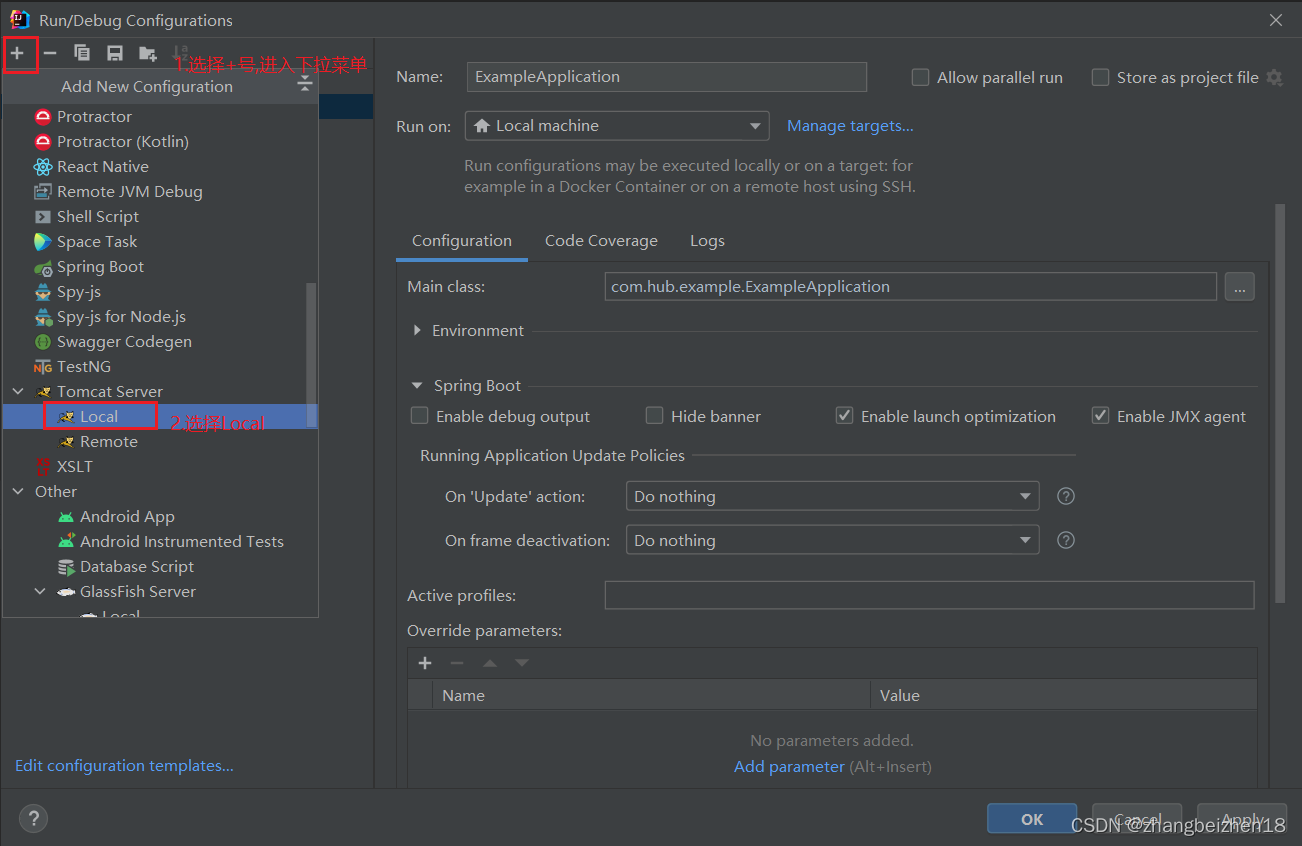
5.1 Edit Configurations
选择Edit Configurations...。

5.2 在Run/Debug Configurations 对话框选择Tomcat
在Run/Debug Configurations 对话框选择Tomcat。
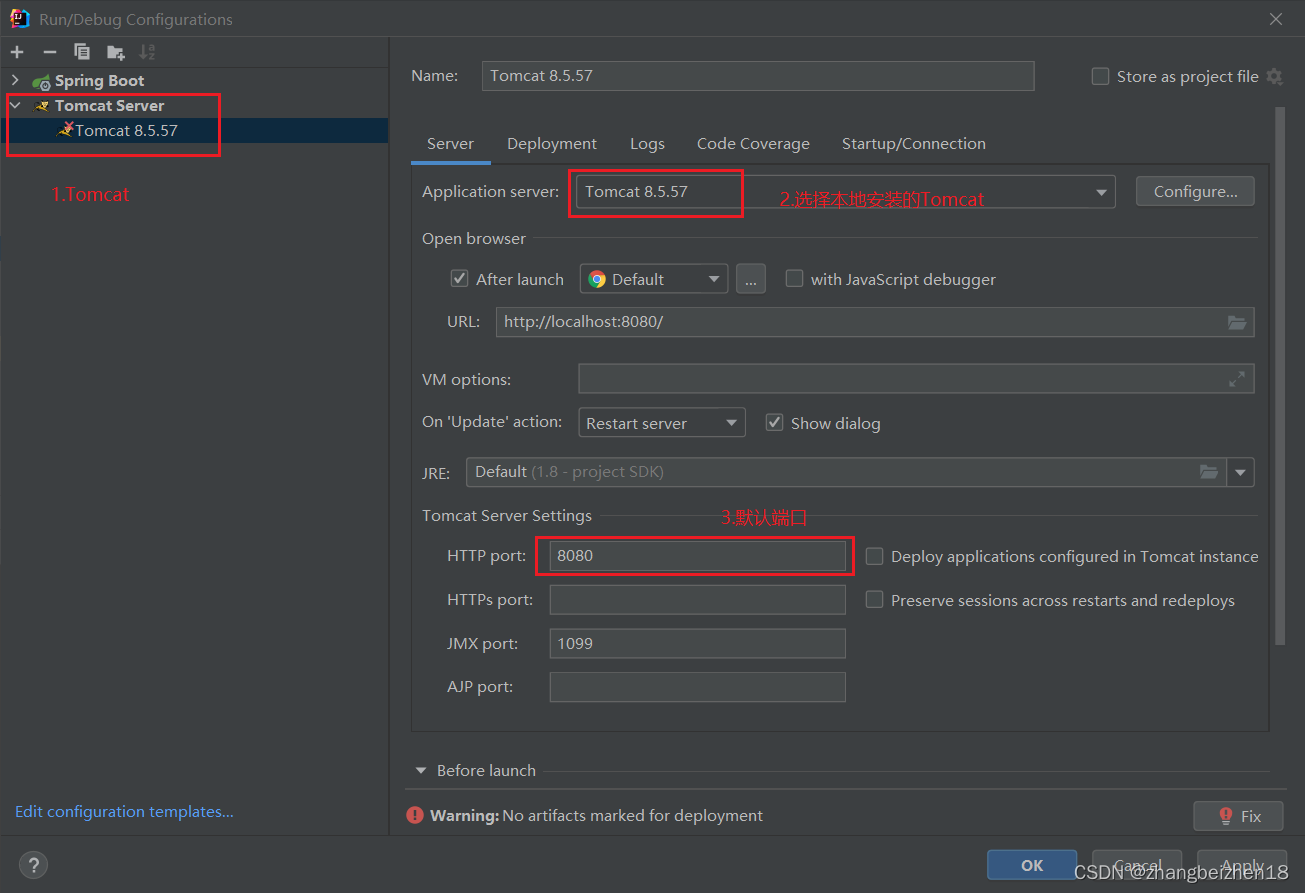
5.3 在Run/Debug Configurations 对话框配置本地Tomcat
在Run/Debug Configurations 对话框配置本地Tomcat。
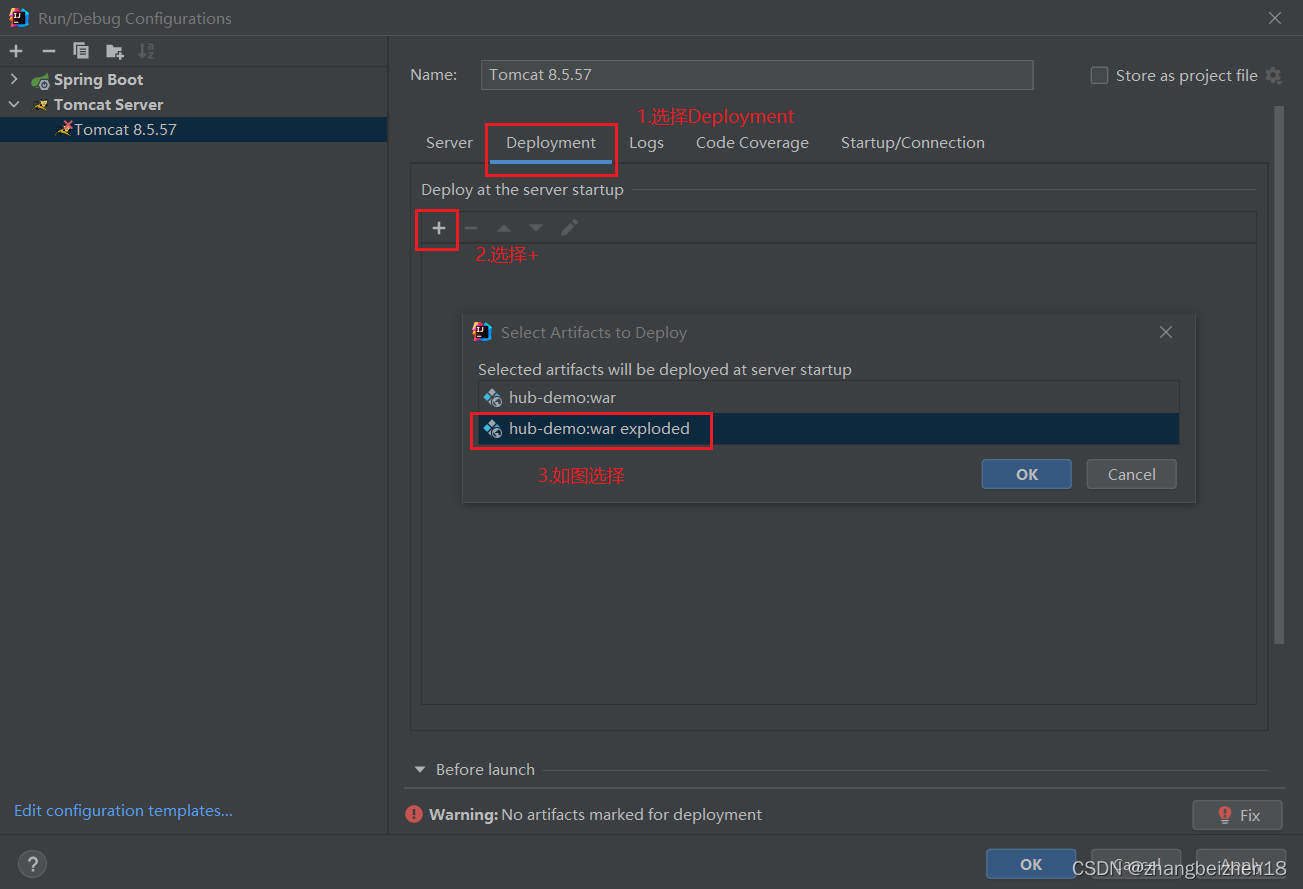
5.4 在Run/Debug Configurations 对话框配置Deployment
在Run/Debug Configurations 对话框配置Deployment。
5.5 在Run/Debug Configurations 对话框配置修改Application context
在Run/Debug Configurations 对话框配置修改Application context。

6.启动Tomcat
注意,不能右键启动类ExampleApplication,执行启动。
正确如下:

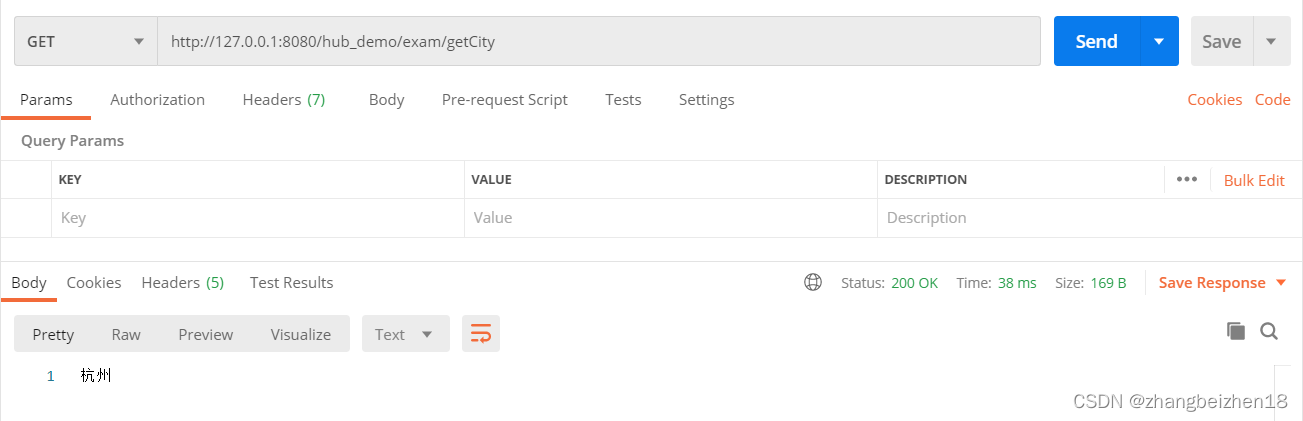
7.测试
请求URL:http://127.0.0.1:8080/hub_demo/exam/getCity
在Postman执行并返回(也可以直接浏览器访问):
8.打war包
生成的war包在hub-demo\target目录下。
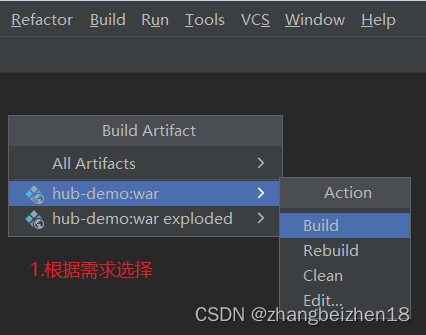
(1)选择Build->Build Artifacts...
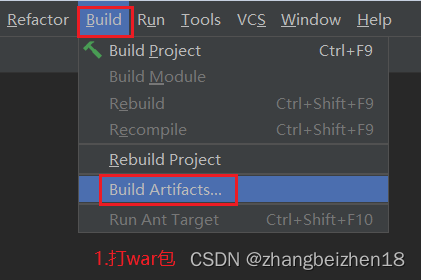
(2)根据需求选择Build Artifact
以上,感谢。
2022年5月20日


 1万+
1万+

 被折叠的 条评论
为什么被折叠?
被折叠的 条评论
为什么被折叠?
 到【灌水乐园】发言


