


2.组件状态共享
1. 状态共享-父子单向
State是当前组件的状态,用State修饰的数据变化会驱动UI的更新(只有一层)
父传子的时候,子组件定义变量的时候,如果没有任何的修饰符,那么该值只会在第一次渲染时生效
State是当前组件的状态,他的数据变化可以驱动UI,但是子组件接收的数据没办法更新
父子单向:
@Prop:子组件可以接收父组件的值,父组件不能接收子组件的值(单向)
@Entry
@Component
struct ComponentQuestionCase {
  @State money: number = 999999;

  build() {
    Column() {
      Text('father:' + this.money)
      Button('存100块')
        .onClick(()=>{
          this.money+=100
        })
      CompQsChild({money:this.money})
    }
    .padding(20)
    .width('100%')
    .height('100%')
  }
}

@Component
struct CompQsChild {
  @Prop money: number = 0

  build() {
    Column() {
      Text('child:' + this.money)
      Button('花100块')
        .onClick(()=>{
          this.money-=100
        })
    }
    .padding(20)
    .backgroundColor(Color.Pink)
  }
}
2. 状态共享-父子双向
父子双向:
@Link:子组件用Link修饰了传递过来的数据,就是双向同步了
注意:Link修饰符不允许给初始值
@Entry
@Component
struct ComponentQuestionCase {
  @State
  money: number = 999999;

  build() {
    Column() {
      Text('father:' + this.money)
      Button('存100块')
        .onClick(()=>{
          this.money+=100
        })
      CompQsChild({money:this.money})
    }
    .padding(20)
    .width('100%')
    .height('100%')
  }
}

@Component
struct CompQsChild {
  // 各玩各的
  // @State money: number = 0
  // 听爸爸的话
  // @Prop money: number
  // 团结一心
  @Link money: number

  build() {
    Column() {
      Text('child:' + this.money)
      Button('花100块')
        .onClick(()=>{
          this.money-=100
        })
    }
    .padding(20)
    .backgroundColor(Color.Pink)
  }
}
3. 状态共享-后代组件
后代组件:
祖组件:@Provide来传值 @Provie data : one={ num:1 }
后代组件:@Consume接收数据 @Consume data : one
注意:@Consume 不允许有默认值
注意:Provide 和 Consume 必须同名,书写时没有校验
建议:在提供数据和访问数据时,使用全局别名。
如果组件已有该命名变量,可以起全局别名进行提供/接收
1.提供起别名
@Provide(全局别名) 组件内名字:类型 = 初始值
2.接收起别名
@Consume(全局别名)组件内名字:类型 组件内名字可以起个不冲突的
@Entry
@Component
struct ComponentQuestionCase1 {
  @Provide
  dataInfo: MoneyInfo1 = {
    money: 99999,
    bank: '中国银行'
  }

  build() {
    Column() {
      Text('father:' + this.dataInfo.money)
      Button('存100块')
        .onClick(() => {
          this.dataInfo.money += 100
        })
      CompQsChild1()
    }
    .padding(20)
    .width('100%')
    .height('100%')
  }
}

@Component
struct CompQsChild1 {
  // 各玩各的
  // @State money: number = 0
  // 听爸爸的话
  // @Prop money: number
  // 团结一心
  @Consume
  dataInfo: MoneyInfo1

  build() {
    Column() {
      Text('child:' + this.dataInfo.money)
      Button('花100块')
        .onClick(() => {
          this.dataInfo.money -= 100
        })
      ChildChild1()
    }
    .padding(20)
    .backgroundColor(Color.Pink)
  }
}

@Component
struct ChildChild1 {
  // 各玩各的
  // @State money: number = 0
  // 听爸爸的话
  // @Prop money: number
  // 团结一心
  @Consume
  dataInfo: MoneyInfo1

  // @Link dataInfo: MoneyInfo

  build() {
    Column() {
      Text('ChildChild:' + this.dataInfo.money)
      Button('花100块')
        .onClick(() => {
          this.dataInfo.money -= 100
        })
    }
    .padding(20)
    .backgroundColor(Color.Red)
  }
}

interface MoneyInfo1 {
  money: number
  bank: string
}
4.状态监听
如果开发者需要关注某个状态变量的值是否改变,可以使用 @Watch 为状态变量设置回调函数。
Watch(“回调函数名”)中的回调必须在组件中声明,该函数接收一个参数,参数为修改的属性名
注意:Watch修饰符要写 State Prop Link Provide的修饰符下面,否则会有问题
在第一次初始化的时候,@Watch装饰器的方法不会被调用
@Entry
@Component
struct PlayControlComp {
  @State shakenX: number = 0
  @State shakenY: number = 0
  timer: number = -1
  @State @Watch('update') isPlay: boolean = false

  update() {
    if (this.isPlay) {
      this.timer = setInterval(() => {
        this.shakenX = 2 - Math.random() * 4
        this.shakenY = 2 - Math.random() * 4
      }, 100)
    } else {
      clearInterval(this.timer)
      this.shakenX = 0
      this.shakenY = 0
    }
  }

  build() {
    Column() {
      Stack() {
        Text('抖音')
          .fontSize(50)
          .fontWeight(FontWeight.Bold)
          .fontColor('#ff2d83b3')
          .translate({
            x: this.shakenX,
            y: this.shakenY
          })
          .zIndex(1)
        Text('抖音')
          .fontSize(50)
          .fontWeight(FontWeight.Bold)
          .fontColor('#ffe31fa9')
          .translate({
            x: this.shakenY,
            y: this.shakenX
          })
          .zIndex(2)

        Text('抖音')
          .fontSize(50)
          .fontWeight(FontWeight.Bold)
          .fontColor('#ff030000')
          .translate({
            x: 0,
            y: 0
          })
          .zIndex(3)
      }

      Row({ space: 20 }) {
        Image($r('sys.media.ohos_ic_public_play_last'))
          .width(20)
          .aspectRatio(1)

        Image(this.isPlay ? $r('sys.media.ohos_ic_public_pause') : $r('sys.media.ohos_ic_public_play'))
          .width(20)
          .aspectRatio(1)
          .onClick(() => {
            this.isPlay = !this.isPlay
          })

        Image($r('sys.media.ohos_ic_public_play_next'))
          .width(20)
          .aspectRatio(1)
      }
      .width('100%')
      .padding(20)
      .backgroundColor(Color.Pink)
      .justifyContent(FlexAlign.Center)
    }

  }
}
5、@Observed与@ObjectLink
Link只有@State或者@Link修饰的数据才能用
如果用ForEatch循环一个数组有多个对象,将对象传给子组件,子组件接收一个个对象就没办法用Link
解决办法:子组件用@ObjectLink来接收,再在Class(i2c生成的)类名前面+@Observed,就可以和对象互相关联了
@Entry
@Component
struct ObservedObjectLinkCase {
  @State goodsList: GoodsTypeModel[] = [
    new GoodsTypeModel({
      name: '瓜子',
      price: 3,
      count: 0
    }),
    new GoodsTypeModel({
      name: '花生',
      price: 3,
      count: 0
    }),
    new GoodsTypeModel({
      name: '矿泉水',
      price: 3,
      count: 0
    })
  ]

  build() {
    Column() {           //ForEach循环数组,传子元素对象
      ForEach(this.goodsList, (item: GoodsTypeModel) => {
        // 2.确保传递的对象是new过observed修饰的
        GoodItemLink({ goodItem: item })
      })
    }
  }
}

@Component
struct GoodItemLink {
  // 3.用ObjectLink修饰         子元素接收每一个对象
  @ObjectLink goodItem: GoodsTypeModel

  build() {
    Row({ space: 20 }) {
      Text(this.goodItem.name)
      Text('¥' + this.goodItem.price)
      Image($r('sys.media.ohos_ic_public_remove_filled'))
        .width(20)
        .aspectRatio(1)
        .onClick(() => {
          this.goodItem.count--
        })
      Text(this.goodItem.count.toString())
      Image($r('sys.media.ohos_ic_public_add_norm_filled'))
        .width(20)
        .aspectRatio(1)
        .onClick(() => {
          this.goodItem.count++
        })
    }
    .width('100%')
    .padding(20)
  }
}

interface GoodsType {
  name: string
  price: number
  count: number
}

// 1.使用 observed 修饰一个类
@Observed
export class GoodsTypeModel implements GoodsType {
  name: string = ''
  price: number = 0
  count: number = 0

  constructor(model: GoodsType) {
    this.name = model.name
    this.price = model.price
    this.count = model.count
  }
}
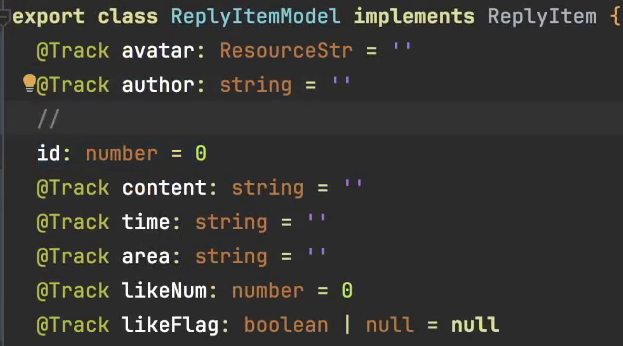
6、@Require 和 @Track
@Require 必传参数装饰器
子组件数据前面+@Require父组件必须传
@Track 节省性能
每个class里面前面默认有一个@Track对象,当我们不跟踪一个对象时不屑@Track ,但是其他的跟踪的需要都写上


 1121
1121

 被折叠的 条评论
为什么被折叠?
被折叠的 条评论
为什么被折叠?
 到【灌水乐园】发言


