


 本文详细介绍了如何使用Django框架搭建一个简单的文件上传应用,并结合DWTSDK实现图像文件的上传功能。包括Django工程创建、应用开发、URL映射、表单实现以及图像文件上传的具体步骤。
使用Django做文件上传功能会遇到跨域安全问题,这里分享下如何搭建一个简单的Django文件上传应用,以及如何利用DWT SDK和Django来上传图像文件。
参考原文:Uploading Files with Django
作者:Desmond Shaw
翻译:yushulx
|
1
2
3
|
本网站刊载的所有内容,包括文字、图片、音频、视频、软件、程序、以及网页版式设计等均在网上搜集。
访问者可将本网站提供的内容或服务用于个人学习、研究或欣赏,以及其他非商业性或非盈利性用途,但同时应遵守著作权法及其他相关法律的规定,不得侵犯本网站及相关权利人的合法权利。除此以外,将本网站任何内容或服务用于其他用途时,须征得本网站及相关权利人的书面许可,并支付报酬。
本网站内容原作者如不愿意在本网站刊登内容,请及时通知本站,予以删除。
|
Django下载和安装
通过命令行来安装:
|
1
|
pip
install
django
|
Django工程创建的基本步骤
-
创建一个新工程:
1django-admin startproject project -
创建应用:
1python manage.py startapp application -
在工程根目录中创建文件夹templates。在settings.py中声明下[os.path.join(BASE_DIR, 'templates')]。
-
在templates中创建一个HTML页面。
-
如果需要加载静态资源,比如CSS, JavaScript,图片等,需要在 settings.py中声明。
-
在urls.py中映射URL。并在对应的views.py中实现函数。
下面通过两个例子来看下具体实现方法。
Form文件上传
创建Django工程simpleform:
|
1
|
django-admin startproject simpleform
|
创建一个应用formupload:
|
1
|
python manage.py startapp formupload
|
创建文件夹templates,并在settings.py中声明路径:
|
1
2
3
4
5
6
7
8
9
10
11
12
13
14
15
16
17
18
19
20
21
|
'''
Author : Desmond Shaw
Company: Dynamsoft
Website: www.dynamsoft.com
'''
TEMPLATES
=
[
{
'BACKEND'
:
'django.template.backends.django.DjangoTemplates'
,
'DIRS'
: [os.path.join(BASE_DIR,
'templates'
)],
'APP_DIRS'
:
True
,
'OPTIONS'
: {
'context_processors'
: [
'django.template.context_processors.debug'
,
'django.template.context_processors.request'
,
'django.contrib.auth.context_processors.auth'
,
'django.contrib.messages.context_processors.messages'
,
],
},
},
]
|
在templates下创建一个简单的页面index.htm:
|
1
2
3
4
5
6
7
8
9
10
11
12
13
14
15
16
17
18
19
20
21
22
23
24
25
26
27
28
29
30
31
32
33
34
35
|
<
html
>
<
head
>
<
title
>Django File Upload</
title
>
<
style
>
h1 {
font-size: 2em;
font-weight: bold;
color: #777777;
text-align: center
}
table {
margin: auto;
}
</
style
>
</
head
>
<
body
>
<
h1
>
{{what}}
</
h1
>
<
table
>
<
tr
>
<
td
>
<
form
action
=
"{{ request.build_absolute_uri }}upload/"
method
=
"POST"
enctype
=
"multipart/form-data"
>
<
input
type
=
"file"
name
=
"file"
/>
<
br
/>
<
input
type
=
"submit"
value
=
"Upload File"
/>
</
form
>
</
td
>
</
tr
>
</
table
>
</
body
>
</
html
>
|
Django的模板引擎会替换{{what}}的值。
打开urls.py,添加映射:
|
1
2
3
4
5
6
7
8
9
10
11
12
|
'''
Author : Desmond Shaw
Company: Dynamsoft
Website: www.dynamsoft.com
'''
from
formupload
import
views
urlpatterns
=
[
url(r
'^$'
, views.home, name
=
"home"
),
url(r
'^upload/'
, views.upload, name
=
"upload"
),
]
|
在网页中输入URL之后,Django会用对应的函数来处理请求。
打开views.py,添加函数实现:
|
1
2
3
4
5
6
7
8
9
10
11
12
13
14
15
16
17
|
def
home(request):
return
render(request,
'index.htm'
, {
'what'
:
'Django File Upload'
})
def
upload(request):
if
request.method
=
=
'POST'
:
handle_uploaded_file(request.FILES[
'file'
],
str
(request.FILES[
'file'
]))
return
HttpResponse(
"Successful"
)
return
HttpResponse(
"Failed"
)
def
handle_uploaded_file(
file
, filename):
if
not
os.path.exists(
'upload/'
):
os.mkdir(
'upload/'
)
with
open
(
'upload/'
+
filename,
'wb+'
) as destination:
for
chunk
in
file
.chunks():
destination.write(chunk)
|
使用下面的命令来启动服务:
|
1
|
python manage.py runserver
|
打开127.0.0.1:8000,试着上传一个文件。这个时候会报错“CSRF verification failed. Request aborted“。
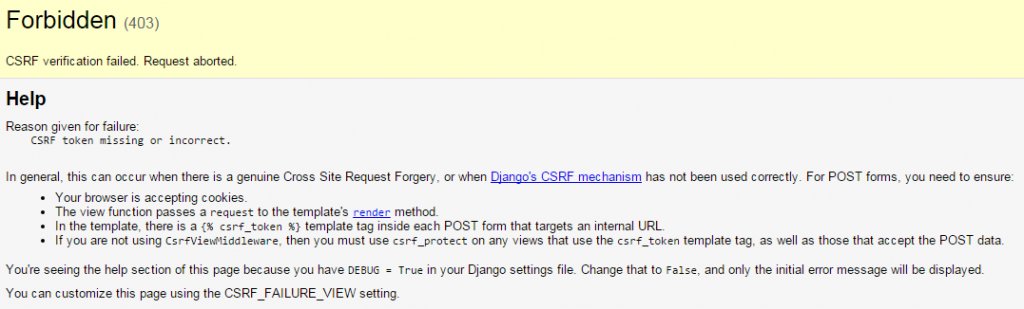
要解决这个问题有两种方法:
-
在settings.py中把django.middleware.csrf.CsrfViewMiddleware注释掉
-
在Form中使用{% csrf_token %}:
123456<formaction="{{ request.build_absolute_uri }}upload/"method="POST"enctype="multipart/form-data">{% csrf_token %}<inputtype="file"name="file"/><br/><inputtype="submit"value="Upload File"/></form>
关于CSRF,可以参考Cross Site Request Forgery protection。
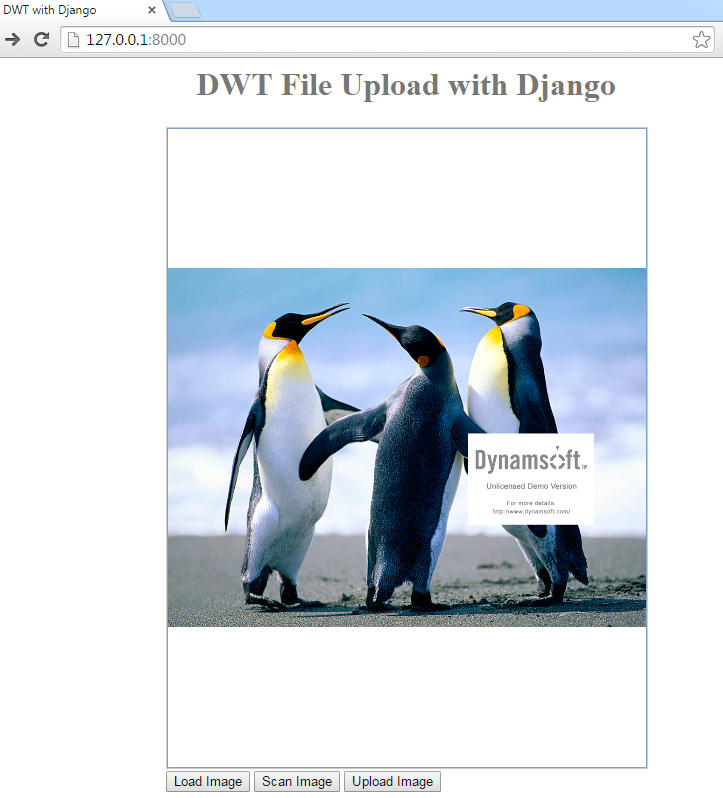
Dynamic Web TWAIN图像文件上传
创建Django工程dwt:
|
1
|
django-admin startproject dwt
|
创建应用dwtupload:
|
1
|
python manage.py startapp dwtupload
|
和之前一样创建templates,并把它的路径添加到settings.py中。
创建一个页面:
|
1
2
3
4
5
6
7
8
9
10
11
12
13
14
15
16
17
18
19
20
21
22
23
24
25
26
27
28
29
30
31
32
33
34
35
36
37
38
39
40
41
42
43
44
45
46
47
48
49
50
51
52
53
54
55
56
57
58
59
60
61
62
63
64
65
66
67
68
69
70
71
72
73
74
75
76
77
78
79
80
81
82
83
84
85
86
87
88
89
90
91
92
93
94
95
96
97
98
99
100
101
102
103
104
105
106
107
108
109
110
111
112
113
114
115
116
117
118
119
120
121
122
|
{% load staticfiles %}
<
html
>
<
head
>
<
title
>DWT with Django</
title
>
<
script
type
=
"text/javascript"
src
=
"{% static "
dynamsoft.webtwain.initiate.js" %}"></
script
>
<
script
type
=
"text/javascript"
src
=
"{% static "
dynamsoft.webtwain.config.js" %}"></
script
>
<
script
type
=
"text/javascript"
src
=
"{% static "
jquery-2.1.4.min.js" %}"></
script
>
<
style
>
h1 {
font-size: 2em;
font-weight: bold;
color: #777777;
text-align: center
}
table {
margin: auto;
}
</
style
>
</
head
>
<
body
>
<
h1
>
{{what}}
</
h1
>
<
table
>
<
tr
>
<
td
>
<!-- dwtcontrolContainer is the default div id for Dynamic Web TWAIN control.
If you need to rename the id, you should also change the id in dynamsoft.webtwain.config.js accordingly. -->
<
div
id
=
"dwtcontrolContainer"
></
div
>
</
td
>
</
tr
>
<
tr
>
<
td
>
<
input
type
=
"button"
value
=
"Load Image"
onclick
=
"btnLoad_onclick();"
/>
<
input
type
=
"button"
value
=
"Scan Image"
onclick
=
"AcquireImage();"
/>
<
input
id
=
"btnUpload"
type
=
"button"
value
=
"Upload Image"
onclick
=
"btnUpload_onclick()"
>
</
td
>
</
tr
>
</
table
>
<!--Custom script goes here-->
<
script
type
=
"text/javascript"
>
Dynamsoft.WebTwainEnv.RegisterEvent('OnWebTwainReady', Dynamsoft_OnReady);
var DWObject;
function Dynamsoft_OnReady() {
DWObject = Dynamsoft.WebTwainEnv.GetWebTwain('dwtcontrolContainer'); // Get the Dynamic Web TWAIN object that is embeded in the div with id 'dwtcontrolContainer'
DWObject.Width = 480; // Set the width of the Dynamic Web TWAIN Object
DWObject.Height = 640; // Set the height of the Dynamic Web TWAIN Object
}
function btnLoad_onclick() {
var OnSuccess = function() {};
var OnFailure = function(errorCode, errorString) {};
DWObject.IfShowFileDialog = true;
DWObject.LoadImageEx("", EnumDWT_ImageType.IT_ALL, OnSuccess, OnFailure);
}
function AcquireImage() {
if (DWObject) {
DWObject.IfShowUI = false;
DWObject.IfDisableSourceAfterAcquire = true; // Scanner source will be disabled/closed automatically after the scan.
DWObject.SelectSource(); // Select a Data Source (a device like scanner) from the Data Source Manager.
DWObject.OpenSource(); // Open the source. You can set resolution, pixel type, etc. after this method. Please refer to the sample 'Scan' -> 'Custom Scan' for more info.
DWObject.AcquireImage(); // Acquire image(s) from the Data Source. Please NOTE this is a asynchronous method. In other words, it doesn't wait for the Data Source to come back.
}
}
function btnUpload_onclick() {
DWObject.HTTPPort = 8000;
var CurrentPathName = unescape(location.pathname); // get current PathName in plain ASCII
var CurrentPath = CurrentPathName.substring(0, CurrentPathName.lastIndexOf("/") + 1);
var strActionPage = CurrentPath + "upload/";
var strHostIP = "127.0.0.1"; // server IP e.g. 192.168.8.84
var OnSuccess = function(httpResponse) {
alert("Succesfully uploaded");
};
var OnFailure = function(errorCode, errorString, httpResponse) {
alert(httpResponse);
};
var date = new Date();
var csrftoken = getCookie('csrftoken');
DWObject.SetHTTPFormField('csrfmiddlewaretoken', csrftoken);
DWObject.HTTPUploadThroughPostEx(
strHostIP,
DWObject.CurrentImageIndexInBuffer,
strActionPage,
date.getTime() + ".jpg",
1, // JPEG
OnSuccess, OnFailure
);
}
function getCookie(name) {
var cookieValue = null;
if (document.cookie && document.cookie != '') {
var cookies = document.cookie.split(';');
for (var i = 0; i < cookies.length; i++) {
var cookie = jQuery.trim(cookies[i]);
// Does this cookie string begin with the name we want?
if (cookie.substring(0, name.length + 1) == (name + '=')) {
cookieValue = decodeURIComponent(cookie.substring(name.length + 1));
break;
}
}
}
return cookieValue;
}
</
script
>
</
body
>
</
html
>
|
和之前代码不同的是,这里用到了静态资源。通过{% loadstaticfiles %}和 {% static “dynamsoft.webtwain.initiate.js” %} 可以实现静态资源加载。另外,我们还必须在settings.py中声明静态资源路径:
|
1
2
3
|
STATICFILES_DIRS
=
(
os.path.join(BASE_DIR,
"Resources"
),
)
|
另外,我们需要从cookies中获取CSRF token:
|
1
2
3
4
5
6
7
8
9
10
11
12
13
14
15
16
|
function getCookie(name) {
var cookieValue = null;
if (document.cookie && document.cookie != '') {
var cookies = document.cookie.split(';');
for (var i = 0; i < cookies.length; i++) {
var cookie = jQuery.trim(cookies[i]);
// Does this cookie string begin with the name we want?
if (cookie.substring(0, name.length + 1) == (name + '=')) {
cookieValue = decodeURIComponent(cookie.substring(name.length + 1));
break;
}
}
}
return cookieValue;
}
var csrftoken = getCookie('csrftoken');
|
要通过CSRF保护, 我们需要调用Dynamic Web TWAIN SDK的接口:
|
1
2
3
|
DWObject.SetHTTPFormField(
'csrfmiddlewaretoken'
, csrftoken);
|
最后,通过URL映射和参数修改(request.FILES['file']改成request.FILES['RemoteFile']),我们就可以实现图像上传了:


 2798
2798

 被折叠的 条评论
为什么被折叠?
被折叠的 条评论
为什么被折叠?
 到【灌水乐园】发言


