


 本文详细介绍了SpringMVC框架,包括其在MVC模式中的角色、优点,以及开发步骤,涵盖了注解配置、控制器设计和请求映射。
什么是SpringMVC
基于MVC开发模式的框架,用来优化控制器,他是Spring家族的一员,具有IOC和AOP。
MVC是一种开发模式,它是模型视图控制器的简称,所有的web应用都是基于MVC开发
M:模型层,包含实体类,业务逻辑层,数据访问层
V:视图层,html,javaScript,vue等都是视图层,用来显示数据
C:控制器,它是用来接收客户端的请求,并返回响应到客户端的组件,Servlet就是组件
SpringMVC框架的优点
1.轻量级,基于MVC的框架
2.易于上手,易理解,功能强
3.具备IOC,AOP
4.完全基于注解开发
基于注解的SpringMVC框架开发的步骤
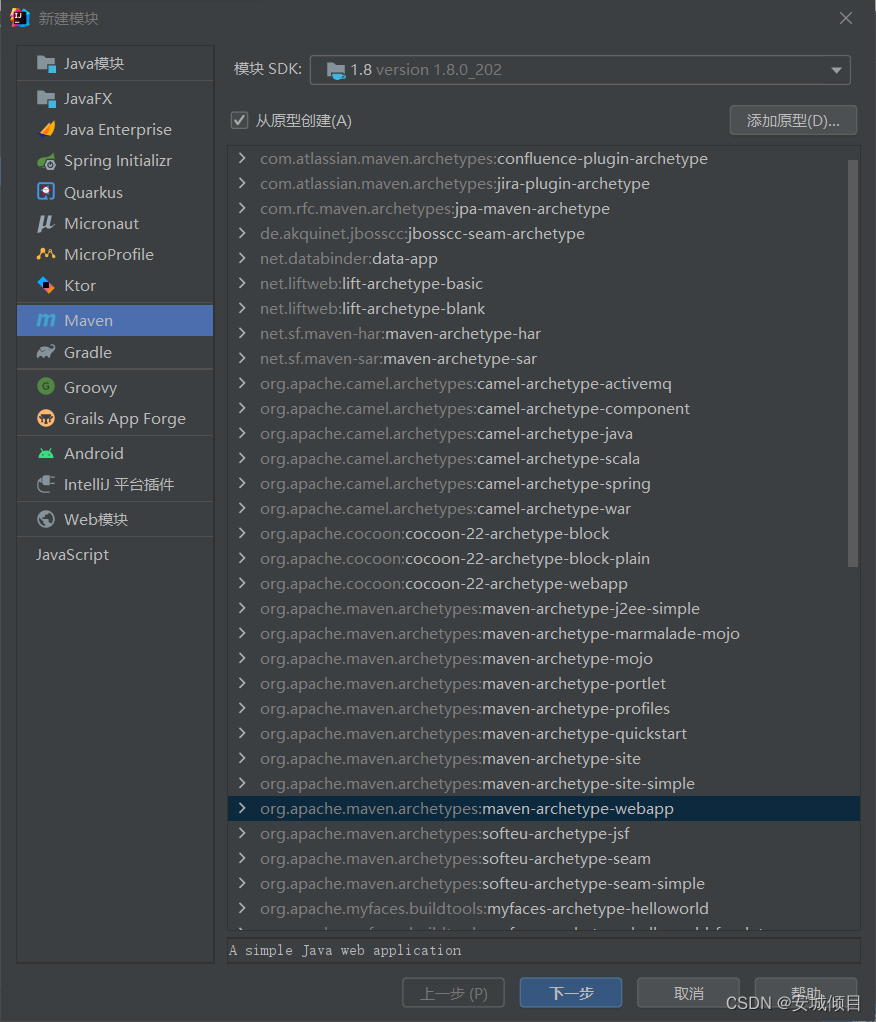
1.新建项目,选择webapp模板
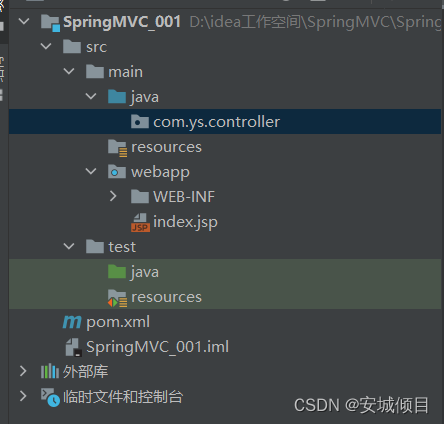
2.修改目录
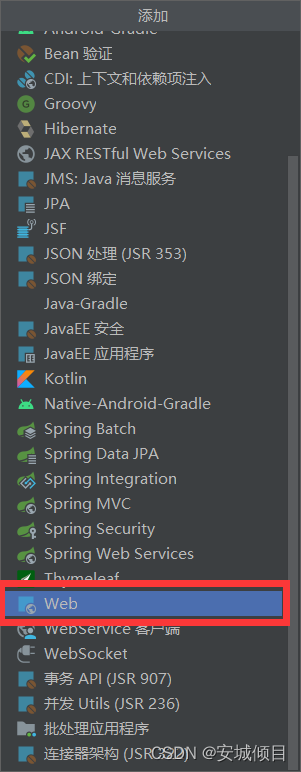
3.修改pom.xml文件,添加SpringMVC的依赖,添加Servlet的依赖
<?xml version="1.0" encoding="UTF-8"?>

<project xmlns="http://maven.apache.org/POM/4.0.0" xmlns:xsi="http://www.w3.org/2001/XMLSchema-instance"
  xsi:schemaLocation="http://maven.apache.org/POM/4.0.0 http://maven.apache.org/xsd/maven-4.0.0.xsd">
  <modelVersion>4.0.0</modelVersion>

  <groupId>org.example</groupId>
  <artifactId>SpringMVC_001</artifactId>
  <version>1.0-SNAPSHOT</version>
  <packaging>war</packaging>

  <name>SpringMVC_001 Maven Webapp</name>
  <!-- FIXME change it to the project's website -->

  <properties>
    <project.build.sourceEncoding>UTF-8</project.build.sourceEncoding>
    <maven.compiler.source>1.8</maven.compiler.source>
    <maven.compiler.target>1.8</maven.compiler.target>
  </properties>

  <dependencies>
    <dependency>
      <groupId>junit</groupId>
      <artifactId>junit</artifactId>
      <version>4.11</version>
      <scope>test</scope>
    </dependency>
<!--      添加Springmvc的依赖-->
      <dependency>
          <groupId>org.springframework</groupId>
          <artifactId>spring-webmvc</artifactId>
          <version>5.2.5.RELEASE</version>
      </dependency>
<!--      添加servlet的依赖-->
      <dependency>
          <groupId>javax.servlet</groupId>
          <artifactId>javax.servlet-api</artifactId>
          <version>3.1.0</version>
      </dependency>
  </dependencies>

    <build>
        <resources>
            <resource>
                <directory>src/main/java</directory>
                <includes>
                    <include>**/*.properties</include>
                    <include>**/*.xml</include>
                </includes>
                <filtering>false</filtering>
            </resource>
        </resources>
        <plugins>
            <plugin>
                <artifactId>maven-compiler-plugin</artifactId>
                <version>3.1</version>
                <configuration>
                    <source>1.8</source>
                    <target>1.8</target>
                </configuration>
            </plugin>
        </plugins>
    </build>
</project>
4.添加Springmvc.xml配置文件,指定包扫描,添加视图解析器

<?xml version="1.0" encoding="UTF-8"?>
<beans xmlns="http://www.springframework.org/schema/beans"
       xmlns:xsi="http://www.w3.org/2001/XMLSchema-instance"
       xmlns:context="http://www.springframework.org/schema/context"
       xsi:schemaLocation="http://www.springframework.org/schema/beans http://www.springframework.org/schema/beans/spring-beans.xsd http://www.springframework.org/schema/context https://www.springframework.org/schema/context/spring-context.xsd">

<!--    添加包扫描-->
    <context:component-scan base-package="com.ys.controller"></context:component-scan>

<!--    添加视图解析器-->
    <bean class="org.springframework.web.servlet.view.InternalResourceViewResolver">
<!--        配置前缀-->
        <!--    value的值是指定跳转到那个页面的名称    -->
        <property name="prefix" value="/admin/"></property>
<!--        配置后缀-->
        <!--    value的值是确定页面的后缀    -->
        <property name="suffix" value=".jsp"></property>
<!--        将前后缀进行拼接就是跳转的页面-->
    </bean>
</beans>
5.删除web.xml,新建web.xml

删除后新建


创建后,需要再原有的名字基础上做一些改动,否则无法创建,例如web1.xml
创建好后在项目中找到文件并改名为web.xml
6.在web.xml文件中注册SpringMVC框架(所有的web请求都是基于servlet的)
<?xml version="1.0" encoding="UTF-8"?>
<web-app xmlns="http://xmlns.jcp.org/xml/ns/javaee"
         xmlns:xsi="http://www.w3.org/2001/XMLSchema-instance"
         xsi:schemaLocation="http://xmlns.jcp.org/xml/ns/javaee http://xmlns.jcp.org/xml/ns/javaee/web-app_4_0.xsd"
         version="4.0">
<!--    注册SpringMVC的框架-->
<!--    servlet 与 servlet-mapping配套使用 当其中的servlet-name相同则配对-->
<!--    servlet-name 为自定义名称,配对成功后调用核心处理器DispatcherServlet-->
<!--   DispatcherServlet会对url-pattern标签内的内容进行拦截-->
    <servlet>
        <servlet-name>springmvc</servlet-name>
        <servlet-class>org.springframework.web.servlet.DispatcherServlet</servlet-class>
<!--        将SpringMVC配置文件与web文件进行关联-->
        <init-param>
            <param-name>contextConfigLocation</param-name>
            <param-value>classpath:springmvc.xml</param-value>
        </init-param>
    </servlet>
    <servlet-mapping>
        <servlet-name>springmvc</servlet-name>
<!--        指定拦截什么样的请求
            *.action 是指 当遇到请求后缀为action时被拦截,名称为通配符
            如http://localhost:8088/demo.action
-->
        <url-pattern>*.action</url-pattern>
    </servlet-mapping>
</web-app>
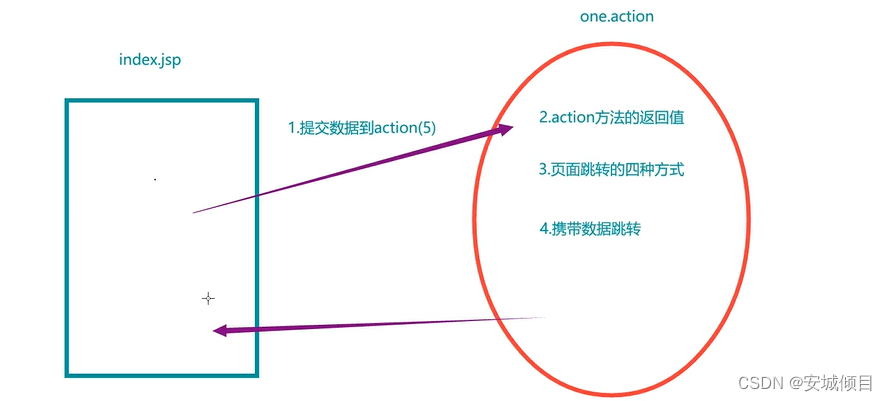
分析web请求流程
index.jap(页面)<------------------>DispatcherServlet(核心处理器)<------------------->SpringMVC的处理器是一个普通方法
7.删除index.jsp页面,并新建,发送请求给服务器
<%--
  Created by IntelliJ IDEA.
  User: HP
  Date: 2022-06-24
  Time: 14:28
  To change this template use File | Settings | File Templates.
--%>

<%@ page contentType="text/html;charset=UTF-8" language="java" %>
<html>
<head>
    <title>Title</title>
</head>
<body>
<br><br><br>
<a href="${pageContext.request.contextPath}/demo.action">访问服务器</a>

</body>
</html>
8.开发控制器(Servlet),是一个普通的类
package com.ys.controller;

import org.springframework.stereotype.Controller;
import org.springframework.web.bind.annotation.RequestMapping;

@Controller //交给Spring创建对象
public class DemoAction {
//    action中所有的功能实现都是由方法来完成的
    /**
     * action中的方法规范
     * 访问权限是public
     * 方法的返回值任意
     * 方法名称任意
     * 方法可以没有参数,也可以有任意类型的参数
     * 需要使用@RequestMapping注解来声明一个访问的路径(名称)
     */
    @RequestMapping("/demo")//此名称需要和index.jsp中的对应的<a href="${pageContext.request.contextPath}/demo.action">访问服务器</a>的页面名称相同
    public String demo(){
        System.out.println("服务器被访问到了");
        return "admin";//直接跳转到/admin/admin.jsp
    }
}
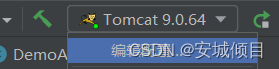
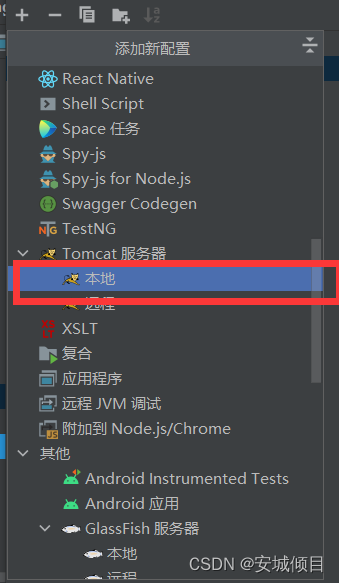
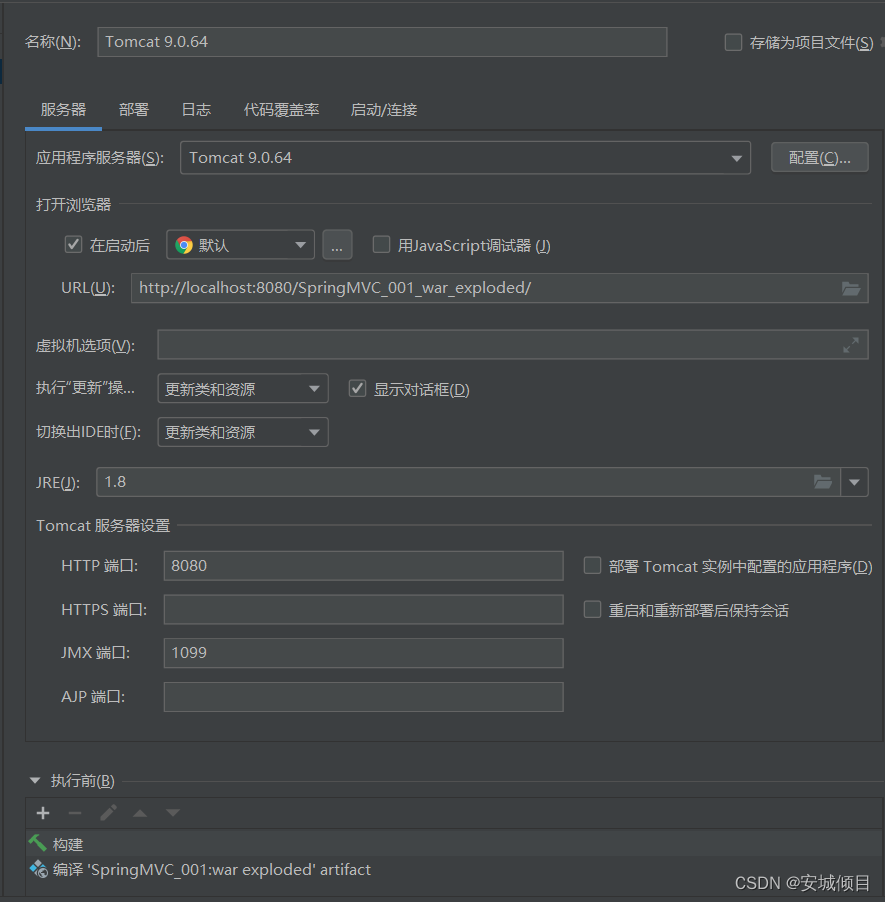
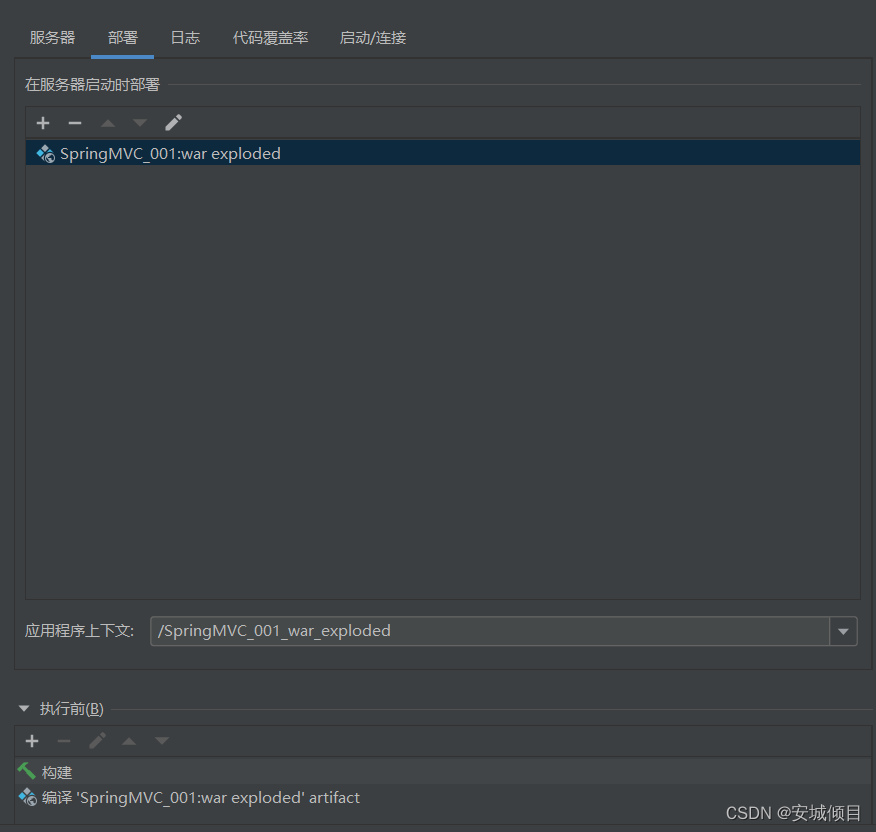
9.添加Tomcat进行测试
详解@RequestMapping注解----映射服务器访问的路径
1.此注解可以加在方法上,是为此方法注册一个访问的名称(路径)
2.可以加在类上,相当于包名(虚拟路径),用于区分不同的类中相同action的名称,所加的前缀
一:

@RequestMapping("/A")
public class Demo1{
 @RequestMapping("/demo")
 public String Student(){
   }
}

二:
@RequestMapping("/B")
public class Demo2{
 @RequestMapping("/demo")
 public String School()
   }
}
3.此注解可以区分get请求和post请求
<%--
  Created by IntelliJ IDEA.
  User: HP
  Date: 2022-06-25
  Time: 16:06
  To change this template use File | Settings | File Templates.
--%>
<%@ page contentType="text/html;charset=UTF-8" language="java" %>
<html>
<head>
    <title>Title</title>
</head>
<body>
<br>
<br>
<br>
<h2>测试不同请求提交方式</h2>
<form action="${pageContext.request.contextPath}/req.action" method="get">
    <input type="submit" value="提交get">
</form>
</body>
</html>
package com.ys.controller;

import org.springframework.stereotype.Controller;
import org.springframework.web.bind.annotation.RequestMapping;
import org.springframework.web.bind.annotation.RequestMethod;

@Controller
public class ReqAction {
    @RequestMapping(value = "/req",method = RequestMethod.GET)
    public String demo(){
        System.out.println("服务器被访问了,get请求");
        return "main";
    }

    @RequestMapping(value = "/req",method = RequestMethod.POST)
    public String demo2(){
        System.out.println("服务器被访问了,post请求");
        return "main";
    }

}
五种数据提交方式
注意:数据提交为中文时,当请求为GET时,且Tomcat版本处于7以上则会自动解析中文,即不会乱码,当请求为POST时则会乱码
1.单个数据提交
index.jsp
<%--
  Created by IntelliJ IDEA.
  User: HP
  Date: 2022-06-25
  Time: 16:06
  To change this template use File | Settings | File Templates.
--%>
<%@ page contentType="text/html;charset=UTF-8" language="java" %>
<html>
<head>
    <title>Title</title>
</head>
<body>
<br>
<br>
<br>
<h2>1.单个数据提交</h2>
<form action="${pageContext.request.contextPath}/one.action">
    姓名:<input name="myname"><br>
    年龄:<input name="age"><br>
    <input type="submit" value="提交">
</form>
</body>
</html>
action.java
package com.ys.controller;

import org.springframework.stereotype.Controller;
import org.springframework.web.bind.annotation.RequestMapping;
import org.springframework.web.bind.annotation.RequestMethod;

/**
 * <form action="${pageContext.request.contextPath}/one.action">
 *     姓名:<input name="myname"><br>
 *     年龄:<input name="age"><br>
 *     <input type="submit" value="提交">
 * </form>
 */
@Controller
public class ReqAction {
  @RequestMapping("/one")
    public String demo(String myname,int age){//方法参数名称与index.jsp中提交参数的名称相同
      System.out.println("myname="+myname+",age="+age);
      return "main";
  }

}
2.对象封装提交数据
在提交请求中,保证请求参数的名称与实体类成员变量的名称一致,则可以自动提交数据,自动转,自动封装数据到对象中。
创建实体类Uesrs
package com.ys.controller;

public class Uesrs {
    private String twoname;
    private int twoage;

    public Uesrs(String twoname, int twoage) {
        this.twoname = twoname;
        this.twoage = twoage;
    }

    @Override
    public String toString() {
        return "Uesrs{" +
                "twoname='" + twoname + '\'' +
                ", twoage=" + twoage +
                '}';
    }

    public String getTwoname() {
        return twoname;
    }

    public void setTwoname(String twoname) {
        this.twoname = twoname;
    }

    public int getTwoage() {
        return twoage;
    }

    public void setTwoage(int twoage) {
        this.twoage = twoage;
    }

    public Uesrs() {
    }
}
在index.jsp中添加
<h2>2.对象封装数据提交</h2>
<form action="${pageContext.request.contextPath}/two.action">
    姓名:<input name="twoname"><br>
<%--    需要与实体类定义的名称相同--%>
    年龄:<input name="twoage"><br>
    <input type="submit" value="提交">
</form>
在action中添加
 @RequestMapping("/two")
    public String demo2(Uesrs uesrs) {//方法参数名称与实体类相同
        System.out.println(uesrs);
        return "main";
    }
3.动态占位符
仅限于超链接或地址栏提交数据,它是一杠一值,一杠一大括号,使用注解@PathVariable来解析。
注解用于action中的方法参数前 有几个参数就有几个注解
index.jsp中添加
<br>
<h2>3.动态占位符提交数据</h2>
<a href="${pageContext.request.contextPath}/three/张三/22.action">动态提交</a>
</body>
action中添加
 @RequestMapping("/three/{name}/{age}")//括号里的参数名自定义(路径中的名称)
    public String demo3(@PathVariable//路径中的变量取值注入给形参
    String name, @PathVariable int age) {//方法参数名称与自定义的路径中的名称相同,否则需要再@PathVariable后加上路径名称
        //如:@PathVariable("name")
        System.out.println("myname=" + name + ",age=" + age);
        return "main";
    }
4.映射名称不一样数据提交
提交请求参数与action方法的形参的名称不一致,使用注解@RequestParam来解析
index.jsp中添加
<br>
<h2>4.参数名称不一致数据提交</h2>
<form action="${pageContext.request.contextPath}/four.action">
    姓名:<input name="name"><br>
    年龄:<input name="age"><br>
    <input type="submit" value="提交">
</form>
action中添加
@RequestMapping("/four")
    public String demo4(
            @RequestParam("name") String username, @RequestParam("age")int userage) {//与index.jsp对应的参数名称不同,无法进行单一数据传参
            //注解@RequestParam用于方法参数前,后面跟括号,里面的值为,注入的参数值
//        @RequestParam("name")
        System.out.println("myname=" + username + ",age=" + userage);
        return "main";
    }
5.手动提取数据(作为了解)
index.jsp中添加
<br>
<h2>5.手工提取数据</h2>
<form action="${pageContext.request.contextPath}/five.action">
    姓名:<input name="name"><br>
    年龄:<input name="age"><br>
    <input type="submit" value="提交">
</form>
action中添加
  @RequestMapping("/five")
    public String demo5(HttpServletRequest request){
        String username=request.getParameter("name");
        String userage=request.getParameter("age");
        System.out.println("myname=" + username + ",age=" + userage);
        return "main";
    }
请求参数中的中文乱码解决
在web.xml中添加
<!--    中文编码过滤器配置-->
    <filter>
        <filter-name>encode</filter-name>
        <filter-class>org.springframework.web.filter.CharacterEncodingFilter</filter-class>
<!--  查看CharacterEncodingFilter中,得到的三个变量
	private String encoding; 字符格式
	private boolean forceRequestEncoding = false;  请求的强制转换编码
	private boolean forceResponseEncoding = false; 响应的强制转换编码
-->
        <!--        配置参数-->
        <init-param>
            <param-name>encoding</param-name>
            <param-value>UTF-8</param-value>
        </init-param>
        <init-param>
            <param-name>forceRequestEncoding</param-name>
            <param-value>true</param-value>
        </init-param>
        <init-param>
            <param-name>forceResponseEncoding</param-name>
            <param-value>true</param-value>
        </init-param>
    </filter>
    <filter-mapping>
        <filter-name>encode</filter-name>
        <url-pattern>/*</url-pattern>
<!--        拦截所有请求-->
    </filter-mapping>


 2084
2084

 被折叠的 条评论
为什么被折叠?
被折叠的 条评论
为什么被折叠?
 到【灌水乐园】发言


