


 本文详细介绍如何在Windows、OSX和Linux环境下搭建gRPC应用,包括开发环境配置、官方demo下载、gRPC代码生成及服务与客户端的运行流程。
上手前准备工作
支持操作系统:windows、OS X、Linux。实例采用.net、.net core sdk。
- The .NET Core SDK command line tools.
- The .NET framework 4.5 (for OS X and Linux, the open source .NET Framework implementation, “Mono”, at version 4+, is suitable)
- Git (to download the sample code)
在windows系统开发环境, 采用 Visual Studio开发工具, 需要满足以下要求:
- .NET Framework 4.5+
- Visual Studio 2013 or 2015.
-
Git (to download the sample code)
在OS X 系统开发环境, 采用Xamarin Studio开发工具, 需要满足以下要求:
- Mono 4.4.2+ (or Mono 4+ is sufficient if you manually update NuGet to version 2.12+)
- Xamarin Studio 6.0+
-
Git (to download the sample code)
在 Linux 系统开发环境, 采用 the Monodevelop IDE,需要满足以下要求 :
- Mono 4.4.2+ (or Mono 4+ is sufficient if you manually update nuget to version 2.12+)
- MonoDevelop 5.9+
- A NuGet executable, at version 2.12+ (you’ll need to restore NuGet package dependencies from the command line)
-
Git (to download the sample code)
下载官方demo
git clone -b v1.6.x https://github.com/grpc/grpc- 打开下载的demo文
C:\Users\YPF\Desktop\grpc - 进入目录
examples/csharp/helloworld
Build the example
- 使用Visual Studio打开
Greeter.sln - 在该项目的解决右键
重新生成解决方案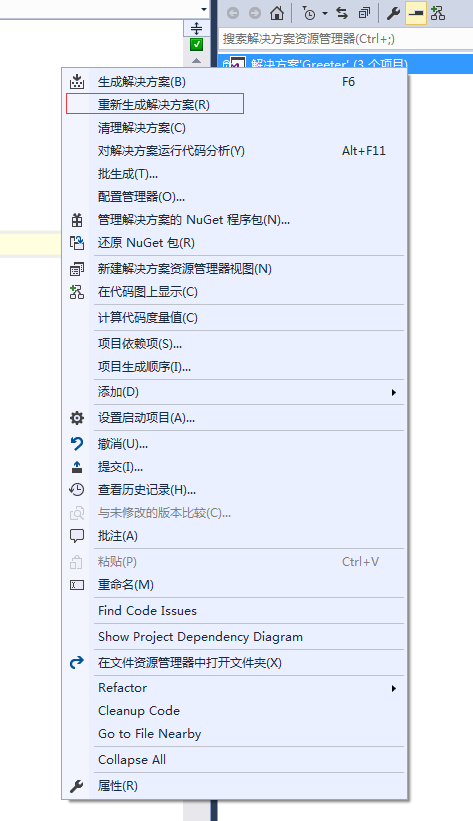
项目会自动使用NuGet进行必要的package的安装。
运行 a gRPC application
- 运行服务
> cd GreeterServer/bin/Debug
> GreeterServer.exe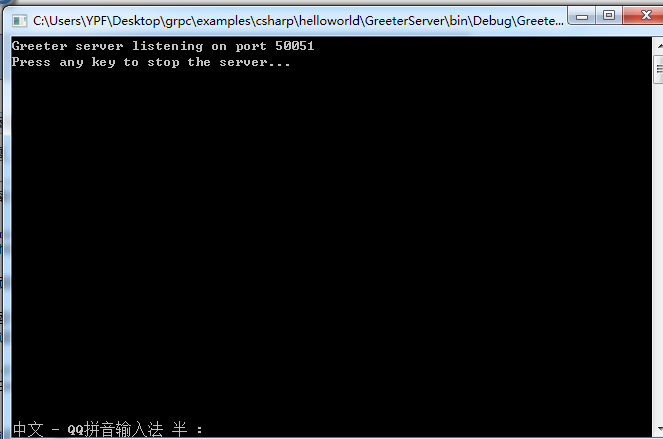
- 运行客户端
> cd GreeterClient/bin/Debug
> GreeterClient.exe
更新 a gRPC service
打开目录examples/protos/helloworld.proto
将原来的文件修改为如下并保存:
// The greeting service definition.
service Greeter {
  // Sends a greeting
  rpc SayHello (HelloRequest) returns (HelloReply) {}
  // Sends another greeting
  rpc SayHelloAgain (HelloRequest) returns (HelloReply) {}
}

// The request message containing the user's name.
message HelloRequest {
  string name = 1;
}

// The response message containing the greetings
message HelloReply {
  string message = 1;
}
生成 gRPC code
在demo的根目录(examples/csharp/helloworld)下执行如下命令:
packages\Grpc.Tools.1.6.1\tools\windows_x86\protoc.exe -I../../protos --csharp_out Greeter --grpc_out Greeter ../../protos/helloworld.proto --plugin=protoc-gen-grpc=packages/Grpc.Tools.1.6.1/tools/windows_x86/grpc_csharp_plugin.exe
这里的
Grpc.Tools.1.6.1这个命令必须是跟项目中使用NuGet安装的版本一致,否则会报错。
更新并从新运行
修改服务端代码
GreeterServer/Program.cs
class GreeterImpl : Greeter.GreeterBase
{
    // Server side handler of the SayHello RPC
    public override Task<HelloReply> SayHello(HelloRequest request, ServerCallContext context)
    {
        return Task.FromResult(new HelloReply { Message = "Hello " + request.Name });
    }

    // Server side handler for the SayHelloAgain RPC
    public override Task<HelloReply> SayHelloAgain(HelloRequest request, ServerCallContext context)
    {
        return Task.FromResult(new HelloReply { Message = "Hello again " + request.Name });
    }
}
修改服务端代码
GreeterClient/Program.cs
public static void Main(string[] args)
{
    Channel channel = new Channel("127.0.0.1:50051", ChannelCredentials.Insecure);

    var client = new Greeter.GreeterClient(channel);
    String user = "you";

    var reply = client.SayHello(new HelloRequest { Name = user });
    Console.WriteLine("Greeting: " + reply.Message);

    var secondReply = client.SayHelloAgain(new HelloRequest { Name = user });
    Console.WriteLine("Greeting: " + secondReply.Message);

    channel.ShutdownAsync().Wait();
    Console.WriteLine("Press any key to exit...");
    Console.ReadKey();
}
运行 a gRPC application
-
运行服务
cd GreeterServer/bin/Debug
GreeterServer.exe -
运行客户端
cd GreeterClient/bin/Debug
GreeterClient.exe
参考文章:


 2583
2583

 被折叠的 条评论
为什么被折叠?
被折叠的 条评论
为什么被折叠?
 到【灌水乐园】发言


