


 本文详细介绍了Spring框架中Bean的三种创建方式及四种属性注入方式,包括无参构造方法、类静态方法、类普通方法创建Bean,以及setter方法、构造方法、P命名空间、SpEL方式的属性注入,并探讨了复杂数据类型的注入。
东家蝴蝶西家飞,白骑少年今日归。 愿,所有迷茫的人,都不再迷茫的,愿,所有努力工作的人,都可以得到应有的回报,愿,所有的人,都可以找到回家的方向,愿,再无苦痛,再无离别。
上一章简单介绍了Spring的"两个蝴蝶飞,你好"的简单开发(一),如果没有看过,请观看上一章
一. 创建的三种方式
spring 创建Bean时,有三种方式,常见的是用无参构造方法,利用反射进行构造。
普通的pojo 类 Person.java
package com.yjl.pojo;
/**
 @author:yuejl
 @date: 2019年4月15日 下午3:29:48
 @Description spring的一个简单的类
*/
public class Person {
	/**
	 * @param name 名称
	 * @param description 描述
	 */
	private String name;
	private String description;
	public String getName() {
		return name;
	}
	public void setName(String name) {
		this.name = name;
	}
	public String getDescription() {
		return description;
	}
	public void setDescription(String description) {
		this.description = description;
	}
	public String say(){
		return this.name+":"+this.description;
	}
}
一.一 无参构造方法创建
<bean id="person" class="com.yjl.pojo.Person"></bean>
@Test
	public void test1(){
		ApplicationContext applicationContext=new ClassPathXmlApplicationContext("applicationContext.xml");
		Person person=(Person) applicationContext.getBean("person");
		person.setName("两个蝴蝶飞1");
		person.setDescription("一个充满希望的程序员1");
		System.out.println(person.say());
	}
其余两种的测试方式,与上面是一样的,只是将 bean()中的参数值改变。 不再重复写。

一.二 类的静态方法创建
package com.yjl.factory;

import com.yjl.pojo.Person;

/**
 @author:yuejl
 @date: 2019年4月15日 下午4:45:35
 @Description 类的相关描述
*/
public class PersonFactory {
	// 使用类的静态方法
	public static Person getPerson2(){
		return new Person();
	}
}
<bean id="personFactory" class="com.yjl.factory.PersonFactory"
	factory-method="getPerson2"></bean>
一.三 类的普通方法创建
package com.yjl.factory;

import com.yjl.pojo.Person;

/**
 @author:yuejl
 @date: 2019年4月15日 下午4:45:35
 @Description 类的相关描述
*/
public class PersonFactory {
	// 普通的方法
	public Person getPerson3(){
		return new Person();
	}
}
<!--先创建工厂的实例化-->
<bean id="personFactory" class="com.yjl.factory.PersonFactory"></bean> -->
<!--利用factory-bean 和factory-method 来指定引用哪个实例,调用的哪个方法-->
<bean id="person" factory-bean="personFactory" factory-method="getPerson3"> </bean>
二. 类属性的注入方式
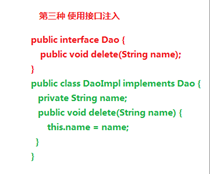
类属性的注入方式一般有三种,一,setter方法注入,二 构造方法注入,三 接口注入,但一般常见是setter方法和构造方式。 其中,接口注入类似于:
图片引用于黑马程序员视频的Spring 教程第一天。
其中,所用的两个类 Car.java 和User.java 代码为:
Car.java
package com.yjl.pojo;
/**
 @author:yuejl
 @date: 2019年4月15日 下午4:54:57
 @Description 类的相关描述
*/
public class Car {
	/**
	 * @param name 名称
	 * @param description 描述
	 */
	private String name;
	private String description;
	public String getName() {
		return name;
	}
	public void setName(String name) {
		this.name = name;
	}
	public String getDescription() {
		return description;
	}
	public void setDescription(String description) {
		this.description = description;
	}
	public Car() {
		super();
	}
	public Car(String name, String description) {
		super();
		this.name = name;
		this.description = description;
	}
	@Override
	public String toString() {
		return "Car [name=" + name + ", description=" + description + "]";
	}
}
User.java. User类中有一个Car的属性引用。
package com.yjl.pojo;
/**
 @author:yuejl
 @date: 2019年4月15日 下午4:54:51
 @Description 类的相关描述
*/
public class User {
	/**
	 * @param name 名称
	 * @param description 描述
	 */
	private String name;
	private String description;
	// 注入对象属性,而不是普通的属性,可扩展为接口形式。
	private Car car;
	public String getName() {
		return name;
	}
	public void setName(String name) {
		this.name = name;
	}
	public String getDescription() {
		return description;
	}
	public void setDescription(String description) {
		this.description = description;
	}
	public Car getCar() {
		return car;
	}
	public void setCar(Car car) {
		this.car = car;
	}
	public User() {
		super();
	}
	public User(String name, String description) {
		super();
		this.name = name;
		this.description = description;
	}
	public User(String name, String description, Car car) {
		super();
		this.name = name;
		this.description = description;
		this.car = car;
	}
	@Override
	public String toString() {
		return "User [name=" + name + ", description=" + description + "]";
	}
}
二.一 Setter方式注入
- 注入普通的属性,用 property 的name 和value 属性,name指定属性名称,value 指明值。
<bean id="userSetter1" class="com.yjl.pojo.User">
		<property name="name" value="两个蝴蝶飞1"></property>
		<property name="description" value="一个充满希望的程序员1"></property>
		<!--注入空值-->
		<!--<property name="name" /><null/></property>-->
	</bean>
测试方法为:
@Test
	public void test1(){
		ApplicationContext applicationContext=new ClassPathXmlApplicationContext("applicationContext.xml");
		User user=applicationContext.getBean("userSetter1",User.class);
		System.out.println(user);
	}

2. 注入对象属性引入,用 property 的name 和ref .
<!-- ref必须要引用的是对象类型 -->
	<bean id="userSetter2" class="com.yjl.pojo.User">
		<property name="name" value="两个蝴蝶飞1"></property>
		<property name="description" value="一个充满希望的程序员1"></property>
		<!--与com.yjl.pojo.Car 所对应的id值一样-->
		<property name="car" ref="carSetter"></property>
		<!--注入空值-->
		<!--<property name="car" /><null/></property>-->
	</bean>
	<bean id="carSetter" class="com.yjl.pojo.Car">
		<property name="name" value="牛车1"></property>
		<property name="description" value="一辆虽破却不丑的车1"></property>
	</bean>
测试方法为:
@Test
	public void test2(){
		ApplicationContext applicationContext=new ClassPathXmlApplicationContext("applicationContext.xml");
		User user=applicationContext.getBean("userSetter2",User.class);
		System.out.println(user);
		Car car=user.getCar();
		System.out.println(car);
	}

下面的测试方法与上面的一样,只是改变bean的传入参数值,不再重复写。
二. 构造方法的注入
利用constructor-arg 进行注入。 可以用name和指明属性
	<bean id="userConstructor1" class="com.yjl.pojo.User">
		<constructor-arg name="name" value="两个蝴蝶飞2"></constructor-arg>
		<constructor-arg name="description" value="一个充满希望的程序员2"></constructor-arg>
	</bean>
也可以利用index 来指明索引,从0开始。
<!-- 是从0开始的。 如果写成从1开始,会报错。 -->
	<bean id="userConstructor2" class="com.yjl.pojo.User">
		<constructor-arg index="0" value="两个蝴蝶飞2" type="java.lang.String"></constructor-arg>
		<constructor-arg index="1" value="一个充满希望的程序员2"></constructor-arg>
	</bean>
当然,也可以引入对象属性,可以指明类型
<bean id="userConstructor3" class="com.yjl.pojo.User">
		<constructor-arg name="name" value="两个蝴蝶飞2" type="java.lang.String"></constructor-arg>
		<constructor-arg name="description" value="一个充满希望的程序员2"></constructor-arg>
		<!--type 为全限定名称-->
		<constructor-arg name="car" ref="carConstructor"  type="com.yjl.pojo.Car"></constructor-arg>
	</bean>
	<bean id="carConstructor" class="com.yjl.pojo.Car">
		<constructor-arg name="name" value="牛车2"></constructor-arg>
		<constructor-arg name="description" value="一辆虽破却不丑的车2"></constructor-arg>
	</bean>
二.三 P命名空间的注入
- 首先要引入P空间的约束
xmlns:p="http://www.springframework.org/schema/p"
- 引入属性,注意 p:name是引入到 节点里面的,当做属性进行处理的。
<bean id="userP1" class="com.yjl.pojo.User"
	p:name="两个蝴蝶飞3" p:description="一个充满希望的程序员3"></bean>
当然,也可以引入对象属性,用p:属性-ref
<bean id="userP2" class="com.yjl.pojo.User"
	p:name="两个蝴蝶飞3" p:description="一个充满希望的程序员3" p:car-ref="carP1"></bean>
	<bean id="carP1" class="com.yjl.pojo.Car"
	p:name="牛车3" p:description="一辆虽破却不丑的车3">
	</bean>
二.四 SpEL方式注入
利用"#" 进行相应的注入
<bean id="userEL1" class="com.yjl.pojo.User">
		<property name="name" value="#{'两个蝴蝶飞4'}"></property>
		<property name="description" value="#{'一个充满希望的程序员4'}"></property>
	</bean>
也可以引入对象属性,
<bean id="userEL2" class="com.yjl.pojo.User">
		<property name="name" value="#{'两个蝴蝶飞4'}"></property>
		<property name="description" value="#{'一个充满希望的程序员4'}"></property>
		<property name="car" value="#{carEL1}"></property>
	</bean>
	<bean id="carEL1" class="com.yjl.pojo.Car">
		<property name="name" value="#{'牛车4'}"></property>
		<property name="description" value="#{'一辆虽破却不丑的车4'}"></property>
	</bean>
强大的一点,可以直接引入对象属性里面的属性值
<bean id="userEL3" class="com.yjl.pojo.User">
		<!--carEl1 属性里面的值 ,利用 "." 来取出。-->
		<property name="name" value="#{carEL1.name}"></property>
		<property name="description" value="#{carEL1.description}"></property>
		<property name="car" value="#{carEL1}"></property>
	</bean>
	<bean id="carEL1" class="com.yjl.pojo.Car">
		<property name="name" value="#{'牛车4'}"></property>
		<property name="description" value="#{'一辆虽破却不丑的车4'}"></property>
	</bean>
三. 注入复杂的数据类型
注入的复杂类型,可以为数组,集合List,集合Set,集合Map,属性 Properties, 其中集合可以放置的是常见的属性如基本属性和String字符串,也可以放置自定义的对象。
package com.yjl.pojo;

import java.util.ArrayList;
import java.util.HashMap;
import java.util.HashSet;
import java.util.List;
import java.util.Map;
import java.util.Properties;
import java.util.Set;

/**
 @author:yuejl
 @date: 2019年4月15日 下午6:51:03
 @Description 类的相关描述
*/
public class Bean {
	private String [] arr;
	//private List<String> list; //建议最好是初始化
	private List<String> list=new ArrayList<String>();
	private Set<String> set=new HashSet<String>();
	private Map<String,String> map=new HashMap<String,String>();
	private Properties properties;
	private List<User> userList=new ArrayList<User>();
	public String[] getArr() {
		return arr;
	}
	public void setArr(String[] arr) {
		this.arr = arr;
	}
	public List<String> getList() {
		return list;
	}
	public void setList(List<String> list) {
		this.list = list;
	}
	public Set<String> getSet() {
		return set;
	}
	public void setSet(Set<String> set) {
		this.set = set;
	}
	public Map<String, String> getMap() {
		return map;
	}
	public void setMap(Map<String, String> map) {
		this.map = map;
	}
	public Properties getProperties() {
		return properties;
	}
	public void setProperties(Properties properties) {
		this.properties = properties;
	}
	public List<User> getUserList() {
		return userList;
	}
	public void setUserList(List<User> userList) {
		this.userList = userList;
	}

}
三.一 注入数组
 <bean id="bean1" class="com.yjl.pojo.Bean">
    	<!-- 注入数组 -->
    	<property name="arr">
    		<array>
    			<value>张三</value>
    			<value>李四</value>
    			<value>王二</value>
    		</array>
    	</property>
    </bean>
可以利用<array>,当然也可以利用常见的<list>
<bean id="bean2" class="com.yjl.pojo.Bean">
    	<!-- 注入数组 -->
    	<property name="arr">
    		<list>
    			<value>张三</value>
    			<value>李四</value>
    			<value>王二</value>
    		</list>
    	</property>
    </bean>
两种方式均可以。
测试方法为:
@Test
	public void test1(){
		ApplicationContext applicationContext=new ClassPathXmlApplicationContext("applicationContext.xml");
		Bean bean=applicationContext.getBean("bean1",Bean.class);
		//Bean bean=applicationContext.getBean("bean2",Bean.class);
		String [] arr=bean.getArr();
		for (String string : arr) {
			System.out.println("输出值为:"+string);
		}
	}
三.二 注入List集合
<bean id="bean3" class="com.yjl.pojo.Bean">
    	<!-- 注入List -->
    	<property name="list">
    		<list>
    			<value>张三</value>
    			<value>李四</value>
    			<value>王二</value>
    			<!-- 注入自定义对象时-->
    			<!-- <ref bean="user"/> -->
    		</list>
    	</property>
    </bean>
测试方法为:
@Test
	public void test3(){
		ApplicationContext applicationContext=new ClassPathXmlApplicationContext("applicationContext.xml");
		Bean bean=applicationContext.getBean("bean3",Bean.class);
		List<String> list=bean.getList();
		list.forEach(n ->System.out.println(n));
	}
三.三 注入Set
<bean id="bean4" class="com.yjl.pojo.Bean">
    	<!-- 注入set -->
    	<property name="set">
    		<set>
    			<value>张三</value>
    			<value>李四</value>
    			<value>王二</value>
    			<!-- <ref bean="user"/> -->
    		</set>
    	</property>
    </bean>
测试方法为:
@Test
	public void test4(){
		ApplicationContext applicationContext=new ClassPathXmlApplicationContext("applicationContext.xml");
		Bean bean=applicationContext.getBean("bean4",Bean.class);
		Set<String> set=bean.getSet();
		set.forEach(n ->System.out.println(n));
	}
三.四 注入Map
<bean id="bean5" class="com.yjl.pojo.Bean">
    	<!-- 注入map -->
    	<property name="map">
    		<map>
    			<!-- 不可以这种写法 -->
    			<!-- <entry>
    				<key>张三</key>
    				<value>不是好人</value>
    			</entry> -->
    			<!-- 可以这样 -->
    			<entry key="张三" value="不是好人"> </entry>
    			<entry key="李四" value="是好人"> </entry>
    			<entry key="王二" value="不是好人"> </entry>
    			<!-- <entry key="王二"  value-ref="user"> </entry> -->
    		</map>
    	</property>
    </bean>
测试方法为:
@Test
	public void test5(){
		ApplicationContext applicationContext=new ClassPathXmlApplicationContext("applicationContext.xml");
		Bean bean=applicationContext.getBean("bean5",Bean.class);
		Map<String,String> map=bean.getMap();
		for (Map.Entry<String,String> m:map.entrySet()) {
			System.out.println(m.getKey()+":"+m.getValue());
		}
	}
三.五 注入Properties
<bean id="bean6" class="com.yjl.pojo.Bean">
    	<!-- 注入Properties -->
    	<property name="properties">
    		<props>
    			<prop key="hello">你好</prop>
    			<prop key="world">世界</prop>
    		</props>
    	</property>
    </bean>
测试方法为:
@Test
	public void test6(){
		ApplicationContext applicationContext=new ClassPathXmlApplicationContext("applicationContext.xml");
		Bean bean=applicationContext.getBean("bean6",Bean.class);
		Properties properties=bean.getProperties();
		System.out.println(properties.get("hello"));
		System.out.println(properties.get("world"));
	}
三.六 注入自定义对象
<bean id="bean7" class="com.yjl.pojo.Bean">
    	<!-- 注入自定义对象 -->
    	<property name="userList">
    		<list>
    			<!-- 注入集合时 -->
    			<ref bean="user"/>
    			<ref bean="user"/>
    			<ref bean="user"/>
    		</list>
    	</property>
    </bean>
    <bean id="user" class="com.yjl.pojo.User">
		<property name="name" value="两个蝴蝶飞1"></property>
		<property name="description" value="一个充满希望的程序员1"></property>
	</bean>
测试方法为:
@Test
	public void test7(){
		ApplicationContext applicationContext=new ClassPathXmlApplicationContext("applicationContext.xml");
		Bean bean=applicationContext.getBean("bean7",Bean.class);
		List<User> list=bean.getUserList();
		list.forEach(n ->System.out.println(n));
	}
谢谢!!!


 297
297

 被折叠的 条评论
为什么被折叠?
被折叠的 条评论
为什么被折叠?
 到【灌水乐园】发言


