


 本文介绍微信Tinker热更新框架的两种集成方式:Gradle和Eclipse。详细步骤包括添加依赖、配置参数、创建BaseApplication及使用补丁更新。适用于Android开发者快速掌握Tinker的使用。
tinker简介
前言:早起熟悉过hotfix修复框架,但是时代在进步,tinker官网有一句话"tinker是微信的热更新框架,微信用户过2亿,你为什么不尝试使用呢"
这里分享二种集成方式,gradle 和eclipse
1. 首先 Android studio的集成方式
- 将tinker-gradle-plugin添加为build.gradle项目根目录中main的依赖项:
 buildscript {
    dependencies{
        classpath(' com.tencent.tinker:tinker-patch-gradle-plugin:1.9.1 ')
     }
}
在你的项目app/build.gradle中添加
 //若使用annotation需要单独引用,对于tinker的其他库都无需再引用
//    annotationProcessor("com.tinkerpatch.tinker:tinker-android-anno:${TINKER_VERSION}") { changing = true }
//    compileOnly("com.tinkerpatch.tinker:tinker-android-anno:${TINKER_VERSION}") { changing = true }
    implementation("com.tinkerpatch.sdk:tinkerpatch-android-sdk:${TINKERPATCH_VERSION}") {
        changing = true
    }
    //记得加上
    apply from: 'tinkerpatch.gradle'
- 下载官方demo 并且复制demo中的 tinkerpatch.gradle
/**
 * TODO: 请按自己的需求修改为适应自己工程的参数
 */
def bakPath = file("${buildDir}/bakApk/")
def baseInfo = "app-1.0-1106-13-37-05"
def variantName = "debug"
tinkerpatchSupport {
    /** 可以在debug的时候关闭 tinkerPatch **/
    tinkerEnable = true

    /** 是否使用一键接入功能  **/
    reflectApplication = true

    /** 是否开启加固模式,只有在使用加固时才能开启此开关 **/
    protectedApp = false

    /** 补丁是否支持新增 Activity (exported必须为false)**/
    supportComponent = false

    autoBackupApkPath = "${bakPath}"

    /** 在tinkerpatch.com得到的appKey **/
    appKey = "yourAppKey"
    /** 注意: 若发布新的全量包, appVersion一定要更新 **/
    appVersion = "1.0.0"

    def pathPrefix = "${bakPath}/${baseInfo}/${variantName}/"
    def name = "${project.name}-${variantName}"

    baseApkFile = "${pathPrefix}/${name}.apk"
    baseProguardMappingFile = "${pathPrefix}/${name}-mapping.txt"
    baseResourceRFile = "${pathPrefix}/${name}-R.txt"
}
reflectApplication = true 时,是一种傻瓜式的对接. 可以依靠TinkerPatch后台补丁平台来完成
- 创建自己的BaseApplication 继承Application
public class BaseApplication extends Application {
    private ApplicationLike tinkerApplicationLike;

    @Override
    public void onCreate() {
        super.onCreate();
        if (BuildConfig.TINKER_ENABLE) {

            // 我们可以从这里获得Tinker加载过程的信息
            tinkerApplicationLike = TinkerPatchApplicationLike.getTinkerPatchApplicationLike();

            // 初始化TinkerPatch SDK, 更多配置可参照API章节中的,初始化SDK
            TinkerPatch.init(tinkerApplicationLike)
                    .reflectPatchLibrary()
                    .setPatchRollbackOnScreenOff(true)
                    .setPatchRestartOnSrceenOff(true);

            // 每隔3个小时去访问后台时候有更新,通过handler实现轮训的效果
            new FetchPatchHandler().fetchPatchWithInterval(3);
            Log.i("TAG", "tinker init");
        }

    }
}
//创建handler
public  class FetchPatchHandler extends Handler {
    public static final long HOUR_INTERVAL = 3600 * 1000;
    private long checkInterval;

    /**
     * 通过handler, 达到按照时间间隔轮训的效果
     * @param hour
     */
    public void fetchPatchWithInterval(int hour) {
        //设置TinkerPatch的时间间隔
        TinkerPatch.with().setFetchPatchIntervalByHours(hour);
        checkInterval = hour * HOUR_INTERVAL;
        //立刻尝试去访问,检查是否有更新
        sendEmptyMessage(0);
    }
    @Override
    public void handleMessage(Message msg) {
        super.handleMessage(msg);

        //这里使用false即可
        TinkerPatch.with().fetchPatchUpdate(false);
        //每隔一段时间都去访问后台, 增加10分钟的buffer时间
        sendEmptyMessageDelayed(0, checkInterval + 10 * 60 * 1000);
    }
}
- 然后在MainActivity中去添加
Button requestPatchButton = (Button) findViewById(R.id.requestPatch);
        //immediately 为 true, 每次强制访问服务器更新
        requestPatchButton.setOnClickListener(new View.OnClickListener() {
            @Override
            public void onClick(View v) {
                TinkerPatch.with().fetchPatchUpdate(true);
            }
        });
-
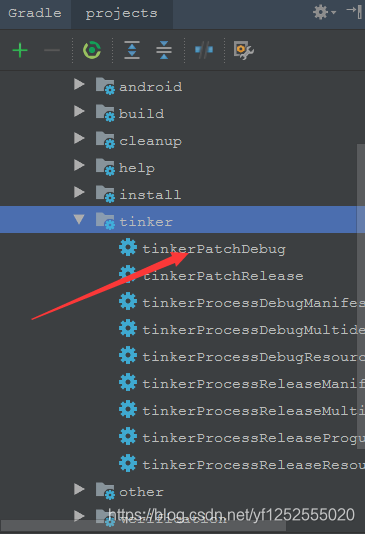
参数配置好以后,用gradle得到Apk.
-
若想发布补丁包
-得到补丁包 补丁包的目\app\build\outputs\apk\tinkerPatch\debug\patch_signed_7zip.apk最后在官网;中添加一个app 发布补丁即可完成
2. eclipse集成tinker
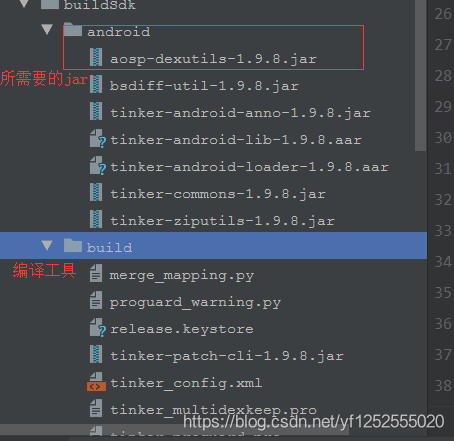
- 首先去github下载tinker源码,然后倒入到Android studio中,编译源码 同样是用gradle 位置在gradle/tinker-master/tasks/tinker/buildtinkersdk
得到编译后的buildSdk文件夹 打开它的下层目录android 里面是jar (把arr解压后 classes.jar改成文件夹的名字) 把android目录里所有的jar文件(包括arr解压后改名的jar)复制到eclipse中 .编译后的问价如下:
- 复制解压后的二个.arr文件中的manifest文件到eclipse的manifest中 在eclipse中添加Application.
public class BaseApplication  extends TinkerApplication {

   public BaseApplication() {
   	super(//tinkerFlags, tinker支持的类型,dex,library,还是全部都支持!
               ShareConstants.TINKER_ENABLE_ALL,
               //ApplicationLike的实现类,只能传递字符串  自己创建的SimpleTinkerInApplicationLike的位置
               "com.tinker.tinker_demo.SimpleTinkerInApplicationLike",
               //Tinker的加载器,一般来说用默认的即可
               "com.tencent.tinker.loader.TinkerLoader",
               //tinkerLoadVerifyFlag, 运行加载时是否校验dex与,ib与res的Md5
               false);
   	// TODO Auto-generated constructor stub
   }
}
//创建DefaultApplicationLike
public class SimpleTinkerInApplicationLike extends DefaultApplicationLike {
   public static Context context;

   public SimpleTinkerInApplicationLike(Application application, int tinkerFlags, boolean tinkerLoadVerifyFlag,
   		long applicationStartElapsedTime, long applicationStartMillisTime, Intent tinkerResultIntent) {
   	super(application, tinkerFlags, tinkerLoadVerifyFlag, applicationStartElapsedTime, applicationStartMillisTime,
   			tinkerResultIntent);
   }

   @Override
   public void onCreate() {
   	super.onCreate();
   	// 获取context实例
   	context = getApplication();
   	// 注册Tinker
   	TinkerInstaller.install(this);
   }

   public static Context getContext() {
   	return context;
   }
}
- 在mainActivity中添加 如下,即完成了配置
TinkerInstaller.onReceiveUpgradePatch(getApplicationContext(), apkPath);
- 下一步进行打包 old.apk 和 new.apk 把这二个apk放到编译源码的到的build文件夹下 用命令编译即可得到补丁包,注意修改 tinker_config.xml
//修改的tinker_config.xml  自己的Application全包名
<loader value="com.tinker.tinker_demo.BaseApplication"/>
<issue id="sign">
  <!--the signature file path, in window use \, in linux use /, and the default path is the running location-->
  <path value="release.keystore"/>
  <!--storepass-->
  <storepass value="123456"/>
  <!--keypass-->
  <keypass value="123456"/>
  <!--alias-->别名
  <alias value="key0"/>
</issue>
  //来用编译的命令
  java -jar tinker-patch-cli.jar -old old.apk -new new.apk -config tinker_config.xml -out output_path
总结:eclipse中会遇到各种的bug 希望你能多去学习解决问题的办法而不是得到问题的答案;
- 如遇到问题欢迎大家留言评论


 2085
2085

 被折叠的 条评论
为什么被折叠?
被折叠的 条评论
为什么被折叠?
 到【灌水乐园】发言


