


在跟着B站视频BV11s4y1a71T学习时,使用到了粒子效果
粒子效果
VUE3+TS+@tsparticles/vue3
以下这种情况只适用于项目是基于typescript的写法,否则无法实现。
1、安装
pnpm i @tsparticles/vue3 @tsparticles/slim
2、main.ts 引入
import { createApp } from 'vue'
import './style.css'
import App from './App.vue'


import Particles from "@tsparticles/vue3";
import { loadSlim } from "@tsparticles/slim";

const app = createApp(App)

app.use(Particles as any, {
  init: async (engine: any) => {
    await loadSlim(engine);
  },
});

app.mount('#app')
3、App.vue
<script setup lang="ts">
import HelloWorld from './components/HelloWorld.vue'
import {ref} from 'vue'
const particlesOptions = ref({
  background: {
    color: {
      value: "block",
    },
  },
  fullScreen: {
    enable: false,
  },
  opacity: {
    value: 1,
    random: true,
  },
  fpsLimit: 120,
  interactivity: {
    events: {
      onClick: {
        enable: true,
        mode: "push",
      },
      onHover: {
        enable: true,
        mode: "repulse",
      },
    },
    modes: {
      bubble: {
        distance: 400,
        duration: 2,
        opacity: 0.8,
        size: 40,
      },
      push: {
        quantity: 4,
      },
      repulse: {
        distance: 200,
        duration: 0.4,
      },
    },
  },
  particles: {
    color: {
      value: "random",
      animation: {
        enable: true,
        speed: 20,
        sync: true,
      },
    },
    links: {
      color: "random",
      distance: 150,
      enable: true,
      opacity: 0.5,
      width: 1,
    },
    move: {
      direction: "none",
      enable: true,
      outModes: "bounce",
      random: false,
      speed: 6,
      straight: false,
    },
    number: {
      density: {
        enable: true,
      },
      value: 80,
    },
    opacity: {
      value: 0.5,
    },
    shape: {
      type: "circle",
    },
    size: {
      value: { min: 1, max: 5 },
    },
  },
  detectRetina: true,
});
</script>

<template>

 <vue-particles id="tsparticles" :options="particlesOptions" />
  <div>
    <a href="https://vitejs.dev" target="_blank">
      <img src="/vite.svg" class="logo" alt="Vite logo" />
    </a>
    <a href="https://vuejs.org/" target="_blank">
      <img src="./assets/vue.svg" class="logo vue" alt="Vue logo" />
    </a>
  </div>
  <HelloWorld msg="Vite + Vue" />
</template>

<style scoped>
#tsparticles{
    position: absolute;
    width: 100%;
    height: 100%;
  }
.logo {
  height: 6em;
  padding: 1.5em;
  will-change: filter;
  transition: filter 300ms;
}
.logo:hover {
  filter: drop-shadow(0 0 2em #646cffaa);
}
.logo.vue:hover {
  filter: drop-shadow(0 0 2em #42b883aa);
}
</style>
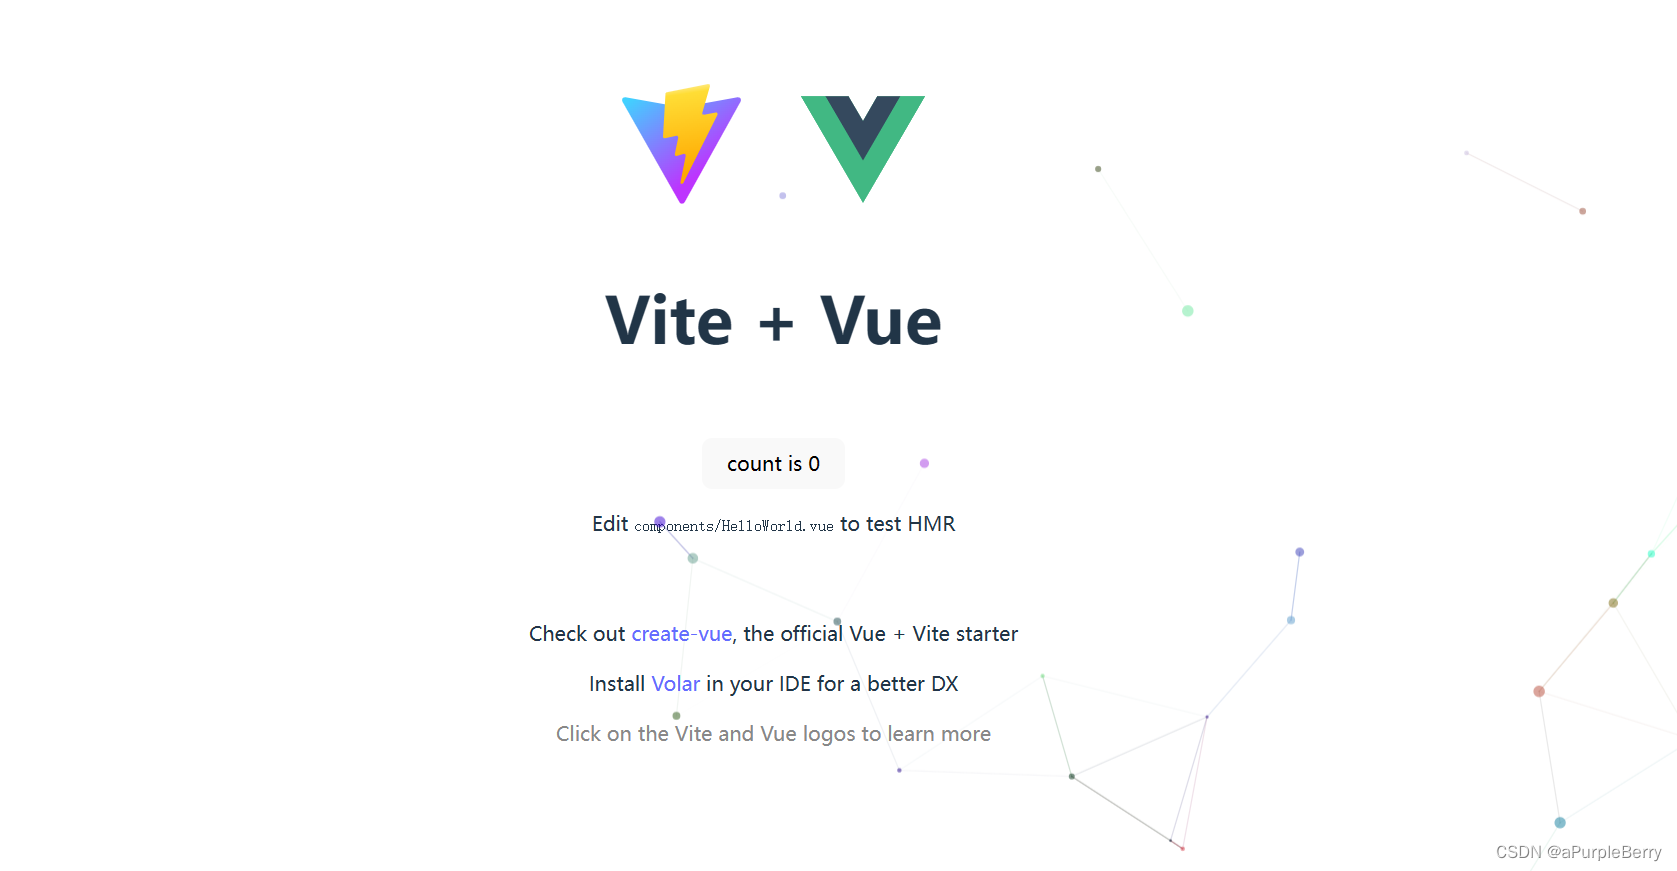
4、效果
VUE3+JS+非最新版
当vue3项目没有配套使用TS的时候,上述粒子效果就无法实现。采用下面的方法。
参考文章《Vue3粒子库只有背景没有粒子效果》
1、安装低版本的vue3-particles
pnpm install vue3-particles@^1.43.1
2、main.js 注册
import { createApp } from 'vue'
import App from './App.vue'
import router from './router'
import store from './store'
//引入element plus
import ElementPlus from 'element-plus'
import 'element-plus/dist/index.css'

import Particles from "vue3-particles";

const app = createApp(App)

app.use(store)
app.use(router)
app.use(ElementPlus)
app.use(Particles)

app.mount('#app')
3、页面使用
<template>
  <div>
    <Particles id="tsparticles" :options="options" />
  </div>
</template>

<script>
export default { name:'' }
</script>

<script setup>
 //import {ref, reactive} from 'vue'
//  const handleLogin = ()=>{
//   localStorage.setItem('token','purpleberry')
//  }

const handleLogin = () => {
    localStorage.setItem("token", "JJ")
};
//配置particles
const options = {
    background: {
        color: {
            value: '#0d47a1',
        },
    },
    fpsLimit: 120,
    interactivity: {
        events: {
            onClick: {
                enable: true,
                mode: 'push',
            },
            onHover: {
                enable: true,
                mode: 'repulse',
            },
            resize: true,
        },
        modes: {
            bubble: {
                distance: 400,
                duration: 2,
                opacity: 0.8,
                size: 40,
            },
            push: {
                quantity: 4,
            },
            repulse: {
                distance: 200,
                duration: 0.4,
            },
        },
    },
    particles: {
        color: {
            value: '#ffffff',
        },
        links: {
            color: '#ffffff',
            distance: 150,
            enable: true,
            opacity: 0.5,
            width: 1,
        },
        move: {
            direction: 'none',
            enable: true,
            outMode: 'bounce',
            random: false,
            speed: 6,
            straight: false,
        },
        number: {
            density: {
                enable: true,
                area: 800,
            },
            value: 80,
        },
        opacity: {
            value: 0.5,
        },
        shape: {
            type: 'circle',
        },
        size: {
            random: true,
            value: 5,
        },
    },
    detectRetina: true,
}

</script>

<style scoped lang="scss">

</style>
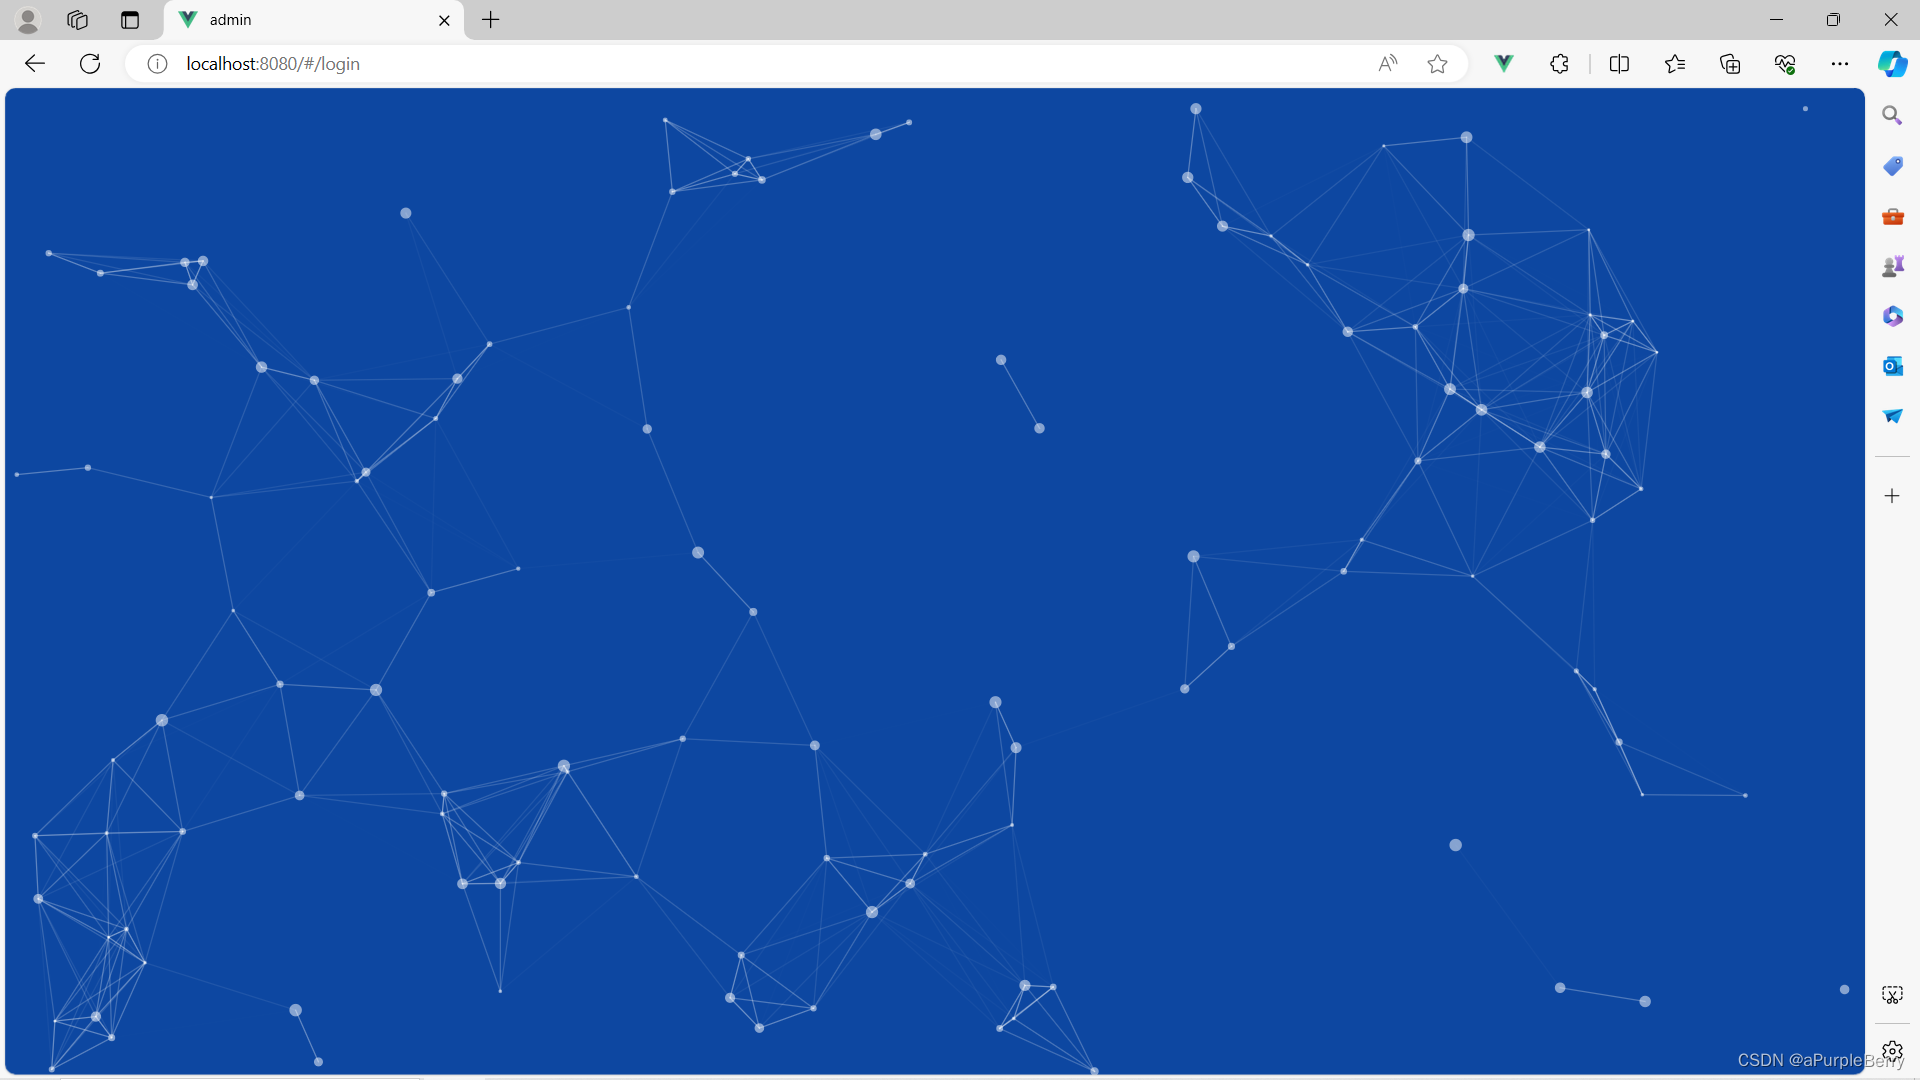
4、效果


 1342
1342

 被折叠的 条评论
为什么被折叠?
被折叠的 条评论
为什么被折叠?
 到【灌水乐园】发言


