


 本文介绍了LAMP(Linux、Apache httpd、Maraiadb/MySQL、php)环境的安装与验证。详细说明了在Linux系统上安装httpd、mariadb和php的步骤,包括设置开机自启、配置数据库、验证php安装等。还介绍了验证LAMP环境可用性的方法,以及mariadb和mysql的区别。
本次测试Linux版本为:Linux version 5.4.119-20.0009.29 (mockbuild@builder2.x86.opencloudos.tech) (gcc version 8.5.0 20210514 (OpenCloudOS 8.5.0-18) (GCC)) #1 SMP Mon Aug 14 20:03:28 CST 2023
一、什么是LAMP
L指Linux操作系统,A指web服务器Apache httpd ,M指Maraiadb数据库/mySQL,P指php语言/python/perl。LAMP是这个web应用框架的总称。 有人会问是Maraiadb好mySQL好?下面是引用百度AI的说法(见文章最后)。我个人感觉比mysql安装更方便了,全程只要一个命令,其他都是y/n即可,有种windows下一步下一步的友好体验。
二、安装
0.先装上vim工具
(题外话:我的是刚装的虚拟机,先装上vim工具,后续在没用ssh工具的情况,操作服务器会顺利一些。命令如下):
[root@localhost ~]# dnf -y install epel-release vim
OpenCloudOS 8.5.0有个奇葩地方,开机ip addr是没用IP的
0-1.查看网卡文件
ls /etc/sysconfig/network-scripts/

网卡文件名为 ifcfg-ens160
0-2.编辑网卡配置
vi /etc/sysconfig/network-scripts/ifcfg-ens160
按Esc结束编辑,然后冒号 : 输入 wq保存并退出
3.启用网卡
nmcli c up ens160##centos8网络管理命令
nmcli c reload #重启网卡
nmcli c up ens160 #启用ens160网卡
nmcli networking off #关闭网络
nmcli networking on #开启网络
nmcli device show #显示网络的详细情况
1.安装httpd,mariadb和php
[root@localhost ~]# yum install -y httpd mariadb mariadb-server php
等看到“完毕!”安装工具就结束了!超级简单吧?下面开始配置。。。。
2、设置httpd和mariadb开机自启
[root@localhost ~]# systemctl enable --now httpdCreated symlink /etc/systemd/system/multi-user.target.wants/httpd.service → /usr/lib/systemd/system/httpd.service. 说明命令没问题,设置成功!
[root@localhost ~]# systemctl enable --now mariadb
Created symlink /etc/systemd/system/mysql.service → /usr/lib/systemd/system/mariadb.service.
Created symlink /etc/systemd/system/mysqld.service → /usr/lib/systemd/system/mariadb.service.
Created symlink /etc/systemd/system/multi-user.target.wants/mariadb.service → /usr/lib/systemd/system/mariadb.service. 说明命令没问题,设置成功
3、检查httpd是否正常启动
[root@localhost ~]# echo "success!" >/var/www/html/test.html
[root@localhost ~]# curl -I http://127.0.0.1/test.html
HTTP/1.1 200 OK
Date: Sat, 02 Mar 2024 06:01:20 GMT
Server: Apache/2.4.37 ()
Last-Modified: Sat, 02 Mar 2024 06:00:35 GMT
ETag: "9-612a73601ee16"
Accept-Ranges: bytes
Content-Length: 9
Content-Type: text/html; charset=UTF-8
4、关闭防火墙,selinux设置为宽容模式
(这里针对初学者,高手可以去设置防火墙)
[root@localhost ~]# systemctl stop firewalld.service
[root@localhost ~]# setenforce 0
有兴趣配置防火墙的可参考如下:permanent表示永久有效
[root@localhost ~]# firewall-cmd --zone=public --add-port=80/tcp --permanent
[root@localhost ~]# firewall-cmd --zone=public --add-port=3306/tcp --permanent
[root@localhost ~]# firewall-cmd --zone=public --add-port=443/tcp --permanent
[root@localhost ~]# systemctl status firewalld
● firewalld.service - firewalld - dynamic firewall daemon
Loaded: loaded (/usr/lib/systemd/system/firewalld.service; enabled; vendor preset: enabled)
Active: active (running) since Sun 2024-03-03 05:57:21 CST; 7h left
Docs: man:firewalld(1)
Main PID: 766 (firewalld)
Tasks: 2 (limit: 11176)
Memory: 48.5M
CGroup: /system.slice/firewalld.service
└─766 /usr/libexec/platform-python -s /usr/sbin/firewalld --nofork --nopid
3月 03 05:57:19 localhost.localdomain systemd[1]: Starting firewalld - dynamic firewall daemon...
3月 03 05:57:21 localhost.localdomain systemd[1]: Started firewalld - dynamic firewall daemon.
3月 03 05:57:21 localhost.localdomain firewalld[766]: WARNING: AllowZoneDrifting is enabled. This is considered an insecure configuration option. It will be removed in a future release. Please con>
[root@localhost ~]# firewall-cmd --reload
success
[root@localhost ~]#
[root@localhost ~]# firewall-cmd --list-port
80/tcp 443/tcp 3306/tcp
在Linux操作系统中配置服务,其实就是修改服务的配置文件,因此,还需要知道这些配置文件所在的位置及用途,httpd服务程序的主要配置文件及存放位置如表12-1所示。
| 配置文件的名称 | 存放位置 |
| 服务目录 | /etc/httpd |
| 主配置文件 | /etc/httpd/conf/httpd.conf |
| 网站数据目录 | /var/www/html |
| 访问日志 | /var/log/httpd/access_log |
| 错误日志 | /var/log/httpd/error_log |
打开httpd服务程序的主配置文件,绝大部分都是以井号(#)开始的注释行,其目的是对httpd服务程序的功能或某一行参数进行介绍,使用户不需要逐行研究这些内容。
在httpd服务程序的主配置文件中,存在三种类型的信息:注释行信息、全局配置参数、区域配置参数。
全局配置参数是一种全局性的配置参数,可作用于所有的子站点,既保证了子站点的正常访问,也有效减少了频繁写入重复参数的工作量。区域配置参数则是单独针对每个独立的子站点进行设置的。就像在大学食堂里打饭,食堂负责打饭的阿姨先给每位同学来一碗标准大小的米饭(全局配置),然后根据每位同学的具体要求给他们盛想吃的菜(区域配置)。配置httpd服务程序时常用的参数及用途描述如表所示。
| 参 数 | 用 途 |
| ServerRoot | 服务目录 |
| ServerAdmin | 管理员邮箱 |
| User | 运行服务的用户 |
| Group | 运行服务的用户组 |
| ServerName | 网站服务器的域名 |
| DocumentRoot | 定义网站数据目录 |
| Directory | 网站数据目录的权限 |
| Listen | 监听的IP地址与端口号 |
| DirectoryIndex | 默认的索引页面 |
| ErrorLog | 错误日志文件 |
| CustomLog | 访问日志文件 |
| Timeout | 网页超时时间,默认为300秒 |
从表中可知,DocumentRoot参数用于定义网站数据目录,其参数的默认值是把网站数据存放到/var/www/html目录中;而当前网站默认的首页面名称是index.html,因此可以向/var/www/html目录写入一个文件,替换掉httpd服务程序的默认首页面,该操作会立即生效。
5、配置mariadb数据库
[root@localhost ~] mysql_secure_installation #移除匿名用户,这里是下划线,因为opencloudOS8.8命令和CentOS8一样的
NOTE: RUNNING ALL PARTS OF THIS SCRIPT IS RECOMMENDED FOR ALL MariaDB SERVERS IN PRODUCTION USE! PLEASE READ EACH STEP CAREFULLY!
In order to log into MariaDB to secure it, we'll need the current password for the root user. If you've just installed MariaDB, and you haven't set the root password yet, the password will be blank, so you should just press enter here.
Enter current password for root (enter for none): #我这里按的是回车,从英文意思来看是要输入密码的,但是我无论输入什么都不行,干脆就默认了
OK, successfully used password, moving on...
Setting the root password ensures that nobody can log into the MariaDB root user without the proper authorisation.
Set root password? [Y/n] y #设置root密码
New password:
Re-enter new password:
Password updated successfully!
Reloading privilege tables..
... Success!
By default, a MariaDB installation has an anonymous user, allowing anyone to log into MariaDB without having to have a user account created for them. This is intended only for testing, and to make the installation go a bit smoother. You should remove them before moving into a production environment.
Remove anonymous users? [Y/n] y #移除匿名用户
... Success!
Normally, root should only be allowed to connect from 'localhost'. This ensures that someone cannot guess at the root password from the network.
Disallow root login remotely? [Y/n] n #是驳回/不许root用户远程登录!!我这里用的是n,因为我一般会用第三方工具(比如Navicat)去使用数据库。如果要禁止root用户远程登录输入y即可。
... Success!
【如果不小心按了y,解决方案如下:登陆mysql执行如命令
use mysql;
update user set Host = '%' where Host = 'localhost' and User='root';
flush privileges;】
By default, MariaDB comes with a database named 'test' that anyone can access. This is also intended only for testing, and should be removed before moving into a production environment.
Remove test database and access to it? [Y/n] y #移除测试数据库
- Dropping test database...
... Success!
- Removing privileges on test database...
... Success!
Reloading the privilege tables will ensure that all changes made so far will take effect immediately.
Reload privilege tables now? [Y/n] y #重载数据表权限
... Success!
Cleaning up...
All done! If you've completed all of the above steps, your MariaDB
installation should now be secure.
Thanks for using MariaDB!
6、查看数据库服务是否启动
[root@localhost ~]# ss -anput | grep 3306
tcp   LISTEN 0      80                         *:3306              *:*     users:(("mysqld",pid=29609,fd=21))
7、尝试登录数据库
[root@server18 yum.repos.d] mysql -u root -pAbc123456+++ -h localhost #回显如下,-p和密码(Abc123456+++)之间没有空格哦
Welcome to the MariaDB monitor. Commands end with ; or \g.
Your MariaDB connection id is 16
Server version: 10.3.28-MariaDB MariaDB Server
Copyright (c) 2000, 2018, Oracle, MariaDB Corporation Ab and others.
Type 'help;' or '\h' for help. Type '\c' to clear the current input statement.
MariaDB [(none)]> show databases; #查看数据库
+--------------------+
| Database |
+--------------------+
| information_schema |
| mysql |
| performance_schema |
+--------------------+
3 rows in set (0.007 sec)
MariaDB [(none)]> SELECT VERSION();#查看mysql/mariadb版本+-----------------+
| VERSION() |
+-----------------+
| 10.3.39-MariaDB |
+-----------------+
1 row in set (0.001 sec)
MariaDB [(none)]> exit #退出数据库
Bye
8、验证php是否正确安装,查看php版本
PHP-FPM 即 PHP FastCGI 进程管理器,是php中所使用的一种fastCGI。
随着 Web 的发展,Web 所能呈现的内容更加丰富,与用户的交互日益频繁,这个时候仅仅通过静态资源已经无法满足 Web 通信的需求,所以引入 CGI 以便客户端请求能够触发 Web 服务器运行另一个外部程序,客户端所输入的数据也会传给这个外部程序,该程序运行结束后会将生成的 HTML 和其他数据通过 Web 服务器再返回给客户端(即动态请求,比如基于 PHP、Python、Java 实现的应用)。利用 CGI 可以针对用户请求动态返回给客户端各种各样动态变化的信息。
[root@localhost ~] php -verson #查看php版本
PHP 7.2.24 (cli) (built: Oct 22 2019 08:28:36) ( NTS )
Copyright (c) 1997-2018 The PHP Group
Zend Engine v3.2.0, Copyright (c) 1998-2018 Zend Technologies
[root@localhost ~] systemctl status php-fpm.service #查看php-fpm的状态● php-fpm.service - The PHP FastCGI Process Manager
Loaded: loaded (/usr/lib/systemd/system/php-fpm.service; disabled; vendor preset: disabled)
Active: active (running) since Sat 2024-03-02 13:59:17 CST; 17min ago
Main PID: 29139 (php-fpm)
Status: "Processes active: 0, idle: 5, Requests: 0, slow: 0, Traffic: 0req/sec"
Tasks: 6 (limit: 11176)
Memory: 19.1M
CGroup: /system.slice/php-fpm.service
├─29139 php-fpm: master process (/etc/php-fpm.conf)
├─29155 php-fpm: pool www
├─29156 php-fpm: pool www
├─29157 php-fpm: pool www
├─29158 php-fpm: pool www
└─29159 php-fpm: pool www
3月 02 13:59:17 localhost.localdomain systemd[1]: Starting The PHP FastCGI Process Manager...
3月 02 13:59:17 localhost.localdomain systemd[1]: Started The PHP FastCGI Process Manager.
9、重启httpd和php-fpm
[root@localhost ~] systemctl restart httpd
[root@localhost ~] systemctl restart php-fpm.service
三、验证LAMP环境是否可用
在/etc/httpd/conf.d/目录下,有一个名为php.conf的配置文件,此文件的存在,使httpd服务器在接受到php文件时,可以将PHP文件交给php解释器进行执行。
[root@localhost ~]ls /etc/httpd/conf.d/
autoindex.conf  php.conf  README  userdir.conf  welcome.conf
(一)、使用函数phpinfo();打印php的信息
1、在/var/www/html/下新建一个名为test.php的文件,phpinfo();这个函数会打印但钱所用的php的版本等配置信息。
[root@localhost ~] vim /var/www/html/test.php
[root@localhost ~] cat /var/www/html/test.php
<?php
phpinfo();
?>
2、浏览器访问,结果如下:
(二)、编写php文件连接数据库
1、安装php连接数据库的模块
[root@localhost ~] yum -y install php-mysqli
[root@localhost ~] php -m | grep mysql   #检查是否正确安装,回显如下
mysqli
mysqlnd
pdo_mysql
*保存失败,请确保网站根目录有写入权限,解决方案
本以大功告成,Centos7、Centos8、Centos9等新版本用户,注意听讲!!!这个坑,全网没几个特意强调的。当你上传好PHP网站,打开一看结果如下:
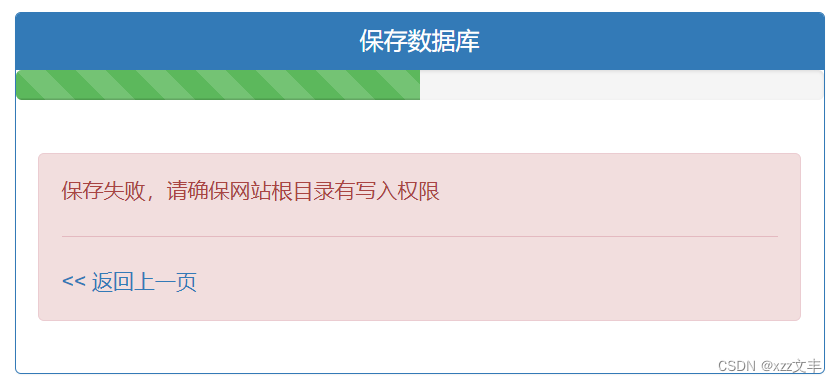
*WordPress写入权限,解决方案:
There has been a critical error on this website.
Learn more about troubleshooting WordPress.(WordPress 5.8版本)

此站点遇到了致命错误。
了解有关对WordPress进行故障排除的更多信息。(WordPress 6.4版本)

解决方案:
1.原因:由于我们FTP上传网站时用的是root或非apache账号,导致apache没有写入权限;
2.解决:把/var/www/html整个文件夹所有者改成apache完成。
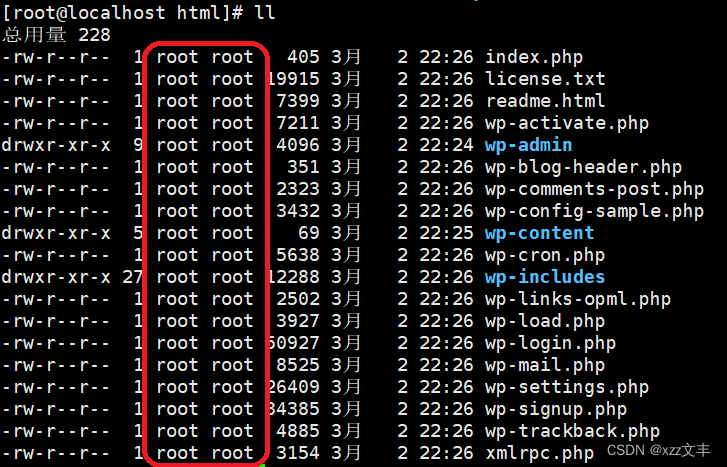
[root@localhost html]# cd /var/www/
[root@localhost www]# chown -R apache:apache html
[root@localhost www]# ll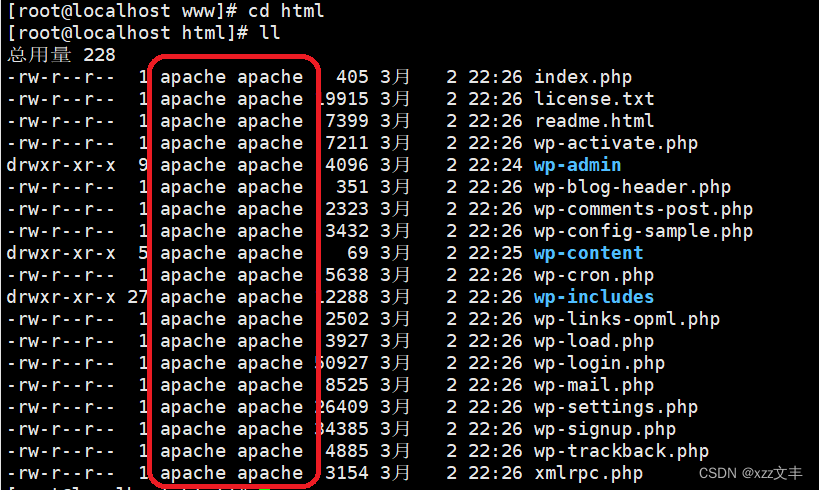
至此,如果你是模板建站(不是自己写网站)可以不用往下看了。
2、登录数据库,新建一个测试用户,用于测试是否可以使用php文件连接数据仓库
数据库新建用户命令为:CREATE USER '用户名'@'host IP' IDENTIFIED BY '密码'; ,host IP就是当前安装数据库的主机ip。
[root@localhost ~] mysql -u root -p123456
MariaDB [(none)]> CREATE USER 'webapp'@'127.0.0.1' IDENTIFIED BY 'Abc123456+++';       #新建一个用户,用户名为webapp,hostip为127.0.0.1,密码为Abc123456+++
Query OK, 0 rows affected (0.000 sec)   #回显,表示用户已经正确创建

MariaDB [(none)]> exit   #退出数据库
Bye
3、编辑一个连接数据库的php文件
[root@localhost ~] vim  /var/www/html/connect_db.php
[root@localhost ~] cat /var/www/html/connect_db.php
<?php
$mysql_c=mysqli_connect('127.0.0.1','webapp','Abc123456+++');  #此处账号密码使用上一步新建的那个测试用户
if($mysql_c)
        echo "webapp connect successfully!";  #连接成功时打印
else
        echo "sorry";    #连接失败时打印
mysqli_close($mysql_c)
?>
4、重启httpd和php-fpm
[root@localhost ~] systemctl restart httpd
[root@localhost ~] systemctl restart php-fpm.service
5、浏览器验证是否可以连接
- 历史背景。MariaDB是MySQL的一个分支,由MySQL的创始人Michael Widenius主导开发,旨在完全兼容MySQL并实现技术上的创新和提高。
- 存储引擎。MariaDB在MySQL的基础上增加了新的存储引擎,如XtraDB(InnoDB的改进版)和Aria(MyISAM的改进版)等,提供了更多的选择。
- 开源程度。MariaDB保持了完全的开源策略,而MySQL在被Oracle收购后,开源程度有所下降。
- 性能和兼容性。MariaDB在查询效率、缓存机制、分区策略和备份支持等方面有所提升,并且在兼容性方面,MariaDB比MySQL更加兼容,支持更多的编程语言。
此外,MariaDB与MySQL在绝大多数方面是兼容的,对于开发者来说,几乎感觉不到任何不同。MariaDB是发展最快的MySQL分支版本,新版本发布速度已经超过了Oracle官方的MySQL版本。


 5191
5191

 被折叠的 条评论
为什么被折叠?
被折叠的 条评论
为什么被折叠?
 到【灌水乐园】发言


