


 本文介绍了Vue.js的基础知识,包括如何在WebStorm中创建项目,引入Vue.js库,以及如何通过数据绑定、事件处理、条件渲染和循环来构建用户界面。同时,文章还涉及了Vue的v-text、v-html、v-on、v-if、v-show、v-bind和v-for等指令的使用,并展示了如何结合axios进行跨域数据请求。
1.vue简介
Vue (读音 /vjuː/,类似于 view) 是一套用于构建用户界面的渐进式框架。与其它大型框架不同的是,Vue 被设计为可以自底向上逐层应用。Vue 的核心库只关注视图层,不仅易于上手,还便于与第三方库或既有项目整合。另一方面,当与现代化的工具链以及各种支持类库结合使用时,Vue 也完全能够为复杂的单页应用提供驱动。
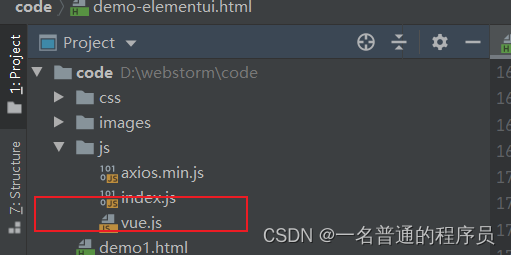
2.创建一个webstorm工程
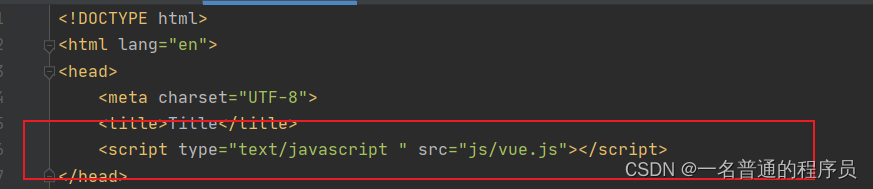
2.1引入vue.js
(1)联网使用
<!-- 开发环境版本,包含了有帮助的命令行警告 -->
<script src="https://cdn.jsdelivr.net/npm/vue@2/dist/vue.js"></script>
(2)下载到本地放到项目中 然后引用本地的vue.js
2.2 在body中创建div标签并给出相应的id
<body>
<div id="aaa">
    {{msg}}
    <hr>
    {{people.name}}
    <hr>
    {{hobby[2]}}
</div>
2.3 编写js代码并通过el属性把当前vue对象挂载到指定的标签元素,令相应的vue生效
<script type="text/javascript">
    //创建一个vue对象
    var app = new Vue({
        //vue对象挂载到id为aaa的标签上,那么该标签的元素都可以使用vue对象中的成员
        el:"#aaa",
        //数据
        data:{
            msg:"今天学习了vue",
            people:{"name":"李明","age":22},//对象数据
            hobby:["唱","跳","rap","打篮球"]//集合数据
        }
    })
</script>
3. vue相关指令
3.1 v-text 和 v-html
<body>
<div id="aaa">
    <span>{{msg}}</span>
    <hr>
    <span v-text="msg">你喜欢什么</span>
    <hr>
<!--    v-text无法解析html标签  v-html可以解析html标签-->
    <span v-html="msg">你不喜欢什么</span>
</div>
</body>
<script type="text/javascript">
    //创建一个vue对象
    var app = new Vue({
        //vue对象挂载到id为aaa的标签上,那么该标签的元素都可以使用vue对象中的成员
        el:"#aaa",
        //数据
        data:{
            msg:"<font color='aqua'>今天学习了vue</font>",
        }
    })
</script>
3.2 v-on 为元素绑定事件
<body>
<div id="aaa">
    <span>{{msg}}</span>
    <button v-on:click="fun">点击</button>
<!--    v-on:可以缩写为@-->
    <button @dblclick="fun">点击2</button>
</div>
</body>
<script type="text/javascript">
    var app = new Vue({
        el:"#aaa",
        data:{
            msg:"<font color='#8a2be2'>我喜欢打篮球</font>"
        },
        //定义方法
        methods:{
          fun(){
              this.msg="我喜欢踢足球"
          },
            fun2(){
            }
        }
    })
</script>
3.3 v-show 及v-if 根据表达值的真假,切换元素的显示和隐藏
<body>
<div id="aaa">
<!--    v-show  显示和隐藏-->
<img src="images/boy.jpg" width="200" v-show="age>18&&age<25"/>
    <hr>
    <img src="images/girls.jpg" width="200" v-show="age>18&&age<30">
    <button @click="fun">点击</button>
</div>
</body>
<script>
    var app = new Vue({
        el:"#aaa",
        data:{
            age:18
        },
        methods:{
            fun(){
                this.age++;
            }
        }
    })
</script>
3.4 v-bind 设置元素属性
<body>
<div id="aaa">
    <!--   如何让img标签属性引用vue对象的数据-->
    <img v-bind:src="imgUrl" width="200" v-bind:title="title" v-bind:class="flag? 'a' : ''"/><br>
<!--    v-bind: 缩写为:-->
  <img :src="imgUrl" width="200" :title="title" :class="flag? 'a' : ''"/> <br>
    <button @click="fun">点击</button>
</div>
</body>
<script>
    var app = new Vue({
        el:"#aaa",
        data:{
            age:18,
            imgUrl:"images/boy.jpg",
            title:"帅哥",
            flag:true
        },
        methods:{
            fun(){
                this.imgUrl="images/girls.jpg";
                this.title="美女"
            }
        }
    })
</script>
3.5 v-for 循环查找数据
<body>
<div id="aaa">
    <ul>
<!--        v-for(数据,下标) in 数组-->
        <li v-for="(item,index) in hobby">
            {{item}}--->{{index}}
        </li>
    </ul>
    <table width="300px" border="1px color='red'" cellpadding="0" class="0" >
        <tr align="center">
            <th>姓名</th>
            <th>年龄</th>
            <th>性别</th>
            <th>操作</th>
        </tr>
        <tr v-for="item in users" align="center">
            <td>{{item.name}}</td>
            <td>{{item.age}}</td>
            <td>{{item.sex}}</td>
            <td>
                <button @click="del(item.name)">删除</button>
                <button>编辑</button>
            </td>
        </tr>
    </table>
</div>
</body>
<script>
    var app = new Vue({
        el:"#aaa",
        data:{
            hobby:["好吃","好玩","好喝","好读"],
            users:[
                {"name":"卢海腾","age":18,"sex":"男"},
                {"name":"张亚祥","age":19,"sex":"男"},
                {"name":"李默","age":20,"sex":"女"}]
        },
        methods:{
            del(name){
                alert(name)
            }
        }
    })
</script>
3.6 v-model 获取和设置表单元素的值. input select textarea
<body>
<div id="app">
<!--v-model会实现双向绑定:表达元素内容改变时,vue中对于的数据也会改变,vue中的数据改变对于的表单元素也会改变-->
<input type="text" v-model="name" />
{{name}}
<button @click="dj">点击</button>
</div>
</body>
<script>
let app=new Vue({
el:"#app",
data:{
name:"AAA"
},
methods:{
dj(){
this.name="BBB";
}
}
})
</script>
4.vue结合axios以及后台代码实现跨域数据请求
引入axios.js 并在后台配置类中添加跨域配置类
@Configuration // 一定不要忽略此注解
public class CorsConfig implements WebMvcConfigurer {
    @Override
    public void addCorsMappings(CorsRegistry registry) {
        registry.addMapping("/**") // 所有接口
                .allowCredentials(true) // 是否发送 Cookie
                .allowedOrigins("*")
                //.allowedOriginPatterns("*") // 支持域
                .allowedMethods(new String[]{"GET", "POST", "PUT", "DELETE"}) // 支持方法
                .allowedHeaders("*")
                .exposedHeaders("*");
    }
}
<body>
<div class="wrap" id="app" align="center">
    <div class="search_form">
        <div class="logo"><img src="./images/view.jpg" alt="logo" /></div>
        <div class="form_group">
            <input
                    type="text"
                    class="input_txt"

                    v-model="city"
            />
            <button class="input_sub" @click="searchWeather">
                搜 索
            </button>
        </div>

    </div>
    <table width="300" border="1" align="center">
        <tr>
            <td>姓名</td>
            <td>年龄</td>
        </tr>
        <tr v-for="item in student">
            <td>{{item.sname}}</td>
            <td>{{item.age}}</td>
        </tr>
    </table>
</div>
<!-- 开发环境版本,包含了有帮助的命令行警告 -->
<script src="./js/vue.js"></script>
<!-- 官网提供的 axios 在线地址 -->
<script src="./js/axios.min.js"></script>
<!-- 自己的js -->
<script>
    let app=new Vue({
        el:"#app",
        data:{
            city:"",
            studentVo:{},
            student:[],
        },
        methods:{
            searchWeather(){
                axios.post("http://localhost:8080/student/get/1/5",this.studentVo).then(result=>{
                    this.student=result.data.data.records;
                    //console.log(result)
                })
            }
        }
    })
</script>


 1006
1006

 被折叠的 条评论
为什么被折叠?
被折叠的 条评论
为什么被折叠?
 到【灌水乐园】发言


