目录
五十七、原生组件注入- 【源码分析】 DispatcherServlet注入原理
五十八、嵌入式Servlet容器- 【源码分析】 切换web服务器与定制化
五十九、定制化原理-SpringBoot定制化组件的几种方式
四十三、视图解析-Thymeleaf初体验
视图解析与模板引擎
所谓的视图解析就是SpringBoot处理完请求后想要跳到某个页面的过程,SpringBoot默认的打包方式是jar包,JSP不支持在压缩包(Jar包)内编译的方式
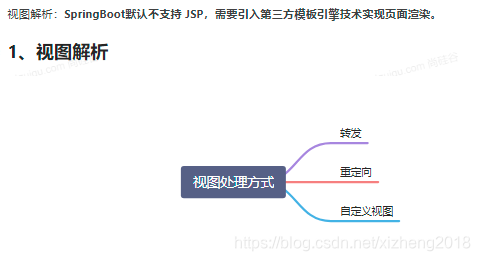
Thymeleaf是一个服务端的Java模板引擎,后端开发人员使用的
第一步:thymeleaf使用
①、引入Starter
 <dependency>
            <groupId>org.springframework.boot</groupId>
            <artifactId>spring-boot-starter-thymeleaf</artifactId>
</dependency>②、自动配置好了thymeleaf(ThymeleafAutoConfiguration)
给Spring容器中放一个模板引擎的解析器,Thymeleaf有前缀和后缀,都是从ThymeleafProperties的属性进行绑定的
@Bean
		SpringResourceTemplateResolver defaultTemplateResolver() {
			SpringResourceTemplateResolver resolver = new SpringResourceTemplateResolver();
			resolver.setApplicationContext(this.applicationContext);
			resolver.setPrefix(this.properties.getPrefix());
			resolver.setSuffix(this.properties.getSuffix());
			resolver.setTemplateMode(this.properties.getMode());
			if (this.properties.getEncoding() != null) {
				resolver.setCharacterEncoding(this.properties.getEncoding().name());
			}
			resolver.setCacheable(this.properties.isCache());
			Integer order = this.properties.getTemplateResolverOrder();
			if (order != null) {
				resolver.setOrder(order);
			}
			resolver.setCheckExistence(this.properties.isCheckTemplate());
			return resolver;
		}
③、自动配好的策略
- 所有thymeleaf的配置值都在 ThymeleafProperties
- 配置好了 SpringTemplateEngine模板引擎
- 配好了 ThymeleafViewResolver视图解析器
- 我们只需要直接开发页面
@ConfigurationProperties(prefix = "spring.thymeleaf")
public class ThymeleafProperties {

	private static final Charset DEFAULT_ENCODING = StandardCharsets.UTF_8;

	public static final String DEFAULT_PREFIX = "classpath:/templates/";

	public static final String DEFAULT_SUFFIX = ".html";
使用Thymeleaf测试功能
第一步:success.html文件
<!DOCTYPE html>
<html lang="en" xmlns:th="http://www.thymeleaf.org">
<head>
    <meta charset="UTF-8">
    <title>Title</title>
</head>
<body>

<h1 th:text="${msg}">哈哈哈</h1>
<h2>
    <a href="www.baidu.com" th:href="${link}">去百度</a>
    <a href="www.baidu.com" th:href="@{/link}">去百度2</a>
</h2>

</body>
</html>
第二步:ViewTestController.java文件
@Controller
public class ViewTestController {

    @GetMapping("/nanjing")
    public String nanjing(Model model){
        //model中的数据会被放在请求域中 request.setAttribute("a",aa)
        model.addAttribute("msg","你好 nanjing");
        model.addAttribute("link","http://www.ourjiangsu.com");
        return "success";
    }

}
四十四、web实验-后台管理系统基本功能
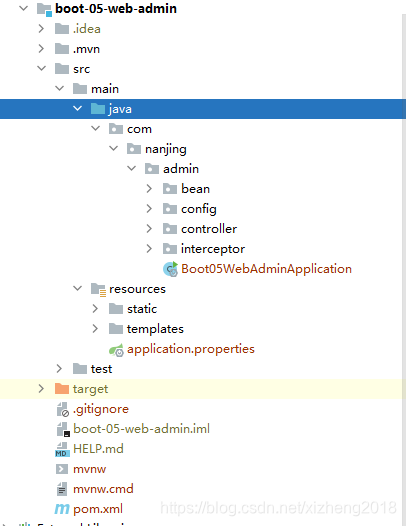
构建后台管理系统
1、项目创建
2、来登录页接口
@Slf4j
@Controller
public class IndexController {

    /**
     * 来登录页
     * @return
     */
    @GetMapping(value = {"/","/login"})
    public String loginPage(){
        return "login";
    }
3、登录接口
xmlns:th="http://www.thymeleaf.org" Thymeleaf名称空间第一步:login.html文件
 <form class="form-signin" action="index.html" method="post" th:action="@{/login}">

        <div class="login-wrap">
            <label style="color: red" th:text="${msg}"></label>
            <input type="text" name="userName" class="form-control" placeholder="User ID" autofocus>
            <input type="password" name="password" class="form-control" placeholder="Password">

            <button class="btn btn-lg btn-login btn-block" type="submit">
                <i class="fa fa-check"></i>
            </button>
第二步:IndexController.java文件
 @PostMapping("/login")
    public String main(User user, HttpSession session, Model model){
        if(StringUtils.hasLength(user.getUserName()) && "123456".equals(user.getPassword())){
            //把登录成功的用户保存起来
            session.setAttribute("loginUser",user);
            //登录成功后重定向到main.html; 重定向防止表单重复提交
            return "redirect:/main.html";
        }else {
            model.addAttribute("msg","账号密码错误");
            //回到登录页
            return "login";
        }
    }

    /**
     *  去main页面
     */
    @GetMapping("/main.html")
    public String mainPage(HttpSession session,Model model){
        log.info("当前方法是:{}","mainPage");
        //是否登录。  拦截器,过滤器
//        Object loginUser = session.getAttribute("loginUser");
//        if(loginUser != null){
//            return "main";
//        }else {
//            //回到登录页面
//            model.addAttribute("msg","请重新登录");
//            return "login";
//        }

        return "main";
    }
四十五、web实验-抽取公共页面
第一步:
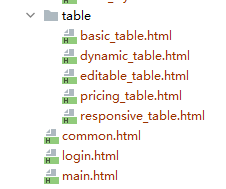
第二步:TableController.java文件
@Controller
public class TableController {

    @GetMapping("/basic_table")
    public String basic_table() {
        int result=10/0;
        return "table/basic_table";
    }

    @GetMapping("/dynamic_table")
    public String dynamic_table(Model model) {
        List<User> users = Arrays.asList(new User("zhangsan", "123456"),
                new User("lisi", "123444"),
                new User("haha", "aaaaa"),
                new User("hehe ", "aaddd"));
        model.addAttribute("users", users);
        return "table/dynamic_table";
    }

    @GetMapping("/responsive_table")
    public String responsive_table() {
        return "table/responsive_table";
    }

    @GetMapping("/editable_table")
    public String editable_table() {
        return "table/editable_table";
    }
}
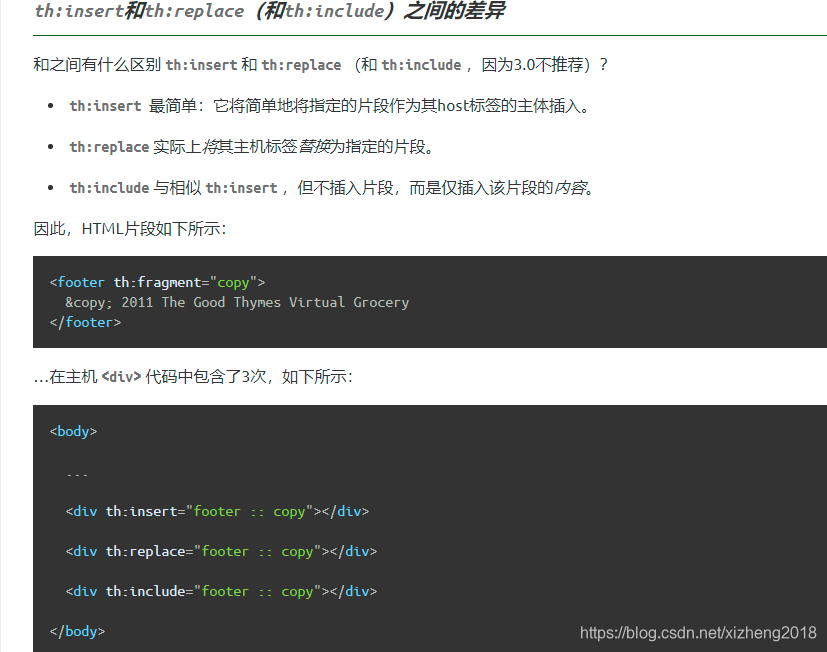
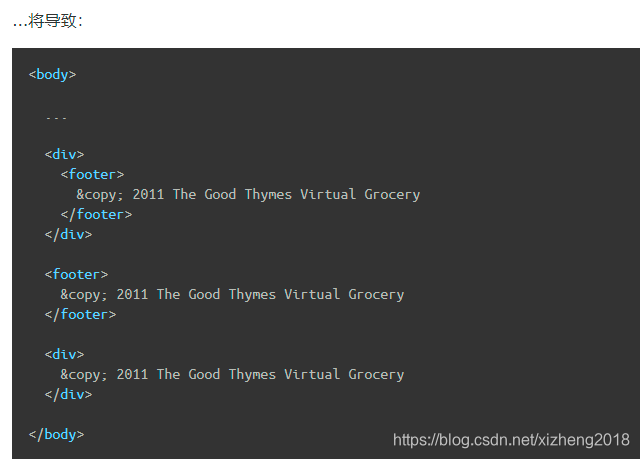
知识点:
1、
2、
案例实践
1、
<head th:fragment="commonheader">
  <!-- HTML5 shim and Respond.js IE8 support of HTML5 elements and media queries -->
  <!--[if lt IE 9]>
  <script src="js/html5shiv.js" th:src="@{/js/html5shiv.js}"></script>
  <script src="js/respond.min.js" th:src="@{/js/respond.min.js}"></script>
  <![endif]-->
</head>

<!-- left side start-->
<div id="leftmenu" class="left-side sticky-left-side"></div>
2、
  <div th:include="common :: commonheader"></div>

  <div th:replace="common :: #leftmenu"></div>
四十六、web实验-遍历数据与页面bug修改
1、第一步:
@Controller
public class TableController {

    @GetMapping("/basic_table")
    public String basic_table() {
        int result=10/0;
        return "table/basic_table";
    }

    @GetMapping("/dynamic_table")
    public String dynamic_table(Model model) {
        List<User> users = Arrays.asList(new User("zhangsan", "123456"),
                new User("lisi", "123444"),
                new User("haha", "aaaaa"),
                new User("hehe ", "aaddd"));
        model.addAttribute("users", users);
        return "table/dynamic_table";
    }

    @GetMapping("/responsive_table")
    public String responsive_table() {
        return "table/responsive_table";
    }

    @GetMapping("/editable_table")
    public String editable_table() {
        return "table/editable_table";
    }
}
2、第二步:
<table class="display table table-bordered" id="hidden-table-info">
        <thead>
        <tr>
            <th>#</th>
            <th>用户名</th>
            <th>密码</th>
        </tr>
        </thead>
        <tbody>
        <tr class="gradeX" th:each="user,status:${users}">
            <td th:text="${status.count}">Trident</td>
            <td th:text="${user.userName}">Internet</td>
            <td>[[${user.password}]]</td>
        </tr>
        </tbody>
        </table>
四十七、视图解析- 【源码分析】 -视图解析器与视图
视图解析原理流程
1、所有请求都是从DispatcherServlet.java文件的doDispatch开始,第一行打断点
测试登录方法(会有重定向以及登录失败会来到login页面)
login接口打断点,看这个整个过程是怎么进行的,以前讲过参数的确定过程以及返回值的处理过程,我们看一下整个页面的跳转过程
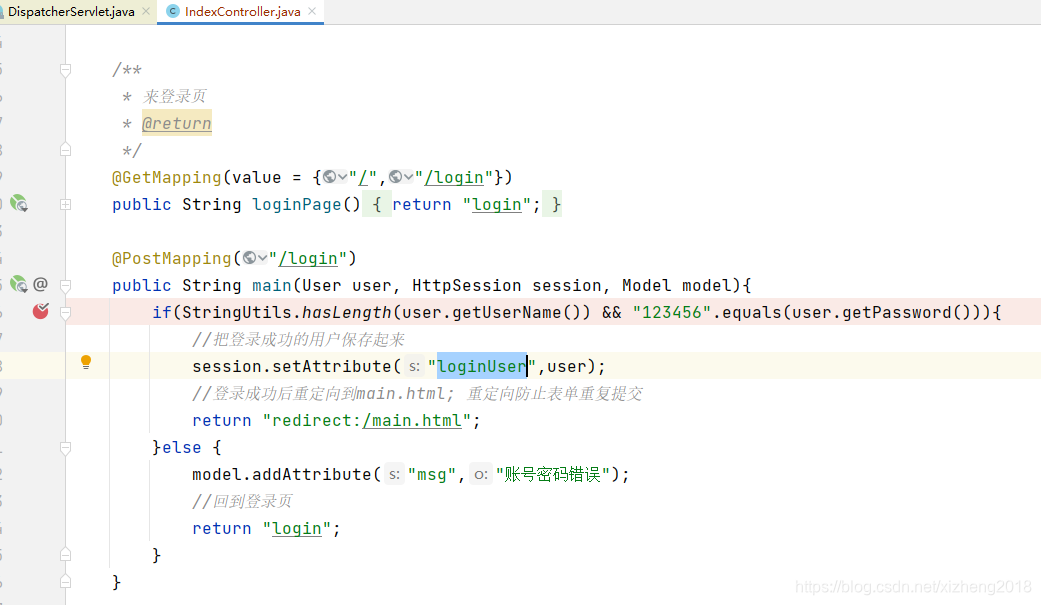
2、先以登录成功为例
①、第一


 本文详细介绍了SpringBoot2中Thymeleaf模板引擎的使用,从视图解析原理到实战,接着探讨了拦截器的执行时机和原理,以及文件上传的操作。同时,深入源码分析了SpringBoot的错误处理机制,包括默认错误处理、异常处理流程和自定义错误页面的方法。此外,还涉及了原生组件注入和嵌入式Servlet容器的定制化。
 最低0.47元/天 解锁文章


 3579
3579

 被折叠的 条评论
为什么被折叠?


