


1. RestFul
配套视频:【编程不良人】2021年SpringBoot最新最全教程_哔哩哔哩_bilibili
1.1 引言

REST全称是(Resources) Representational State Transfer,中文意思是表述(编者注:通常译为表征)性状态转移。 它首次出现在2000年Roy Fielding的博士论文中,Roy Fielding是HTTP规范的主要编写者之一。 他在论文中提到:"我这篇文章的写作目的,就是想在符合架构原理的前提下,理解和评估以网络为基础的应用软件的架构设计,得到一个功能强、性能好、适宜通信的架构。REST指的是一组架构约束条件和原则。" 如果一个架构符合REST的约束条件和原则,我们就称它为RESTful架构。
REST本身并没有创造新的技术、组件或服务,而隐藏在RESTful背后的理念就是使用Web的现有特征和能力, 更好地使用现有Web标准中的一些准则和约束。虽然REST本身受Web技术的影响很深, 但是理论上REST架构风格并不是绑定在HTTP上,只不过目前HTTP是唯一与REST相关的实例。 所以我们这里描述的REST也是通过HTTP实现的REST。
web开发:实现所有功能
restful:软件设计风格---标准、简洁、层次、优雅,基于rest设计原则和约束的架构被称之为restFul。
总结:
-
Rest 词:没有更新的技术、组件、服务,但能让web请求能够利用web中的标准和能力更好的描述架构。
-
RestFul: 是一种以网络为基础构架的一种架构风格, 符合Rest设计原则和约束的架构被称为RestFul。
-
Restful 一种软件架构风格、设计风格,而不是标准,只是提供了一组设计原则和约束条件。它主要用于客户端和服务器交互类的软件。基于这个风格设计的软件可以更简洁,更有层次,更易于实现缓存等机制。
1.2 URL定义
-
资源:互联网所有的事物都可以被抽象为资源
-
一首歌、一张图片、数据库一条记录等
-
-
资源操作:使用POST(添加)、DELETE(删除)、PUT(修改)、GET(查询),使用不同请求方法对资源进行操作。
-
删除 delete
-
查询 get
-
添加 post
-
修改 put (修改全部字段)| patch(更新部分字段)
-
1.3 传统方式操作资源
注意:传统的操作是没有问题的,但大神认为是有问题的,有什么问题呢?你每次请求的接口或者地址,都在做描述,例如查询的时候用了queryUser,新增的时候用了saveUser,修改的时候用了updateUser,其实完全没有这个必要,我使用了get请求就是查询、使用post请求就是新增的请求、PUT就是修改、delete就是删除,我的意图很明显,完全没有必要做描述,这就是为什么有了restful。
1.4 使用RESTful操作资源
-
【GET】 /users # 查询用户信息列表
-
【GET】 /users/1001 # 查看某个用户信息
-
【POST】 /users # 新建用户信息
-
【PUT】 /users/1001 # 更新用户信息(全部字段)
-
【PATCH】 /users/1001 # 更新用户信息(部分字段)
-
【DELETE】 /users/1001 # 删除用户信息
1.5 Rest API设计风格原则
# 1.使用名词而不是动词
- 不要使用:
如:
/getAllUsers get /users 、 get /users/002
/createNewUser post /users
/deleteAllUser delete /users 、delete /users/001
/updateUser put|patch /users 、patch /users/001
# 2.Get方法和查询参数不应该涉及状态改变
- 使用PUT,POST和DELETE方法 而不是GET方法来改变状态,不要使用GET进行状态改变
# 3.使用复数名词
- 不要混淆名词单数和复数,为了保持简单,只对所有资源使用复数,如:
/cars 而不是 /car
/users 而不是 /user
/products 而不是 /product
/settings 而不是 /setting
/orders 而不是 /order
# 4. 使用子资源表达关系
- 如果一个资源与另外一个资源有关系,使用子资源,如:
GET /cars/711/drivers/ 返回 car 711的所有司机
GET /cars/711/drivers/4 返回 car 711的4号司机
GET /users/11/pets 返回 user 11的所有宠物
GET /users/11/pets/2 返回 user 11的2号宠物
# 5.使用Http头声明序列化格式
- 在客户端和服务端双方都要知道通讯的格式,格式在HTTP-Header中指定,如:
Content-Type:定义请求格式
Accept:定义系列可接受的响应格式
# 6.为集合提供过滤排序选择和分页等功能
- Filtering过滤:使用唯一的查询参数进行
GET /cars?color=red 返回红色的cars
GET /cars?seats<=2 返回小于两座位的cars集合
- Sorting排序:允许针对多个字段排序
GET /cars?sort=-manufactorer,+model
这是返回根据生产者降序和模型升序排列的car集合
- Field selection
移动端能够显示其中一些字段,它们其实不需要一个资源的所有字段,给API消费者一个选择字段的能力,这会降低网络流量,提高API可用性。
GET /cars?fields=manufacturer,model,id,color
- Paging分页
使用limit和offset.实现分页,缺省时,limit=20和offset=0;
GET /cars?offset=10&limit=5
为了将总数发给客户端,使用订制的HTTP头: X-Total-Count.
链接到下一页或上一页可以在HTTP头的link规定,遵循Link规定:
Link: <https://blog.mwaysolutions.com/sample/api/v1/cars?offset=15&limit=5>;
rel="next",<https://blog.mwaysolutions.com/sample/api/v1/cars?offset=50&limit=3>;
rel="last",<https://blog.mwaysolutions.com/sample/api/v1/cars?offset=0&limit=5>;
rel="first",<https://blog.mwaysolutions.com/sample/api/v1/cars?offset=5&limit=5>;
rel="prev",
# 7.版本化你的API 支付宝 v1 v2 v3
- 使得API版本变得强制性,不要发布无版本的API,使用简单数字,避免小数点,如:2.5.
一般在Url后面使用?v,如:/blog/api/v1
# 8. 使用Http状态码处理错误
- 如果你的API没有错误处理是很难的,只是返回500和出错堆栈不一定有用
- Http状态码提供70个出错,我们只要使用10个左右:
`200 – OK – 一切正常
`201 – OK – 新的资源已经成功创建
`204 – OK – 资源已经成功删除
`304 – Not Modified – 客户端使用缓存数据
`400 – Bad Request – 请求无效,需要附加细节解释如 "JSON无效"
`401 – Unauthorized – 请求需要用户验证
`403 – Forbidden – 服务器已经理解了请求,但是拒绝服务或这种请求的访问是不允许的。
`404 – Not found – 没有发现该资源
`422 – Unprocessable Entity – 只有服务器不能处理实体时使用,比如图像不能被格式化,或者重要字段丢失。
`500 – Internal Server Error – API开发者应该避免这种错误。
使用详细的错误包装错误:状态码、数据、header头信息
{
"errors": [
{
"userMessage": "Sorry, the requested resource does not exist",
"internalMessage": "No car found in the database",
"code": 34,
"more info": "http://dev.mwaysolutions.com/blog/api/v1/errors/12345"
}
]
}
1.6 Rest API案例
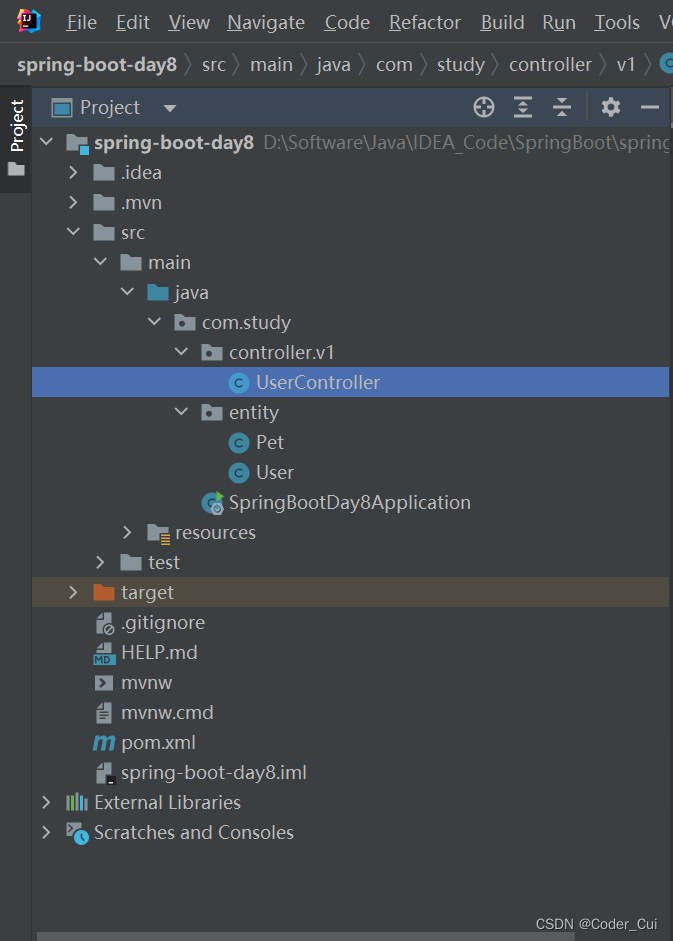
新建Spring Initializr、引入Spring Web的项目spring-boot-day8
创建实体类User
package com.study.entity;
import java.util.Date;
/**
* @ClassName User
* @Description TODO
* @Author Jiangnan Cui
* @Date 2022/6/29 16:13
* @Version 1.0
*/
public class User {
private Integer id;
private String name;
private Double salary;
private Date birthday;
public User() {
}
public User(Integer id, String name, Double salary, Date birthday) {
this.id = id;
this.name = name;
this.salary = salary;
this.birthday = birthday;
}
public Integer getId() {
return id;
}
public void setId(Integer id) {
this.id = id;
}
public String getName() {
return name;
}
public void setName(String name) {
this.name = name;
}
public Double getSalary() {
return salary;
}
public void setSalary(Double salary) {
this.salary = salary;
}
public Date getBirthday() {
return birthday;
}
public void setBirthday(Date birthday) {
this.birthday = birthday;
}
@Override
public String toString() {
return "User{" +
"id=" + id +
", name='" + name + '\'' +
", salary=" + salary +
", birthday=" + birthday +
'}';
}
}
创建实体类Pet
package com.study.entity;
/**
* @ClassName Pet
* @Description TODO
* @Author Jiangnan Cui
* @Date 2022/6/29 17:48
* @Version 1.0
*/
public class Pet {
private Integer id;
private String name;
private Integer age;
public Pet() {
}
public Pet(Integer id, String name, Integer age) {
this.id = id;
this.name = name;
this.age = age;
}
public Integer getId() {
return id;
}
public void setId(Integer id) {
this.id = id;
}
public String getName() {
return name;
}
public void setName(String name) {
this.name = name;
}
public Integer getAge() {
return age;
}
public void setAge(Integer age) {
this.age = age;
}
@Override
public String toString() {
return "Pet{" +
"id=" + id +
", name='" + name + '\'' +
", age=" + age +
'}';
}
}
创建控制器UserController
package com.study.controller.v1;
import com.study.entity.User;
import org.slf4j.Logger;
import org.slf4j.LoggerFactory;
import org.springframework.web.bind.annotation.*;
import java.util.Date;
/**
* @ClassName UserController
* @Description TODO
* @Author Jiangnan Cui
* @Date 2022/6/29 16:16
* @Version 1.0
*/
@RestController //专用于restful风格的注解=@Controller + @ResponseBody
//@Controller:专用于传统开发的注解
@RequestMapping("/v1/users") //符合使用名词复数形式
public class UserController {
//新建日志对象
private static final Logger logger = LoggerFactory.getLogger(UserController.class);
/**
* @MethodName findUserById
* @Description 根据id查询某个用户的详细信息
* @param: id
* @return: com.study.entity.User
* @Author Jiangnan Cui
* @Date 16:28 2022/6/29
*/
//@RequestMapping(value = "/{id}",method = RequestMethod.GET) 此种方式太繁琐,推荐使用下面这种
@GetMapping("/{id}") //@RequestMapping的子类注解,使用GetMapping时只能使用GET方式访问当前请求
//@ResponseBody //将控制器方法返回值转换为json格式
//@PathVariable:在路径中获取请求参数
public User findUserById(@PathVariable("id") Integer id){
logger.info("本次id:{}",id);
return new User(id,"小崔",1234.56,new Date());
}
}

配套视频:【编程不良人】2021年SpringBoot最新最全教程_哔哩哔哩_bilibili
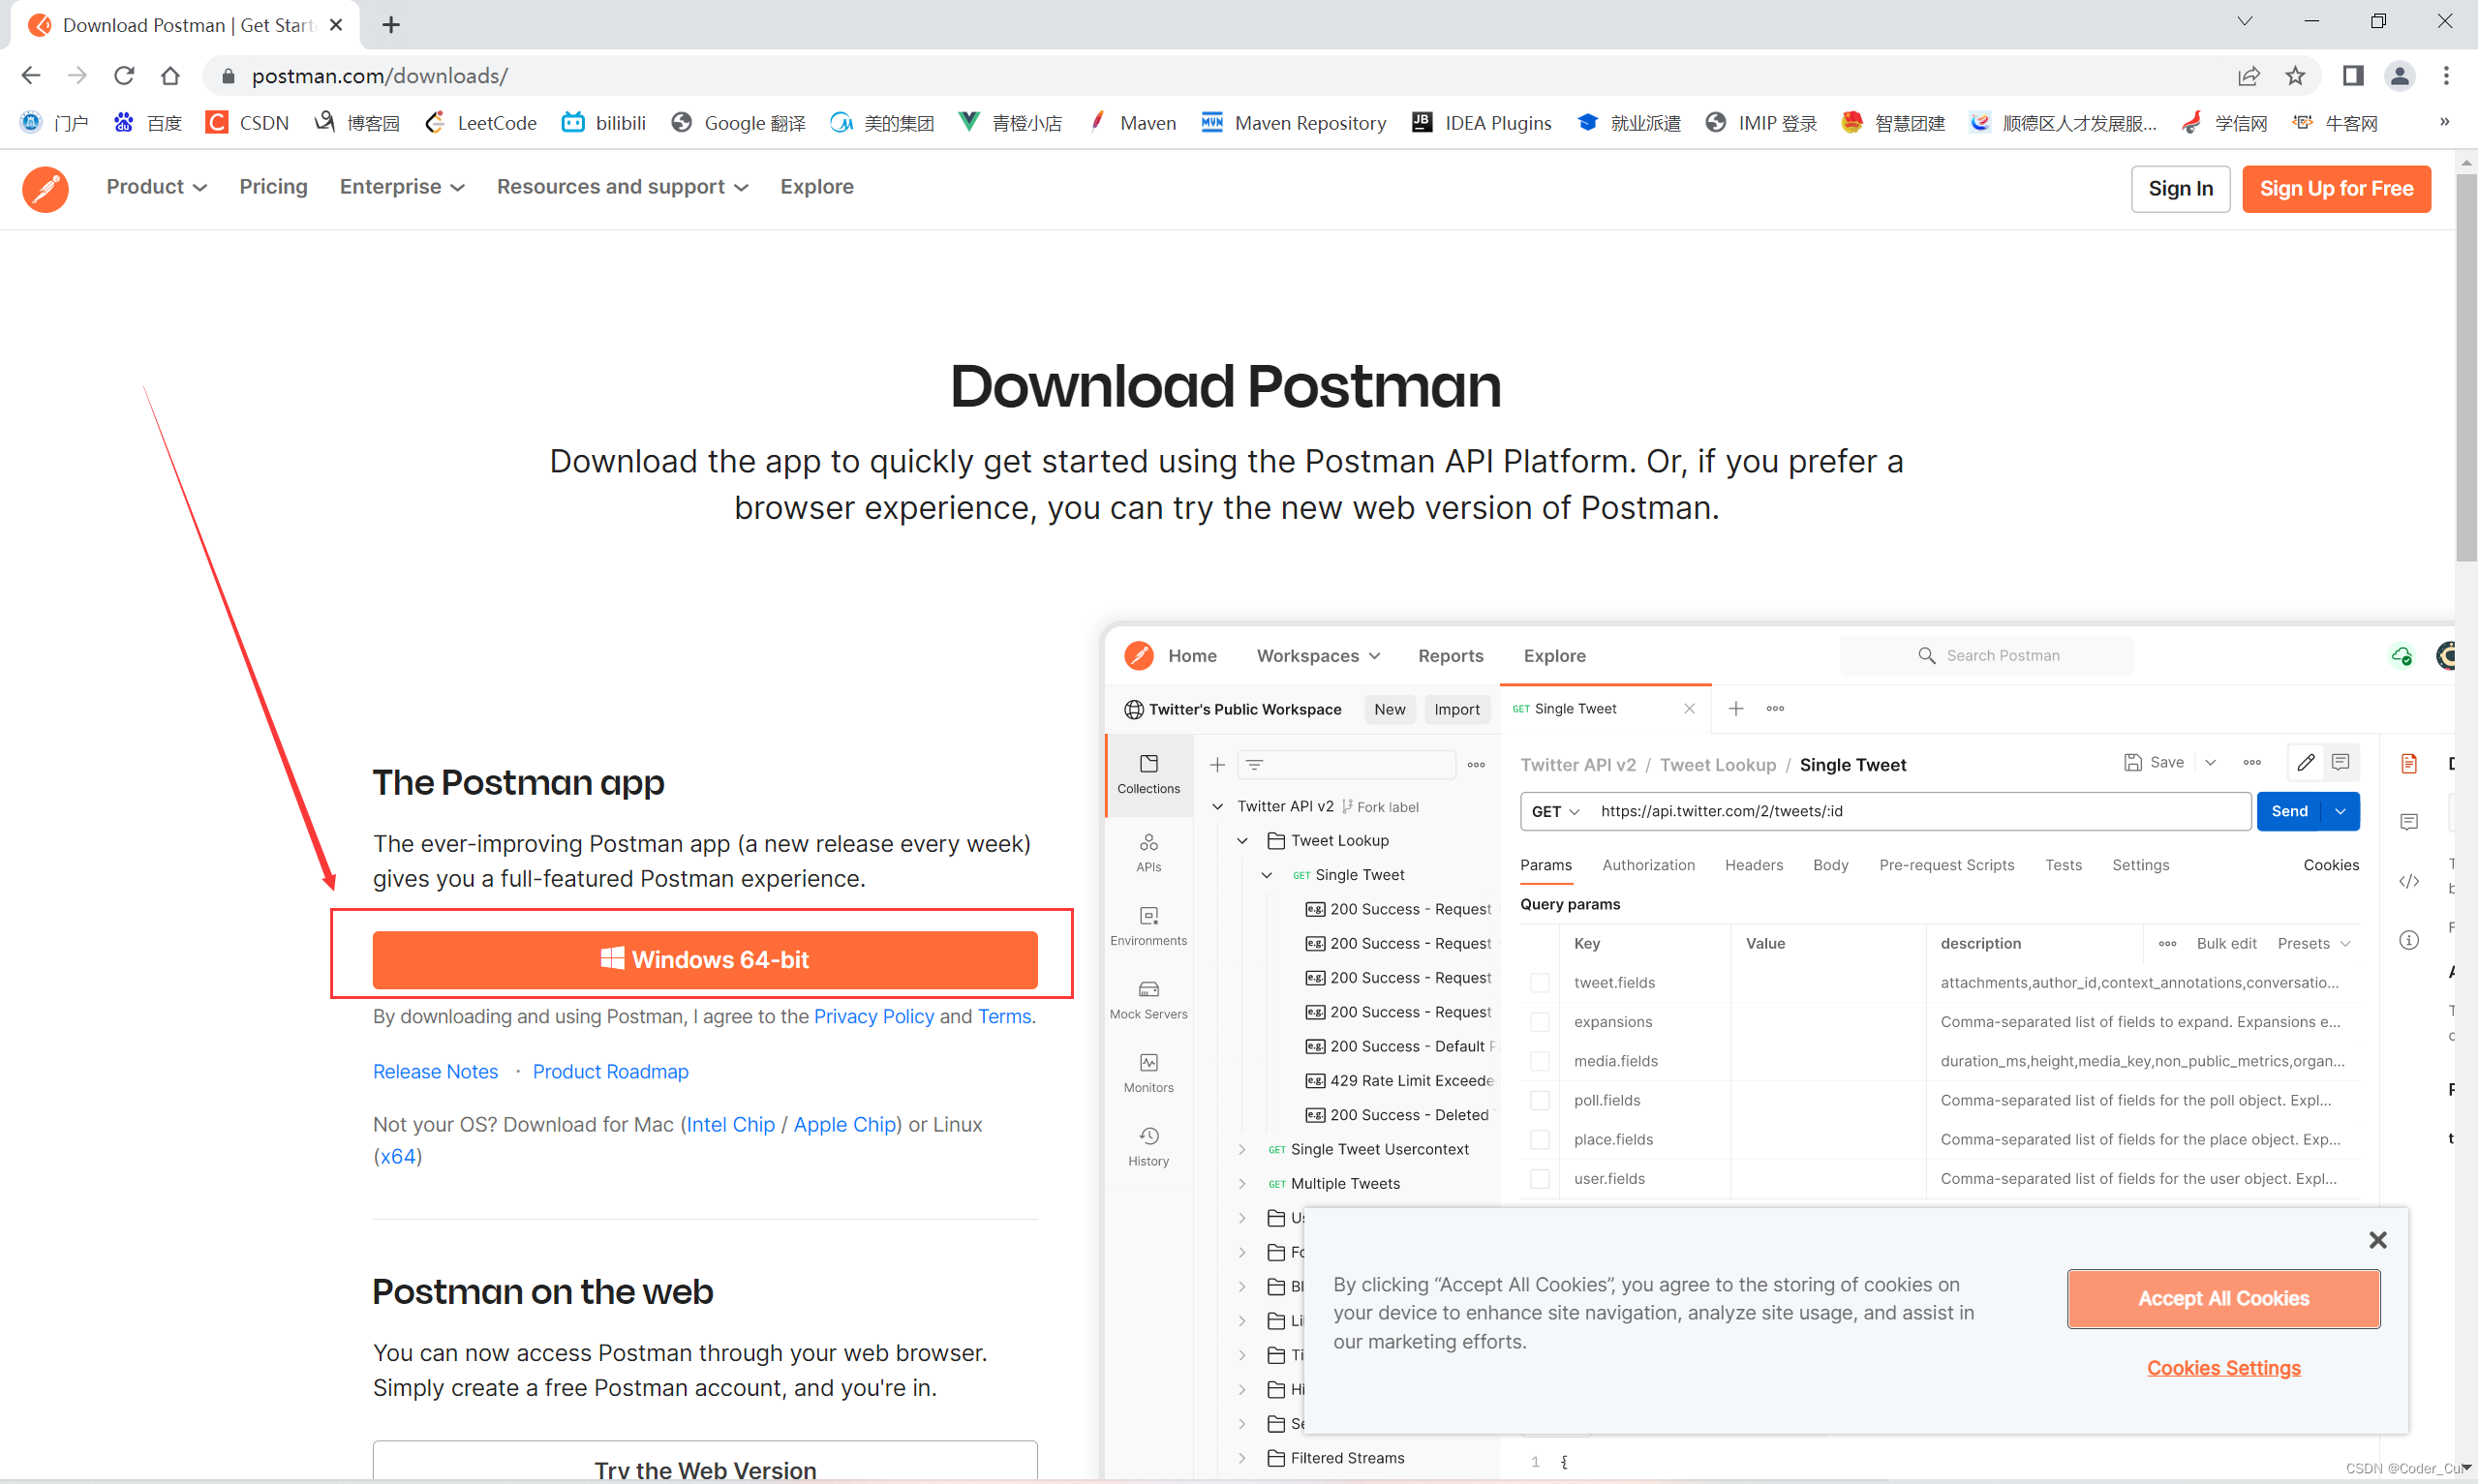
安装Postman进行测试:Download Postman | Get Started for Free (访问官网后自动识别版本,下载后双击打开即安装完毕)
package com.study.controller.v1;
import com.study.entity.Pet;
import com.study.entity.User;
import org.slf4j.Logger;
import org.slf4j.LoggerFactory;
import org.springframework.web.bind.annotation.*;
import java.util.ArrayList;
import java.util.Arrays;
import java.util.Date;
import java.util.List;
/**
* @ClassName UserController
* @Description TODO
* @Author Jiangnan Cui
* @Date 2022/6/29 16:16
* @Version 1.0
*/
@RestController //专用于restful风格的注解=@Controller + @ResponseBody
//@Controller:专用于传统开发的注解
@RequestMapping("/v1/users") //符合使用名词复数形式
public class UserController {
//新建日志对象
private static final Logger logger = LoggerFactory.getLogger(UserController.class);
/**
* @MethodName findUserById
* @Description 根据id查询某个用户的详细信息
* @param: id
* @return: com.study.entity.User
* @Author Jiangnan Cui
* @Date 16:28 2022/6/29
*/
//@RequestMapping(value = "/{id}",method = RequestMethod.GET) 此种方式太繁琐,推荐使用下面这种
@GetMapping("/{id}") //@RequestMapping的子类注解,使用GetMapping时只能使用GET方式访问当前请求
//@ResponseBody //将控制器方法返回值转换为json格式
//@PathVariable:在路径中获取请求参数
public User findUserById(@PathVariable("id") Integer id){
logger.info("本次id:{}",id);
return new User(id,"小崔",1234.56,new Date());
}
/**
* @MethodName findAllUser
* @Description 查询所有用户信息
* @return: java.util.List<com.study.entity.User>
* @Author Jiangnan Cui
* @Date 17:24 2022/6/29
*/
@GetMapping
//@ResponseBody
public List<User> findAllUser(){
ArrayList<User> users = new ArrayList<>();
users.add(new User(1,"张三",1000.00,new Date()));
users.add(new User(2,"李四",2000.00,new Date()));
users.add(new User(3,"王五",3000.00,new Date()));
return users;
}
/**
* @MethodName addUser
* @Description 新增用户信息
* @param: user
* @Author Jiangnan Cui
* @Date 17:28 2022/6/29
*/
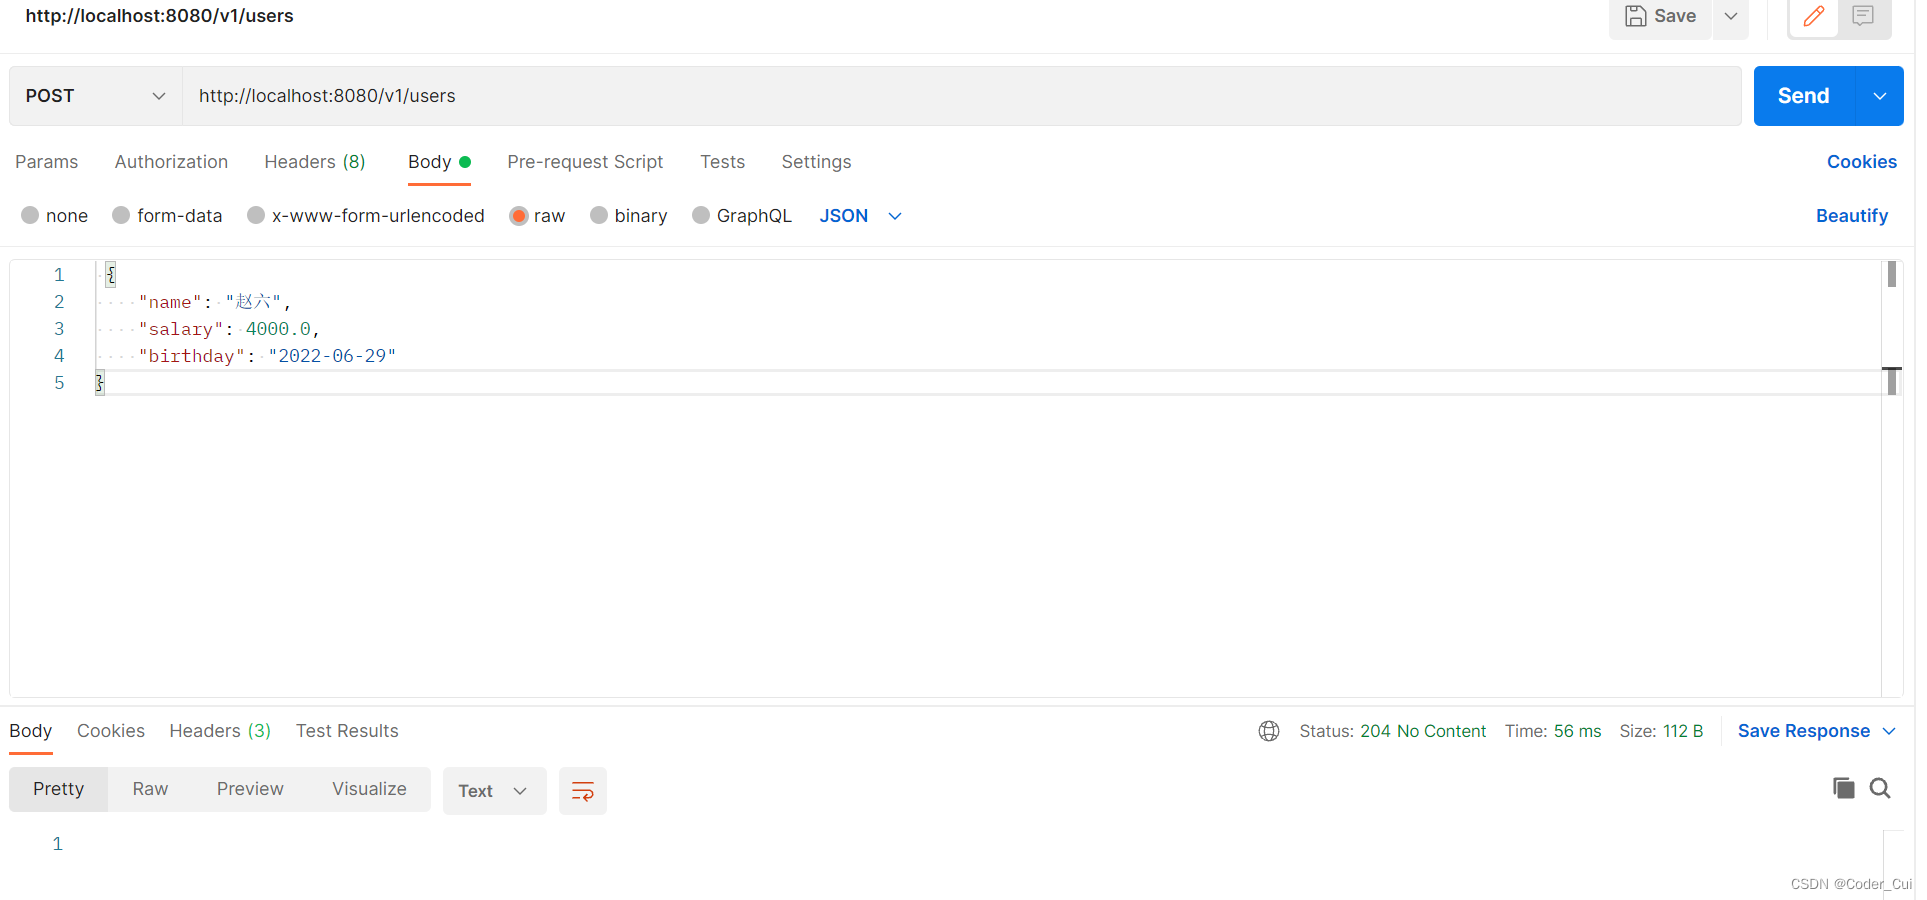
@PostMapping
//@ResponseBody //将方法的返回值转化为json格式,并响应请求
//@RequestBody: 接收请求的json格式数据,将json格式数据转化为对象
public void addUser(@RequestBody User user){
logger.info("name:{},salary:{},birthday:{}",user.getName(),user.getSalary(),user.getBirthday());
//调用业务方法
}
/**
* @MethodName updateUser
* @Description 更新用户信息
* @param: user
* @Author Jiangnan Cui
* @Date 17:30 2022/6/29
*/
@PutMapping("/{id}")
//@ResponseBody
public void updateUser(@PathVariable("id") Integer id,@RequestBody User user){
logger.info("id:{},name:{},salary:{},birthday:{}",id,user.getName(),user.getSalary(),user.getBirthday());
//调用业务方法
}
/**
* @MethodName deleteUser
* @Description 删除用户信息
* @param: id
* @Author Jiangnan Cui
* @Date 17:32 2022/6/29
*/
@DeleteMapping("/{id}")
@ResponseBody
public void deleteUser(@PathVariable("id") Integer id){
logger.info("本次删除用户的id:{}",id);
}
/**
* @MethodName findPetById
* @Description 根据宠物id查询主人的一个宠物
* @param: id
* @param: petId
* @return: com.study.entity.Pet
* @Author Jiangnan Cui
* @Date 17:54 2022/6/29
*/
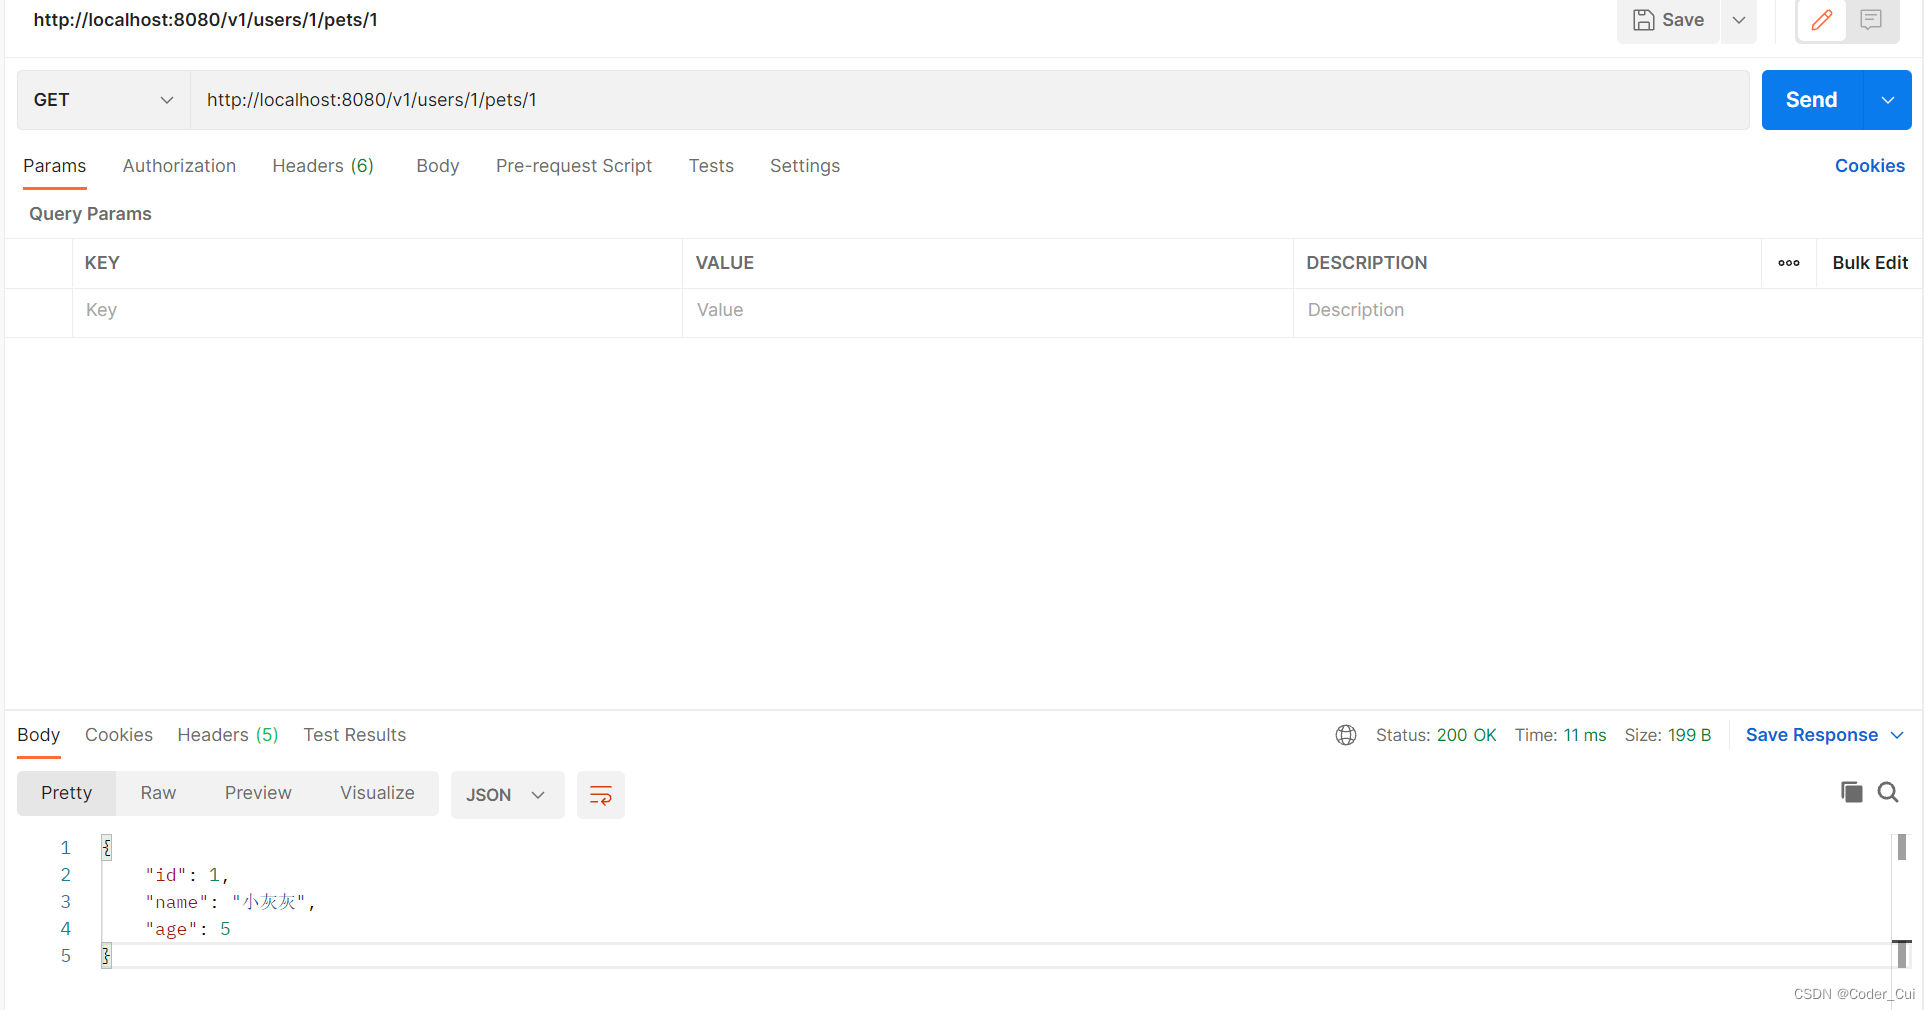
@GetMapping("/{id}/pets/{petId}")
public Pet findPetById(@PathVariable("id") Integer id,@PathVariable("petId") Integer petId){
logger.info("宠物主人的id:{}",id);
logger.info("宠物id:{}",petId);
return new Pet(1,"小灰灰",5);
}
/**
* @MethodName findAllPet
* @Description 查询主人的所有宠物
* @param: id
* @return: java.util.List<com.study.entity.Pet>
* @Author Jiangnan Cui
* @Date 17:57 2022/6/29
*/
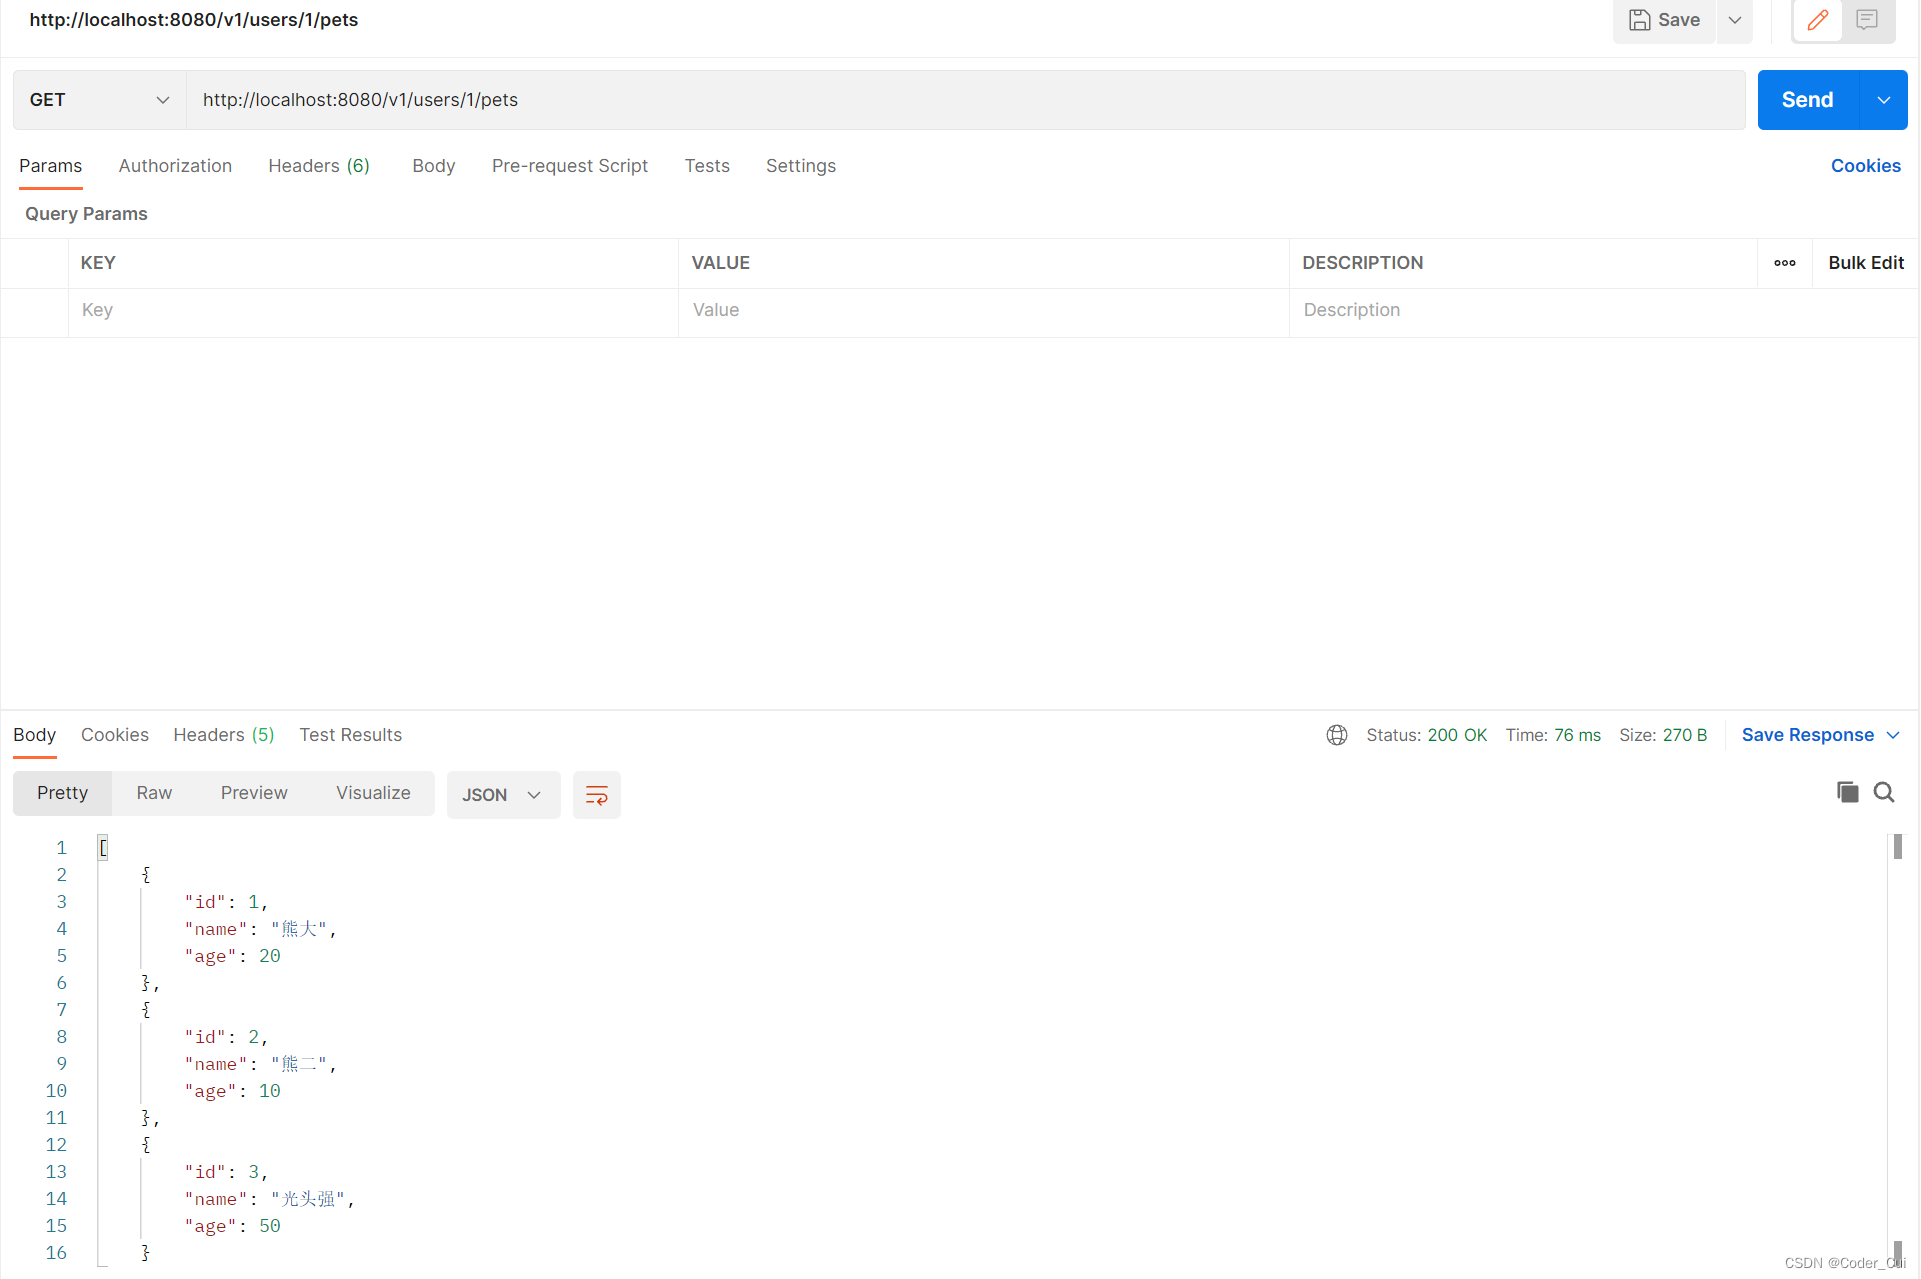
@GetMapping("/{id}/pets")
public List<Pet> findAllPet(@PathVariable("id") Integer id){
logger.info("宠物主人的id:{}",id);
List<Pet> pets = Arrays.asList(
new Pet(1,"熊大",20),
new Pet(2,"熊二",10),
new Pet(3,"光头强",50)
);
return pets;
}
}
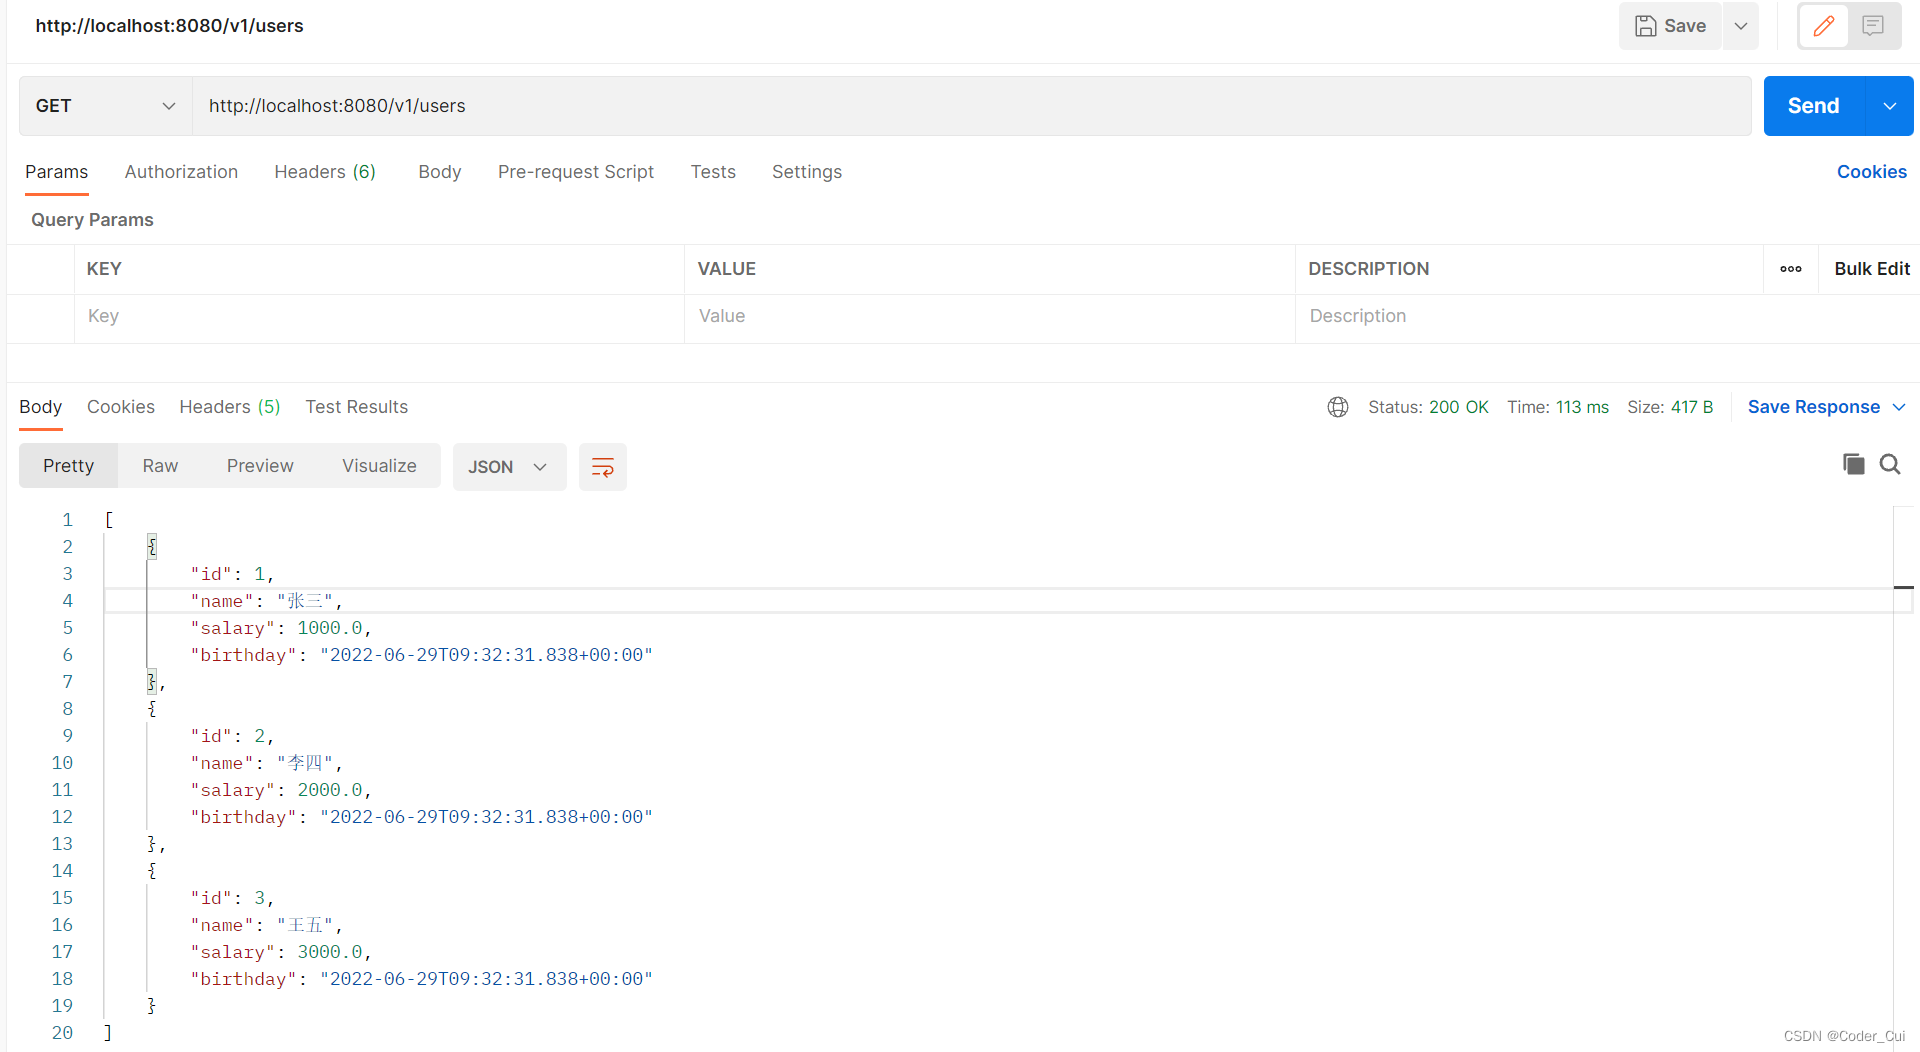
测试路径:
(1)http://localhost:8080/v1/users
(2)http://localhost:8080/v1/users

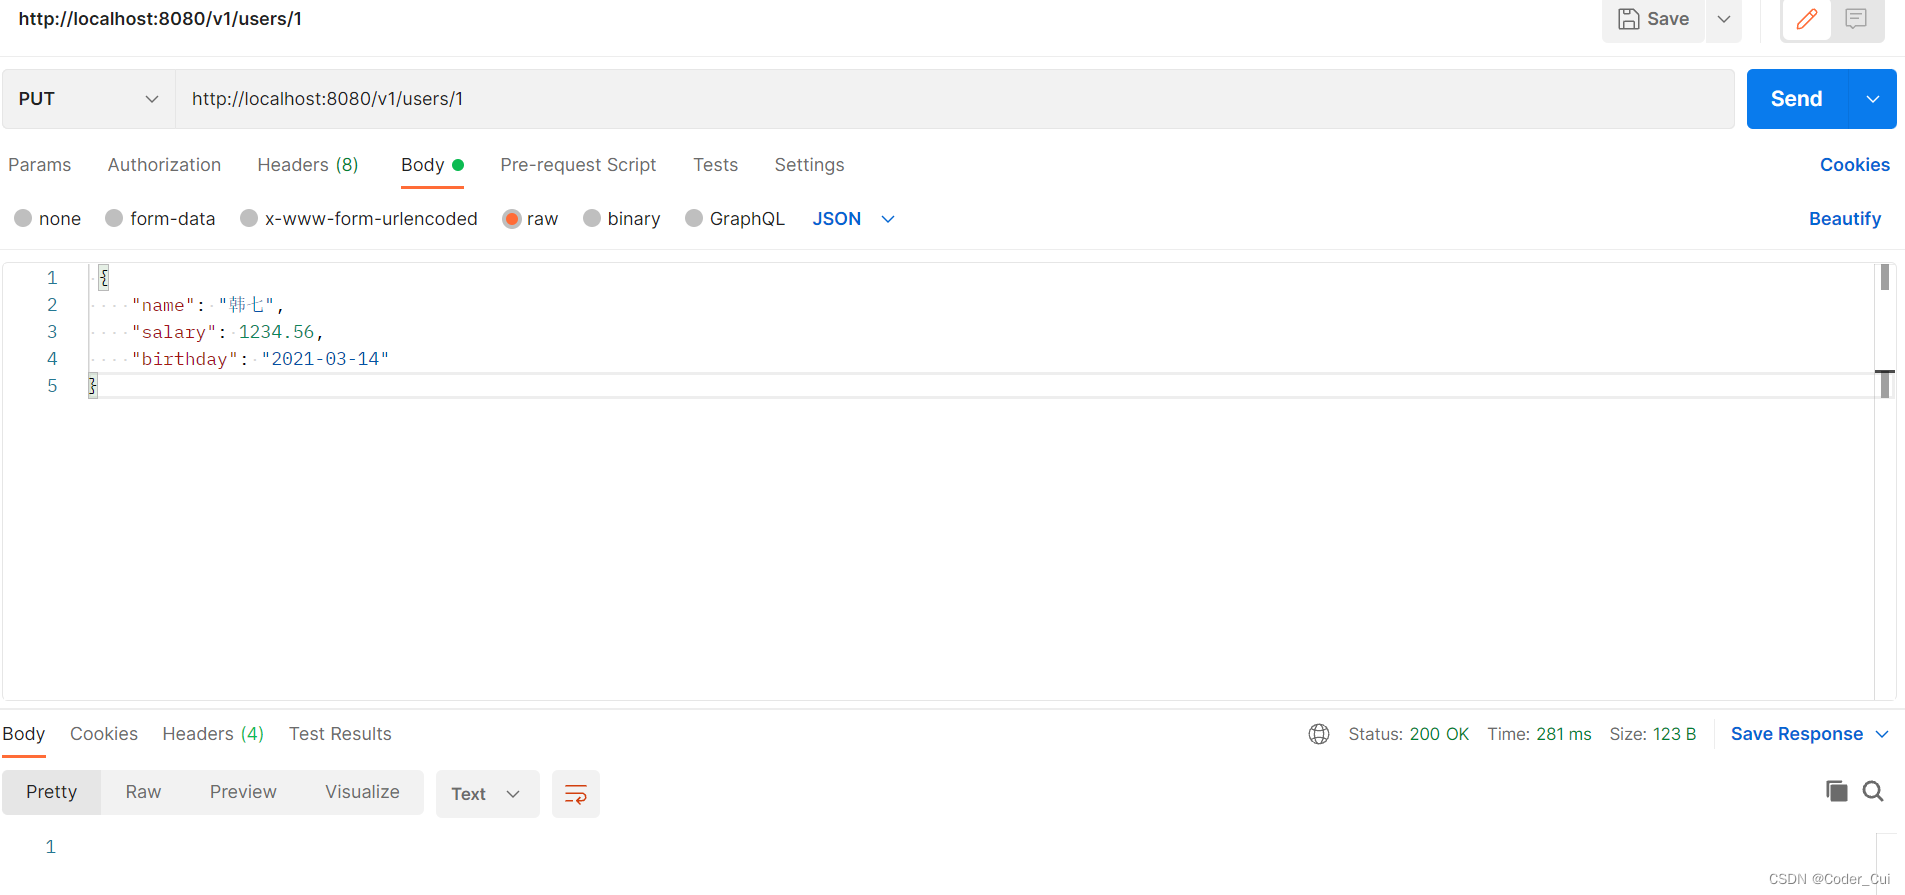
(3)http://localhost:8080/v1/users/1
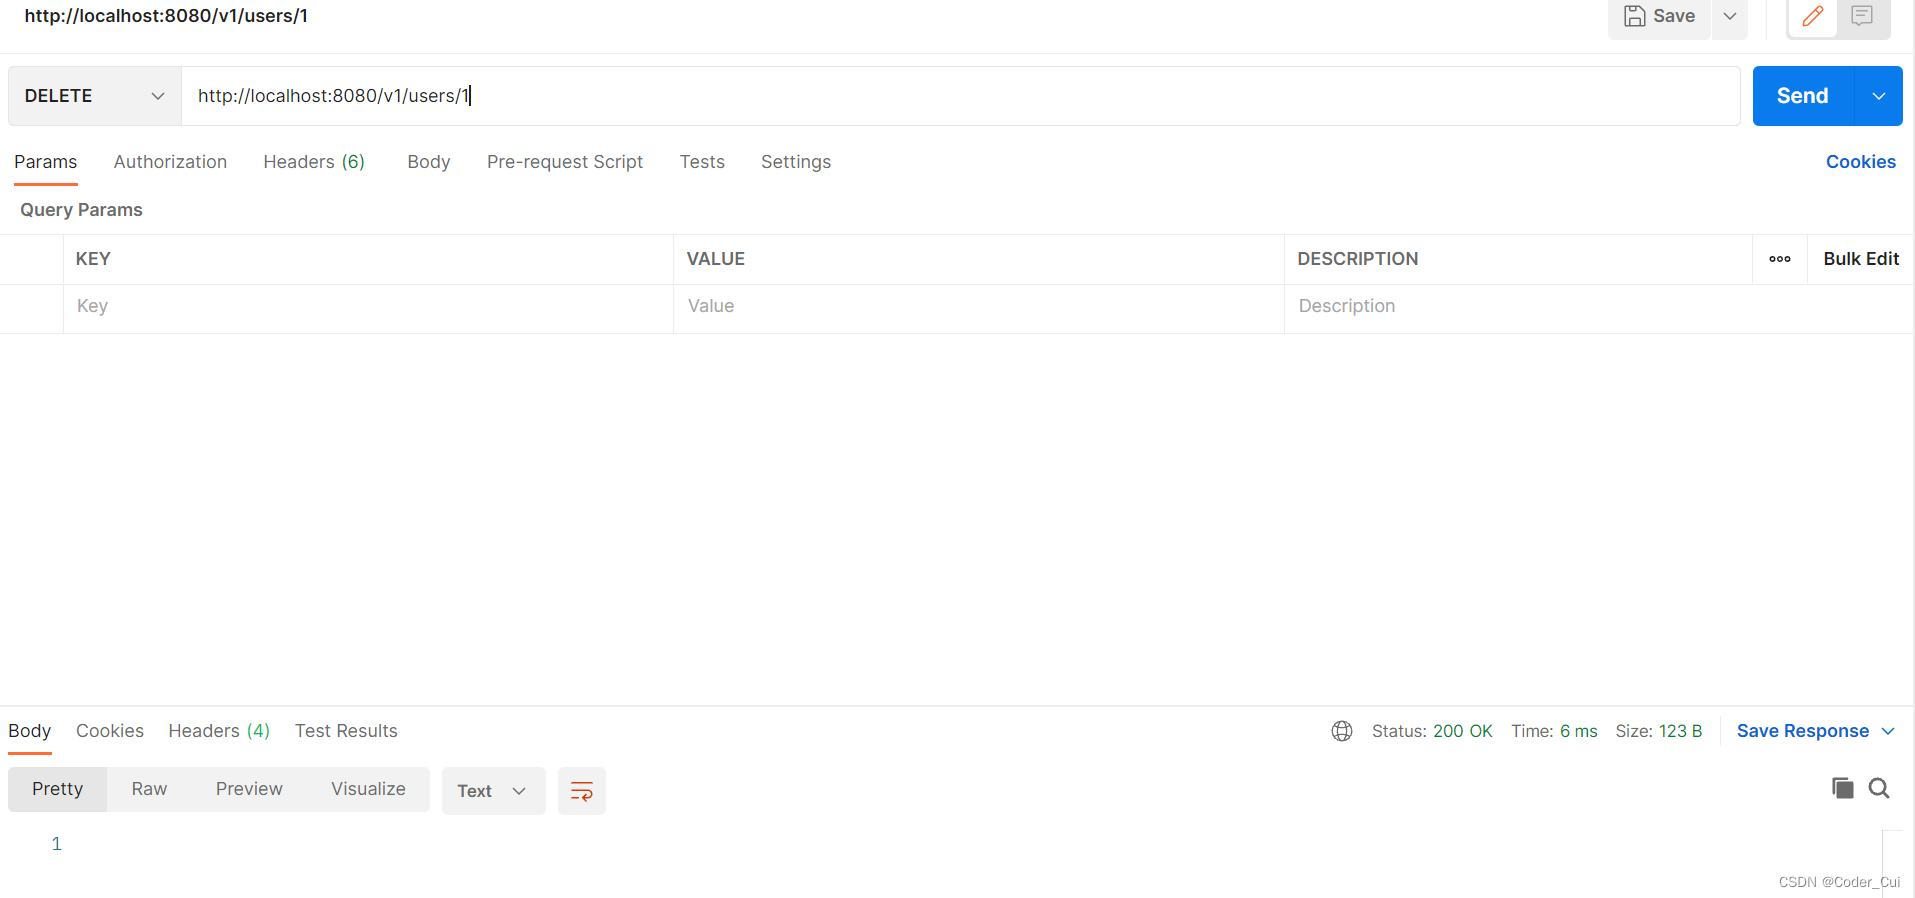
(4)http://localhost:8080/v1/users/1
(5)http://localhost:8080/v1/users/1/pets/1
(6)http://localhost:8080/v1/users/1/pets
RestFul标准版:利用RestFul响应类ResponseEntity和状态码HttpStatus优化UserController
ResponseEntity:SpringMVC封装的一个专用于RestFul的响应类,这个类在响应时可以提供响应的状态码,同时还可以自定义响应头信息。
HttpStatus:SpringMVC封装的一个枚举类型,这个类中都是网络中状态码
package com.study.controller.v1;
import com.study.entity.Pet;
import com.study.entity.User;
import org.slf4j.Logger;
import org.slf4j.LoggerFactory;
import org.springframework.http.HttpStatus;
import org.springframework.http.ResponseEntity;
import org.springframework.web.bind.annotation.*;
import java.util.ArrayList;
import java.util.Arrays;
import java.util.Date;
import java.util.List;
/**
* @ClassName UserController
* @Description TODO
* @Author Jiangnan Cui
* @Date 2022/6/29 16:16
* @Version 1.0
*/
@RestController //专用于restful风格的注解=@Controller + @ResponseBody
//@Controller:专用于传统开发的注解
@RequestMapping("/v1/users") //符合使用名词复数形式
public class UserController {
//新建日志对象
private static final Logger logger = LoggerFactory.getLogger(UserController.class);
/**
* 补充:
* 1.ResponseEntity:SpringMVC封装的一个专用于RestFul的响应类,这个类在响应时可以提供响应的状态码,
* 同时还可以自定义响应头信息。
* 2.HttpStatus:SpringMVC封装的一个枚举类型,这个类中都是网络中状态码
*/
/**
* @MethodName findUserById
* @Description 根据id查询某个用户的详细信息
* @param: id
* @return: com.study.entity.User
* @Author Jiangnan Cui
* @Date 16:28 2022/6/29
*/
//@RequestMapping(value = "/{id}",method = RequestMethod.GET) 此种方式太繁琐,推荐使用下面这种
@GetMapping("/{id}") //@RequestMapping的子类注解,使用GetMapping时只能使用GET方式访问当前请求
//@ResponseBody //将控制器方法返回值转换为json格式
//@PathVariable:在路径中获取请求参数
public ResponseEntity<User> findUserById(@PathVariable("id") Integer id){
logger.info("本次id:{}",id);
User user = new User(id, "小崔", 1234.56, new Date());
return new ResponseEntity<>(user, HttpStatus.OK);
}
/**
* @MethodName findAllUser
* @Description 查询所有用户信息
* @return: java.util.List<com.study.entity.User>
* @Author Jiangnan Cui
* @Date 17:24 2022/6/29
*/
@GetMapping
//@ResponseBody
public ResponseEntity<List<User>> findAllUser(){
ArrayList<User> users = new ArrayList<>();
users.add(new User(1,"张三",1000.00,new Date()));
users.add(new User(2,"李四",2000.00,new Date()));
users.add(new User(3,"王五",3000.00,new Date()));
return new ResponseEntity<>(users,HttpStatus.OK);
}
/**
* @MethodName addUser
* @Description 新增用户信息
* @param: user
* @Author Jiangnan Cui
* @Date 17:28 2022/6/29
*/
@PostMapping
//@ResponseBody //将方法的返回值转化为json格式,并响应请求
//@RequestBody: 接收请求的json格式数据,将json格式数据转化为对象
public ResponseEntity<Void> addUser(@RequestBody User user){
logger.info("name:{},salary:{},birthday:{}",user.getName(),user.getSalary(),user.getBirthday());
//调用业务方法
return new ResponseEntity<>(HttpStatus.NO_CONTENT);
}
/**
* @MethodName updateUser
* @Description 更新用户信息
* @param: user
* @Author Jiangnan Cui
* @Date 17:30 2022/6/29
*/
@PutMapping("/{id}")
//@ResponseBody
public ResponseEntity<Void> updateUser(@PathVariable("id") Integer id,@RequestBody User user){
logger.info("id:{},name:{},salary:{},birthday:{}",id,user.getName(),user.getSalary(),user.getBirthday());
//调用业务方法
return new ResponseEntity<>(HttpStatus.NO_CONTENT);
}
/**
* @MethodName deleteUser
* @Description 删除用户信息
* @param: id
* @Author Jiangnan Cui
* @Date 17:32 2022/6/29
*/
@DeleteMapping("/{id}")
@ResponseBody
public void deleteUser(@PathVariable("id") Integer id){
logger.info("本次删除用户的id:{}",id);
}
/**
* @MethodName findPetById
* @Description 根据宠物id查询主人的一个宠物
* @param: id
* @param: petId
* @return: com.study.entity.Pet
* @Author Jiangnan Cui
* @Date 17:54 2022/6/29
*/
@GetMapping("/{id}/pets/{petId}")
public ResponseEntity<Pet> findPetById(@PathVariable("id") Integer id,@PathVariable("petId") Integer petId){
logger.info("宠物主人的id:{}",id);
logger.info("宠物id:{}",petId);
Pet pet = new Pet(1, "小灰灰", 5);
return new ResponseEntity<>(pet,HttpStatus.OK);
}
/**
* @MethodName findAllPet
* @Description 查询主人的所有宠物
* @param: id
* @return: java.util.List<com.study.entity.Pet>
* @Author Jiangnan Cui
* @Date 17:57 2022/6/29
*/
@GetMapping("/{id}/pets")
public ResponseEntity<List<Pet>> findAllPet(@PathVariable("id") Integer id){
logger.info("宠物主人的id:{}",id);
List<Pet> pets = Arrays.asList(
new Pet(1,"熊大",20),
new Pet(2,"熊二",10),
new Pet(3,"光头强",50)
);
return new ResponseEntity<>(pets,HttpStatus.OK);
}
}
再次启动服务,用Postman测试上面路径,从Postman中可以查看到相应状态码
1.7 最终项目结构
2. 异常处理
2.1 传统开发的异常处理
配套视频:【编程不良人】2021年SpringBoot最新最全教程_哔哩哔哩_bilibili
新建Spring Initializr、Spring Web项目
pom.xml引入thymeleaf依赖
 <!--thymeleaf-->
 <dependency>
     <groupId>org.springframework.boot</groupId>
     <artifactId>spring-boot-starter-thymeleaf</artifactId>
 </dependency>
修改application.properties为application.yml,添加thymeleaf配置
 # thymeleaf配置
 spring:
   thymeleaf:
     cache: false
     prefix: classpath:/templates/
     suffix: .html
新建hello.html
 <!DOCTYPE html>
 <html lang="en">
 <head>
     <meta charset="UTF-8">
     <title>hello</title>
 </head>
 <body>
   <h1>Hello, SpringBoot!</h1>
 </body>
 </html>
新建MvcConfig配置类
package com.study.config;
import org.springframework.context.annotation.Configuration;
import org.springframework.web.servlet.config.annotation.ViewControllerRegistry;
import org.springframework.web.servlet.config.annotation.WebMvcConfigurer;
/**
* @ClassName MvcConfig
* @Description TODO
* @Author Jiangnan Cui
* @Date 2022/7/2 18:28
* @Version 1.0
*/
@Configuration //一定要添加此配置
public class MvcConfig implements WebMvcConfigurer {
@Override
public void addViewControllers(ViewControllerRegistry registry) {
//配置请求和页面视图映射,设置后可不经过页面直接访问html页面
registry.addViewController("/hello")
.setViewName("hello");
}
}
新建DemoController
package com.study.controller;
import com.study.exceptions.UserNameNotFoundException;
import org.springframework.stereotype.Controller;
import org.springframework.web.bind.annotation.RequestMapping;
import org.springframework.web.bind.annotation.RestController;
/**
* @ClassName DemoController
* @Description TODO
* @Author Jiangnan Cui
* @Date 2022/7/2 18:31
* @Version 1.0
*/
@Controller
@RequestMapping("demo")
public class DemoController {
@RequestMapping("demo")
public String demo(){
System.out.println("demo ok...");
int n = 1 / 0; //除零异常
return "hello";
}
@RequestMapping("login")
public String login(String username, String password){
System.out.println("login...");
System.out.println("username = " + username);
System.out.println("password = " + password);
if("xiaocui".equals(username) && "123456".equals(password)){
return "hello";
}else{
throw new UserNameNotFoundException("用户名不正确!");
}
}
}
新建500.html
 <!DOCTYPE html>
 <html lang="en">
 <head>
     <meta charset="UTF-8">
     <title>500</title>
 </head>
 <body>
     <h1>系统内部错误,请稍后再试...</h1>
 </body>
 </html>
新建error.html
 <!DOCTYPE html>
 <html lang="en">
 <head>
     <meta charset="UTF-8">
     <title>error</title>
 </head>
 <body>
   <h1>系统错误,用户名不正确!!!</h1>
 </body>
 </html>
自定义全局异常解析类GlobalExceptionResolver
package com.study.exceptions;
import org.springframework.stereotype.Component;
import org.springframework.web.servlet.HandlerExceptionResolver;
import org.springframework.web.servlet.ModelAndView;
import javax.servlet.http.HttpServletRequest;
import javax.servlet.http.HttpServletResponse;
/**
* @ClassName GlobalExceptionResolver
* @Description 全局异常解析类
* @Author Jiangnan Cui
* @Date 2022/7/2 18:59
* @Version 1.0
*/
@Component
public class GlobalExceptionResolver implements HandlerExceptionResolver {
/**
* @MethodName resolveException
* @Description 当控制器中任意一个方法出现异常时,如果该控制器的方法没有自己的异常处理(try-catch),
* 则会进入当前方法
* @param: request 当前请求对象
* @param: response 当前响应对象
* @param: handler 当前出现错误的方法对象
* @param: ex 出现异常的异常对象
* @return: org.springframework.web.servlet.ModelAndView 模型和视图
* @Author Jiangnan Cui
* @Date 19:00 2022/7/2
*/
@Override
public ModelAndView resolveException(HttpServletRequest request, HttpServletResponse response, Object handler, Exception ex) {
System.out.println("这是全局异常处理...");
System.out.println("当前异常为:" + ex);
ModelAndView modelAndView = new ModelAndView();
//针对不同异常类型跳转不同页面
if(ex instanceof UserNameNotFoundException){
modelAndView.setViewName("error");
return modelAndView;
}
modelAndView.setViewName("500");
return modelAndView;
}
}
自定义异常UserNameNotFoundException
package com.study.exceptions;
/**
* @ClassName UserNameNotFoundException
* @Description 自定义异常:用户名不存在
* @Author Jiangnan Cui
* @Date 2022/7/2 18:54
* @Version 1.0
*/
public class UserNameNotFoundException extends RuntimeException{
public UserNameNotFoundException(String message) {
super(message);
}
}
测试路径:
(1)http://localhost:8080/demo/demo
 demo ok...
 这是全局异常处理...
 当前异常为:java.lang.ArithmeticException: / by zero
(2)http://localhost:8080/demo/login?username=xiaozhu&password=123456
 login...
 username = xiaozhu
 password = 123456
 这是全局异常处理...
 当前异常为:com.study.exceptions.UserNameNotFoundException: 用户名不正确!
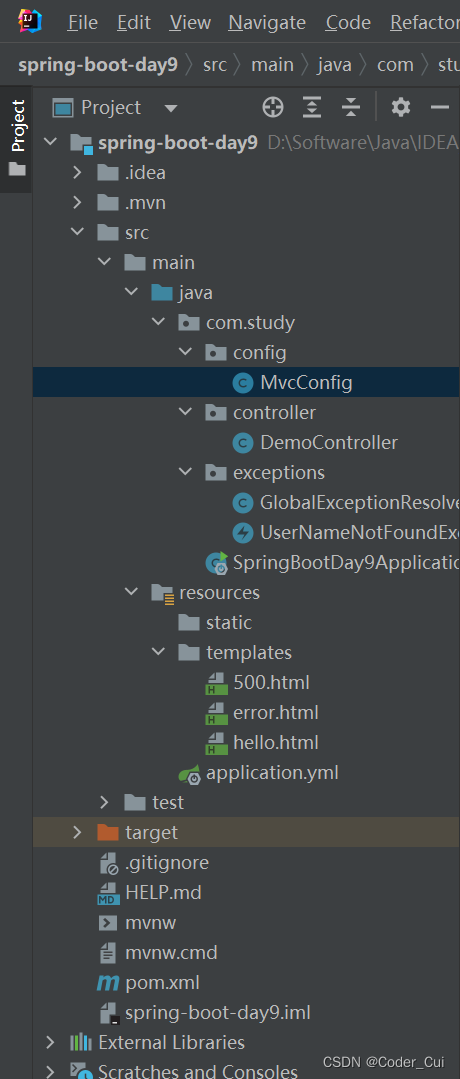
项目最终结构:
2.2 RestFul的异常处理
配套视频:【编程不良人】2021年SpringBoot最新最全教程_哔哩哔哩_bilibili
新建Spring Initializr、Spring Web项目spring-boot-day10
pom.xml引入thymeleaf依赖
 <!--thymeleaf-->
 <dependency>
     <groupId>org.springframework.boot</groupId>
     <artifactId>spring-boot-starter-thymeleaf</artifactId>
 </dependency>
application.properties重命名为application.yml,添加thymeleaf配置
 spring:
   thymeleaf:
     prefix: classpath:/templates/
     suffix: .html
     cache: false
新建控制器DemoController
package com.study.controller;
import com.study.exceptions.IllegalNumberException;
import org.springframework.http.HttpStatus;
import org.springframework.http.ResponseEntity;
import org.springframework.web.bind.annotation.GetMapping;
import org.springframework.web.bind.annotation.PathVariable;
import org.springframework.web.bind.annotation.RequestMapping;
import org.springframework.web.bind.annotation.RestController;
/**
* @ClassName DemoController
* @Description TODO
* @Author Jiangnan Cui
* @Date 2022/7/2 22:06
* @Version 1.0
*/
@RestController
@RequestMapping("demos")
public class DemoController {
/**
* @MethodName demos
* @Description 测试查询所有
* @return: org.springframework.http.ResponseEntity<java.lang.String>
* @Author Jiangnan Cui
* @Date 22:08 2022/7/2
*/
@GetMapping//测试路径:http://localhost:8080/demos
public ResponseEntity<String> demos(){
System.out.println("demo ok");
return new ResponseEntity<>("demo ok", HttpStatus.OK);
}
/**
* @MethodName demo
* @Description 测试查询一个
* @param: id
* @return: org.springframework.http.ResponseEntity<java.lang.String>
* @Author Jiangnan Cui
* @Date 22:10 2022/7/2
*/
@GetMapping("/{id}") //测试路径:http://localhost:8080/demos/1
public ResponseEntity<String> demo(@PathVariable("id") Integer id){
System.out.println("demo ok" + id);
if(id<0)
throw new IllegalNumberException("无效id,请检查!");
return new ResponseEntity<>("demo ok",HttpStatus.OK);
}
}
新建全局异常解析类GlobalExceptionResolver
package com.study.exceptions;
import org.springframework.http.HttpStatus;
import org.springframework.http.ResponseEntity;
import org.springframework.web.bind.annotation.ControllerAdvice;
import org.springframework.web.bind.annotation.ExceptionHandler;
import org.springframework.web.bind.annotation.ResponseBody;
/**
* @ClassName GlobalExceptionResolver
* @Description TODO
* @Author Jiangnan Cui
* @Date 2022/7/2 22:11
* @Version 1.0
*/
@ControllerAdvice
public class GlobalExceptionResolver {
//处理指定异常
@ExceptionHandler(value = IllegalNumberException.class)
@ResponseBody
public ResponseEntity<String> IllegalNumberException(Exception ex){
System.out.println("进入非法参数异常处理");
return new ResponseEntity<>(ex.getMessage(), HttpStatus.INTERNAL_SERVER_ERROR);
}
//处理Exception子类异常
@ExceptionHandler(value = Exception.class)
@ResponseBody
public ResponseEntity<String> exceptionHandler(Exception ex){
System.out.println("进入自定义异常处理");
return new ResponseEntity<>(ex.getMessage(),HttpStatus.INTERNAL_SERVER_ERROR);
}
}
自定义异常IllegalNumberException
package com.study.exceptions;
/**
* @ClassName IllegalNumberException
* @Description 自定义异常
* @Author Jiangnan Cui
* @Date 2022/7/2 22:17
* @Version 1.0
*/
public class IllegalNumberException extends RuntimeException{
public IllegalNumberException(String message) {
super(message);
}
}
测试路径:
(1)http://localhost:8080/demos
demo ok

(2)http://localhost:8080/demos/1
demo ok1

(3)http://localhost:8080/demos/0
demo ok0

(4)http://localhost:8080/demos/-1
 demo ok-1
 进入非法参数异常处理

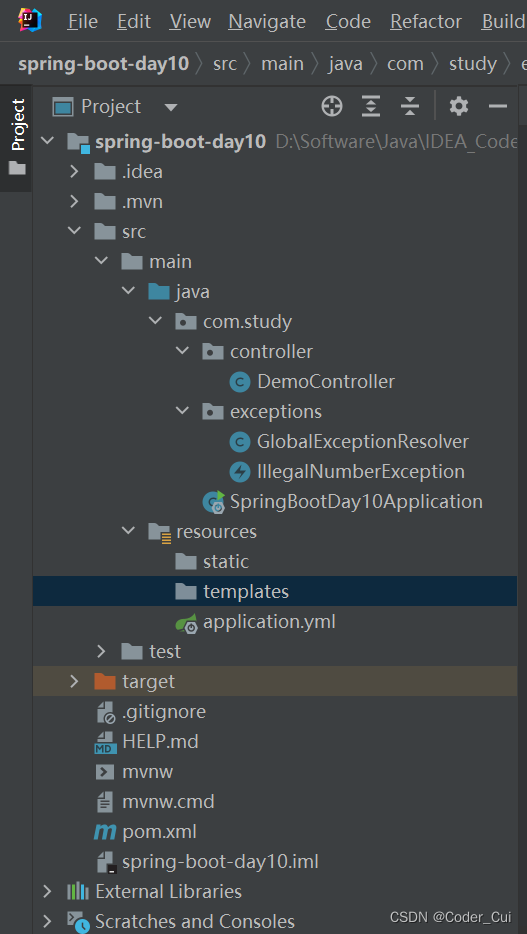
项目结构
2.3 总结
1.开发方式演变
a.传统方式开发 基于javaweb方式开发
项目业务代码 + view 写在一个项目中
业务代码+view(jsp、thymeleaf、freemark)
b.前后端分离开发 前后端分离 天下
前端系统(Vue)
ajax 异步请求
后端系统(java) 接口 controller ===> 传统web方式 /user/findById?id=21 =====> GET POST PUT DELETE GET /users users/001(RestFul API)
2.springboot异常处理
异常处理:
当出现异常改如何处理====>当controller中方法在执行过程中如果出现异常,我们应该如何处理异常这种方式 称之为异常处理
a.传统方式开发异常处理
@Component
public class GlobalExceptionResolver implements HandlerExceptionResolver {
//resolveExcpetion: 当控制器中任意一个方法出现异常时,如果该控制器的方法没有自己异常处理(try...catch),则会进入当前方法
//注意:在异常处理这个方法中 完成自定义异常处理
//参数1: request 当前请求对象
//参数2: response 当前请求对应响应对象
//参数3: 当前出现错误的方法对象
//参数4: 出现异常的异常对象
//返回值: modelAndview 模型和视图
@Override
public ModelAndView resolveException(HttpServletRequest request, HttpServletResponse response, Object handler, Exception ex) {
System.out.println("这是全局异常处理....");
System.out.println("当前异常为: "+ex);
ModelAndView modelAndView = new ModelAndView();
//针对不同异常类型跳转不同页面
if(ex instanceof UserNameNotFoundException){
modelAndView.setViewName("error");
return modelAndView;
}
modelAndView.setViewName("500");
return modelAndView;
}
}
b.前后端分离开发异常处理
ajax<------>controller
@ControllerAdvice
public class GlobalExceptionResolver {
//处理指定异常
@ExceptionHandler(value = IllegalNumberException.class)
@ResponseBody
public ResponseEntity<String> illegalNumberExceptionHandler(Exception ex) {
System.out.println("进入非法参数异常处理");
return new ResponseEntity<String>(ex.getMessage(), HttpStatus.INTERNAL_SERVER_ERROR);
}
//处理exception子类异常
@ExceptionHandler(value = Exception.class) //用在方法上 作用:用来处理指定异常 value属性: 用来指定处理异常类型
@ResponseBody
public ResponseEntity<String> exceptionHandler(Exception ex) {
System.out.println("进入自定义异常处理");
return new ResponseEntity<>(ex.getMessage(), HttpStatus.INTERNAL_SERVER_ERROR);
}
}
3. CORS 跨域
3.1 CORS简介
配套视频:【编程不良人】2021年SpringBoot最新最全教程_哔哩哔哩_bilibili
CORS:CORS是一个W3C标准,全称是"跨域资源共享"(Cross-origin resource sharing)。它允许浏览器向跨源服务器,发出XMLHttpRequest(ajax)请求,从而克服了AJAX只能同源使用的限制。
同源策略[same origin policy]:是浏览器的一个安全功能,不同源的客户端脚本在没有明确授权的情况下,不能读写对方资源。同源策略是浏览器安全的基石。
源[origin]:就是协议、域名和端口号。例如:百度一下,你就知道这个URL中:协议为http、域名为www.baidu.com、端口号为80。
同源:若地址里面的协议、域名和端口号均相同,则属于同源。
 # 同源举例
 - 例如判断下面的URL是否与 http://www.a.com/test/index.html 同源
     http://www.a.com/dir/page.html --------->同源,协议、域名、端口号均相同
     http://www.child.a.com/test/index.html ->不同源,域名不相同
     https://www.a.com/test/index.html ------>不同源,协议不相同
     http://www.a.com:8080/test/index.html -->不同源,端口号不相同
哪些操作不受同源限制:
-
页面中的链接、重定向以及表单提交是不会受到同源策略限制的;
-
跨域资源的引入是可以的,如嵌入到页面中的
<script src="..."></script>,<img>,<link>,<iframe>等。
哪些操作受到同源限制:
-
在浏览器中发起一个AJAX请求,会受到同源策略限制,
出现错误:Access-Control-Allow-Origin

测试:
新建cors.html
<!DOCTYPE html>
<html lang="en">
<head>
<meta charset="UTF-8">
<title>Title</title>
<script>
function test(){
//1.创建xhr对象
var xhr = new XMLHttpRequest();
//1.5 处理结果
xhr.onreadystatechange = function(){
if(xhr.status==200 && xhr.readyState==4){
console.log(xhr.responseText);
document.getElementById("msg").innerText="返回结果为: "+xhr.responseText;
}
}
//2.发送请求
xhr.open("GET","http://localhost:8080/demos");
xhr.send();
}
</script>
</head>
<body>
<h1>cors跨域测试</h1>
<input type="button" value="点我发送ajax请求" οnclick="test()">
<h4 id="msg"></h4>
</body>
</html>
新建MvcConfig
package com.study.config;
import org.springframework.context.annotation.Configuration;
import org.springframework.web.servlet.config.annotation.ViewControllerRegistry;
import org.springframework.web.servlet.config.annotation.WebMvcConfigurer;
/**
* @ClassName MvcConfig
* @Description 配置后可不经过控制器直接访问html页面
* @Author Jiangnan Cui
* @Date 2022/7/3 10:08
* @Version 1.0
*/
@Configuration
public class MvcConfig implements WebMvcConfigurer {
@Override
public void addViewControllers(ViewControllerRegistry registry) {
registry.addViewController("/cors")
.setViewName("cors");
}
}
启动项目后,浏览器访问:http://localhost:8080/cors,可以正常访问,不存在跨域问题。

使用IDEA内置的浏览器打开项目:此时路径变成了http://localhost:63342/spring-boot-day10/templates/cors.html?_ijt=oru29oe9dkg5rkhii47uic36ig&_ij_reload=RELOAD_ON_SAVE,存在跨域问题。

3.2 Springboot中如何解决cors跨域问题
配套视频:【编程不良人】2021年SpringBoot最新最全教程_哔哩哔哩_bilibili
以下两种方法使用其中一种即可:
(1)控制器类上添加@CrossOrigin注解
package com.study.controller;
import com.study.exceptions.IllegalNumberException;
import org.springframework.http.HttpStatus;
import org.springframework.http.ResponseEntity;
import org.springframework.web.bind.annotation.*;
/**
* @ClassName DemoController
* @Description TODO
* @Author Jiangnan Cui
* @Date 2022/7/2 22:06
* @Version 1.0
*/
@CrossOrigin //允许这个Controller中所有请求被其他域访问
@RestController
@RequestMapping("demos")
public class DemoController {
/**
* @MethodName demos
* @Description 测试查询所有
* @return: org.springframework.http.ResponseEntity<java.lang.String>
* @Author Jiangnan Cui
* @Date 22:08 2022/7/2
*/
@GetMapping//测试路径:http://localhost:8080/demos
public ResponseEntity<String> demos(){
System.out.println("demo ok");
return new ResponseEntity<>("demo ok", HttpStatus.OK);
}
/**
* @MethodName demo
* @Description 测试查询一个
* @param: id
* @return: org.springframework.http.ResponseEntity<java.lang.String>
* @Author Jiangnan Cui
* @Date 22:10 2022/7/2
*/
@GetMapping("/{id}") //测试路径:http://localhost:8080/demos/1
public ResponseEntity<String> demo(@PathVariable("id") Integer id){
System.out.println("demo ok" + id);
if(id<0)
throw new IllegalNumberException("无效id,请检查!");
return new ResponseEntity<>("demo ok",HttpStatus.OK);
}
}
(2)全局解决跨域问题:编写cors全局配置类,对所有页面生效
package com.study.config;
import org.springframework.context.annotation.Bean;
import org.springframework.context.annotation.Configuration;
import org.springframework.web.cors.CorsConfiguration;
import org.springframework.web.cors.UrlBasedCorsConfigurationSource;
import org.springframework.web.filter.CorsFilter;
/**
* @ClassName CorsConfig
* @Description 全局配置解决跨域问题
* @Author Jiangnan Cui
* @Date 2022/7/3 10:35
* @Version 1.0
*/
@Configuration
public class CorsConfig {
@Bean
public CorsFilter corsFilter(){
UrlBasedCorsConfigurationSource source = new UrlBasedCorsConfigurationSource();
CorsConfiguration corsConfiguration = new CorsConfiguration();
corsConfiguration.addAllowedOrigin("*");//1.允许任何域名使用
corsConfiguration.addAllowedHeader("*");//2.允许任何头使用
corsConfiguration.addAllowedMethod("*");//3.允许任何方法使用(post、get等)
source.registerCorsConfiguration("/**",corsConfiguration);//4.处理所有请求的跨域配置
return new CorsFilter(source);
}
}
3.3 总结
1.什么是CORS
定义: 跨域资源共享
2.什么跨域资源共享
结束: 允许浏览器可以从当前源服务器通过ajax访问另外一个源服务地址
3.同源策略
是浏览器的一个安全功能,不同源的客户端脚本在没有明确授权的情况下,不能读写对方资源。 同源策略是浏览器安全的基石 ajax请求
4.什么是源 origin
源[origin]就是协议、域名和端口号。例如:http://www.baidu.com:80这个URL。
协议: http
域名: www.baidu.com
端口: 80
url: http://www.baidu.com:80
url: https://www.baidu.com:80
url: http://www.baizhiedu.com:80
url: http://www.baidu.com:90
测试:
http://www.a.com/test/index.html
1.http://www.a.com/dir/page.html 同源
2.http://www.child.a.com/test/index.html 不同源
3.https://www.a.com/test/index.html 不同源
4.http://www.a.com:8080/test/index.html 不同源
5.哪些操作不会受到同源限制
1.<script src="..."></script>,<img>,<link>,<iframe>
6.哪些操作会受到同源限制
ajax
出现跨域: Access-Control-Allow-Origin
7.springboot中如何解决跨域问题?
1.局部解决跨域
@CrossOrigin: 这个注解用在类上 代表解决类中所有方法运行允许其他域中资源访问
2.全局解决跨域
@Configuration
public class CorsConfig {
@Bean
public CorsFilter corsFilter() {
UrlBasedCorsConfigurationSource source = new UrlBasedCorsConfigurationSource();
CorsConfiguration corsConfiguration = new CorsConfiguration();
corsConfiguration.addAllowedOrigin("*"); // 1允许任何域名使用
corsConfiguration.addAllowedHeader("*"); // 2允许任何头
corsConfiguration.addAllowedMethod("*"); // 3允许任何方法(post、get等)
source.registerCorsConfiguration("/**", corsConfiguration);//4处理所有请求的跨域配置
return new CorsFilter(source);
}
}
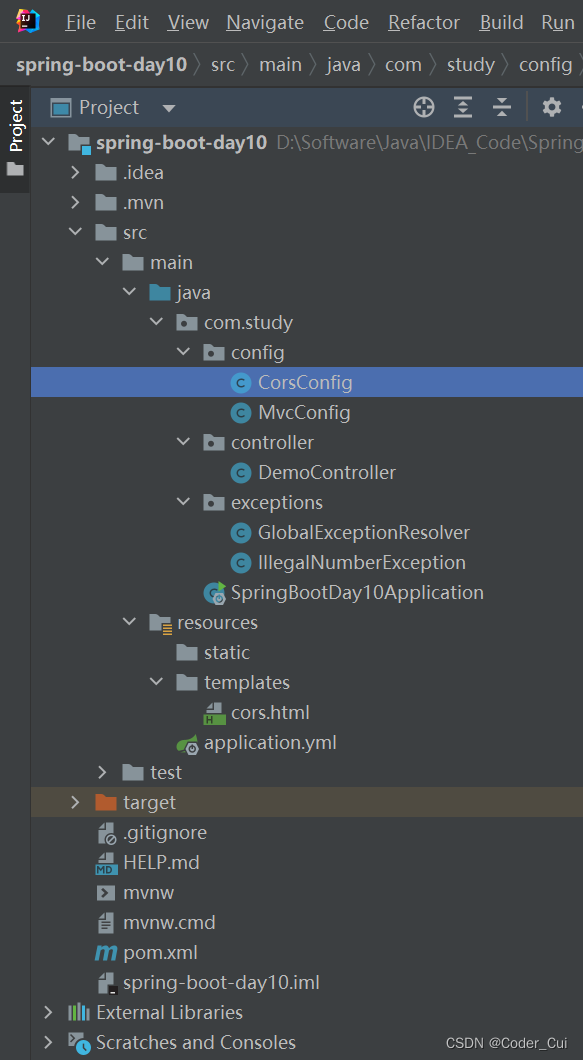
最终项目结构:
4. Jasypt 加密
配套视频:【编程不良人】2021年SpringBoot最新最全教程_哔哩哔哩_bilibili
4.1 引言
Jasypt 也即Java Simplified Encryption是Sourceforge.net上的一个开源项目。在当地时间11月23号的通告中,Jasypt 1.4的新特征包括:加密属性文件(encryptable properties files)、Spring Framework集成、加密Hibernate数据源配置、新的命令行工具、URL加密的Apache wicket集成以及升级文档。
根据Jasypt文档,该技术可用于加密任务与应用程序,例如加密密码、敏感信息和数据通信、创建完整检查数据的sums. 其他性能包括高安全性、基于标准的加密技术、可同时单向和双向加密的加密密码、文本、数字和二进制文件。Jasypt也可以与Acegi Security整合也即Spring Security。Jasypt亦拥有加密应用配置的集成功能,而且提供一个开放的API从而任何一个Java Cryptography Extension都可以使用Jasypt。
Jasypt还符合RSA标准的基于密码的加密,并提供了无配置加密工具以及新的、高可配置标准的加密工具。
4.2 SpringBoot整合Jasypt加密
新建Spring Initializr、Spring Web的spring-boot-jasypt项目
-
pom.xml引入依赖
<!--mysql-connector-java--> <dependency> <groupId>mysql</groupId> <artifactId>mysql-connector-java</artifactId> <version>5.1.38</version> </dependency> <!--druid--> <dependency> <groupId>com.alibaba</groupId> <artifactId>druid</artifactId> <version>1.2.11</version> </dependency> <!--mybatis-spring-boot-starter--> <dependency> <groupId>org.mybatis.spring.boot</groupId> <artifactId>mybatis-spring-boot-starter</artifactId> <version>2.2.2</version> </dependency> <!--jasypt加密--> <dependency> <groupId>com.github.ulisesbocchio</groupId> <artifactId>jasypt-spring-boot-starter</artifactId> <version>3.0.4</version> </dependency>
-
修改application.properties为application.yml,编写如下配置:
# 对主机名进行加密
mysql:
host: ENC(+Szc93CJDBbbOZShvgnUxeZiec3+Xc6BCKt2IFE9JdZy7kmy4NOk+xZAXcuT57So)
# 数据库配置
spring:
datasource:
type: com.alibaba.druid.pool.DruidDataSource
driver-class-name: com.mysql.jdbc.Driver
url: jdbc:mysql://${mysql.host}:3306/ems-thymeleaf?characterEncoding=UTF-8
username: ENC(SAYP3WbR7jm0HYPlg3b9IWvMEZBBK+M8+rmDcFrwH8p+WNwxyYWkuZ1FvZztGELF)
password: ENC(SAYP3WbR7jm0HYPlg3b9IWvMEZBBK+M8+rmDcFrwH8p+WNwxyYWkuZ1FvZztGELF)
# mybatis配置
mybatis:
mapper-locations: classpath:com/study/mapper/*.xml
type-aliases-package: com.study.entity
# jasypt加密配置
jasypt:
encryptor:
algorithm: PBEWITHHMACSHA512ANDAES_256 # 指定加密算法
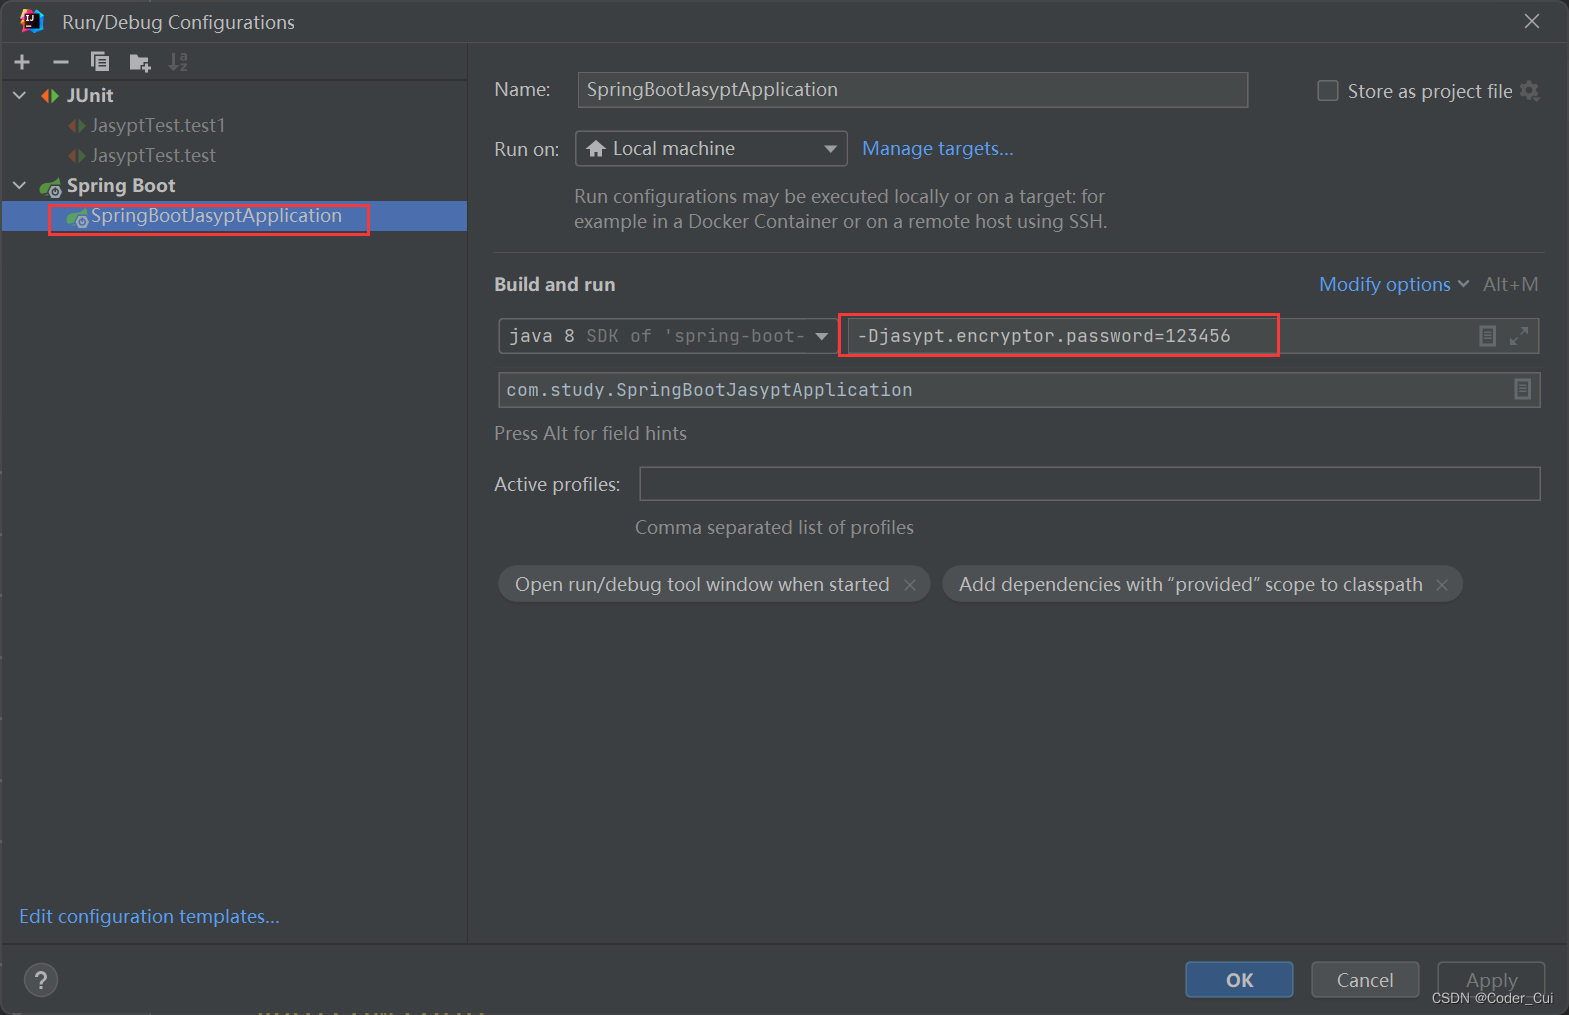
# password: 123456 # 指定秘钥,秘钥一般不能暴露在外面,需要单独设置 -Djasypt.encryptor.password=123456
# 打包运行时添加加密秘钥:nohuo java -jar -Djasypt.encryptor.password=123456 xxx.jar
-
启动类添加注解扫描
package com.study;
import org.mybatis.spring.annotation.MapperScan;
import org.springframework.boot.SpringApplication;
import org.springframework.boot.autoconfigure.SpringBootApplication;
@SpringBootApplication
@MapperScan("com.study.dao")
public class SpringBootJasyptApplication {
public static void main(String[] args) {
SpringApplication.run(SpringBootJasyptApplication.class, args);
}
}
-
新建实体类User
package com.study.entity;
/**
* @ClassName User
* @Description TODO
* @Author Jiangnan Cui
* @Date 2022/7/3 11:43
* @Version 1.0
*/
public class User {
private Integer id;
private String username;
private String realname;
private String password;
private Boolean gender;
public User() {
}
public User(Integer id, String username, String realname, String password, Boolean gender) {
this.id = id;
this.username = username;
this.realname = realname;
this.password = password;
this.gender = gender;
}
public Integer getId() {
return id;
}
public void setId(Integer id) {
this.id = id;
}
public String getUsername() {
return username;
}
public void setUsername(String username) {
this.username = username;
}
public String getRealname() {
return realname;
}
public void setRealname(String realname) {
this.realname = realname;
}
public String getPassword() {
return password;
}
public void setPassword(String password) {
this.password = password;
}
public Boolean getGender() {
return gender;
}
public void setGender(Boolean gender) {
this.gender = gender;
}
@Override
public String toString() {
return "User{" +
"id=" + id +
", username='" + username + '\'' +
", realname='" + realname + '\'' +
", password='" + password + '\'' +
", gender=" + gender +
'}';
}
}
-
新建UserDAO
package com.study.dao;
import com.study.entity.User;
import java.util.List;
/**
* @ClassName UserDAO
* @Description TODO
* @Author Jiangnan Cui
* @Date 2022/7/3 11:45
* @Version 1.0
*/
public interface UserDAO {
/**
* @MethodName findAll
* @Description 查询所有
* @return: java.util.List<com.study.entity.User>
* @Author Jiangnan Cui
* @Date 11:45 2022/7/3
*/
List<User> findAll();
}
-
新建UserDAOMapper
<?xml version="1.0" encoding="UTF-8"?> <!DOCTYPE mapper PUBLIC "-//mybatis.org//DTD Mapper 3.0//EN" "http://mybatis.org/dtd/mybatis-3-mapper.dtd" > <mapper namespace="com.study.dao.UserDAO"> <!--findAll--> <select id="findAll" resultType="User"> select id,username,realname,password,gender from `user` </select> </mapper>
-
新建UserService
package com.study.service;
import com.study.entity.User;
import org.springframework.stereotype.Service;
import java.util.List;
/**
* @ClassName UserService
* @Description TODO
* @Author Jiangnan Cui
* @Date 2022/7/3 11:47
* @Version 1.0
*/
public interface UserService {
/**
* @MethodName findAll
* @Description 查询所有
* @return: java.util.List<com.study.entity.User>
* @Author Jiangnan Cui
* @Date 11:48 2022/7/3
*/
List<User> findAll();
}
-
新建UserServiceImpl
package com.study.service;
import com.study.dao.UserDAO;
import com.study.entity.User;
import org.springframework.beans.factory.annotation.Autowired;
import org.springframework.stereotype.Service;
import org.springframework.transaction.annotation.Transactional;
import java.util.List;
/**
* @ClassName UserServiceImpl
* @Description TODO
* @Author Jiangnan Cui
* @Date 2022/7/3 11:48
* @Version 1.0
*/
@Service
@Transactional
public class UserServiceImpl implements UserService{
private UserDAO userDAO;
@Autowired
public UserServiceImpl(UserDAO userDAO) {
this.userDAO = userDAO;
}
@Override
public List<User> findAll() {
return userDAO.findAll();
}
}
-
新建UserController
package com.study.controller;
import com.study.entity.User;
import com.study.service.UserService;
import org.springframework.beans.factory.annotation.Autowired;
import org.springframework.http.HttpStatus;
import org.springframework.http.ResponseEntity;
import org.springframework.web.bind.annotation.GetMapping;
import org.springframework.web.bind.annotation.RequestMapping;
import org.springframework.web.bind.annotation.RestController;
import java.util.List;
/**
* @ClassName UserController
* @Description TODO
* @Author Jiangnan Cui
* @Date 2022/7/3 11:50
* @Version 1.0
*/
@RestController
@RequestMapping("/users")
public class UserController {
private UserService userService;
@Autowired
public UserController(UserService userService) {
this.userService = userService;
}
@GetMapping
public ResponseEntity<List<User>> users(){
List<User> users = userService.findAll();
return new ResponseEntity<>(users, HttpStatus.OK);
}
}
-
测试Jasypt加密算法
package com.study;
import org.jasypt.encryption.StringEncryptor;
import org.junit.jupiter.api.Test;
import org.springframework.beans.factory.annotation.Autowired;
import org.springframework.boot.test.context.SpringBootTest;
/**
* @ClassName JasyptTest
* @Description TODO
* @Author Jiangnan Cui
* @Date 2022/7/3 11:59
* @Version 1.0
*/
@SpringBootTest
public class JasyptTest {
private StringEncryptor stringEncryptor;
@Autowired
public JasyptTest(StringEncryptor stringEncryptor) {
this.stringEncryptor = stringEncryptor;
}
@Test
public void test(){
for (int i = 0; i < 10; i++) {
String root = stringEncryptor.encrypt("root");
System.out.println("root = " + root);
}
}
@Test
public void test1(){
//加密
String localhost = stringEncryptor.encrypt("localhost");
System.out.println("localhost = " + localhost);
//解密
String decrypt = stringEncryptor.decrypt("+Szc93CJDBbbOZShvgnUxeZiec3+Xc6BCKt2IFE9JdZy7kmy4NOk+xZAXcuT57So");
System.out.println("decrypt = " + decrypt);
}
}
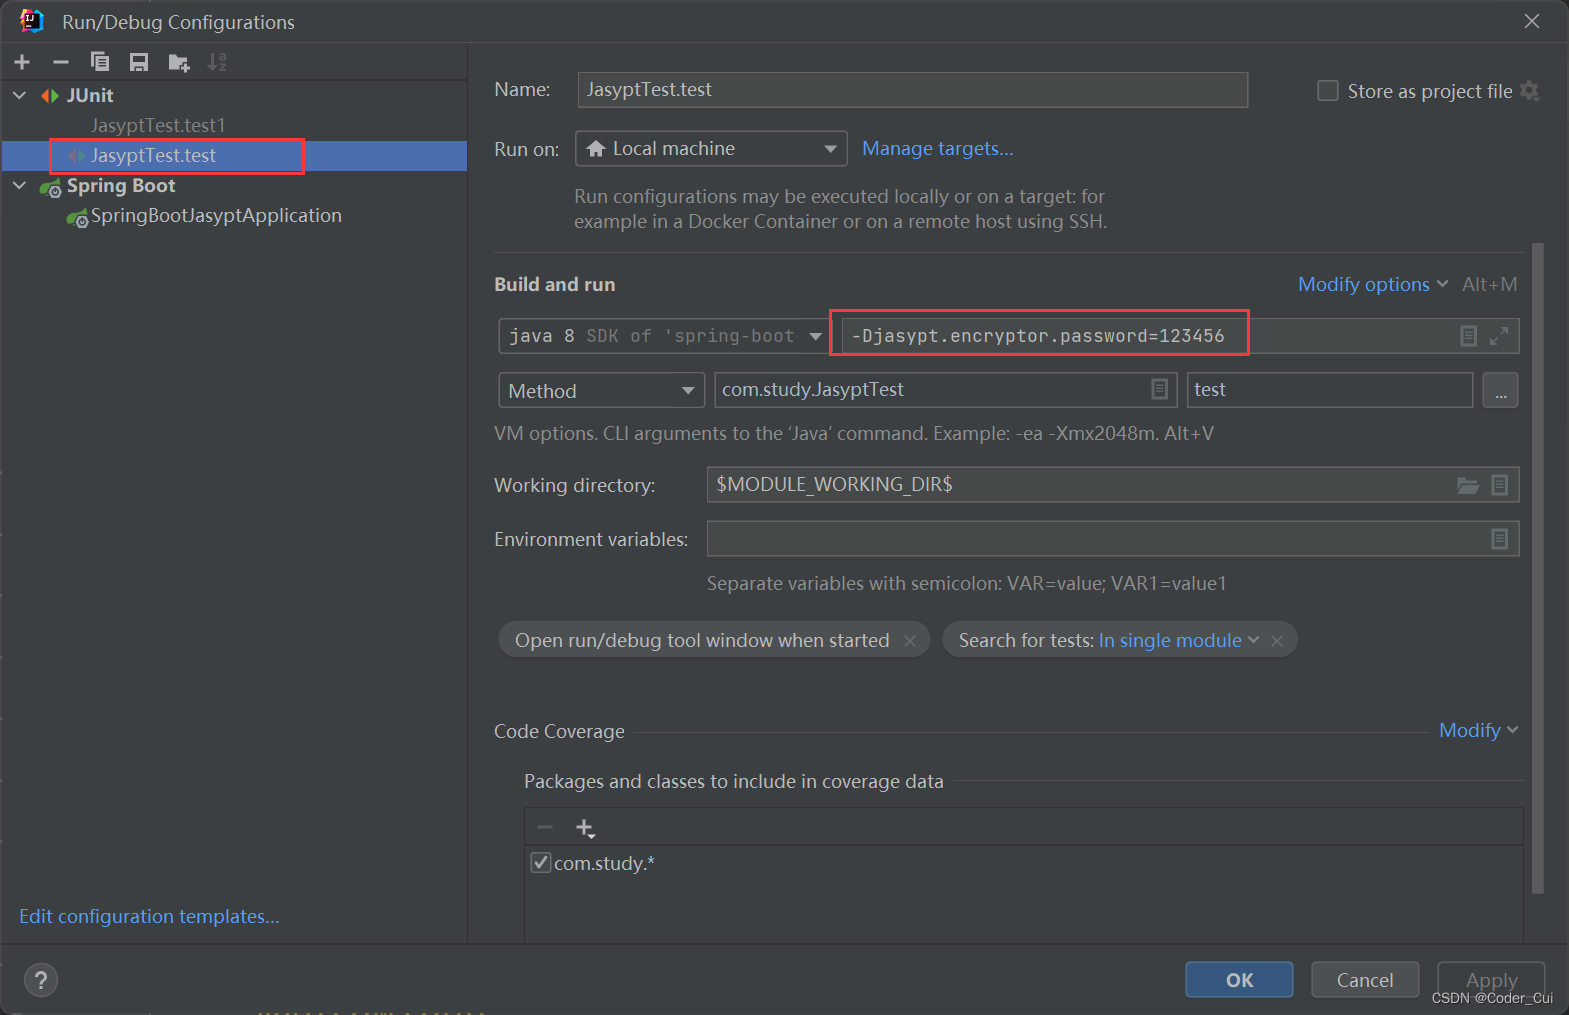
注意:启动前配置好秘钥参数:-Djasypt.encryptor.password=123456
-
启动项目进行测试:测试前配置传递秘钥参数,测试路径:http://localhost:8080/users

-
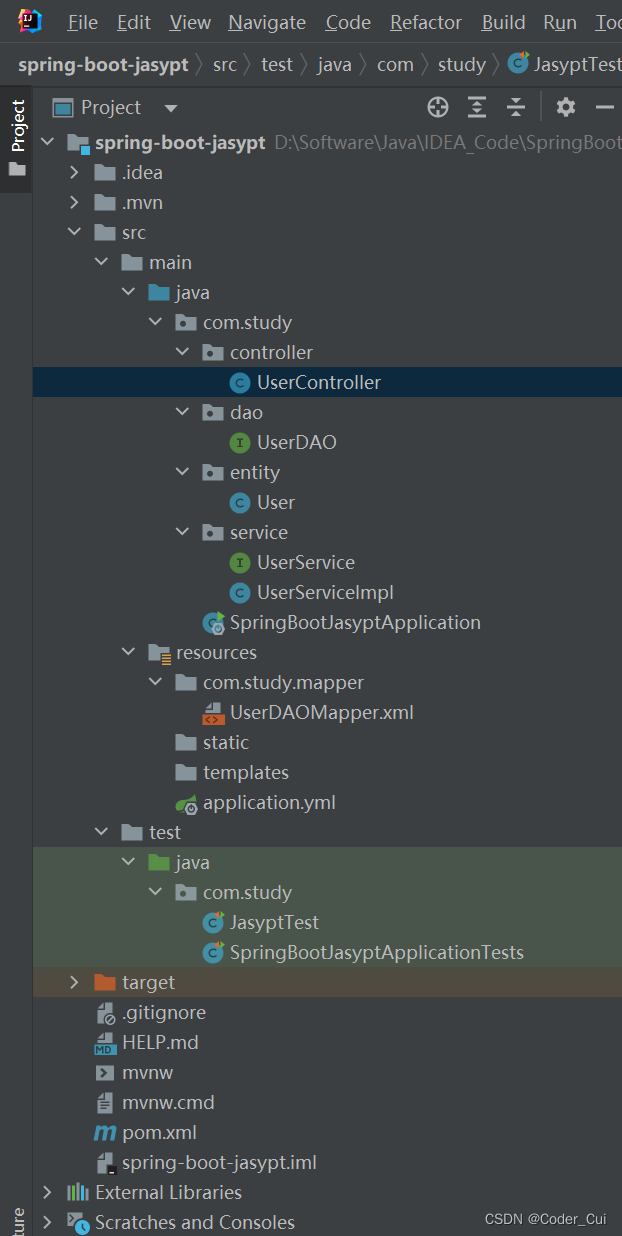
最终项目结构:
4.3 总结
1.原理
  引入jasypt依赖
2.使用
  (1)类 =====> root + 秘钥(暴露) =====>    加密之后结果 每一次运行都会生成一个新的加密结果    每个加密结果都是可用
  (2)加密之后结果 ====> 类.方法 秘钥 =====> root


 1万+
1万+

 被折叠的 条评论
为什么被折叠?
被折叠的 条评论
为什么被折叠?
 到【灌水乐园】发言


